This post may contain affiliate links. Read my privacy policy.
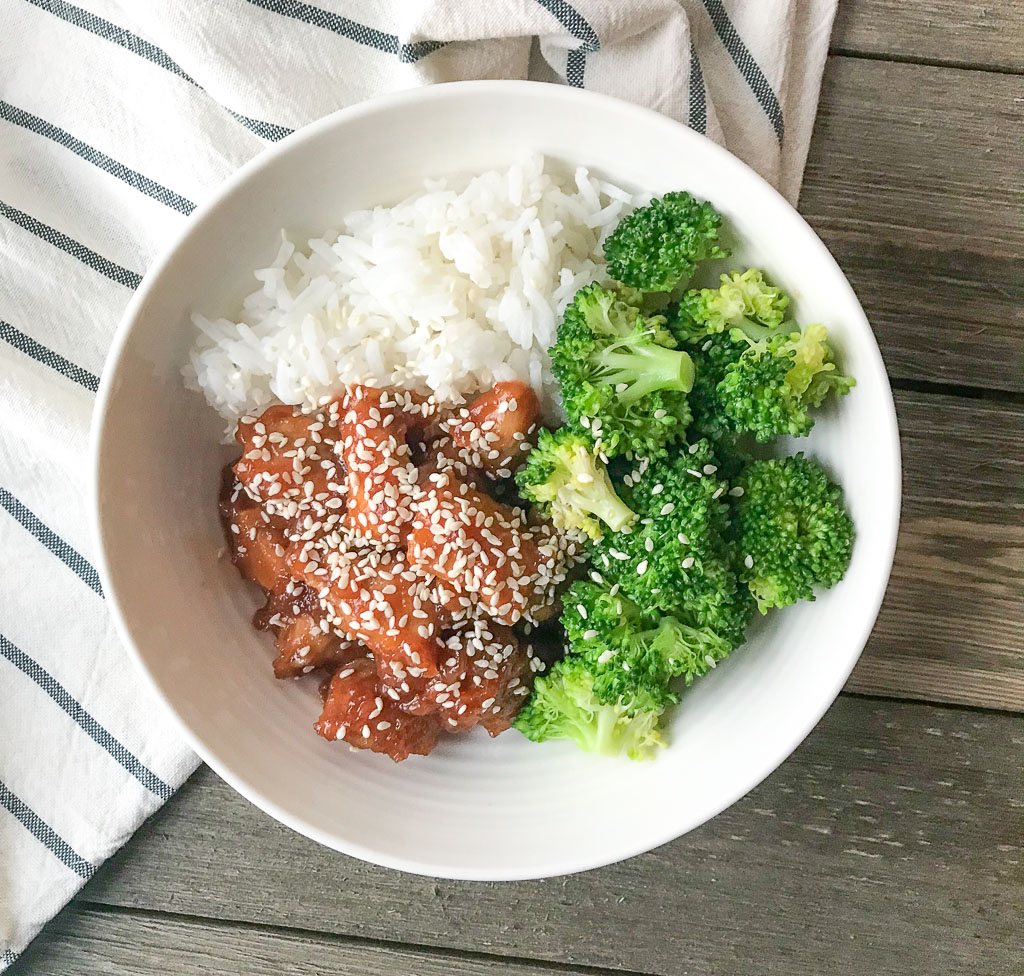
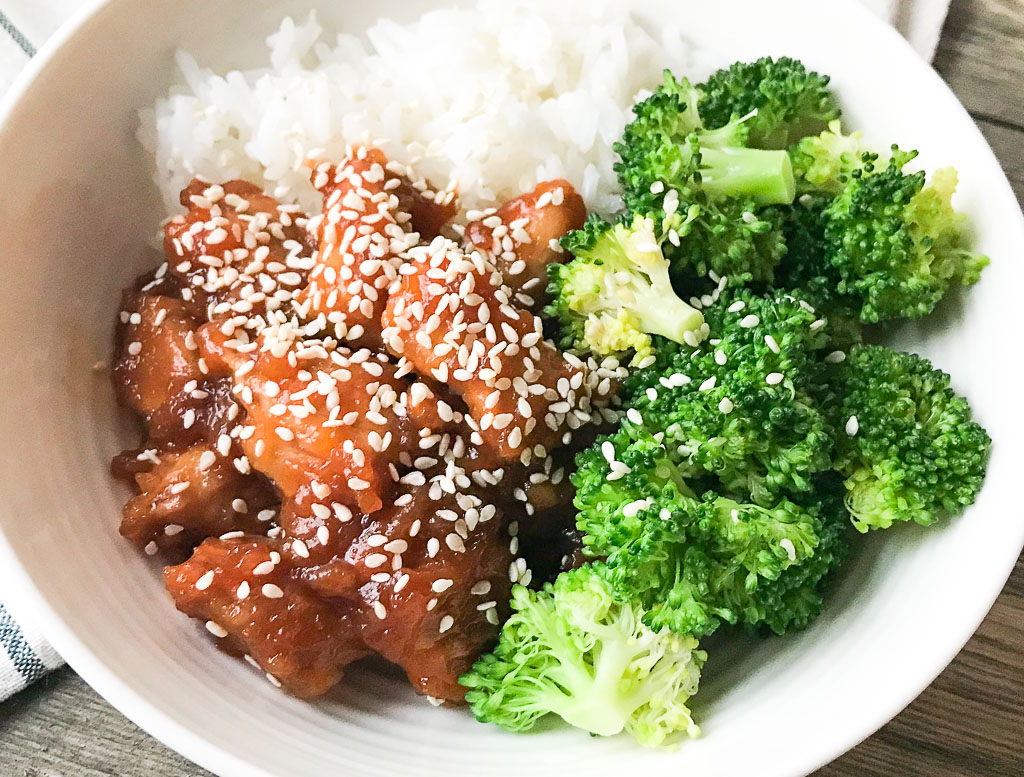
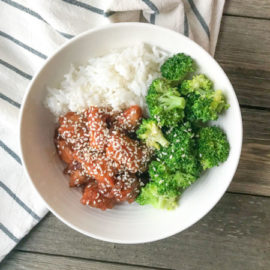
Skip takeout! It will take you less time to make this Instant Pot Sesame Chicken than it is to make a trip out for takeout. This easy dinner idea only takes 30 minutes to make and goes great with a side of rice and steamed broccoli!
There are just some nights where takeout seems like the easier option. Sesame chicken is one of my favorites when ordering takeout but never leaves me feeling the best. What if I told you, I’ve figured out a way to enjoy this signature takeout dish faster than it will take you to hop in the car and grab from a restaurant. Would you believe me?
You may also enjoy Instant Pot lemon ginger salmon and pressure cooker barbacoa beef tacos! Both are easy and cook so fast!
Why You’ll Love Sesame Chicken in the Instant Pot
Healthier than takeout: Cooking the chicken in the Instant Pot creates a crispy texture without a fryer, which how typical take-out restaurants cook this dish.
Simple sauce ingredients: You most likely have the majority of these ingredients already on hand. The soy sauce, ketchup, and red pepper flakes will cook with the chicken helping it stay tender while infusing flavors. The honey and cornstarch will help crisp up the chicken and thicken the sauce.
Easy Dinner and meal prep idea: Take it even one step further to make this dinner with ease. Utilize the steamable rice and broccoli found in the frozen aisle. Or keep putting your Instant Pot to work again by cooking rice and the broccoli in there too.
Ingredients Needed
- Chicken – I used boneless, skinless breasts but you can also use tenders since we are cutting the chicken in bite sized pieces.
- cornstarch – This makes an excellent thickening agent when mixed with water and helps to get that crispy breading on the chicken.
- sesame oil – adds that traditional flavor you are used to
- soy sauce – go with the low sodium kind
- ketchup
- red pepper flakes – this is optional but adds just the right amount of spice.
- honey
- water
- sesame seeds
How to Make Instant Pot Sesame Chicken
Mix a tablespoon of cornstarch with a pinch of salt in a small bowl. Toss the chicken so it’s completely covered.
Set the Instant Pot to saute and add a tablespoon of sesame oil. Once hot, saute the chicken until it’s browned.
Stir in the soy sauce, ketchup, and red pepper flakes if using. Lock the lid in place and switch the valve to the sealing position. Cook on high pressure for 3 minutes.
Once the timer goes off, carefully turn the valve to release the pressure. Remove the lid and add a teaspoon of sesame oil and honey. Stir to combine.
Whisk together the remaining water and cornstarch in a separate bowl to make a slurry.
Turn the Instant Pot back to saute and stir in the slurry. Continue stirring so the sauce thickens.
Top with sesame seeds and serve!
Tips for Making Homemade Sesame Chicken
- If you like more spice, swap the ketchup for sriracha.
- Don’t have cornstarch? Use a little flour instead.
- To make this recipe gluten-free, substitute the soy sauce for tamari.
- Toasting the sesame seeds adds more flavor, but it’s not a must!
- Using sesame oil is essential. While you can substitute, you will miss out on the of the signature flavor of sesame chicken.
- This recipe can be made using any electric pressure cooker, not just the Instant Pot.
Storage Instructions
Keep leftovers in an airtight container in the refrigerator for up to 4 days.
Can You Make Sesame Chicken on the Stovetop?
Yes! Follow the same instructions for breading the chicken. Saute it in a large skillet. Whisk the sauce ingredients in a small saucepan and cook until boiling, then reduce to a simmer to thicken. Stir in the slurry and remove from the heat once the desired consistency has been reached. Then toss to coat the chicken.
More Chicken Recipes to Try:


Instant Pot Sesame Chicken
- Prep Time: 10
- Cook Time: 15
- Total Time: 25 minutes
- Yield: 4
- Category: dinner
- Method: Instant Pot
- Cuisine: Chinese
Description
Skip takeout! It will take you less time to make this Instant Pot Sesame Chicken than it is to make a trip out for take out.
Ingredients
- 1 pound boneless, skinless, chicken breast, cut into bite-size pieces
- 2 tablespoons cornstarch, divided
- 1 tablespoon + 1 teaspoon sesame oil, divided
- 1/4 cup low sodium soy sauce
- 1 1/2 tablespoons ketchup
- pinch of red pepper flakes, optional
- 1/4 cup honey
- 2 tablespoons water
- 2 teaspoons sesame seeds
Instructions
- In a small bowl, combine 1 tablespoon of cornstarch with a pinch of salt and pepper. Toss chicken to evenly and lightly coat.
- Preheat the Instant Pot and set to “saute”. Add 1 tablespoon sesame oil. Once the oil is hot, add the chicken and saute for 3-4 minutes, to brown.
- Stir in soy sauce, ketchup, and red pepper flakes, if using. Place the lid on the Instant Pot and seal the valve. Set to manual and 3 minutes cook time.
- When done, use the quick pressure release. When most of the steam is released, remove the lid. Add the remaining 1 teaspoon of sesame oil and honey. Stir to combine.
- In a small bowl, whisk together the remaining 1 tablespoon of cornstarch and water to make a slurry.
- Set Instant Pot back to saute, stir in the slurry and continue to stir as the sauce thickens to desired consistency, about 2 minutes.
- Top with sesame seeds.
- Serve over rice and steam broccoli.
Keywords: instant pot, sesame chicken, dinner


![[No Bake] Pumpkin Cheesecake Mousse via RDelicious Kitchen @RD_Kitchen #pumpkin #tofu #cheesecake #mousse #dessert #lowsugar #singleserve #healthy #pumpkinspice #thanksgiving](https://chefjulierd.com/wp-content/uploads/2016/10/pumpkin-cheesecake-shooters-037.jpg)