This post may contain affiliate links. Read my privacy policy.
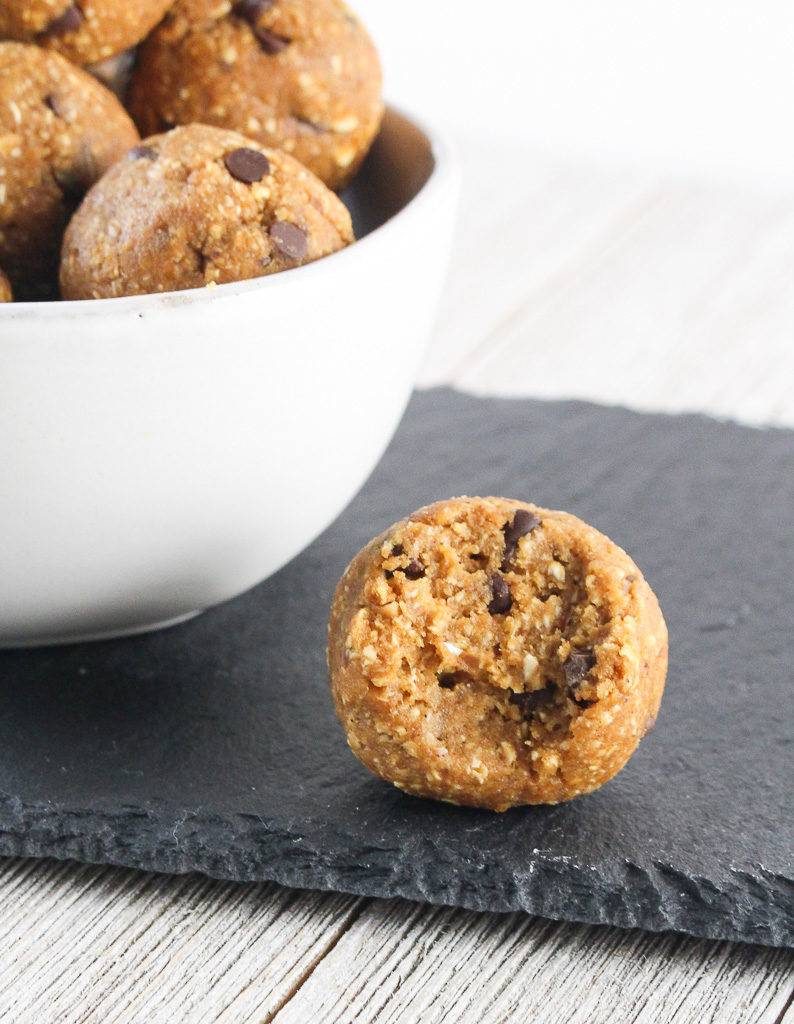
Do you ever have something on your to-do list that just keeps getting rolled over every time to a new to-do list? Welp. That’s posting this Pumpkin Pie Bites recipe. Sorry for holding out on you.
I know I am often the minority when it comes to the love of my paper planner. (Passion Planner to be exact) For the month of January, the pages are completely filled with meetings, cooking classes, presentations, parties, etc. I’m one of those people who likes being busy, but sometimes things fall through the cracks, like posting this recipe which has been sitting in draft for the past two weeks. #sorryivebeenbusy
A version of this recipe was developed with one of my awesome JWU interns. I have a sweet spot for JWU interns and I am a JWU alum myself. I love spending days in the kitchen as a full “test kitchen” days. It’s been fun working with JWU interns because we speak the same “culinary language”. This recipe was tested a few times until the texture and taste came out just right.
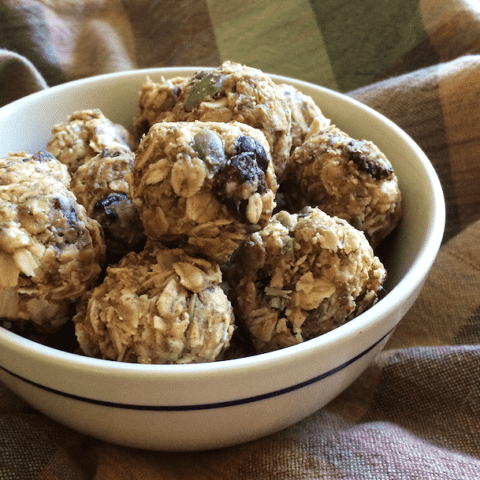
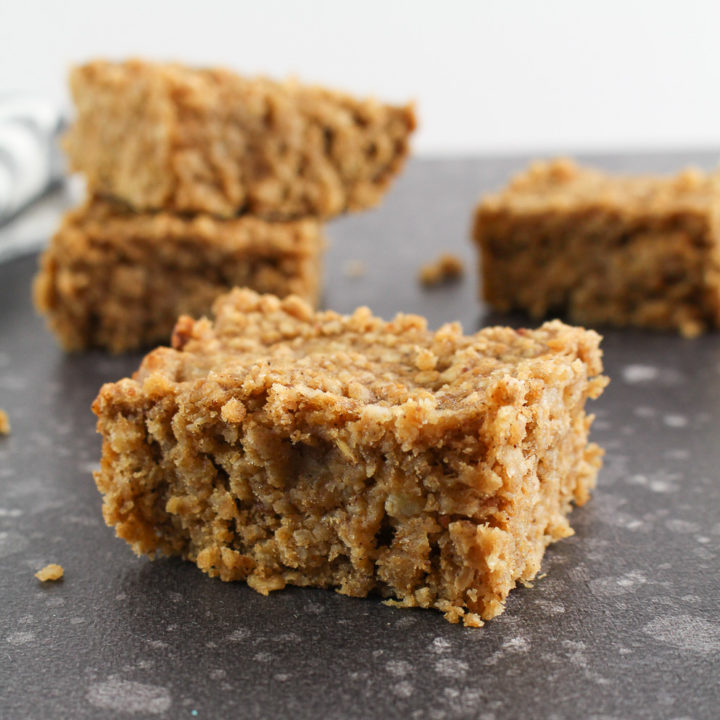
Batch cook these little energy bites for the week. They are the perfect on-the-go snack. Who says pumpkin season is over? Let’s keep the pumpkin around all year round!
Batch cook these bites for an energy-boosting snack during the day!
Ingredients
Scale
1/4 cup Medjool dates, pitted
boiling water, as needed
1/4 cup almond butter
1/4 cup pumpkin puree
2 teaspoons maple syrup
1 1/2 teaspoons pumpkin pie spice (or a mix of 1/2 tsp ginger, 1/2 tsp nutmeg, 1 tsp cinnamon)
1/4 teaspoon salt
2 tablespoon coconut flour*
1 1/2 cup oats
1/2 cup mini chocolate chips
Instructions
Soak the dates in boiling water for 10 minutes. Drain.
Combine all ingredients, except for the chocolate chips, in a food processor. Process until fairly smooth, stopping occasionally to scrape down the sides.
Transfer to a separate bowl and fold in chocolate chips. Chill in the fridge for at least 20 minutes.
Once chilled, scoop 1-tablespoon sized portions and roll into balls. The mixture makes about 16 bites. Store in the refrigerator in an airtight container.
Notes
If the dough is too sticky, pulse in additional coconut flour, 1/2 teaspoon at a time.
Keywords: pumpkin, pumpkin pie, energy bites, snack,
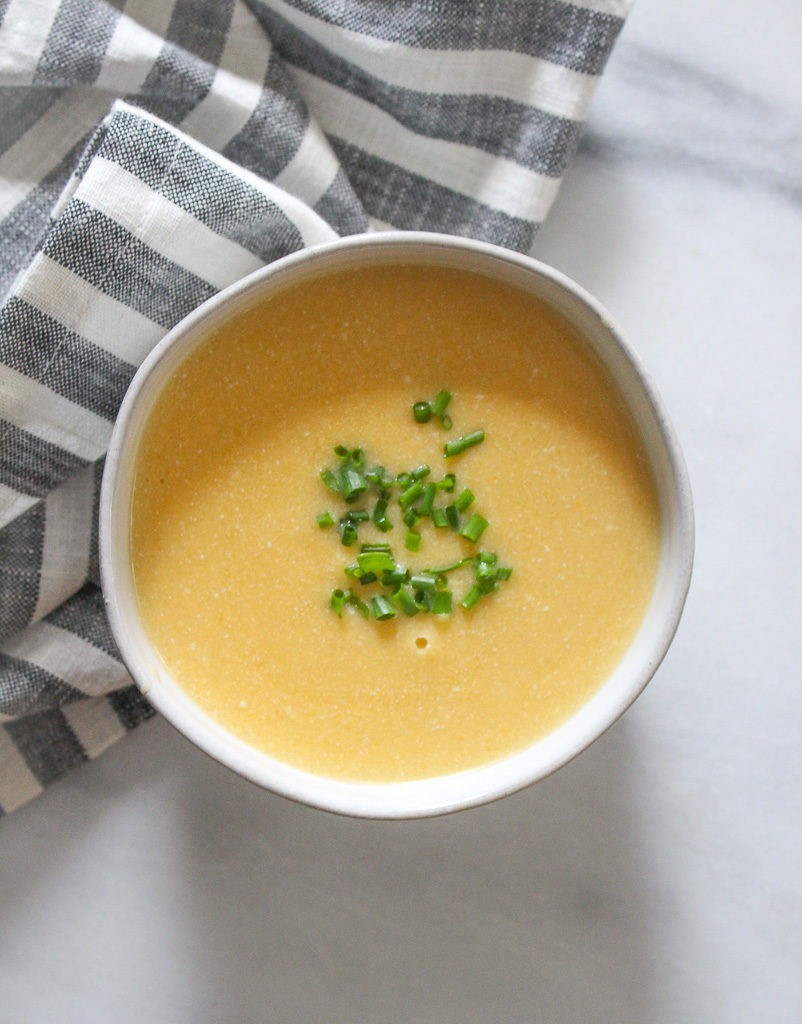
There is nothing better then cozying up to a warm bowl of soup on a chilly evening. Soups can pack in a ton of flavor utilizing various food groups creating a balanced meal.
A couple of weeks ago I had a cooking class called “Hearty Soups & Salads” and in the class, we discussed when making soup, the ingredients and steps are well thought out to build and develop depths of flavors.
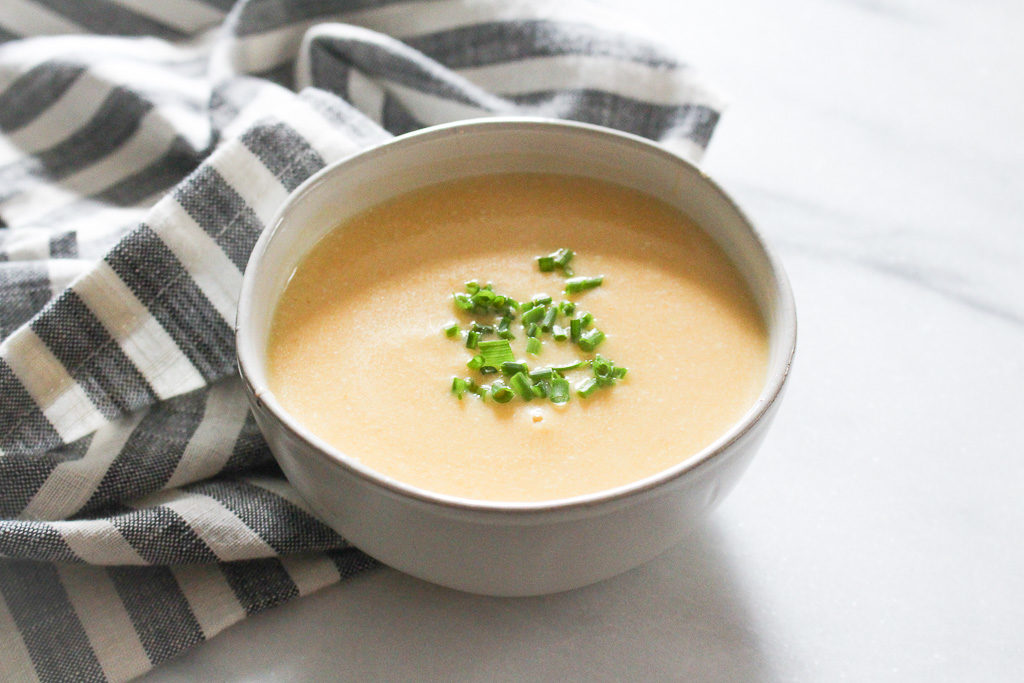
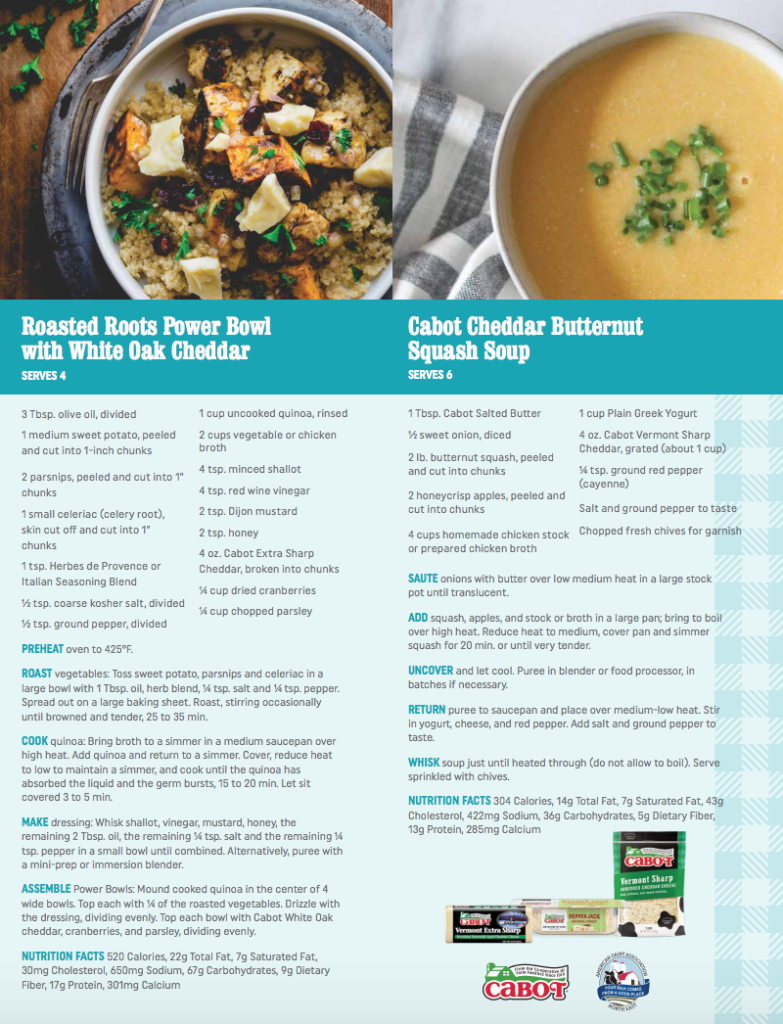
You might think, pairing butternut squash and Honeycrisp apples would yield a soup too sweet, but with the addition of sharp cheddar and plain yogurt, adds a balance of salty, with a hint of tart and tangy.
When blended, this creates a silky smooth soup. Batch cook and freeze some for later.
Properly cool, freeze, and reheat soup:
Refrigerators and freezers cannot cool soups quickly enough for food safety protocols. Speed up the cooling process by placing the pot of soup in a bath of ice water in the sink. Stir soup to help release the heat.
Label and date large ziplock plastic bags. To help pour soup in the bag, place bag in the bowl and cuff the bag over the edges. Ladle soup into each bag, let out excess air and seal.
Lay bags flat in a single layer in the freezer. When completely frozen, stack bags to save space in the freezer.
Thaw overnight in the refrigerator. Reheat over medium-low heat, stirring occasionally.
1 tablespoon butter ½ sweet onion, diced 2 pounds butternut squash, peeled and cut into chunks 2 Honeycrisp apples, peeled and cut into chunks 4 cups low-sodium chicken broth 1 cup plain Greek yogurt 4 ounces sharp cheddar, grated (about 1/2 cup) [I used Cabot’s sharp cheddar] ¼ teaspoon ground red pepper (cayenne) Salt and ground pepper to taste Chopped fresh chives, for garnish
Instructions
Saute onions with butter over low medium heat in a large stockpot until translucent. Add squash, apples, and stock or broth in a large pan; bring to boil over high heat. Reduce heat to medium, cover pan and simmer squash for 20 minutes or until very tender. Uncover and let cool. Puree in blender or food processor, in batches, if necessary. Return puree to saucepan and place over medium-low heat. Stir in yogurt, cheese, and ground red pepper. Add salt and ground pepper to taste. Whisk soup just until heated through (do not allow to boil). Serve sprinkled with chives.
This post may contain affiliate links. Read my privacy policy.
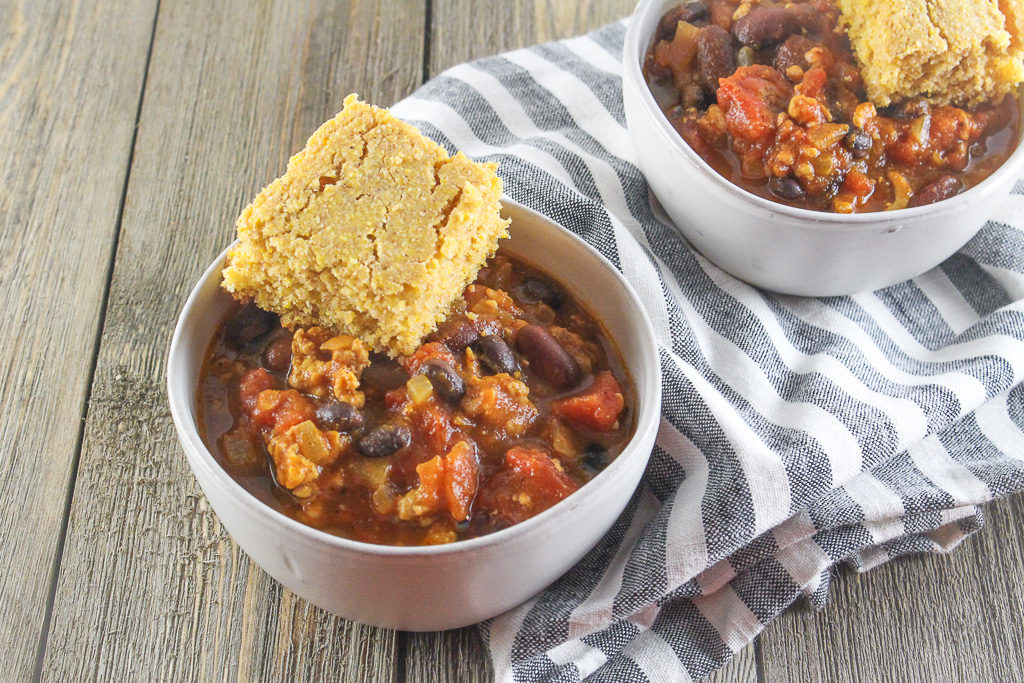
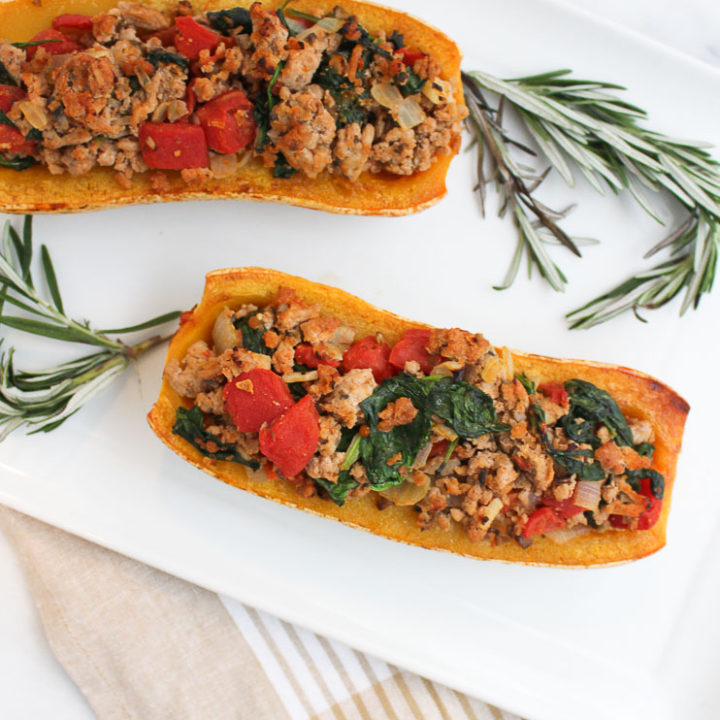
Pumpkin isn’t only for sweet recipes. Try switching things up and use pumpkin in a savory cooking application. Start with this Turkey Pumpkin Chili!
How is October already coming to an end? Fall is a busy time for me with conferences and a lot of work travel. Also during this time of year, I’m sure your Pinterest boards are being saturated with pumpkin everything! I am would say I am a self-proclaimed pumpkin lover, but my RD friend Maggie I would nominate as the president of the pumpkin lover’s club. She just came out with a pumpkin cookbook featuring 50 creative pumpkin flavored, shaped, & spiced recipes.
Did You Know?
A few years back I was at a conference and an RD from Nestle was there speaking about Libby’s canned pumpkin. That brand is a staple across supermarkets nationally. I’m sure many of you, like myself, stock up on Libby’s canned pumpkin this time of year. I was fascinated to learn they exclusively use Dickinson pumpkins, which are a special strain of pumpkins.
Why Dickinson Pumpkins?
Libby’s acquired the rights to the “Libby’s Select Dickinson” pumpkin in 1929 from the Dickinson family who brought it in the early 1800s from Kentucky. If you ever Google “Dickinson pumpkin” images that appear look like a pale, slightly misshapen butternut squash, not the jack-o-lantern pumpkin you may be thinking of. When Dickinson pumpkins are grown and cultivated just right, they yield a sweet, bright orange flesh that’s amazing in dishes from pies to pasta, and a healthier ingredient to swap into some of your favorite recipes.
Confession: One year I was a little too pumpkin obsessed. I ate it in my oats for breakfast, stirred it in my yogurt, made smoothies, breads, soups every. single. day. I had a tad too much beta-carotene and my palms started turning orange. Lesson learned.
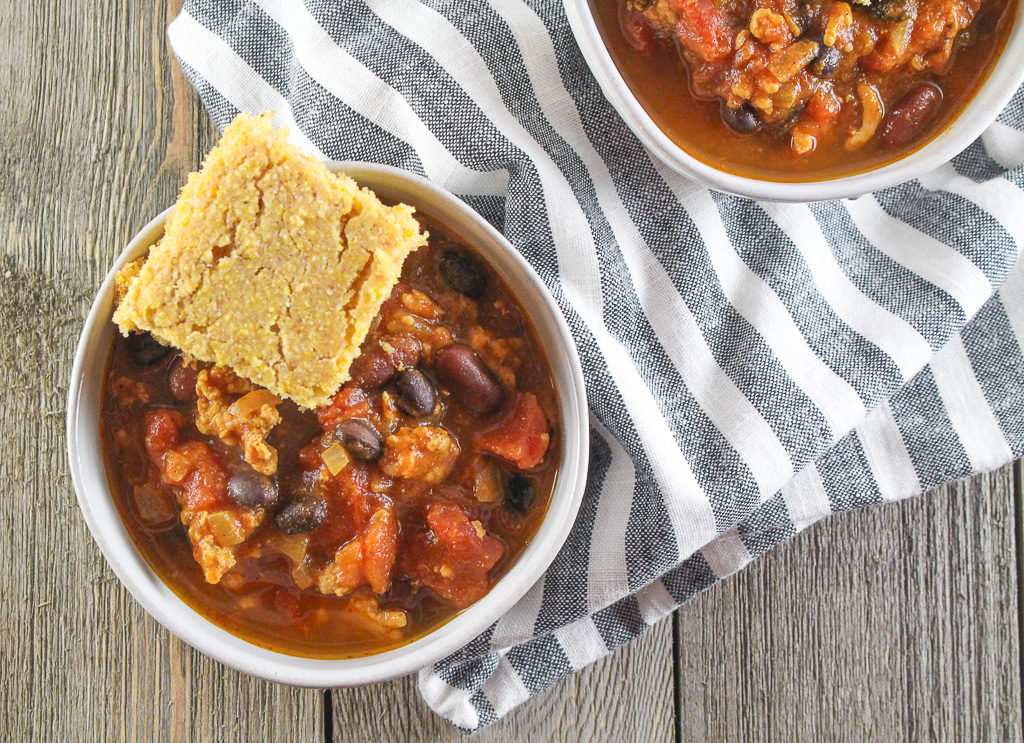
While pumpkin is used in sweet applications the majority of the time, pumpkin works well with savory applications. This chili is perfect for someone who isn’t too crazy about super spicy chili. It’s a mellow flavor with a hint of sweet. I feel like chili isn’t complete without a slice of cornbread. I always crumble up the cornbread right into the chili.
Heat oil in a large pot over medium heat. Add the onion and garlic. Cook until tender, about 5 minutes. Add the turkey, and cook until browned, stirring occasionally.
Stir in the chili powder, cumin, oregano, cinnamon, and cayenne pepper, and cook for 1-2 minutes.
Add in the diced tomatoes, pumpkin, chicken stock and beans, and stir to combine.
Bring the chili to a boil, then reduce the heat and simmer, uncovered, for 20 minutes.
Serve with cornbread.
Notes
This chili freezes well. Make a large batch and freeze half for another time.
This post may contain affiliate links. Read my privacy policy.
Have you ever had one of those aha moments at work where you just feel like, this is what I was meant to be doing? When I was younger and was asked, what do you want to be when you grow up, my answer wasn’t a dietitian/chef. Yes, I always loved cooking, but honestly, my response was less than typical than my other classmates who wanted to be teachers, police officers, and doctors. Mine was a whale trainer. Yup. I loved animals (and still do!) and became fascinated with orca whales when I was in 2nd grade.
So how did I get here? Well honestly, as a senior in high school I was like many others – I had no idea what I wanted to do. I was interested in plenty of careers, but nothing stood out to me to directly pursue. Since I was really unsure, I was looking at colleges that had a variety of offerings, but honestly, I really wanted to play a sport and Cabrini college was talking to me about playing field hockey. I went into my first year at Cabrini with a major in Health Professions.
As I was completing my gen-ed courses I started taking courses for my major and looking into the future with that major, I was thinking of all the things I wanted to do, but wouldn’t be able to pursue with just that degree. Along with a brutal first year at college (that is a whole other crazy story), I decided to leave Cabrini.
That summer was difficult. I felt lost. I definitely had the support of my friends and family during this time trying to figure out what I wanted to do next. It was to my benefit that my mom is a high school guidance counselor and has the inside scoop about a plethora of colleges as she helps high school seniors apply to college. When my mom suggested Johnson & Wales University, I was skeptical. Culinary school? But then I learned about their culinary nutrition program and I fell in love. I was always drawn to the health professional field and being able to merge my love of cooking with nutrition seemed like the perfect fit. I literally applied (and got in!) about a week before the semester started. Talk about fast decisions!
I look back on that summer and remind myself that whenever in a tough situation, things will work out and never settle for anything that doesn’t make you happy. I truly appreciate the opportunities I have within the culinary nutrition field. It feels like this is what I was meant to be doing. I hope my passion is transferred over to others when I present on culinary nutrition topics and demonstrations.
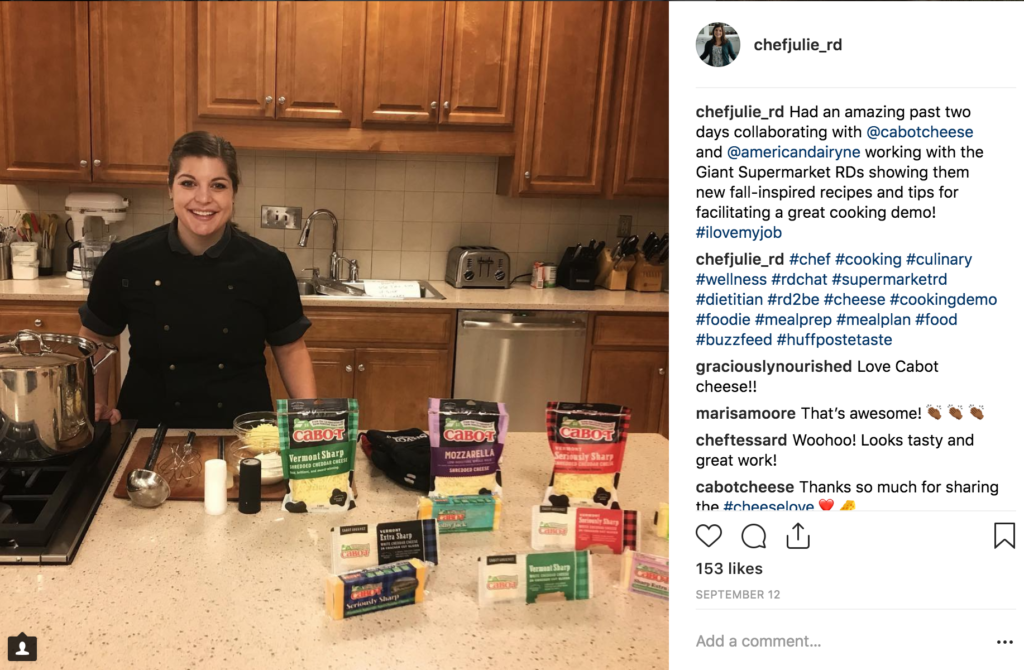
I love my job!
Last month I spent two days with Cabot and the NY American Dairy Council providing cooking demonstrations and cooking tips to Giant supermarket RD’s how to utilize seasonal fall ingredients, and of course Cabot cheese! They are gearing up for diabetes awareness month in November, so I helped develop educational materials and recipes to fit within their themes.
Traveling and presenting to other RD’s was definitely an aha moment feeling. Not many RD’s have a strong culinary background or had the opportunity to go to culinary school as I did.
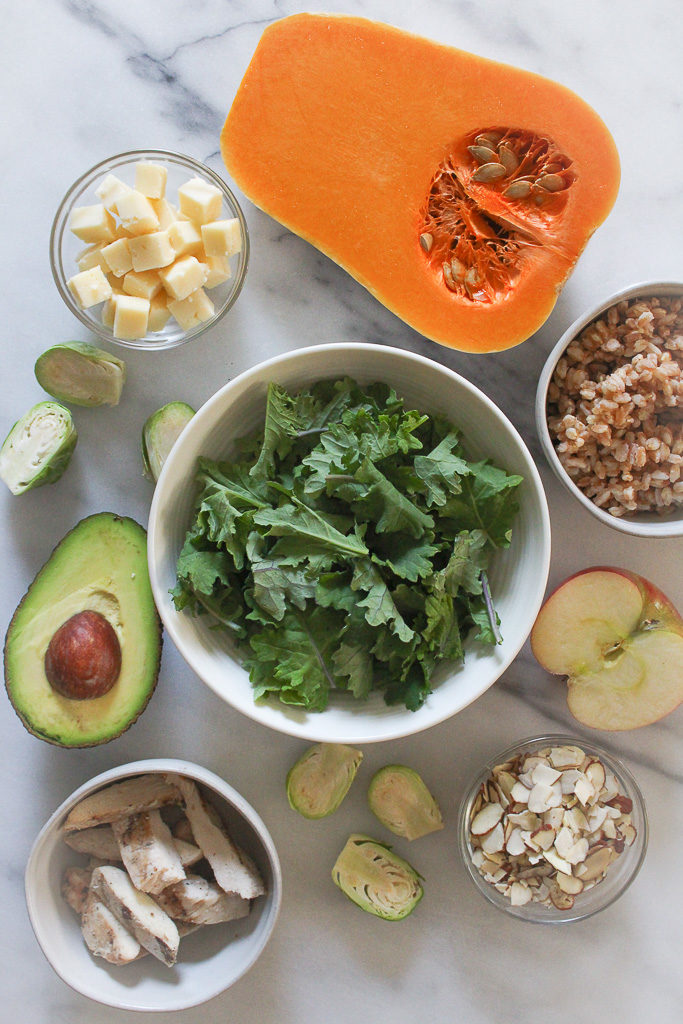
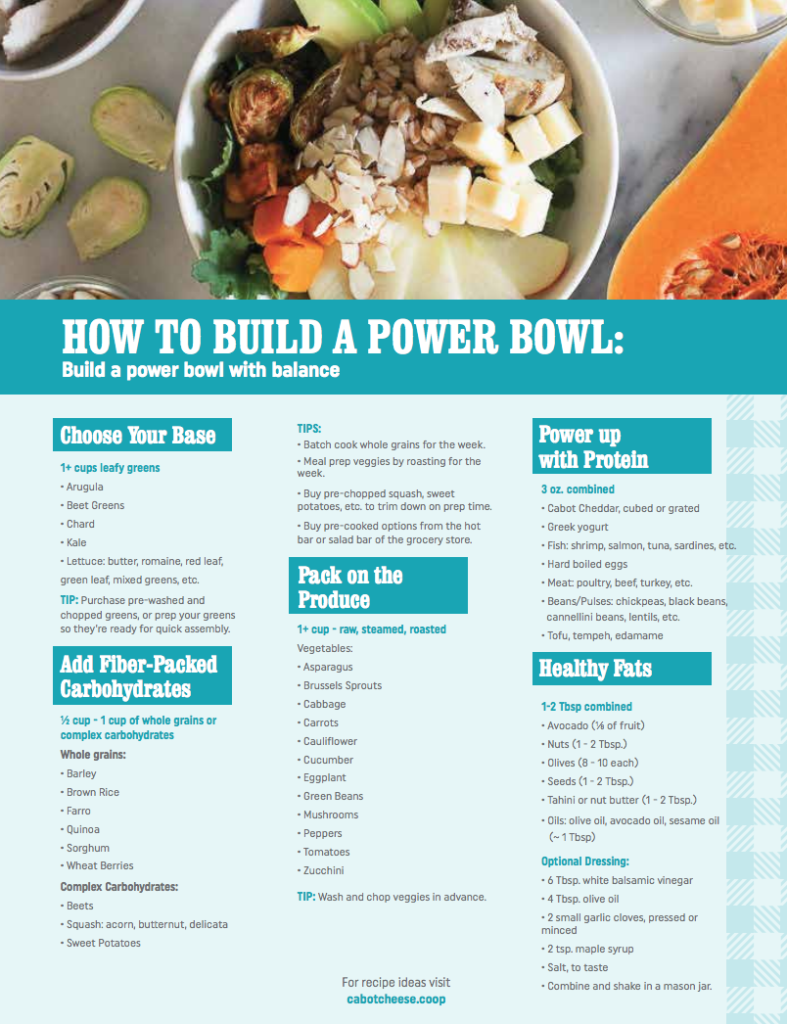
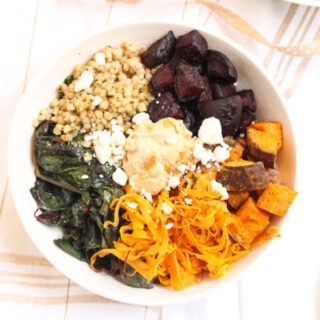
HOW TO BUILD A POWER BOWL WITH BALANCE
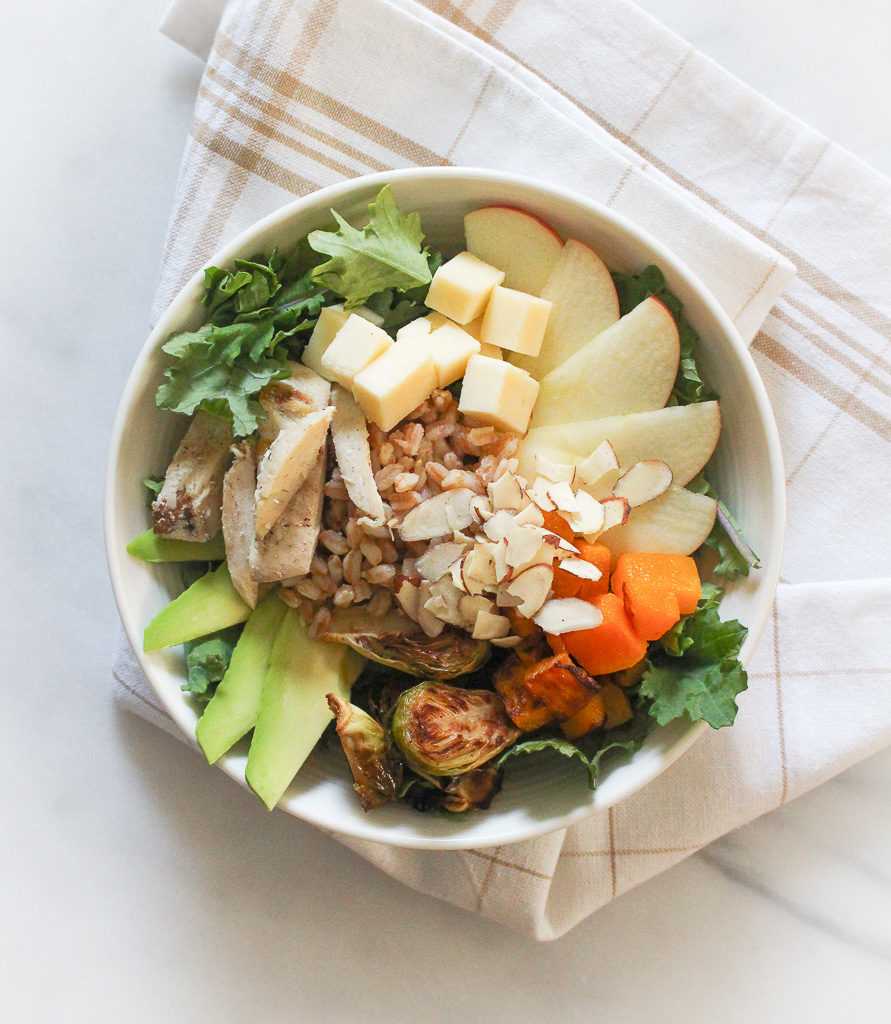
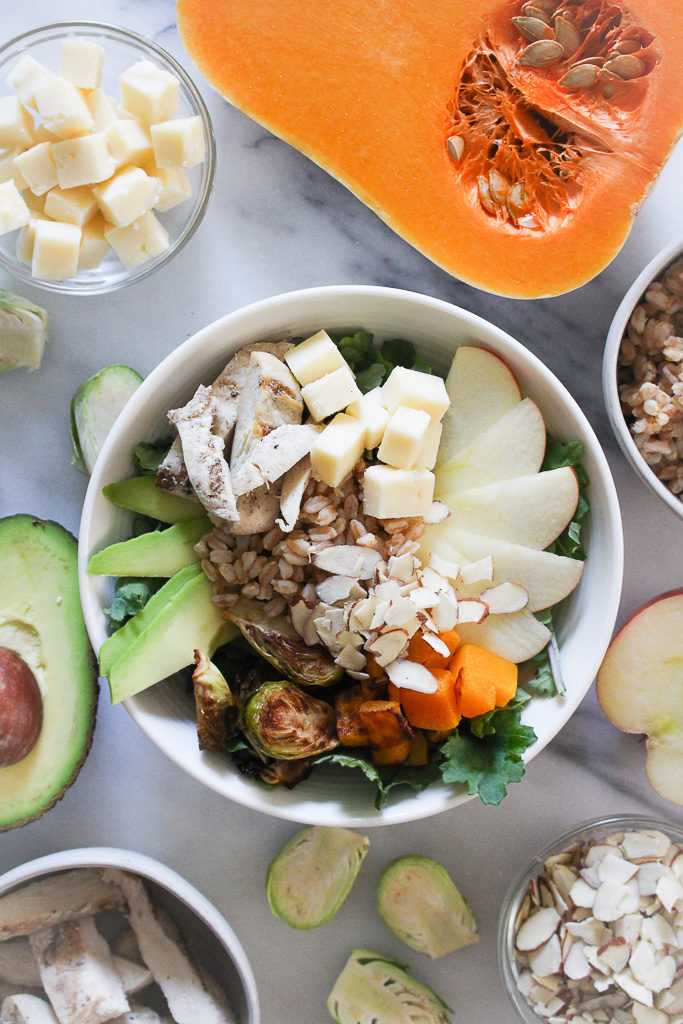
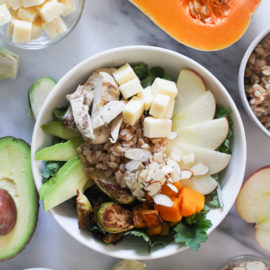
I had a lot of fun developing this recipe. Whenever you build a power bowl or nourish bowl (whatever you choose to call it), think about balance. Balancing food groups to be more full and satisfying. Balancing textures and flavors so every bite is more exciting.
What I love about these bowls is that you can customize them so many ways and never get bored. Plus, if you spend a little time meal prepping ingredients in advance a fancy bowl with a plethora of delicious ingredients can come together in minutes.
1–2 cups baby kale 1/2 cup farro, cooked 1/2 cup butternut squash, cubed and roasted 1/2 cup Brussels sprouts, roasted 1 small apple, sliced 3 oz. grilled chicken, chopped 1 oz. cheddar cheese, cubed (I love Cabot’s 1/4 avocado, sliced 1 tablespoon sliced almonds
Dressing: 6 tablespoons white balsamic vinegar 4 tablespoons olive oil 2 small garlic clove, pressed or minced 2 teaspoons maple syrup salt, to taste
Instructions
For the dressing: In a mason jar, combine white balsamic vinegar, olive oil, garlic, and maple syrup. Shake to combine. Season with salt to taste.
Add all ingredients into a bowl and toss together. Toss with salad dressing and serve.
Notes
The dressing will make extra. Save the remaining dressing for later use.
This recipe is great to prep all ingredients in advance and just toss together.
This post may contain affiliate links. Read my privacy policy.
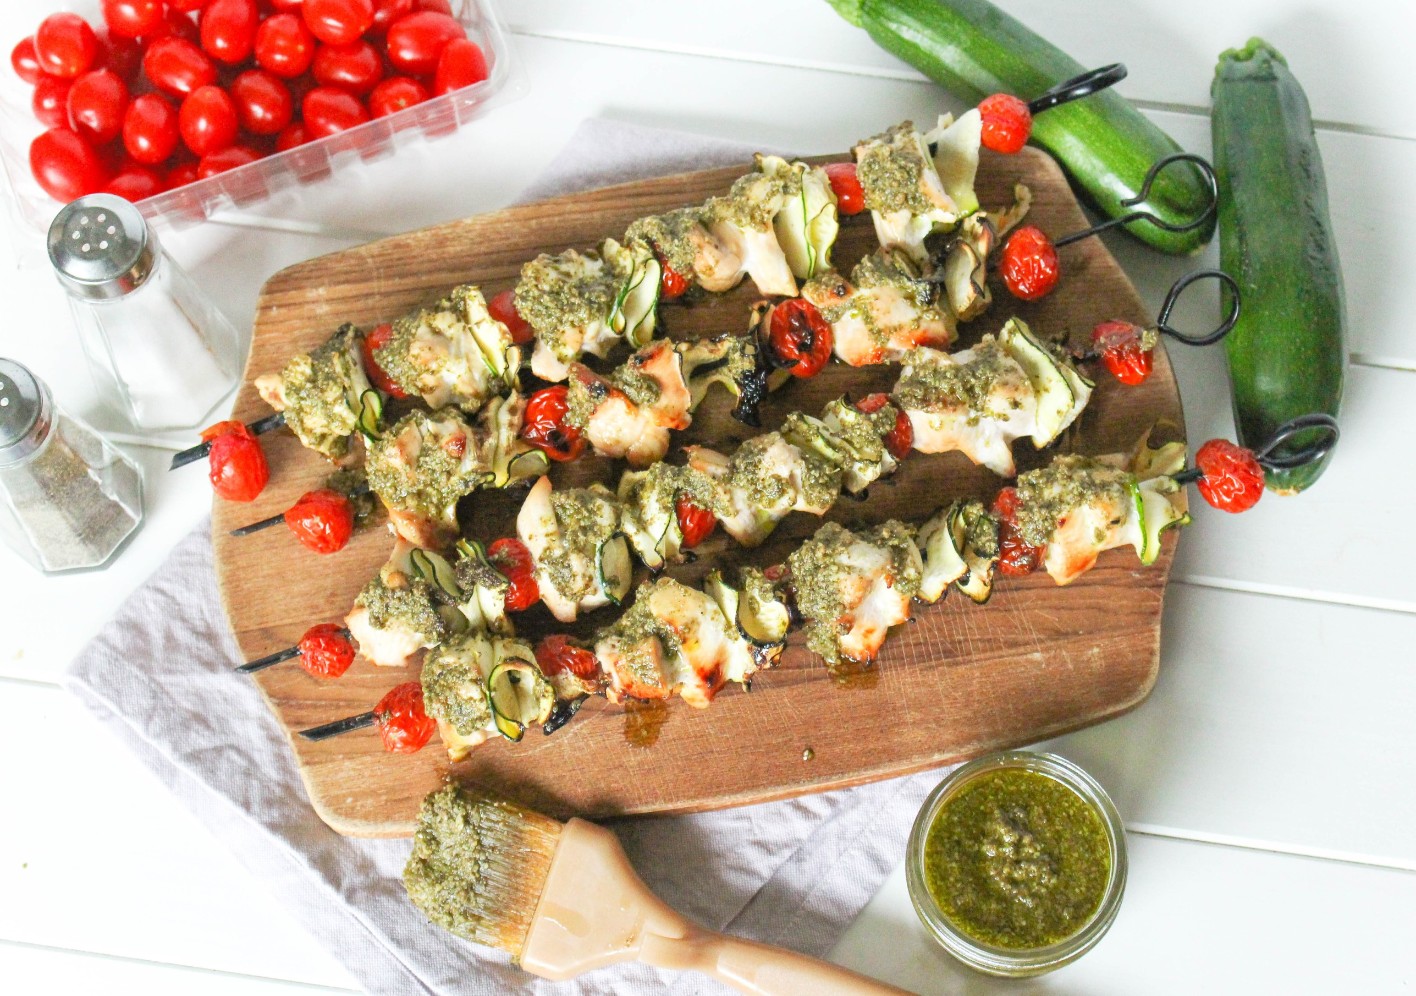
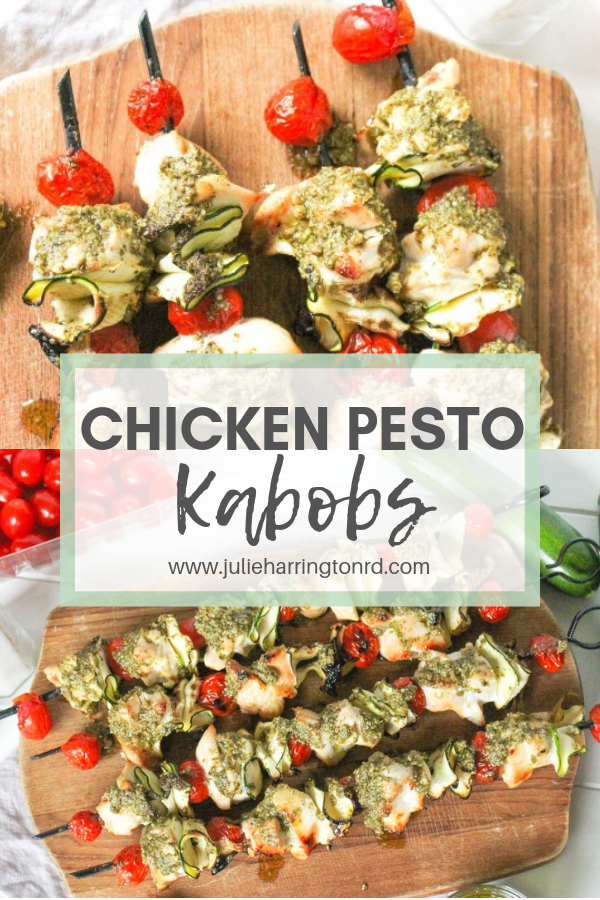
Need some new grilling inspiration? Try these simple and flavorful Chicken Pesto Kabobs!
Fire up the grill! Any grill will do, but there are advantages and disadvantages of using both charcoal or gas grills.
Charcoal vs. Gas Grills – What’s the difference?
Charcoal Grills:
Charcoal grills provide a more distinct smoky flavor along with that amazing backyard aroma. It’s such a tease when I’m running through the neighborhood and all I smell are my neighbors grilling. Scented wood chips or charcoal will add additional flavor. However, charcoal can be a little messy and sometimes tricky to regulate the temperature.
Gas Grills:
Just turn on a switch and your gas grill is fired up and ready to go. You are able to easily regulate the temperature and often gas grills have different settings that you can easily regulate areas of the grill at different temperatures. You won’t really get that smoky flavor, but you are able to cook various items on the grill at the same time.
I like to create little ribbons for the zucchini to thread on the skewers. Chopped (quartered or in half moons) zucchini works just as fine! I just enjoy the crispy edges of the zucchini ribbons that crisp up from the grilling process.
If you are making zucchini ribbons, just be careful using the mandolin. They can be a tad dangerous. I got into a fight with mine once.
Grilling is a healthy cooking method
Grilling is a healthy cooking method to prepare your food. It requires minimal added fats and imparts a smoky flavor while keeping meats and veggies juicy and tender.
Recipe shortcut
There is nothing wrong with cooking with convenience. If using prepared pesto this recipe only has 4 ingredients and can be whipped up for a delicious dinner in no time!
1 pound boneless, skinless chicken breasts, cut into 1 inch cubes
1 cup pre-made pesto, divided
salt and pepper, to taste
Instructions
In a large resealable bag, combine chicken and ¾ cup pesto; marinate for 1 hour.
Using a mandolin (or carefully cut with a knife), slice zucchini lengthwise.
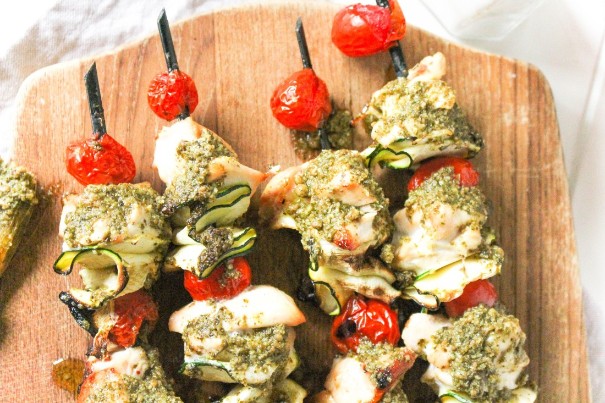
Remove chicken from the marinade. Thread the cherry tomatoes, zucchini in a ribbon-like pattern, then chicken. Repeat until skewer is filled.
Preheat grill to medium-high heat. Add kebobs to grill, cook gently turning halfway through for about 10-12 minutes or until internal temperature of the chicken reaches 165 degrees F. Season with salt and pepper, to taste.
Brust on additional pesto, if desired. Serve immediately.
This post may contain affiliate links. Read my privacy policy.
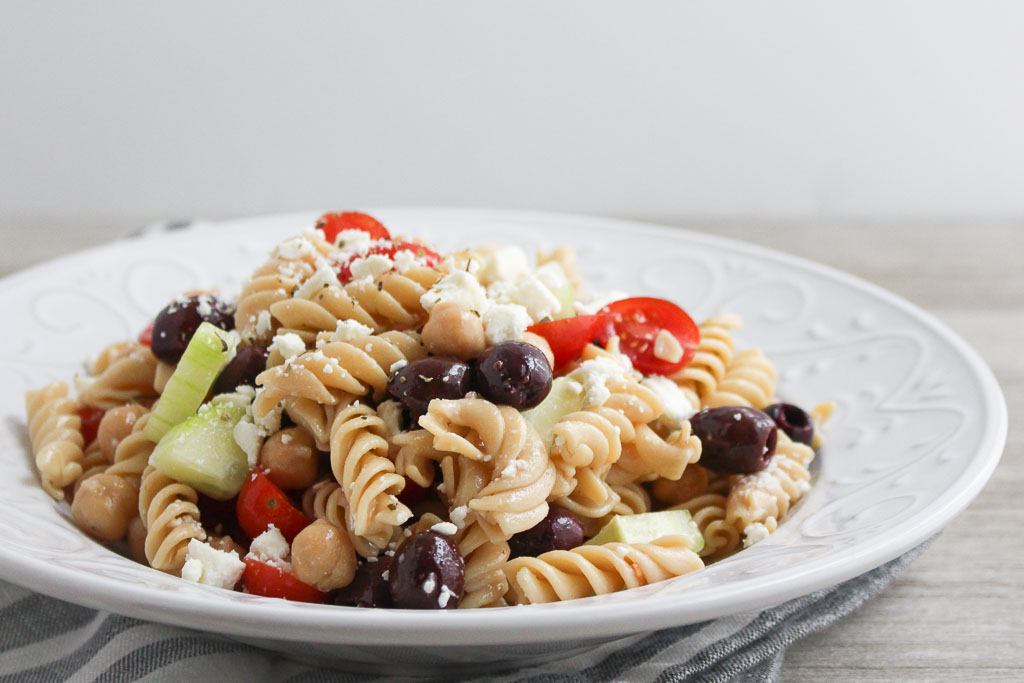
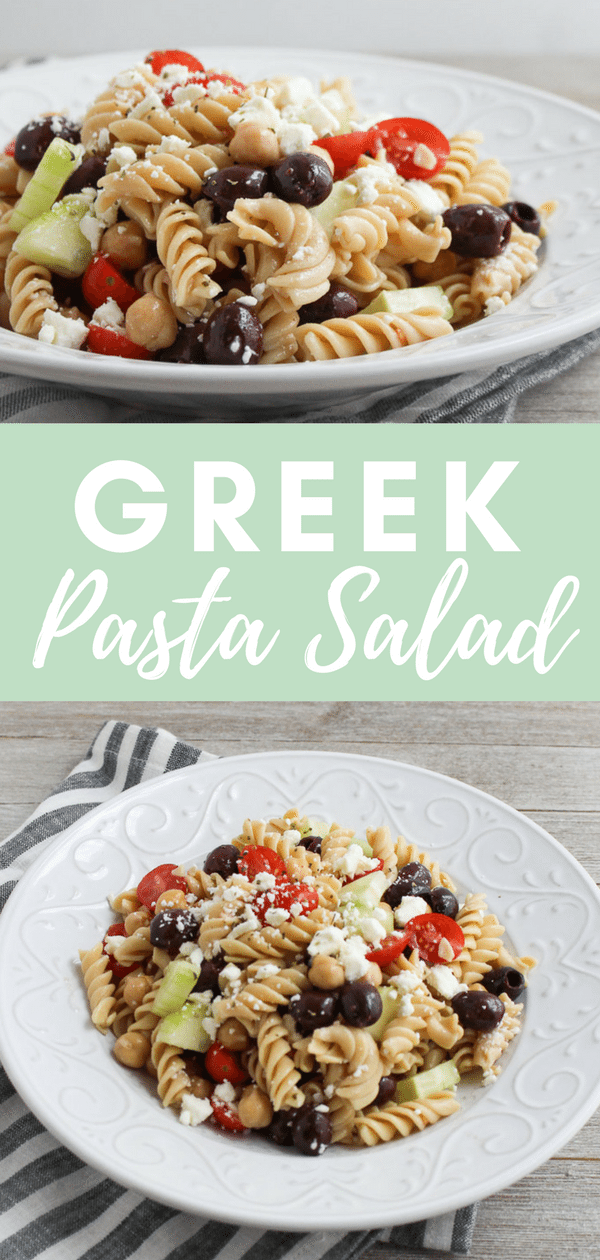
Did you know April 23rd is picnic day? What are your favorite picnic recipes? Add this Greek Pasta Salad to your next picnic spread.
I had many summer jobs during high school and in between college semesters. One of them was at an outdoor catering business. We did a lot of BBQ’s and graduation parties, which served the classic outdoor fair, including burgers, hot dogs, barbeque chicken, and ribs. Plus, the typical sides like, potato salad, pasta, salad, and coleslaw.
Making the sides was one of the tasks I simply dreaded. With catering, every recipe is made in mass quantities to serve a crowd.
Do you have a certain food or ingredient that just skeeves you out? For me it’s mayonnaise. For a large party, I would have to make potato salad in these large buckets and wear these giant gloves to toss the mayonnaise in.
I used Banza pasta for this recipe. I feel like there are never enough plant-based protein options available at barbeques. This is a great way to have a protein-packed option for those who don’t eat meat and want to enjoy this as more of a meal than a side dish.
This post may contain affiliate links. Read my privacy policy.
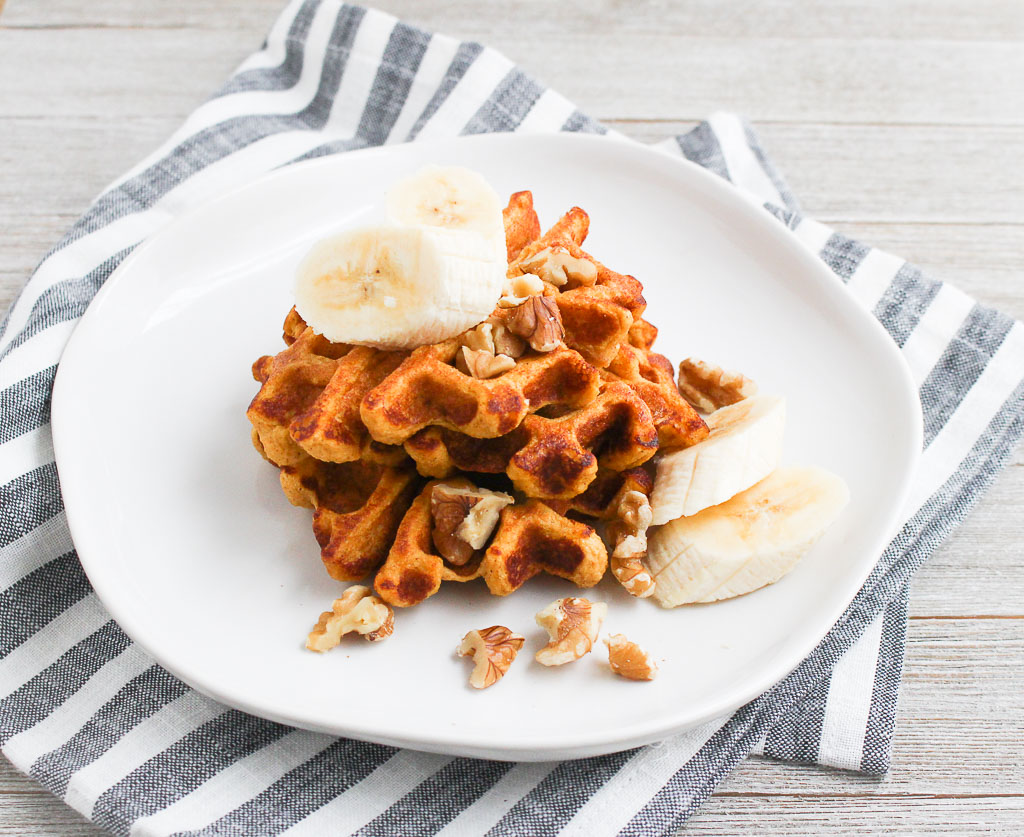
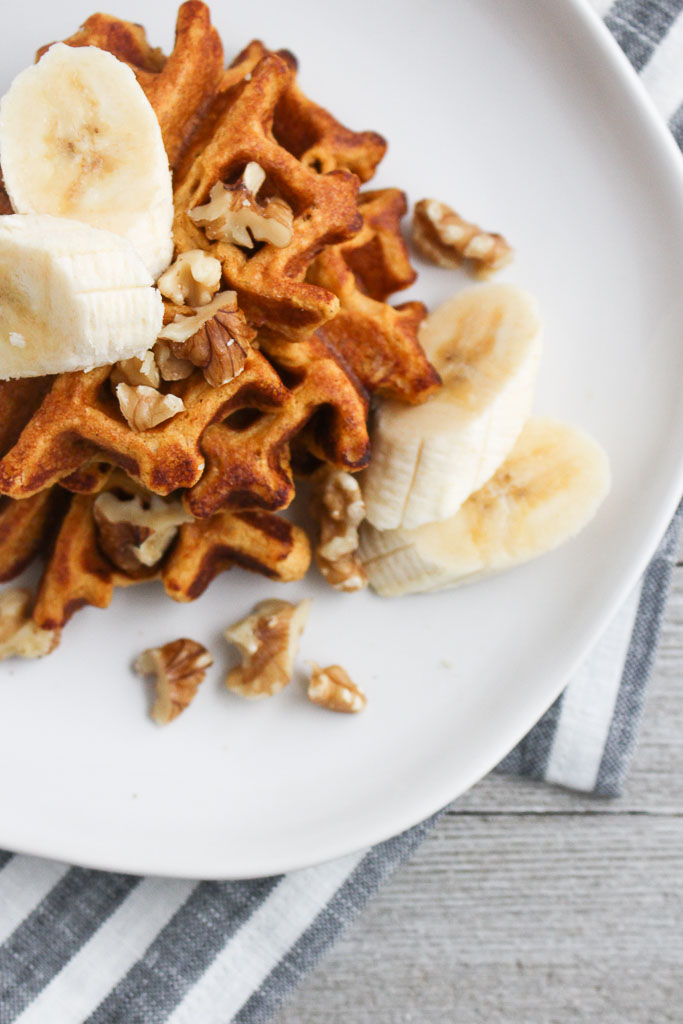
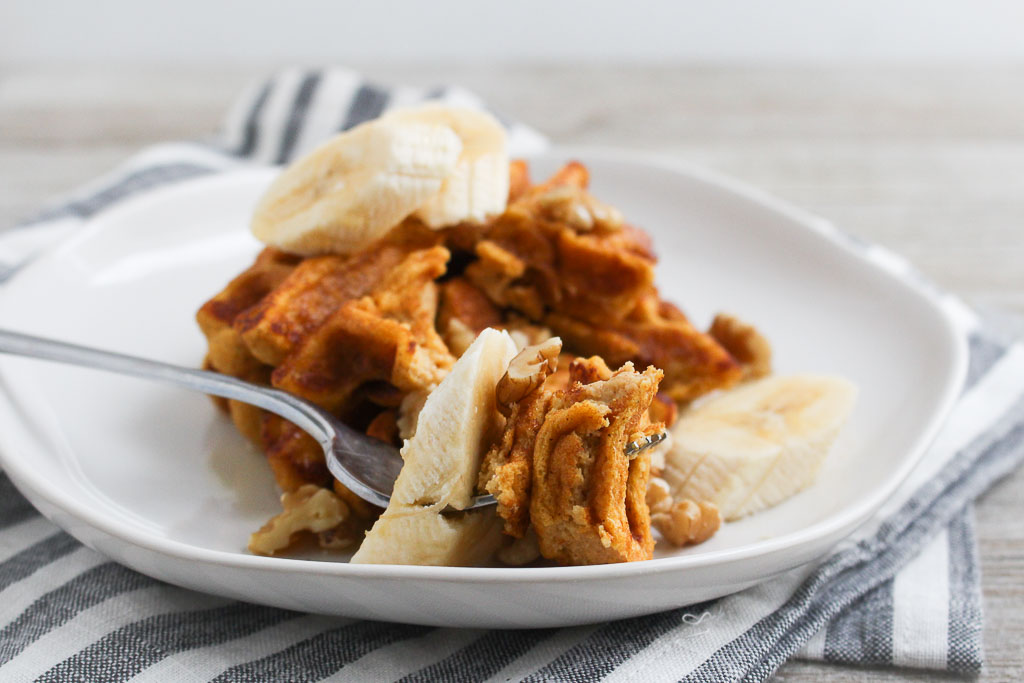
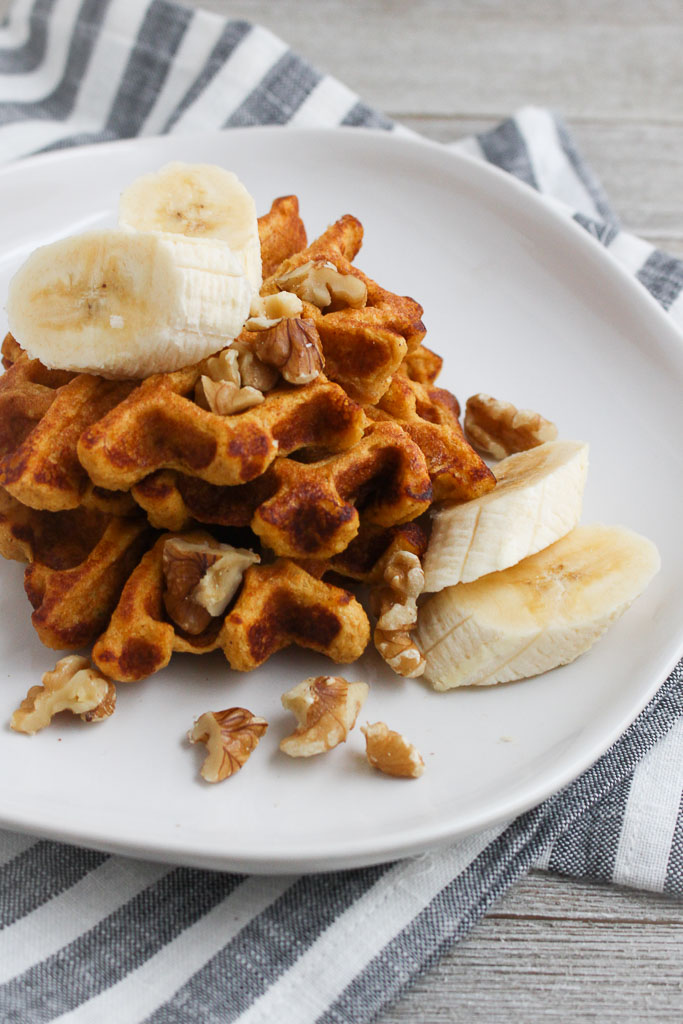
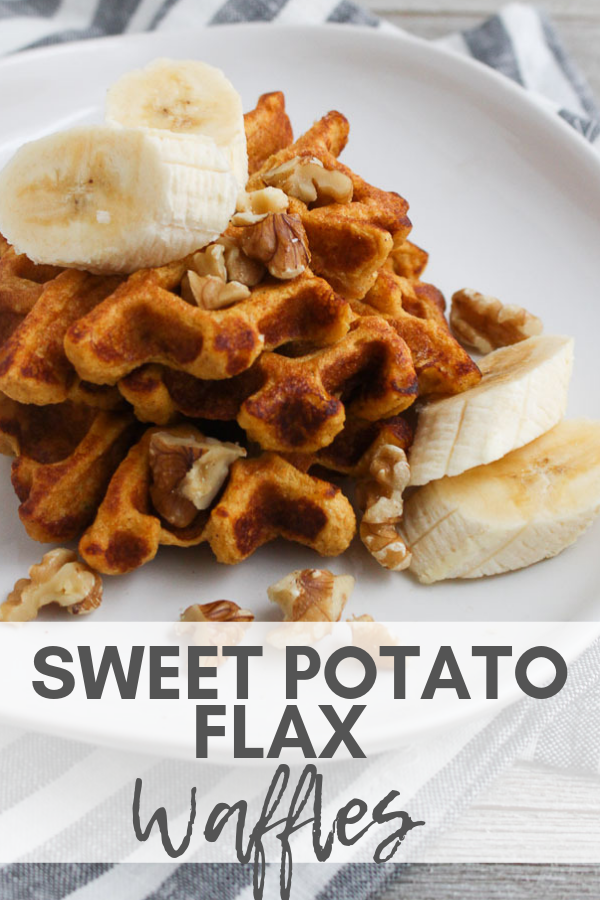
Make these Sweet Potato Flax Waffles for a delicious weekend breakfast, and freeze for later to enjoy during a busy week.
I go through phases where my waffle iron is always being used daily but then sits there collecting dust. I think it’s because sometimes I get sick of cleaning it. You have to get into all the nooks and crannies to make sure you don’t miss anything.
I used to get SO excited when we would stay at a hotel that had a continental breakfast and we could make Belgium waffles for breakfast. It was always an extra little treat!
Are Potato Waffles Healthy?
Yes! These waffles are packed with nutrition. These sweet potatoes are filled with vitamins, minerals, and antioxidants. Using the ground flax takes place of having to add flour. Flax seeds are a great source of fiber and are high in omega 3 fatty acids. Oats are another good source of fiber and have some protein as well.
This waffle recipe is balanced to help with blood sugar spikes and will keep you fuller for longer, especially when compared to other conventional breakfast foods.
Sweet Potato Waffle Ingredients
sweet potato puree
old-fashioned oats
ground flax (I used Manitoba Milling Co.)
milk
eggs
cinnamon
baking powder
salt
cooking spray
toppings: sliced banana, walnuts, maple syrup (optional)
How to Make Waffles Using Sweet Potatoes
To make the sweet potato waffle base, you need to bake the sweet potatoes first. Once they are done, scoop out the flesh and add it to a blender or food processor.
Add the remaining ingredients to the blender and pulse until it’s smooth. Allow the waffle batter to sit for about 10 minutes.
Spray your waffle iron with cooking spray and heat to medium-high.
Pour 1/3 of the batter at a time to make each sweet potato waffle. Cook 3-4 minutes or until the desired consistency is reached.
Serve with your favorite toppings for a healthy and nutritious breakfast.
Waffle Topping Ideas
Fresh fruit – bananas, apples, berries, melon
Greek yogurt
Nut Butter – peanut butter, almond butter
Seeds
Honey or maple syrup
Can You Make Sweet Potato Waffles Vegan?
I haven’t tested this version, but if you experiment you could swap the poultry eggs for flax eggs. Then cut down on the amount of additional flax. You would also want to use a plant-based milk as well.
Are These Waffles Gluten Free?
They are as long as you choose a gluten free brand of oats, like Quaker or Bob’s Red Mill.
Tips for Making
I used Manitoba Milling Co. finely milled flaxseed, which is almost like the consistency of flour. If using coarse ground flax, more liquid may be needed.
To store you can reheat them in a toaster. They also freeze really well too which is great for meal prepping.
Make sure you cook the sweet potatoes until they are tender before adding them to the blender.
Preheating the waffle iron first helps to give a crispy outside.
This batter can easily be used for pancakes as well.
Team Waffle or Team Pancake?
I’ve mentioned before that I used to be a waffle person over pancake person, only because I used to be terrible at flipping them. I think my skills have improved though. Waffle pros: They freeze and reheat better than pancakes (in my opinion). Waffle cons: You only can really make one at a time, whereas with a large enough pan, you can easily make a few pancakes at a time.
Make these Sweet Potato Flax Waffles for a delicious weekend breakfast, and freeze for later to enjoy during a busy week.
Ingredients
Scale
3/4 cup sweet potato puree (about 1 medium sweet potato – baked and flesh scooped out)
1/2 cup old-fashioned oats
1/2 cup ground flax (I used Manitoba Milling Co.)
1 cup milk
2 eggs
1 tablespoon cinnamon
1/4 teaspoon baking powder
pinch of salt
cooking spray
toppings: sliced banana, walnuts, maple syrup (optional)
Instructions
Add all ingredients to a blender and blend until smooth. Let batter sit for 10 minutes.
Preheat waffle iron to medium-high heat. Spray with cooking spray.
Pour 1/3 cup of batter into waffle iron. Cook until desired consistency (about 3-4 minutes per side).
Top waffles with sliced bananas, walnuts, and syrup, if desired.
Notes
To make sweet potato puree: Score a sweet potato with a paring knife. Wrap in tin foil and bake until soft. When cool enough to handle, scoop out the flesh and puree.
Meal Prep: Make a batch of these waffles ahead of time. They freeze well. Just pop them in the toaster to warm up.
I used Manitoba Milling Co. finely milled flax seed, which is almost like the consistency of flour. If using coarse ground flax, more liquid may be needed.
This post may contain affiliate links. Read my privacy policy.
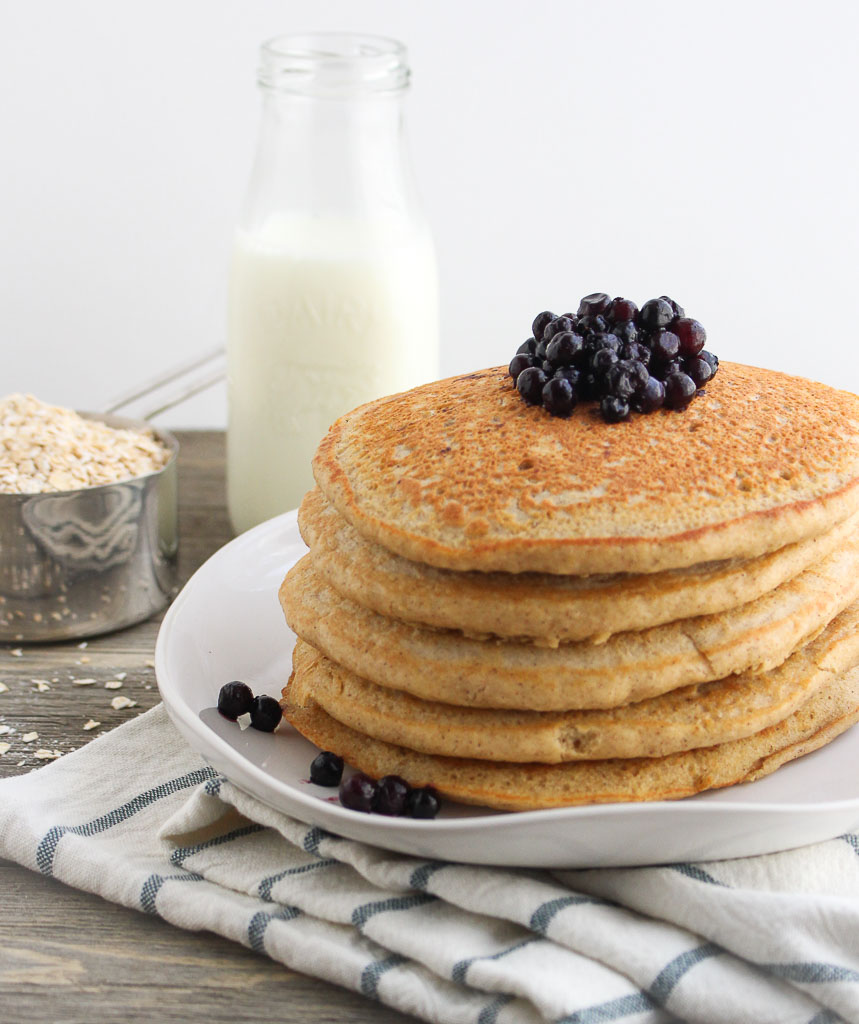
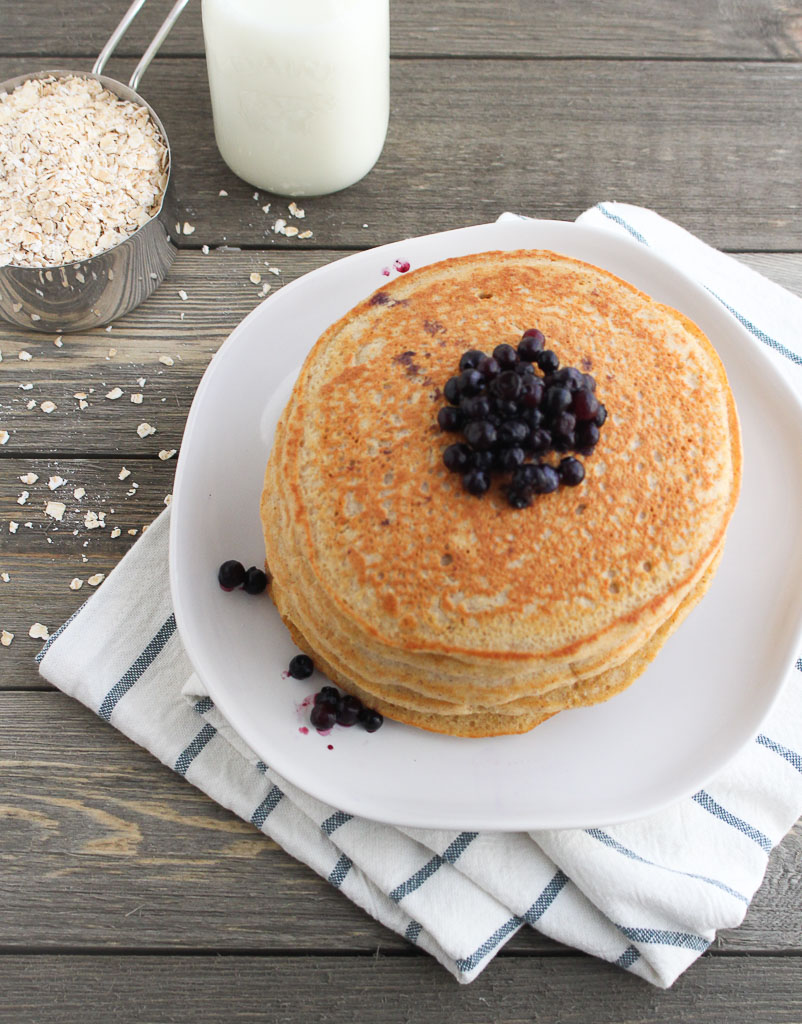
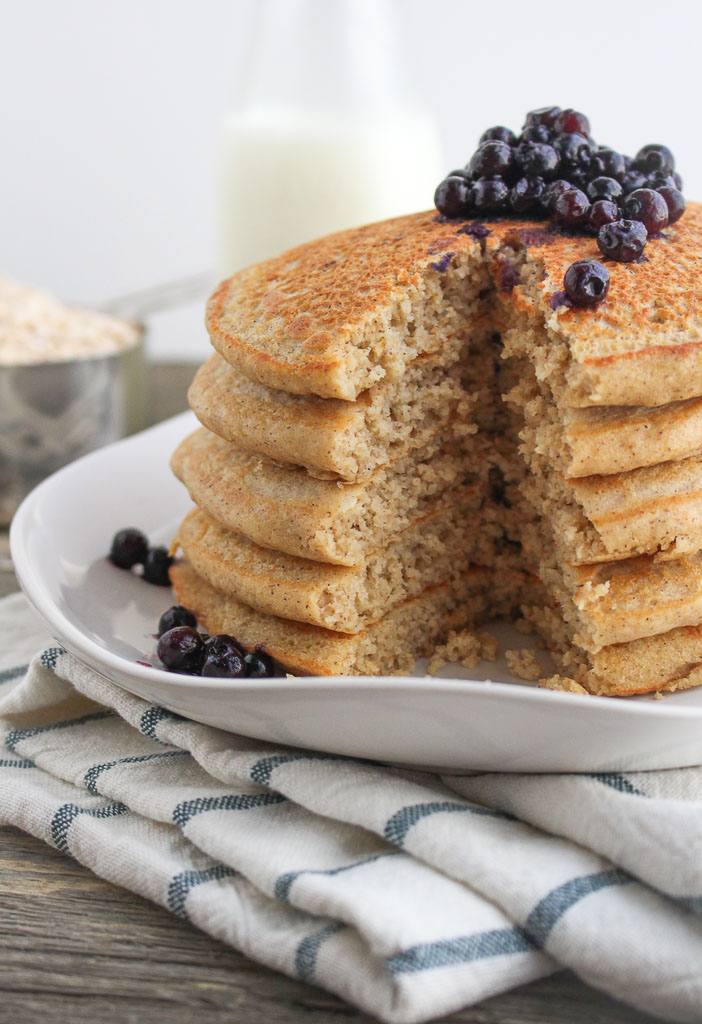
These pancakes are whole grain and gluten-free, making them a perfect fit for any pancake enthusiast!
Why I love Oat Flour Pancakes
I used to be “anti pancake” because I am the worst at flipping them. Really, it was that I was impatient and tried to flip them too early before they set.
When my sisters and I were little, my dad was the only one who was allowed to cut our pancakes. He would keep them perfectly stacked and cut them into perfect triangles. I was more of a syrup dunker than a drizzler. I would take each triangle and dunk it into the “good syrup”. My aunt lives in Vermont and she would send us delicious locally made maple syrup.
Using whole grains for pancakes
The problem with pancakes is that I never felt satisfied after eating them. Adding whole grains as the base of pancakes can help solve that solution.
I used oat flour as the base. You could just buy oat flour, but it’s pretty easy to make. Just take rolled oats or instant oats and pulse them in a food processor until they resemble a light fluffy flour. Oat flour still contains all part of the whole grain, but not as dense as whole wheat flour, yielding a fluffier pancake.
The secret to creating fluffy pancakes
Vinegar in pancakes? Yes! It’s the secret to help activate the baking powder and helps the pancakes puff and become fluffy.
I’ve tried some other methods like adding seltzer to the batter or whipping the egg whites separately from the egg yolks before combining them. Both methods do work, but I don’t always have seltzer on hand, and mixing egg whites separately makes more messy bowls. I don’t know about you, but the fewer dishes to clean, the better!
Syrup dunker or drizzler?
Are you a syrup dunker or drizzler? Most of the time I ditch the syrup and use frozen fruit like wild blueberries. When frozen berries defrost they become all gooey and syrupy. Other times, I’ll spread peanut butter or yogurt between the layers. I really just go with what I’m craving at the time. How do you top your pancakes?
This post may contain affiliate links. Read my privacy policy.
This post is sponsored by The Beef Checkoff. Thanks for supporting brands that make this blog possible!
Dietitians are celebrating all month long because March is National Nutrition Month! This year’s theme is “Go Further with Food”. This theme encourages us to achieve the numerous benefits healthy eating habits offer while including a variety of healthful foods from all of the food groups on a regular basis.
Previously working as a Supermarket RD, I quickly learned that a grocery store is a confusing place, especially in certain areas like the meat section.
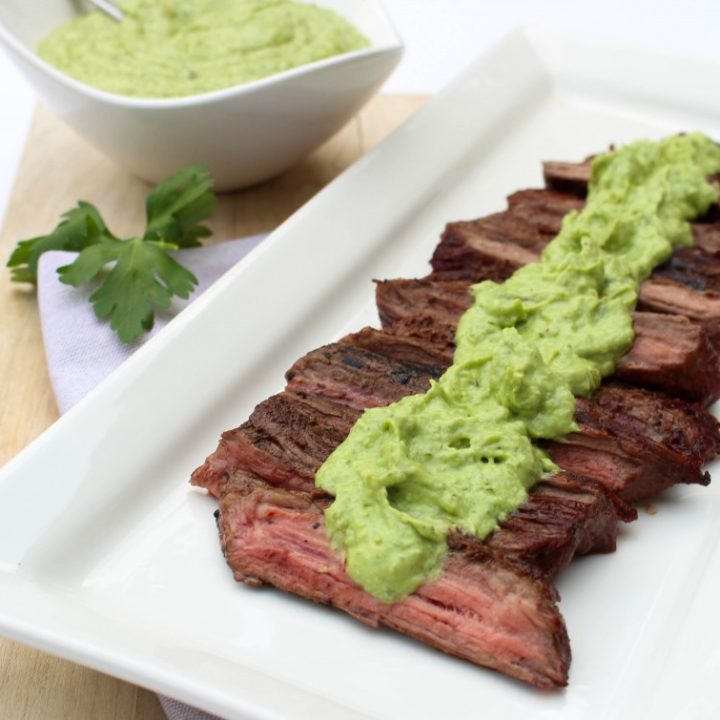
It can be challenging grocery shopping for beef if you are unsure of the difference between flank steak and skirt steak. The different costs, categories, or even proper cooking techniques of various cuts of beef can throw off even a savvy home cook.
At the supermarket meat case, each beef package label typically identifies the primal cut and the sub-primal cut name. It also includes the weight, price per pound, total price, sell-by date, and safe handling instructions. It may also include a grade, nutrition and preparation information, and the country of origin.
It’s time to “Beef Up Nutrition Month” with decoding what the labels mean in the supermarket meat case.
BEEF QUALITY GRADING
The USDA divides beef into categories by different grades. Prime, Choice, and Select are the ones you will see at the grocery store. The certain qualifications that determine the quality grade of beef are:
Distribution of marbling within the lean muscle at the 12th/13th rib
Age/maturity of the carcass
Color, texture, & firmness of the lean muscle
Prime-Grade Beef is the USDA’s highest designation. Coming from younger, well-fed cattle, this beef has more marbling with afirmer flesh. Prime-grade beef accounts for less than approximately five percent of the market in the United States, with the vast majority going to steakhouses and fancy hotels. Prime roasts and steaks are excellent for roasting, grilling, or broiling.
Choice-Grade Beef is of high quality and produced in highest quantity. Choice-grade beef has less marbling than Prime. This is the standard option at supermarkets. Choice roast and steaks, especially from the rib and loin, will be very tender, juicy, and flavorful when roasted, grilled, or broiled. Less tender cuts are great for slow cooking.
Select-Grade Beef is slightly leaner than Prime and Choice because it has less marbling. It can lack some tenderness, flavor, and juiciness as compared to the higher grades. Select grade beef often benefits from marinating prior to grilling or broiling. 1
Check out this easy to explore chart, outlining the various Grades of Beef.
NATURAL, GRASS-FED, ORGANIC – WHAT’S THE DIFFERENCE?
Beyond just the quality grade, beef comes along with additional labels. Package labeling can be very confusing.
All cattle spend the majority of their lives eating grass on pastures. But beef can be finished in a variety of ways, giving you choices when at the meat case in your local grocery store or at a restaurant.
“Natural” This label implies the beef has no artificial ingredients or colors added to it an is minimally processed. 2
“Naturally Raised” does have validity. As of 2009, the label ensures that the animals are free of antibiotics, never received growth-promoting hormones, never fed animal by-products, and may spend time at a feed yard. Naturally raised cattle may be either grain- or grass-finished.
“100% Organic Beef” means that the animals must be fed completely organic feed grains and have never received antibiotics and growth-promoting hormones. This is certified and inspected by the government. Organic beef cattle may be either grain- or grass-finished, as long as the USDA’s Agriculture Marketing Service certifies the feed is 100% organically grown and can be fed in a feed yard. 3
“Grass Finished” cattle spend their lives eating grass or foraging, but not always necessarily stay on a 100 percent grass-fed diet or finished on grass. Some “grass-fed” cattle are still fed grain for their last few weeks to help fatten the cattle. Grass-fed cattle may or may not be given FDA-approved antibiotics to treat, prevent, or control disease and/or growth-promoting hormones. 2
Need help choosing lean beef or wondering what type of cooking method works best? Use the Beef. It’s what’s for dinner’s cooking guide.
WHY BEEF?
Beef provides you with 10 essential nutrients that support a heart-healthy lifestyle including protein, zinc, iron and B vitamins. The nutrients found in beef provide our bodies with the strength to thrive and grow throughout all the stages of life.
Beef is an excellent source of protein.
One 3-ounce cooked serving of beef provides approximately 50% of your Daily Value (25 grams) of this important nutrient—making it an excellent source! Protein helps maintain a healthy weight, as well as preserve and build muscle.
New research suggests it’s not only important to just get enough protein in at dinner or lunch but to spread it throughout your day for optimal health. Aim for 25-30 grams of protein at each meal. 4,5
What is considered lean?
6 Look for the word “round” or “loin” in its name when choosing lean cuts of beef.
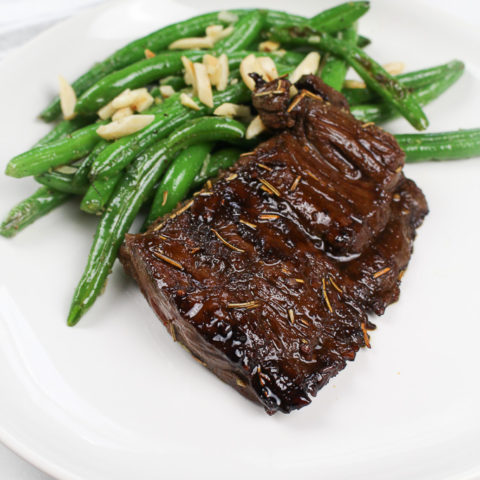
Lean cuts include top sirloin steak, tenderloin steak, strip steak (or top loin steak), or 95% lean ground beef.
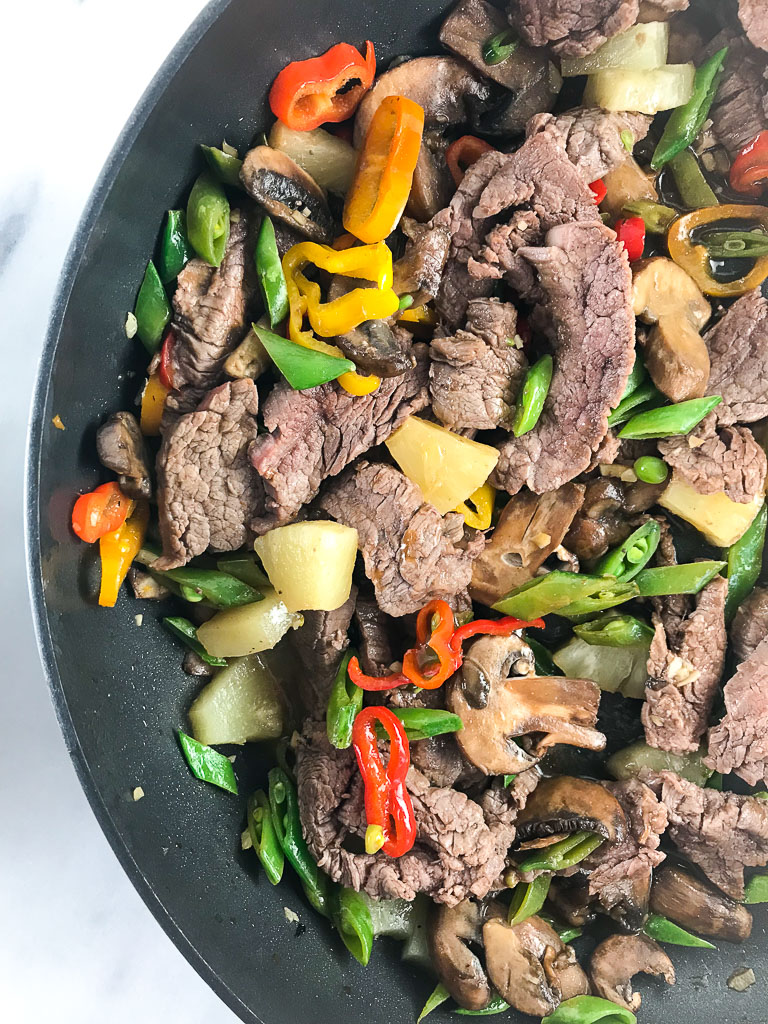
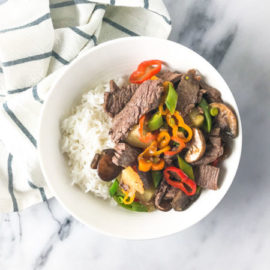
Whip up this simple and delicious stir-fry for dinner.
Ingredients
Scale
1 (8-ounce) can pineapple tidbits, 3 tablespoons juice reserved
5 tsp rice vinegar
1 tbsp low sodium soy sauce
1 tbsp ketchup
2 tsp brown sugar
1 lb. flank steak, cut into strips
1 tsp cornstarch
3 tsp sesame oil, divided
1 tbsp minced garlic
1 cup sliced mushrooms
1 cup snap peas
1 sweet pepper, sliced
Instructions
Whisk the reserved 3 tbsp pineapple juice, vinegar, soy sauce, ketchup, and sugar in a small bowl until smooth. Place beef in a medium bowl; toss with 2 tablespoons of the sauce. Let marinate for 20 minutes.
Add cornstarch to the remaining sauce and whisk until smooth.
Heat 2 teaspoons oil in a large nonstick pan over medium-high heat. Transfer the beef to the pan. Whisk any remaining marinade into the bowl of sauce. Cook the beef, stirring every 1 to 2 minutes, until tender, about 4-5 minutes. Transfer the beef to a plate.
Add the remaining 1 tsp oil to the pan and heat over medium heat. Add garlic, stirring constantly, until fragrant, about 30 seconds. Add the mushrooms, snap peas and sweet pepper to cook, stirring often, until just tender, about 3 minutes. Pour in the sauce and cook, stirring, until thickened, about 30 seconds. Add the beef and pineapple and cook, until heated through.
This post may contain affiliate links. Read my privacy policy.
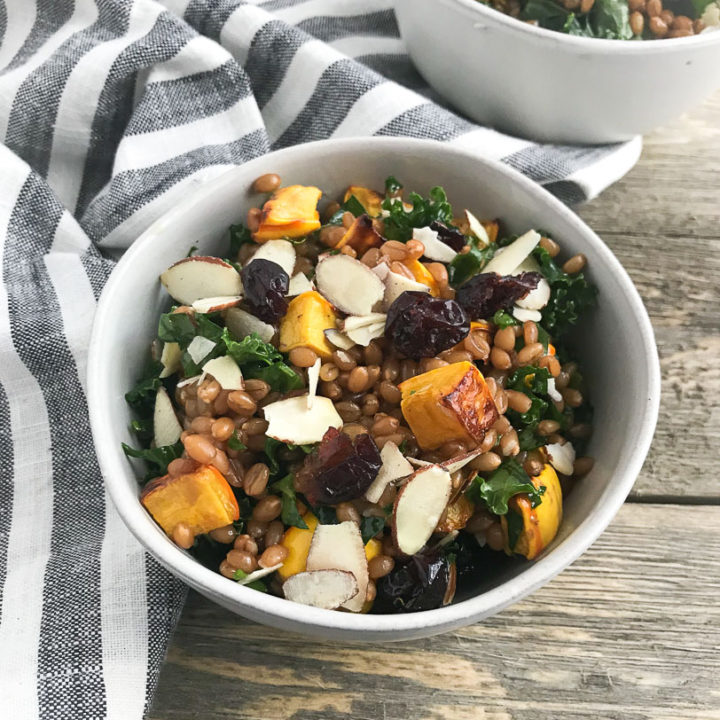
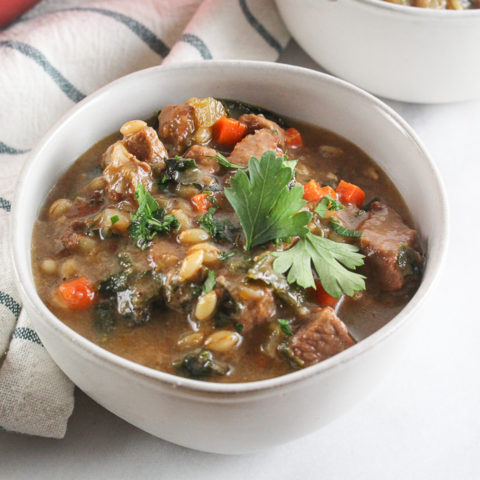
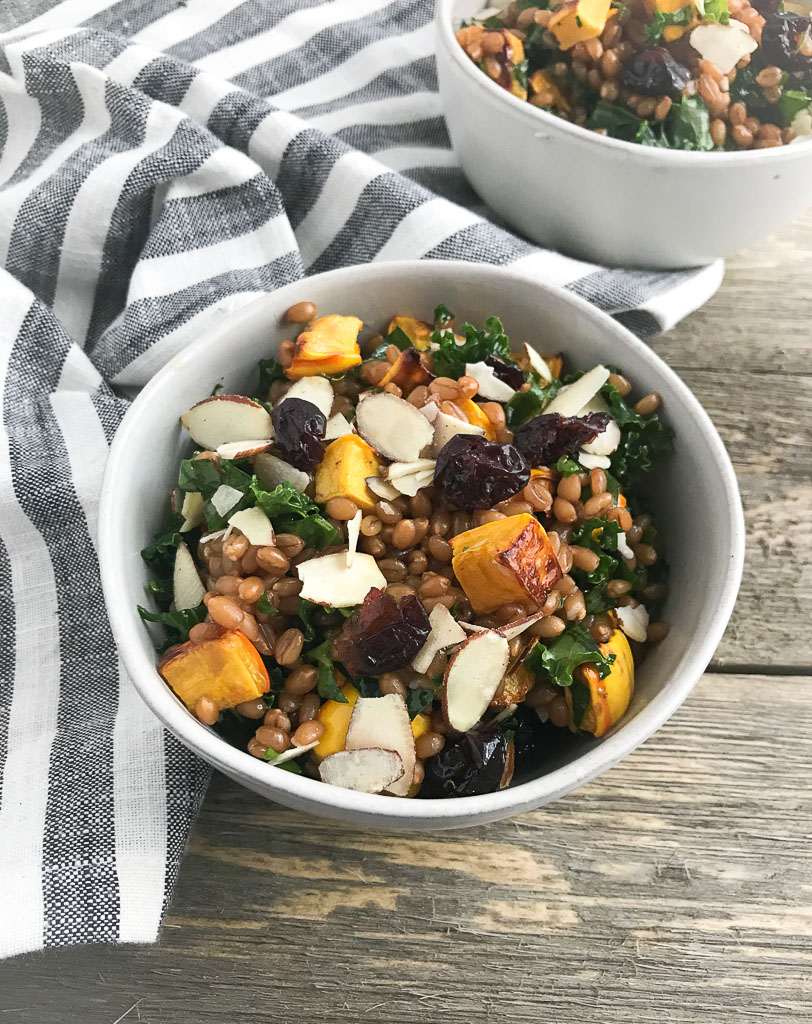
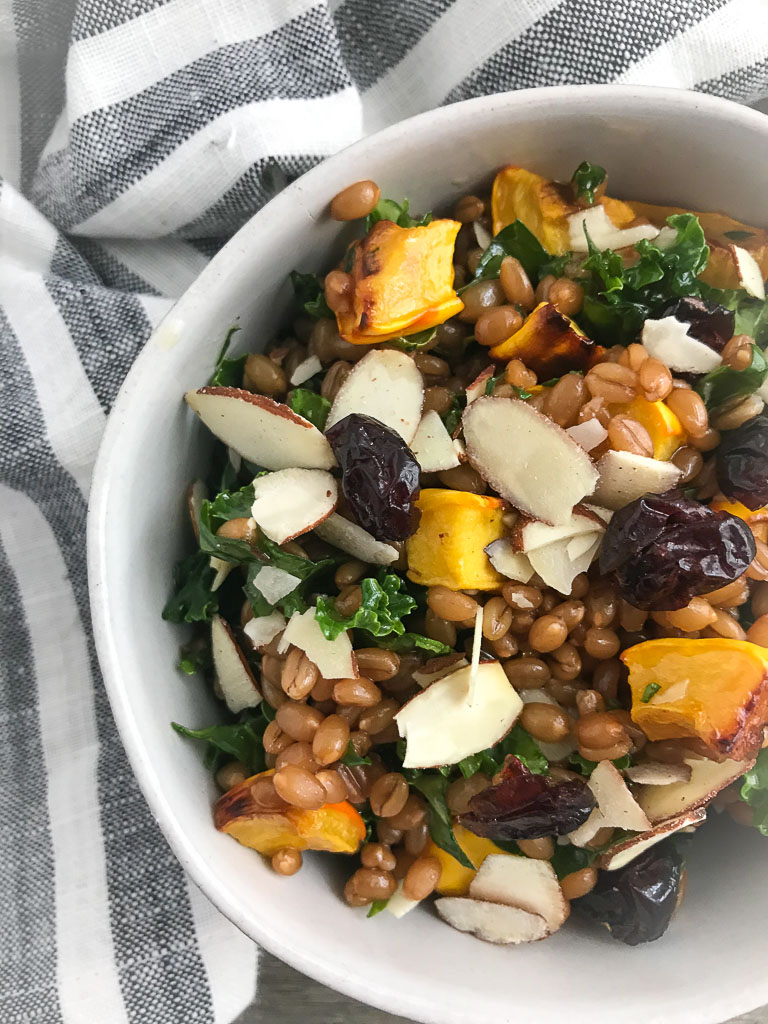
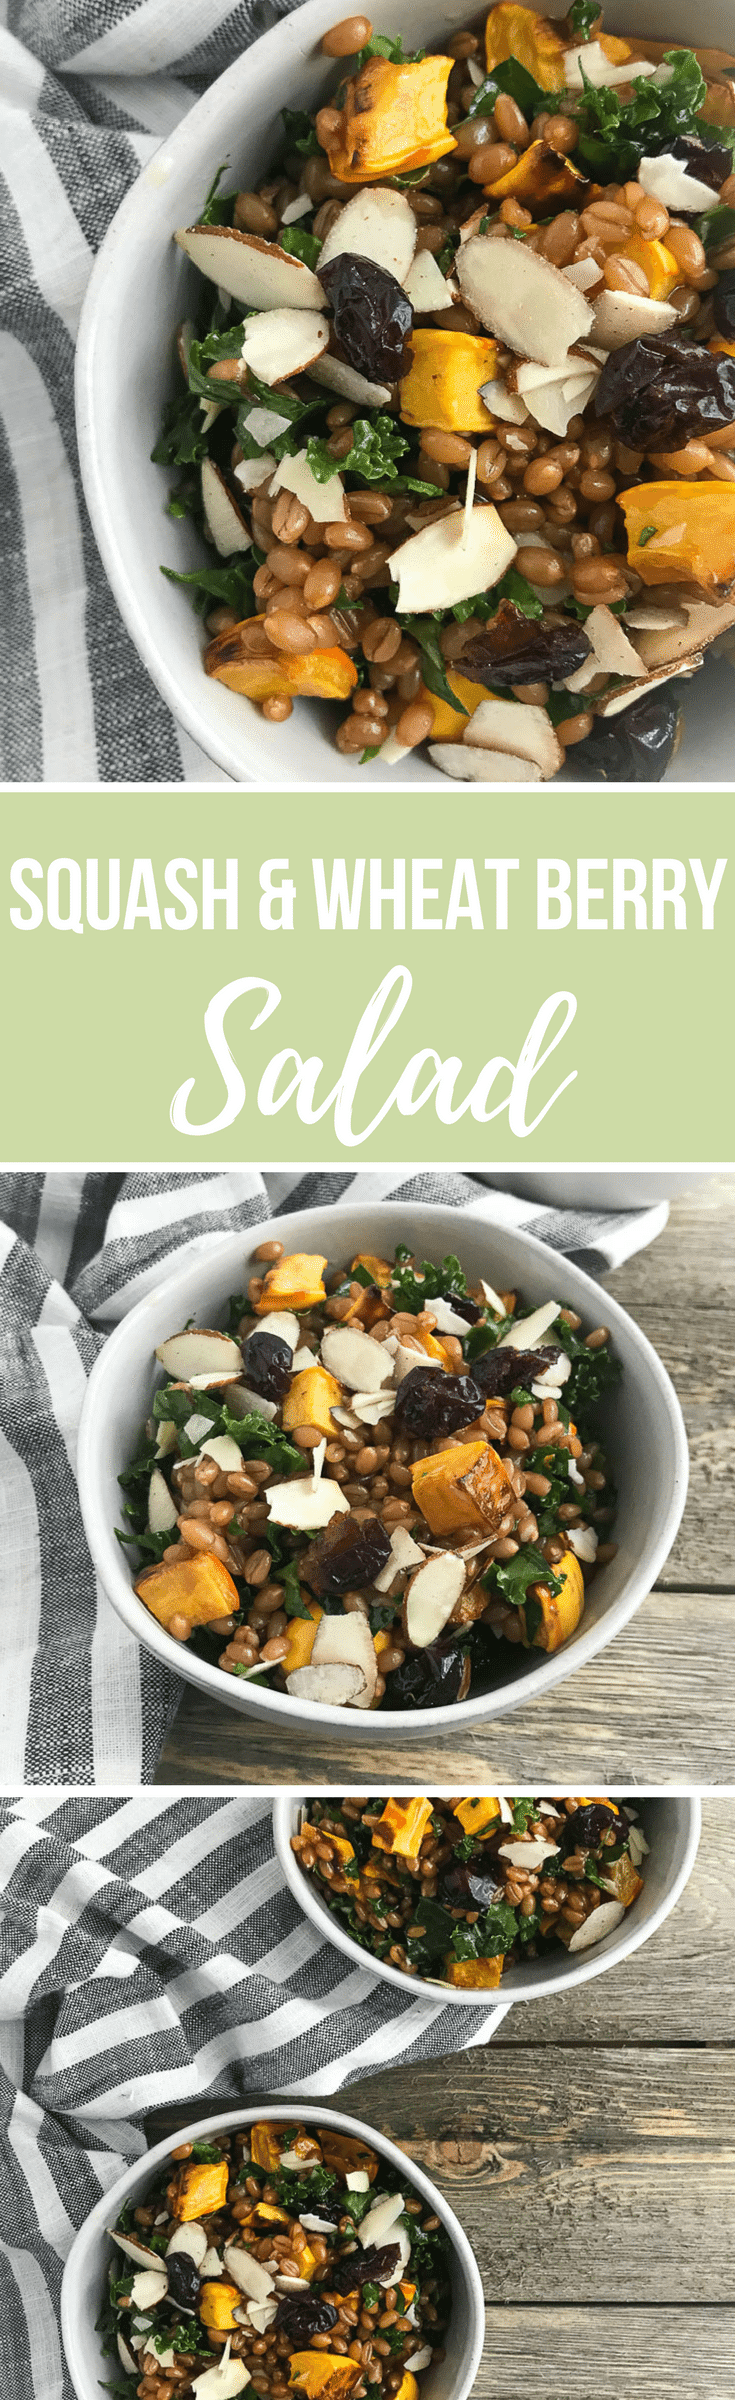
This Squash & Wheat Berry Salad captures all the different flavors of sweet, savory, tart, and nutty. Batch cook for the week for a satisfying meal or side dish.
One of my meal prep strategies is batch cooking at least one whole grain for the week. Then that whole grain is incorporated throughout the week in various ways.
I’ve been utilizing my Instant Pot to quickly batch cook grains for my weekly meal prep. Wheat berries can take up to an hour to cook and require you to keep a constant eye on them. Throw them into the Instant Pot and voila – done in half the time!
I’ve had a little extra time on my hands this week being completely snowed in the past two days. With an already prepped batch of wheat berries in my fridge, I utilized the ingredients in my kitchen to create this dish.
I feel like many of my recipes are like I am a contestant on Chopped. The items that are in my kitchen are my “mystery basket”. I must say it is a much easier mystery basket than what the contestants end up with. Chopped viewers voted, mashed potatoes candies were voted the weirdest basket ingredient on the show. What even are those?!
Squash season is not over yet! I love using delicata squash because of its more tender flesh and skin, making this variety easier to work with. No need to even peel the skin!
You know I love making my own dressings. It’s SO easy. Want to create your own signature vinaigrette? Use my guide with your favorite flavor combination!
This Squash & Wheat Berry Salad captures all the different flavors of sweet, savory, tart, and nutty. Batch cook for the week for a satisfying meal or side dish.
Cook wheat berries according to package directions (or try my Instant Pot Wheat Berries recipe for a simple method). Let cool once cooked.
Preheat oven to 400 degrees F. Dice delicate squash. Toss with 1 tablespoon of olive oil and sprinkle with salt and pepper. Place on a baking sheet lined with parchment paper. Roast for 20-30 minutes, until squash is tender and caramelized, stirring occasionally.
In a mason jar, combine remaining 1 tablespoon of olive oil, orange zest, orange juice, and maple syrup. Secure the mason jar lid and vigorously shake. Season with salt and pepper, to taste.
In a large bowl, combine wheat berries, squash, kale, dried tart cherries, and sliced almond. Dress with salad dressing. Toss to combine.
This website uses cookies to improve your experience. We'll assume you're ok with this, but you can opt-out if you wish.AcceptRejectRead More
Privacy & Cookies Policy
Privacy Overview
This website uses cookies to improve your experience while you navigate through the website. Out of these, the cookies that are categorized as necessary are stored on your browser as they are essential for the working of basic functionalities of the website. We also use third-party cookies that help us analyze and understand how you use this website. These cookies will be stored in your browser only with your consent. You also have the option to opt-out of these cookies. But opting out of some of these cookies may affect your browsing experience.
Necessary cookies are absolutely essential for the website to function properly. This category only includes cookies that ensures basic functionalities and security features of the website. These cookies do not store any personal information.
Any cookies that may not be particularly necessary for the website to function and is used specifically to collect user personal data via analytics, ads, other embedded contents are termed as non-necessary cookies. It is mandatory to procure user consent prior to running these cookies on your website.