This post may contain affiliate links. Read my privacy policy.
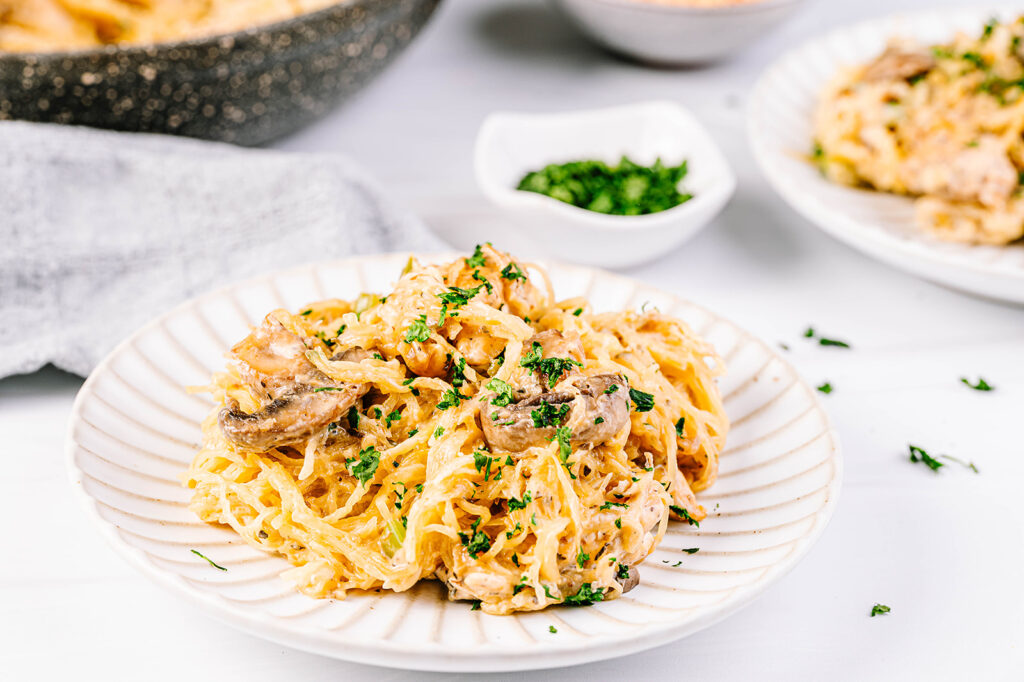
This Creamy Spaghetti Squash Tetrazzini featuring winter squash offers a unique twist to give you lots of nutrition in this creamy, savory dish.
Guest blog post written by Registered Dietitian Ann Kent, creator of the Peas and Hoppy Meal Guides meal planning app.
This Creamy Spaghetti Squash Tetrazzini offers a unique twist on the traditional Italian-American dish to give you lots of nutrition in this creamy, savory dish.
Make sure to pin this recipe to make when you’re ready to cook!
In the middle of winter, what’s better than a creamy, savory Italian dish like chicken tetrazzini? Perhaps one that’s made with a vegetable as the star!
Spaghetti squash is a delicious, versatile winter squash. It’s easy to simply use spaghetti squash in place of pasta, topped with simple marinara or meat sauce. My favorite way to enjoy using it in dishes with lots of flavor, like this Creamy Spaghetti Squash Tetrazzini.
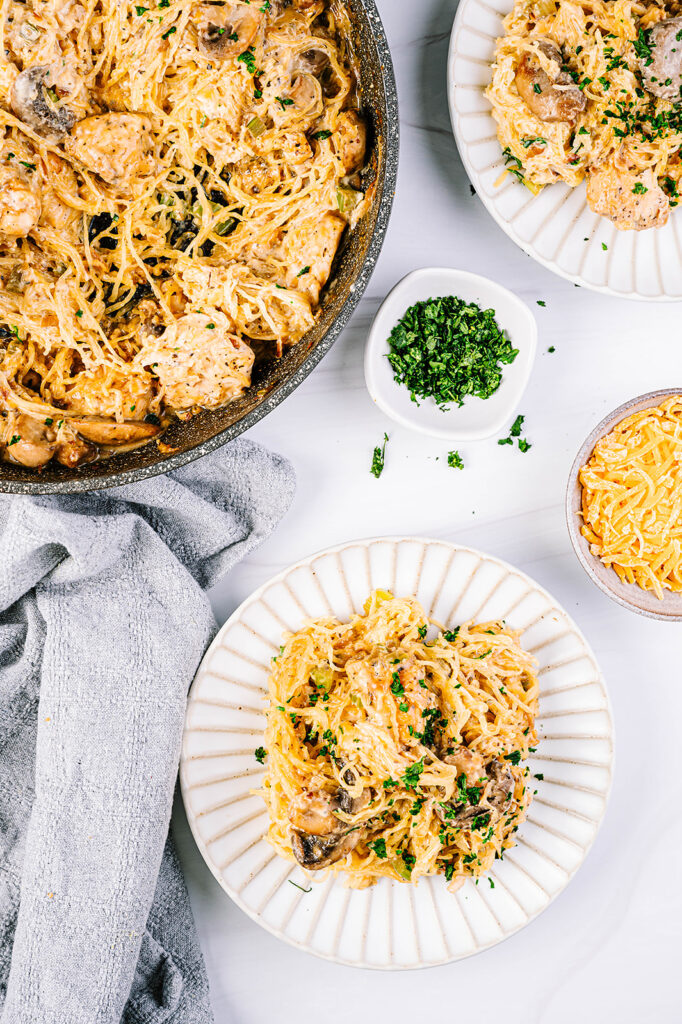
This recipe is hearty enough for a main dish. It contains all the components of the “healthy plate,” so it’s a perfect all-in-one meal! No sides necessary – although I do love to serve this with garlic bread.
Instead of condensed soup, this recipe uses individual ingredients. It’s naturally gluten-free and easy to adjust for dairy-free, vegetarian, or vegan options.
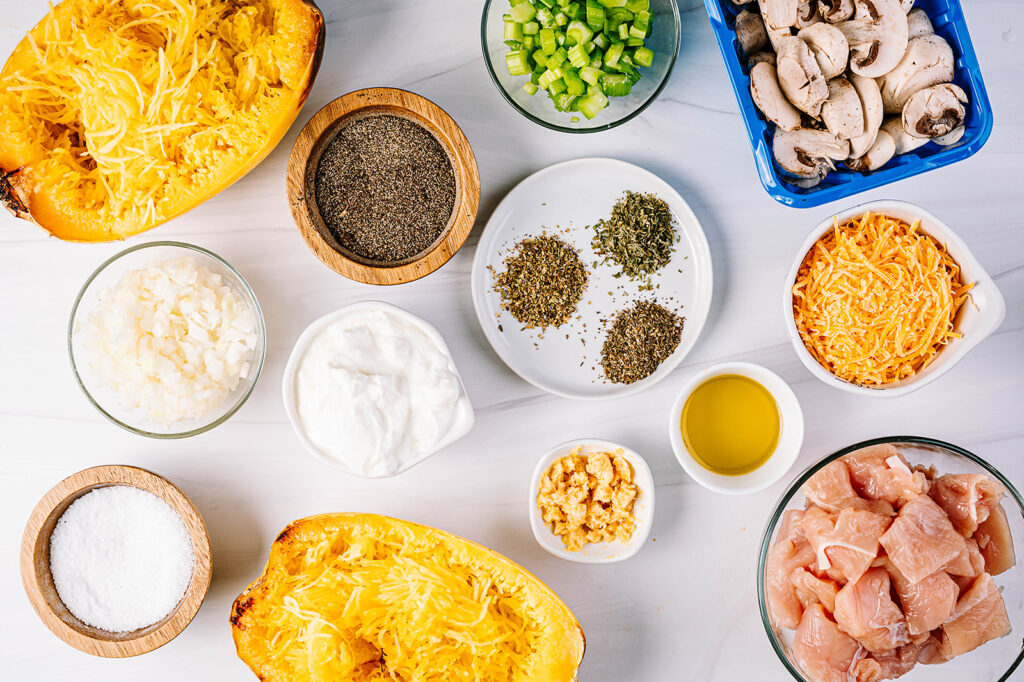
Ingredients for Creamy Spaghetti Squash Tetrazzini
Spaghetti squash – medium size, about 4 lbs
Olive oil, divided – half for the chicken, half for the vegetables
Boneless, skinless chicken breast – cut into cubes
Salt and pepper – to season the chicken
Onion – diced
Garlic – minced; fresh is best, or use pre-minced garlic to save time
Celery – diced
Button mushrooms – sliced
Seasonings – salt, basil, oregano, parsley
Greek yogurt – for extra protein
Cheddar cheese – shredded
See notes below for substation options!
How to Make Creamy Spaghetti Squash Tetrazzini
Not ready to make this recipe yet? Pin it to save for later!
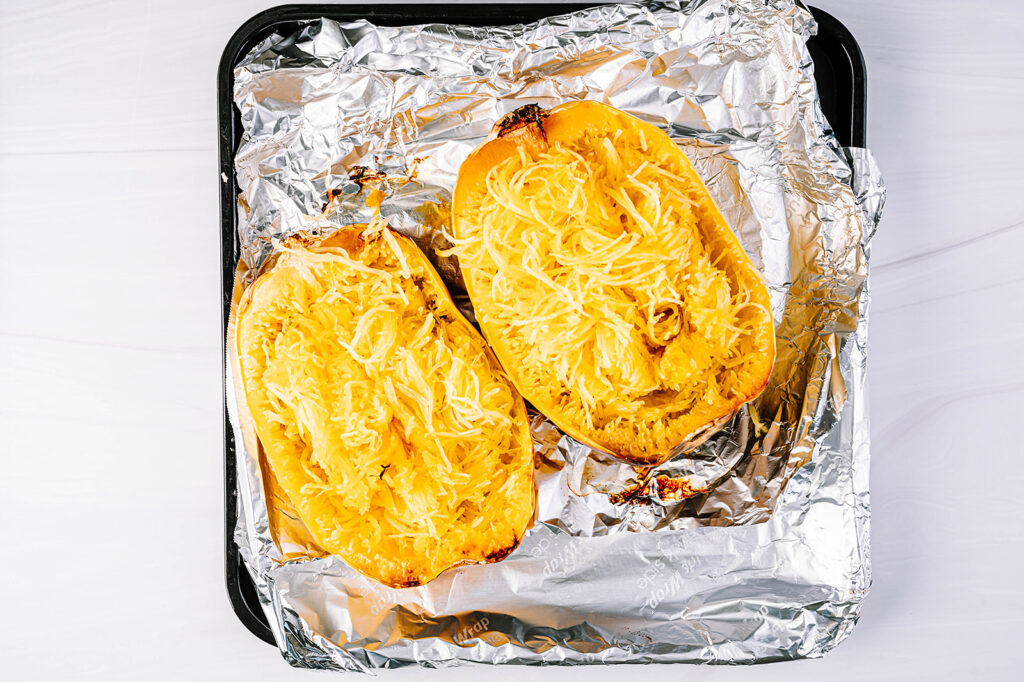
Preheat oven to 400 degrees F. Line a baking sheet with parchment paper. Cut spaghetti squash in half, remove and discard seeds, and place flesh side down on the baking pan. Roast for 30-40 minutes or until fork tender.
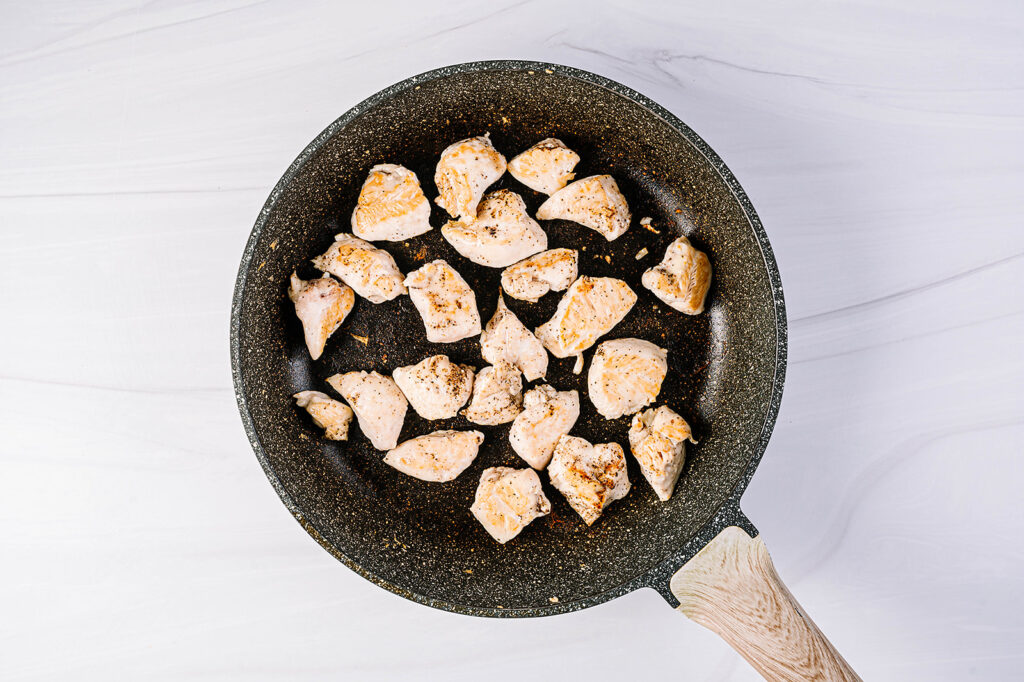
While spaghetti squash cooks, cut chicken into cubes and season with salt and pepper. Heat a large sauté pan over medium-high heat. Once hot, add oil and chicken; brown chicken and cooked through until 165 degrees F. Remove chicken from pan and set aside. Note: you may need to do this step in batches. Do not overcrowd the pan.
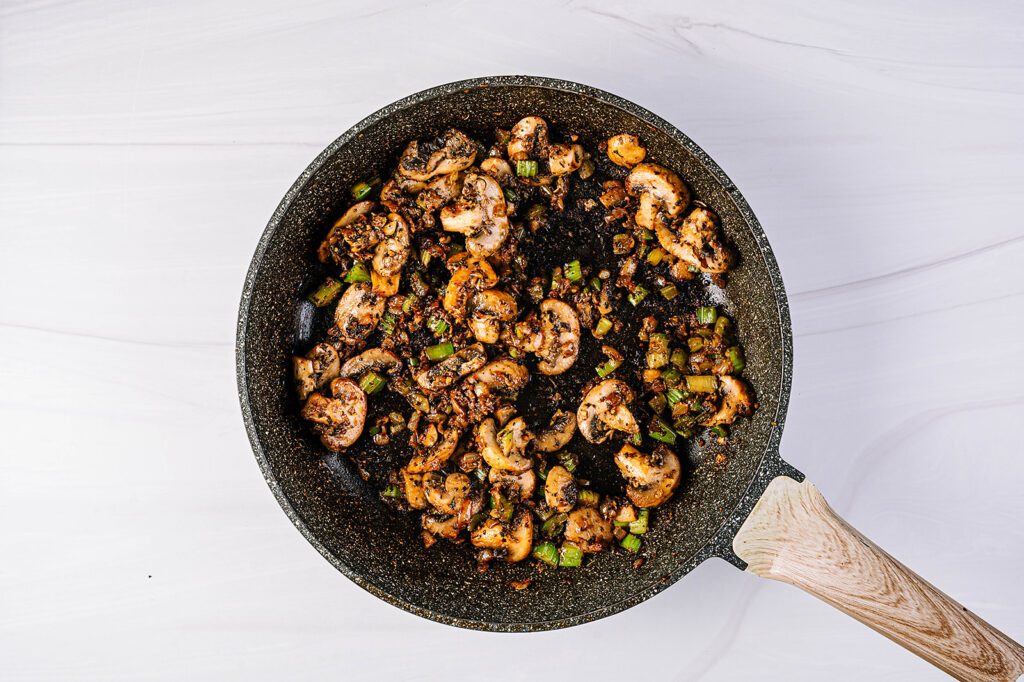
Using the same pan, heat the remaining 2 tablespoons olive oil over medium-high heat. Add onions and sauté until translucent. Add garlic and cook until fragrant, about an additional minute. Add celery, mushrooms, basil, oregano, and parsley. Cook for about 10 minutes or until mushrooms are tender.
Once squash is fully cooked and tender enough to easily insert a fork, remove from oven and allow to cool. When squash is cool enough to handle, scoop out the flesh of the squash with a fork to create spaghetti like strands. Note: If squash is very watery, press with a paper towel to remove as much water as possible. Set squash aside.
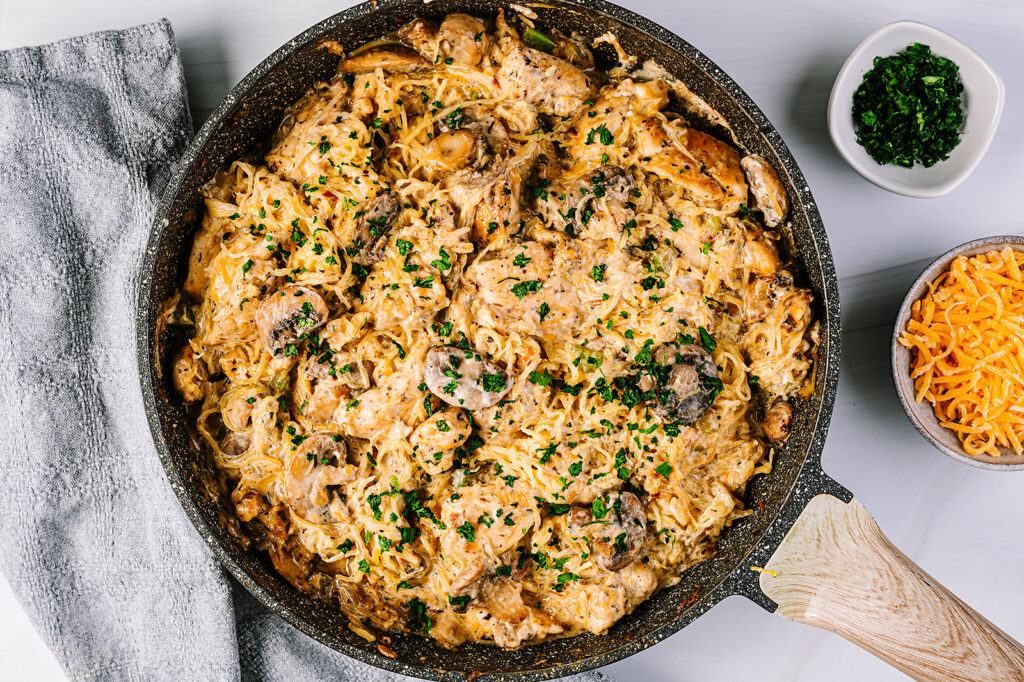
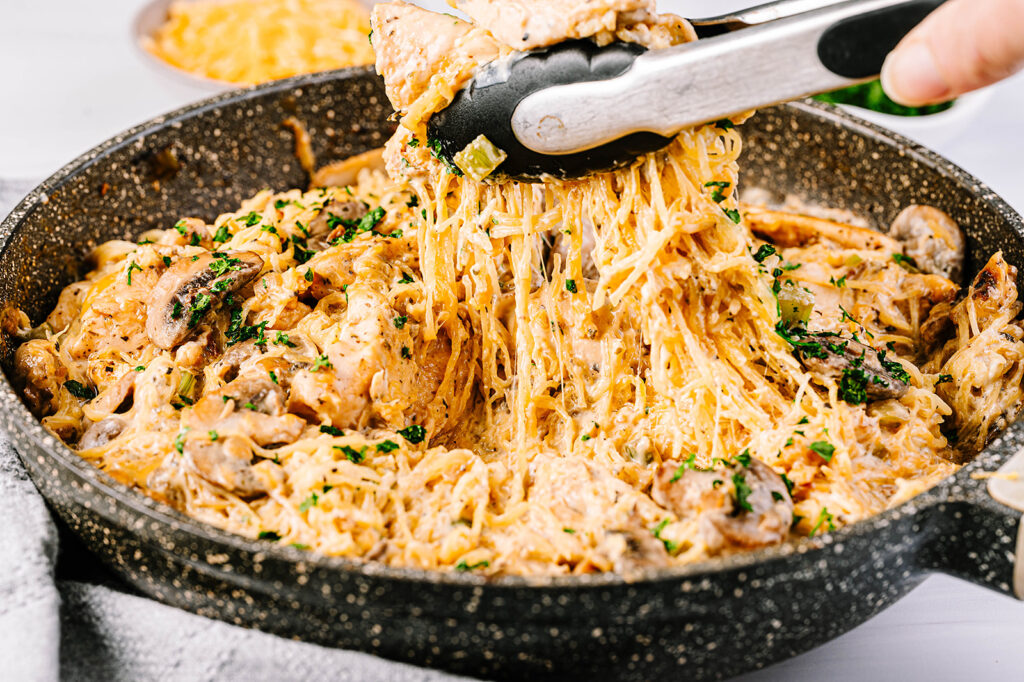
To the pan with vegetables, add back cooked chicken along with the spaghetti squash. Stir in the Greek yogurt and cheddar cheese and continue to cook until cheese melts.
Variations
Vegetarian – Leave out the chicken and add another package of mushrooms or a can of beans.
Olive oil – swap canola oil, avocado oil, or unsalted butter
Greek yogurt – swap soy or coconut yogurt for dairy free
Cheddar cheese – swap plant-based cheese for dairy free
How do you Cut a Spaghetti Squash?
Having a hard time cutting squash in half? To make it easier to cut the spaghetti squash, pierce the squash with a paring knife.
Place on a baking sheet and bake for 10 minutes just to slightly soften, so it will be
easier to cut in half. It will be hot do be careful! Then slice in half, scoop out the seeds
and proceed with cooking the squash according to the recipe directions.
Storing and Reheating
Refrigerate leftovers in an airtight container for up to 5 days. Reheat individual servings in the microwave, or reheat the entire dish on the stovetop.
FREE Cooking Class
This recipe was featured as part of Virtual Teaching Kitchen’s FREE virtual cooking classes. Click here to learn more about the Virtual Teaching kitchen.
Meal Planning App: The Peas and Hoppy Meal Guides
Use the code CHEFJULIERD for 50% off your first monthly or annual meal plan subscription. The app starts at just $14.99/month after that!
Want to make mealtime easier for your busy family? The Peas and Hoppy Meal Guides meal planning app takes the stress out of the “What’s for dinner?” question!
Every week Dietitian Ann sends app subscribers a new seasonal menu with 10 fresh meal ideas. Substitute recipes from the database of 800+ options and adjust serving sizes of the recipes to make your perfect plan.
With a weekly customizable menu, lots of healthy, delicious recipe options, AND a made-for-you grocery list, meal planning has never been easier!
Print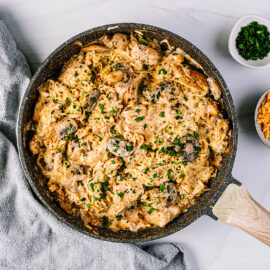
Creamy Spaghetti Squash Tetrazzini
- Yield: 4
Description
This Creamy Spaghetti Squash Tetrazzini featuring winter squash offers a unique twist to give you lots of nutrition in this creamy, savory dish.
Ingredients
- 1 spaghetti squash (medium size, about 4 lbs.)
- 4 tablespoon olive oil, divided
- 1 lbs. boneless, skinless chicken breast, cut into cubes
- salt and pepper
- 1 medium onion
- 4 cloves garlic, minced
- 2 stalks celery, diced
- 8 ounces button mushrooms, sliced
- 1 teaspoon salt
- 1 teaspoon dried basil
- 1 teaspoon dried oregano
- 1 teaspoon dried parsley
- ½ cup low-fat Greek yogurt
- 1 cup shredded cheddar cheese
Instructions
- Preheat oven to 400 degrees F. Line a baking sheet with parchment paper.
- Cut spaghetti squash in half, remove and discard seeds, and place flesh side down on the baking pan. Roast for 30-40 minutes or until fork tender.
- Season chicken with salt and pepper. Add 2 tablespoons olive oil to a large sauté pan over medium-high heat. Brown chicken and cooked through until 165 degrees F. (Might need to do this step in batches. Do not overcrowd the pan.) Remove from pan and set aside.
- Heat remaining 2 tablespoons olive oil over medium-high heat. Add onions and sauté until translucent. Add garlic and cook until fragrant, about an additional minute.
- Add celery, mushrooms, basil, oregano, and parsley. Cook for about 10 minutes or until mushrooms are tender.
- When squash is cool enough to handle, scoop out the flesh of the squash with a fork to create spaghetti like strands. (If squash is very watery, press with a paper towel to remove as much water as possible)
- Return chicken back to the pan along with the spaghetti squash. Stir in the Greek yogurt and cheddar cheese and continue to cook until cheese melts.
Notes
- To make vegetarian:
Leave out the chicken and add another package of mushrooms or a can of beans. - Leftovers:
Leftovers can be refrigerated in an airtight container for up to 5 days. - Substitution Ideas:
Olive oil – swap canola oil, avocado oil, or unsalted butter
Greek yogurt – swap soy or coconut yogurt for dairy free
Cheddar cheese – swap plant-based cheese for dairy free - Having a hard time cutting squash in half?
To make it easier to cut the spaghetti squash, pierce the squash with a paring knife. Place on a baking sheet and bake for 10 minutes just to slightly soften, so it will be easier to cut in half. It will be hot do be careful! Then slice in half, scoop out the seeds and proceed with cooking the squash according to the recipe directions.
Recipe from Peas and Hoppiness meal guide