Make PERFECT Hard Boiled and Soft Boiled Eggs in the Instant Pot

Do you have an Instant Pot and don’t know where to start? I am still getting the hang of it, but I’ve mastered how to make PERFECT hard-boiled and soft-boiled eggs in the Instant Pot.

Disclosure: This post was sponsored by the American Egg Board and the Egg Nutrition Center. Thank you for supporting the brands that make this blog possible!

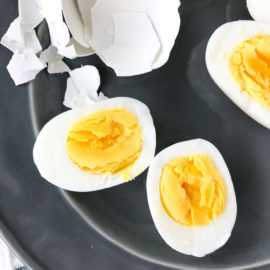
instant pot hard boiled eggs on a gray plate next to egg carton and shells

What Can the Instant Pot Do?

215,000+ Amazon customers purchased the Instant Pot on Prime Day alone. Now that it’s in everyone’s kitchen they are looking for new recipes to try.

The Instant Pot is a single appliance that does the job of seven (yes, seven!) different kitchen appliances. It can handle the tasks of a slow cooker, electric pressure cooker, rice cooker, steamer, yogurt maker, sauté/browning pan, and a warming pot. Think of all those appliances taking up space in your kitchen that can be replaced by one.

New to using the Instant Pot? Learn about these seven tips for efficiently using your Instant Pot.

While I am still learning all the functions of the Instant Pot, the first technique I mastered was preparing hard and soft-boiled eggs.
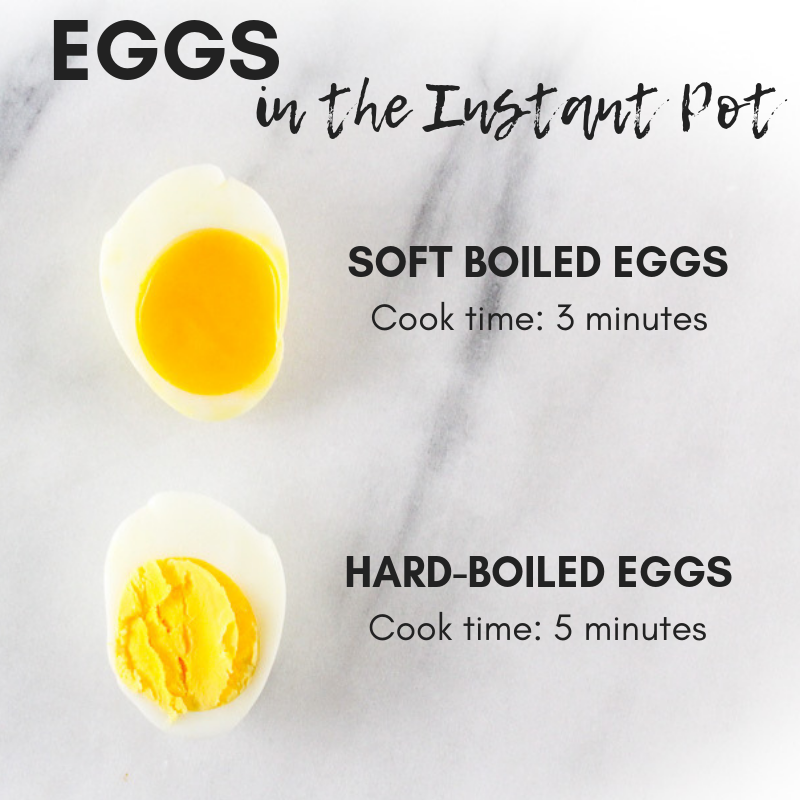
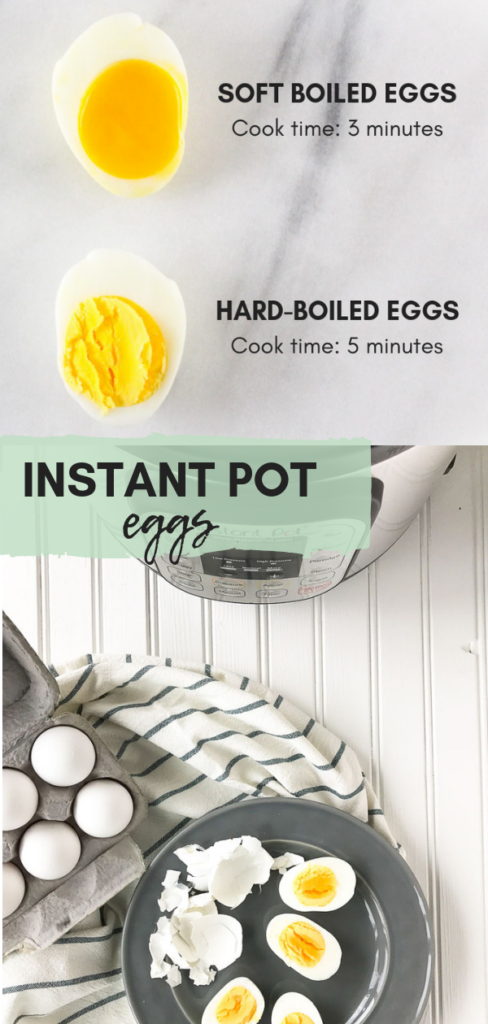
infographic for cooking eggs in the instant pot

How Are Eggs Healthy?

One large egg has 6 grams of high-quality protein and all 9 essential amino acids. Nearly half the protein is in the yolk so don’t ditch the yolk!

Eggs were once avoided and criticized for their cholesterol content. However, the totality of scientific research has shown no or little effect between dietary cholesterol and cardiac outcomes or markers of heart disease risk in healthy individuals.

Government and health organizations have revised their dietary cholesterol recommendations. The 2015-2020 Dietary Guidelines for Americans place no daily limit on dietary cholesterol intake. Foods like egg yolks and some shellfish are higher in dietary cholesterol but not saturated fats making them a healthful choice along with healthy eating patterns.

Hard-boiled eggs are something I pretty much meal prep every week for myself. One large egg has varying amounts of 13 essential vitamins and minerals, including choline plus the antioxidants lutein and zeaxanthin, all just for 70 calories.
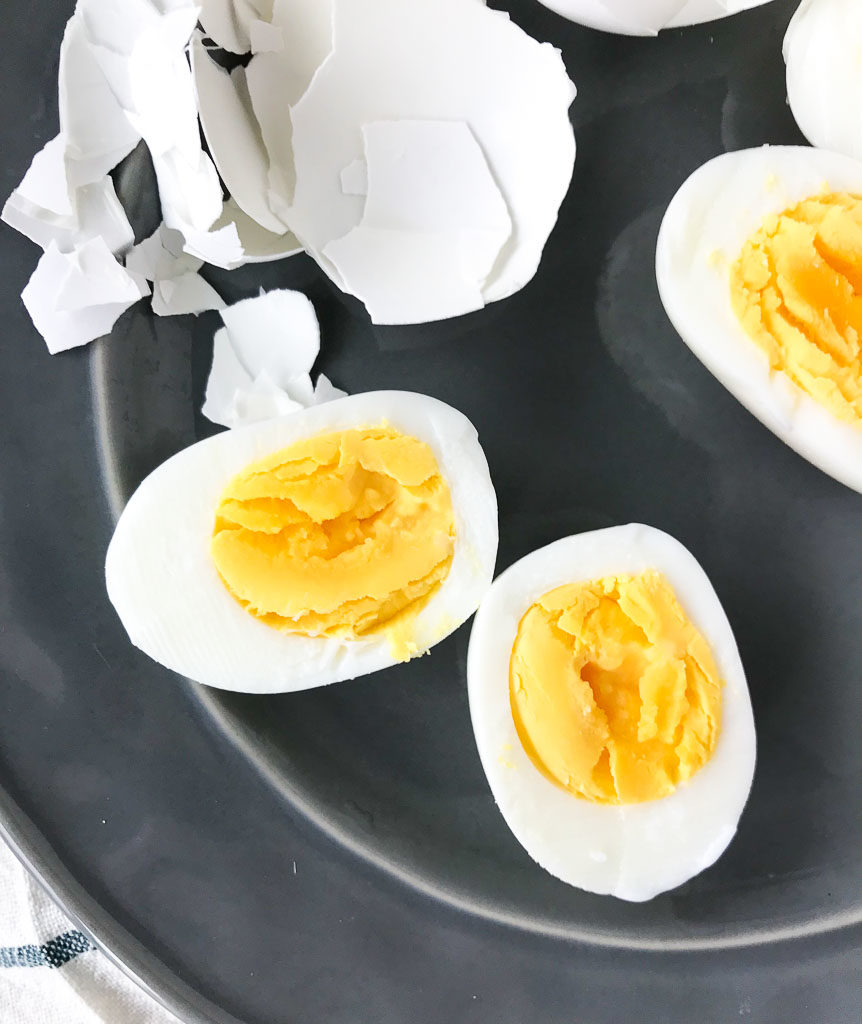
three hard boiled instant pot eggs on a gray plate next to the shells

Why the Instant Pot method works:

Now, I know making hard-boiled eggs on the stovetop is not too challenging, but this Instant Pot method makes it even simpler and in just 5 minutes, they are ready. Plus, there is a science behind why cooking eggs in the Instant Pot make them easier to peel. The reason according to Alton Brown is:

“Eggs that are quickly heated are easier to peel than eggs that are slowly heated, say in cold water brought to a boil. Fast cooking prevents the white from bonding so epoxy-like to the outer membranes. Since pressure steamers can generate temperatures between 230 and 250 degrees F it is suspected that this is actually why folks think they’re magic egg machines.” Also, thorough cooling eases peeling by allowing the proteins in the albumen to fully set and harden, thus preventing tearing.
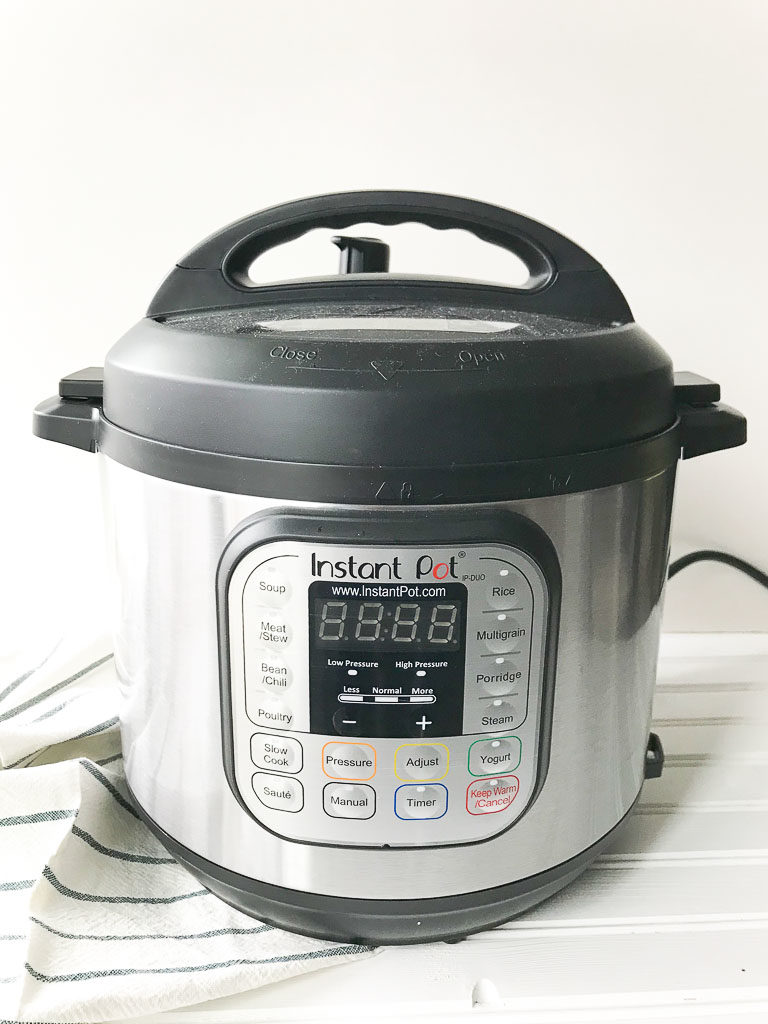
instant pot sitting next to gray striped towel

How to Make Soft Boiled Eggs in the Instant Pot

Pour the water in and place the rack (trivet) in the bottom. Then sit the eggs on the rack in the Instant Pot in a single layer.

Cook for 3 minutes on high pressure. Once the timer goes off, quickly release the pressure.

Transfer the eggs to a bowl with ice and cold water until they are cool enough to hold in your hand.

Peel right away.

The Best Pressure Cooker Hard Boiled Eggs

If you want to make hard boiled eggs in the Instant Pot, pour the water in. Set the rack in the bottom. Place the eggs on the rack. Cook for 5 minutes using high pressure. Let the pressure release naturally for 5 minutes, then transfer to an ice bath. Peel once they are cool enough for you to hold.

Tips for Making

  • Make sure the eggs are in a single layer, do not stack them.
  • There is an accessory you can buy that is specifically for making eggs in the Instant Pot that may allow you to cook more at a time.
  • When you release the pressure, place a towel over the top. Also make sure the pressure cooker is away from cabinets so the steam doesn’t ruin them.

How Long Do Cooked Eggs Last?

Hard-Boiled Eggs will keep up to a week in your refrigerator. Make a few perfect hard-boiled eggs to create delicious recipes throughout the week.
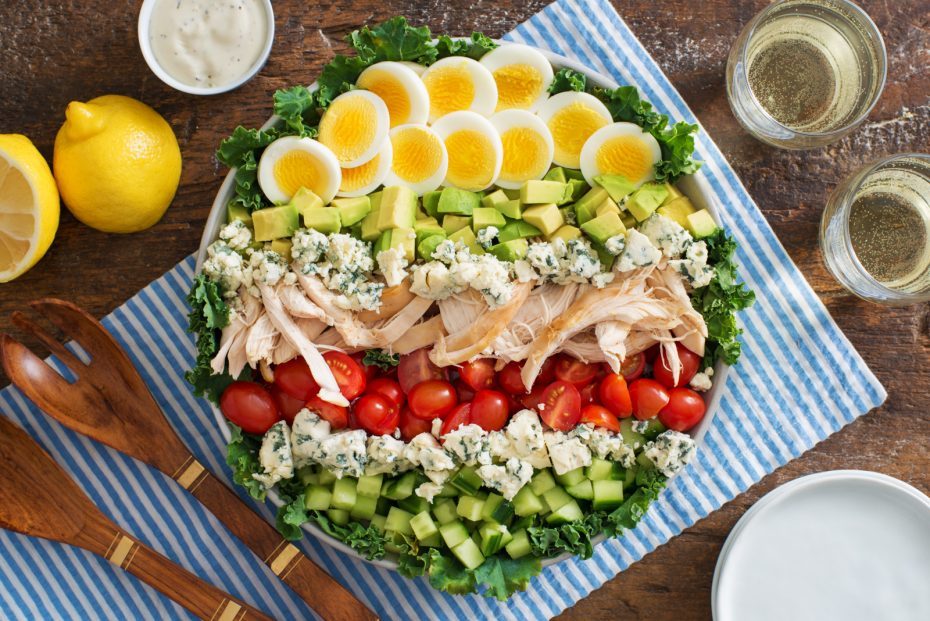
cobb salad topped with hard boiled eggs made in the pressure cooker

A few ways I use hard-boiled eggs are:

  • Pair hard-boiled eggs with avocado and tomato. I usually just add a little salt and pepper, but when I’m looking to add an extra pop of flavor, I add everything but the bagel, sesame seasoning blend.
  • For a filling snack, try my version of a “quick deviled egg”. Scoop out the yolk, mix with hummus and fill back in the egg white.

Ways to Use Instant Pot Eggs

(source)

Print
clock clock iconcutlery cutlery iconflag flag iconfolder folder iconinstagram instagram iconpinterest pinterest iconfacebook facebook iconprint print iconsquares squares iconheart heart iconheart solid heart solid icon
hard boiled eggs on a gray plate

Make PERFECT Hard Boiled and Soft Boiled Eggs in the Instant Pot

  • Author: Chef Julie Harrington, RD
  • Prep Time: 3
  • Cook Time: 5
  • Total Time: 8 minutes
  • Yield: 5
  • Method: Instant Pot

Description

Make PERFECT Hard Boiled and Soft Boiled Eggs in the Instant Pot EVERY. SINGLE. TIME.


Ingredients

Scale

Ingredients:
Eggs (up to as many that can fit in an even layer in your Instant Pot – do not stack)
1 cup water

Equipment:
Instant Pot with the rack


Instructions

Place the rack in the bottom of the pot. Pour the water in the pot. Place the eggs on the rack.

For soft-boiled:
Set Instant pot on high pressure on manual 3 minutes. Quick release placing a towel over the valve. Quickly add eggs to a bowl with cold water and ice until cool enough to hold. Peel right away.

For hard-boiled:
Set Instant Pot on high pressure on manual 5 minutes. Natural release 5 minutes then use quick release placing a towel over the valve. Quickly add eggs to a bowl with cold water and ice until cool enough to hold. Peel right away.


Keywords: eggs, instant pot, meal prep

Recipe Card powered byTasty Recipes

Make PERFECT Hard Boiled and Soft Boiled Eggs in the Instant Pot #instantpot #protein #cookingtip #healthy #breakfast #snack #eggs

Instant Pot Barbacoa Beef Tacos

Revamp taco night with a kick of spice with these Instant Pot Barbacoa Beef Tacos. This flavorful meat is deliciously seasoned and cooked until perfectly tender. Layer it in tortillas with all your favorite toppings your next taco night!

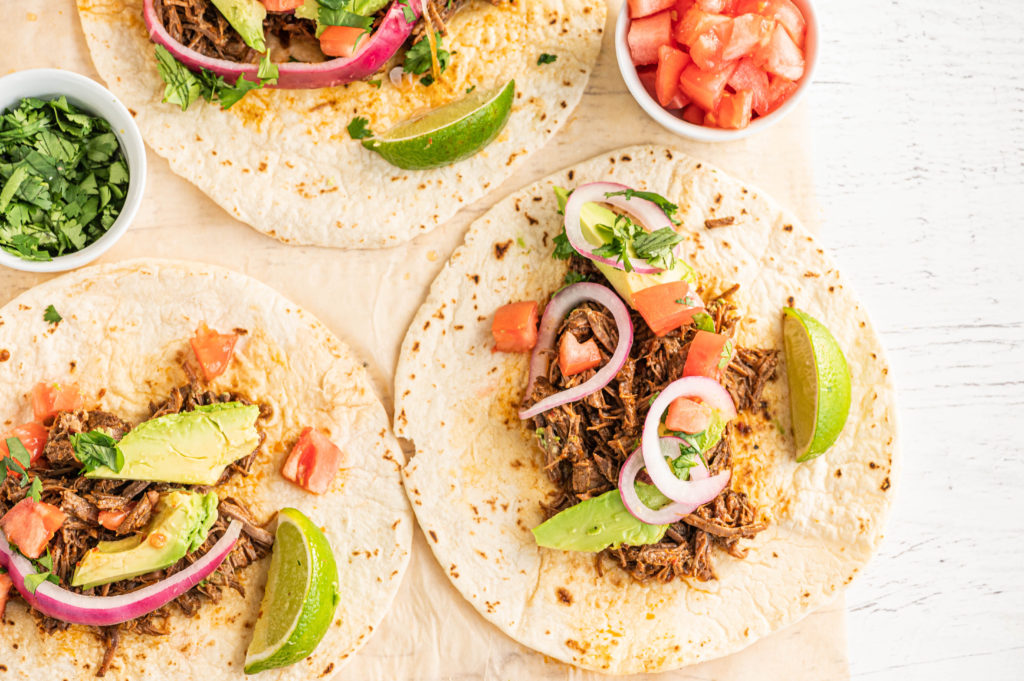
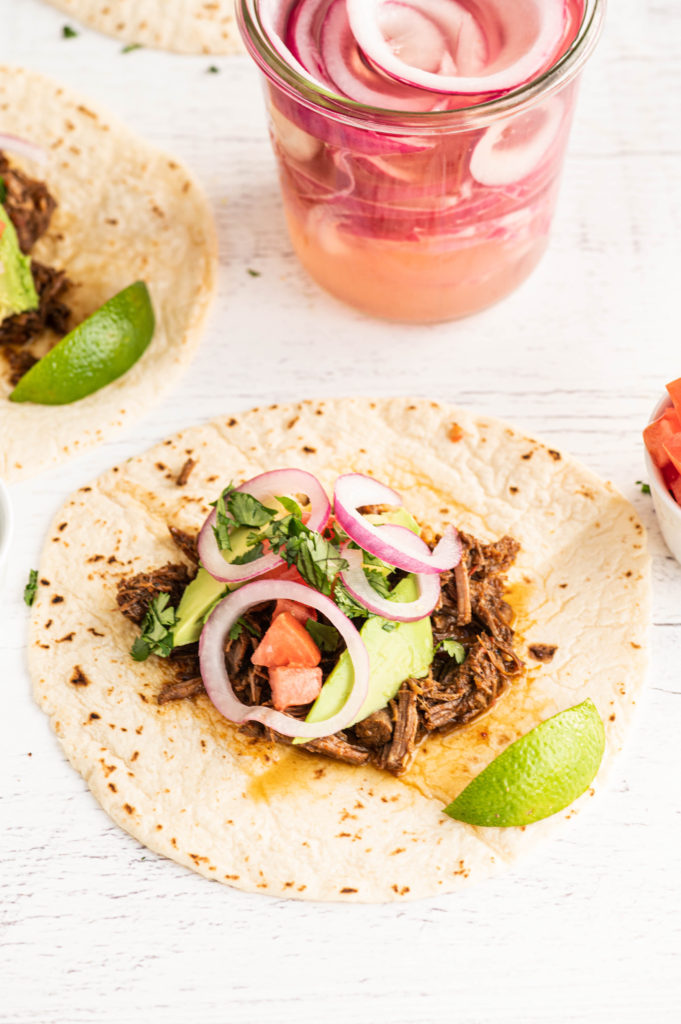
open-faced tacos with beef barbacoa

This post is sponsored by the Northeast Beef Promotion Initiative a subcontractor to the Beef Checkoff. Thank you for supporting brands that make this blog possible!

Did you get gifted an Instant Pot this holiday season? The Instant Pot is a single appliance that does the job of seven (yes, seven!) different kitchen appliances. It can handle the tasks of a slow cooker, electric pressure cooker, rice cooker, steamer, yogurt maker, sauté/browning pan, and a warming pot. Think of all those appliances taking up space in your kitchen that can be replaced by one.

Don’t be intimidated by this new appliance. Read up on these 7 Things You Need to Know About Your Instant Pot before you get started.

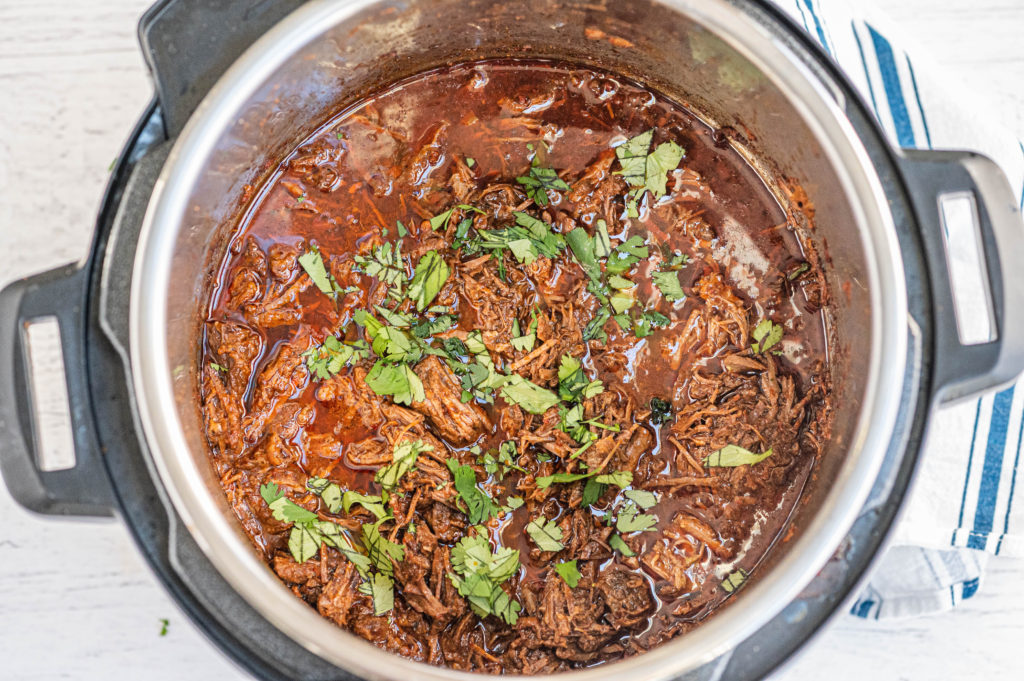
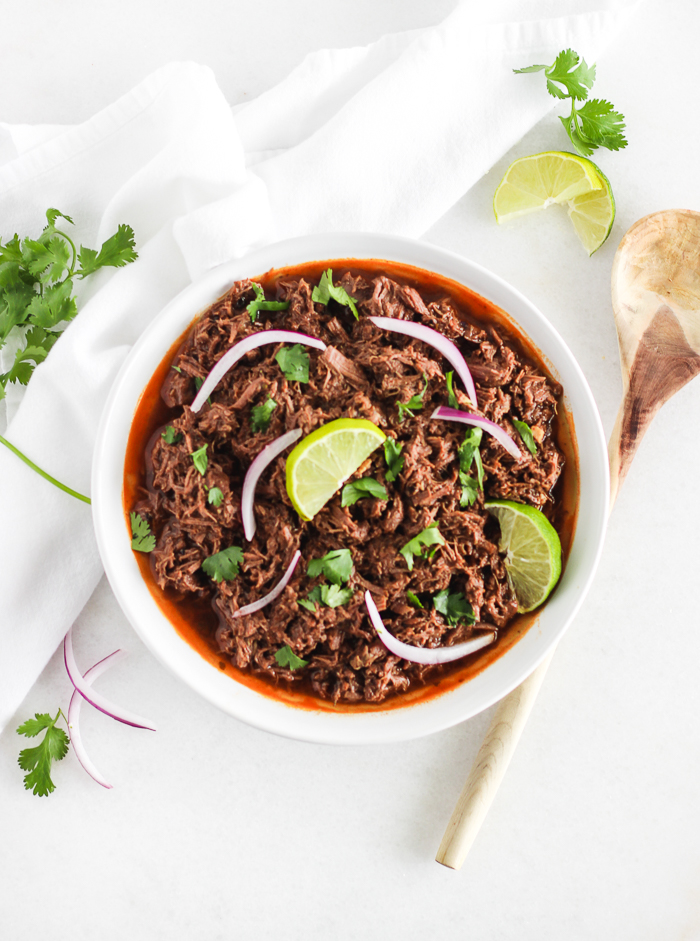
Beef barbacoa in the Instant Pot

What is barbacoa?

Barbacoa refers to the method of cooking meat. Barbacoa is an authentic Mexican dish typically made with a cut of beef head meat, like beef cheek. When cooked long and slow it becomes extra tender. It is traditionally seasoned with dried chilies and spices and slowly cooked.

Barbacoa is now used to refer to a seasoned beef, that has been slow-cooked. 

open-faced beef barbacoa taco on a flour tortilla

Choosing lean beef

Forget about sacrificing taste for nutrition. These lean beef cuts are chock-full of flavor and 10 essential nutrients. Beef can only be claimed as “lean” if the cut of beef is less than 10g total fat, 4.5g or less saturated fat and less than 95 mg of cholesterol per 100-gram serving.

Beef chuck

Beef chuck is a primal cut that comes from the shoulder area and yields cuts known for their rich, beefy flavor. Beef chuck is ideal for slow cooking to yield tender beef.

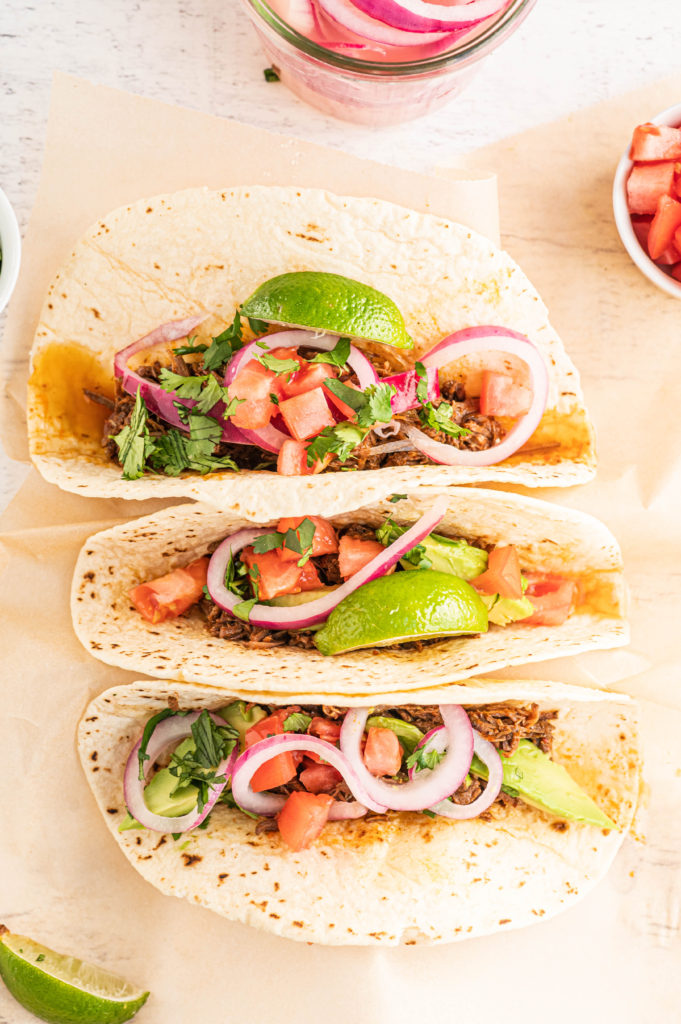
beef barbacoa tacos with toppings
Print
clock clock iconcutlery cutlery iconflag flag iconfolder folder iconinstagram instagram iconpinterest pinterest iconfacebook facebook iconprint print iconsquares squares iconheart heart iconheart solid heart solid icon
open-faced taco with Barbacoa Beef

Instant Pot Barbacoa Beef Tacos

  • Author: Chef Julie Harrington, RD
  • Yield: 6
  • Category: meat
  • Method: instant pot
  • Cuisine: mexican

Description

Revamp taco night with these Instant Pot Barbacoa Beef Tacos! This flavorful meat is deliciously seasoned and cooked until perfectly tender. Layer it in tortillas with all your favorite toppings your next taco night!


Ingredients

For the beef barbacoa:
3 tablespoons olive oil, divided
1/2 small onion, chopped
2 cloves garlic, chopped
2 chipotle peppers (from a can in adobo sauce – reserve sauce), chopped
2 tablespoons adobo sauce (from the chipotle peppers)
1 tablespoon ground cumin
2 teaspoons dried oregano
1 teaspoon salt
3/4 teaspoon black pepper
1/4 teaspoon ground cloves
1/2 cup low-sodium beef broth
1/3 cup apple cider vinegar
1/4 cup fresh lime juice
2 pounds beef chuck, fat trimmed, cut into 2-inch pieces
2 bay leaves

For the tacos:
Tortillas, soft or hard shells
Sliced avocado
Pickled onions
Chopped tomatoes
Chopped cilantro
Lime wedges


Instructions

  1. Press the “saute” setting on the Instant Pot. Heat 1 tablespoon of olive oil until heated and shimmering. Add the onion and garlic, saute for 1-2 minutes until the onion begins to turn translucent. Add the chipotle peppers, adobo sauce, cumin, oregano, salt, and pepper, and saute until fragrant, about 1 minute. Press “cancel” to turn off the heat.
  2. Remove contents from the Instant Pot into a food processor and add beef broth, apple cider vinegar, and lime juice. Pulse until smooth and set aside.
  3. Press the “saute” setting on the Instant Pot. Heat the remaining 2 tablespoons of olive oil until heated and shimmering. In batches, add beef and brown all sides. Be mindful not to overcrowd the pan. Repeat until all beef is browned. Press “cancel” and turn off the heat.
  4. Add all the beef, bay leaves, and reserved sauce in the Instant Pot. Stir well to combine. Close lid securely and set vent to “sealing”. Press “manual”, then press “Pressure” until the light on “High Pressure” lights up, then add 60 minutes of cook time.
  5. When cook time is complete, very carefully, turn the vent to “venting” for quick release, and wait until all of the steam has released.
  6. Remove the lid and discard the bay leaves. Using two forks, shred the beef into bite-sized pieces. Stir shredded beef with the juices so it can soak up all the flavor.
  7. Assemble tacos by layering beef barbacoa on a tortilla and top with avocado, onions, tomatoes, and cilantro. Serve with a lime wedge on the side.

Keywords: beef, tacos, barbacoa, instant pot

Recipe Card powered byTasty Recipes

This post contains affiliate links. Read full disclosure here.

Other ways to use beef barbacoa

This Instant Pot barbacoa beef is so flavorful and tender, and it’s so versatile!

  • Tacos
  • Burritos (wraps or bowls)
  • Salads
  • Nachos
  • Quesadillas
  • Enchiladas
  • Or just about any other use, you can think of for spicy shredded beef

7 Things You Need to Know About Your Instant Pot + Instant Pot Recipes

On Amazon Prime Day in 2017, it was estimated that 215,000+ Amazon customers purchasing the Instant Pot on Prime Day alone. It was the hottest new kitchen appliance and it’s here to stay! I’m curious to see if it will exceed in 2018 Amazon Prime Day.

The Instant Pot is a single appliance that does the job of seven (yes, seven!) different kitchen appliances. It can handle the tasks of a slow cooker, electric pressure cooker, rice cooker, steamer, yogurt maker, sauté/browning pan, and a warming pot. Think of all those appliances taking up space in your kitchen that can be replaced by one.

7 Things You Need to Know About Your Instant Pot + Instant Pot Recipes by Chef Julie Harrington, RD @ChefJulie_RD

It’s magical! Check out these 7 tips and tricks about the Instant Pot I wish I knew before I started using mine.

1. Be sure the pressure value is turned to seal.
When you use the pressure cooking feature, be sure the pressure value is set to seal. If it is set to vent, the Instant Pot will not be able to come to pressure. It can be easy to miss if you’re cooking in a hurry. You’ll hear a whistling sound from the Instant Pot if the pressure value is not set to seal. Simply turn it, and then the unit will come to pressure.

2. Utilize the steaming rack.
Use the steaming rack what it’s intended for – steaming. It perfect steams food in a matter of minutes and makes the perfect hard-boiled eggs. Beyond just steaming, the steaming rack can be useful for reheating. Use the steamer insert and add food wrapped in foil. If you open the Instant Pot to add an ingredient, it will reheat much faster.

3. Get acquainted with saute mode.
What I love about the Instant Pot vs. a Slow Cooker is the saute function. A recipe can be made from start to finish right in the Instant Pot. I don’t know about you, but when I see a slow cooker recipe that requires other pots and pans to first to brown over stove top then to add to the slow cooker, I’m more likely to pass over that recipe.

4. Food cooks by surface area rather than volume.
Larger pieces of foods like a roast or a large potato will cook slower than foods cut into smaller pieces. The steam and pressure must reach the inside of each piece of food, so if you want to speed up your cooking time, cut food into smaller pieces.

5. No need to wait for food to thaw. Start right from frozen.
Don’t waste time waiting for items from the freezer to defrost. Add frozen veggies, fruit or other frozen ingredients directly to your Instant Pot. It may just take a few more minutes of cook time.

6. The cook time listed in your recipe is not the total amount of time it will take.
The Instant Pot needs time to heat up before it starts to cook and needs time to release the pressure afterward. Add about 10 minutes to the total cook time, mentally, every time you see a suggested number and you’ll always have a better idea of the actual cook time.

7. Easy clean-up.
Many of the Instant Pot’s parts, including the inner pot and steam rack, can be washed in the dishwasher, making for a quick clean-up. The outside of the Instant Pot can easily be wiped down with a wet towel. Keep in mind that the lid does need to be hand-washed, but hey, you can wash one part by hand, can’t you?

Now that you are ready to use your Instant Pot, start with one of these recipes created by Registered Dietitians.

Instant Pot Italian White Bean Soup: Instant Pot Tips and Tricks via Chef Julie Harrington, RD @ChefJulie_RD

Soup:

Instant Pot Chicken Noodle Soup by Sinful Nutrition
Minestrone Soup by Your Choice Nutrition
Instant Pot Chicken Soup by The Wandering RD
Instant Pot Vegetable Barely Soup by Sharon Palmer, Plant-Powered Dietitian
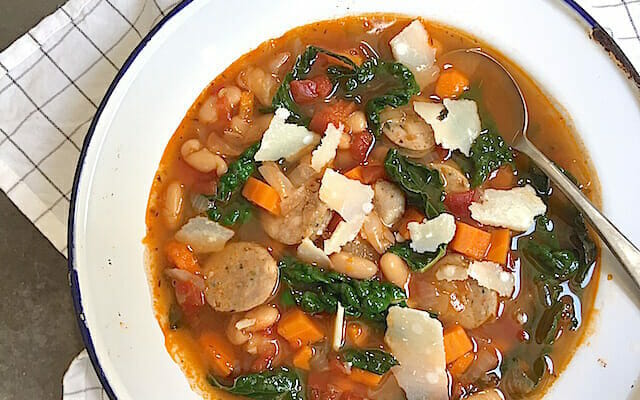
Instant Pot Italian White Bean Soup by Mom’s Kitchen Handbook

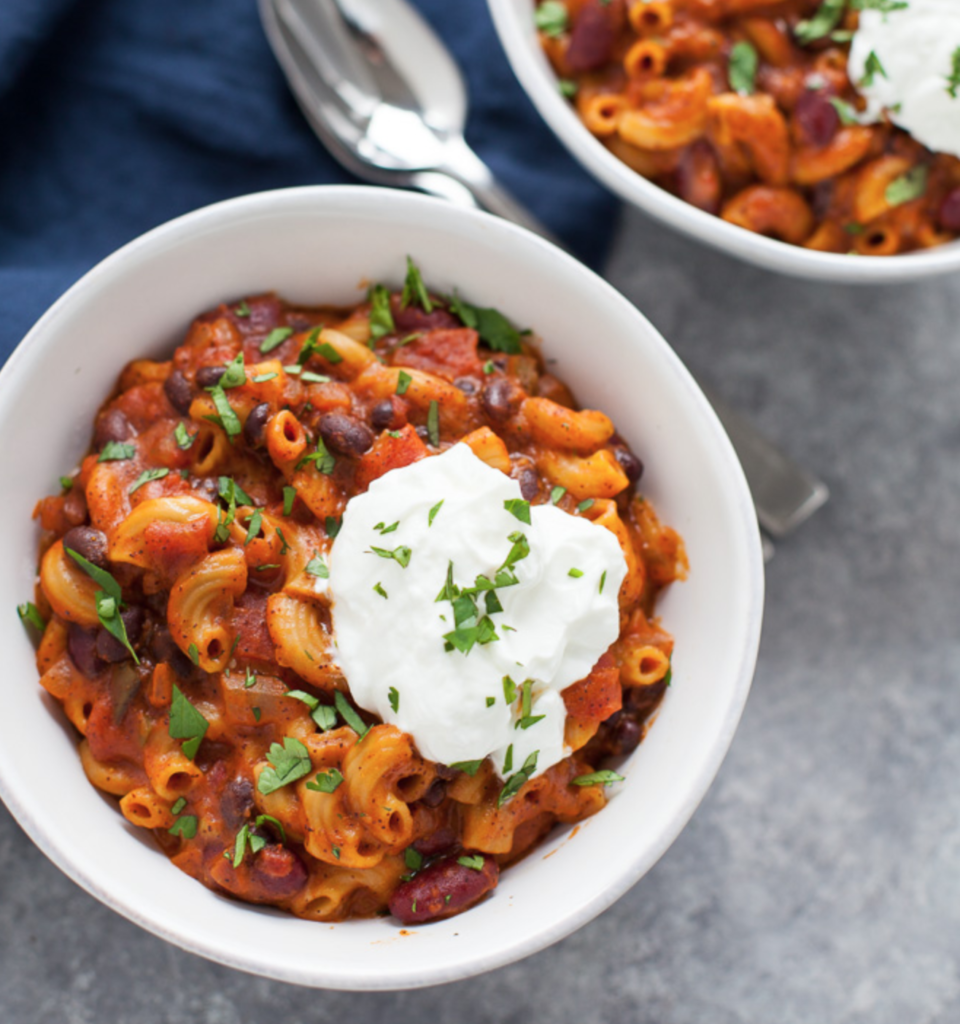
Vegetarian Chili Mac: Instant Pot Tips and Tricks via Chef Julie Harrington, RD @ChefJulie_RD

Chili:

Easy Instant Pot Vegetarian Chili Mac by Kara Lydon, The Foodie Dietitian

Instant Pot Sesame Chicken: Instant Pot Tips and Tricks via Chef Julie Harrington, RD @ChefJulie_RD

Chicken:

Instant Pot Sesame Chicken by Chef Julie Harrington, RD
Instant Pot Creamy Dill Chicken and Rice by Smart Nutrition
Instant Pot Chicken Coconut Curry by Bite of Health Nutrition
Thai Peanut Chicken by Smart Nutrition
Chicken Jambalaya by Live Best
Instant Pot Chicken Teriyaki by Chelsea’s Choices
Instant Pot Chicken in Salsa Verde by Mom’s Kitchen Handbook

Instant Pot Barbacoa Beef: Instant Pot Tips and Tricks via Chef Julie Harrington, RD @ChefJulie_RD

Beef:

Easy Instant Pot Barbacoa Beef by Lively Table
Moroccan Beef and Lentils by Smart Nutrition
Lasagna by Your Choice Nutrition
Instant Pot French Dip Sandwich by Street Smart Nutrition
Instant Pot Corned Beef and Cabbage by Nourish Nutrition Co.
Instant Pot Beef Greek “Gyros” by The Wandering RD
Instant Pot Ribs by Lara Clevenger
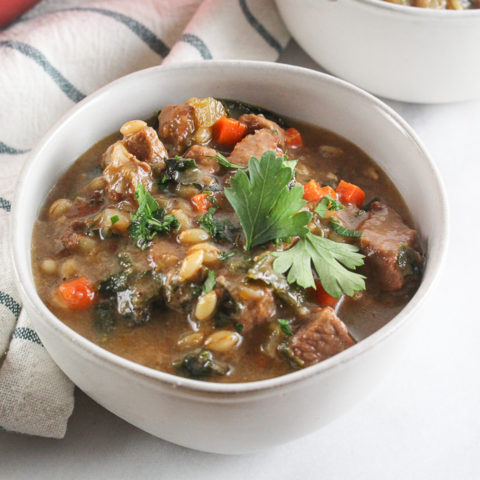
Kale Lentil and Beef Stew by Beautiful Eats & Things

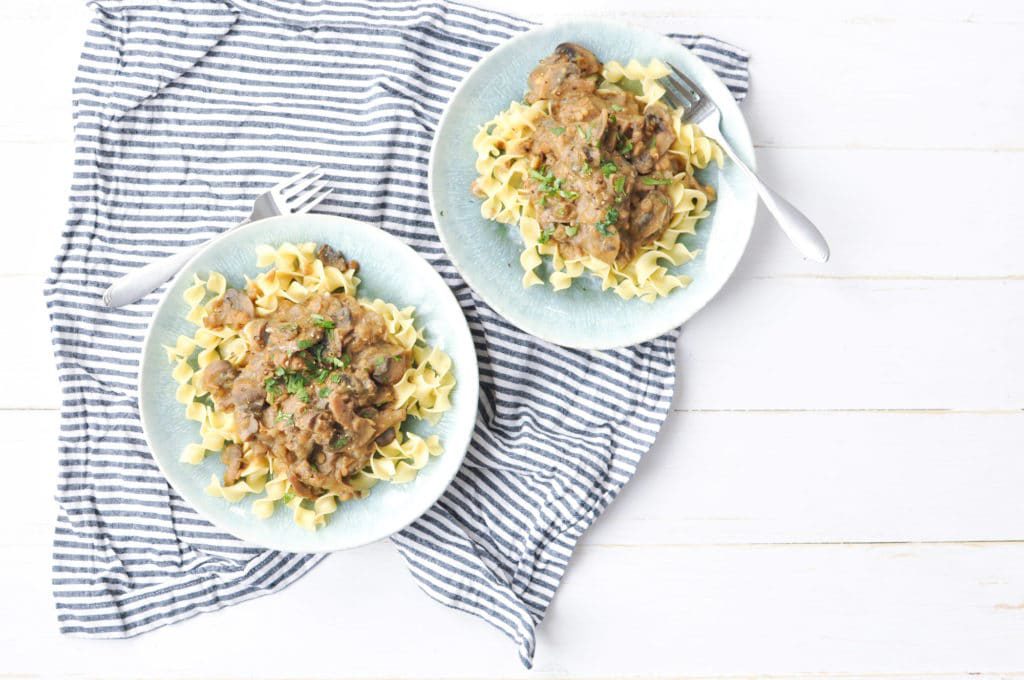
Lentils Stroganoff: Instant Pot Tips and Tricks via Chef Julie Harrington, RD @ChefJulie_RD

Vegetarian:

Instant Pot Lentil Stroganoff by Nourish Nutrition Co.
Vegan Thai Yellow Curry Chickpeas and Potatoes by Smart Nutrition
Instant Pot Spaghetti Squash with Tomatoes, Basil, and Garlic by Betsy’s Kitchen
Instant Pot Black Eyed Peas and Greens by Sharon Palmer, The Plant-Powered Dietitian

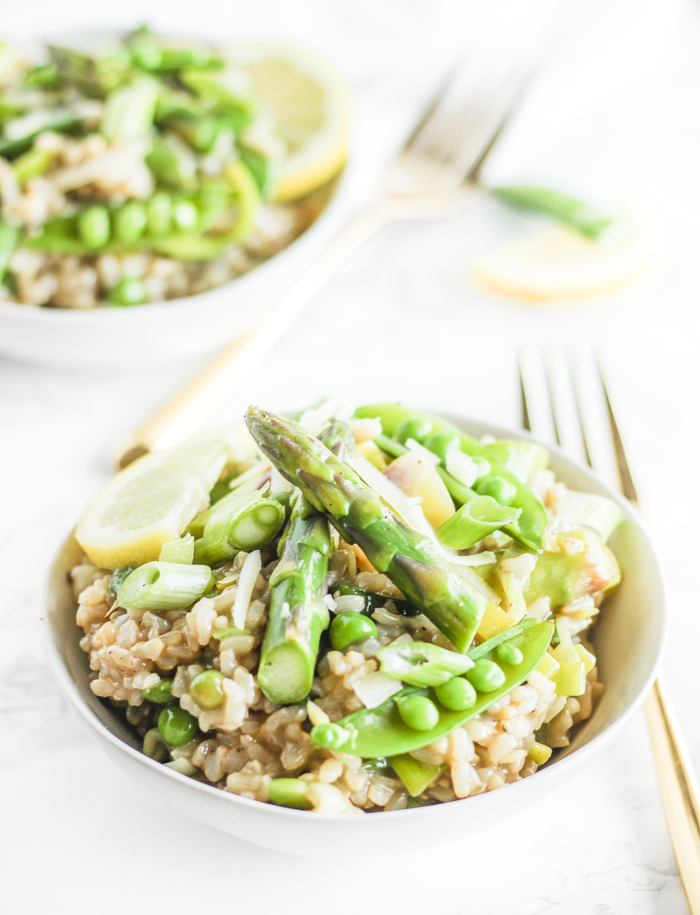
Spring Vegetable Instant Pot Brown Rice Risotto: Instant Pot Tips and Tricks via Chef Julie Harrington, RD @ChefJulie_RD

Sides:

Spring Vegetable Instant Pot Brown Rice Risotto by Lively Table
Instant Pot Greek Lemon Potatoes by Smart Nutrition
Instant Pot Wheat Berries by Chef Julie Harrington, RD
Instant Pot Garlic Creamy Broccoli Mash by The Keto Queens
Cheesy Mashed Potatoes by Nourish Nutrition Co.
Instant Pot Artichokes with White Wine, Capers, and Burrata by Lively Table
Instant Pot Artichokes with Lemon Chive Butter by Mom’s Kitchen Handbook

Perfect Hard Boiled Eggs in the Instant Pot: Instant Pot Tips and Tricks via Chef Julie Harrington, RD @ChefJulie_RD

Other:

Perfect Hard Boiled Eggs by Chef Julie Harrington, RD
Peach Jam in the Instant Pot by Marisa Moore Nutrition
Instant Pot Poached Pears by Chef Julie Harrington, RD
Instant Pot Raisin Bread by Kara Lydon, The Foodie Dietitian

Chef Julie Harrington, RD - Where food and love meet in the kitchen @ChefJulie_RD

Disclosure: Some products listed in this post, may be affiliate links — which means if you purchase or sign up from that link, Julie Harrington Consulting LLC may receive a small commission.


7 Things You Need to Know About Your Instant Pot + Instant Pot Recipes via Julie Harrington, RD @ChefJulie_RD #InstantPot #CookingTips

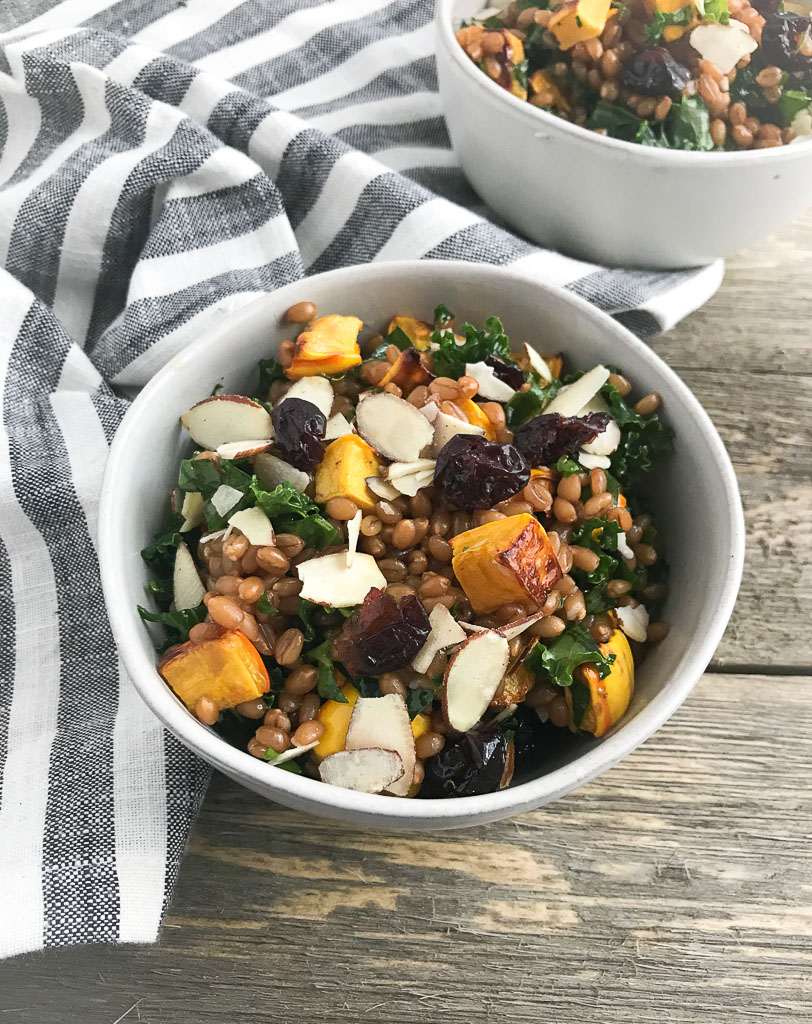
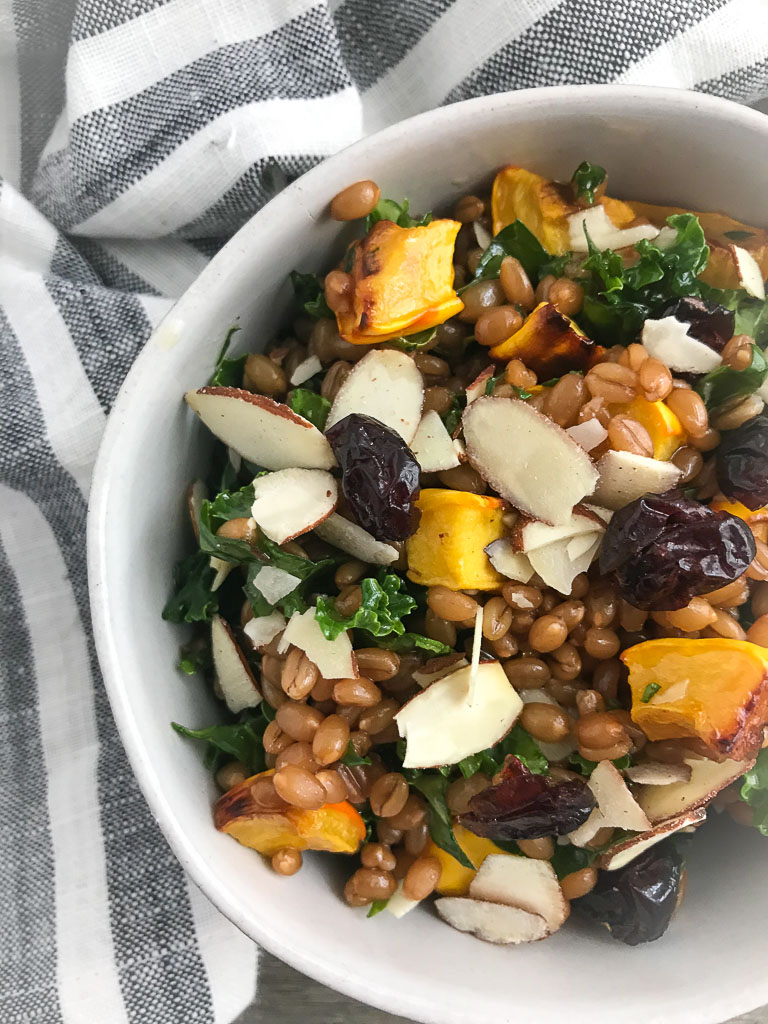
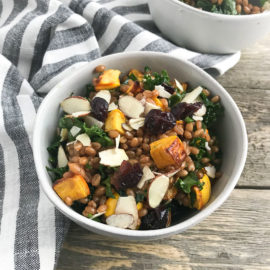
Squash and Wheat Berry Salad

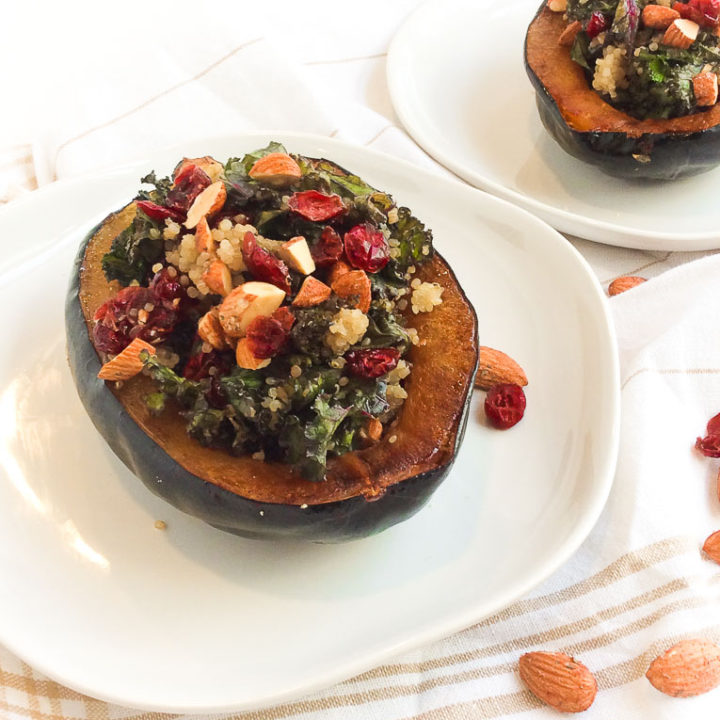
This Squash & Wheat Berry Salad captures all the different flavors of sweet, savory, tart, and nutty. Batch cook for the week for a satisfying meal or side dish. 
Squash & Wheat Berry Salad via RDelicious Kitchen @RD_Kitchen #wheatberries #wholegrain #squash #sidedish #salad

One of my meal prep strategies is batch cooking at least one whole grain for the week. Then that whole grain is incorporated throughout the week in various ways.
I’ve been utilizing my Instant Pot to quickly batch cook grains for my weekly meal prep. Wheat berries can take up to an hour to cook and require you to keep a constant eye on them. Throw them into the Instant Pot and voila – done in half the time!
Squash & Wheat Berry Salad via RDelicious Kitchen @RD_Kitchen #wheatberries #wholegrain #squash #sidedish #salad
I’ve had a little extra time on my hands this week being completely snowed in the past two days. With an already prepped batch of wheat berries in my fridge, I utilized the ingredients in my kitchen to create this dish.
I feel like many of my recipes are like I am a contestant on Chopped. The items that are in my kitchen are my “mystery basket”. I must say it is a much easier mystery basket than what the contestants end up with. Chopped viewers voted, mashed potatoes candies were voted the weirdest basket ingredient on the show. What even are those?!
Squash & Wheat Berry Salad via RDelicious Kitchen @RD_Kitchen #wheatberries #wholegrain #squash #sidedish #salad
Squash season is not over yet! I love using delicata squash because of its more tender flesh and skin, making this variety easier to work with. No need to even peel the skin!

Make your own vinaigrette:

You know I love making my own dressings. It’s SO easy. Want to create your own signature vinaigrette? Use my guide with your favorite flavor combination!

Print

clock clock iconcutlery cutlery iconflag flag iconfolder folder iconinstagram instagram iconpinterest pinterest iconfacebook facebook iconprint print iconsquares squares iconheart heart iconheart solid heart solid icon
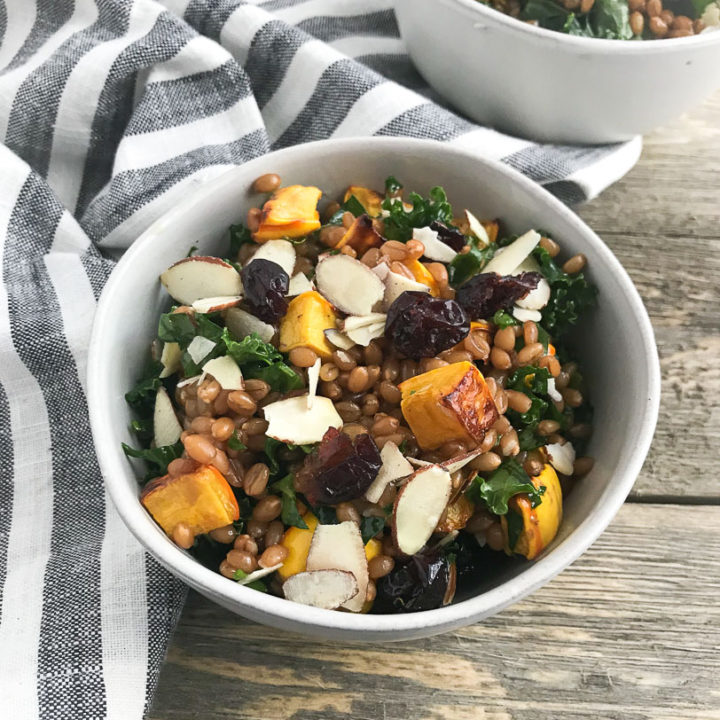
wheat berry salad with squash in a white bowl

Squash Wheat Berry Salad

  • Author: Chef Julie Harrington, RD
  • Prep Time: 30
  • Cook Time: 8
  • Total Time: 38 minutes
  • Yield: 6
  • Category: side dish

Description

This Squash & Wheat Berry Salad captures all the different flavors of sweet, savory, tart, and nutty. Batch cook for the week for a satisfying meal or side dish.


Ingredients

Scale
  • 2 cups wheat berries, cooked
  • 1 delicata squash (about 2 cups), or your favorite squash
  • 2 tablespoons olive oil, divided
  • zest of one orange
  • 3 tablespoons fresh orange juice
  • 1 tablespoon maple syrup
  • 2 cups kale, stems removed and chopped
  • ½ cup dried tart cherries
  • 1/3 cup sliced almond

Instructions

  1. Cook wheat berries according to package directions (or try my Instant Pot Wheat Berries recipe for a simple method). Let cool once cooked.
  2. Preheat oven to 400 degrees F. Dice delicate squash. Toss with 1 tablespoon of olive oil and sprinkle with salt and pepper. Place on a baking sheet lined with parchment paper. Roast for 20-30 minutes, until squash is tender and caramelized, stirring occasionally.
  3. In a mason jar, combine remaining 1 tablespoon of olive oil, orange zest, orange juice, and maple syrup. Secure the mason jar lid and vigorously shake. Season with salt and pepper, to taste.
  4. In a large bowl, combine wheat berries, squash, kale, dried tart cherries, and sliced almond. Dress with salad dressing. Toss to combine.

Notes

Instant Pot Wheat Berries recipe here

Keywords: side dish, farro, whole grain, squash, salad

Recipe Card powered byTasty Recipes

Did you make this recipe? I’d love to see. Tag me on Instagram, Facebook, or comment below!

Chef Julie Harrington, RD - Culinary Nutrition Consultant of chefjulierd.com

Pin for later!

Squash & Wheat Berry Salad via RDelicious Kitchen @RD_Kitchen #wheatberries #wholegrain #squash #sidedish #salad

Instant Pot Sesame Chicken

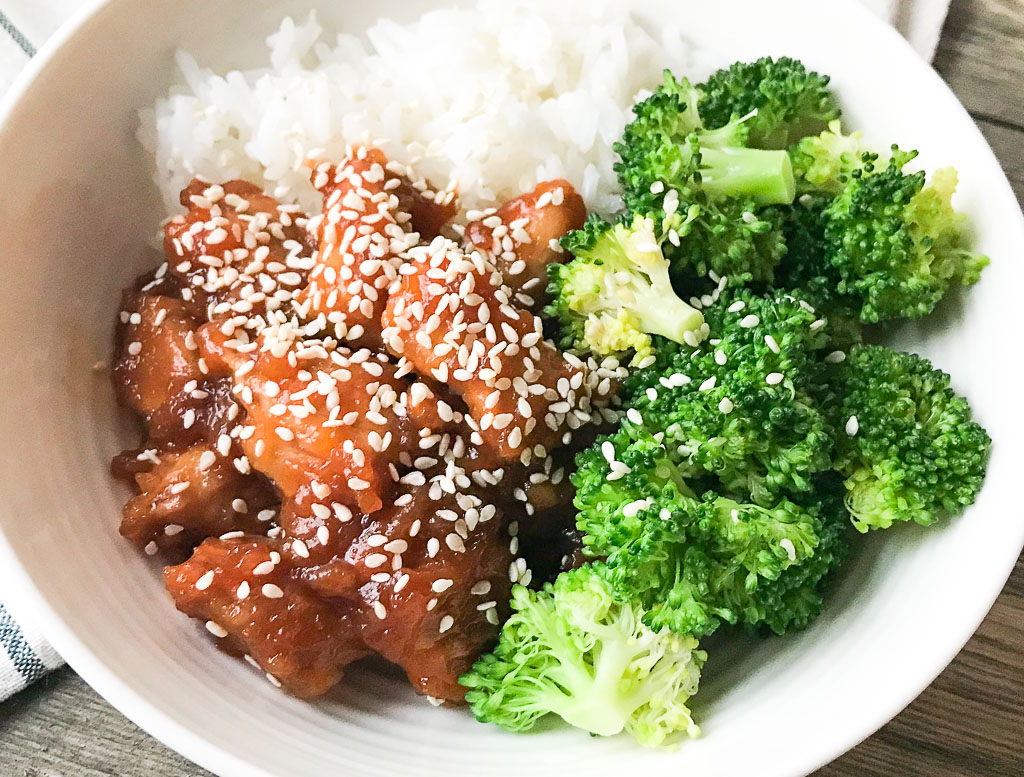
Skip takeout! It will take you less time to make this Instant Pot Sesame Chicken than it is to make a trip out for takeout. This easy dinner idea only takes 30 minutes to make and goes great with a side of rice and steamed broccoli!

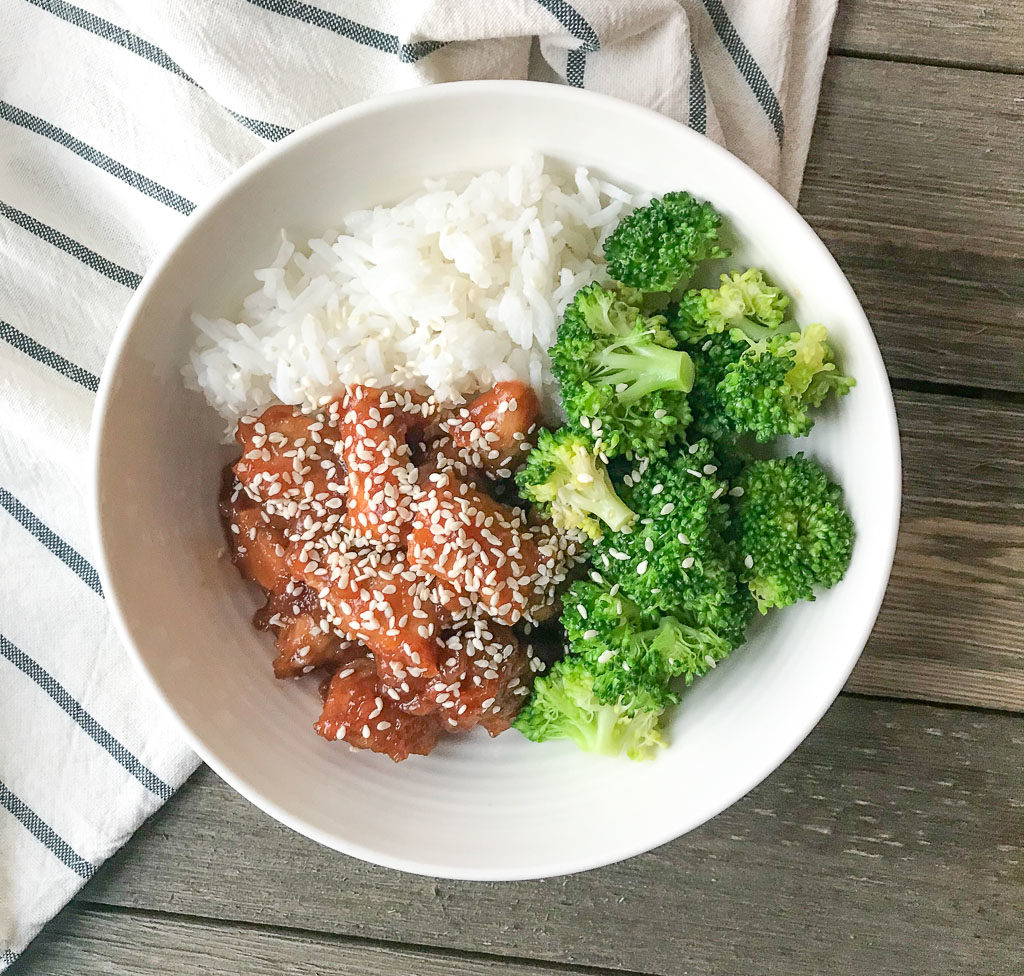
white bowl with sesame chicken, broccoli, & rice.

There are just some nights where takeout seems like the easier option. Sesame chicken is one of my favorites when ordering takeout but never leaves me feeling the best. What if I told you, I’ve figured out a way to enjoy this signature takeout dish faster than it will take you to hop in the car and grab from a restaurant. Would you believe me?

You may also enjoy Instant Pot lemon ginger salmon and pressure cooker barbacoa beef tacos! Both are easy and cook so fast!

Why You’ll Love Sesame Chicken in the Instant Pot

Healthier than takeout: Cooking the chicken in the Instant Pot creates a crispy texture without a fryer, which how typical take-out restaurants cook this dish.

Simple sauce ingredients: You most likely have the majority of these ingredients already on hand. The soy sauce, ketchup, and red pepper flakes will cook with the chicken helping it stay tender while infusing flavors. The honey and cornstarch will help crisp up the chicken and thicken the sauce.

Easy Dinner and meal prep idea: Take it even one step further to make this dinner with ease. Utilize the steamable rice and broccoli found in the frozen aisle. Or keep putting your Instant Pot to work again by cooking rice and the broccoli in there too.

Instant Pot Sesame Chicken in a white bowl with broccoli and rice

Ingredients Needed

  • Chicken – I used boneless, skinless breasts but you can also use tenders since we are cutting the chicken in bite sized pieces.
  • cornstarch – This makes an excellent thickening agent when mixed with water and helps to get that crispy breading on the chicken.
  • sesame oil – adds that traditional flavor you are used to
  • soy sauce – go with the low sodium kind
  • ketchup
  • red pepper flakes – this is optional but adds just the right amount of spice.
  • honey
  • water
  • sesame seeds

How to Make Instant Pot Sesame Chicken

Mix a tablespoon of cornstarch with a pinch of salt in a small bowl. Toss the chicken so it’s completely covered.

Set the Instant Pot to saute and add a tablespoon of sesame oil. Once hot, saute the chicken until it’s browned.

Stir in the soy sauce, ketchup, and red pepper flakes if using. Lock the lid in place and switch the valve to the sealing position. Cook on high pressure for 3 minutes.

Once the timer goes off, carefully turn the valve to release the pressure. Remove the lid and add a teaspoon of sesame oil and honey. Stir to combine.

Whisk together the remaining water and cornstarch in a separate bowl to make a slurry.

Turn the Instant Pot back to saute and stir in the slurry. Continue stirring so the sauce thickens.

Top with sesame seeds and serve!

Tips for Making Homemade Sesame Chicken

  • If you like more spice, swap the ketchup for sriracha.
  • Don’t have cornstarch? Use a little flour instead.
  • To make this recipe gluten-free, substitute the soy sauce for tamari.
  • Toasting the sesame seeds adds more flavor, but it’s not a must!
  • Using sesame oil is essential. While you can substitute, you will miss out on the of the signature flavor of sesame chicken.
  • This recipe can be made using any electric pressure cooker, not just the Instant Pot.

Storage Instructions

Keep leftovers in an airtight container in the refrigerator for up to 4 days.

Can You Make Sesame Chicken on the Stovetop?

Yes! Follow the same instructions for breading the chicken. Saute it in a large skillet. Whisk the sauce ingredients in a small saucepan and cook until boiling, then reduce to a simmer to thicken. Stir in the slurry and remove from the heat once the desired consistency has been reached. Then toss to coat the chicken.

More Chicken Recipes to Try:

Print
clock clock iconcutlery cutlery iconflag flag iconfolder folder iconinstagram instagram iconpinterest pinterest iconfacebook facebook iconprint print iconsquares squares iconheart heart iconheart solid heart solid icon
homemade sesame chicken with white rice and broccoli in a white bowl

Instant Pot Sesame Chicken

  • Author: Chef Julie Harrington, RD
  • Prep Time: 10
  • Cook Time: 15
  • Total Time: 25 minutes
  • Yield: 4
  • Category: dinner
  • Method: Instant Pot
  • Cuisine: Chinese

Description

Skip takeout! It will take you less time to make this Instant Pot Sesame Chicken than it is to make a trip out for take out.


Ingredients

Scale
  • 1 pound boneless, skinless, chicken breast, cut into bite-size pieces
  • 2 tablespoons cornstarch, divided
  • 1 tablespoon + 1 teaspoon sesame oil, divided
  • 1/4 cup low sodium soy sauce
  • 1 1/2 tablespoons ketchup
  • pinch of red pepper flakes, optional
  • 1/4 cup honey
  • 2 tablespoons water
  • 2 teaspoons sesame seeds

Instructions

  1. In a small bowl, combine 1 tablespoon of cornstarch with a pinch of salt and pepper. Toss chicken to evenly and lightly coat.
  2. Preheat the Instant Pot and set to “saute”. Add 1 tablespoon sesame oil. Once the oil is hot, add the chicken and saute for 3-4 minutes, to brown.
  3. Stir in soy sauce, ketchup, and red pepper flakes, if using. Place the lid on the Instant Pot and seal the valve. Set to manual and 3 minutes cook time.
  4. When done, use the quick pressure release. When most of the steam is released, remove the lid. Add the remaining 1 teaspoon of sesame oil and honey. Stir to combine.
  5. In a small bowl, whisk together the remaining 1 tablespoon of cornstarch and water to make a slurry.
  6. Set Instant Pot back to saute, stir in the slurry and continue to stir as the sauce thickens to desired consistency, about 2 minutes.
  7. Top with sesame seeds.
  8. Serve over rice and steam broccoli.

Keywords: instant pot, sesame chicken, dinner

Recipe Card powered byTasty Recipes

Instant Pot Wheat Berries

Save time and utilize the Instant Pot to make hearty whole grains, like wheat berries. Learn how meal prepping a batch of whole grains can turn into various recipes throughout the week.

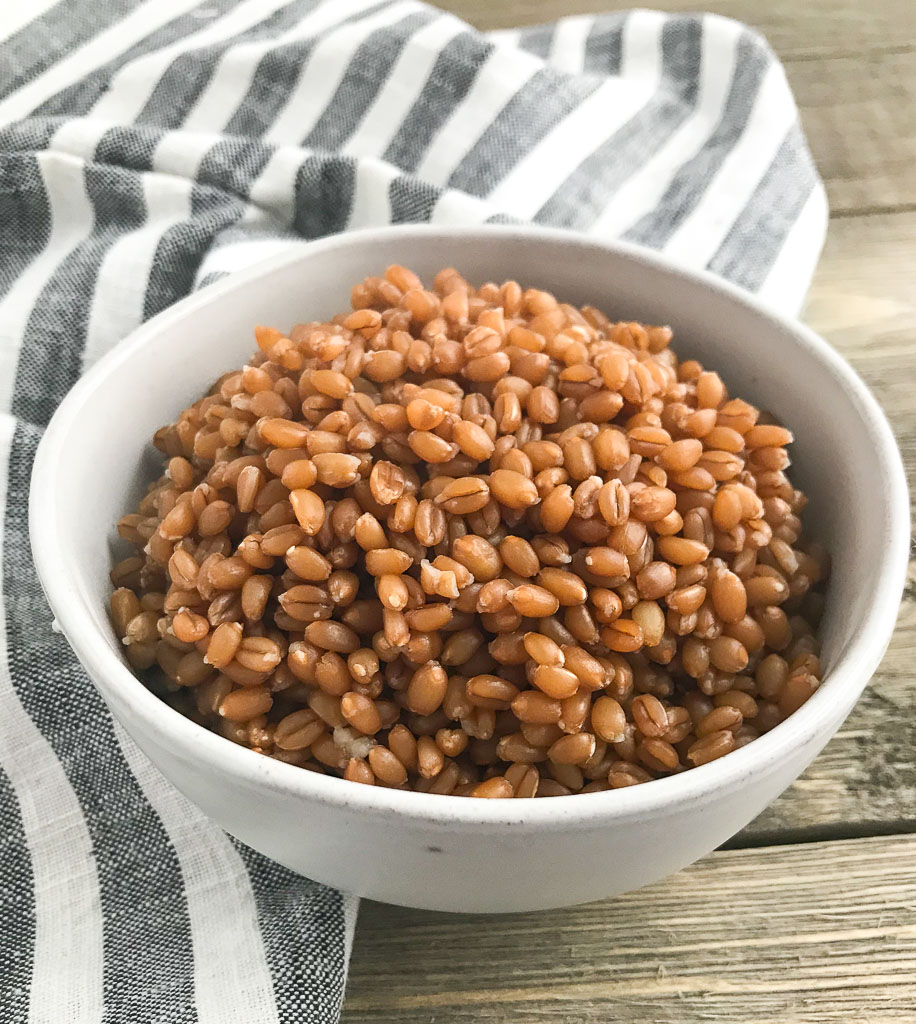
Instant Pot Wheat Berries -Save time and utilize your Instant Pot to make hearty whole grains, like wheat berries. via Chef Julie Harrington, RD @ChefJulie_RD #instantpot #wheatberries #pressurecooker #wholegrain #mealprep #glutenfree

The Instant Pot continues to be magical. What takes over an hour to cook, now is done in 35 minutes.

Meal prep strategies

Every week now, I’ve been prepping at least one whole grain for the week. Everyone meal preps a little differently. I tend not to make full meals, but to get the cooking process started, like chopping veggies, making a batch of whole grains, grilling a few pieces of chicken, roasting a tray of veggies, etc.

This way, I am not mandated to a certain meal and it gives me more flexibility while allowing to save time during a busy week.

Instant Pot Wheat Berries -Save time and utilize your Instant Pot to make hearty whole grains, like wheat berries. via Chef Julie Harrington, RD @ChefJulie_RD #instantpot #wheatberries #pressurecooker #wholegrain #mealprep #glutenfree

Meal prep tip:

Prep a batch of whole grains, like wheat berries, to add on top of a salad, in a stir-fry, mixed into a soup, as a side dish, or even served up breakfast-style. Switch up the prepped whole grain each week for variety.

Health benefits of wheat berries

Wheat berries contain 6 grams of protein, with over 20 percent of your daily value for dietary fiber, and 8 percent of your iron in each serving.

Instant Pot Wheat Berries -Save time and utilize your Instant Pot to make hearty whole grains, like wheat berries. via Chef Julie Harrington, RD @ChefJulie_RD #instantpot #wheatberries #pressurecooker #wholegrain #mealprep #glutenfree

What are Wheat Berries?

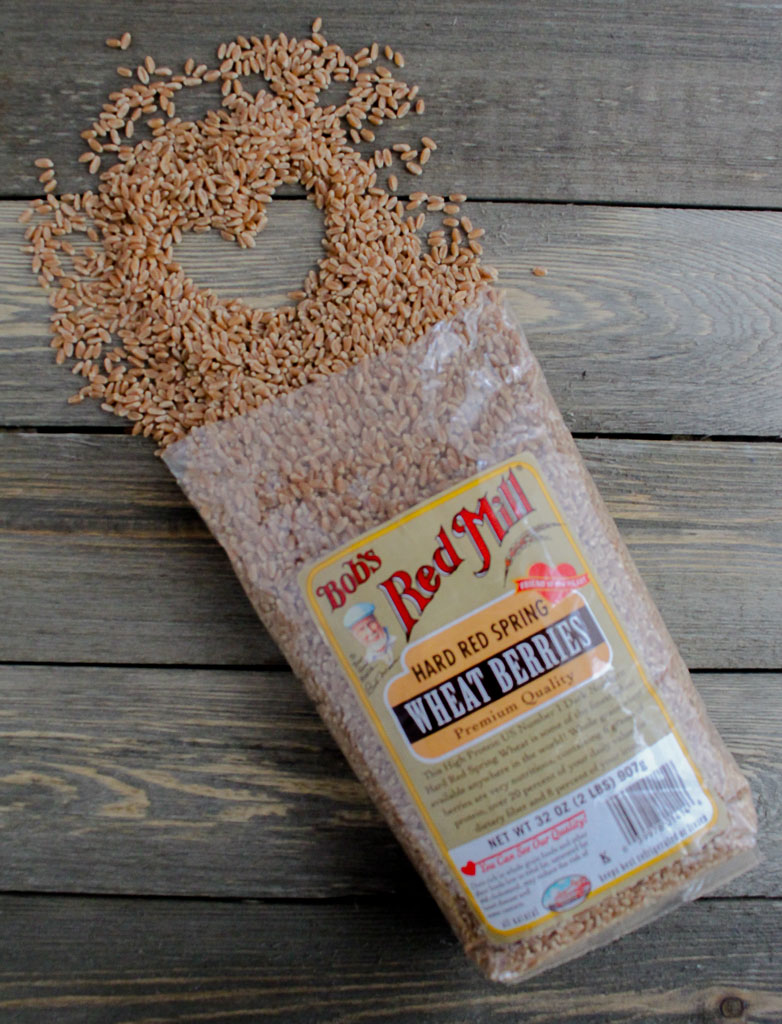
Wheat Berries are the whole grain form of wheat – the whole, complete grain before it has undergone any processing. They’re a high-fiber whole grain, containing the bran, germ, and the endosperm. Wheat berries typically take longer to cook because they are not processed and it takes a while for the liquid to penetrate through the bran to soften the grain.

When cooked, wheat berries have a chewy bite and a subtle nutty, earthy flavor. They’re sturdy enough to handle bold dressings in salads and still delicate enough to taste delicious with some milk, honey, and cinnamon.

Print
clock clock iconcutlery cutlery iconflag flag iconfolder folder iconinstagram instagram iconpinterest pinterest iconfacebook facebook iconprint print iconsquares squares iconheart heart iconheart solid heart solid icon
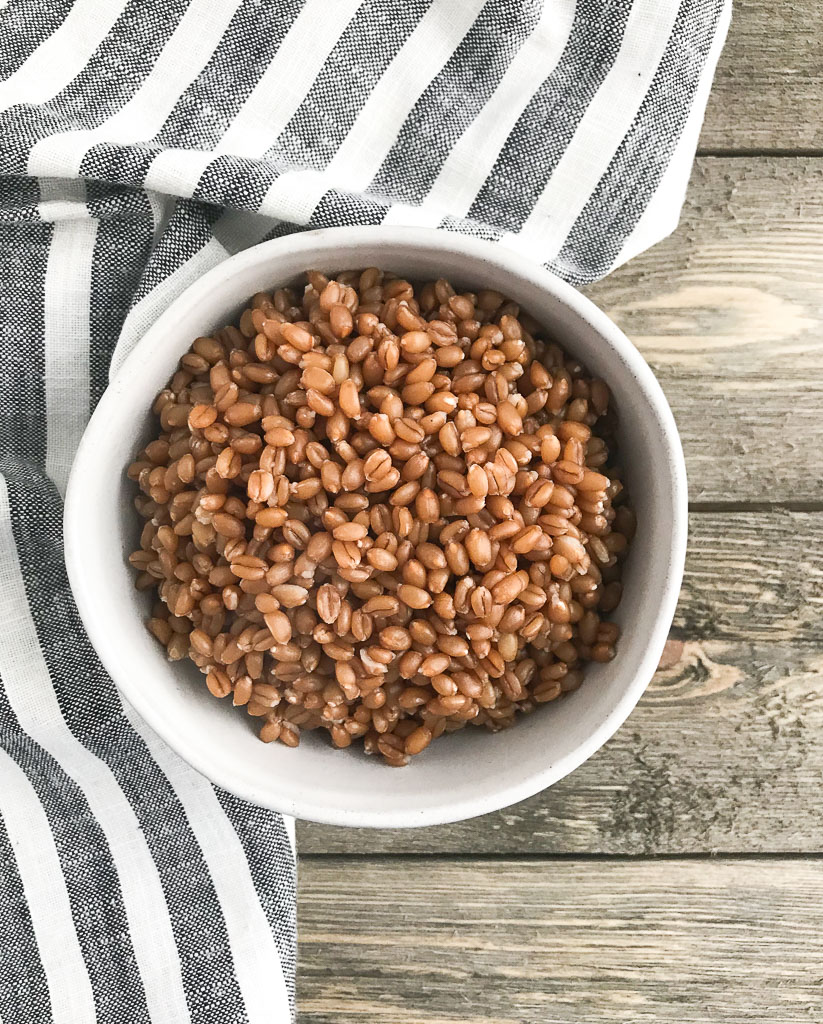
wheat berries in a white bowl with a blue and white striped napkin

Instant Pot Wheat Berries

  • Author: Chef Julie Harrington, RD
  • Prep Time: 5 mins
  • Cook Time: 30 mins
  • Total Time: 35 mins
  • Yield: 4
  • Category: side dish
  • Method: Instant Pot

Ingredients

Scale
  • 3 cups water
  • 1 cup hard red spring wheat berries
  • Pinch of salt

Instructions

  1. Combine water, wheat berries, and salt in the Instant Pot. Secure the lid and seal the valve.
  2. Set the manual timer for 35 minutes.
  3. When done, do quick release by moving the valve to vent the steam. Let all the steam release.
  4. Drain the wheat berries and enjoy as is or incorporate into other recipes.

Keywords: instant pot, pressure cooker, wheat berries, whole grain, meal prep

Recipe Card powered byTasty Recipes

Other recipes you may enjoy

Instant Pot Poached Pears

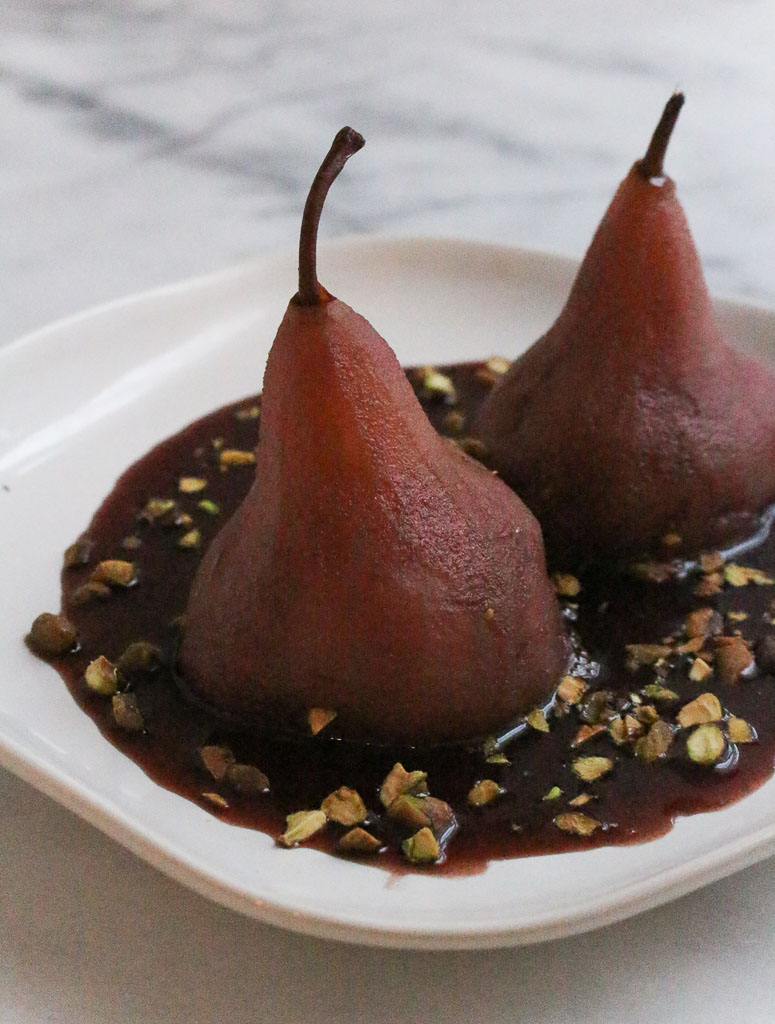
Present this stunning dessert at your next dinner party. These Instant Pot Poached Pears are an elegant dessert that takes minimal prep work.
Instant Pot Poached Pears via Chef Julie Harrington, RD @ChefJulie_RD #pears #poachespears #dessert #lowcarb #fruitdessert #pistachio #redwine

Present this stunning dessert at your next dinner party. These Instant Pot Poached Pears are an elegant dessert that takes minimal prep work.
Instant Pot Poached Pears via Chef Julie Harrington, RD @ChefJulie_RD #pears #poachespears #dessert #lowcarb #fruitdessert #pistachio #redwine

The Instant Pot is a single appliance that does the job of seven (yes, seven!) different kitchen appliances. It can handle the tasks of a slow cooker, electric pressure cooker, rice cooker, steamer, yogurt maker, sauté/browning pan, and a warming pot. Think of all those appliances taking up space in your kitchen that can be replaced by one.

7 Things You Need to Know About Your Instant Pot

Instant Pot Poached Pears via Chef Julie Harrington, RD @ChefJulie_RD #pears #poachespears #dessert #lowcarb #fruitdessert #pistachio #redwine

The red wine and pomegranate juice naturally add a beautiful color.

Why use bosc pears?

I feel like pears are often forgotten to use for desserts. Bosc pears (the variety I used in this recipe) have a more firm, dense flesh than other pear varieties, so they are ideal for use in baking, broiling, or poaching. They retain their shape and texture better than other varieties, and their flavor is less likely to be overwhelmed by the use of strong spices like cinnamon, clove, or nutmeg.

Print
clock clock iconcutlery cutlery iconflag flag iconfolder folder iconinstagram instagram iconpinterest pinterest iconfacebook facebook iconprint print iconsquares squares iconheart heart iconheart solid heart solid icon
pomegranate poached pears on a white plate

Instant Pot Poached Pears

  • Author: Chef Julie Harrington, RD
  • Prep Time: 8 minutes
  • Cook Time: 8 minutes
  • Total Time: 16 minutes
  • Yield: 4
  • Category: Dessert
  • Method: Instant Pot

Description

Present this stunning dessert at your next dinner party. These Instant Pot Poached Pears are an elegant dessert that takes minimal prep work.

Ingredients

Scale
  • 4 Bartlett pears
  • 2 ½ cups water
  • 1 ½ cup red wine
  • 1 cup 100% pomegranate juice
  • ½ cup sugar
  • 1 orange, juiced and zested
  • 1 tablespoon balsamic vinegar
  • 3 cinnamon sticks
  • 1 teaspoon whole cloves
  • 1/3 cup pistachios, chopped

Instructions

  1. Peel pears. If needed, slice the bottom so pear is able to stand straight up. Using a melon baller, scoop out seeds and core from the bottom.
  2. Add water, red wine, pomegranate juice, sugar, orange juice, orange zest, balsamic vinegar, cinnamon sticks, and whole cloves in the instant pot. Set instant pot on the sauté setting until liquid mixture begins to slightly simmer.
  3. Once the liquid begins to simmer, add pears and switch instant pot to manual setting. Cover and lock the Instant Pot lid and set for 8 minutes.
  4. When finished, let the steam release from Instant Pot. Remove the lid. Carefully remove pears and let cool.
  5. Turn the Instant Pot to saute and allow the juices to simmer for 10 minutes, or until reduced by half. Let cool and strain out the cinnamon sticks, cloves, and orange zest.
  6. Plate poached pears, by adding pear to a plate. Drizzle liquid to coat the pears and pool at the bottom of the dish. Sprinkle with chopped pistachios.
  7. Store extra pears the extra liquid in the refrigerator.

Keywords: #pears #poachespears #dessert #lowcarb #fruitdessert #pistachio #redwine

Recipe Card powered byTasty Recipes
Chef Julie Harrington, RD - Culinary Nutrition Consultant of chefjulierd.com

Other recipes you may enjoy

Slow Cooker Thai Meatballs

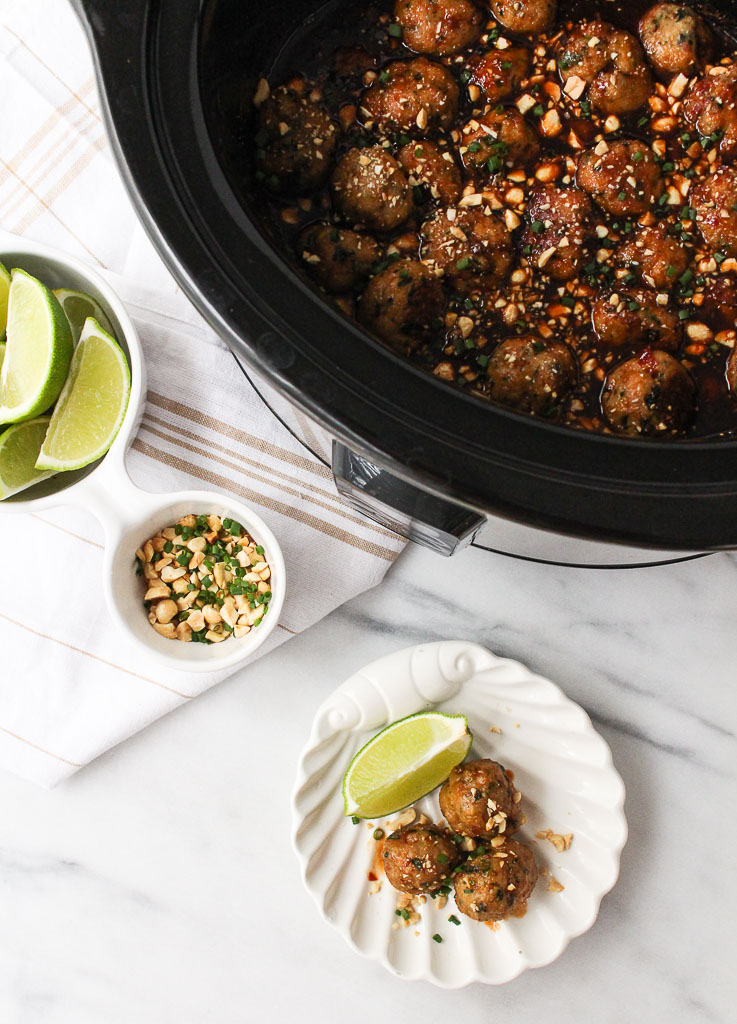
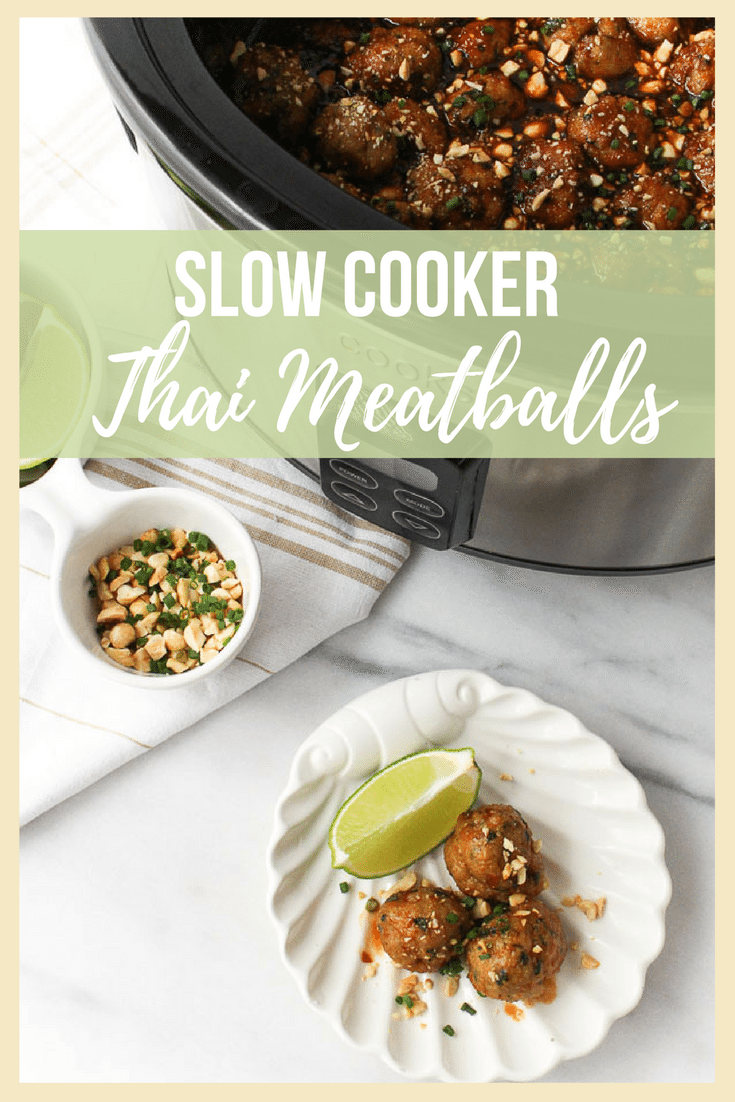
Looking for a new appetizer idea? Set it and forget it! These Slow Cooker Thai Meatballs are the perfect balance of sweet and spicy that everyone will keep coming back for.
Slow Cooker Thai Meatballs via RDelicious Kitchen @RD_Kitchen
By posting this recipe I am entering a recipe contest sponsored by SPLENDA® Sweeteners and am eligible to win prizes associated with the contest. I was not compensated for my time.
This past weekend, my family did our second annual fantasy football draft. I am feeling pretty good about my picks. There is a trophy on the line and I want bragging rights this year.
Slow Cooker Thai Meatballs via RDelicious Kitchen @RD_Kitchen
With football season about to start, it’s got me thinking of new recipes for Sunday football game gatherings. Let’s be honest, if my team isn’t playing, I’m mainly just there for the food.

Slow Cooker Thai Meatballs via RDelicious Kitchen @RD_Kitchen

Why SPLENDA® Naturals Sugar & Stevia Blend?

These Slow Cooker Thai Meatballs have the perfect balance of sweet and spicy, sweetened with SPLENDA® Naturals Sugar & Stevia Blend and adds a kick of spice with Thai chili sauce. SPLENDA® Naturals Sugar & Stevia Blend is made from only 2 non-GMO ingredients: stevia & cane sugar. With 50% Fewer calories than sugar, a 1⁄2 teaspoon of SPLENDA® Naturals Sugar & Stevia Blend gives you the same amount of sweetness as a full teaspoon of traditional sugar. Bonus – it has no bitter aftertaste that you sometimes get with other artificial or alternative sweeteners.
Slow Cooker Thai Meatballs via RDelicious Kitchen @RD_Kitchen
If serving as an appetizer, keep them on warm in the crockpot and serve with small skewers or toothpicks to or serve over quinoa or cauliflower rice to make a main dish.

Print

clock clock iconcutlery cutlery iconflag flag iconfolder folder iconinstagram instagram iconpinterest pinterest iconfacebook facebook iconprint print iconsquares squares iconheart heart iconheart solid heart solid icon
thai meatballs made in the slow cooker

Slow Cooker Thai Meatballs

  • Author: Chef Julie Harrington, RD
  • Prep Time: 20
  • Cook Time: 50
  • Total Time: 1 hour 10 minutes
  • Yield: 16-20 1x
  • Category: Appetizer
  • Method: Slow Cooker
  • Cuisine: Thai

Description

Set it and forget it! These Slow Cooker Thai Meatballs are the perfect balance of sweet and spicy that everyone will keep coming back for.

Ingredients

Scale
  • 3 stalks lemongrass, roughly chopped
  • 2 shallots, roughly chopped
  • 4 cloves garlic, roughly chopped
  • 2-inch knob of ginger, peeled and roughly chopped
  • 3 tablespoons hoisin sauce
  • 2/3 cup Thai chili sauce
  • ¼ cup SPLENDA® Naturals Sugar & Stevia Blend
  • 2/3 cup low sodium soy sauce
  • ½ cup rice vinegar
  • 1 cup water
  • 2 lbs. ground chicken breast
  • 1 cup whole wheat panko bread crumbs
  • 1 egg
  • ½ cup chives, divided
  • ¼ cup cilantro, chopped
  • salt and pepper, to taste
  • ½ cup unsalted peanuts, chopped
  • (optional) fresh lime wedges, to garnish

Instructions

  1. In a food processor, combine lemongrass, shallots, garlic, ginger, and hoisin sauce. Process the mixture until it forms a paste.
  2. In a small sauté pan add half the paste, reserving the remaining half for the meatballs. Cook stirring until fragrant. Remove from the pan and add to a slow cooker.
  3. Stir in the chili sauce, SPLENDA® Naturals Sugar & Stevia Blend, soy sauce, rice vinegar, and water with the paste in the slow cooker. Cover and cook on high for 3 hours, or until reduced by half.
  4. Preheat the oven to 350 degrees F. Line a large baking sheet with parchment paper. In a large bowl combine the remaining paste, ground chicken, panko, egg, ¼ cup of the chives, and cilantro. Season with salt and pepper. Mix meatball mixture until well combined. If the mixture is too wet, add more panko.
  5. Roll meatballs into golf ball size meatballs; line on the baking sheet. Bake for 20 minutes, until beginning to brown.
  6. Add meatballs to the slow cooker for the last 30 minutes of cooking, stirring to coat.
  7. In a small bowl, combine remaining chives and peanuts. Slice limes.
  8. Once the timer is up, sprinkle meatballs with the peanuts and chives. Serve meatballs with lime wedges.

Keywords: slow cooker, appetizer, meatballs, crockpot

Recipe Card powered byTasty Recipes

Chef Julie Harrington, RD - Culinary Nutrition Consultant of chefjulierd.com

  Pin it for later!

Slow Cooker Thai Meatballs via RDelicious Kitchen @RD_Kitchen
Need more inspiration? You can see lots of other lower sugar recipes at the link below. Thank you to #TheRecipeReDux for hosting another great recipe contest!