Chickpea Salad Sandwich Without Mayo

Get out of your lunchtime rut and make packing lunches more exciting with this Chickpea Salad Sandwich. 

half of a chickpea salad sandwich on a cutting board

Ever get in a lunch rut? Need new ideas for packing your kids’ or your own lunch? Are packable noontime options dwindling? Surely you’ve met the ‘What shall I pack for lunch?” question.

I always pack my lunch for the next day the night before. If not, I’m typically running out the door and a Siggi’s yogurt, KIND bar, and a piece of fruit are just tossed in my bag on my way out. I don’t mind those “snacky” kind of lunches once in a while, but I’d prefer more of a meal kind of lunch.

Plant-Based Proteins:

This chickpea walnut sandwich is a plant-based tuna/chicken salad makeover. I always try and make sure protein is present at lunchtime to help keep me full through the afternoon. Chickpeas are the perfect pulse for this recipe because the firm texture holds its shape. The addition of the walnuts is key for the crunch factor, while also providing heart-healthy fats.

chickpea salad sandwich on rye bread with an apple

Are garbanzo beans the same as chickpeas?

Yes. Originally the name garbanzo bean came from the Spanish community and over time different cultures have referred to them as another name. Eventually, these beans came to be known as chickpeas to most people in the world today.

Are chickpeas lectins?

Yes, chickpeas are considered a legume, and all legumes contain lectin. Lectin, a protein, binds to carbs and is known to some as an anti-nutrient. This is somewhat a controversial concept, because people with stomach sensitives may see an effect, but most do not. Also, most foods containing lectin are high in antioxidants, so the good outweighs the bad. If you are concerned about lectins, know that once they are cooked, the lectin is deactivated.

chickpea salad sandwich on rye bread cut in half

Ingredients for Chickpea Salad Sandwiches

  • chickpeas
  • walnuts
  • plain Greek yogurt – Greek yogurt is a great substitute for mayonnaise to trim back on saturated fat and replace it with a boost of protein and calcium instead.
  •  Dijon mustard
  •  honey
  • scallions
  • salt and pepper to taste
  • whole wheat bread, toasted
  • (Optional) Toppings: lettuce, tomato, onion

How to Make a Chickpea Salad Sandwich Without Mayo

Mash the chickpeas in a small bowl using a fork. Don’t over-mash, we aren’t making hummus!

Mix in the nuts, mustard, greek yogurt, honey, and scallions. Season with salt and pepper to taste.

Spread the chickpea salad on your bread to make the perfect sandwich. You can also add it on top of a salad, or dip with crackers – this chickpea walnut mixture is versatile to get you out of your lunchtime rut.

vegetarian chickpea salad sandwich on a cutting board

Should you rinse canned garbanzo beans?

You should and mainly it’s because the liquid contains a lot of unnecessary sodium which is why. most recommend draining and rinsing chickpeas before using.

Print
clock clock iconcutlery cutlery iconflag flag iconfolder folder iconinstagram instagram iconpinterest pinterest iconfacebook facebook iconprint print iconsquares squares iconheart heart iconheart solid heart solid icon
cut in half chickpea sandwich

Chickpea Walnut Sandwich

  • Author: Chef Julie Harrington, RD
  • Prep Time: 15
  • Total Time: 15 minutes
  • Yield: 2
  • Category: sandwich

Ingredients

Scale
  • 1 (15-ounce) can chickpeas, drained and rinsed
  • ⅓ cup chopped walnuts
  • 3 tablespoons plain Greek yogurt
  • ½ teaspoon Dijon mustard
  • 1 tablespoon honey
  • 2 tablespoons scallions, thinly sliced
  • salt and pepper to taste
  • 4 slices whole wheat bread, toasted
  • (Optional) Toppings: lettuce, tomato, onion

Instructions

  1. Add chickpeas to a bowl and lightly mash with a fork. (Not too much. We aren’t making hummus!) Add walnuts, Greek yogurt, Dijon mustard, honey, and scallions and mix together. Season with salt and pepper, to taste.
  2. Add a desired amount of the chickpea mixture to the bread and add desired toppings. Top with the other slice of bread.

Notes

Recipe adapted from Minimalist Baker.

Keywords: sandwich, vegetarian, plant-based

Recipe Card powered byTasty Recipes

other recipes you may enjoy

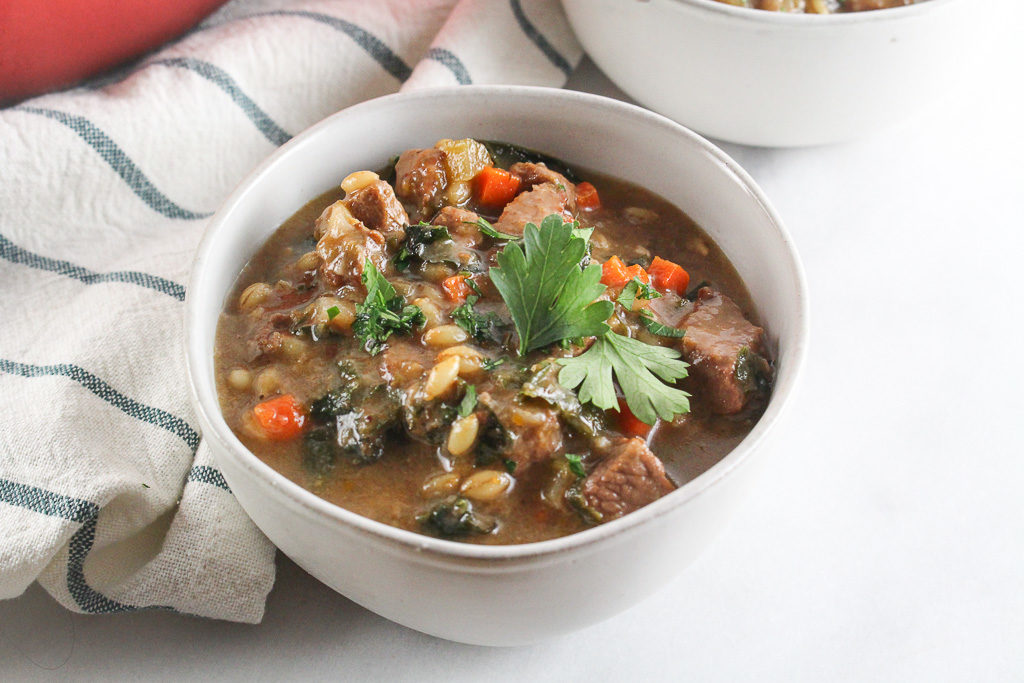
Beef and Barley Soup

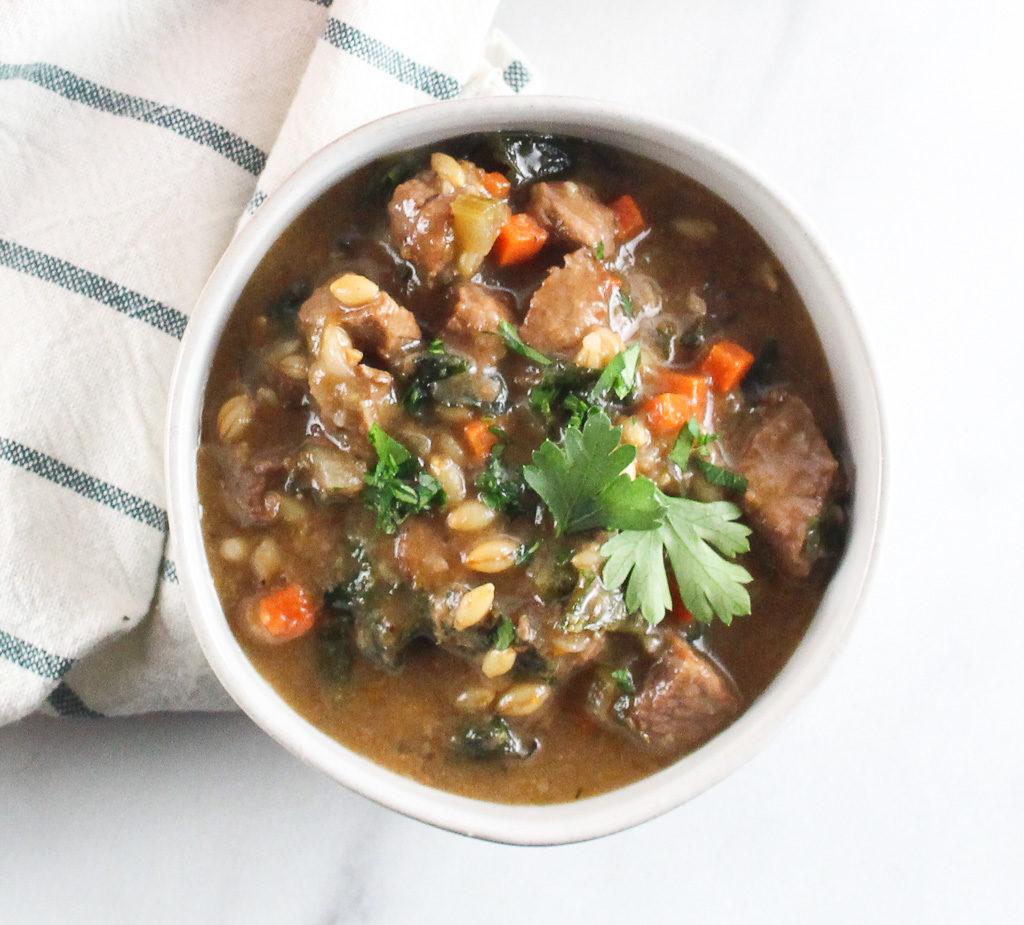
Cozy up to a bowl of Beef and Barley Soup. Not only can you add layers and layers of flavors, but they also can be balanced nutritionally.

Beef & Barley Soup in a white bowl garnished with parsley

I am on a total soup and stew kick lately. Mainly because I can cook once and eat all week.

I am teaching three cooking classes this week, so cooking all day at work, the last thing I want to do when I get home it to cook again and wash more dishes!

What is Hulled Barley?

Aim to add more whole grains in soups and stews when you can. Barley is a fantastic whole grain. I chose to use hull-less barley. This type of barley has an outer hull that’s so loosely attached to the kernel that it generally falls off during harvesting. This cuts down on processing and ensures that all of the bran and germ are retained.

Ingredients for Beef and Barley Soup 

all-purpose flour

Veggies: celery, carrots, garlic, kale, onion

Spices: salt, pepper, oregano, parsley

beef chuck roast – trim the fat if needed and dice into bite size pieces

olive oil

red wine

tomato paste

beef broth

water

hulless barley

kale

fresh parsley

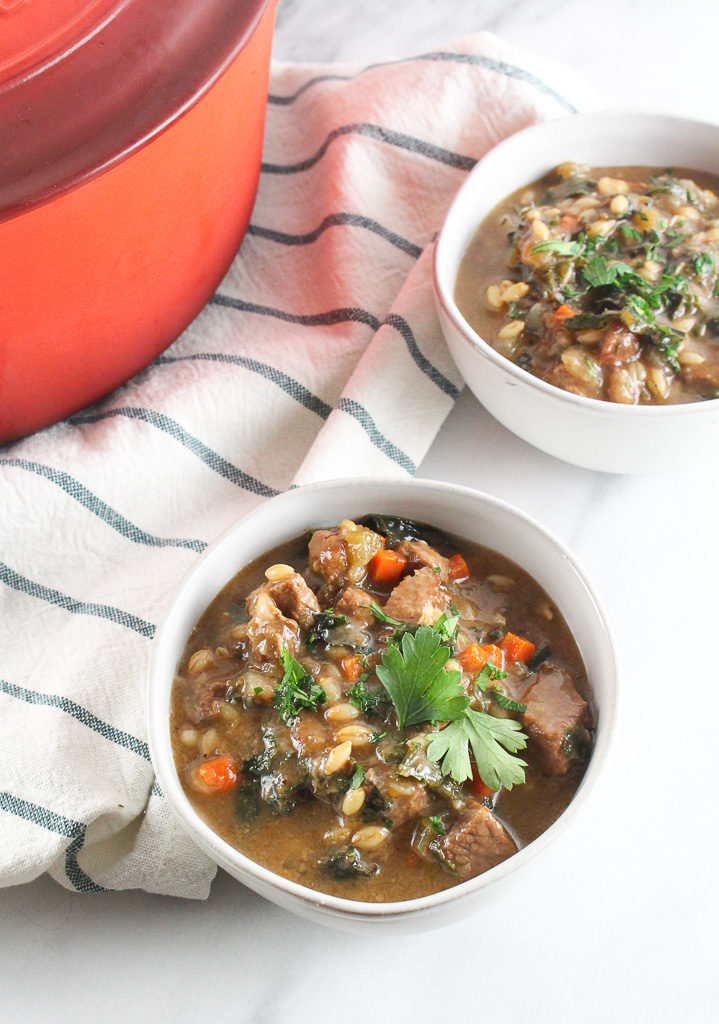
top shot of hulled barley soup in a white bowl with a garnish next to dishtowel

How to Make Hulled Barley Soup 

Once you have trimmed and diced the beef, add the flour, salt, and pepper to a shallow bowl or dish and dredge each piece. Shake off the excess flour if needed. 

Add the olive oil to a large pot and heat over medium-high heat. 

Brown the beef, turning as needed. You will need to do this step in batches because you don’t want to overload the pot. Once the meat has finished browning, remove and set aside. 

Add the carrots, celery, diced onions, garlic, and oregano. Stirring occasionally, cook the veggies until they are soft. 

Pour in the red wine to deglaze the bottom of the pot, scraping the brown bits. Simmer and reduce the red wine by half. Add in the tomato paste and stir. 

Place the beef back in the pot, and add the water and broth. 

Bring it to a boil then add the hulled barley. 

Turn the heat down low, and simmer for 45 minutes. The meat should be tender and the barley should be cooked all the way through. 

Be sure to stir it occasionally; this will keep the barley from sticking together. 

Once the soup is done, remove the pot from the heat and the kale. Season with salt and pepper! 

My Barley Soup is Too Thick, What Do I Do? 

If you find that the soup is too thick for your liking after it is done simmering, add some more water until it reaches a consistency you are happy with. 

Tips for Making and Storing 

  • Be sure to add the kale while the soup is still hot so it will wilt. 
  • Store in an airtight container in the refrigerator up to 5 days. 
  • This barley soup is great for freezing. Let it cool completely before placing it in the freezer. To serve again, reheat on the stovetop over low heat until it is warm all the way through. 

Soups are great! Not only can you add layers and layers of flavors, but they also can be balanced nutritionally. Any good soup starts with mirepoix. I like to use dry herbs and spices in my soup recipes because you are able to add them during the cooking process, as they can stand up to the heat. 

Beef & Barley Soup in bowls with a white and blue striped napkin

This beef and barley soup may take a little longer to prepare, but it’s worth the wait.

Print
clock clock iconcutlery cutlery iconflag flag iconfolder folder iconinstagram instagram iconpinterest pinterest iconfacebook facebook iconprint print iconsquares squares iconheart heart iconheart solid heart solid icon
beef and barley soup in a white bowl

Beef and Barley Soup

  • Author: Chef Julie Harrington, RD
  • Prep Time: 20
  • Cook Time: 50
  • Total Time: 1 hour 10 minutes
  • Category: Soup
  • Method: Stove Top

Ingredients

Scale
  • 1/2 cup all-purpose flour
  • 1 teaspoon salt
  • 1 teaspoon pepper
  • 1 lb boneless beef chuck roast, fat trimmed off and cubed
  • 2 tablespoon olive oil
  • 1 large onion, chopped
  • 1 large carrot, peeled and chopped
  • 2 stalks celery, chopped
  • 3 cloves garlic, minced
  • 2 teaspoons dried oregano
  • 1/2 cup red wine
  • 3 tablespoon tomato paste
  • 4 cups low-sodium beef broth
  • 4 cups water
  • 3/4 cup hulless barley
  • 4 cups kale, spines removed and roughly chopped
  • 1 tablespoon fresh parsley, chopped

Instructions

In a shallow dish combine flour, salt, and pepper. Dredge the beef cubes with flour, shaking off excess flour. 

Heat the olive oil in a Dutch oven (or large pot) over medium-high heat. Add the beef to the pot and cook just until the meat starts to brown, turning as needed. Do this in 2 or 3 batches, to not crowd the pot. Remove the meat from the pot and set aside.

In the same pot, add the chopped onion, carrots, celery, garlic, and oregano. Cook the vegetables until soft, about 5 minutes, stirring occasionally. 

Deglaze the pan with red wine scraping the fond (the brown bits) from the bottom of the pan. Let simmer and reduce red wine by half. Add tomato paste and stir to coat the vegetables.

Add beef back to the pot with water and beef broth. Stir to combine.

Bring to a boil, add barley and turn down to a simmer for 45-50 minutes, until meat is tender and barley is cooked through. Stir occasionally so the barley won’t stick together. If you find that too much liquid has evaporated or the soup is too thick add more water as necessary until you get the desired consistency.

Remove soup from heat and stir in the kale while the soup is still hot to wilt. Season with salt and pepper, as needed. 

Garnish with parsley, if using.


Notes

If you do not want to use wine, deglaze with additional beef broth.

Keywords: barley, beef, soup, batch cooking, meal prep

Recipe Card powered byTasty Recipes

other recipes you may enjoy

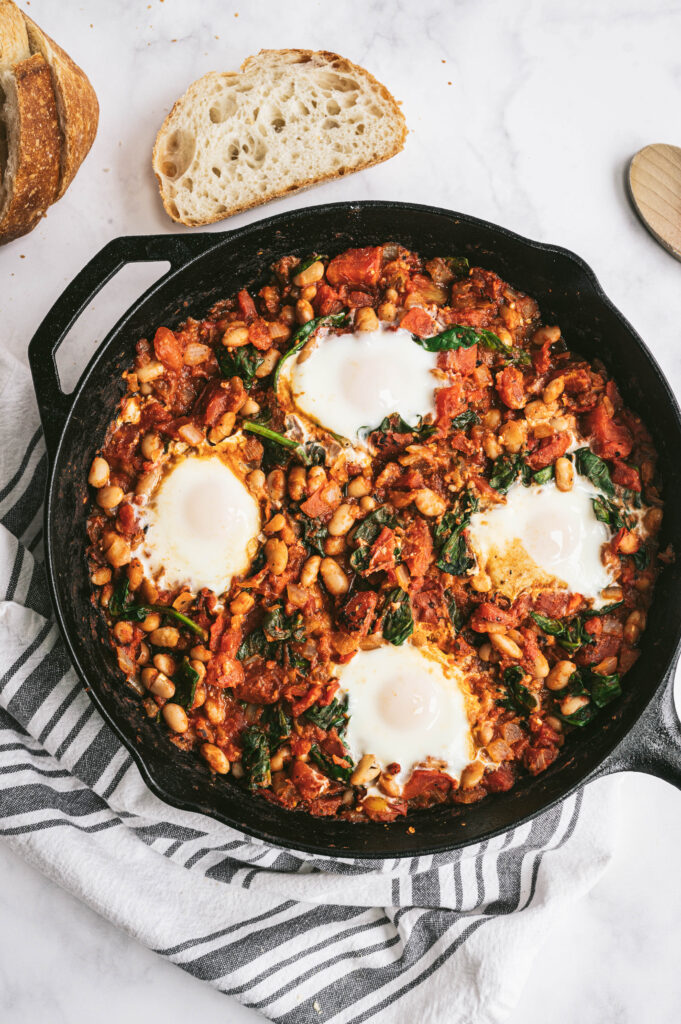
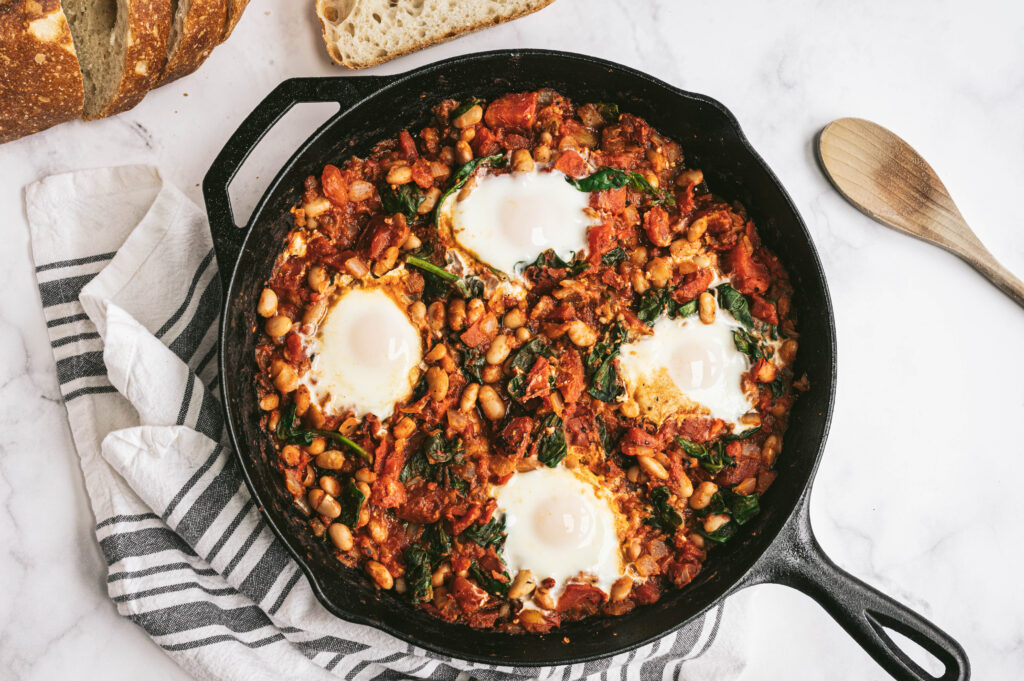
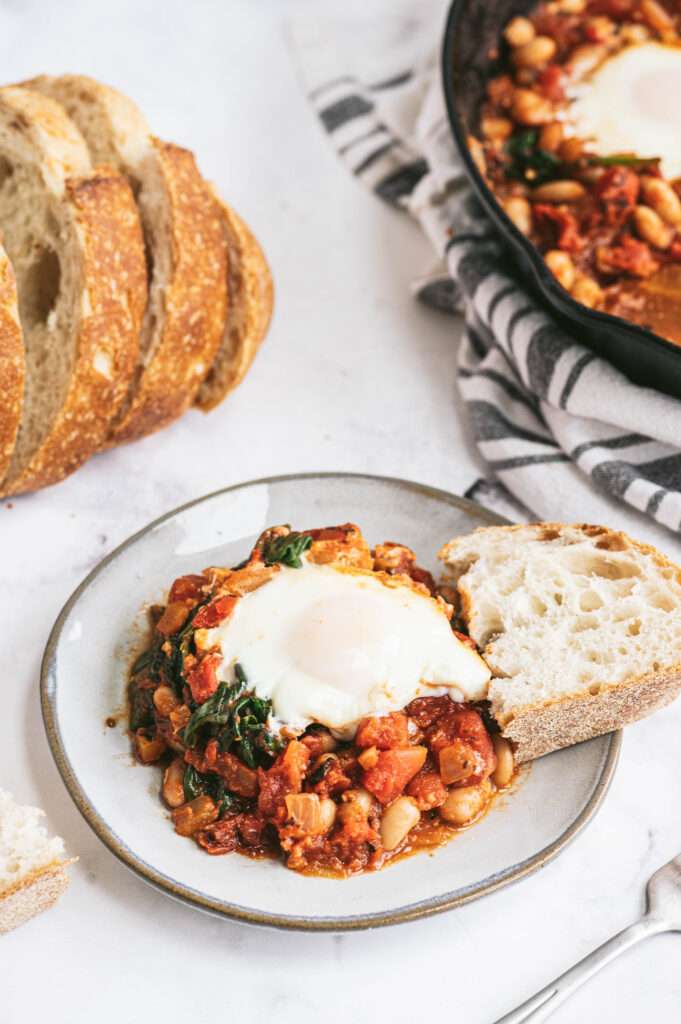
White Bean Shakshuka

Whip up this one-pan smoky White Bean Shakshuka for a weekend brunch, but it is just as good for breakfast, lunch, and dinner!

cast iron skillet with white bean shakshuka with a piece of bread

What is Shakshuka?

Shakshuka is a Mediterranean meal of poached eggs in a simmering tomato sauce with spices.

The beauty of this dish is that you can play around with the ingredients to customize it for your preference. I’ve even made a green shakshuka before!

Why you should always keep a well-stocked pantry.

Writing this blog post now, we are in the midst of COVID-19. We are taking fewer trips to the grocery store and may need to rely on pantry staples to create nutritious meals around. Mealtime inspiration is just a can opener away.

cast iron skillet with shakshuka

Is canned food healthy?

Canned foods are an easy, cost-effective way to eat healthy year-round. They are a simple, realistic way people can incorporate nutrients into meals.

Nutritionally speaking, canned food is comparable to its cooked fresh and frozen counterparts. Canned fruits and vegetables are packed at their peak of harvest, which means they are packed at their peak nutrient value. Crops that go directly from the field to the processor often retain vitamins better than those that travel hundreds of miles across the country and sit for days in produce bins. (resource)

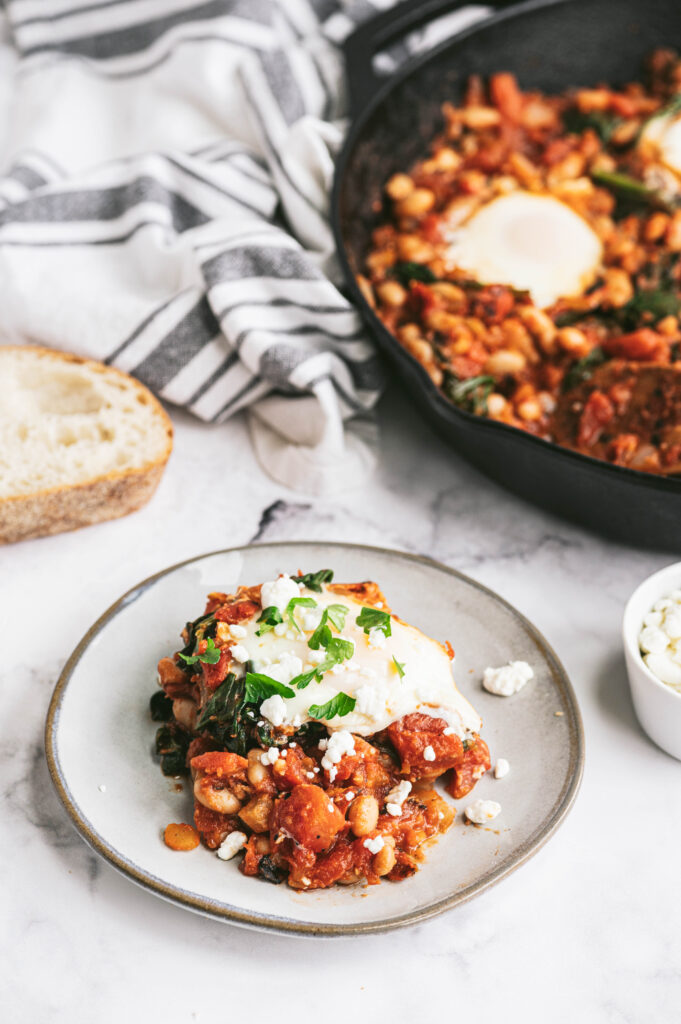
portion of white bean shakshuka on a ceramic plate

What ingredients give this shakshuka a smoky flavor?

The smoky flavor mainly comes from two ingredients in this recipe – the fire-roasted tomatoes and smoked paprika.

  • Fire-Roasted Tomatoes
    Fire-roasted tomatoes are made by charring the tomatoes over a flame before they’re diced and canned. You may even see little black flecks within your can. That is from the tomato making direct heat with the flame creating that smoky flavor.
  • Smoked Paprika
    Smoked paprika is made from pimiento peppers that have been dried and smoked over an oak fire, then ground into a fine powder, creating that earthy and smoky taste.
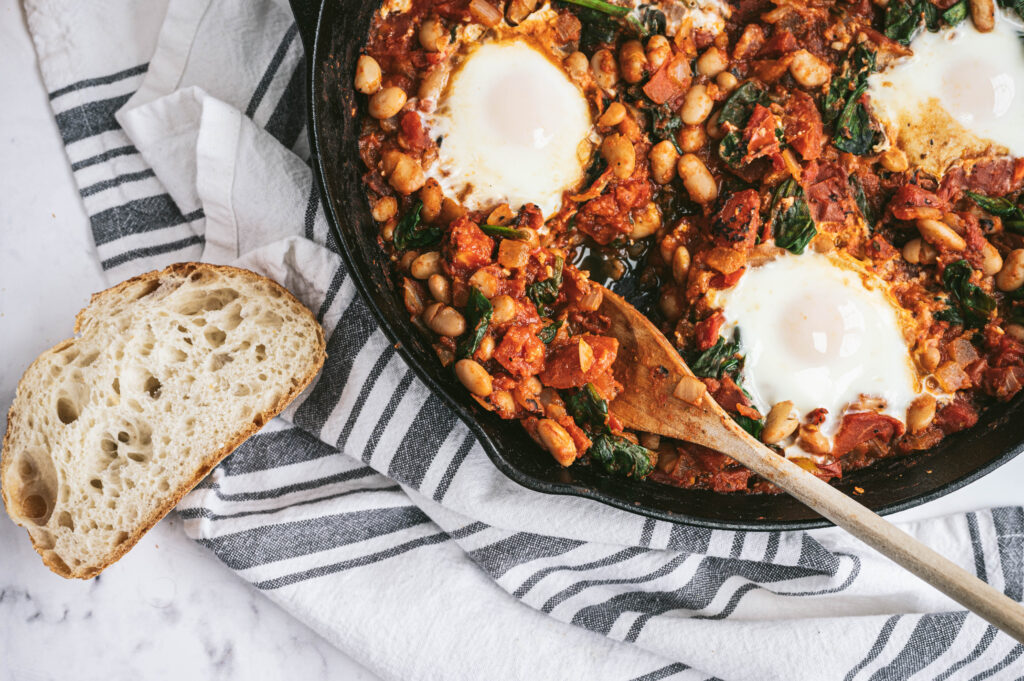
Cast iron skillet with a brunch recipe scooped with a wooden spoon

What equipment you need to make shakshuka:

  • Cast iron skillet or oven-safe pan* (see FAQ below if you don’t have one!)
  • Cutting board
  • Knife
  • Wooden spoon
  • Measuring spoons
  • Can opener
  • Colander
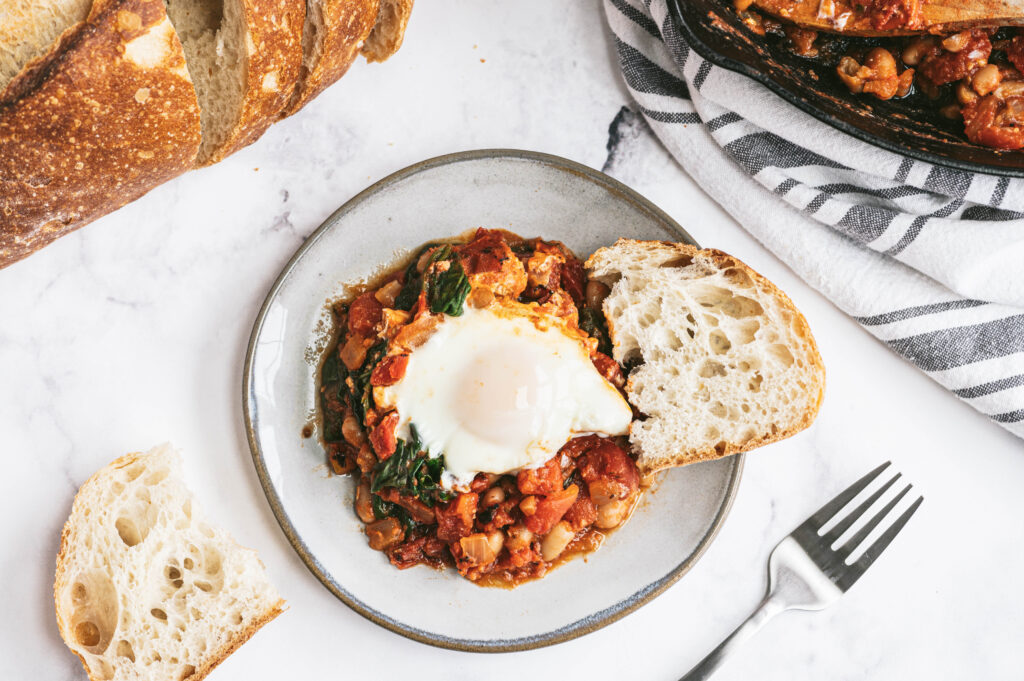
plate of tomato sauce mixture with an egg and bread

FREE Cooking Class:

This recipe was featured as part of Virtual Teaching Kitchen’s FREE virtual cooking classes. Click here to learn more about the Virtual Teaching kitchen.

Print
clock clock iconcutlery cutlery iconflag flag iconfolder folder iconinstagram instagram iconpinterest pinterest iconfacebook facebook iconprint print iconsquares squares iconheart heart iconheart solid heart solid icon

White Bean Shakshuka

  • Author: Chef Julie Harrington, RD
  • Prep Time: 10
  • Cook Time: 15
  • Total Time: 25 minutes
  • Yield: 4

Description

Whip up this one-pan smoky White Bean Shakshuka for a weekend brunch, but it is just as good for breakfast, lunch, and dinner!


Ingredients

Scale

2 teaspoons olive oil
1 medium sweet onion, diced
4 cloves garlic, minced
1 teaspoon smoked paprika
1/2 teaspoon oregano
1 tablespoon tomato paste
1 (28 oz) can fire-roasted crushed tomatoes
1 (15oz) can cannellini beans, drained and rinsed
2 cups packed baby spinach
4 large eggs
Salt, to taste Pepper, to taste
1/4 cup feta crumbles
2 tablespoons fresh parsley, chopped
Red pepper flakes, if desired
Crusty bread or pita, for serving


Instructions

  1. Preheat the oven to 375 degrees Fahrenheit. Heat olive oil in a large oven-safe skillet, preferably cast-iron over medium-high heat. Add onions and cook 2-3 minutes until tender and translucent. Add garlic and cook an additional 30 seconds.
  2. Add the smoked paprika, oregano, and tomato paste, consistently stirring for 1-2 minutes or until fragrant. 
  3. Pour in the crushed tomatoes with their juices, beans, and spinach. Reduce the heat to maintain a gentle simmer, and cook for 5 minutes to give the flavors time to come together and spinach has wilted.
  4. Turn off the heat. Use the back of a spoon to make a well in the tomato/bean mixture and crack the egg directly into it. Gently spoon a bit of the tomato mixture over the whites to help contain the egg. Repeat with the remaining eggs. Sprinkle with salt and pepper, to taste. 
  5. Transfer the skillet to the oven and bake for 8 to 12 minutes. They’re done when the egg whites are an opaque white and the yolks have risen a bit but are still soft. They should still jiggle in the centers. (Keep in mind that they’ll continue cooking after you pull the dish out of the oven.) Cook to preferred doneness.
  6. Transfer the hot skillet to a heat-safe surface like the stove. Top with crumbled feta, fresh parsley, and red pepper flakes, if desired. Serve in bowls with crusty bread or pita on the side.

Notes

Don’t have an oven-safe pan or cast-iron pan? No problem! Once you have cracked the eggs into the skillet, lower the heat and place a lid on top and cook until the desired doneness.

Recipe Card powered byTasty Recipes
plate of white bean shakshuka with poached egg and a slice of bread

FAQ:

What if I don’t have a cast-iron pan?

Not a problem! Once you have cracked the eggs into the skillet, lower the heat and place a lid on top and cook until the desired doneness.

What if I can’t find fire-roasted tomatoes?

You can use regular crushed tomatoes for this recipe! If you are looking for an extra smoky flavor, then add a little extra smoked paprika.

What if I don’t prefer the smoky flavor?

Use plain crushed tomatoes and paprika (not smoked).

Instant Pot Steel Cut Oats (+ Freezer-Friendly Tip)

Make mornings easier by meal prepping a batch of Instant Pot Steel Cut Oats for the week and follow a simple freezer-friendly tip to enjoy steel cut oats in just minutes.

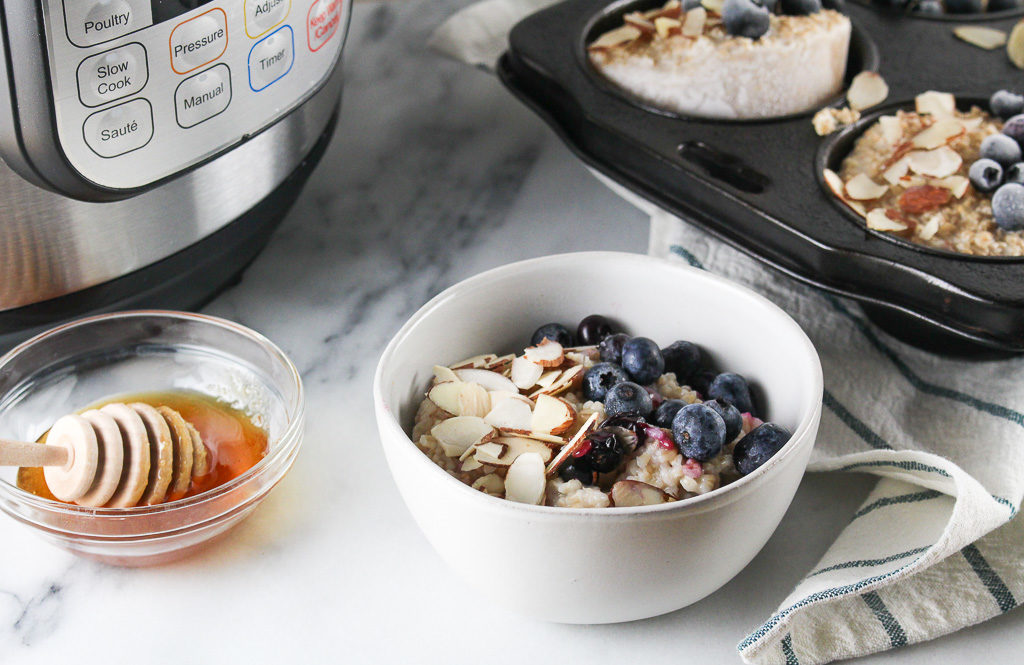
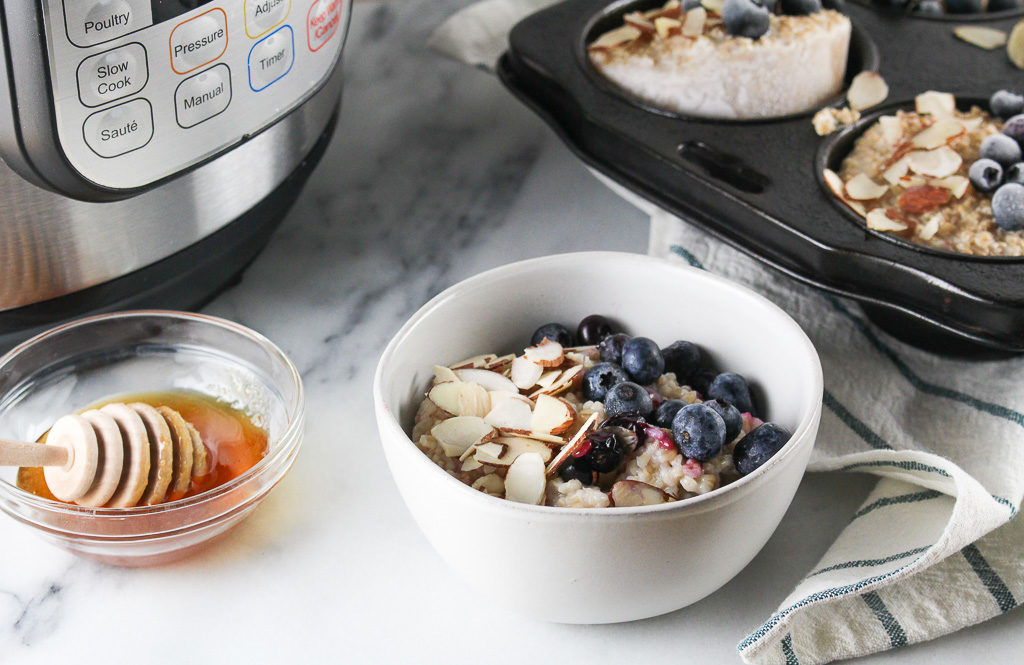
steel cut oats in a small white bowl with blueberries and sliced almonds

Who has time to make a fresh batch of steel-cut oats in the morning? If you do, more power to you, but like many, I prefer extra sleep vs. waking up earlier to make breakfast from scratch.

What Are Steel Cut Oats?

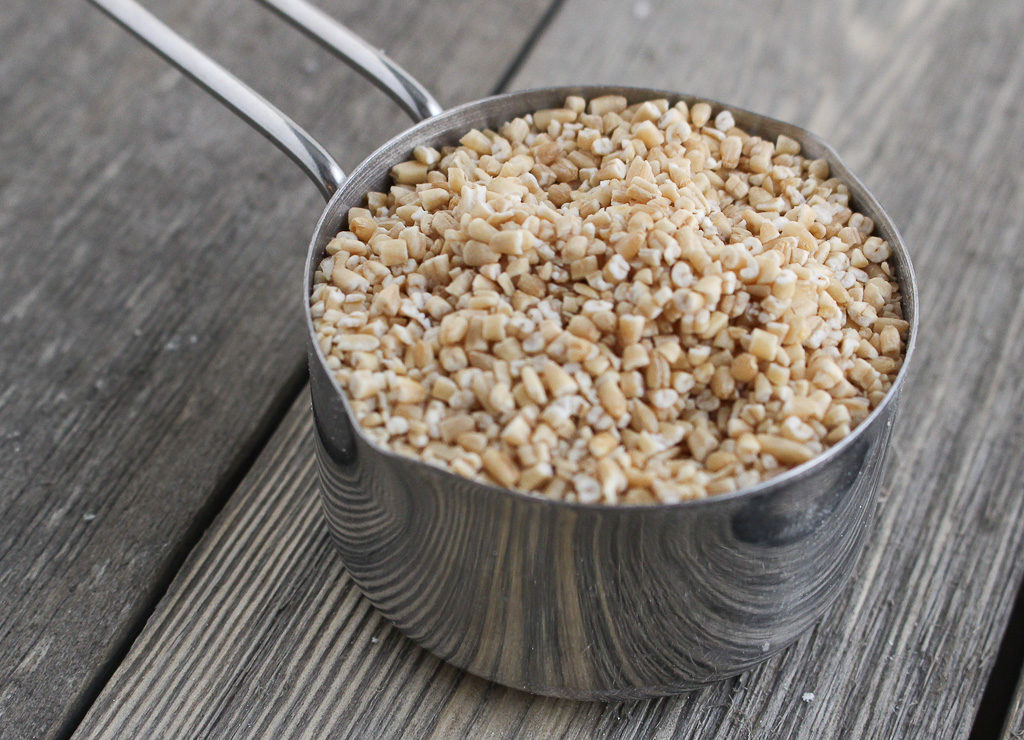
Steel cut oats are the least processed variety of oats, take the longest to cook, and maintain their texture better than others when it comes to a good bowl of oatmeal. It’s literally the whole oat, including the bran (the outermost layer). I previously talked about the differences between steel-cut, rolled, and quick oats.

Are Steel Cut Oats Healthy?

Yes! They are naturally gluten free for anyone with sensitivities and packed full of fiber. Most don’t know this, but one serving (without added toppings) has 7 grams of protein! Steel cut oats also have a lower glycemic index than others. Even if you don’t take the GI into consideration, know that this is a good concept for everyone, which means your body will digest it slower than other varieties and you will have less of a sugar spike.

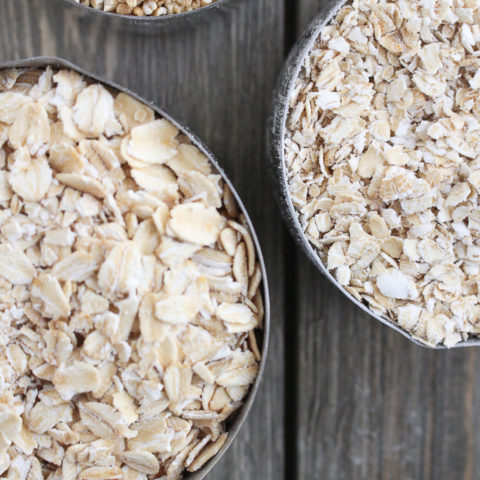
steel cut oats in a metal measuring cup

Does Using the Instant Pot Save Time? 

By the time the Instant Pot comes to pressure, the cooking time, and the pressure release time it’s about the same. BUT the greatest thing is that it’s hands-free cooking. So no stirring constantly, wondering if they are ready, and you can do other stuff while you wait on your breakfast!

Instead of spending time each morning making a serving of steel-cut oats meal prep a large batch for the week. Steel-cut oats can easily be made over the stovetop, but I love using the Instant Pot to make steel-cut oats because just add your ingredients, press a few buttons, and done!

steel cut oats in a white bowl with toppings on a marble slab next to the Instant Pot

Ingredients for Instant Pot Steel Cut Oats 

steel cut oats
water
cinnamon sticks – if you don’t have these you can use ground cinnamon instead

How to Cook Steel Cut Oats in a Pressure Cooker

Pour the steel cut oats and water into the Instant Pot and stir. Add in the cinnamon sticks or ground cinnamon and stir once more. 

Place the lid on the Instant Pot and turn the valve to the sealing position. 

Cook for 6 minutes using manual pressure. 

When the timer goes off, allow the pressure cooker to release naturally for 20 minutes, then turn the valve to the venting position. 

Toss out the cinnamon sticks and give it a good stir. 

Serve with your favorite toppings!

Steel Cut Oatmeal Topping Ideas

I prefer to make the batch of steel-cut oats pretty plain because then there is the flexibility to add different toppings to create different flavor combinations. I do enjoy adding a cinnamon stick to the pot and the cinnamon flavor infuses into the oats. (This can easily be done with a few shakes of ground cinnamon too.) Here are some more ideas.

Bananas & Blueberries – a favorite combination! Add these on top just before serving

Syrup & Honey – Need just a touch of sweetness? Drizzle some maple syrup or honey over the oats once they come out of the Instant Pot 

Pumpkin – you could add a couple of spoonfuls of pureed pumpkin before cooking, great for the fall! 

Apples – because that just makes sense with cinnamon! Dice them into small pieces (as even as possible) and stir before you cook or after as a topping. 

  • Other fresh fruit and berries
  • Nuts (almond, walnuts, pecans) 
  • Splash of milk to thin it out if needed.
  • Nut or seed butter
  • Chia seeds or ground flax meal

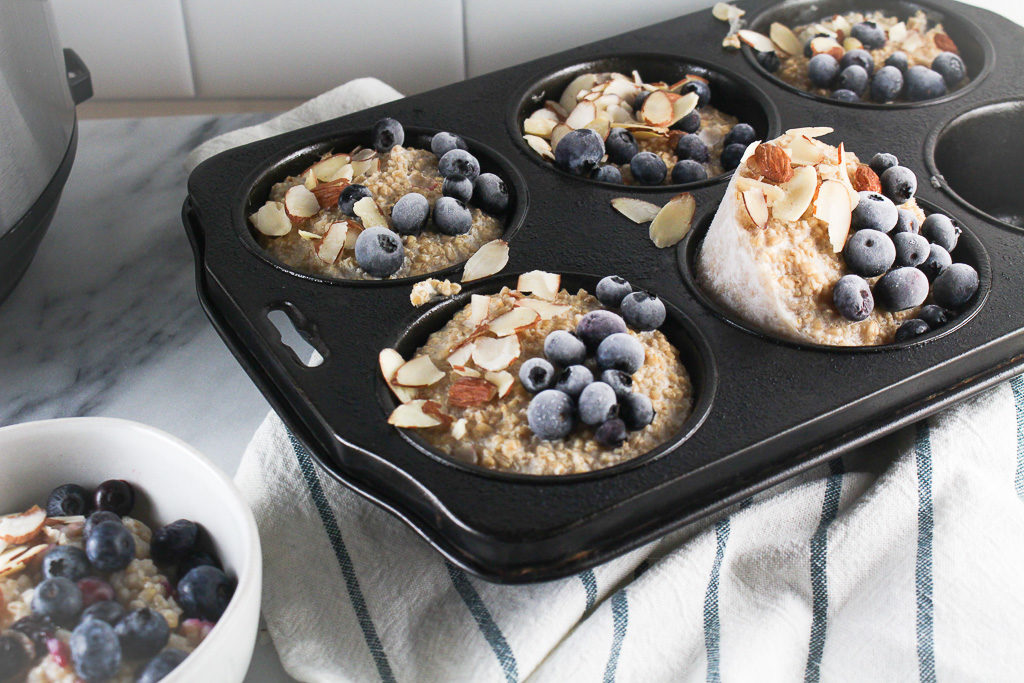
frozen steel cut oatmeal in a jumbo muffin tin

How Long Do Steel Cut Oats Last After Being Cooked? 

Once you have pressure cooked them, they stay fresh when kept in the refrigerator for up to a week. 

If you want to batch, I recommend freezing them. 

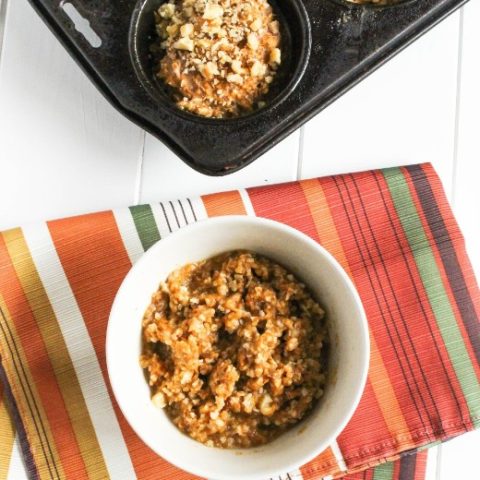
After making a batch of these Instant Pot Steel Cut Oats, spray a jumbo muffin tin with cooking spray and scoop about a cup of oats into each muffin tin well. Then add your favorite topping combinations.

Once hardened, dip the bottom of the muffin tin in warm water to help remove the single-serving steel cut oat portions and freeze in a container or bag for later use.

Then, simply add a single-serving portion of oats to a microwave-safe bowl with a few drops of water, and reheat in the microwave.

Print
clock clock iconcutlery cutlery iconflag flag iconfolder folder iconinstagram instagram iconpinterest pinterest iconfacebook facebook iconprint print iconsquares squares iconheart heart iconheart solid heart solid icon
Instant Pot Steel Cut Oats in a white bowl topped with blueberries and almonds

Instant Pot Steel Cut Oats

  • Author: Chef Julie Harrington, RD
  • Prep Time: 5
  • Cook Time: 6
  • Total Time: 11 minutes
  • Yield: 6
  • Category: Breakfast
  • Method: Instant Pot

Ingredients

Scale

2 1/2 cups steel cut oats
7 cups water
2 cinnamon sticks (or 1 teaspoon ground cinnamon)


Instructions

  1. Add steel cut oats, water, and cinnamon sticks to the Instant Pot and stir to combine.
  2. Secure Instant Pot lid and close the vent. Set Instant Pot on the manual setting for 6 minutes.
  3. When Instant Pot beeps, allow the pressure to naturally release for 20 minutes.
  4. Remove lid, discard cinnamon sticks, and stir oats to incorporate any water that has risen to the top.
  5. Serve with your favorite toppings. (Combination recommendation: blueberries, sliced almonds, and honey)

Notes

Leftover oats can be stored in the fridge for up to a week or utilize the freezer-friendly method.

Freezer-Friendly Method:
Spray a jumbo muffin tin with cooking spray and scoop about a cup of oats into each muffin tin well. Then add your favorite topping combinations. Once hardened, dip the bottom of the muffin tin in warm water to help remove the single-serving steel cut oat portions and freeze in a container or bag for later use.

Keywords: oatmeal, Instant Pot, steel cut oats, breakfast, cooking tip, oats

Recipe Card powered byTasty Recipes

Other recipes you may enjoy

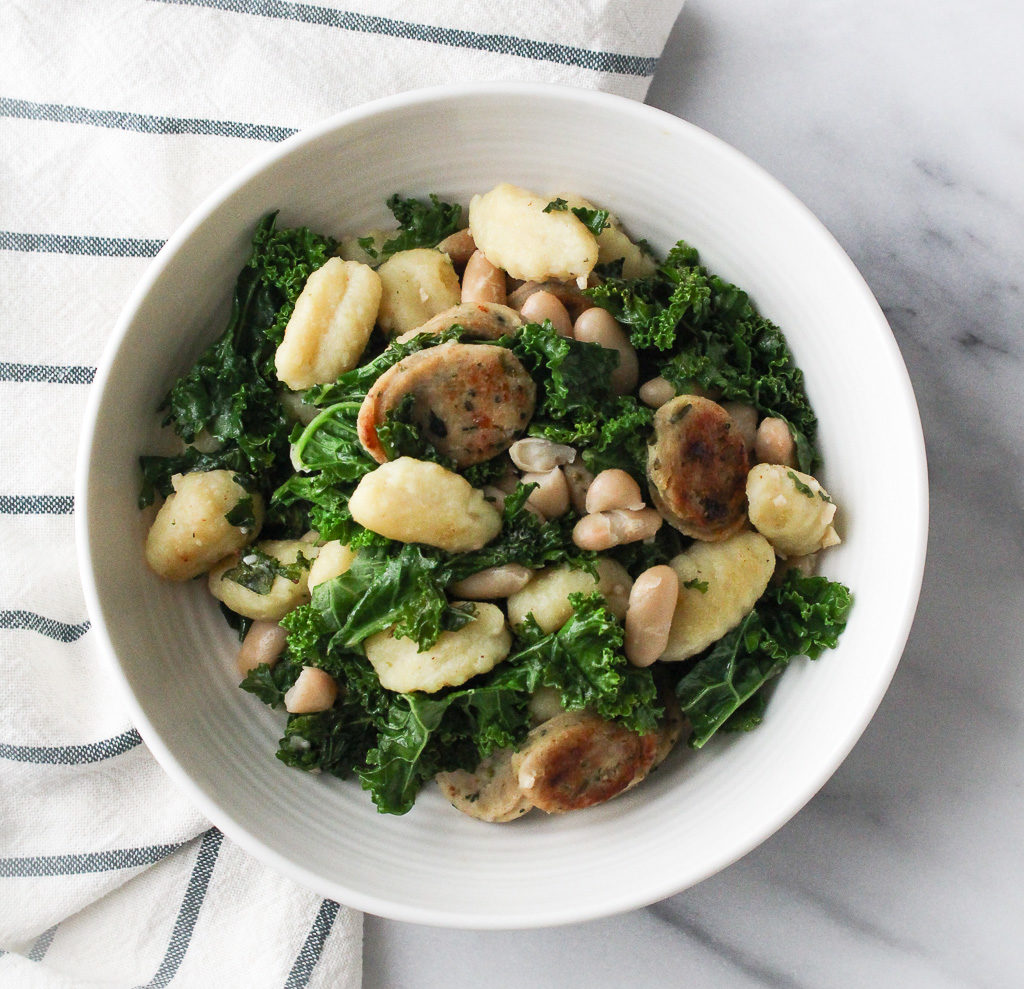
One-Pan Chicken Sausage & Gnocchi Sauté

This one-pan chicken sausage & gnocchi saute utilizes simple ingredients to create a delicious meal in minutes.

kale with chicken sausage and gnocchi

I never understood the mad rush to the grocery store when there is an inkling of news about the possibility of snow. Previously, working as a retail dietitian, the madness was unreal. The aisles with the bread and milk would be completely wiped out. I guess everyone’s instinct is to survive on bread and milk if they get snowed in? I’ll never understand.

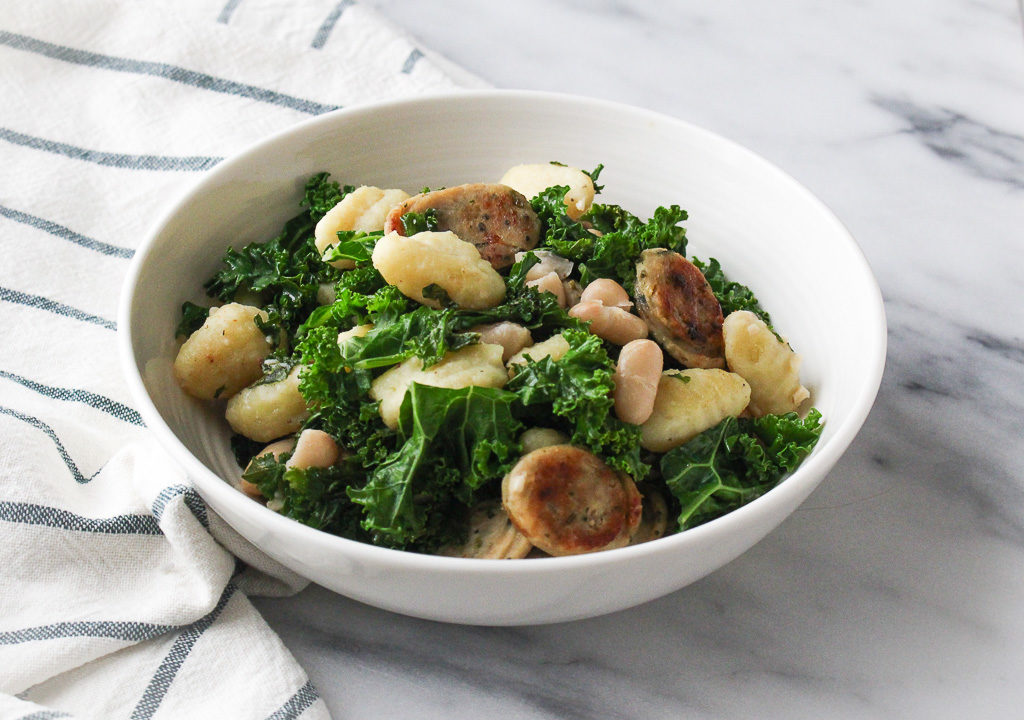
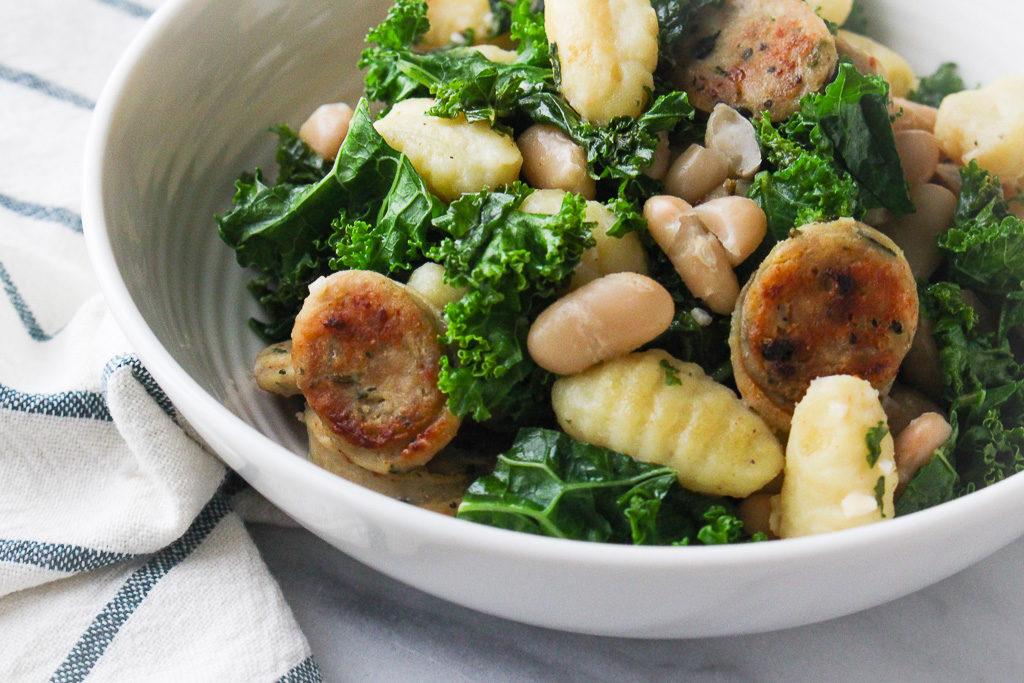
Sausage, gnocchi, and kale in a white bowl

My kitchen isn’t always completely stocked and with news of snow, I’m the last person you will see heading to the grocery store. I don’t want to deal with the craziness!

I think it’s fun to poke around the kitchen utilizing what I have on hand to create new meal ideas. I always say that makes me feel like I am on an episode of “Chopped“. (minus the crazy ingredients like cow’s tongue the contestants get in their mystery baskets)

One Pan Chicken Sausage & Gnocchi Sauté in a white bowl on a marble slab

Each kitchen no matter how big or small has four kitchen zones: the refrigerator, freezer, pantry, and countertops. Don’t just open the fridge and just decide “there’s nothing to eat, let’s grab take out.” Utilize the ingredients in each zone to create a meal. This recipe uses all four kitchen zones to create a delicious and balanced meal.

What Kind of Gnocchi Should I Use? 

You can use the kind you find that are shelf-stable, frozen, and can even use cauliflower gnocchi instead of potato. 

The gnocchi is cooked separately to start with, which is why you can use multiple brands of varieties. 

If you haven’t tried Trader Joe’s gnocchi, you are truly missing out!

Ingredients for Chicken Sausage Gnocchi

Gnocchi – as I mentioned earlier you can choose your favorite 

Olive oil

Chicken sausage – these are the link kind

Garlic cloves

White beans – any variety will work 

Kale 

Chicken broth – try to get low sodium if you can

How to Make Chicken Sausage Gnocchi in Less Than 30 Minutes

Before we get started, go ahead and cook the gnocchi according to the instructions on the packaging. 

While that’s cooking, prep your kale by removing the ribs and chopping it coarsely. 

Then add a tablespoon of oil over medium heat and cook the chicken sausages, just until they are browned. Take them out of the pan and set aside. 

Using the same pan, heat the rest of the oil and add the minced garlic, drained white beans, and cooked gnocchi. 

Cook until the gnocchi and beans are warmed. Be sure to keep a close watch on the garlic, you do not want it to burn. You can turn down the heat if needed. 

Add the sausage links back to the pan followed by the kale and chicken broth. Stir and cover until the kale wilts. 

Take the lid off and continue cooking just to allow the excess liquid to evaporate. 

Top with some parm and serve! 

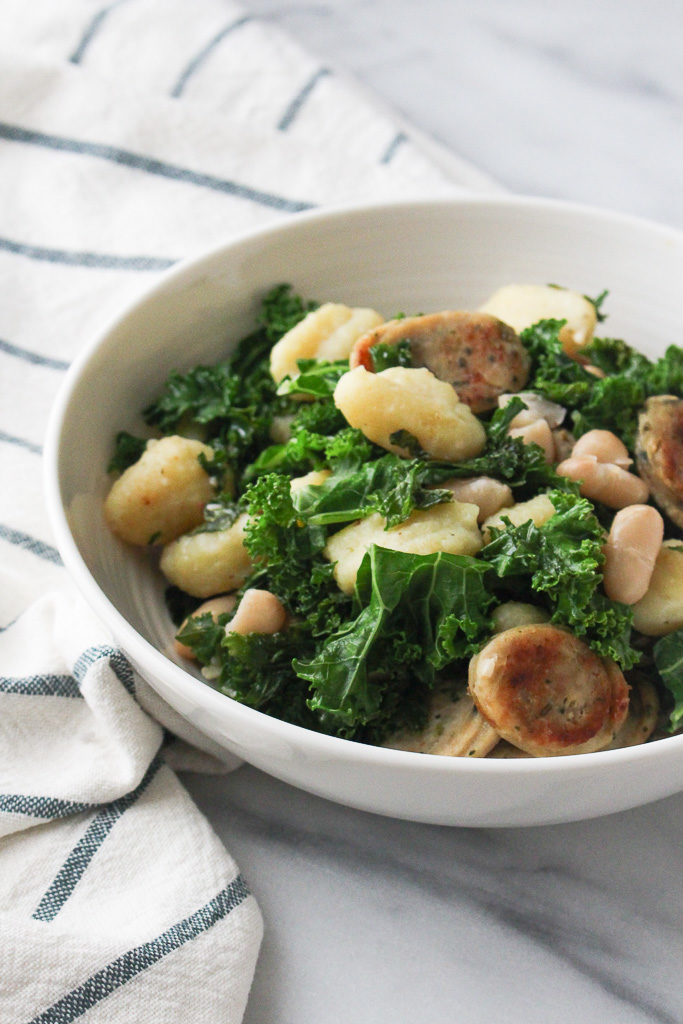
chicken sausage and gnocchi in a white bowl next to a dish towel

No need to rush to the grocery store when there is snow in the forecast. Just utilize what you have in each kitchen zone! And with simply one pan, chicken sausage & gnocchi saute came together in minutes.

Print
clock clock iconcutlery cutlery iconflag flag iconfolder folder iconinstagram instagram iconpinterest pinterest iconfacebook facebook iconprint print iconsquares squares iconheart heart iconheart solid heart solid icon
One Pan Chicken Sausage & Gnocchi Sauté in a white bowl

One Pan Chicken Sausage & Gnocchi Sauté

  • Author: Chef Julie Harrington, RD
  • Prep Time: 10
  • Cook Time: 25
  • Total Time: 35 minutes
  • Yield: 4
  • Category: dinner
  • Method: one pan

Description

One Pan Chicken Sausage & Gnocchi Sauté making meal time a breeze


Ingredients

Scale

10 oz. gnocchi*, cooked according to package directions
2 tablespoons olive oil, divided
4 links chicken sausage*, sliced on a bias
4 cloves garlic, minced
1 (15.5 oz.) can white beans, drained and rinsed
6 cups kale, ribs removed and roughly chopped
1/4 cup low-sodium chicken broth


Instructions

Cook gnocchi according to package directions. 

Heat 1 tablespoon of olive oil over medium-high heat. Cook chicken sausages until browned. Remove from pan and set aside.

Heat remaining 1 tablespoon of olive oil in the same pan. Add garlic, white beans and gnocchi. Saute until beans and gnocchi are warmed through. (Keep an eye on the garlic. Do not let it burn. Turn down heat if needed.)

Add chicken sausage back into the pan. Then, add kale and chicken broth. Stir to thoroughly combine ingredients. Cover until kale wilts. Remove lid and allow excess moisture to evaporate. 

Serve. Top with parmesan cheese, if desired. 


Notes

  • *Can use cauliflower gnocchi in this recipe, if desired.
    *I used Alfresco chicken sausage.

Keywords: kale, chicken, chicken sausage, one pan, gnocchi, white beans, beans, dinner

Recipe Card powered byTasty Recipes

This post may contain affiliate links. To find out more information, please read my disclosure statement.

other recipes you may enjoy

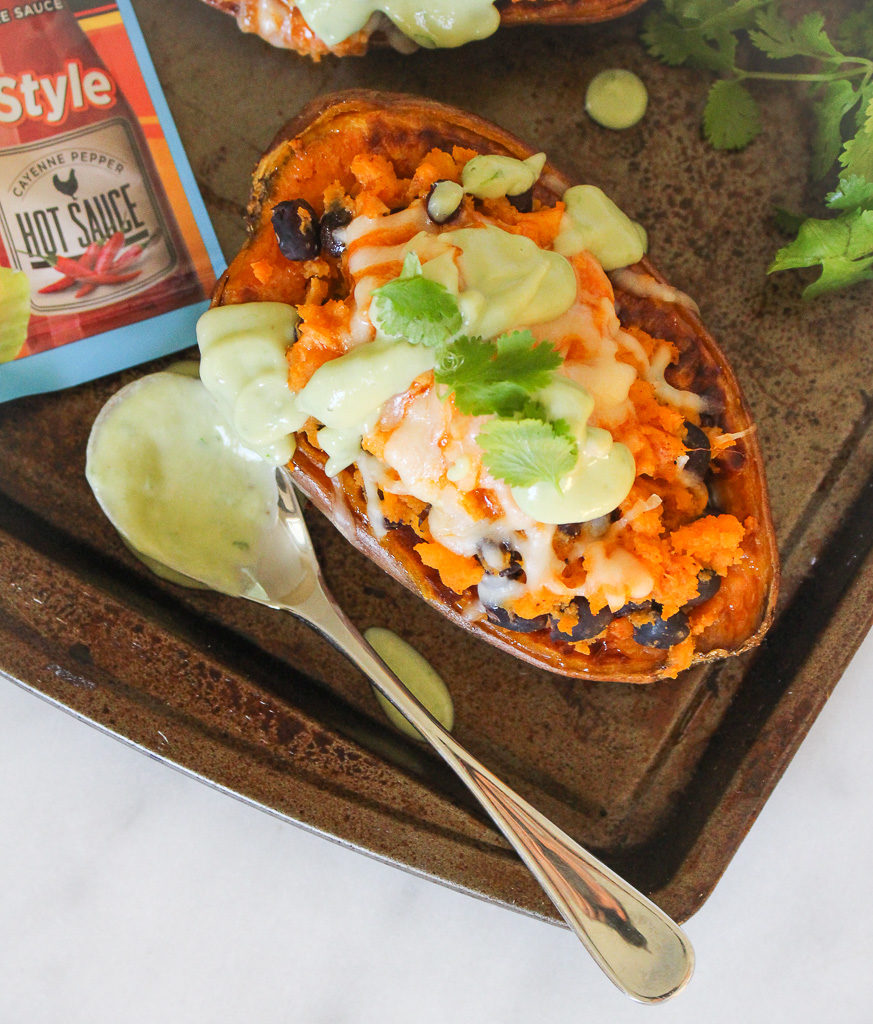
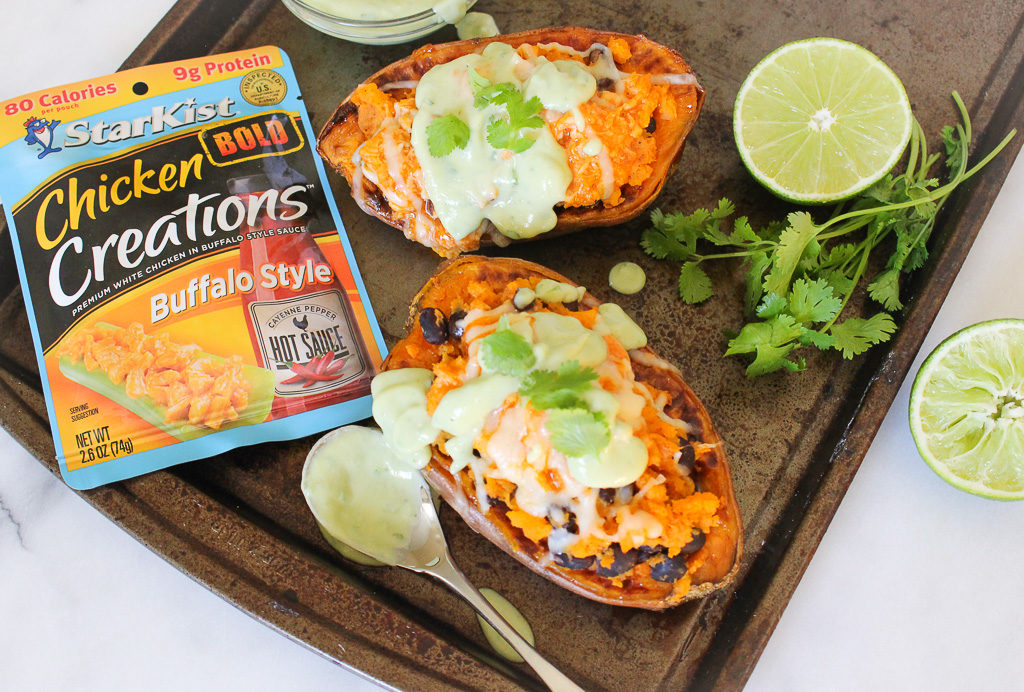
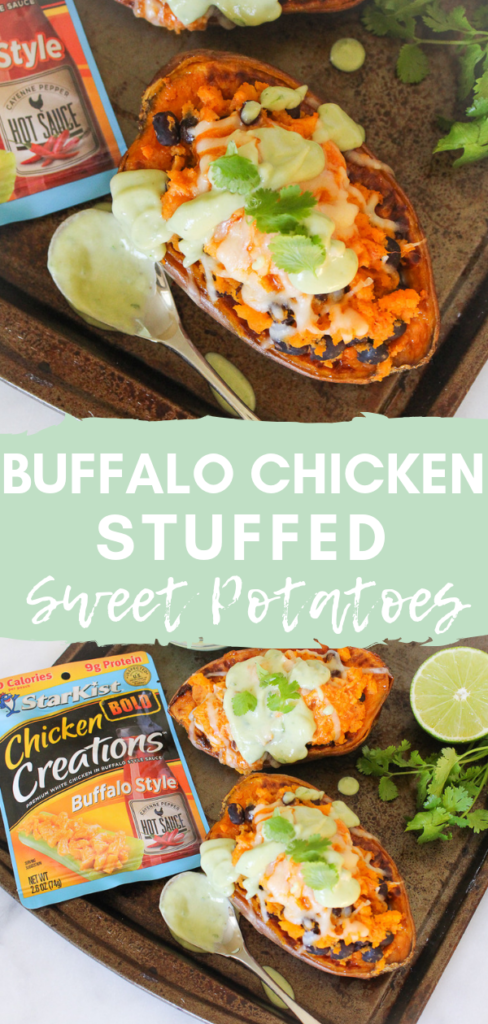
Buffalo Chicken Stuffed Sweet Potatoes

Whip up these quick and delicious Buffalo Chicken Stuffed Sweet Potatoes that have been sponsored by StarKist, but of course, all opinions expressed are my own. Thank you for like-minded brands for making this blog possible!

Buffalo Chicken Stuffed Sweet Potatoes via Chef Julie Harrington, RD @ChefJulie_RD

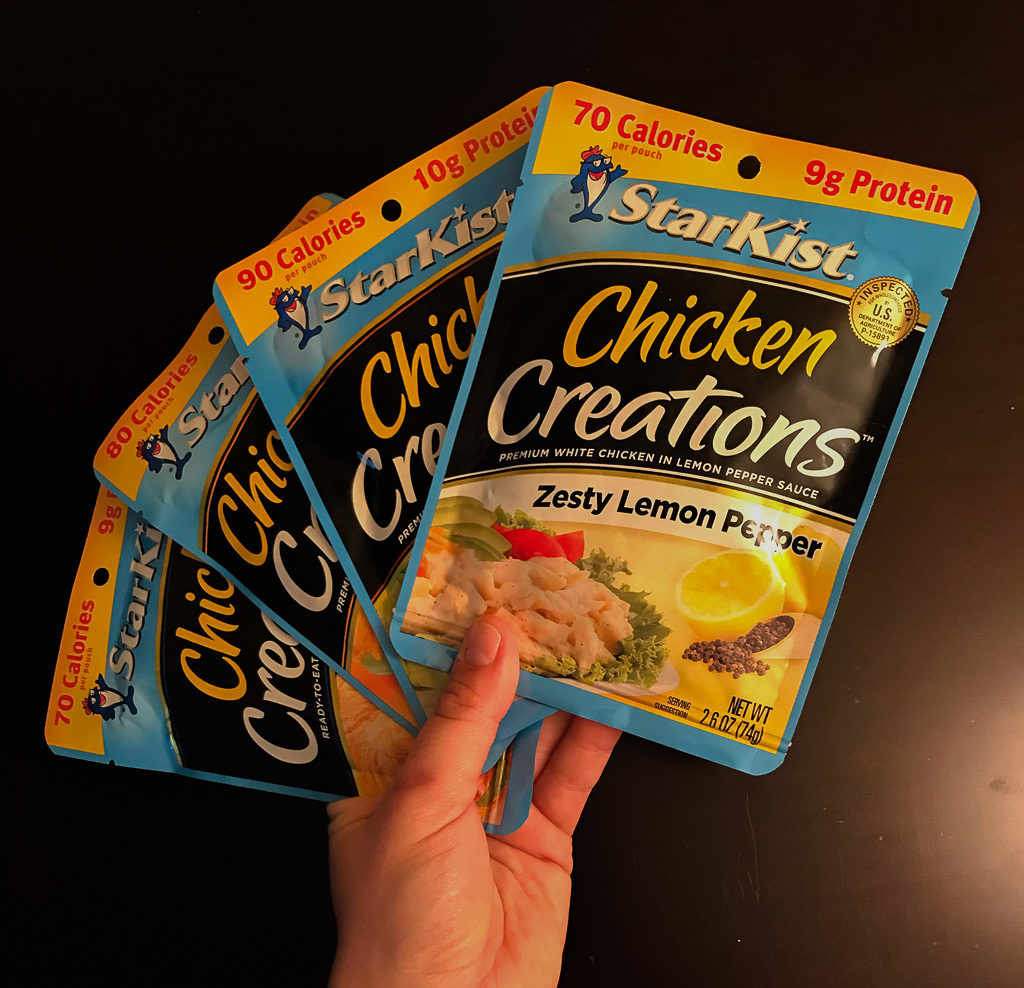
Traveling is always fun and like many of you, I make sure I am always packing plenty of food for my travel adventures. No one wants to be stuck in the car, train, or airplane hangry. One food group that sometimes is a struggle packing for travel is protein. I don’t want to be that person that whips out hard boiled eggs and be known as the stinky food traveler that gets stuck sitting next to me. StarKist’s new Chicken Creations are making protein on the go a cinch. These Chicken Creations come in a pouch that is ready to be on the move – just tear, eat, and go!

Buffalo Chicken Stuffed Sweet Potatoes via Chef Julie Harrington, RD @ChefJulie_RD

If we are friends on Instagram you saw that I recently was at FNCE (Food & Nutrition Conference & Expo), the world’s largest meeting of food and nutrition experts — more than 10,000 registered dietitian nutritionists, nutrition science researchers, policy makers, health-care providers, and industry leaders attend the annual meeting — and address key issues affecting the health of all Americans.

Buffalo Chicken Stuffed Sweet Potatoes via Chef Julie Harrington, RD @ChefJulie_RD

At FNCE, I spent most of my time at the expo hall connecting with RDN colleagues and businesses. I made a stop over to StarKist’s booth to chat with Laura Ali, MS, RDN, LDN of StarKist. I love that brands are hiring registered dietitians on staff to provide evidence-based nutrition. I wish more brands would do that! We chatted about StarKist’s new Chicken Creations pouches. If you didn’t know, they already have convenient pouches for tuna, salmon, and now chicken!

Buffalo Chicken Stuffed Sweet Potatoes via Chef Julie Harrington, RD @ChefJulie_RD

Image mid-boomerang!

Last week I posted on my Instagram stories, asking what you wanted to learn more about StarKist’s new tear and go Chicken Creations. You asked, they answered! I went back to Laura Ali, MS, RDN, LDN of StarKist with your questions and here is what she said.

Laura Ali, MS, RDN, LDN of StarKist answers your questions about StarKist Chicken Creations

Q: What defines “premium white chicken”? Does it come from chicken breast or other parts as well?
A: “Our chicken is 100% white meat with no dark meat added”

Q: How is the chicken cooked?
A: The chicken is lightly grilled and then cooked to a safe internal temperature before it is mixed with our seasonings and added to the pouch. It is then vacuum sealed and then retorted for sterility.

Q: What is the shelf life?
A: 3 years

Q: Is the pouch recyclable?
A: Not at this time. We are actively investigating options for how to recycle the pouch.

Q: What is the pouch made of?
A: The pouch is made of food grade materials. It has 4 separate layers of aluminum, polypropylene, nylon, and polyester.

Q: Can you heat the chicken in the pouch?
A: No, it is not a microwaveable pouch so you should remove the chicken and place it in a separate container to microwave.

Q: Will other flavors be coming out?
A: Our beaks are sealed! But you can be assured StarKist has a strong innovation agenda with many new products planned for the future!

Buffalo Chicken Stuffed Sweet Potatoes via Chef Julie Harrington, RD @ChefJulie_RD

I am all about quick and easy recipes. Coming back from FNCE, I didn’t have my usual meal prep done since I got home on a Tuesday evening. I was able to whip up this recipe from ingredients I had on hand. Having protein ready to go in my pantry was clutch. StarKist Chicken Creations are ready to eat as is. I’ve been also grabbing a pouch as I’m running out the door to top a simple salad with for quick and easy lunch. The possibilities are endless!

Print

clock clock iconcutlery cutlery iconflag flag iconfolder folder iconinstagram instagram iconpinterest pinterest iconfacebook facebook iconprint print iconsquares squares iconheart heart iconheart solid heart solid icon
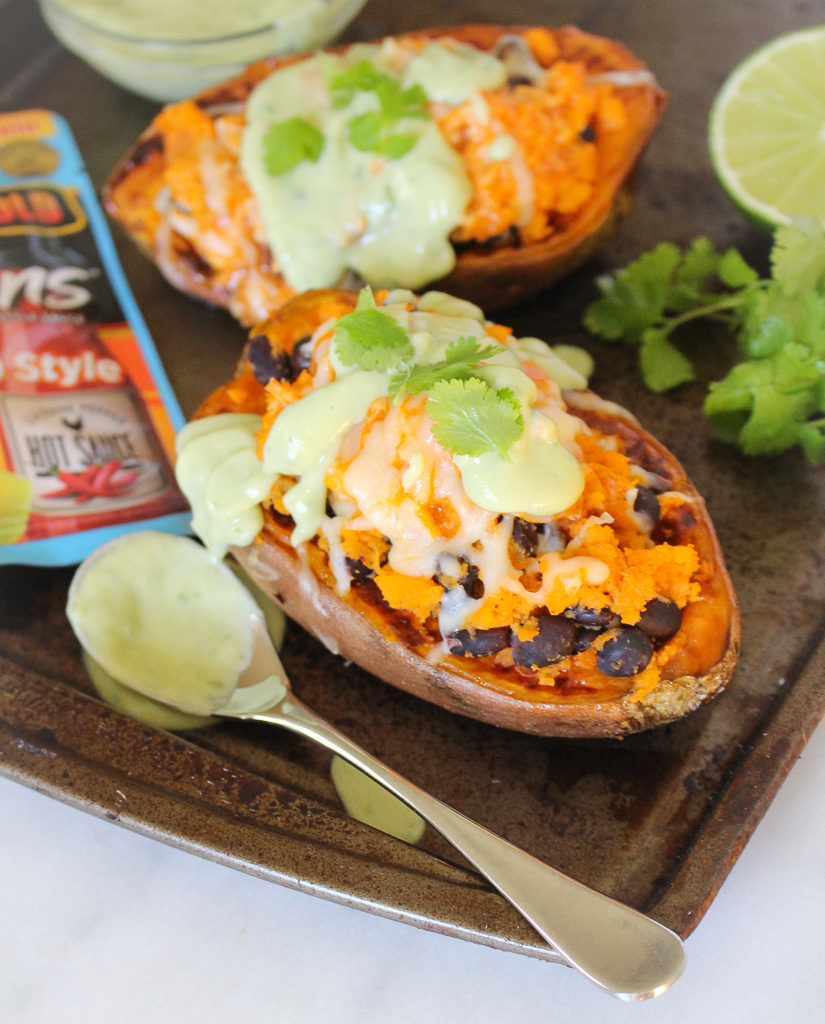
Buffalo Chicken Stuffed Sweet Potatoes on a sheet pan

Buffalo Chicken Stuffed Sweet Potatoes

  • Author: Chef Julie Harrington, RD
  • Prep Time: 5
  • Cook Time: 40
  • Total Time: 45 minutes
  • Yield: 2
  • Category: lunch, dinner

Ingredients

Scale

1 large sweet potato
1 teaspoon chili powder
2 teaspoons garlic powder
1/2 cup black beans
2 (2.6 oz.) packets of Starkist Chicken Creations BOLD Buffalo Style
1/4 cup mozzarella cheese

For the Avocado Lime Sauce:
1/2 avocado
1/4 cup plain yogurt
1/2 lime, juiced
2 tablespoons cilantro
23 tablespoons water (more if needed)
salt and pepper, to taste.


Instructions

Preheat the oven to 425 degrees F. Line a baking sheet with parchment paper, cut the sweet potatoes in half lengthwise, and place both halves flat side down on the baking sheet. Bake in the oven for 30 minutes.

Once the sweet potato halves are finished cooking, remove from the oven. Let cool enough to be able to handle. Scoop out the inside of the sweet potato halves and place in a bowl. Add the chili powder and garlic powder; mix together. Fold in the black beans.

Scoop the mixture back into the sweet potato skins. Top each sweet potato with one packet of Starkist Chicken Creations BOLD Buffalo Style and sprinkle with mozzarella cheese. Place back in the oven for about 8-10 minutes or until heated through.

While sweet potatoes are cooking, combine avocado, yogurt, lime, cilantro, and water in a blender or a small food processor. Blend until smooth. Season with salt and pepper, to taste.

Remove sweet potatoes from the oven and drizzle with avocado sauce.


Notes

Don’t love buffalo sauce? Try this same recipe with one of Starkist’s Chicken Creations other flavors: Chicken Salad, Ginger Soy, or Zesty Lemon Pepper.

Keywords: buffalo, sweet potato, southwest, chicken, avocado

Recipe Card powered byTasty Recipes

Chef Julie Harrington, RD - Culinary Nutrition Consultant of chefjulierd.com

Buffalo Chicken Stuffed Sweet Potatoes via Chef Julie Harrington, RD @ChefJulie_RD

Turkey Pumpkin Chili

Pumpkin isn’t only for sweet recipes. Try switching things up and use pumpkin in a savory cooking application. Start with this Turkey Pumpkin Chili! 

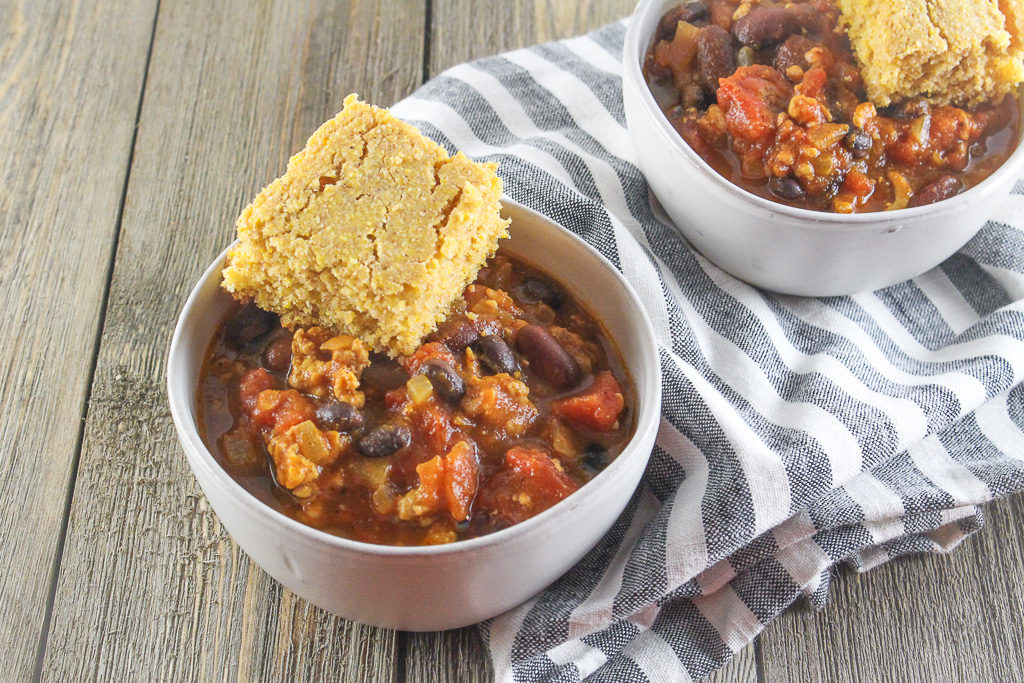
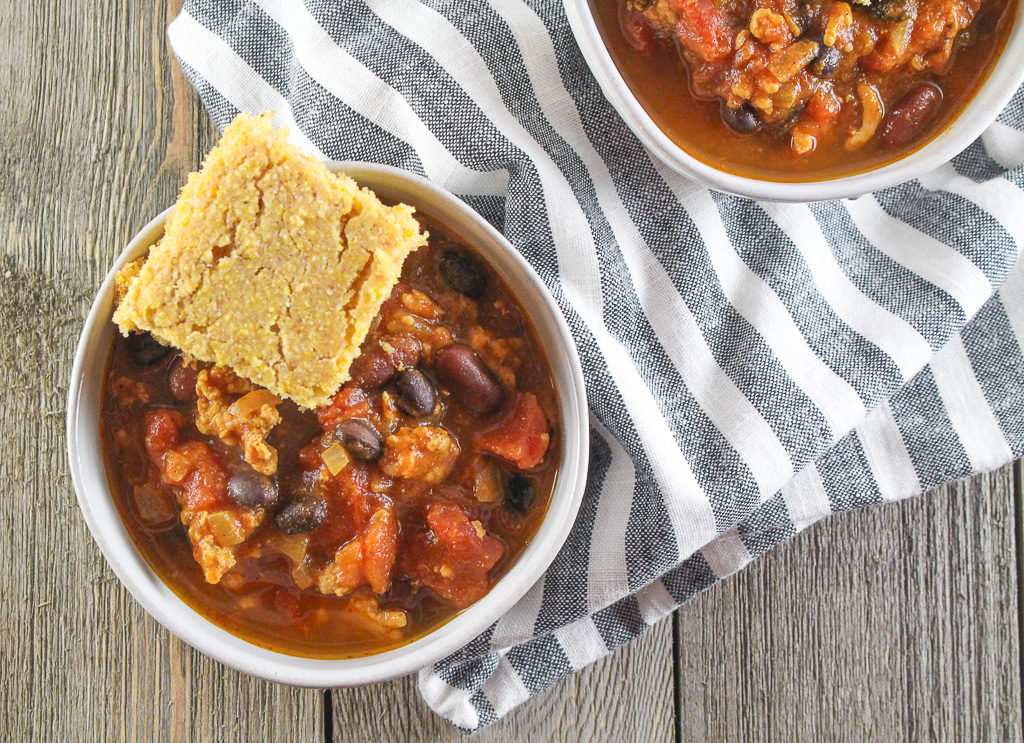
Turkey Pumpkin Chili with a piece of cornbread in a white bowl

How is October already coming to an end? Fall is a busy time for me with conferences and a lot of work travel. Also during this time of year, I’m sure your Pinterest boards are being saturated with pumpkin everything! I am would say I am a self-proclaimed pumpkin lover, but my RD friend Maggie I would nominate as the president of the pumpkin lover’s club. She just came out with a pumpkin cookbook featuring 50 creative pumpkin flavored, shaped, & spiced recipes.

Turkey Pumpkin Chili with piece of cornbread in a white bowl

Did You Know?

A few years back I was at a conference and an RD from Nestle was there speaking about Libby’s canned pumpkin. That brand is a staple across supermarkets nationally. I’m sure many of you, like myself, stock up on Libby’s canned pumpkin this time of year. I was fascinated to learn they exclusively use Dickinson pumpkins, which are a special strain of pumpkins.

Why Dickinson Pumpkins?

Libby’s acquired the rights to the “Libby’s Select Dickinson” pumpkin in 1929 from the Dickinson family who brought it in the early 1800s from Kentucky. If you ever Google “Dickinson pumpkin” images that appear look like a pale, slightly misshapen butternut squash, not the jack-o-lantern pumpkin you may be thinking of. When Dickinson pumpkins are grown and cultivated just right, they yield a sweet, bright orange flesh that’s amazing in dishes from pies to pasta, and a healthier ingredient to swap into some of your favorite recipes.

Confession: One year I was a little too pumpkin obsessed. I ate it in my oats for breakfast, stirred it in my yogurt, made smoothies, breads, soups every. single. day. I had a tad too much beta-carotene and my palms started turning orange. Lesson learned.

While pumpkin is used in sweet applications the majority of the time, pumpkin works well with savory applications. This chili is perfect for someone who isn’t too crazy about super spicy chili. It’s a mellow flavor with a hint of sweet. I feel like chili isn’t complete without a slice of cornbread. I always crumble up the cornbread right into the chili.

Print
clock clock iconcutlery cutlery iconflag flag iconfolder folder iconinstagram instagram iconpinterest pinterest iconfacebook facebook iconprint print iconsquares squares iconheart heart iconheart solid heart solid icon
white bowl with turkey pumpkin chili with a piece of cornbread

Turkey Pumpkin Chili

  • Author: Chef Julie Harrington, RD
  • Prep Time: 10
  • Cook Time: 20
  • Total Time: 30 minutes
  • Yield: 6
  • Category: chili

Ingredients

Scale
  • 2 tablespoons olive oil
  • 1 medium onion, diced
  • 3 cloves garlic, minced
  • 1 lb. ground turkey breast
  • 1 1/2 tablespoons chili powder
  • 1 teaspoon cumin
  • 1/4 teaspoon cinnamon
  • 1/4 teaspoon cayenne pepper
  • 1 (28 oz) can no salt added diced tomatoes
  • 1 (15 oz) can pumpkin puree (not pie filling)
  • 2 cups low sodium chicken stock
  • 1 (15 oz) can black beans, drained & rinsed
  • 1 (15 oz) can red kidney beans, drained & rinsed
  • pinch of salt and pepper

Instructions

  1. Heat oil in a large pot over medium heat. Add the onion and garlic. Cook until tender, about 5 minutes. Add the turkey, and cook until browned, stirring occasionally.
  2. Stir in the chili powder, cumin, oregano, cinnamon, and cayenne pepper, and cook for 1-2 minutes.
  3. Add in the diced tomatoes, pumpkin, chicken stock and beans, and stir to combine.
  4. Bring the chili to a boil, then reduce the heat and simmer, uncovered, for 20 minutes.
  5. Serve with cornbread.

Notes

This chili freezes well. Make a large batch and freeze half for another time.

Keywords: chili, pumpkin, turkey,

Recipe Card powered byTasty Recipes

Other recipes you may enjoy

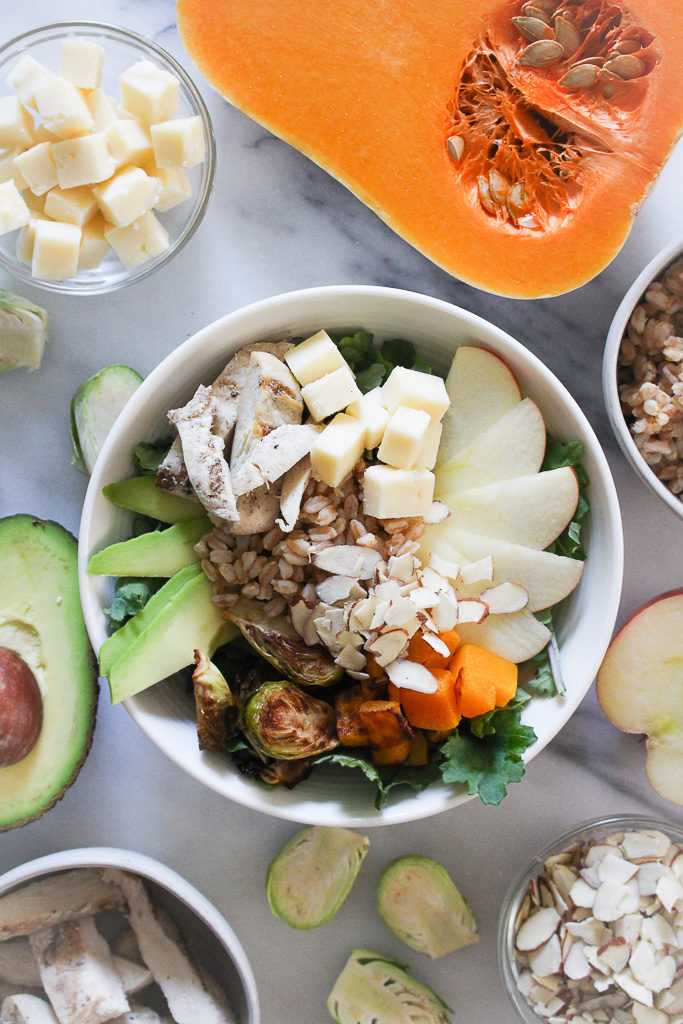
Fall Harvest Nourish Bowl

Fall Harvest Nourish Bowl via Chef Julie Harrington, RD @ChefJulie_RD #powerbowl #nourishbowl #salad #fall

Have you ever had one of those aha moments at work where you just feel like, this is what I was meant to be doing? When I was younger and was asked, what do you want to be when you grow up, my answer wasn’t a dietitian/chef. Yes, I always loved cooking, but honestly, my response was less than typical than my other classmates who wanted to be teachers, police officers, and doctors. Mine was a whale trainer. Yup. I loved animals (and still do!) and became fascinated with orca whales when I was in 2nd grade.

Fall Harvest Nourish Bowl via Chef Julie Harrington, RD @ChefJulie_RD #powerbowl #nourishbowl #salad #fall

So how did I get here? Well honestly, as a senior in high school I was like many others – I had no idea what I wanted to do. I was interested in plenty of careers, but nothing stood out to me to directly pursue. Since I was really unsure, I was looking at colleges that had a variety of offerings, but honestly, I really wanted to play a sport and Cabrini college was talking to me about playing field hockey. I went into my first year at Cabrini with a major in Health Professions.

As I was completing my gen-ed courses I started taking courses for my major and looking into the future with that major, I was thinking of all the things I wanted to do, but wouldn’t be able to pursue with just that degree. Along with a brutal first year at college (that is a whole other crazy story), I decided to leave Cabrini.

Fall Harvest Nourish Bowl via Chef Julie Harrington, RD @ChefJulie_RD #powerbowl #nourishbowl #salad #fall

That summer was difficult. I felt lost. I definitely had the support of my friends and family during this time trying to figure out what I wanted to do next. It was to my benefit that my mom is a high school guidance counselor and has the inside scoop about a plethora of colleges as she helps high school seniors apply to college. When my mom suggested Johnson & Wales University, I was skeptical. Culinary school? But then I learned about their culinary nutrition program and I fell in love. I was always drawn to the health professional field and being able to merge my love of cooking with nutrition seemed like the perfect fit. I literally applied (and got in!) about a week before the semester started. Talk about fast decisions!

I look back on that summer and remind myself that whenever in a tough situation, things will work out and never settle for anything that doesn’t make you happy. I truly appreciate the opportunities I have within the culinary nutrition field. It feels like this is what I was meant to be doing. I hope my passion is transferred over to others when I present on culinary nutrition topics and demonstrations.

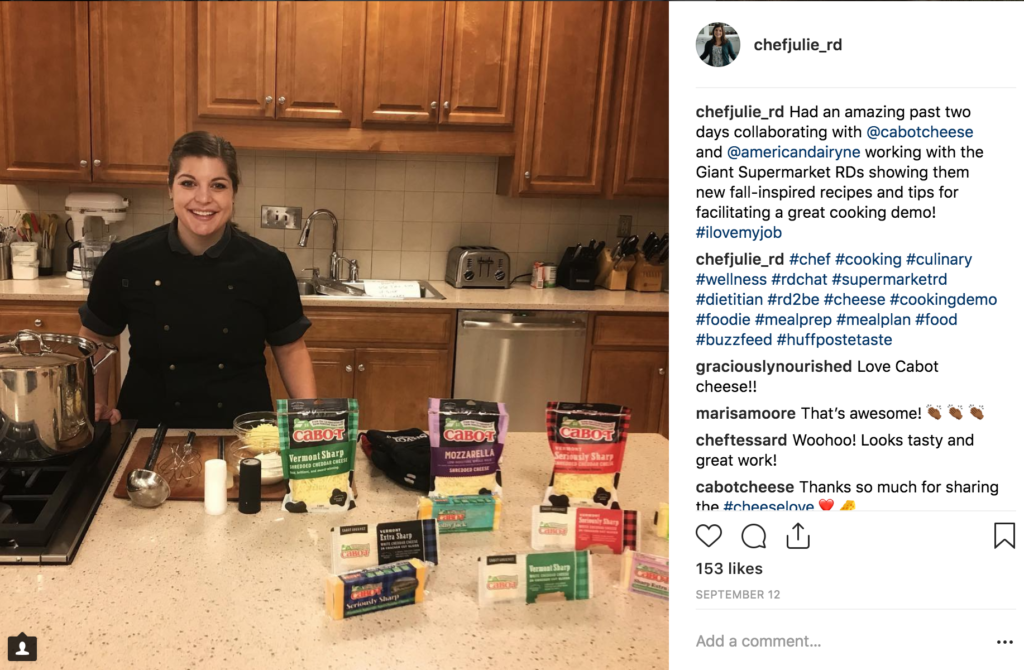
@ChefJulie_RD Instagram

I love my job!

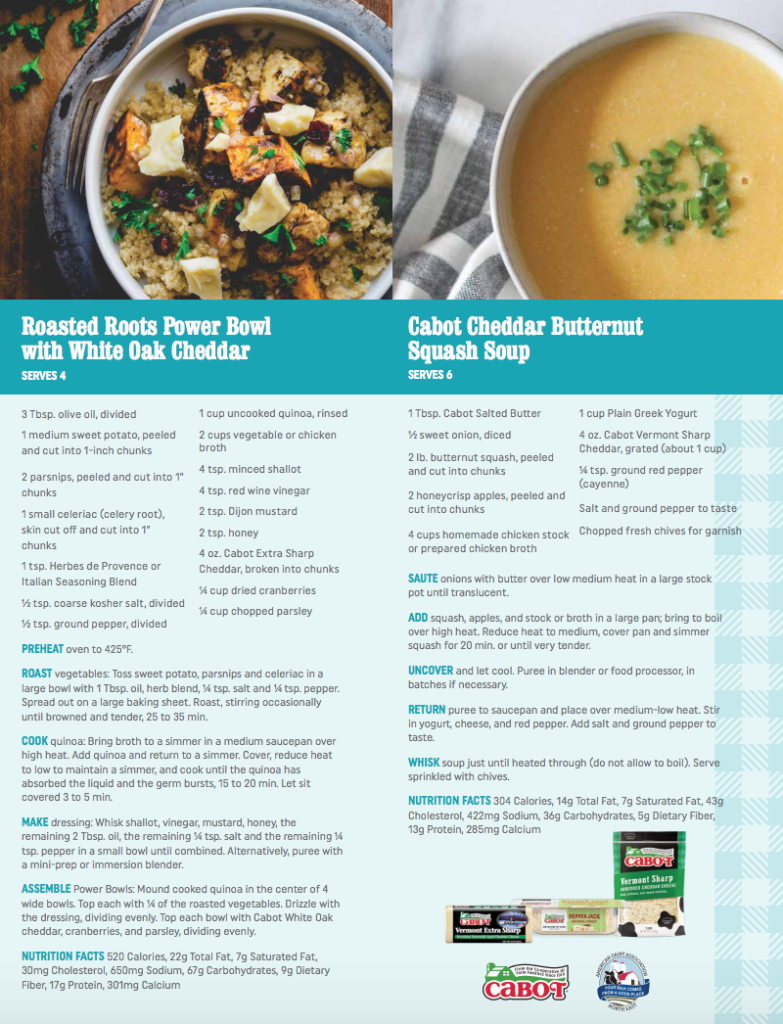
Last month I spent two days with Cabot and the NY American Dairy Council providing cooking demonstrations and cooking tips to Giant supermarket RD’s how to utilize seasonal fall ingredients, and of course Cabot cheese! They are gearing up for diabetes awareness month in November, so I helped develop educational materials and recipes to fit within their themes.

Traveling and presenting to other RD’s was definitely an aha moment feeling. Not many RD’s have a strong culinary background or had the opportunity to go to culinary school as I did.

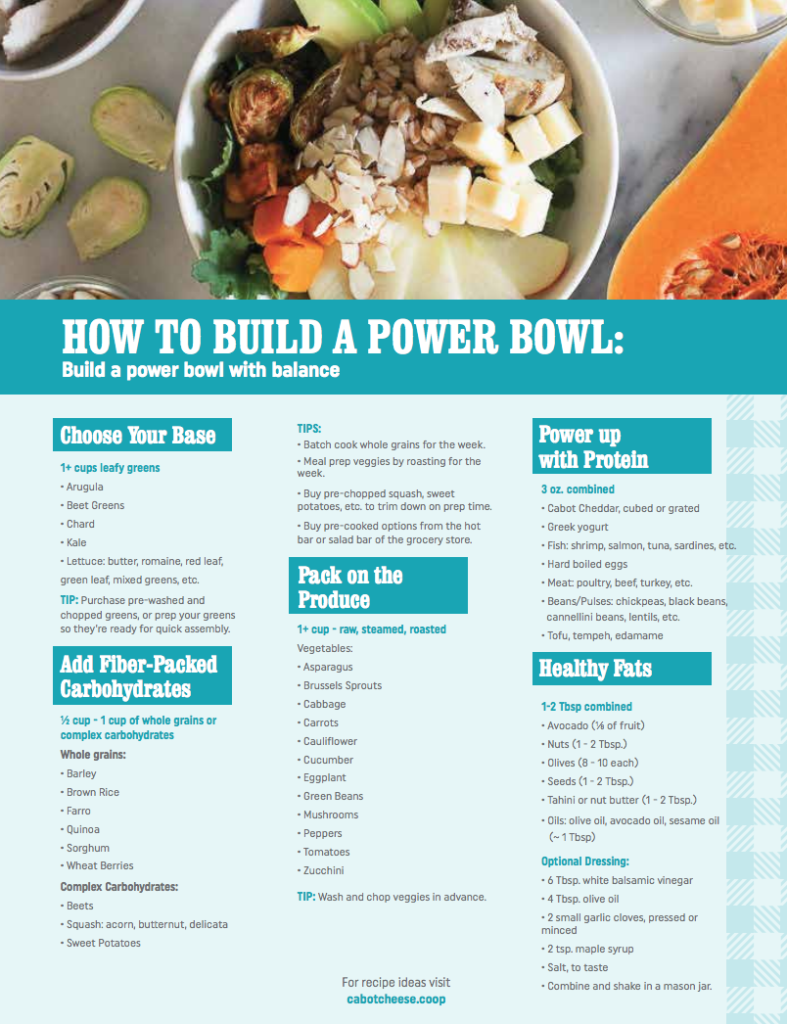
HOW TO BUILD A POWER BOWL WITH BALANCE

I had a lot of fun developing this recipe. Whenever you build a power bowl or nourish bowl (whatever you choose to call it), think about balance. Balancing food groups to be more full and satisfying. Balancing textures and flavors so every bite is more exciting.

Build your own with this guide below.

How to build a power bowl: Build a power bowl with balance
How to Build a Power Bowl: Build a power bowl with balance

Click on the image to download!

What I love about these bowls is that you can customize them so many ways and never get bored. Plus, if you spend a little time meal prepping ingredients in advance a fancy bowl with a plethora of delicious ingredients can come together in minutes.

Print
clock clock iconcutlery cutlery iconflag flag iconfolder folder iconinstagram instagram iconpinterest pinterest iconfacebook facebook iconprint print iconsquares squares iconheart heart iconheart solid heart solid icon
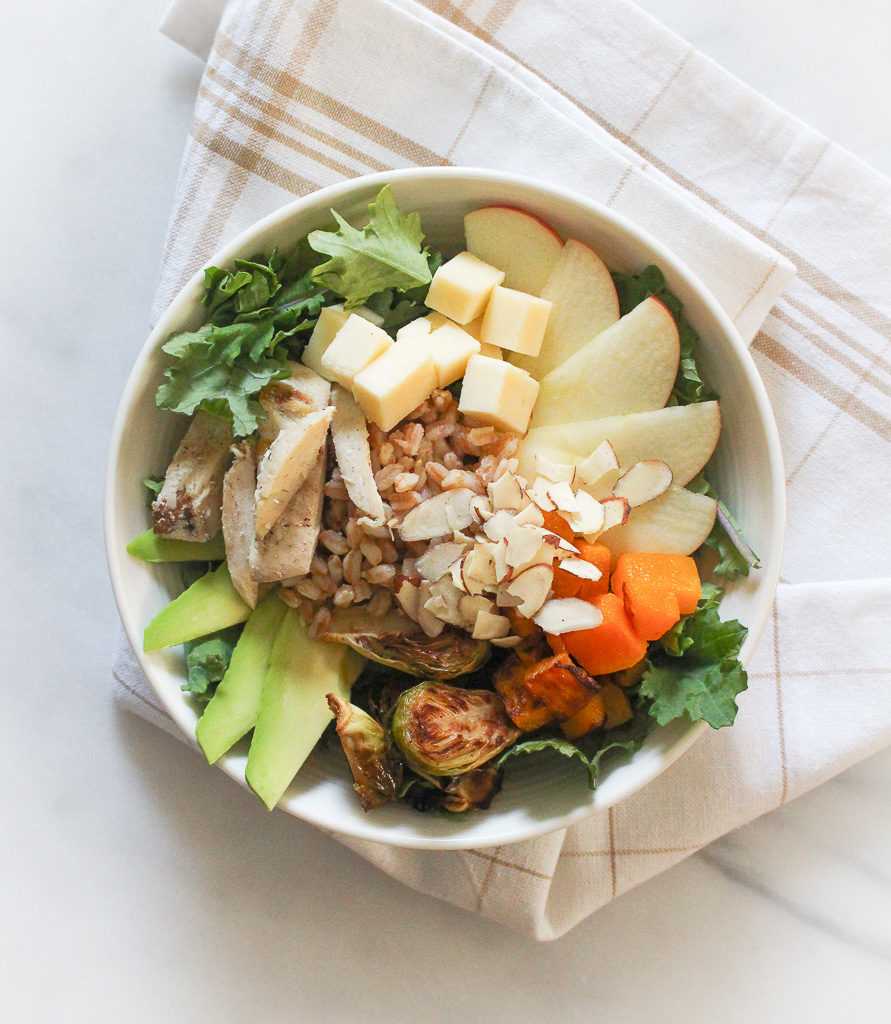
Fall Harvest Nourish Bowl in a white bowl with ingredients

Fall Harvest Nourish Bowl

  • Author: Chef Julie Harrington, RD
  • Prep Time: 15
  • Total Time: 15 minutes
  • Yield: 1-2 1x
  • Cuisine: Seasonal

Ingredients

Scale

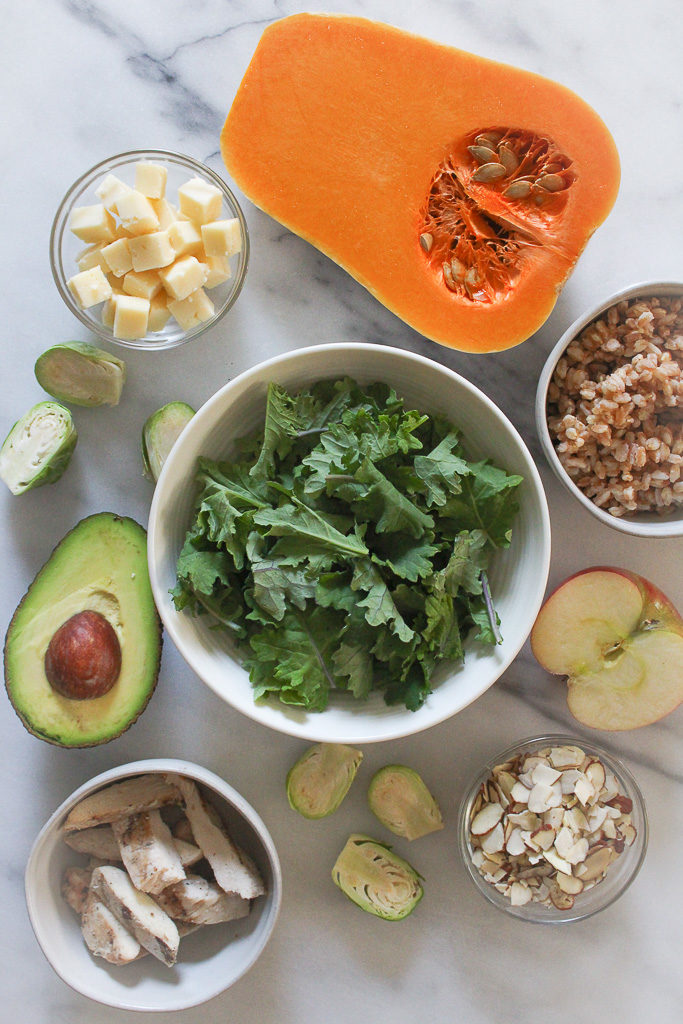
12 cups baby kale
1/2 cup farro, cooked
1/2 cup butternut squash, cubed and roasted
1/2 cup Brussels sprouts, roasted
1 small apple, sliced
3 oz. grilled chicken, chopped
1 oz. cheddar cheese, cubed (I love Cabot’s
1/4 avocado, sliced
1 tablespoon sliced almonds

Dressing:
6 tablespoons white balsamic vinegar
4 tablespoons olive oil
2 small garlic clove, pressed or minced
2 teaspoons maple syrup
salt, to taste


Instructions

For the dressing: In a mason jar, combine white balsamic vinegar, olive oil, garlic, and maple syrup. Shake to combine. Season with salt to taste.

Add all ingredients into a bowl and toss together. Toss with salad dressing and serve.

Notes

The dressing will make extra. Save the remaining dressing for later use.

This recipe is great to prep all ingredients in advance and just toss together.

Recipe Card powered byTasty Recipes

Other recipes you may enjoy

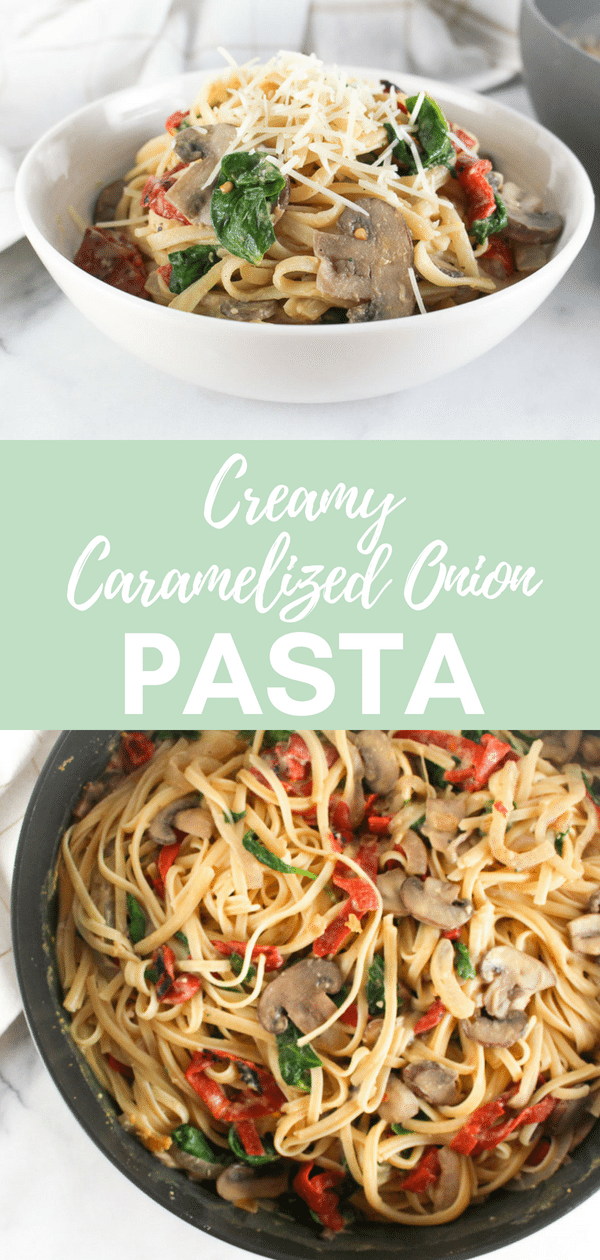
Creamy Caramelized Onion Pasta

Looking to revamp pasta night? Love a creamy sauce, but looking for a dairy free version? Try this Creamy Caramelized Onion Pasta, using hummus as the base of the sauce. 
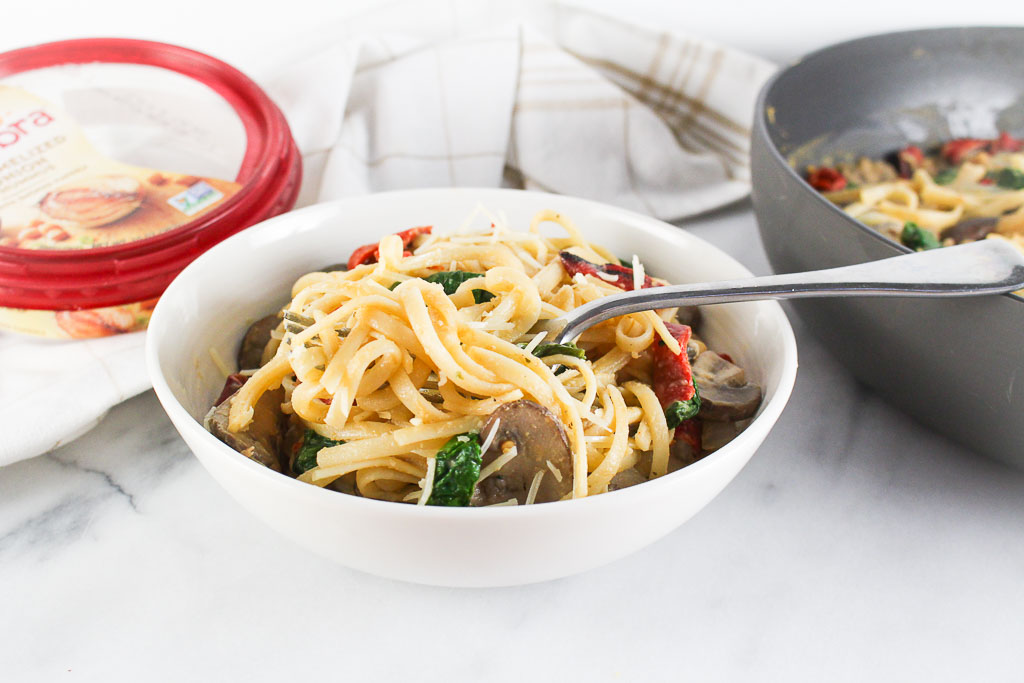
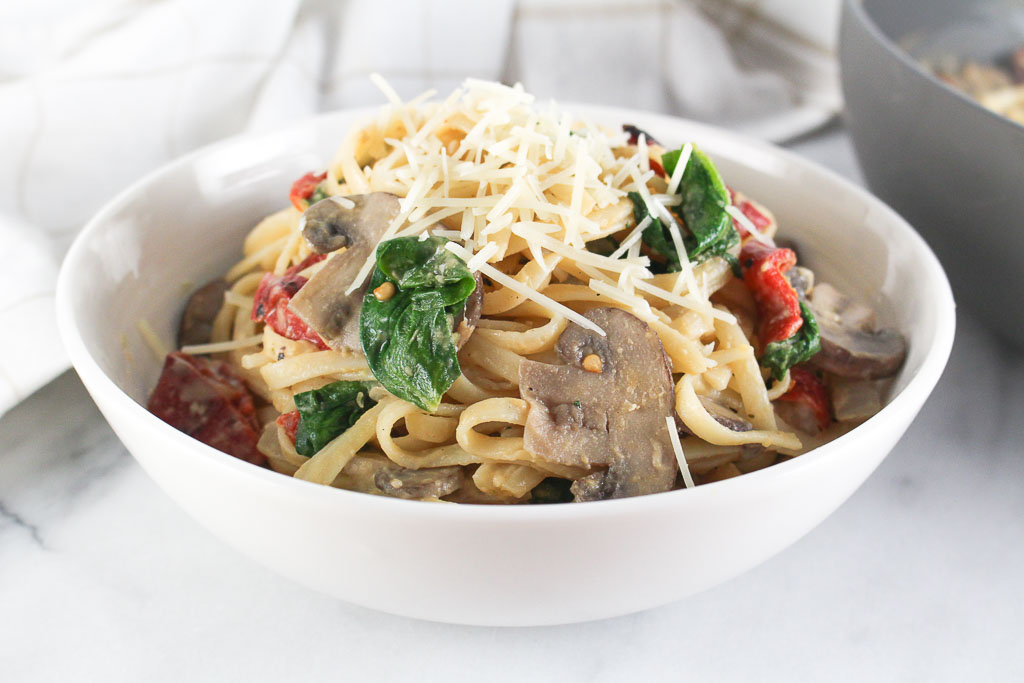
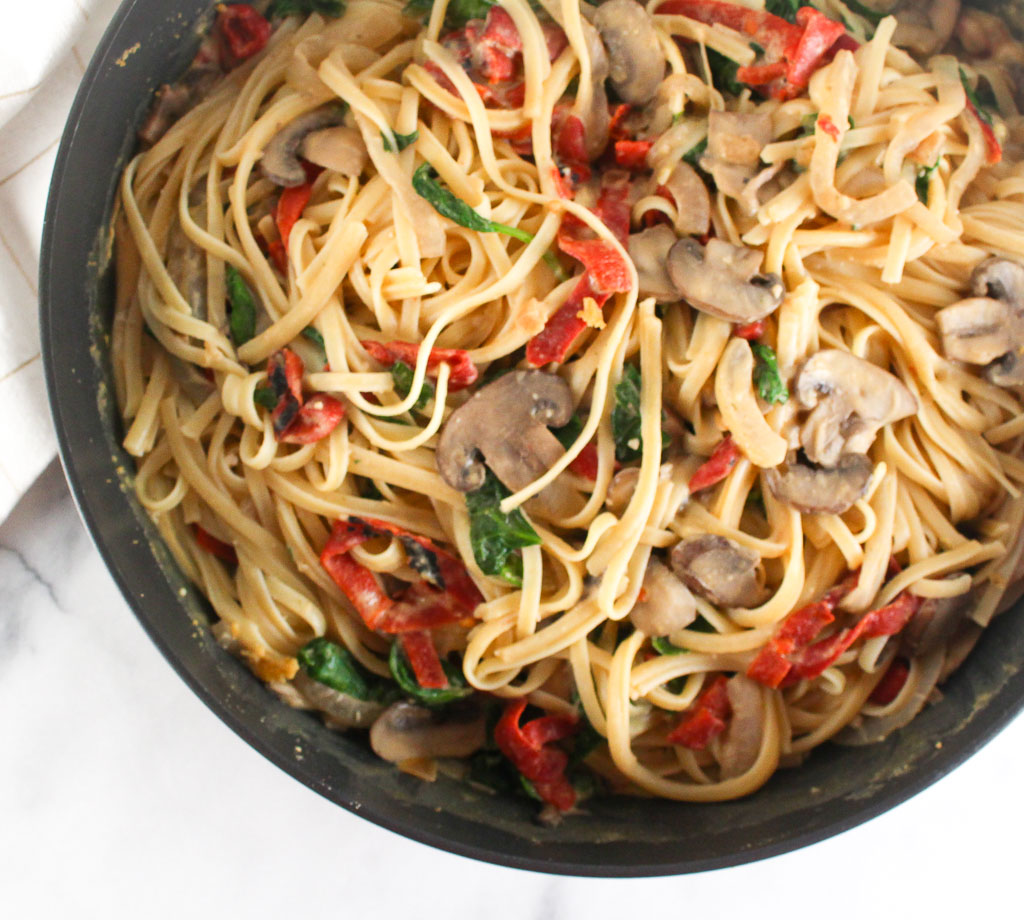
creamy pasta in a white bowl with mushrooms, spinach, roasted red peppers, caramelized onions, and parmesan cheese

I received free samples of Sabra mentioned in this post. By posting this recipe I am entering a recipe contest sponsored by Sabra and am eligible to win prizes associated with the contest. I was not compensated for my time.
I have so many memories of my childhood going to Grandma’s for Sunday night dinner with my whole family. Pasta was always on the menu. It’s the Italian way! The second you walked into Grandma’s house you could smell the gravy that has been simmering all day.
Funny story about gravy .. Well, I thought everyone called marinara sauce, gravy. I remember teaching one of my first cooking classes discussing the baked eggplant parm that we were going to top with homemade gravy. With all the puzzled faces looking back at me, I instantly got nervous thinking, “oh no, maybe no one likes eggplant parm?”, but one participant spoke up and questioned the unique combo. They were all thinking gravy = the brown gravy you put on turkey during Thanksgiving. I would have given the same look if I thought I was going to be eating baked eggplant parm with brown gravy. From then on, I’ve been pretty specific when explaining the recipes we are making in cooking class.
creamy pasta in a white bowl with mushrooms, spinach, roasted red peppers, caramelized onions, and parmesan cheese

creamy pasta in a white bowl with mushrooms, spinach, roasted red peppers, caramelized onions, and parmesan cheese

Use hummus as a base to create a creamy sauce.

I love creamy pasta, but it always leaves me with a stomach ache because it’s just so heavy. Did you know you can create a creamy sauce using hummus? Is your mind blown? By using hummus as the base for a creamy sauce, not only makes it dairy free but also is a plant-based protein making it a more filling and satisfying bowl of pasta. There are over a dozen delicious flavors of Sabra to choose from, but I have a sweet spot for anything caramelized onion.
creamy pasta in a white bowl with mushrooms, spinach, roasted red peppers, caramelized onions, and parmesan cheese
To double up on the caramelized onion flavor, I added even more caramelized onions and other veggies to round out this meal. Revamp your pasta night with this new recipe!

Print

clock clock iconcutlery cutlery iconflag flag iconfolder folder iconinstagram instagram iconpinterest pinterest iconfacebook facebook iconprint print iconsquares squares iconheart heart iconheart solid heart solid icon
creamy pasta with vegetables in a white bowl

Creamy Caramelized Onion Pasta

  • Author: Chef Julie Harrington, RD
  • Prep Time: 15
  • Cook Time: 30
  • Total Time: 45 minutes
  • Yield: 6
  • Category: dinner, pasta

Description

This creamy pasta is completely dairy free with the base of the sauce being hummus!


Ingredients

Scale
  • 1/2 pound linguine
  • 1 tablespoon olive oil
  • 1 sweet onion, thinly sliced
  • 2 cloves garlic, minced
  • 1 pound crimini mushrooms, sliced
  • 4 cups baby spinach
  • 8 oz. jar roasted red peppers, packed in water, sliced
  • 1 (10 oz.) container Sabra Caramelized Onion Hummus
  • 1/3 cup low-sodium vegetable broth
  • salt, to taste

Instructions

  1. Cook pasta according to pasta directions.
  2. In a large saute pan, heat olive oil over medium heat. Saute onions and garlic for about 4 minutes, until the onion is translucent. Add the mushrooms and saute for 5-7 minutes, until tender and most of the water has evaporated. Tips: Do not rush this step. The mushrooms will release a lot of moisture. Saute until most of the moisture evaporates.
  3. Add the spinach and stir to combine and wilt. Fold in the roasted red peppers. Remove from pan and set aside.
  4. In the same pan, add the container of Sabra Caramelized Onion Hummus and broth. Whisk and bring to a gentle simmer.
  5. Add the sauteed vegetables and linguine to the sauce. Season with salt to taste.

Notes

For a lower-carb version: Use half pasta and half zucchini noodles (or all zucchini noodles)
For gluten-free: Use a gluten-free paste (my favorite it Banza!)
To pack in more protein: Use a bean-based pasta.

Keywords: pasta, dinner, vegetarian

Recipe Card powered byTasty Recipes

Chef Julie Harrington, RD - Culinary Nutrition Consultant of chefjulierd.com

Pin for later!

Creamy Caramelized Onion Pasta @julieharringtonRD #pasta #hummus #dairyfree #caramelizedonion #dinner

For more delicious recipes, click the link below or go to Sabra.

Greek Pasta Salad

Did you know April 23rd is picnic day? What are your favorite picnic recipes? Add this Greek Pasta Salad to your next picnic spread.
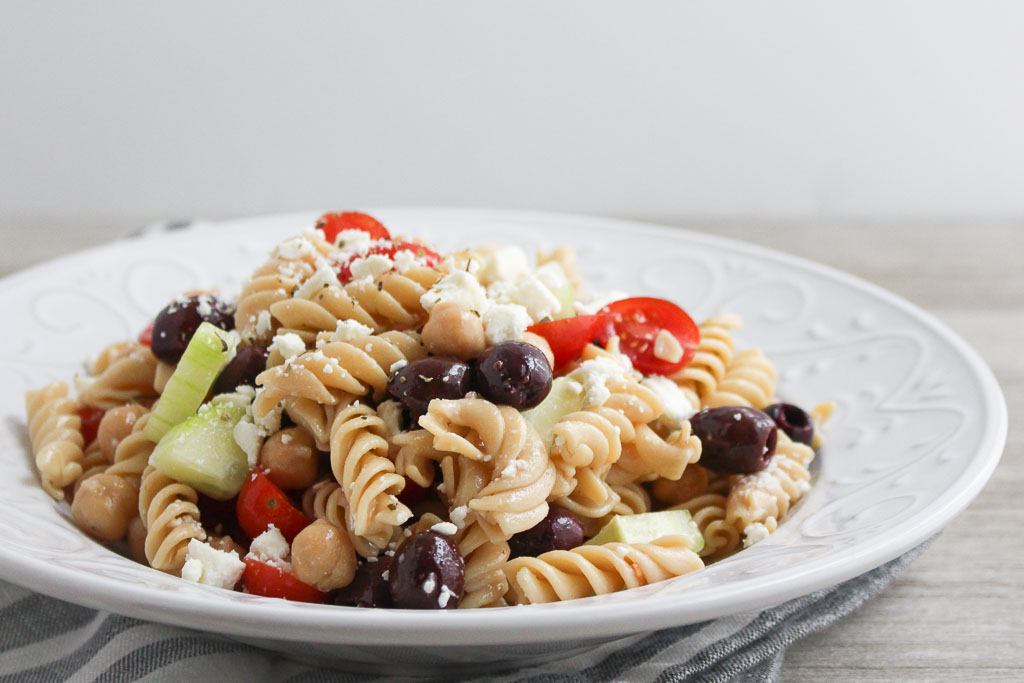
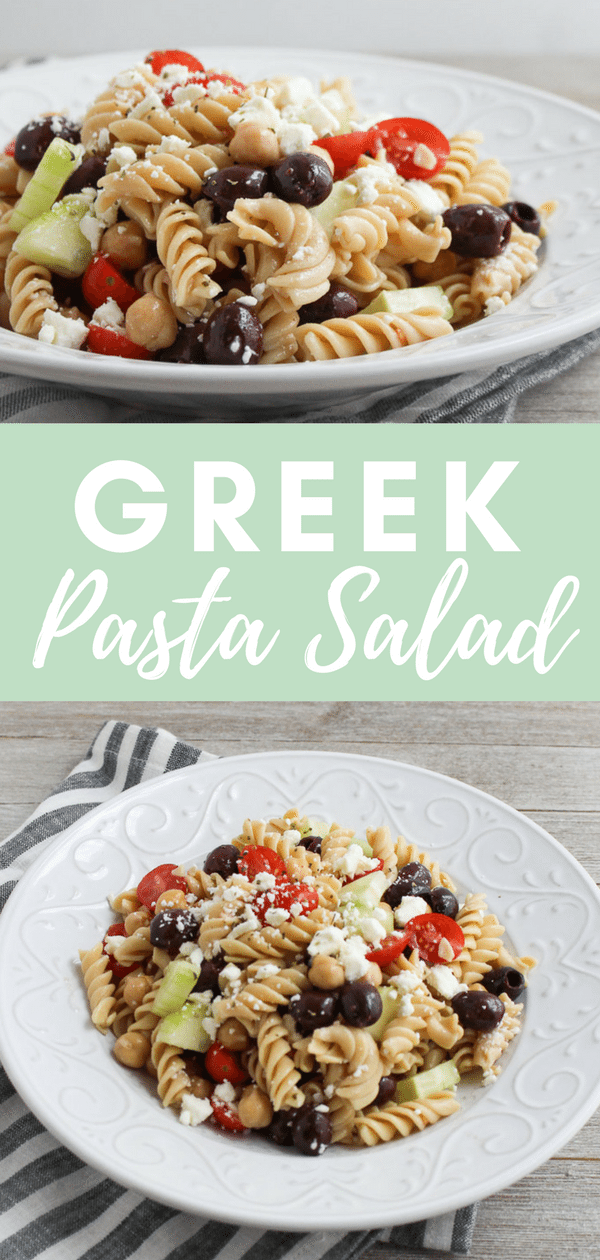
Greek pasta salad - Banza (chickpea) pasta salad with cherry tomatoes, cucumbers, olives, chickpeas, feta cheese, in a white dish
I had many summer jobs during high school and in between college semesters. One of them was at an outdoor catering business. We did a lot of BBQ’s and graduation parties, which served the classic outdoor fair, including burgers, hot dogs, barbeque chicken, and ribs. Plus, the typical sides like, potato salad, pasta, salad, and coleslaw.

Making the sides was one of the tasks I simply dreaded. With catering, every recipe is made in mass quantities to serve a crowd.
Do you have a certain food or ingredient that just skeeves you out? For me it’s mayonnaise. For a large party, I would have to make potato salad in these large buckets and wear these giant gloves to toss the mayonnaise in.
Greek pasta salad - Banza (chickpea) pasta salad with cherry tomatoes, cucumbers, olives, chickpeas, feta cheese, in a white dish
I used Banza pasta for this recipe. I feel like there are never enough plant-based protein options available at barbeques. This is a great way to have a protein-packed option for those who don’t eat meat and want to enjoy this as more of a meal than a side dish.
Print

clock clock iconcutlery cutlery iconflag flag iconfolder folder iconinstagram instagram iconpinterest pinterest iconfacebook facebook iconprint print iconsquares squares iconheart heart iconheart solid heart solid icon
chickpea pasta with vegetables in a white bowl

Greek Pasta Salad

  • Author: Chef Julie Harrington, RD
  • Prep Time: 10
  • Cook Time: 8
  • Total Time: 18 minutes
  • Yield: 6
  • Category: pasta, side dish

Description

Everyone will love it when you bring this Greek Pasta Salad to your next BBQ!


Ingredients

Scale
  • 8 ounces box rotini Banza pasta (or pasta of your choice)
  • 1-pint cherry tomatoes halved
  • 1 seedless cucumber, peeled and quartered
  • 1 (15 oz.) can chickpeas, drained and rinsed
  • 1/2 cup pitted Kalamata olives
  • 3 tablespoons olive oil
  • 2 tablespoons red wine vinegar
  • 2 cloves garlic, minced
  • 2 teaspoons dried oregano
  • salt, to taste
  • 1/2 cup feta cheese

Instructions

  1. Cook pasta according to package directions. Rinse with cold water to stop the cooking process.
  2. In a large bowl combine, pasta, tomatoes, cucumbers, chickpeas, and olives.
  3. In a small bowl, whisk together olive oil, red wine vinegar, garlic, and oregano. Season with salt to taste.
  4. Drizzle dressing over pasta salad and toss to combine. Gently fold in feta cheese just before serving.

Keywords: pasta salad, side dish, vegetarian

Recipe Card powered byTasty Recipes

Check out some more picnic inspired recipes. Click on the link below.

Chef Julie Harrington, RD - Culinary Nutrition Consultant of chefjulierd.com

Pin for later!

Greek pasta salad - Banza (chickpea) pasta salad with cherry tomatoes, cucumbers, olives, chickpeas, feta cheese, in a white dish