This post may contain affiliate links. Read my privacy policy.
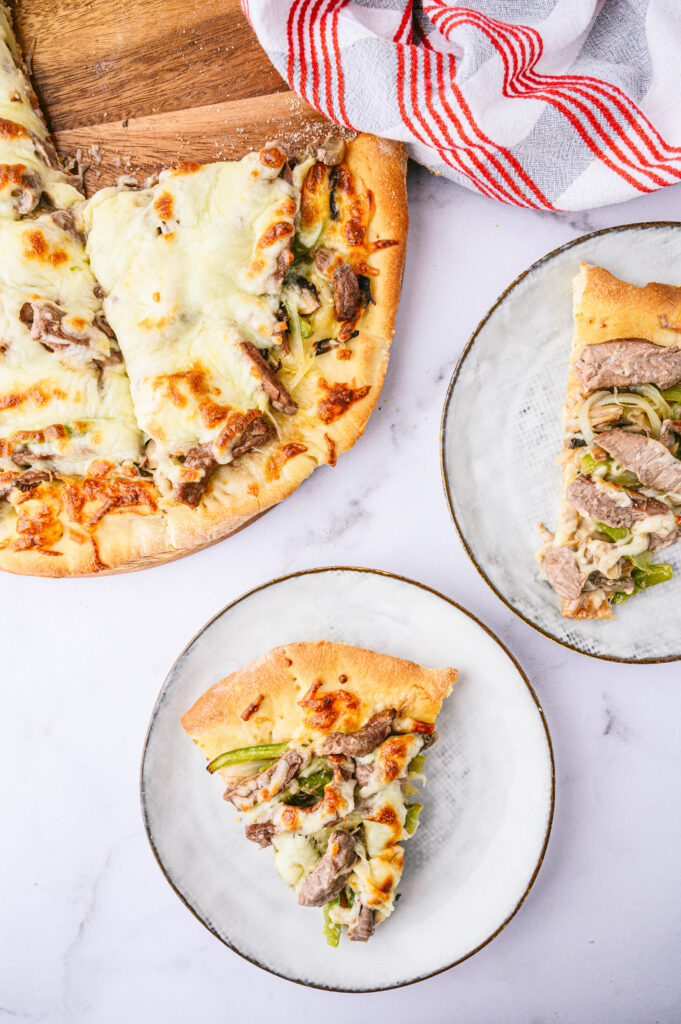
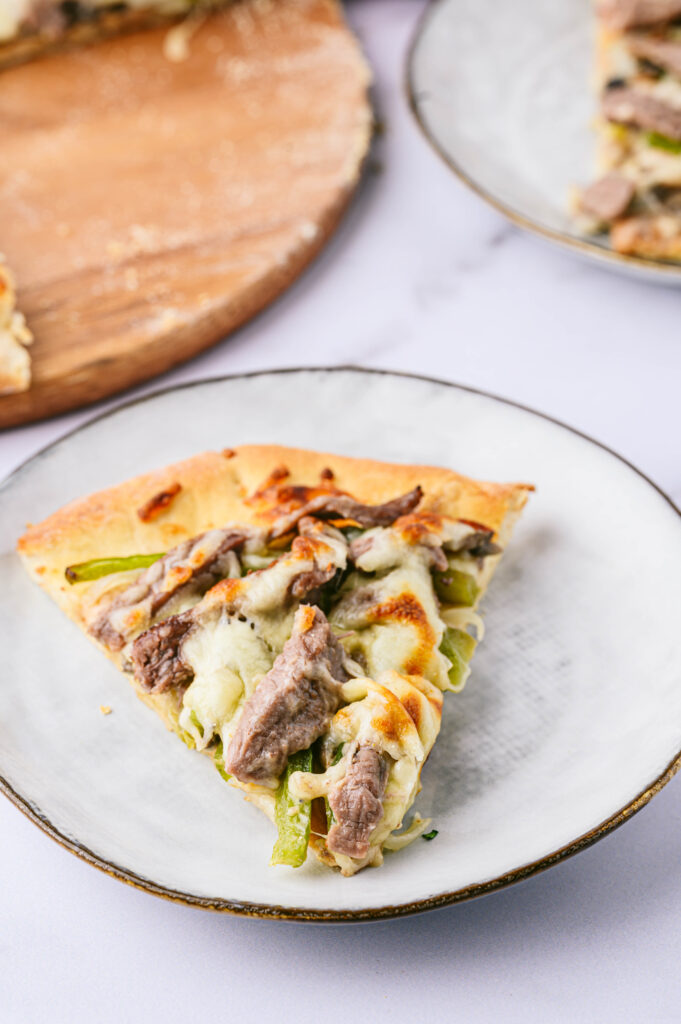
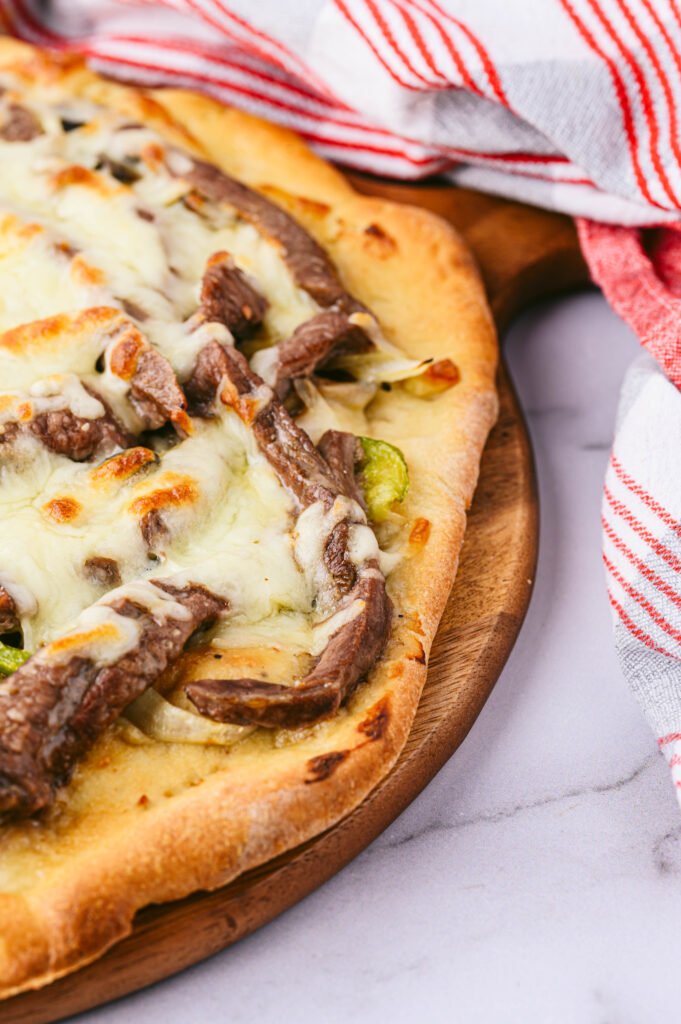
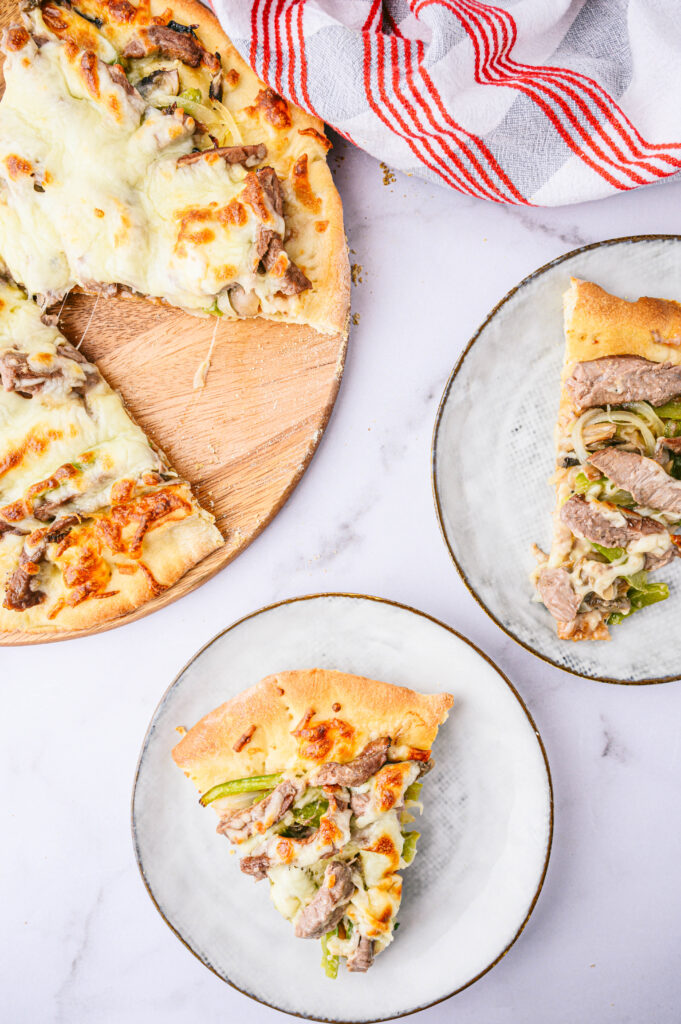
Never choose between your two favorite foods again! This Philly cheesesteak pizza recipe combines traditional flavors on a crispy golden crust, with a creamy sauce that will have your mouth watering!
Has there ever been a time when you were craving a Philly, but you kind of wanted pizza too? That’s when you need this recipe! Not only is it delicious, but it’s also a fun meal to make on the weekends that the whole family will love!
To make things easy you can stick with store bought dough, but to get the full experience you have to try my homemade pizza dough that is super simple!
This pizza is perfect when you have a leftover steak that didn’t get eaten, and it’s like two totally different meals!
More Easy and Delicious Pizza Recipes:
- Butternut Squash and Kale Pita Pizza
- Garden Fresh Ricotta Pizzas
- Whole Wheat Pizza with Veggies and Feta
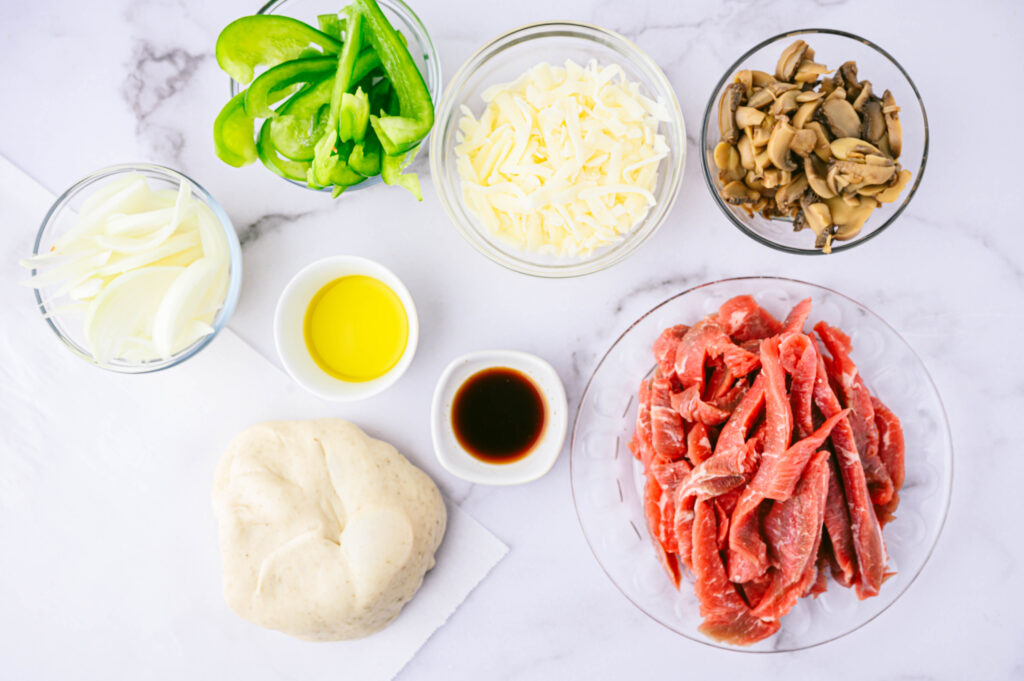
Ingredients Needed:
For the creamy sauce:
- butter
- Garlic cloves – if you don’t have fresh, store bought minced garlic can be used or garlic powder.
- flour
- Milk – be sure it’s cold!
- chicken stock – vegetable stock can be substituted if needed.
- crushed red pepper flakes – add more if you like it spicy.
- salt
- ground black pepper
- ground nutmeg
- parmesan cheese
For the pizza:
- ribeye steak – could also use flank or skirt steak
- olive oil
- Worcestershire sauce
- onion
- green pepper
- mushrooms
- prepared pizza dough – if the dough has been refrigerated, allow it to sit at room temperature for 1-2 hours before rolling it out to use.
- mozzarella cheese
- provolone cheese
How to Make the Best Philly Cheesesteak Pizza Recipe:
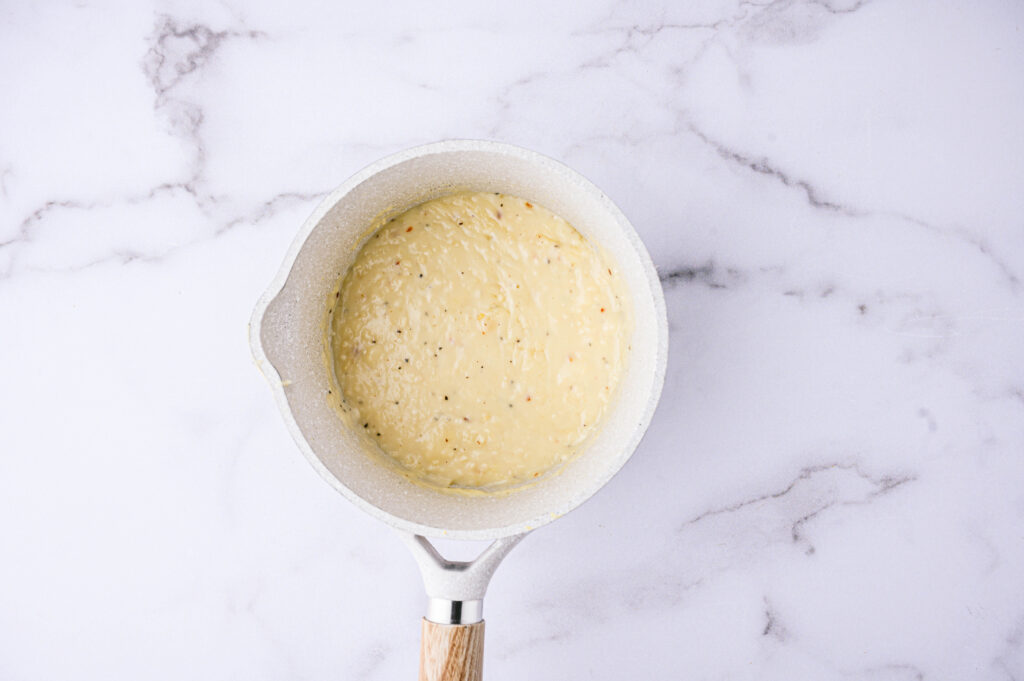
In a small skillet over medium heat, melt the butter. Stir in the garlic and cook for 30 seconds then the flour. Cook until bubbly.
Slowly whisk in the milk and chicken stock until the sauce has thickened. Add the seasonings and parmesan cheese, then remove from the heat and set aside.
Place the steak in the freezer for about 10 minutes. This makes it much easier to slice. Trim off any large fatty pieces around the edges. Slice as thin as possible.
Preheat the oven to 500 degrees and sit the pizza stone in to warm.
Heat a tablespoon of oil over medium high heat in a large skillet. Season the steak with salt, pepper, and Worcestershire sauce. Cook for a couple of minutes, then remove from the pan.
Add the remaining oil and saute the veggies until they are tender.
Roll out the pizza dough. Remove the pizza stone from the oven and coat with cooking spray.
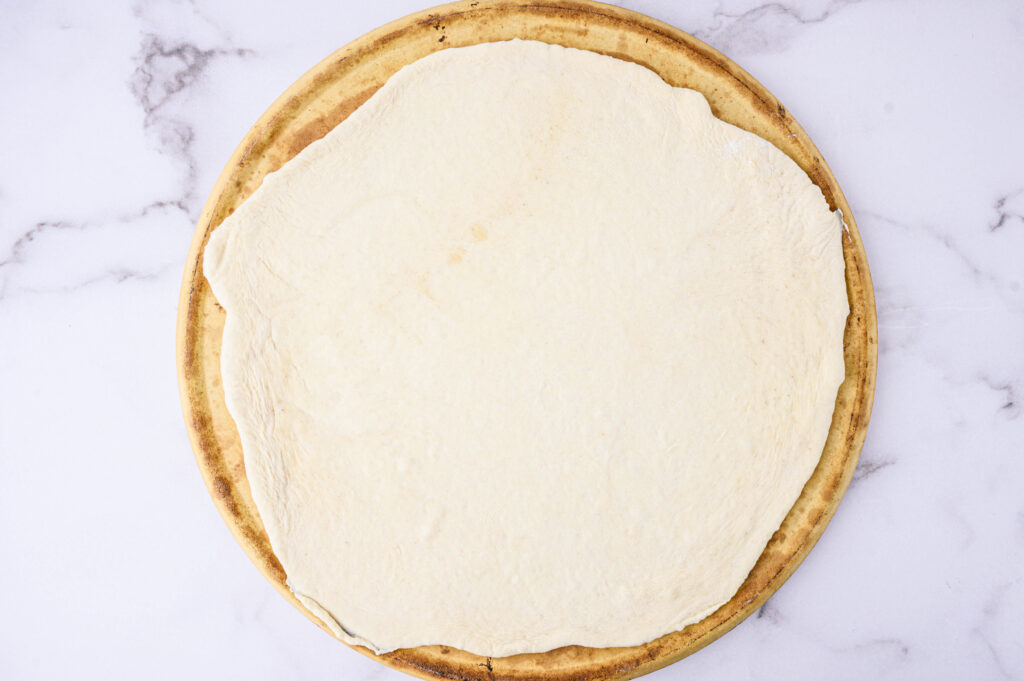
Spread the dough on the stone and piece with a fork. Bake for 3-5 minutes.
Remove the dough from the oven and spread on the cheese sauce. Add the steak, onions, peppers, and mushrooms. Then top with mozzarella and provolone cheese.
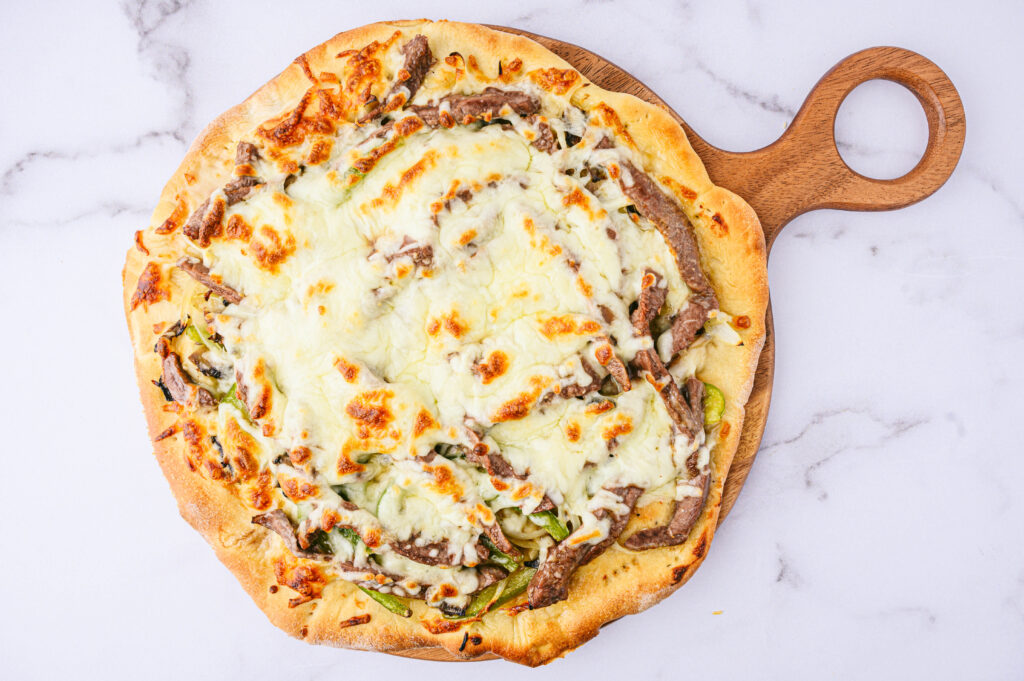
Bake until the dough is golden brown and the cheese has melted.
Tips for Making
- The stone can also be dusted with flour or cornmeal instead of greasing with cooking spray.
- If you don’t have a pizza stone, you can still use a regular baking sheet to make homemade pizzas! The stone retains the heat really well, so you may want to cook it a little longer the first time to make sure it gets nice and crispy.
- Using leftover steak? Skip the cooking instructions and add it directly to the pizza.
- To make ahead of time, prep the steak and veggies (in advance) then follow the remaining instructions. This is great when it comes to entertaining.
- Feel free to add your other favorite pizza toppings.
Storing and Reheating Cheesesteak Pizza
Keep leftover pizza in the refrigerator for up to 5 days.
When reheating to keep the crust crispy, it’s best to use the oven or air fryer. Cook at 400 degrees until it’s warmed through. For a chewy crust, bake at 350 degrees.
Microwaving is the fastest reheating method, but as you know, the crispiness just isn’t there so we don’t recommend it.
If you would like to freeze it, it’s best without the veggies. They get a little mushy during the thawing process.

Philly Cheesesteak Pizza
- Yield: 8 slices 1x
Description
Never choose between your two favorite foods again! This philly cheesesteak pizza recipe combines traditional flavors on a crispy golden crust, with a creamy sauce that will have your mouth watering!
Ingredients
For the creamy sauce:
1 tablespoon butter
2 cloves garlic, finely minced
1 tablespoon flour
1/4 cup cold milk
1/4 cup chicken stock
1/8 teaspoon crushed red pepper flakes
1/8 teaspoon salt
pinch of ground black pepper
pinch of ground nutmeg
¼ cup parmesan cheese
For the pizza:
6 oz. ribeye steak
2 tablespoons olive oil, divided
1 tablespoon Worcestershire sauce
1 onion, thinly sliced
1 green pepper, thinly sliced
1 cup mushrooms, thinly sliced
prepared pizza dough
1 cup shredded mozzarella cheese
1 cup shredded provolone cheese
Instructions
- Add butter to small skillet over medium heat. Add garlic and cook for 30 seconds. Add flour and cook for about 1 minute, or until bubbly.
- Slowly whisk in milk and chicken stock and cook until thickened. Add crushed red pepper, salt, pepper, nutmeg, and parmesan cheese, stirring to combine. Remove from heat and set aside.
- Place steak in the freezer on a sheet pan for about 10 minutes so it gets very cold but not frozen through. Trim off any large pieces of fat normally around the edges of the steak, but some veins of fat in the middle of the steak are good. Slice the steak as thin as possible with a sharp knife.
- Place pizza stone in oven and preheat to 500 degrees F.
- Heat 1 tablespoon of olive oil in a large skillet over medium-high heat. Season steak with Worcestershire sauce, salt, and pepper. Cook for 2-3 minutes, stirring occasionally. Remove from pan and set aside.
Notes
If using prepared pizza dough that has been refrigerated, remove from the fridge, and allow to rest for 1-2 hours before rolling out and using.