Chickpea Salad Sandwich Without Mayo

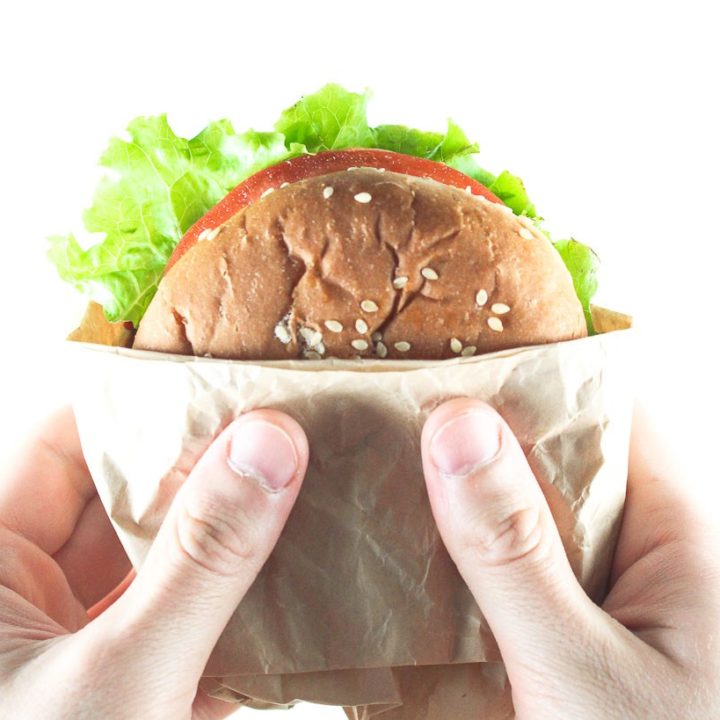
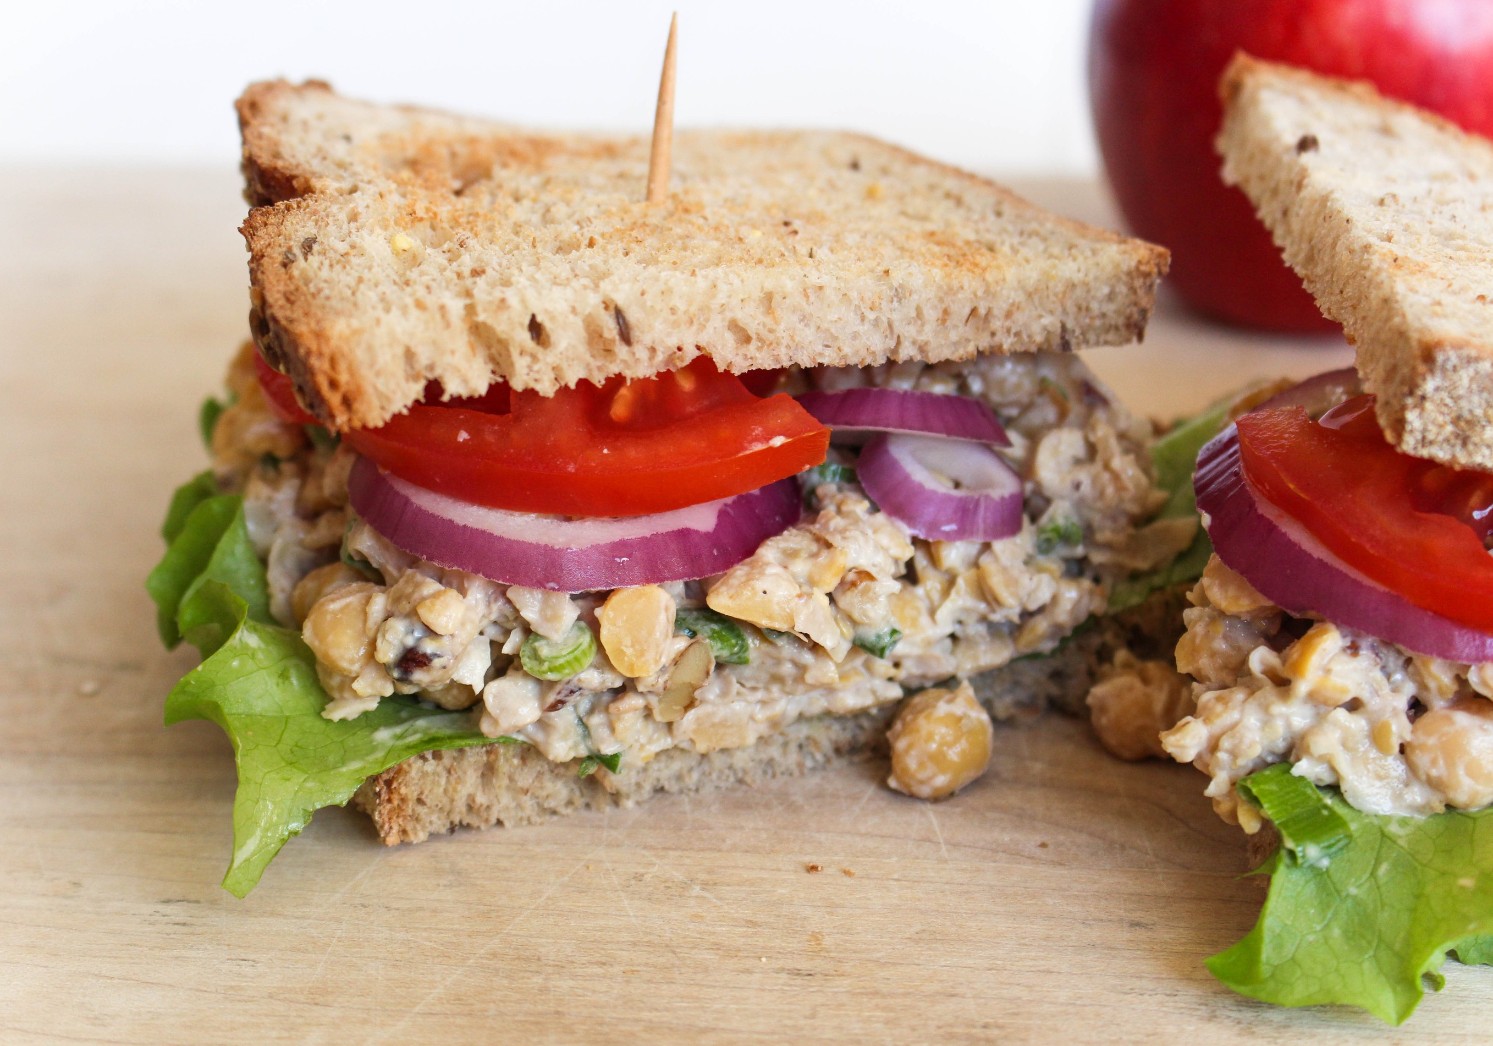
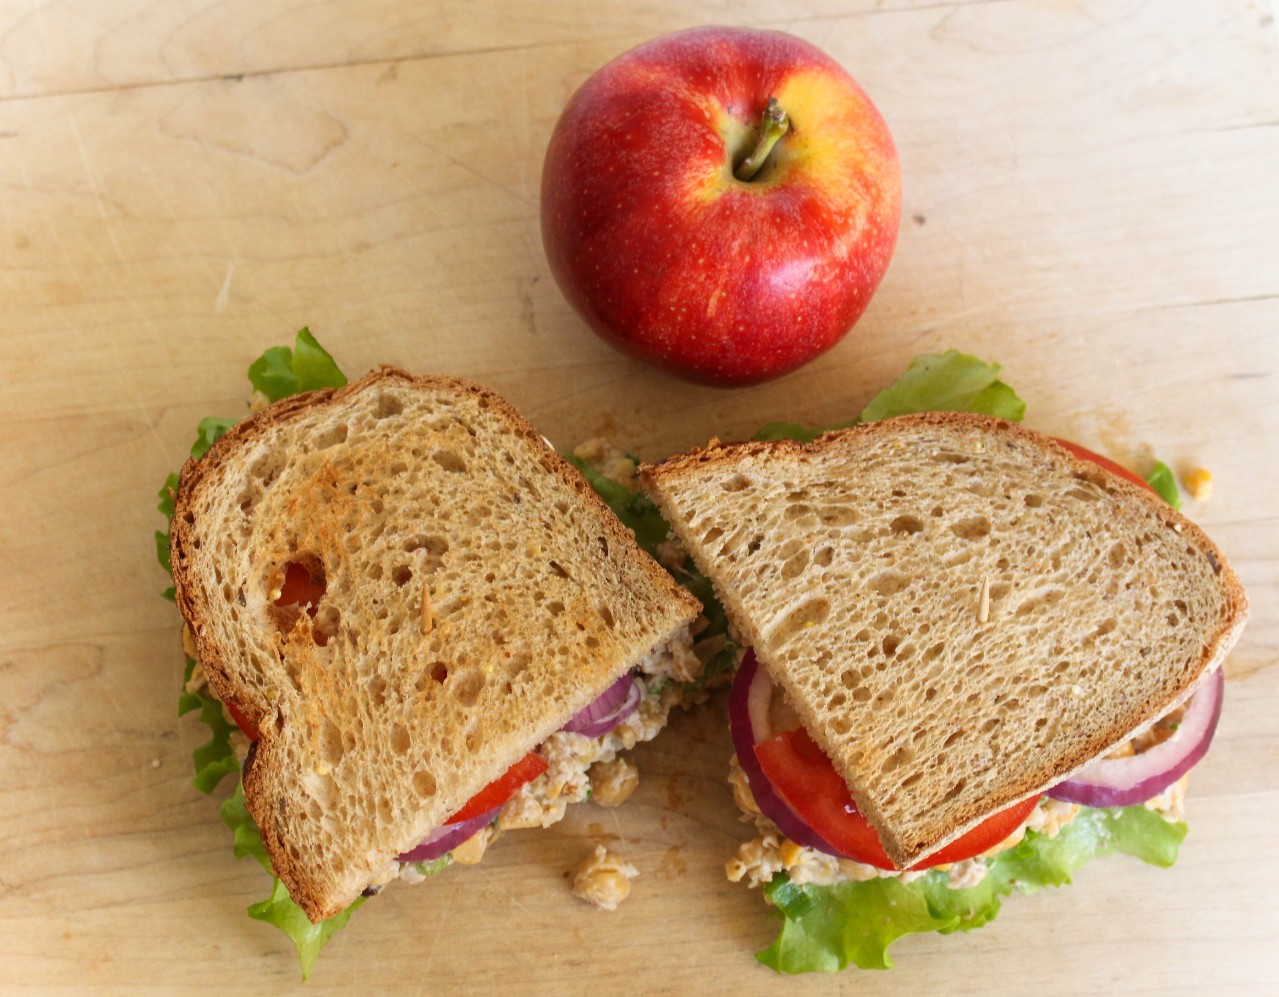
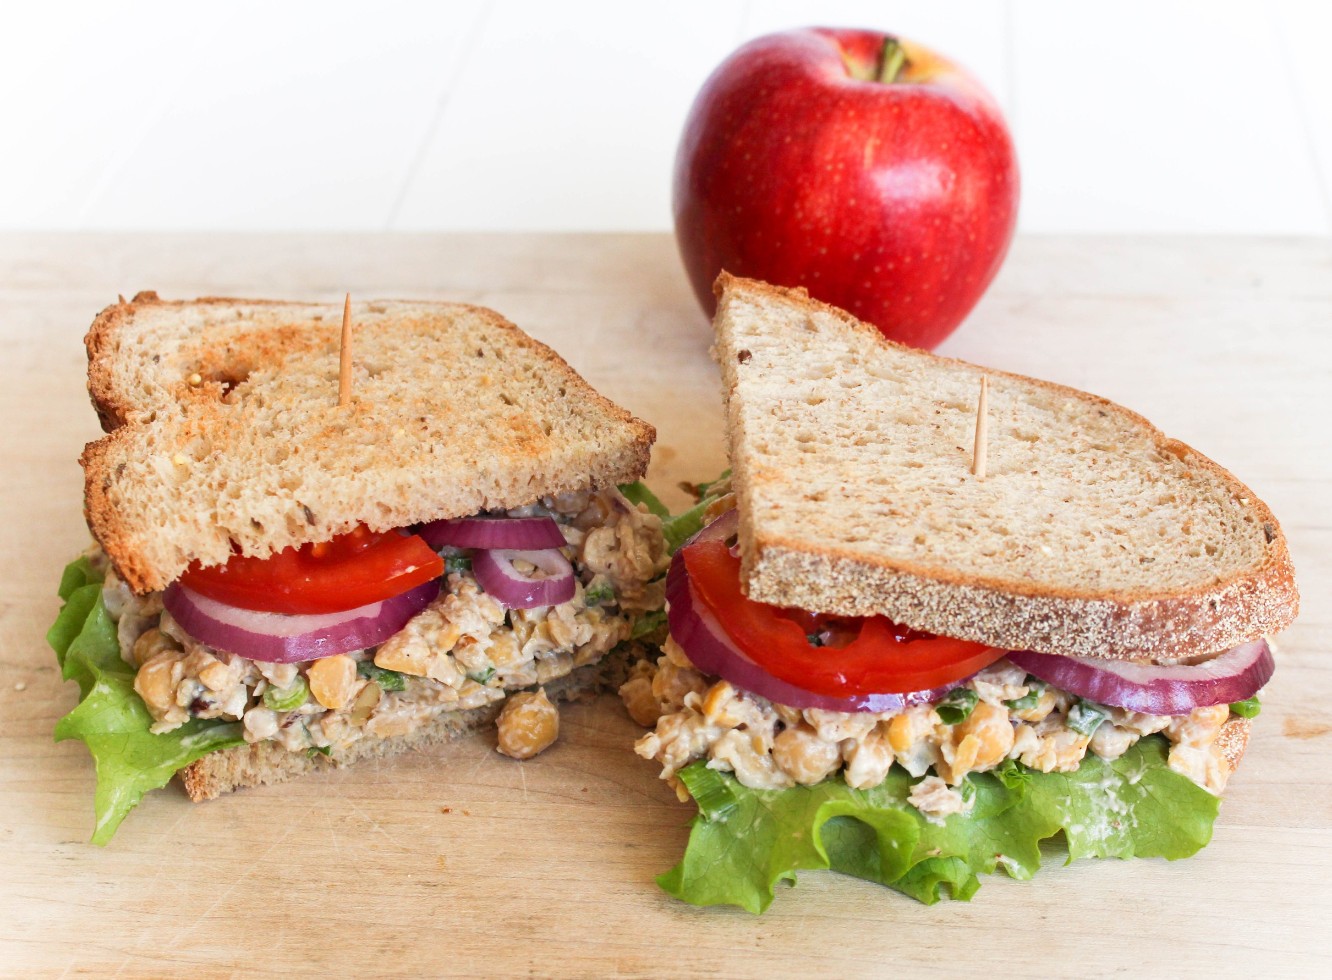
Get out of your lunchtime rut and make packing lunches more exciting with this Chickpea Salad Sandwich. 

half of a chickpea salad sandwich on a cutting board

Ever get in a lunch rut? Need new ideas for packing your kids’ or your own lunch? Are packable noontime options dwindling? Surely you’ve met the ‘What shall I pack for lunch?” question.

I always pack my lunch for the next day the night before. If not, I’m typically running out the door and a Siggi’s yogurt, KIND bar, and a piece of fruit are just tossed in my bag on my way out. I don’t mind those “snacky” kind of lunches once in a while, but I’d prefer more of a meal kind of lunch.

Plant-Based Proteins:

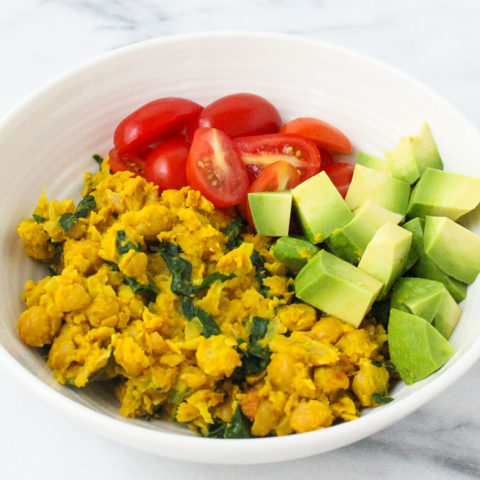
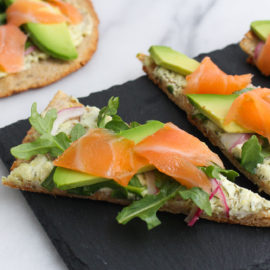
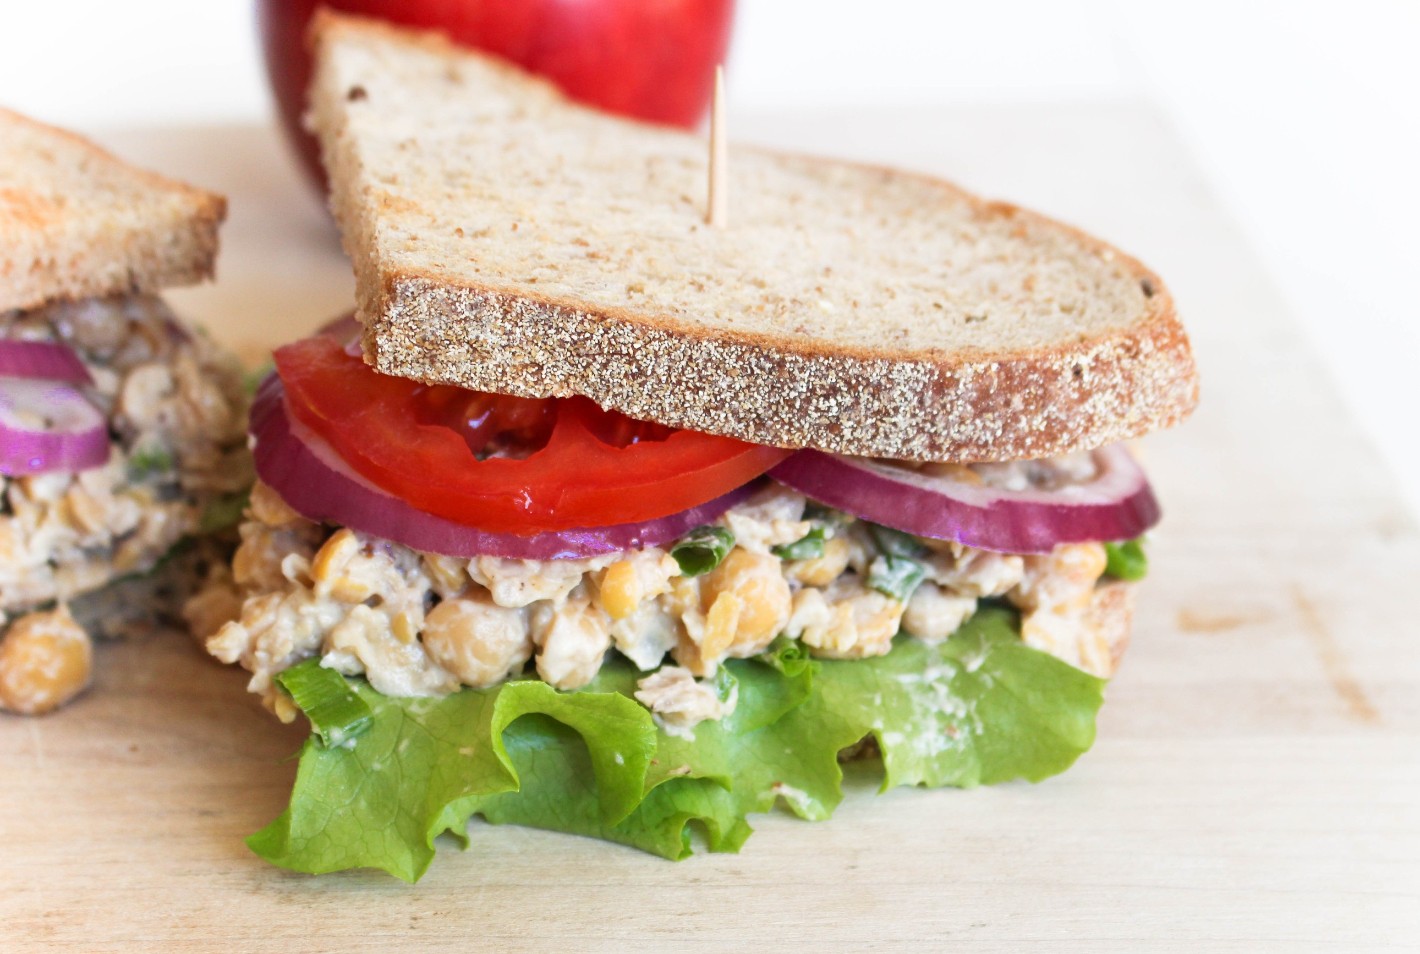
This chickpea walnut sandwich is a plant-based tuna/chicken salad makeover. I always try and make sure protein is present at lunchtime to help keep me full through the afternoon. Chickpeas are the perfect pulse for this recipe because the firm texture holds its shape. The addition of the walnuts is key for the crunch factor, while also providing heart-healthy fats.

chickpea salad sandwich on rye bread with an apple

Are garbanzo beans the same as chickpeas?

Yes. Originally the name garbanzo bean came from the Spanish community and over time different cultures have referred to them as another name. Eventually, these beans came to be known as chickpeas to most people in the world today.

Are chickpeas lectins?

Yes, chickpeas are considered a legume, and all legumes contain lectin. Lectin, a protein, binds to carbs and is known to some as an anti-nutrient. This is somewhat a controversial concept, because people with stomach sensitives may see an effect, but most do not. Also, most foods containing lectin are high in antioxidants, so the good outweighs the bad. If you are concerned about lectins, know that once they are cooked, the lectin is deactivated.

chickpea salad sandwich on rye bread cut in half

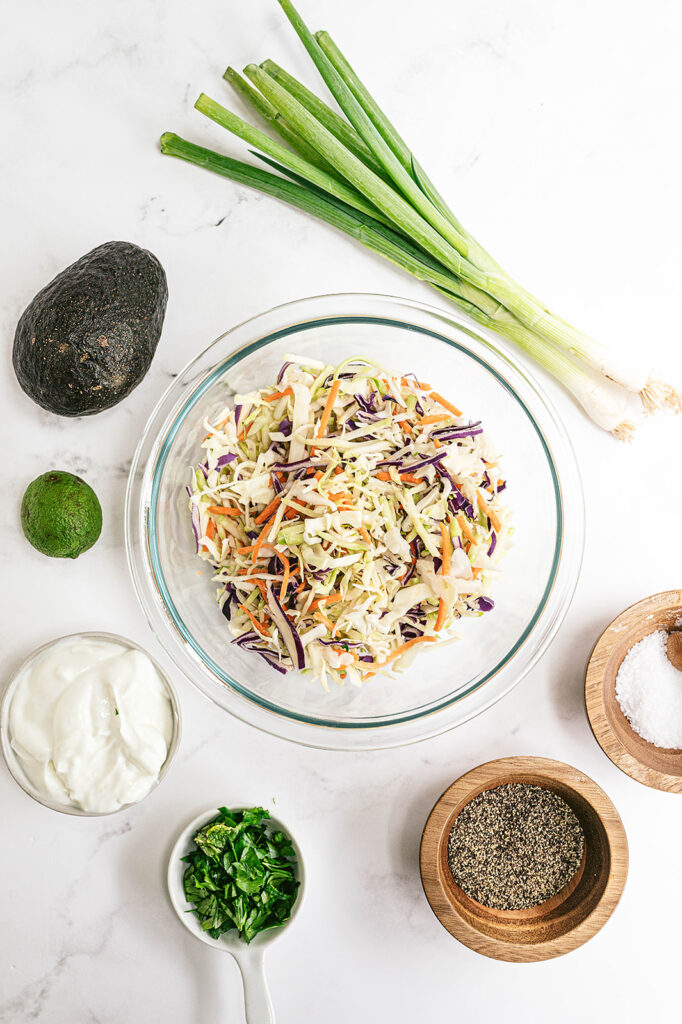
Ingredients for Chickpea Salad Sandwiches

  • chickpeas
  • walnuts
  • plain Greek yogurt – Greek yogurt is a great substitute for mayonnaise to trim back on saturated fat and replace it with a boost of protein and calcium instead.
  •  Dijon mustard
  •  honey
  • scallions
  • salt and pepper to taste
  • whole wheat bread, toasted
  • (Optional) Toppings: lettuce, tomato, onion

How to Make a Chickpea Salad Sandwich Without Mayo

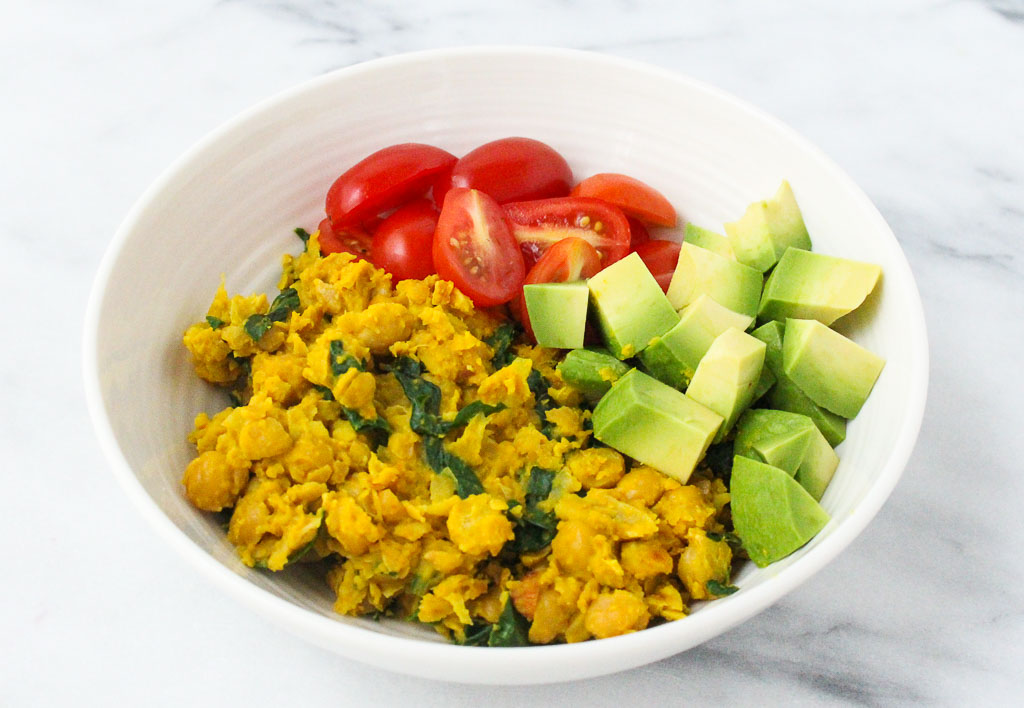
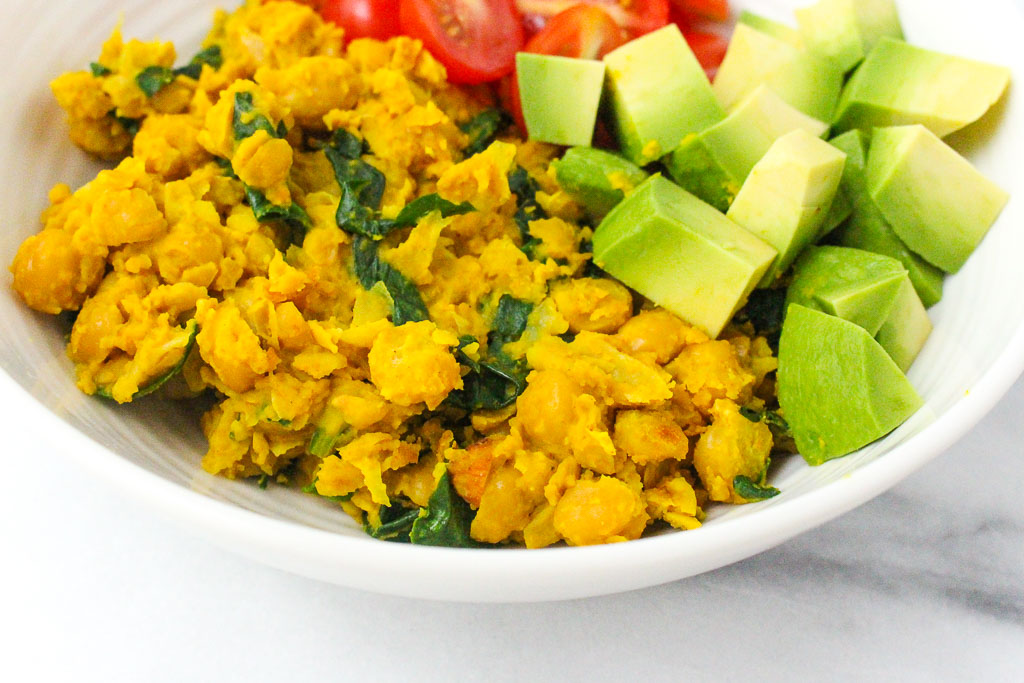
Mash the chickpeas in a small bowl using a fork. Don’t over-mash, we aren’t making hummus!

Mix in the nuts, mustard, greek yogurt, honey, and scallions. Season with salt and pepper to taste.

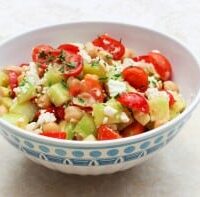
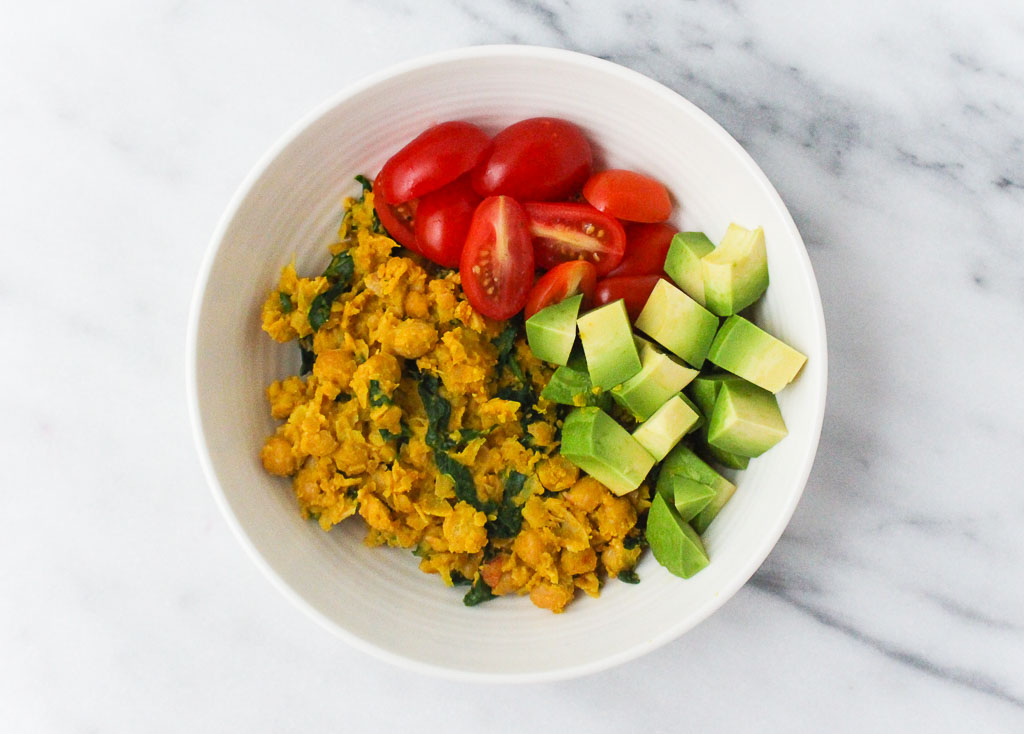
Spread the chickpea salad on your bread to make the perfect sandwich. You can also add it on top of a salad, or dip with crackers – this chickpea walnut mixture is versatile to get you out of your lunchtime rut.

vegetarian chickpea salad sandwich on a cutting board

Should you rinse canned garbanzo beans?

You should and mainly it’s because the liquid contains a lot of unnecessary sodium which is why. most recommend draining and rinsing chickpeas before using.

Print
clock clock iconcutlery cutlery iconflag flag iconfolder folder iconinstagram instagram iconpinterest pinterest iconfacebook facebook iconprint print iconsquares squares iconheart heart iconheart solid heart solid icon
cut in half chickpea sandwich

Chickpea Walnut Sandwich

  • Author: Chef Julie Harrington, RD
  • Prep Time: 15
  • Total Time: 15 minutes
  • Yield: 2
  • Category: sandwich

Ingredients

Scale
  • 1 (15-ounce) can chickpeas, drained and rinsed
  • ⅓ cup chopped walnuts
  • 3 tablespoons plain Greek yogurt
  • ½ teaspoon Dijon mustard
  • 1 tablespoon honey
  • 2 tablespoons scallions, thinly sliced
  • salt and pepper to taste
  • 4 slices whole wheat bread, toasted
  • (Optional) Toppings: lettuce, tomato, onion

Instructions

  1. Add chickpeas to a bowl and lightly mash with a fork. (Not too much. We aren’t making hummus!) Add walnuts, Greek yogurt, Dijon mustard, honey, and scallions and mix together. Season with salt and pepper, to taste.
  2. Add a desired amount of the chickpea mixture to the bread and add desired toppings. Top with the other slice of bread.

Notes

Recipe adapted from Minimalist Baker.

Keywords: sandwich, vegetarian, plant-based

Recipe Card powered byTasty Recipes

other recipes you may enjoy

Chipotle Lime Shrimp Tacos with Creamy Avocado Broccoli Slaw

Get dinner on the table under 30 minutes! These Chipotle Lime Shrimp Tacos with a Creamy Avocado Broccoli Slaw is simple to make and you might already have all the ingredients already on hand!

The beauty of tacos is that they are easily customizable. Kick it up a notch and add more spices to the shrimp. Swap shrimp for cod. What I love about taco recipes is that they act more as a guide. You don’t need to follow them exactly. That is what’s fun about cooking, you get to be creative in the kitchen!

Chipotle Lime Shrimp Tacos with Creamy Avocado Broccoli Slaw on a white linen napkin
raw shrimp in a glass bowl with marinade ingredients

How to make Chipotle Lime Shrimp Tacos with Creamy Avocado Broccoli Slaw

Ingredients

  • Shrimp. I prefer using large or jumbo shrimp. Cut down on prep time by purchasing already peeled and deveined shrimp.
  • Olive oil. Olive oil or any neutral oil works.
  • Lime. The title of the recipe is lime tacos .. so ya know .. lime is needed here.
  • Chipotle seasoning blend. Take out the guess work and use a blend. The blend I used was a combo of: Sweet Chili Pepper, Chipotle Chili Pepper, Cayenne Pepper, Oregano, Cumin, Parsley, Mustard, Garlic, Onion, Carrot, Sugar, Citric Acid, Orange Peel, Lemon Peel, Oil Of Lemon & Lime.
  • Ground cumin. To add a warm, earthy flavor and aroma with a bit of both sweetness and bitterness.
  • Salt. To enhance the flavors!
  • Broccoli slaw mix. Cut down on prep time and use a slaw mix which is typically a mixture of shredded broccoli stalks with julienned carrots and a bit of purple cabbage. It can be purchased at almost any grocery store along with the bagged salads.
  • Scallions.
  • Plain yogurt. I used this in place of sour cream. Yogurt will add the same tanginess and creaminess needed for the slaw.
  • Avocado. Your avocado still hard as a rock? Place it in a brown paper bag with a banana overnight. The banana will ripen faster giving off ethylene gas in a closed space to help ripen the avocado faster.
  • Cilantro. Don’t go crazy picking off each individual leaf. The stems pack in a ton of flavor too!
  • Tortillas. Use flour or corn tortilla – whatever you like best!
broccoli slaw in a glass bowl with scallions, avocado, lime, yogurt, cilantro, black pepper, salt surrounding the bowl on a marble platter

Equipment

  • Large mixing bowls for both marinating the shrimp and mixing the broccoli slaw.
  • A microplane is needed to zest the lime.
  • A food processor or blender helps make the avocado yogurt mixture creamy, but it’s not needed. Use a potato masher to mash to desired consistency.
  • A grill or grill pan to cook the shrimp and give it a smokier flavor.
  • Wooden skewers will help to easily flip the shrimp as it cooks.
three shrimp tacos in flour tortillas garnished with yogurt and cilantro

Step-by-Step Instructions

  1. Rinse and pat the shrimp dry. Transfer to a large mixing bowl. Drizzle with olive oil and lime juice. Sprinkle with the lime zest, chipotle seasoning, cumin, and salt. Toss to coat evenly. Cover in place in the refrigerator to marinate for at least 20 minutes. Soak skewers in water as the shrimp marinades.
  2. In a bowl, combine the broccoli slaw and scallions. In a food processor, combine the yogurt, avocado, cilantro, lime juice, and zest. Pour over the slaw and toss to combine. Season with salt and pepper, to taste.
  3. Heat a grill (or grill pan) to medium-high heat. Place the shrimp on the skewers and grill until shrimp turn pink, about 1-2 minutes per side. (Alternatively, heat a large skillet over medium high heat. Add the shrimp to the hot pan and sauté, flipping occasionally, until the shrimp are cooked through.)
  4. Assemble tacos by layering the broccoli slaw, shrimp, then toppings in the tortilla.

Cooking Tips

A general rule of thumb for marinades is needing approximately 1/4 to 1/2 cup of marinade for every pound of protein. Always marinate in the refrigerator, not at room temperature Before cooking, remove the protein from marinade and pat dry with a paper towel to promote even browning and prevent steaming

opened shrimp taco
Print
clock clock iconcutlery cutlery iconflag flag iconfolder folder iconinstagram instagram iconpinterest pinterest iconfacebook facebook iconprint print iconsquares squares iconheart heart iconheart solid heart solid icon

Chipotle Lime Shrimp Tacos with Creamy Avocado Broccoli Slaw

  • Author: Chef Julie Harrington, RD
  • Prep Time: 20
  • Cook Time: 5
  • Total Time: 25 minutes
  • Yield: 4

Ingredients

Scale

For the shrimp:
1 pound large or jumbo shrimp, peeled, deveined, and tails removed (fresh or frozen and thawed)
1 teaspoon olive oil
1 lime, juiced and zested
1 teaspoon chipotle seasoning blend
½ teaspoon ground cumin
½ teaspoon salt
Wooden skewers

For the broccoli slaw:
2 cups broccoli slaw mix
2 tablespoons scallions, thinly sliced
½ cup plain yogurt
1 avocado
1/4 cup fresh cilantro, chopped
1 lime, juiced and zested
Salt and pepper, to taste

For the tacos:
8 small flour or corn tortillas
Optional toppings: Cotija cheese, sour cream, cilantro, sliced avocado, lime wedges


Instructions

  1. Rinse and pat the shrimp dry. Transfer to a large mixing bowl. Drizzle with olive oil and lime juice. Sprinkle with the lime zest, chipotle seasoning, cumin, and salt. Toss to coat evenly. Cover in place in the refrigerator to marinate for at least 20 minutes. Soak skewers in water as the shrimp marinades.
  2. In a bowl, combine the broccoli slaw and scallions. In a food processor, combine the yogurt, avocado, cilantro, lime juice, and zest. Pour over the slaw and toss to combine. Season with salt and pepper, to taste.
  3. Heat a grill (or grill pan) to medium-high heat. Place the shrimp on the skewers and grill until shrimp turn pink, about 1-2 minutes per side. (Alternatively, heat a large skillet over medium high heat. Add the shrimp to the hot pan and sauté, flipping occasionally, until the shrimp are cooked through.)
  4. Assemble tacos by layering the broccoli slaw, shrimp, then toppings in the tortilla.

Keywords: taco, shrimp tacos, heart healthy, taco Tuesday, healthy tacos

Recipe Card powered byTasty Recipes

FAQ

What if I don’t have a grill pan?
Alternatively, heat a large skillet over medium high heat. Add the shrimp to the hot pan and sauté, flipping occasionally, until the shrimp are cooked through.

What can I use in place of shrimp?
Any mild white flakey fish will do – cod, tilapia, halibut, grouper, etc.

Can I make the broccoli slaw from scratch?
Of course! Create a mixture of shredded broccoli stalks with julienned carrots and thinly sliced purple cabbage.

Other recipes you may enjoy

Turkey Pumpkin Chili

Pumpkin isn’t only for sweet recipes. Try switching things up and use pumpkin in a savory cooking application. Start with this Turkey Pumpkin Chili! 

Turkey Pumpkin Chili with a piece of cornbread in a white bowl

How is October already coming to an end? Fall is a busy time for me with conferences and a lot of work travel. Also during this time of year, I’m sure your Pinterest boards are being saturated with pumpkin everything! I am would say I am a self-proclaimed pumpkin lover, but my RD friend Maggie I would nominate as the president of the pumpkin lover’s club. She just came out with a pumpkin cookbook featuring 50 creative pumpkin flavored, shaped, & spiced recipes.

Turkey Pumpkin Chili with piece of cornbread in a white bowl

Did You Know?

A few years back I was at a conference and an RD from Nestle was there speaking about Libby’s canned pumpkin. That brand is a staple across supermarkets nationally. I’m sure many of you, like myself, stock up on Libby’s canned pumpkin this time of year. I was fascinated to learn they exclusively use Dickinson pumpkins, which are a special strain of pumpkins.

Why Dickinson Pumpkins?

Libby’s acquired the rights to the “Libby’s Select Dickinson” pumpkin in 1929 from the Dickinson family who brought it in the early 1800s from Kentucky. If you ever Google “Dickinson pumpkin” images that appear look like a pale, slightly misshapen butternut squash, not the jack-o-lantern pumpkin you may be thinking of. When Dickinson pumpkins are grown and cultivated just right, they yield a sweet, bright orange flesh that’s amazing in dishes from pies to pasta, and a healthier ingredient to swap into some of your favorite recipes.

Confession: One year I was a little too pumpkin obsessed. I ate it in my oats for breakfast, stirred it in my yogurt, made smoothies, breads, soups every. single. day. I had a tad too much beta-carotene and my palms started turning orange. Lesson learned.

While pumpkin is used in sweet applications the majority of the time, pumpkin works well with savory applications. This chili is perfect for someone who isn’t too crazy about super spicy chili. It’s a mellow flavor with a hint of sweet. I feel like chili isn’t complete without a slice of cornbread. I always crumble up the cornbread right into the chili.

Print
clock clock iconcutlery cutlery iconflag flag iconfolder folder iconinstagram instagram iconpinterest pinterest iconfacebook facebook iconprint print iconsquares squares iconheart heart iconheart solid heart solid icon
white bowl with turkey pumpkin chili with a piece of cornbread

Turkey Pumpkin Chili

  • Author: Chef Julie Harrington, RD
  • Prep Time: 10
  • Cook Time: 20
  • Total Time: 30 minutes
  • Yield: 6
  • Category: chili

Ingredients

Scale
  • 2 tablespoons olive oil
  • 1 medium onion, diced
  • 3 cloves garlic, minced
  • 1 lb. ground turkey breast
  • 1 1/2 tablespoons chili powder
  • 1 teaspoon cumin
  • 1/4 teaspoon cinnamon
  • 1/4 teaspoon cayenne pepper
  • 1 (28 oz) can no salt added diced tomatoes
  • 1 (15 oz) can pumpkin puree (not pie filling)
  • 2 cups low sodium chicken stock
  • 1 (15 oz) can black beans, drained & rinsed
  • 1 (15 oz) can red kidney beans, drained & rinsed
  • pinch of salt and pepper

Instructions

  1. Heat oil in a large pot over medium heat. Add the onion and garlic. Cook until tender, about 5 minutes. Add the turkey, and cook until browned, stirring occasionally.
  2. Stir in the chili powder, cumin, oregano, cinnamon, and cayenne pepper, and cook for 1-2 minutes.
  3. Add in the diced tomatoes, pumpkin, chicken stock and beans, and stir to combine.
  4. Bring the chili to a boil, then reduce the heat and simmer, uncovered, for 20 minutes.
  5. Serve with cornbread.

Notes

This chili freezes well. Make a large batch and freeze half for another time.

Keywords: chili, pumpkin, turkey,

Recipe Card powered byTasty Recipes

Other recipes you may enjoy

Chicken Pesto Kabobs

Need some new grilling inspiration? Try these simple and flavorful Chicken Pesto Kabobs!

Chicken Pesto Kabobs + learn the difference between charcoal and gas #grills via Chef Julie Harrington, RD @ChefJulie_RD #kabobs #grill #grilling #chicken #pesto #simplerecipe

Fire up the grill! Any grill will do, but there are advantages and disadvantages of using both charcoal or gas grills.

Charcoal vs. Gas Grills – What’s the difference?

Charcoal Grills:

Charcoal grills provide a more distinct smoky flavor along with that amazing backyard aroma. It’s such a tease when I’m running through the neighborhood and all I smell are my neighbors grilling. Scented wood chips or charcoal will add additional flavor. However, charcoal can be a little messy and sometimes tricky to regulate the temperature.

Gas Grills:

Just turn on a switch and your gas grill is fired up and ready to go. You are able to easily regulate the temperature and often gas grills have different settings that you can easily regulate areas of the grill at different temperatures. You won’t really get that smoky flavor, but you are able to cook various items on the grill at the same time.

Chicken Pesto Kabobs + learn the difference between charcoal and gas #grills via Chef Julie Harrington, RD @ChefJulie_RD #kabobs #grill #grilling #chicken #pesto #simplerecipe

I like to create little ribbons for the zucchini to thread on the skewers. Chopped (quartered or in half moons) zucchini works just as fine! I just enjoy the crispy edges of the zucchini ribbons that crisp up from the grilling process.

If you are making zucchini ribbons, just be careful using the mandolin. They can be a tad dangerous. I got into a fight with mine once.

Chicken Pesto Kabobs + learn the difference between charcoal and gas #grills via Chef Julie Harrington, RD @ChefJulie_RD #kabobs #grill #grilling #chicken #pesto #simplerecipe

Grilling is a healthy cooking method

Grilling is a healthy cooking method to prepare your food. It requires minimal added fats and imparts a smoky flavor while keeping meats and veggies juicy and tender.

Recipe shortcut

There is nothing wrong with cooking with convenience. If using prepared pesto this recipe only has 4 ingredients and can be whipped up for a delicious dinner in no time!

Print
clock clock iconcutlery cutlery iconflag flag iconfolder folder iconinstagram instagram iconpinterest pinterest iconfacebook facebook iconprint print iconsquares squares iconheart heart iconheart solid heart solid icon
chicken pesto kabobs on a wooden board

Chicken Pesto Kabobs

  • Author: Chef Julie Harrington, RD
  • Prep Time: 1 hour
  • Cook Time: 12 mins
  • Total Time: 1 hour 12 mins
  • Yield: 4
  • Category: Dinner
  • Method: Grilling

Ingredients

Scale
  • 1 cup cherry tomatoes
  • 2 zucchini
  • 1 pound boneless, skinless chicken breasts, cut into 1 inch cubes
  • 1 cup pre-made pesto, divided
  • salt and pepper, to taste

Instructions

  1. In a large resealable bag, combine chicken and ¾ cup pesto; marinate for 1 hour.
  2. Using a mandolin (or carefully cut with a knife), slice zucchini lengthwise.
  3. Remove chicken from the marinade. Thread the cherry tomatoes, zucchini in a ribbon-like pattern, then chicken. Repeat until skewer is filled.
  4. Preheat grill to medium-high heat. Add kebobs to grill, cook gently turning halfway through for about 10-12 minutes or until internal temperature of the chicken reaches 165 degrees F. Season with salt and pepper, to taste.
  5. Brust on additional pesto, if desired. Serve immediately.

Keywords: grilling, grill, kabob, chicken, pesto, simple

Recipe Card powered byTasty Recipes
Chef Julie Harrington, RD - Culinary Nutrition Consultant of chefjulierd.com

Pin for later!

Chicken Pesto Kabobs + learn the difference between charcoal and gas #grills via Chef Julie Harrington, RD @ChefJulie_RD #kabobs #grill #grilling #chicken #pesto #simplerecipe

This recipe was originally posted in July 2016. Content and recipe have been updated.

Oat Flour Pancakes

These pancakes are whole grain and gluten-free, making them a perfect fit for any pancake enthusiast!

oat flour pancakes stacked on a white plate

Why I love Oat Flour Pancakes

I used to be “anti pancake” because I am the worst at flipping them. Really, it was that I was impatient and tried to flip them too early before they set.

When my sisters and I were little, my dad was the only one who was allowed to cut our pancakes. He would keep them perfectly stacked and cut them into perfect triangles. I was more of a syrup dunker than a drizzler. I would take each triangle and dunk it into the “good syrup”. My aunt lives in Vermont and she would send us delicious locally made maple syrup.

gluten free pancakes on a white plate topped with wild blueberries

Using whole grains for pancakes

The problem with pancakes is that I never felt satisfied after eating them. Adding whole grains as the base of pancakes can help solve that solution.

I used oat flour as the base. You could just buy oat flour, but it’s pretty easy to make. Just take rolled oats or instant oats and pulse them in a food processor until they resemble a light fluffy flour. Oat flour still contains all part of the whole grain, but not as dense as whole wheat flour, yielding a fluffier pancake.

oat flour pancakes with blueberries

The secret to creating fluffy pancakes

Vinegar in pancakes? Yes! It’s the secret to help activate the baking powder and helps the pancakes puff and become fluffy.

I’ve tried some other methods like adding seltzer to the batter or whipping the egg whites separately from the egg yolks before combining them. Both methods do work, but I don’t always have seltzer on hand, and mixing egg whites separately makes more messy bowls. I don’t know about you, but the fewer dishes to clean, the better!

Oat flour pancakes cut with wild blueberries

Syrup dunker or drizzler?

Are you a syrup dunker or drizzler? Most of the time I ditch the syrup and use frozen fruit like wild blueberries. When frozen berries defrost they become all gooey and syrupy. Other times, I’ll spread peanut butter or yogurt between the layers. I really just go with what I’m craving at the time.
How do you top your pancakes?

Print
clock clock iconcutlery cutlery iconflag flag iconfolder folder iconinstagram instagram iconpinterest pinterest iconfacebook facebook iconprint print iconsquares squares iconheart heart iconheart solid heart solid icon
stack of oat flour pancakes on a white plate with blueberries

Oat Flour Pancakes

  • Author: Chef Julie Harrington, RD
  • Prep Time: 10
  • Cook Time: 10
  • Total Time: 20 minutes
  • Yield: 2-3 1x
  • Category: pancakes, breakfast

Description

These oat flour pancakes are whole grain and gluten-free, making them a perfect fit for any pancake enthusiast!


Ingredients

Scale
  • 1 3/4 cup oat flour (see notes)
  • 1 tablespoon sugar
  • 2 teaspoons baking powder
  • 2 teaspoons cinnamon
  • ¼ teaspoon salt
  • 1 cup milk (or non-dairy milk of choice)
  • 1 teaspoon vanilla extract
  • 2 teaspoons apple cider vinegar (or white vinegar)
  • 1 tbsp canola oil
  • 2 eggs

Instructions

  1. In a large mixing bowl, combine oat flour, sugar, baking powder, cinnamon, and salt. Stir to combine.
  2. In a medium mixing bowl, add milk, vanilla, apple cider vinegar, canola oil, and eggs; whisk together.
  3. Slowly add wet ingredients into dry ingredients and mix until it just comes together. (do not overmix)
  4. Let batter sit for 5-7 minutes. It will thicken.
  5. Lightly spray a hot griddle with cooking spray.
  6. Use a 1/2 measuring cup to scoop the pancake batter onto the griddle.
  7. Let the pancakes bubble before flipping. Cook until golden brown on both sides.

Notes

Make your own oat flour:
Place either rolled oats or instant oats in a food processor at high speed. Process until it turns into fine oat flour.

Batter makes 6 medium-sized pancakes.

Keywords: pancakes, breakfast, whole grain, brunch

Recipe Card powered byTasty Recipes

*This recipe was originally posted in 2014. A new picture has been updated in 2018.

Smoked Salmon Avocado Flatbread

Looking to switch up the same old appetizer recipes you serve at parties or gatherings? Kick off your next party with Smoked Salmon Avocado Flatbreads your guests will love.
Smoked Salmon Avocado Flatbread - Looking to switch up the same old appetizer recipes you serve at parties or gatherings? Kick off your next party with Smoked Salmon Avocado Flatbreads your guests will love. - via RDelicious Kitchen @RD_KitchenBy posting this recipe I am entering a recipe contest sponsored by the Seafood Nutrition Partnership and am eligible to win prizes associated with the contest. I was not compensated for my time.

I was excited to enter this recipe contest sponsored by the Seafood Nutrition Partnership because I feel like seafood does not get enough love in the appetizer department. Also, I selfishly can’t wait to see what everyone else came up with for this contest to get even more seafood inspired recipe ideas.
Smoked Salmon Avocado Flatbread - Looking to switch up the same old appetizer recipes you serve at parties or gatherings? Kick off your next party with Smoked Salmon Avocado Flatbreads your guests will love. - via RDelicious Kitchen @RD_Kitchen
Yes, you may see the usual shrimp cocktail, or crab dip included in an appetizer spread. There are so many other seafood options to consider.

Why add more seafood into your weekly routine? 

Eating seafood twice a week reduces the risk of death from any health-related cause. Studies show it may reduce your risk of heart disease, plus it gives you more energy throughout the day. (Source)

My feeling is the general population knows they should eat more seafood, but not sure how to prepare it. From delicate, mild flounder to rich, flavorful salmon, or sweet and savory shrimp, seafood can please any palate. Seafood fits with all of your favorite flavors – it can be incorporated into a spicy Latin dish, flavorful Creole recipe, light, and refreshing salad, or a rich Italian pasta bowl.
Smoked Salmon Avocado Flatbread - Looking to switch up the same old appetizer recipes you serve at parties or gatherings? Kick off your next party with Smoked Salmon Avocado Flatbreads your guests will love. - via RDelicious Kitchen @RD_Kitchen
I’ve loved smoked salmon ever since I was introduced to it when I worked at a local bagel shop in high school. It has a silky, buttery, texture balanced with a not so fishy, smokiness flavor. All seafood, including smoked salmon, is one of the leanest sources of protein and a superfood packed with nutrients such as omega-3s, which is essential for your good heart health.
Smoked Salmon Avocado Flatbread - Looking to switch up the same old appetizer recipes you serve at parties or gatherings? Kick off your next party with Smoked Salmon Avocado Flatbreads your guests will love. - via RDelicious Kitchen @RD_Kitchen

 The Great Debate: Farm-Raised or Wild Caught:

I get this question often and I never tell anyone one way or another, but rather to help them educate themselves.  The Seafood Nutrition Partnership collaborates with FishWatch.gov who provides easy-to-understand facts about the science and management behind U.S. seafood and tips on how to make educated seafood choices. Helping everyone—from chefs to consumers—understand sustainable seafood.

Also, check out Monterey Bay Aquarium’s Seafood Watch. They make recommendations, in your area, showing you which seafood items are “Best Choices” or “Good Alternatives,” and which ones you should “Avoid.” This list is constantly being updated as things are changing.

Print

clock clock iconcutlery cutlery iconflag flag iconfolder folder iconinstagram instagram iconpinterest pinterest iconfacebook facebook iconprint print iconsquares squares iconheart heart iconheart solid heart solid icon
smoked salmon flatbread on a slate

Smoked Salmon Avocado Flatbread

  • Author: Chef Julie Harrington, RD
  • Yield: 8 appetizer pieces 1x
  • Category: appetizer

Description

Looking to switch up the same old appetizer recipes you serve at parties or gatherings? Kick off your next party with Smoked Salmon Avocado Flatbreads


Ingredients

Scale
  • 2 tablespoons goat cheese
  • 2 tablespoons cream cheese
  • 1 tablespoon fresh dill, finely chopped
  • 1 clove garlic, minced
  • 1 1/2 teaspoons olive oil, divided
  • 2 whole grain naan
  • 1/2 small red onion, thinly sliced
  • 1 cup arugula
  • 6 oz. smoked salmon
  • 1/2 of an avocado, sliced thinly
  • salt and pepper, to taste

Instructions

  1. Preheat oven to 350 degrees F. Line a baking cheese with parchment paper or cooking spray.
  2. In a small bowl, combine the goat cheese, cream cheese, dill, garlic, and 1 teaspoon olive oil. Mix well.
  3. Spread evenly over both pieces of naan bread. Top with onion slices.
  4. Bake naan in the oven for 8-10 minutes until the edges and bottom of the naan are crisp.
  5. Remove naan from the oven. Let slightly cool.
  6. In a small bowl, toss arugula with remaining 1/2 teaspoon of olive oil. Season with salt and pepper.
  7. Top naan with arugula, salmon, and avocado. Cut each naan into 4 appetizer size slices. Serve.

Keywords: smoked salmon, flatbread, appetizer

Recipe Card powered byTasty Recipes

Chef Julie Harrington, RD - Culinary Nutrition Consultant of chefjulierd.com

Pin it for later!

Smoked Salmon Avocado Flatbread - Looking to switch up the same old appetizer recipes you serve at parties or gatherings? Kick off your next party with Smoked Salmon Avocado Flatbreads your guests will love. - via RDelicious Kitchen @RD_Kitchen
Learn more about the Seafood Nutrition Partnership:
Website: http://www.seafoodnutrition.org/
Facebook: https://www.facebook.com/seafoodnutrition
Instagram: https://www.instagram.com/seafoodnutritionpartnership
Pinterest: https://www.pinterest.com/seafood4health/
Twitter: https://twitter.com/Seafood4Health

Smashed Chickpea Scramble

Looking for a protein-packed and plant-based breakfast? Try a new breakfast idea, Smashed Chickpea Scramble. 
Smashed Chickpea Scramble - a plant-based and protein-packed breakfast recipe (vegan, vegetarian) via RDelicious Kitchen @RD_Kitchen
I have a slight obsession with chickpeas. If you search “chickpeas” on my recipe index tab, there are plenty of recipes to choose from. For me, what I think sets them apart is their texture. With a firmer texture, chickpeas are sturdier in dishes. Plus, chickpeas have a slightly nutty taste that pairs well with many flavors.
Smashed Chickpea Scramble - a plant-based and protein-packed breakfast recipe (vegan, vegetarian) via RDelicious Kitchen @RD_Kitchen
Ever wonder how I come up with new recipes?

The recipe development process:

I am usually inspired with new recipe ideas from when I travel, go out to eat, or just chatting with my friends, family, and clients. This recipe was inspired when I was counseling a client who was looking for warm plant-based breakfast ideas, that is packed with protein.

The first priority of when I develop a new recipe is taste. If it doesn’t taste good, then no one is going to want to make it or even eat it. Then I think of the nutritional value. Hello, dietitian here. Of course, I’m going to add that to the recipe development process.
Smashed Chickpea Scramble - a plant-based and protein-packed breakfast recipe (vegan, vegetarian) via RDelicious Kitchen @RD_Kitchen
During this client’s session, she mentioned she loved chickpeas. We had a brief bonding moment of our love for chickpeas. She asked if I had a chickpea breakfast recipe. I did not! Well, I have this cookie dough smoothie bowl, but she specifically asked for something warm.
Every recipe on here has a story. This is how this recipe became created. This is why I love cooking! I’m inspired daily to get creative in the kitchen.

Print

clock clock iconcutlery cutlery iconflag flag iconfolder folder iconinstagram instagram iconpinterest pinterest iconfacebook facebook iconprint print iconsquares squares iconheart heart iconheart solid heart solid icon
smashed breakfast chickpeas in a white bowl with avocado and grape tomatoes

Smashed Chickpea Scramble

  • Author: Chef Julie Harrington, RD
  • Yield: 4
  • Category: breakfast

Description

Looking for a protein-packed and plant-based breakfast? Try a new breakfast idea, Smashed Chickpea Scramble. 


Ingredients

Scale
  • 1 (15 oz.) can chickpeas, drained and rinsed
  • 2 tablespoons water
  • 1 1/2 tablespoon olive oil, divided
  • 1 teaspoon ground turmeric
  • 1 teaspoon ground cumin
  • 1/4 teaspoon ground ginger
  • 1/2 teaspoon garlic powder
  • 1/4 teaspoon salt
  • 1/4 teaspoon black pepper
  • 1/4 cup hummus
  • 3 cups baby spinach
  • 1 small avocado, diced
  • 1 pint grape tomatoes, sliced

Instructions

  1. In a bowl, add chickpeas, water, and 1 tablespoon olive oil. Mash with the back of a fork, leaving some whole for texture.
  2. Fold in turmeric, cumin, ginger, garlic powder, salt, pepper, and hummus until well combined.
  3. Heat remaining 1/2 tablespoon olive oil in a skillet. Add the smashed chickpea mixture with spinach. Saute until chickpeas are warmed through and spinach has wilted.
  4. Serve with diced avocado and tomatoes.

Keywords: breakfast, plant-based, vegetarian

Recipe Card powered byTasty Recipes

Chef Julie Harrington, RD - Culinary Nutrition Consultant of chefjulierd.com


 Pin it for later!

Smashed Chickpea Scramble - a plant-based and protein-packed breakfast recipe (vegan, vegetarian) via RDelicious Kitchen @RD_Kitchen
Recipe created for Living Plate Pro meal plans

Swiss Chard and Mushroom Quiche

Whether you are pleasing a crowd for brunch or simply meal prepping for the upcoming week, add a Swiss Chard and Mushroom Quiche to the menu for a veggie and protein-packed breakfast!

Swiss Chard and Mushroom Quiche via RDelicious Kitchen @RD_Kitchen
I love a good quiche, but I’m a little OCD on the ratios when I make mine. I crave the perfect balance of crust, filling, and eggy-ness.

  • Crust thin enough but thick enough to enjoy delicious flaky crust in every bite.
  • Plenty of filling. Quiches are typically filled with vegetables, protein, and cheese. I like when each bite incorporates all the flavors of the filling.
  • The perfect balance of fluffy eggs. This kind of goes hand in hand with the filling part, and even amount of filling and eggs.

Swiss Chard and Mushroom Quiche via RDelicious Kitchen @RD_Kitchen
I used red swiss chard with mushrooms as the stars for the filling. What’s fun about quiche is you can play around with the ingredients to create your favorite combo! Plus, it’s an easy (and tasty) way to incorporate vegetables in the morning.


Swiss Chard and Mushroom Quiche via RDelicious Kitchen @RD_Kitchen
The magic of this quiche is the cheese. Cabot’s garlic & herb cheddar is out of this world. It is so creamy with a rich garlic and herb flavor, finishing with the subtle bite from the cheddar. Did you know many of Cabot’s cheese is lactose free? How can cheese be lactose free, you may wonder. The removal of lactose occurs naturally during the cheese making process. Just look for the “Lactose-Free” icon on the packaging of your favorite Cabot cheese products if you are looking for a  naturally lactose-free cheese.
Swiss Chard and Mushroom Quiche via RDelicious Kitchen @RD_KitchenI have a pretty deep pie plate that I used for this quiche. If you don’t have as deep of a dish, you may want to scale back a little on the amount of eggs. I did note that in the recipe’s note section, but just in case, I thought I would remind you again 😉
What’s your favorite quiche combo?

Print
clock clock iconcutlery cutlery iconflag flag iconfolder folder iconinstagram instagram iconpinterest pinterest iconfacebook facebook iconprint print iconsquares squares iconheart heart iconheart solid heart solid icon
Swiss Chard and Mushroom Quiche on a white plate

Swiss Chard and Mushroom Quiche

  • Author: Julie @ RDelicious Kitchen
  • Cook Time: 40 mins
  • Total Time: 40 mins
  • Yield: 8-12 1x

Ingredients

Scale
  • For the crust:
  • 1 1/4 cups all-purpose flour
  • 1 tsp salt
  • 1/2 cup (1 stick) unsalted butter
  • 2 tbsp to 1/4 cup ice water
  • For the quiche:
  • 2 tbsp olive oil
  • 1/2 large onion, sliced
  • 2 tbsp garlic, minced
  • 1 1/2 cups mini portabello mushrooms, sliced
  • 1 tbsp balsamic vinegar
  • 2 heaping cups red swiss chard, chopped (or any dark leafy green)
  • 4 oz Cabot garlic & herb cheddar cheese, shredded
  • 68 eggs* (see note)
  • 1/2 cup low-fat milk

Instructions

  1. Whisk together the flour and salt.
  2. Dice the butter into small cubes. Using a pastry blender (or fork) work the butter into the flour until it’s well-distributed, but not fully incorporated.
  3. Tossing with a fork, drizzle in the ice water. Stop adding water when the dough starts to come together, and grab it in your hands.
  4. Gather the dough into a ball. Gently shape each dough into a rough disk. For better texture, chill the dough for at least 30 minutes before rolling. Roll into an even circle. Place into pie dish and pinch the edges along the sides for the crust. Set aside until ready to use.
  5. In a large skillet, heat olive oil over low-medium heat. Cook onions for 20 minutes, until caramelized. Add the garlic and mushrooms and cook until mushrooms are tender. Add the balsamic vinegar and let reduce to about half. Toss in the swiss chard to coat with vegetables until just beginning to wilt.
  6. In a large bowl, whisk together eggs and milk. Season with salt and pepper.
  7. Sprinkle half the garlic & herb cheddar cheese at the bottom of the quiche crust. In an even layer add the swiss chard and mushroom mixture. Pour in the eggs. Top with remaining cheese.
  8. Bake in the oven for 35-40 minutes, until the edge of the crust has browned and the filling appears set.

Notes

Pie crust recipe adapted from King Arthur Flour’s all-butter pie crust.

I used a deep pie dish which was able to fit 8 eggs. If your pie plate is more shallow use 6 eggs.

Recipe Card powered byTasty Recipes


Jumbo Skillet Apple Pancake

Serve pancakes family style with this (grain-free) Jumbo Skillet Apple Pancake.
Jumbo Skillet Apple Pancake via Chef Julie Harrington, RD @ChefJulie_RD #pancake #jumbopancake #apple #glutenfree #breakfast #brunchConfession: I am a terrible pancake flipper. I am a waffle maker pro, but when it comes to pancakes, I fall short.

It’s either I am too eager to flip them before they are ready or the flipping process is just a disaster, like how I flipped it right on top on my other pancakes and I just made one giant pancake mound. Culinary school graduate fail.
Jumbo Skillet Apple Pancake via Chef Julie Harrington, RD @ChefJulie_RD #pancake #jumbopancake #apple #glutenfree #breakfast #brunchI was going to attempt to make this recipe into individual pancakes, but instead of the hassle of making a bunch of pancakes, I tried making one giant pancake and let me tell you.. it was the best idea I’ve ever had.
Jumbo Skillet Apple Pancake via Chef Julie Harrington, RD @ChefJulie_RD #pancake #jumbopancake #apple #glutenfree #breakfast #brunchThis giant pancake can now be served family style, so no more waiting for your stack on Sunday morning when everyone else is chowing down. Plus, no more pancake flipping disasters!
I opted to top mine with apple slices this time, but now I am thinking of all the topping options I want to try. This is going to become a staple on my weekends. Bonus, it heats up well too!
Jumbo Skillet Apple Pancake via Chef Julie Harrington, RD @ChefJulie_RD #pancake #jumbopancake #apple #glutenfree #breakfast #brunch

Print

clock clock iconcutlery cutlery iconflag flag iconfolder folder iconinstagram instagram iconpinterest pinterest iconfacebook facebook iconprint print iconsquares squares iconheart heart iconheart solid heart solid icon
Jumbo Skillet Apple Pancake in a baking pan

Jumbo Skillet Apple Pancake

  • Author: Chef Julie Harrington, RD
  • Prep Time: 10
  • Cook Time: 20
  • Total Time: 30 minutes
  • Yield: 6
  • Category: Breakfast
  • Method: Oven-Baked

Description

Serve pancakes family style with this (grain-free) Jumbo Skillet Apple Pancake.


Ingredients

Scale
  • 4 eggs
  • ¾ cup full-fat coconut milk, from the can
  • 1 tablespoon maple syrup
  • 1 teaspoon almond flour
  • 2 tablespoons arrowroot starch (or tapioca starch)
  • 2 teaspoons cinnamon, plus more for garnish
  • ¼ teaspoon baking powder
  • 1/8 teaspoon sea salt
  • 1 tablespoon coconut oil
  • 1 apple (such as a Honeycrisp Pink Lady), peeled, cored, and thinly sliced

Instructions

  1. Place a large cast iron skillet in the oven. Preheat the oven to 450 degrees F, leaving the skillet inside during preheating.
  2. In a large bowl, whisk together the eggs, coconut milk, maple syrup, and vanilla. In a separate bowl, whisk together the almond flour, arrowroot starch, cinnamon, baking powder, and salt. Pour the dry ingredients into the egg mixture and stir until fully combined.
  3. Carefully remove the hot skillet from the oven and add the coconut oil. Swirl it around the pan to coat the bottom and sides. Carefully pour the batter into the skillet. Gently place the apple slices on top. Bake for 15-20 minutes, or until golden brown and slightly puffed.
  4. Serve sprinkled with extra cinnamon and drizzle with maple syrup, if desired.

Notes

adapted from Paleo Magazine

Keywords: #pancake #jumbopancake #apple #glutenfree #breakfast #brunch

Recipe Card powered byTasty Recipes

Chef Julie Harrington, RD - Culinary Nutrition Consultant of chefjulierd.com


Jumbo Skillet Apple Pancake via Chef Julie Harrington, RD @ChefJulie_RD #pancake #jumbopancake #apple #glutenfree #breakfast #brunch

Prickly Pear & Wild Blueberry Smoothie

Start your morning with a simple smoothie with an exotic twist. The mix of prickly pear and wild blueberries adds a burst of flavor while packing in antioxidants to start your morning off right.
Prickly Pear & Wild Blueberry via RDelicious Kitchen @RD_KitchenDisclosure: By posting this recipe I am entering a recipe contest sponsored by the Wild Blueberry Association of North America and I am eligible to win prizes associated with the contest. I was not compensated for my time.
Did you know there are two different kinds of blueberries? The two different varieties are regular, cultivated blueberries and Wild Blueberries. While they may have a few similar qualities, they are quite different.

Wild Blueberries have a more intense flavor than regular blueberries. Wild Blueberry plants grow wild and are genetically diverse with thousands of interlocking plants spreading naturally across fields called barrens. It’s this diversity that gives Wild Blueberries their complex and delicious flavor — an extraordinary mix of tart and sweet.
Prickly Pear & Wild Blueberry via RDelicious Kitchen @RD_KitchenI wanted to highlight Wild Blueberries’ unique flavor profile with another unique fruit – prickly pear! I was recently asked what my strategies were to add plenty of produce into my daily eating habits. My response was, make it fun! Try adding unique and exotic new produce to your regular routine so it never gets boring.
An item like Wild Blueberries, you won’t find in the fresh produce section. You can find Wild Blueberries in the frozen fruit section of your local grocery store; just make sure the package says “Wild”. The Wild Blueberry crop (99% of it) is frozen. These potent little berries are individually quick-frozen (IQF) at harvest, locking in their nutrition and taste.
Prickly Pear & Wild Blueberry via RDelicious Kitchen @RD_KitchenWild Blueberries have twice (2x) the antioxidant capacity of larger, cultivated blueberries. A growing body of research shows the potential health benefits of Wild Blueberries including gut health, diabetes, cancer and brain health.
It’s a no-brainer that I now always have Wild Blueberries stashed in my freezer.
Prickly Pear & Wild Blueberry via RDelicious Kitchen @RD_Kitchen

Print

clock clock iconcutlery cutlery iconflag flag iconfolder folder iconinstagram instagram iconpinterest pinterest iconfacebook facebook iconprint print iconsquares squares iconheart heart iconheart solid heart solid icon

Prickly Pear & Wild Blueberry Smoothie

  • Author: Julie @ RDelicious Kitchen
  • Yield: 2

Ingredients

Scale
  • 1 prickly pear, peeled and diced
  • 1 cup frozen wild blueberries
  • 1/2 cup unsweetened almond milk
  • 1/2 tablespoon flax seeds
  • 1 teaspoon cinnamon
  • 1 banana, peeled
  • Ice (optional)

Instructions

  1. Blend all ingredients together until smooth and creamy.
  2. Serve immediately.

Recipe Card powered byTasty Recipes

RDelicious Kitchen @RD_Kitchen
Prickly Pear & Wild Blueberry via RDelicious Kitchen @RD_Kitchen

Learn more about Wild Blueberries:
Website // Facebook // Instagram // Pinterest // Twitter