This post may contain affiliate links. Read my privacy policy.
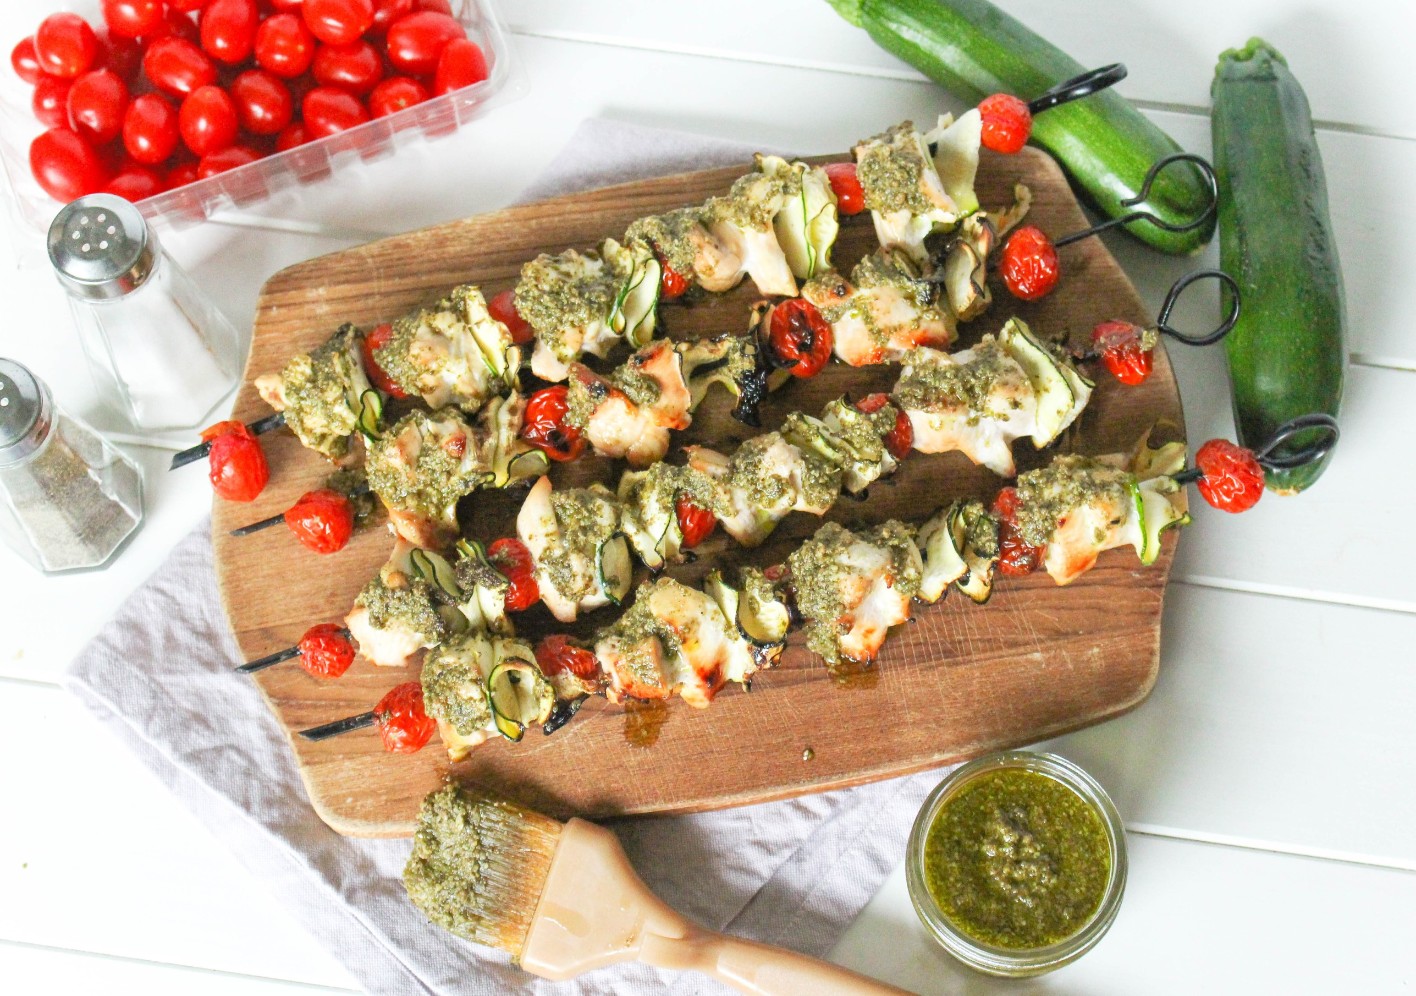
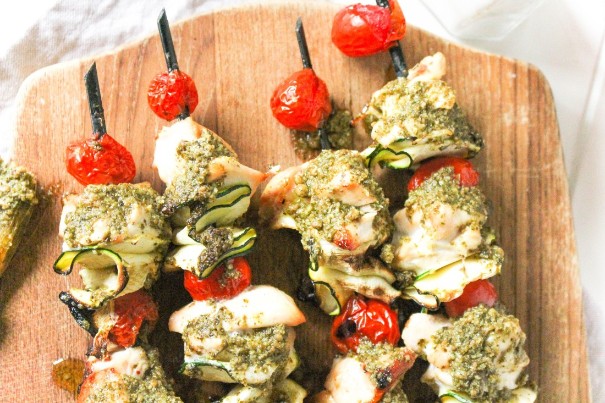
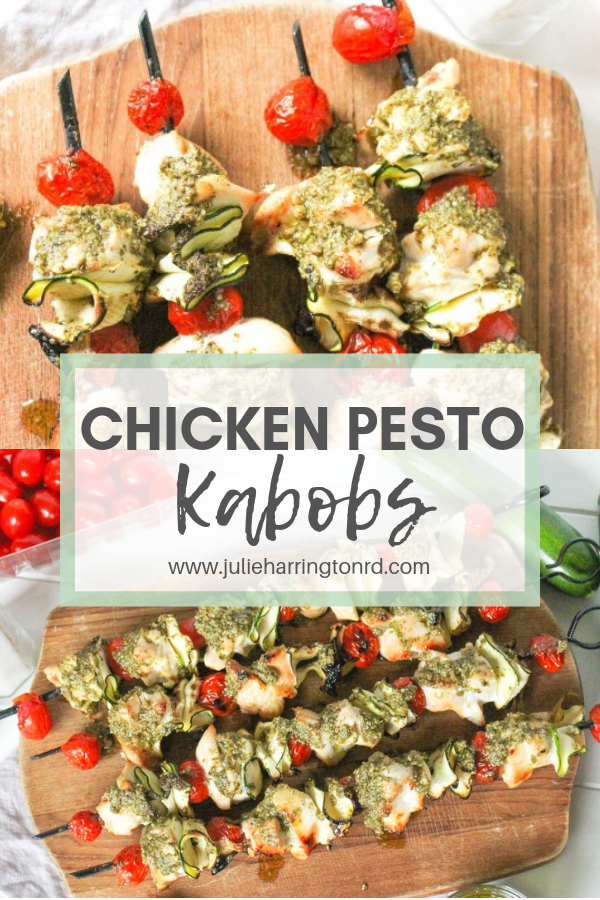
Need some new grilling inspiration? Try these simple and flavorful Chicken Pesto Kabobs!
Fire up the grill! Any grill will do, but there are advantages and disadvantages of using both charcoal or gas grills.
Charcoal vs. Gas Grills – What’s the difference?
Charcoal Grills:
Charcoal grills provide a more distinct smoky flavor along with that amazing backyard aroma. It’s such a tease when I’m running through the neighborhood and all I smell are my neighbors grilling. Scented wood chips or charcoal will add additional flavor. However, charcoal can be a little messy and sometimes tricky to regulate the temperature.
Gas Grills:
Just turn on a switch and your gas grill is fired up and ready to go. You are able to easily regulate the temperature and often gas grills have different settings that you can easily regulate areas of the grill at different temperatures. You won’t really get that smoky flavor, but you are able to cook various items on the grill at the same time.
I like to create little ribbons for the zucchini to thread on the skewers. Chopped (quartered or in half moons) zucchini works just as fine! I just enjoy the crispy edges of the zucchini ribbons that crisp up from the grilling process.
If you are making zucchini ribbons, just be careful using the mandolin. They can be a tad dangerous. I got into a fight with mine once.
Grilling is a healthy cooking method
Grilling is a healthy cooking method to prepare your food. It requires minimal added fats and imparts a smoky flavor while keeping meats and veggies juicy and tender.
Recipe shortcut
There is nothing wrong with cooking with convenience. If using prepared pesto this recipe only has 4 ingredients and can be whipped up for a delicious dinner in no time!
1 pound boneless, skinless chicken breasts, cut into 1 inch cubes
1 cup pre-made pesto, divided
salt and pepper, to taste
Instructions
In a large resealable bag, combine chicken and ¾ cup pesto; marinate for 1 hour.
Using a mandolin (or carefully cut with a knife), slice zucchini lengthwise.
Remove chicken from the marinade. Thread the cherry tomatoes, zucchini in a ribbon-like pattern, then chicken. Repeat until skewer is filled.
Preheat grill to medium-high heat. Add kebobs to grill, cook gently turning halfway through for about 10-12 minutes or until internal temperature of the chicken reaches 165 degrees F. Season with salt and pepper, to taste.
Brust on additional pesto, if desired. Serve immediately.
This post may contain affiliate links. Read my privacy policy.
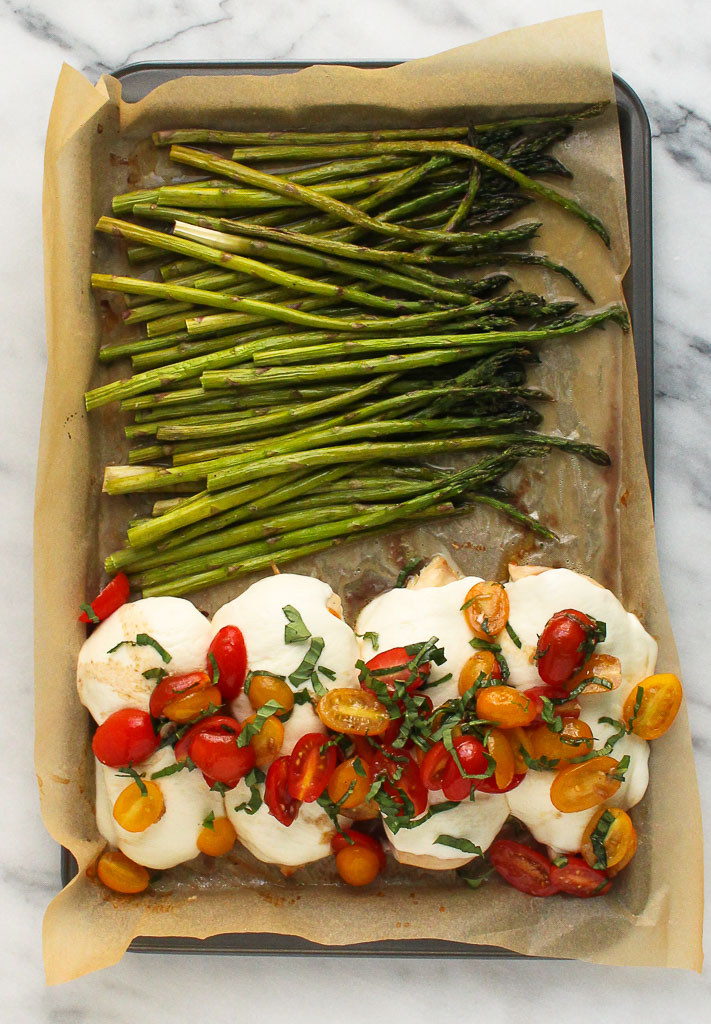
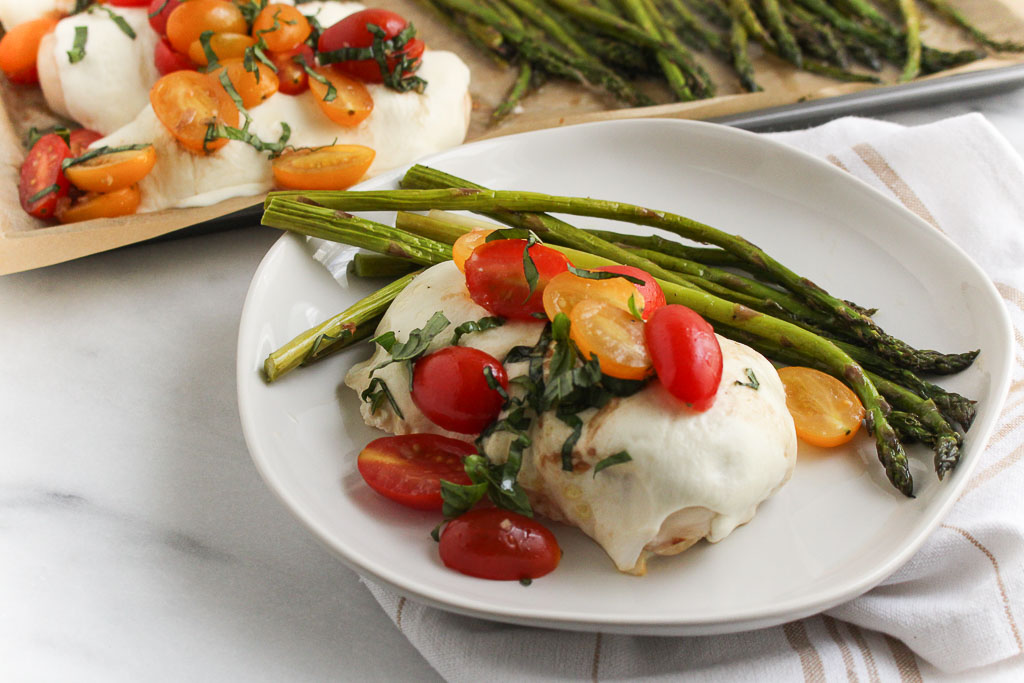
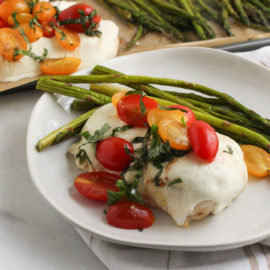
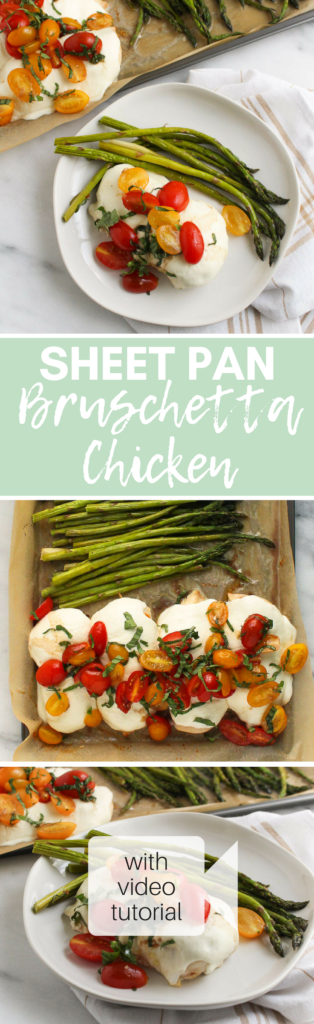
Make dinner time less stressful with easy prep and easy clean-up. This Sheet Pan Bruschetta Chicken with Roasted Asparagus is quick, nourishing, and delicious! Sheet pan dinners have been lifesavers during busy weeks. Throw ingredients together on a sheet pan and roast for a simple sheet pan dinner. They make busy weeknights a bit more manageable. With just only one pan to clean up, count me in. It’s exciting that sheet pan dinners are this month’s Recipe ReDux theme. I can’t wait to see what other members came up with. We will all have so many new ideas to try now! Hate scrubbing pans? Me too! I highly suggest investing in parchment baking sheets. It makes clean up even easier! No food gets stuck to the pan, so no scrubbing required!
In my house, we have a pretty solid system in place. I cook, and my boyfriend does the dishes. He loves sheet pan dinner nights because he barely has to clean a thing. Print
Make dinner time less stressful with easy prep and easy clean-up. This Sheet Pan Bruschetta Chicken with Roasted Asparagus is quick, nourishing, and delicious!
In a small bowl, combine the tomatoes, olive oil, balsamic vinegar, garlic, basil, salt, and pepper. Set aside.
Season both sides of the chicken with salt and pepper. Place chicken in a line on one end of the prepared baking sheet.
Place asparagus on the opposite side of the baking sheet in a single layer. Drizzle olive oil, salt, and pepper over asparagus. Toss to combine to evenly coat.
Place in the oven and bake for 25 minutes. Remove from oven and top chicken with mozzarella cheese. Toss the asparagus. Cook for an additional 5-10 minutes until chicken reaches an internal temperature of 165 degrees F and asparagus is tender.
Top chicken with bruschetta and serve immediately.
Notes
If chicken breasts are thick, cook chicken for 10 minutes alone first before adding asparagus to the pan.
This post may contain affiliate links. Read my privacy policy.
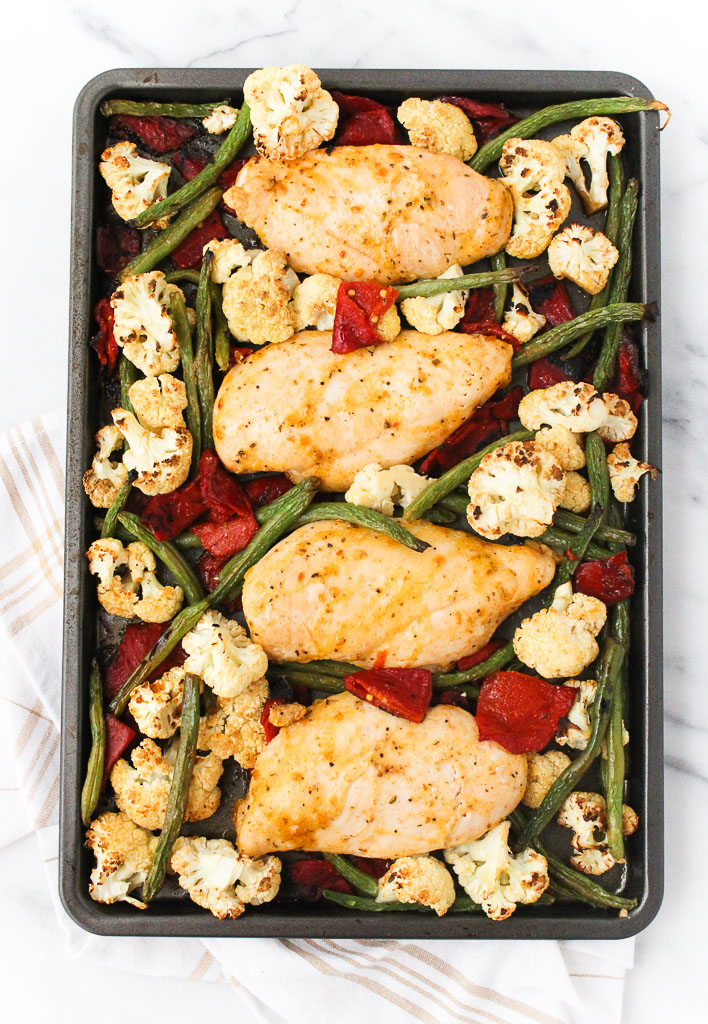
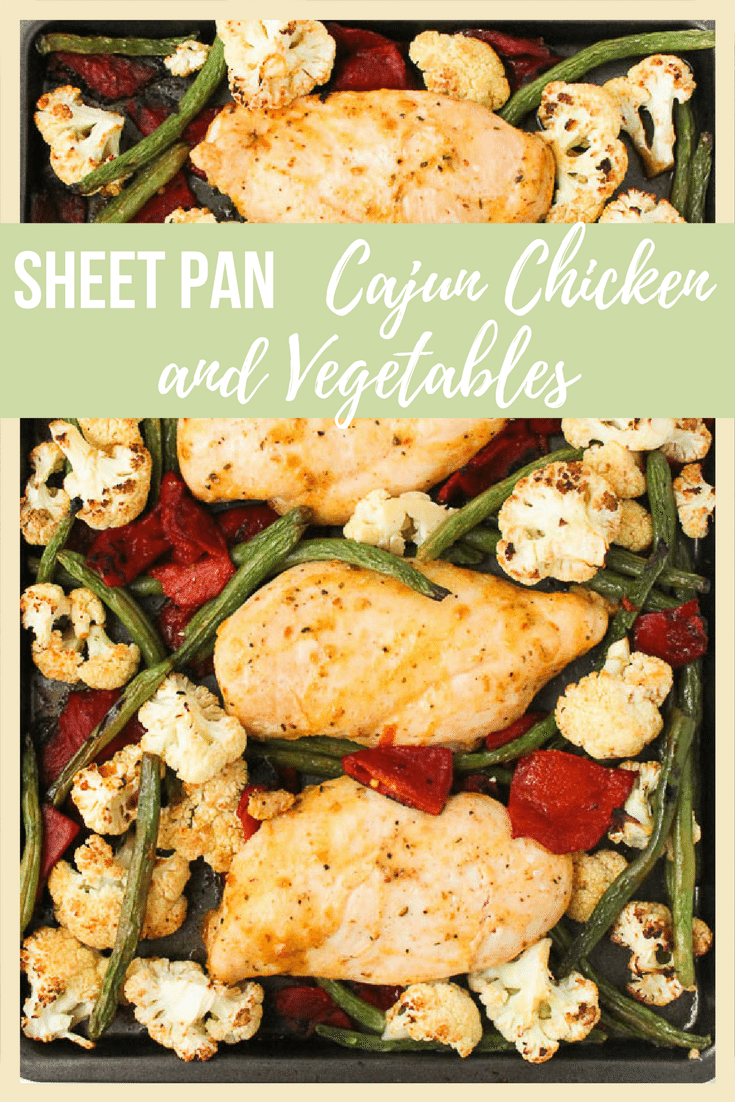
Make dinner even easier with sheet pan dinners and I’ve got the perfect one for you to try first! This Sheet Pan Cajun Chicken with Vegetables can easily be customized with flavors you love, using the same cooking process.
September is National Family Meals Month, a nationwide event designed to underscore the benefits of family meals and to challenge us all to share one more meal at home per week with our families.
The busy demands of modern life often come at the expense of family mealtime at home. Family meals eaten at home have been proven to benefit the health and wellness of children and adolescents. They have also been shown to fight obesity, substance abuse and to make families stronger—creating a positive impact on our communities and our nation as a whole.
According to a 2013 Harris poll, only 30 percent of American families share dinner every night.
(source)
Family meals were a big part of my life growing up. Even with my sisters and I involved in different activities, my family made it a point to get together around the table for family meals.
Regular family meals are linked to the kinds of outcomes that we all want for our children: higher grades and self-esteem, healthier eating habits and weights, and less risky behavior. (source)
When I go home to have family dinner, I soak that feeling in. Since I’ve moved out, I still try and get home for family dinner at least once a week. It’s a time where we all catch up on each other lives over a delicious home cooked meal. There are always lots of laughs. Charlie (our dog) knows exactly when our dad gets up from the table he can slide in for a few bites from my plate.
I’m excited to share family meals with my own family one day.
Sheet pan dinners are easily customizable. Choose a protein and some veggies, plus a seasoning blend you like. For this sheet pan dinner, I tried a Cajun spice blend. I liked the extra little kick it gave the dish and it was delicious on the cauliflower.
The best part about sheet pan dinners – only one pan to clean up! Can’t beat that! Plus, if you have leftovers, pack it for lunch. Looking to mix it up? Try serving over a bed of greens or quinoa.
3 cups cauliflower (1 large head), cut into florets
1 (12 oz.) jar roasted red peppers, drained and chopped
Instructions
Preheat oven to 450 degrees F.
In a small bowl, whisk together the olive oil, lemon juice, Cajun spice blend, and garlic. Set aside.
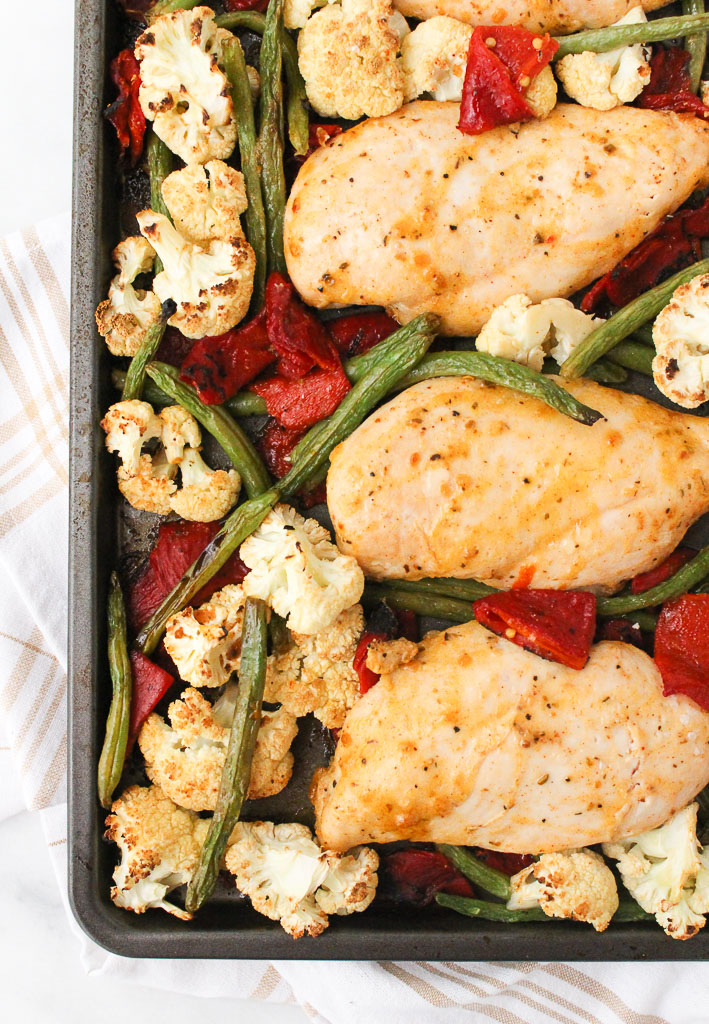
Evenly spread the green beans, cauliflower, and roasted red peppers on the baking sheet. Drizzle 2 tablespoons of marinade over the vegetables and toss until combined. Cook in the oven for 15 minutes.
Add chicken to the marinade and let marinate for 15 minutes.
Remove vegetables from the oven and nestle the pieces of chicken between the vegetables onto the pan. Bake for an additional 15-20 minutes until internal temperature of the chicken reaches 165 degrees F and vegetables are tender.
This post may contain affiliate links. Read my privacy policy.
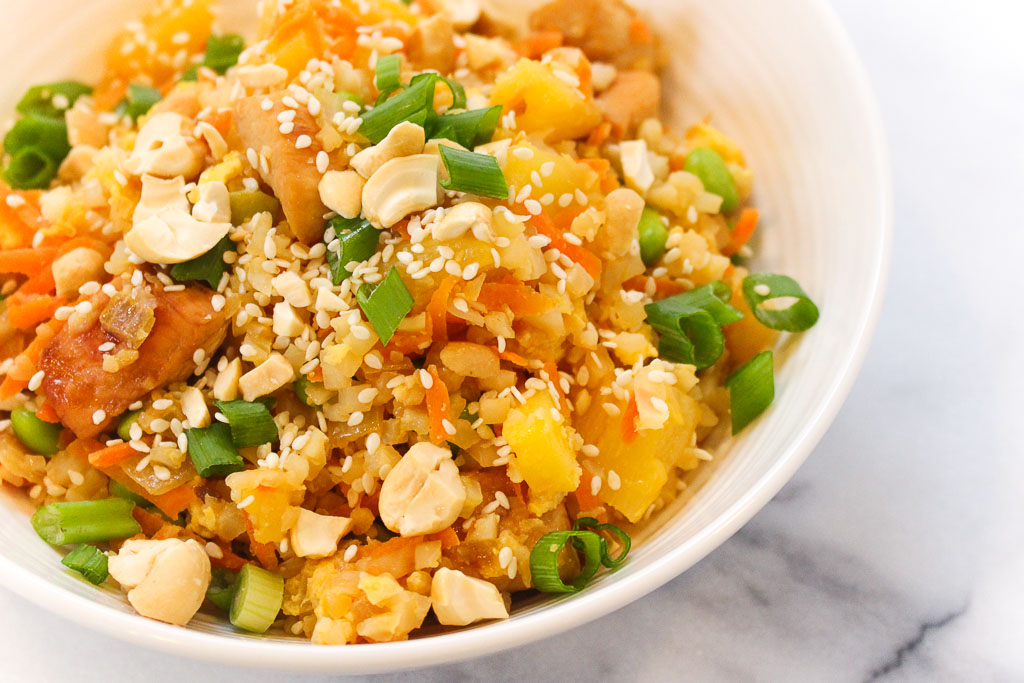
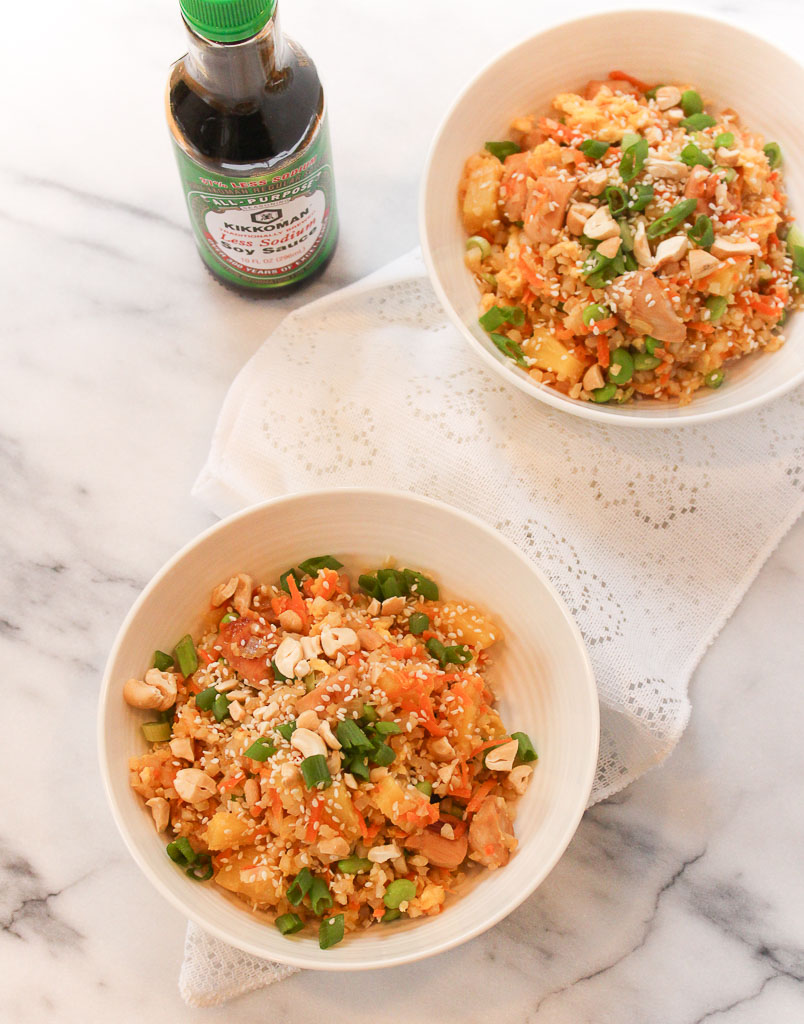
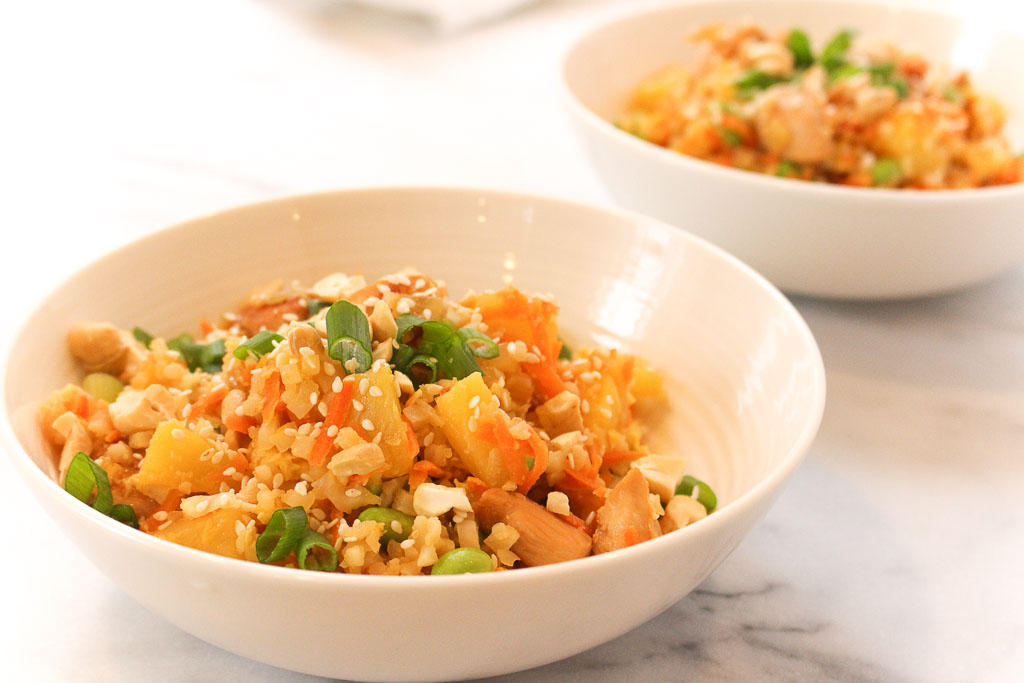
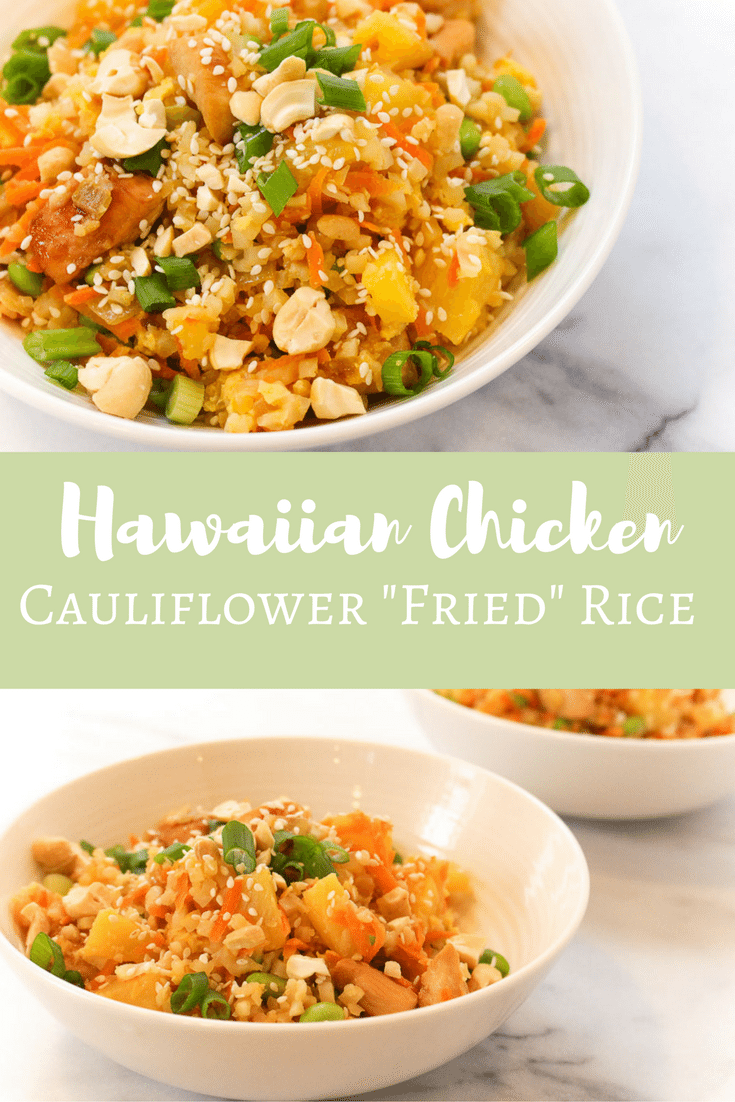
Skip take-out and make your own delicious fried rice, with this healthy twist. Try swapping out rice for cauliflower rice and creating this flavor packed Hawaiian Chicken Cauliflower “Fried” Rice. I received a free sample of Kikkoman soy sauce mentioned in this post. By posting this recipe I am entering a recipe contest sponsored by Kikkoman and am eligible to win prizes associated with the contest. I was not compensated for my time.
Have you jumped on board the cauliflower rice trend? This is one trend that I love because it adds more veggies to your meal! Many also opt into this ingredient swap idea because it is a lower carb option.
Your typical fried rice take-out may be packed with excess sodium, but by adding Kikkoman’s Traditionally Brewed Less Sodium Soy Sauce in this recipe can actually help reduce the amount of sodium in this dish. Soy sauce is often associated with being high in sodium, but culinary research indicates it’s an ingredient that can actually help reduce sodium in recipes. How? Soy sauce is rich in umami, a savory taste that helps round out the overall flavor of a dish and enhances the palatability of a wide variety of foods. In fact, a study published in the Journal of Food Science revealed that swapping soy sauce for salt reduces the sodium by up to 50% without decreasing consumer acceptance.
As you’ll see there is no additional source of sodium from any other ingredients in this recipe. By using 1/2 tsp. Kikkoman Soy Sauce in place of 1/2 tsp. table salt, the sodium content of the recipe is cut by 1000 mg. This isn’t just any cauliflower rice. I added a little tropical twist. As I am typing this recipe, I am dreaming of being on a tropical island away from the NJ snow. The addition of pineapple, not only adds that tropical flavor, but also the enzyme found in pineapple, bromelain, digests protein, softening the tissues in meat before cooking it, creating tender pieces of chicken. Looking to add more umami flavor to your recipes? Kikkoman offers a variety of less sodium products: Less Sodium Soy Sauce, 50% Less Sodium Gluten-Free Tamari Soy Sauce, Less Sodium Teriyaki Marinade & Sauce, and 50% Less Sodium Gluten-Free Teriyaki Marinade & Sauce.
1/4 cup + 3 tablespoons Kikkoman Traditionally Brewed Less Sodium Soy Sauce, divided
3 tablespoons honey, divided
1 (12 oz.) bag riced cauliflower (or 1 medium-sized head of cauliflower riced)
2 carrots, peeled and shredded
2 tablespoons + 1 teaspoon sesame oil, divided
1/2 medium onion, diced
1 cup frozen and shelled edamame, thawed
2 eggs, beaten
6 scallions, sliced
2 tablespoons, cashews, crushed
1 teaspoon sesame seeds
Instructions
In a bowl, combine 3 garlic cloves (minced), 1/4 cup pineapple juice, 1/4 cup soy sauce, and honey. Add the cubed chicken; stir to combine. Let marinade in the refrigerator for at least 1 hour.
Remove chicken from marinade. Discard marinade. Heat 1 tablespoon sesame oil in a large skillet over medium-high heat. Add chicken and cook for about 5 minutes, until internal temperature reaches 165 degrees F. Remove chicken from pan and set aside.
In a small bowl combine remaining pineapple juice, 3 tablespoons soy sauce, 1 tablespoon honey and 1 teaspoon sesame oil; set aside.
Heat 1 tablespoon of sesame oil in the same pan over medium-high heat. Add the onions and carrots. Saute for about 2 minutes; then add garlic; saute for another minute. Add the cauliflower and edamame. Saute until cauliflower is soft (but not mushy).
Turn pan down to low-medium heat. Make a well in the center of the pan and add the eggs. Stir gently in the center until starting to cook, then incorporate into the rest of the veggies. Stir in soy sauce mixture, scallions, pineapple chunks and chicken.
Top with cashews and sesame seeds before serving.
Recipe Card powered by
Don’t forget to check out all the other recipes that are slashing sodium with soy sauce!
This post may contain affiliate links. Read my privacy policy.
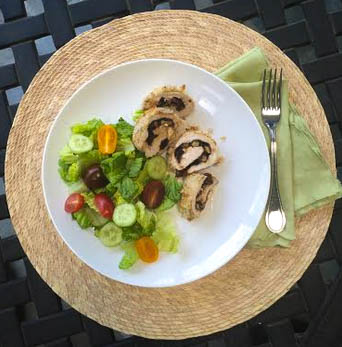
Balsamic stuffed chicken is an easy dinner idea that is ready in 45 minutes from start to finish that is bursting with flavor!
Disclosure: By posting this recipe I am entering a recipe contest sponsored by California Dried Plum Board and am eligible to win prizes associated with the contest. I was not compensated for my time.
Did you know May is National Osteoporosis Month? While you may automatically think of calcium, vitamin D, mainly found in dairy products for bone health, dried plums also have an array of health benefits.
Why We Are Using Prunes
Let’s be honest, dried plums, aka “prunes” get a bad reputation, but they are so versatile and great to add into your diet for its health benefits.
Emerging research suggests that dried plums support healthy bones, and may support heart health, digestive health, immunity and healthy aging. One serving (4-5 dried plums) is less than 100 calories. Plus, each serving provides 3 grams of fiber, 293 mg of potassium, 16 mg of magnesium, and more vitamin K than any other fresh or dried fruit.
I like dried plums as a snack, just as is, but they also can really up your game in the kitchen. Dried plums can serve as a substitute for fats or sugars to reduce calories in a baked good recipe. You can toss them on a salad or mix in to your yogurt for an extra nutritional boost.
The way I am using them today, is to add moisture to this chicken dish, while mixing it’s naturally sweet flavor with other savory ingredients.
Ingredients Needed
boneless, skinless chicken breasts – you will need 4 that are 4 ounces each.
salt and pepper – to taste
California Dried Plums – also known as prunes
balsamic vinegar – gives this easy chicken recipe a ton of flavor
walnuts – if desired, you can swap for pecans, almonds, or pistachios.
feta cheese – mozzarella cheese would also taste good!
dijon mustard
panko breadcrumbs
How to Make Stuffed Balsamic Chicken
Spray a baking dish with non-stick cooking spray and preheat the oven to 350 degrees.
Add the dried plums and balsamic vinegar to a small bowl and let them soak for at least 5 minutes.
Place the chicken in between 2 pieces of plastic wrap and flatten using a rolling pin or meat mallet. Season both sides with salt and pepper.
Blend the balsamic mixer in a food process until it’s turns to a paste. If needed, add a couple of drops of water.
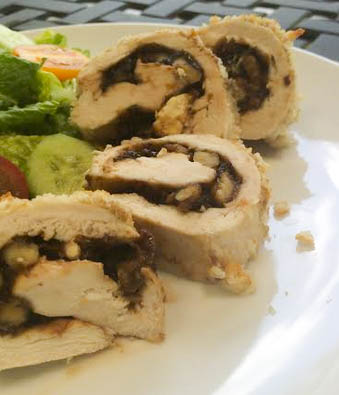
Spread the plum mixture over one side of each chicken breast. Sprinkle the feta and crushed walnuts on top.
Roll the chicken pieces and secure with toothpicks so the filling doesn’t fall out.
Brush the chicken roll ups with dijon mustard and coat with the panko breadcrumbs.
Bake for 25-30 minutes. Remove from the oven, take the toothpicks out and slice crosswise before serving.
Tips for Making
Try to pound the chicken so it’s even in thickness.
To make these ahead of time, follow the same instructions. Once they are rolled, cover in an airtight container. When ready, pop them in the oven and bake. We recommend only making these 24 hours in advance.
You can use this same method and stuff the chicken with your other favorite ingredients, such as spinach, cherry tomatoes, and mozzarella (caprese).
To make sure the chicken is fully cooked, use a meat thermometer. The internal temperature should be at least 165 degrees.
Can I Use Chicken Thighs Instead?
Sometimes you can swap breast for thighs, but since we are going to be rolling the chicken up, the breasts work better.
Do You Have to Roll the Chicken?
Some prefer to make “pockets” out of the chicken verus using a meat mallet. While they may be a little easier, pounding the chicken also helps to tenderize it. We also like the ratio of chicken to filling by using this method compared to the pocket.
Serving Suggestions
This meal goes great with just about any side dish, but here are a few of our favorites.
The key is marinating and using a liquid that is somewhat acidic to help tenderize the chicken.
How long does raw stuffed chicken last in the fridge?
We recommending only prepping stuffed chicken 24 hours in advanced. Depending on the filling, it can get soggy. Also, we do not want the chicken to spoil before it’s time to cook.
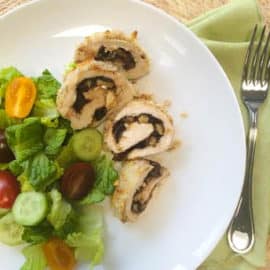
Liven up your weeknight chicken dinner with dried plums to add a boost of flavor with a boost of nutritional benefits.
Ingredients
Scale
4 (4 ounce) pieces skinless chicken breasts
salt and pepper
3/4 cup California Dried Plums
1/4 cup balsamic vinegar
1/3 cup walnuts, finely chopped
1/4 cup feta cheese
2 tbsp dijon mustard
1/2 cup panko breadcrumbs
Instructions
Preheat oven to 350 degrees F. Coat a baking dish with cooking spray.
In a small bowl add the California Dried Plums and balsamic vinegar and set aside to soak for at least 5 minutes.
Place chicken breasts between 2 sheets of plastic wrap, and flatten out, using a meat mallet, or rolling pin. Season each side with salt and pepper.
In a blender or food processor, blend the dried plums and balsamic vinegar, until it turns into a paste like consistency. (Add a few drops of water, if needed)
Evenly spread the plum mixture over one side of each chicken breasts. Sprinkle walnuts and feta cheese on top.
Roll chicken (in a jelly roll fashion) gently without letting the filling spill out. Secure chicken with wooden toothpicks.
Brush each chicken roll up with dijon mustard and and coat with panko breadcrumbs.
Bake in the oven for 25-30 minutes. Remove from oven and remove wooden toothpicks. Slice chicken breasts crosswise and serve.
Recipe Card powered by
FREE Ebook
Get on the list and download my free Knife Basics & Skills Ebook!
This website uses cookies to improve your experience. We'll assume you're ok with this, but you can opt-out if you wish.AcceptRejectRead More
Privacy & Cookies Policy
Privacy Overview
This website uses cookies to improve your experience while you navigate through the website. Out of these, the cookies that are categorized as necessary are stored on your browser as they are essential for the working of basic functionalities of the website. We also use third-party cookies that help us analyze and understand how you use this website. These cookies will be stored in your browser only with your consent. You also have the option to opt-out of these cookies. But opting out of some of these cookies may affect your browsing experience.
Necessary cookies are absolutely essential for the website to function properly. This category only includes cookies that ensures basic functionalities and security features of the website. These cookies do not store any personal information.
Any cookies that may not be particularly necessary for the website to function and is used specifically to collect user personal data via analytics, ads, other embedded contents are termed as non-necessary cookies. It is mandatory to procure user consent prior to running these cookies on your website.