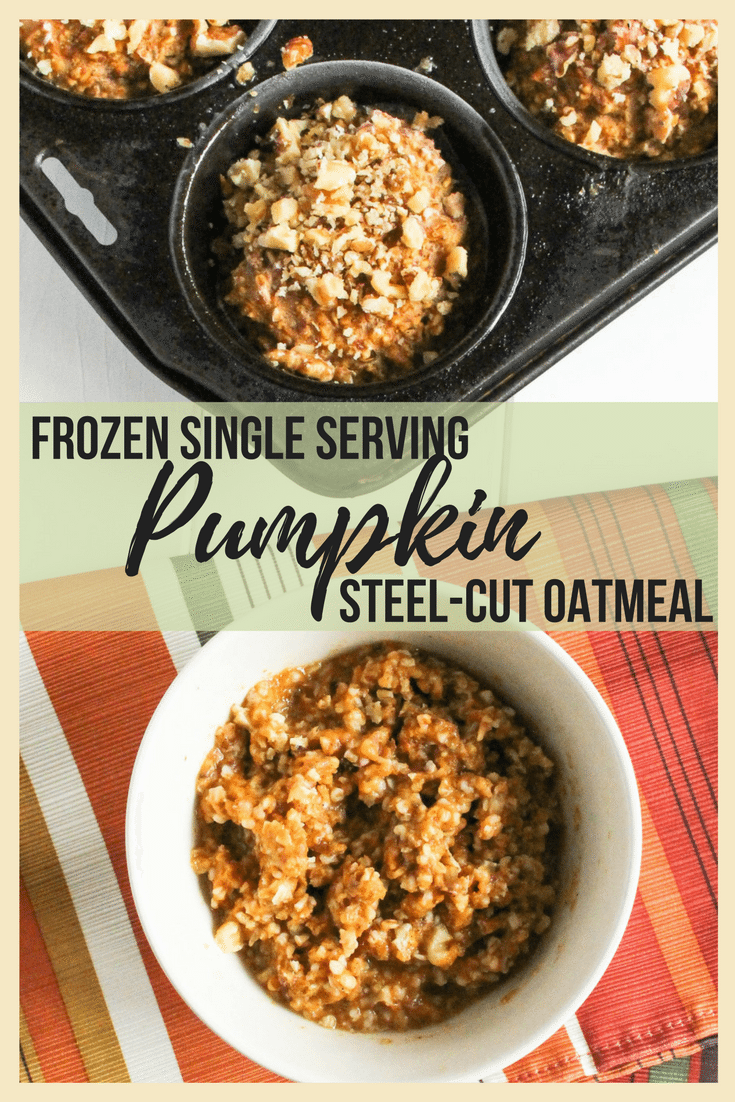
Don’t have time in the morning to prepare hearty steel cut oatmeal for breakfast? With a little meal prep will help solve that morning rush and nourish your body with a wholesome breakfast with these Frozen (Single Serving) Pumpkin Steel Cut Oatmeal.
Breakfast is the most important meal of the day. How many times have you heard that before? While I believe all meals are important, a good breakfast fuels you up and gets you ready for the day. During the weekends, I love having a leisurely breakfast, sipping my coffee, and enjoying my morning. During the week breakfast making time is 5 minutes or less, rush out the door and coffee in the car on my commute.
Steel cut oatmeal is a hearty wholesome breakfast, but its downfall is that it takes about 15-20 minutes to cook. I’d rather get an extra 20 minutes of sleep. I know I’m not the only one!
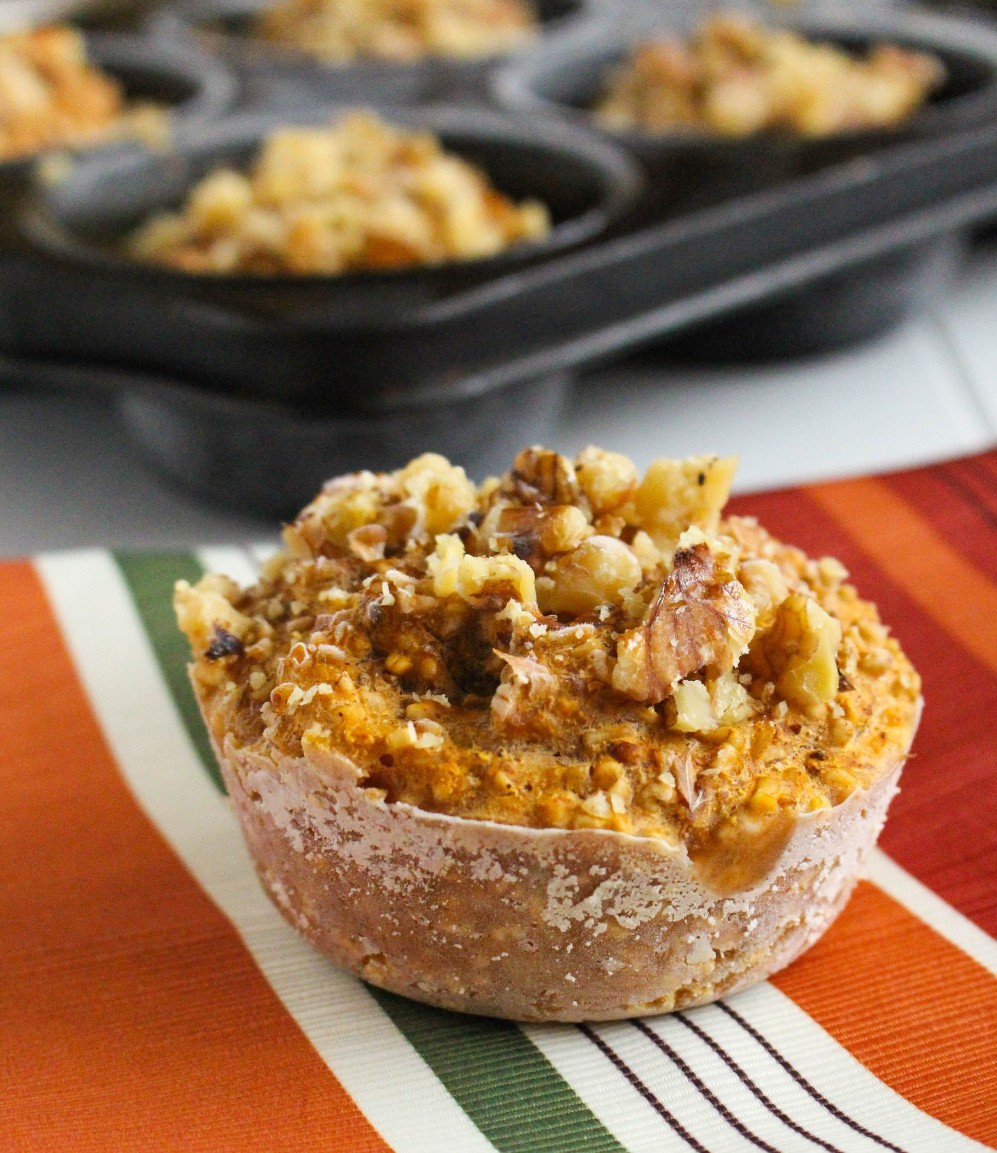
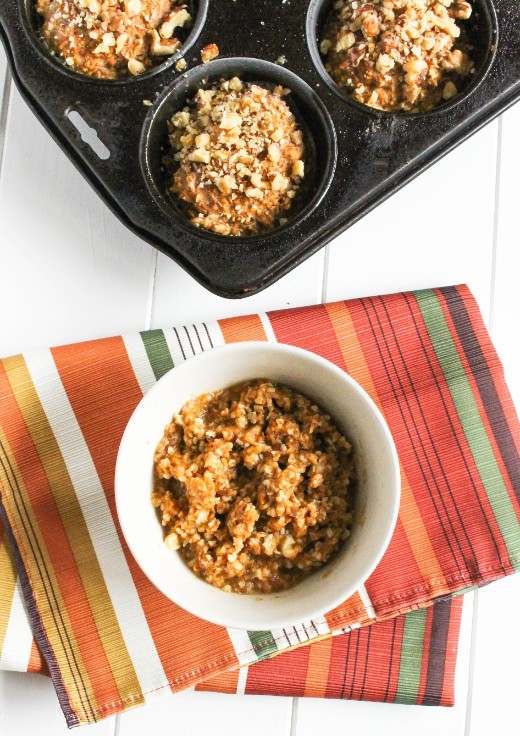
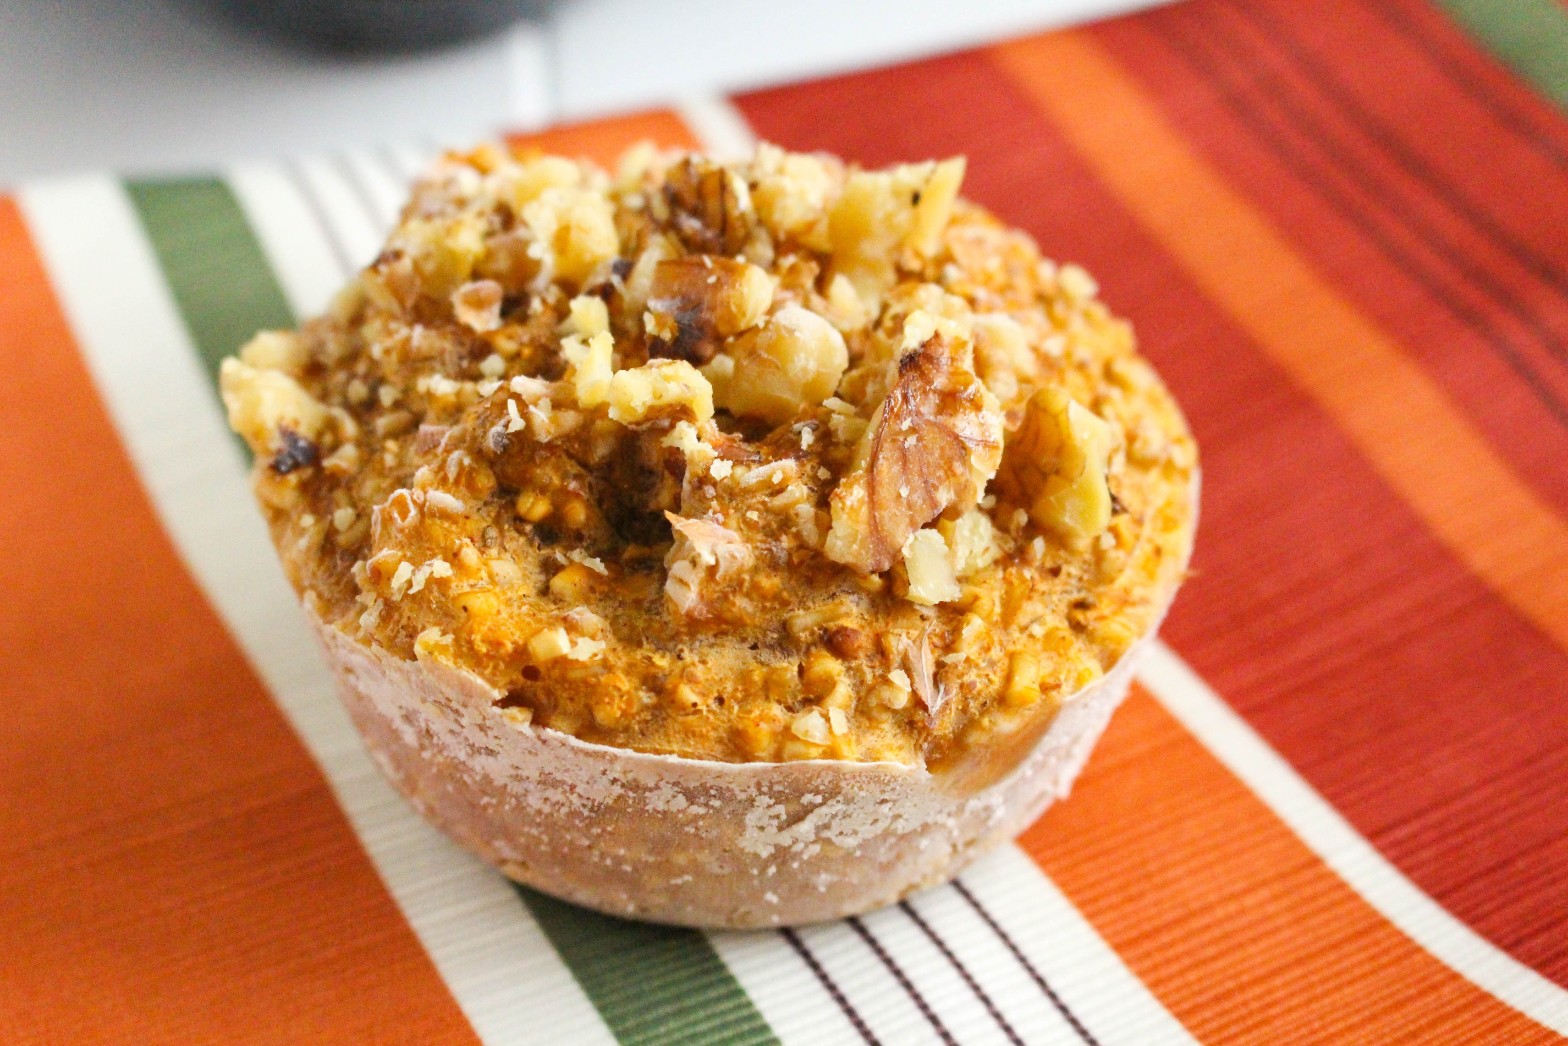
Want to enjoy steel cut oats in under 2 minutes? Meal prep to the rescue! Spend 20 minutes one day and have steel cut oats all week. Even if they weren’t steel cut oats and rolled oats instead, the time to take out all the mix-ins is just too much when you are trying to get out the door. Instead, simply take your little frozen single-serving steel cut oat “muffin”, add a few drops of water and pop it into the microwave.
steel cut vs. rolled oats vs. old fashioned oats – what’s the difference?
Steel cut oats vs. rolled oats vs. old-fashioned oats can get confusing. Steel cut oats are whole oat groats cut into little pieces. They are higher in fiber and protein than rolled and instant oats making it more filling and satisfying breakfast.
Make these. You’ll thank me when you are enjoying a hearty breakfast with that extra 20 minutes of sleep.

Frozen (Single Serving) Pumpkin Steel Cut Oatmeal
- Prep Time: 5
- Cook Time: 15
- Total Time: 20 minutes
- Yield: 6
- Category: Breakfast
Description
Don’t have time in the morning to prepare hearty steel cut oatmeal for breakfast? With a little meal prep will help solve that morning rush and nourish your body with a wholesome breakfast with these Frozen (Single Serving) Pumpkin Steel Cut Oatmeal.
Ingredients
- 1 cup steel cut oats
- 3 cups water
- ⅛ tsp salt
- 1 banana, mashed
- 1½ cup pumpkin puree
- 2 tbsp chia seeds
- 2 tbsp ground flaxseed
- 2 tsp pumpkin pie spice
- 1 tsp pumpkin pie spice extract (can sub vanilla extract)
- ½ cup walnuts, chopped
Instructions
- In a pot, bring water to a boil. Add salt and steel cut oats. Reduce heat to a low simmer. Cover and cook 15. Stir once or twice during cooking time.
- Remove oats from heat. Stir in mashed banana, pumpkin, chia seeds, flaxseed, cinnamon, pumpkin pie spice, and pumpkin pie extract.
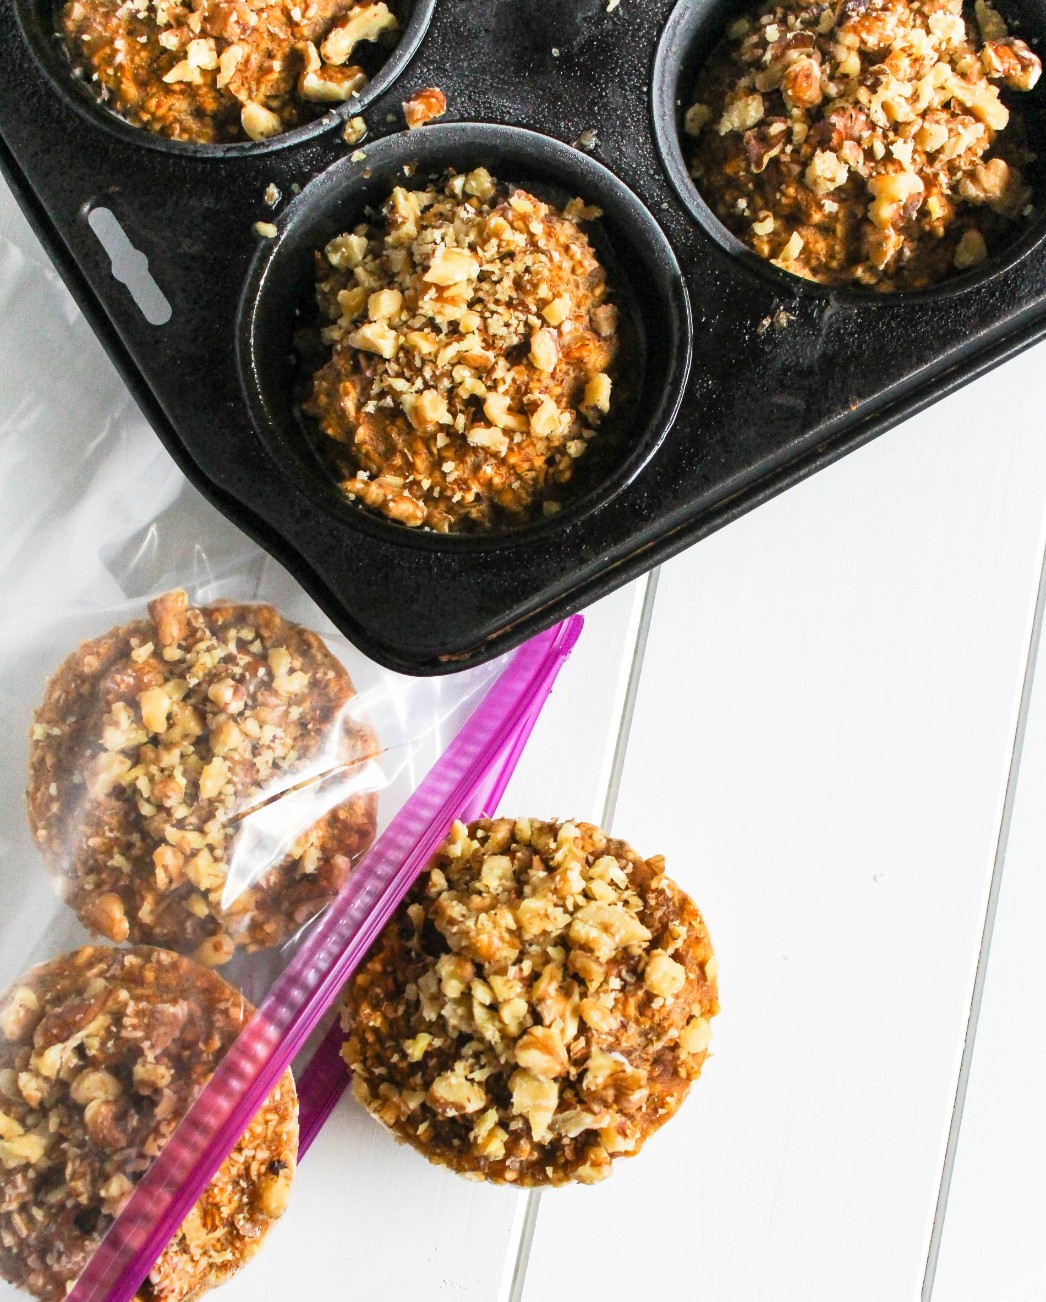
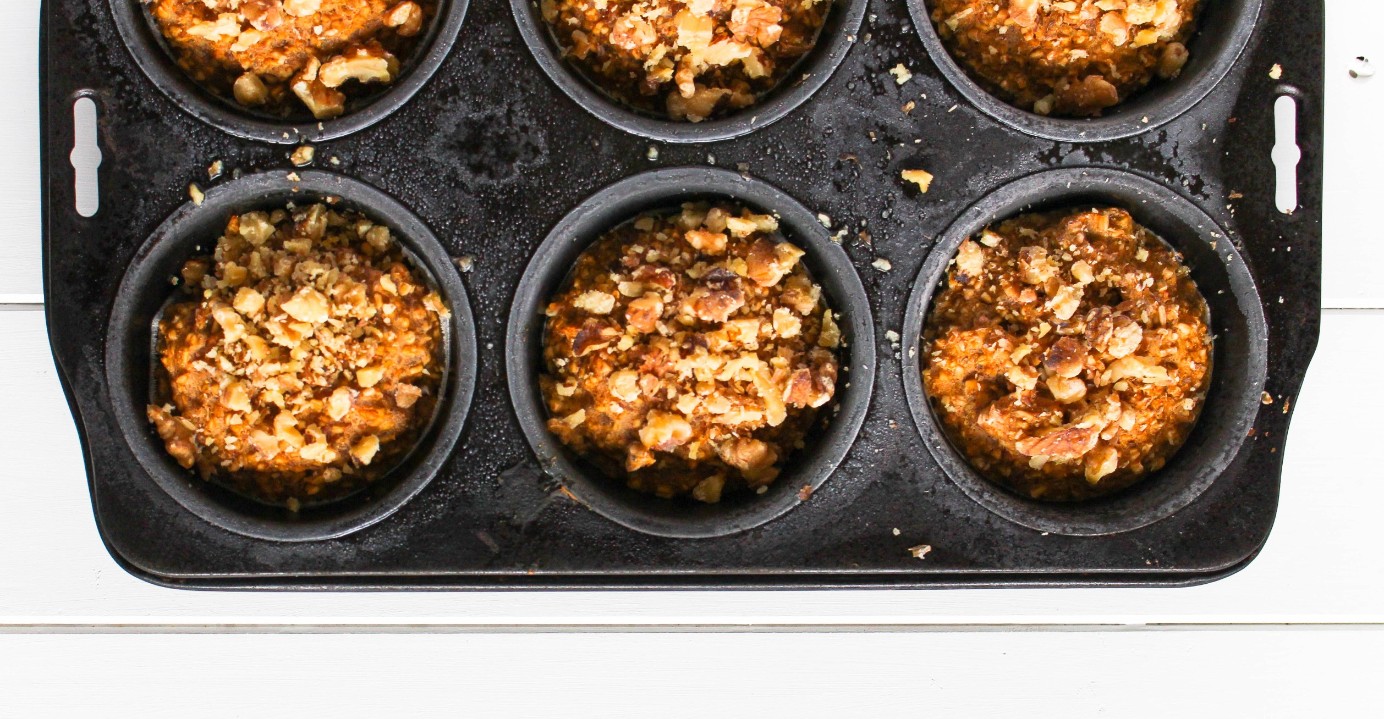
- Spray a large muffin pan with cooking spray. Fill 6 muffin cups with the steel cut oats. Sprinkle chopped walnuts on each.
- Freeze steel cut oats in muffin tins until solid. Remove from muffin pan and store in a ziplock bag.
- To enjoy warm, simple add a few drops of water and reheat in the microwave for 1 minute and 30 seconds – 2 minutes.
Keywords: breakfast, oatmeal, steel cut oats


Pin for later!