This post may contain affiliate links. Read my privacy policy.
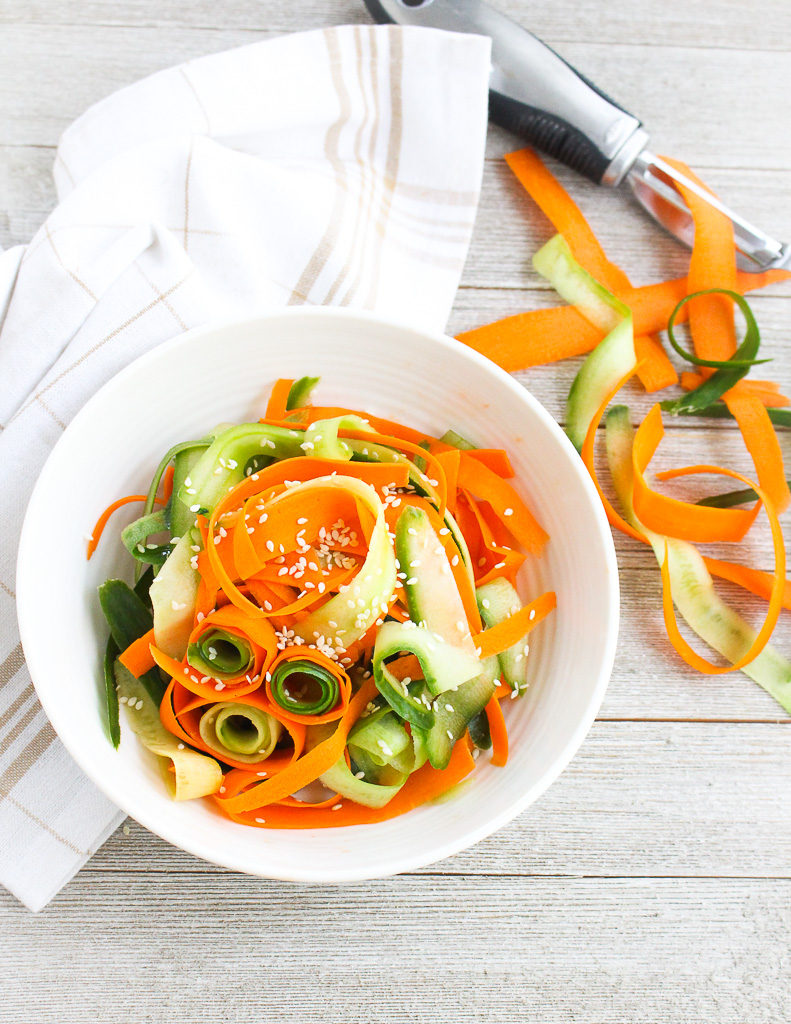
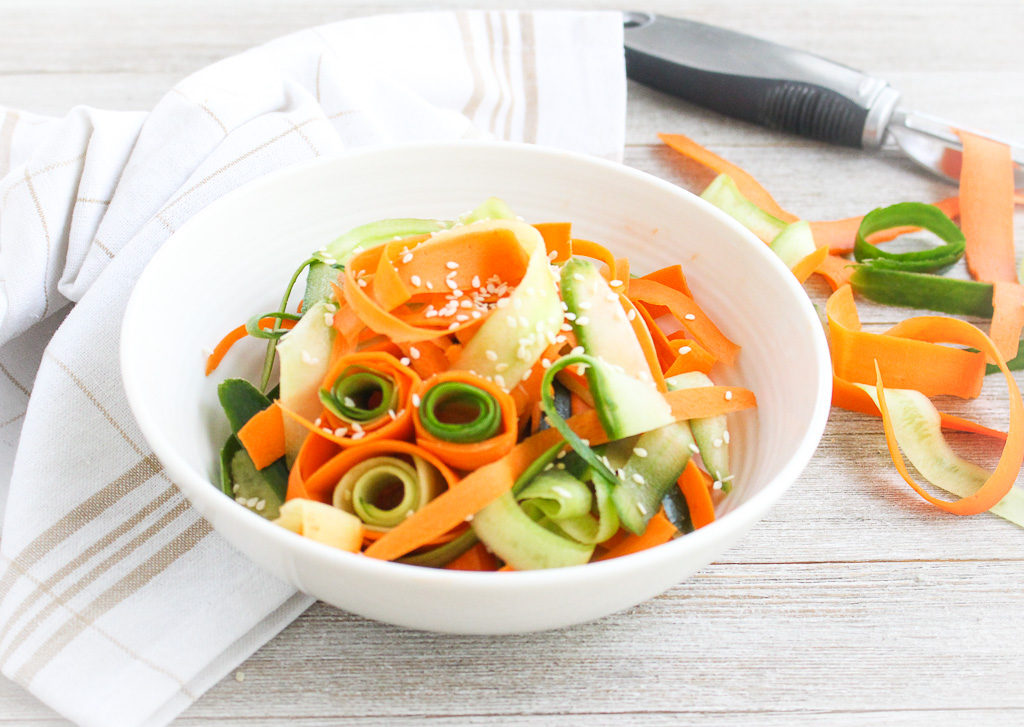
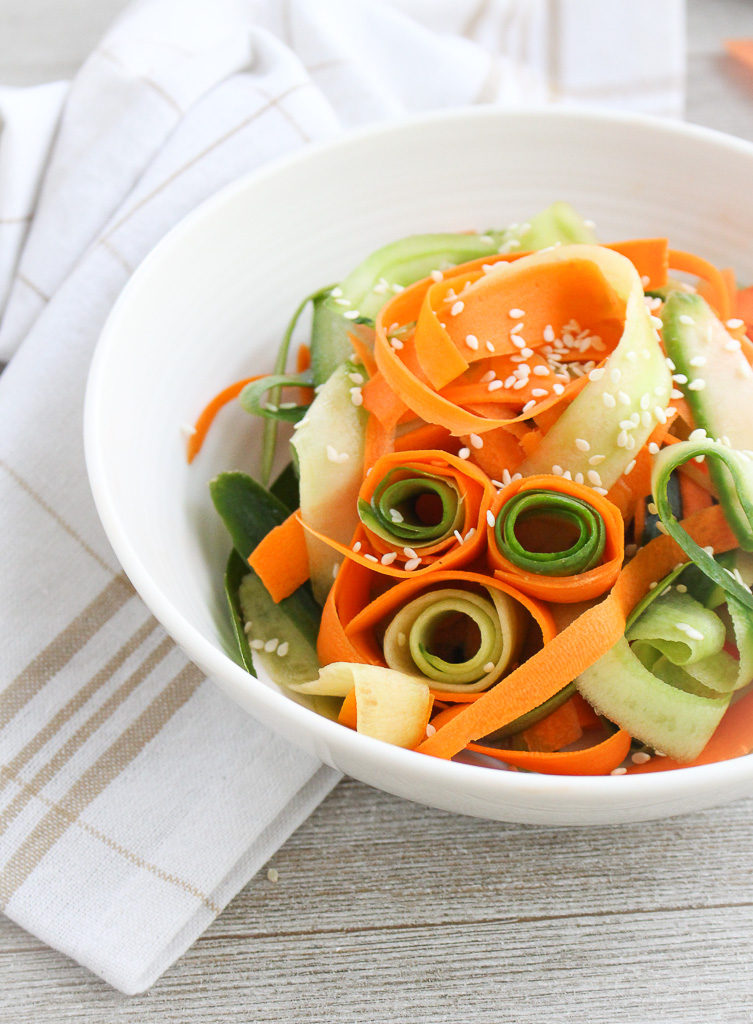
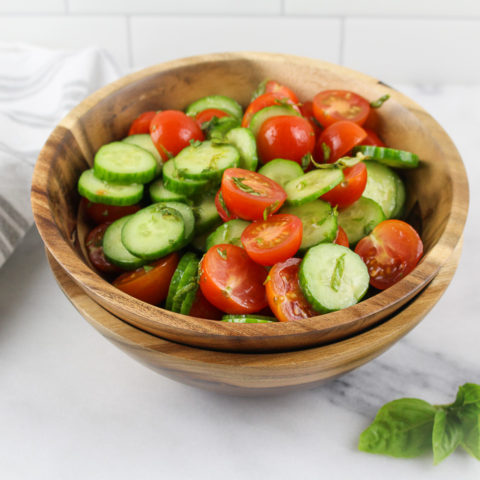
Ribbon sliced vegetables in an Asian dressing is light and refreshing. This Sesame, Carrot, & Cucumber Salad is perfect for warmer weather and also a delicious change from a traditional salad.
Utilize your vegetable peeler a little more than just removing the skin. No need for a fancy spiralizer. Simply continue to peel using your vegetable peeler to create delicate vegetable ribbons.
What are English Cucumbers?
I specifically used English cucumbers in this recipe. Why? Because English cucumbers (also known as burp-less, seedless, or hothouse cucumbers) taste is less bitter than conventional cucumbers, are milder and almost have a hint of sweetness. You can find them in the produce aisle wrapped in plastic. Conventional cucumbers are waxed protecting their skin, whereas English cucumbers are not and have a thinner more delicate skin that is protected by the wrapping.
Switch it up from your traditional lettuce-based salads and try something new! This quick and easy Sesame, Carrot, & Cucumber Salad is perfect to switch up your salad game in the warmer months.
Want to turn it more into a meal? Try adding shrimp on top.
This post may contain affiliate links. Read my privacy policy.
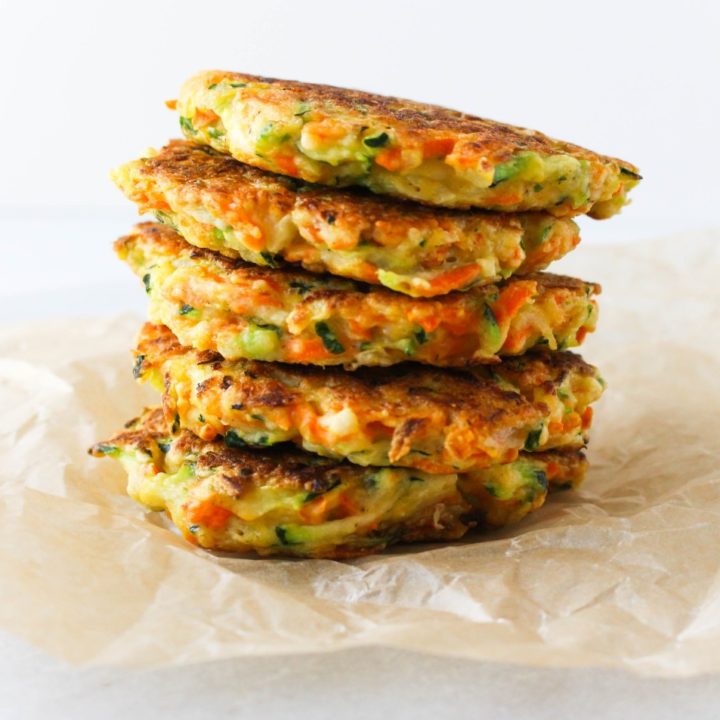
Make mornings easier by meal prepping a batch of Instant Pot Steel Cut Oats for the week and follow a simple freezer-friendly tip to enjoy steel cut oats in just minutes.
Who has time to make a fresh batch of steel-cut oats in the morning? If you do, more power to you, but like many, I prefer extra sleep vs. waking up earlier to make breakfast from scratch.
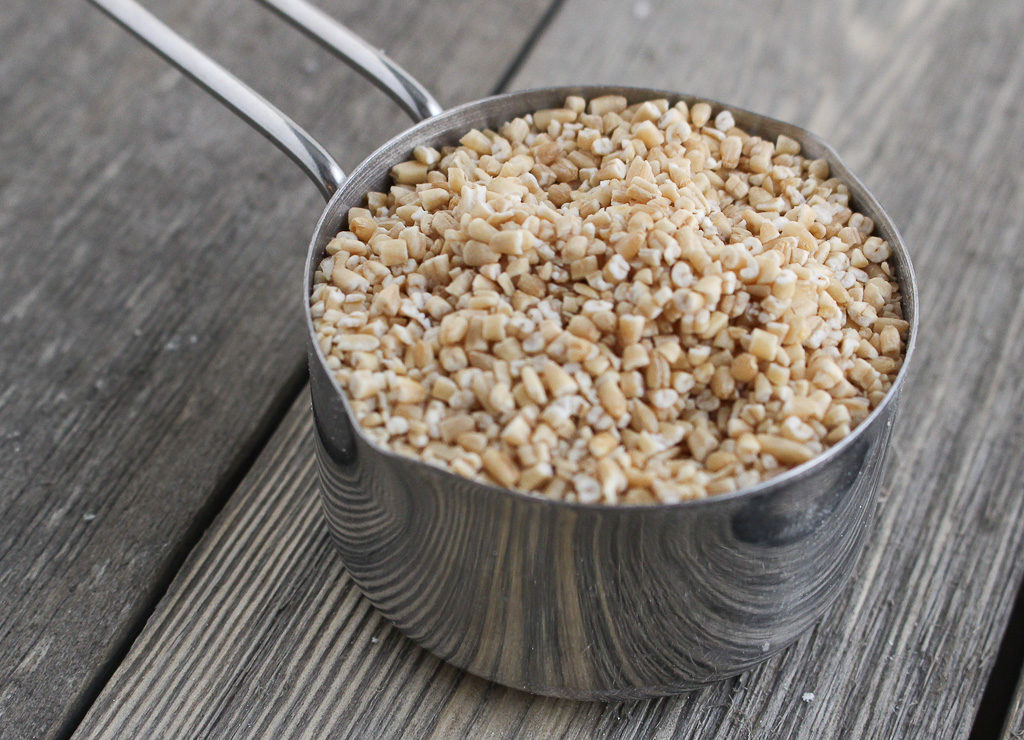
What Are Steel Cut Oats?
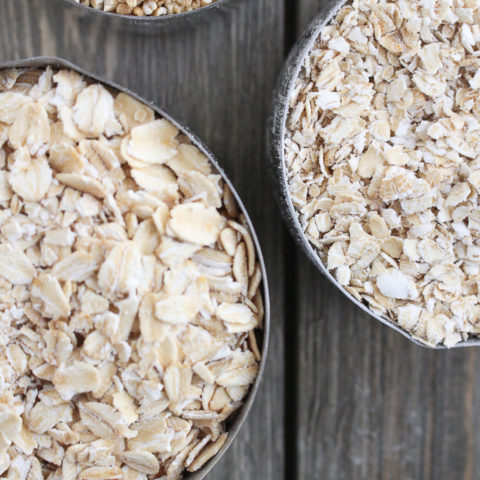
Steel cut oats are the least processed variety of oats, take the longest to cook, and maintain their texture better than others when it comes to a good bowl of oatmeal. It’s literally the whole oat, including the bran (the outermost layer). I previously talked about the differences between steel-cut, rolled, and quick oats.
Are Steel Cut Oats Healthy?
Yes! They are naturally gluten free for anyone with sensitivities and packed full of fiber. Most don’t know this, but one serving (without added toppings) has 7 grams of protein! Steel cut oats also have a lower glycemic index than others. Even if you don’t take the GI into consideration, know that this is a good concept for everyone, which means your body will digest it slower than other varieties and you will have less of a sugar spike.
Does Using the Instant Pot Save Time?
By the time the Instant Pot comes to pressure, the cooking time, and the pressure release time it’s about the same. BUT the greatest thing is that it’s hands-free cooking. So no stirring constantly, wondering if they are ready, and you can do other stuff while you wait on your breakfast!
Instead of spending time each morning making a serving of steel-cut oats meal prep a large batch for the week. Steel-cut oats can easily be made over the stovetop, but I love using the Instant Pot to make steel-cut oats because just add your ingredients, press a few buttons, and done!
Ingredients for Instant Pot Steel Cut Oats
steel cut oats water cinnamon sticks – if you don’t have these you can use ground cinnamon instead
How to Cook Steel Cut Oats in a Pressure Cooker
Pour the steel cut oats and water into the Instant Pot and stir. Add in the cinnamon sticks or ground cinnamon and stir once more.
Place the lid on the Instant Pot and turn the valve to the sealing position.
Cook for 6 minutes using manual pressure.
When the timer goes off, allow the pressure cooker to release naturally for 20 minutes, then turn the valve to the venting position.
Toss out the cinnamon sticks and give it a good stir.
Serve with your favorite toppings!
Steel Cut Oatmeal Topping Ideas
I prefer to make the batch of steel-cut oats pretty plain because then there is the flexibility to add different toppings to create different flavor combinations. I do enjoy adding a cinnamon stick to the pot and the cinnamon flavor infuses into the oats. (This can easily be done with a few shakes of ground cinnamon too.) Here are some more ideas.
Bananas & Blueberries – a favorite combination! Add these on top just before serving
Syrup & Honey – Need just a touch of sweetness? Drizzle some maple syrup or honey over the oats once they come out of the Instant Pot
Pumpkin – you could add a couple of spoonfuls of pureed pumpkin before cooking, great for the fall!
Apples – because that just makes sense with cinnamon! Dice them into small pieces (as even as possible) and stir before you cook or after as a topping.
Other fresh fruit and berries
Nuts (almond, walnuts, pecans)
Splash of milk to thin it out if needed.
Nut or seed butter
Chia seeds or ground flax meal
How Long Do Steel Cut Oats Last After Being Cooked?
Once you have pressure cooked them, they stay fresh when kept in the refrigerator for up to a week.
If you want to batch, I recommend freezing them.
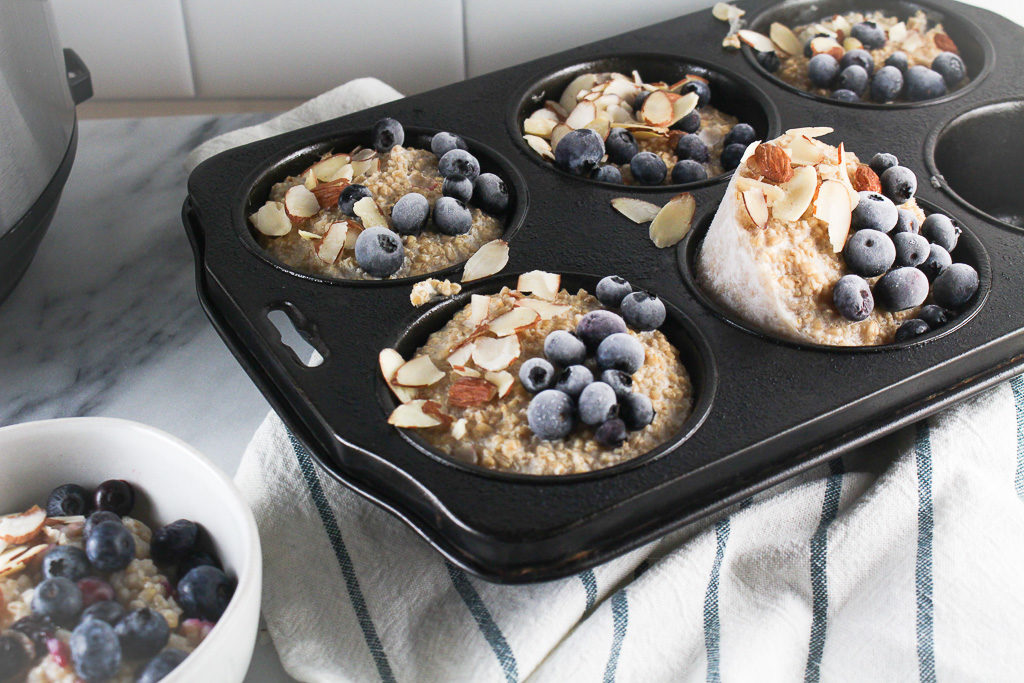
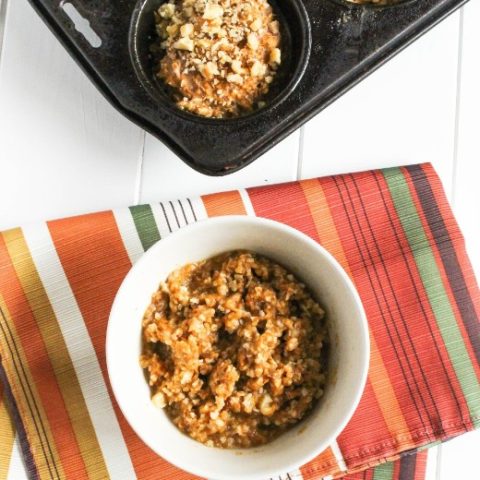
After making a batch of these Instant Pot Steel Cut Oats, spray a jumbo muffin tin with cooking spray and scoop about a cup of oats into each muffin tin well. Then add your favorite topping combinations.
Once hardened, dip the bottom of the muffin tin in warm water to help remove the single-serving steel cut oat portions and freeze in a container or bag for later use.
Then, simply add a single-serving portion of oats to a microwave-safe bowl with a few drops of water, and reheat in the microwave.
Add steel cut oats, water, and cinnamon sticks to the Instant Pot and stir to combine.
Secure Instant Pot lid and close the vent. Set Instant Pot on the manual setting for 6 minutes.
When Instant Pot beeps, allow the pressure to naturally release for 20 minutes.
Remove lid, discard cinnamon sticks, and stir oats to incorporate any water that has risen to the top.
Serve with your favorite toppings. (Combination recommendation: blueberries, sliced almonds, and honey)
Notes
Leftover oats can be stored in the fridge for up to a week or utilize the freezer-friendly method.
Freezer-Friendly Method: Spray a jumbo muffin tin with cooking spray and scoop about a cup of oats into each muffin tin well. Then add your favorite topping combinations. Once hardened, dip the bottom of the muffin tin in warm water to help remove the single-serving steel cut oat portions and freeze in a container or bag for later use.
This post may contain affiliate links. Read my privacy policy.
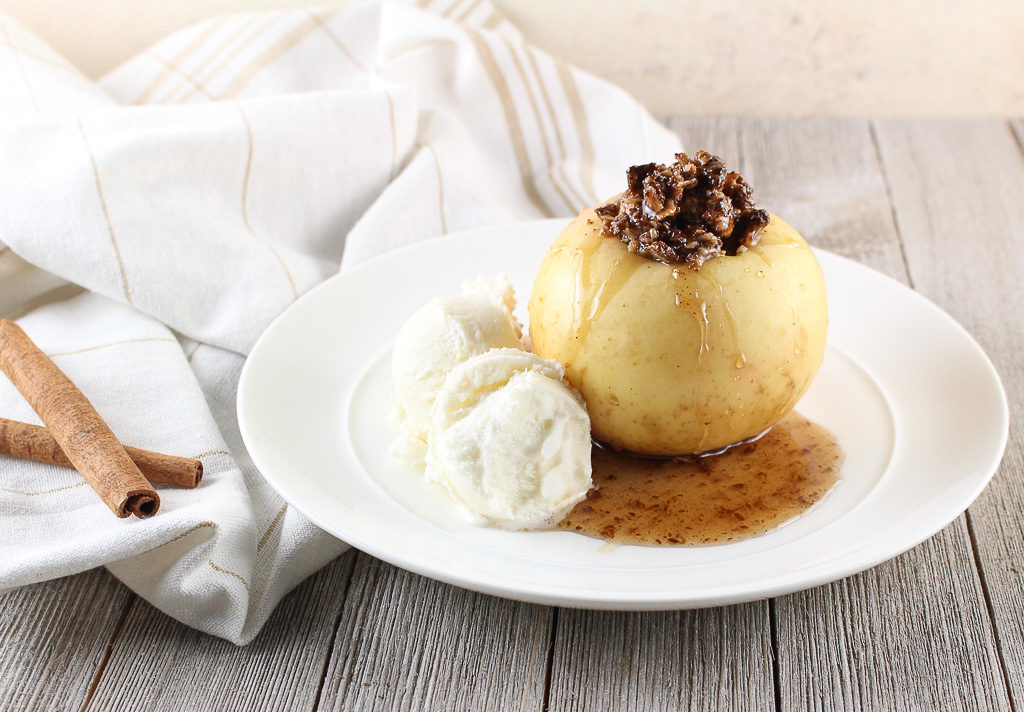
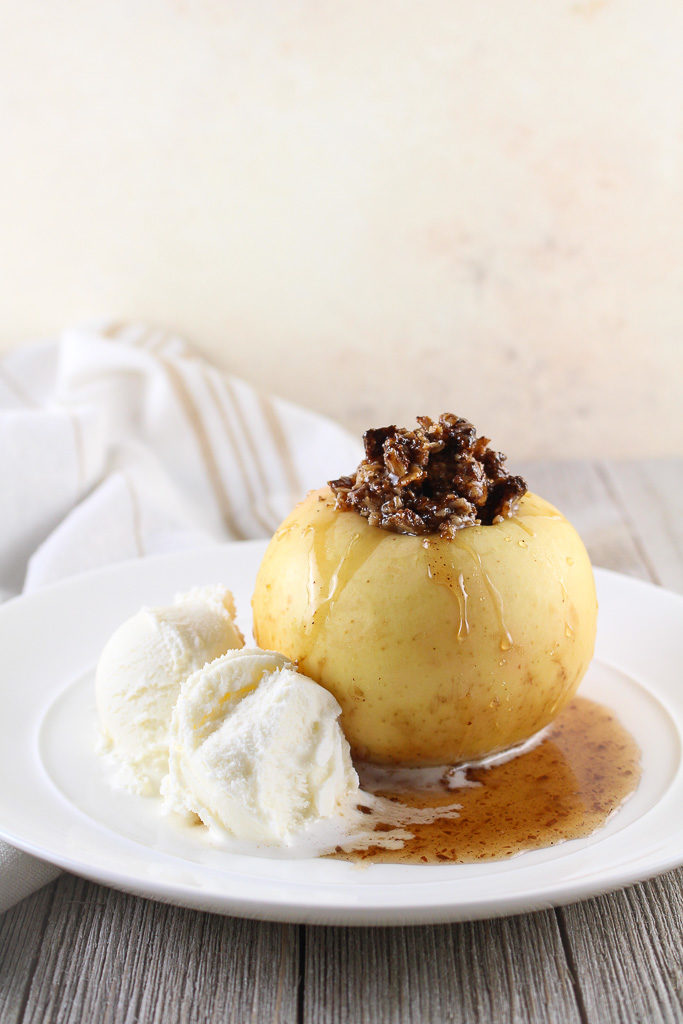
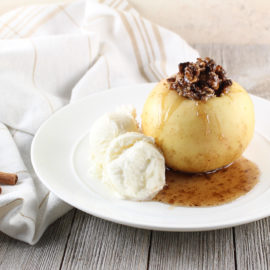
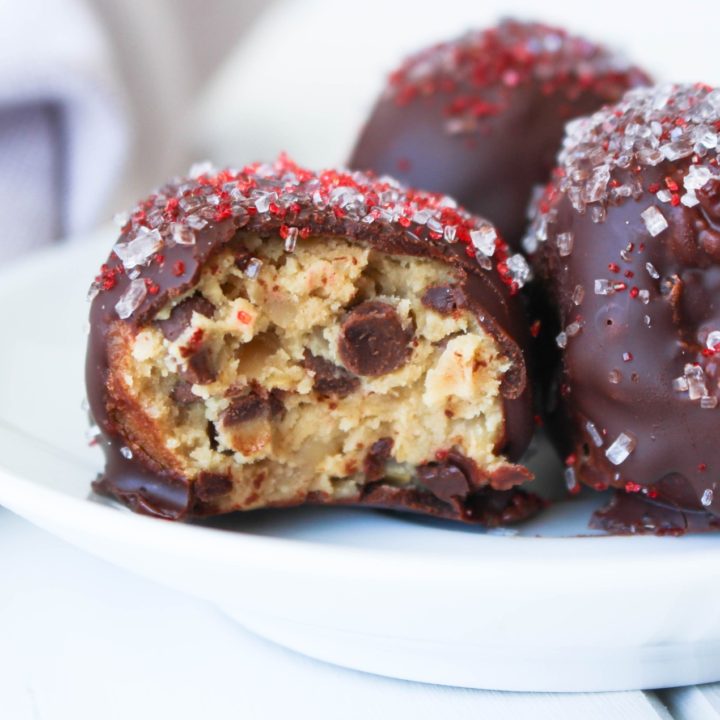
Craving something sweet, but don’t want to make a whole batch of a dessert recipe? Enter this delicious (and allergy-friendly) Baked Apple for One.
I received free samples from Kip’s for the development of this recipe and am eligible for prizes for their recipe contest.
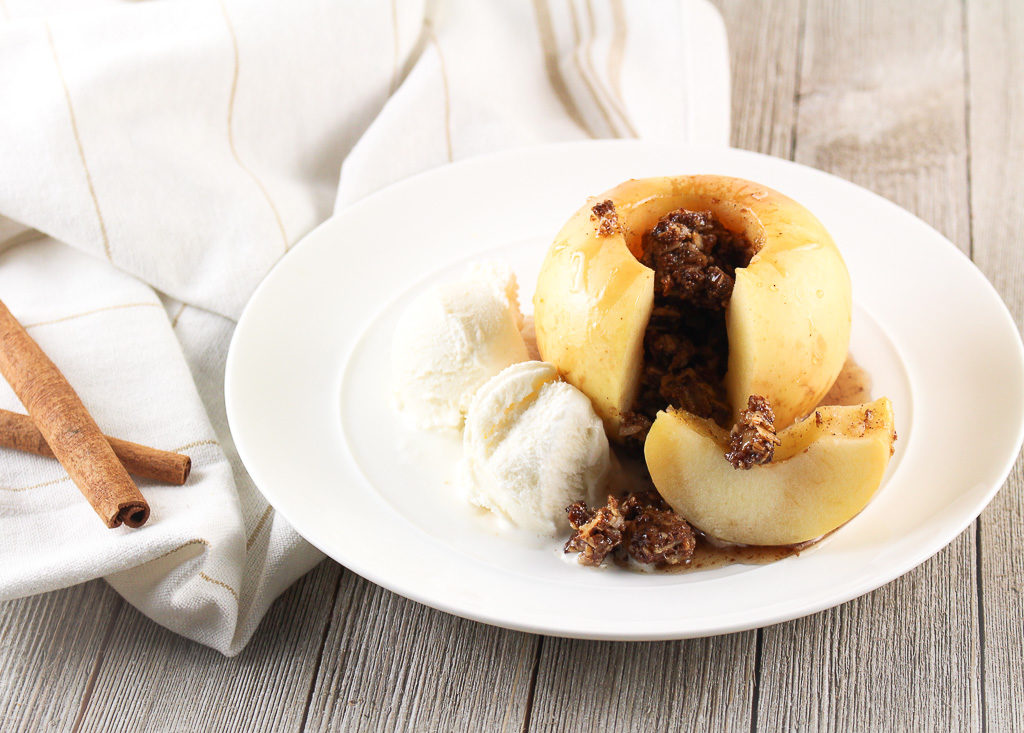
Baked fruit is often overlooked for dessert. Fruit is sweet as is, but when baked the natural sweetness intensifies. Baked apples are a delicious dessert. Simply remove the core, stuff with your favorite filling, and bake!
Using a dry-cook method, like baking, will break down the cell walls of the fruit and result in water loss from being exposed to heat. Be mindful of the cooking time. Too long, the fruit will become too mushy and mealy.
When creating a recipe for a single serving, there is no need to complicate the cooking technique with too many ingredients. If cooking for one, keep it simple!
These baked apples are stuffed with Kip’s Granola Bark. Kip’s is an allergy-friendly, gluten-free, and vegan granola bark is free from the eight main food allergens, including peanuts, tree nuts, wheat, dairy, eggs, and soy, and additionally free of sesame and sunflower seeds.
For those navigating food allergies, Kip’s Granola Bark is a wholesome snack that can be enjoyed as is or incorporated into a recipe.
Craving something sweet, but don’t want to make a whole batch of a dessert recipe? Enter these delicious (and allergy friendly) Baked Apple for One.
Ingredients
Scale
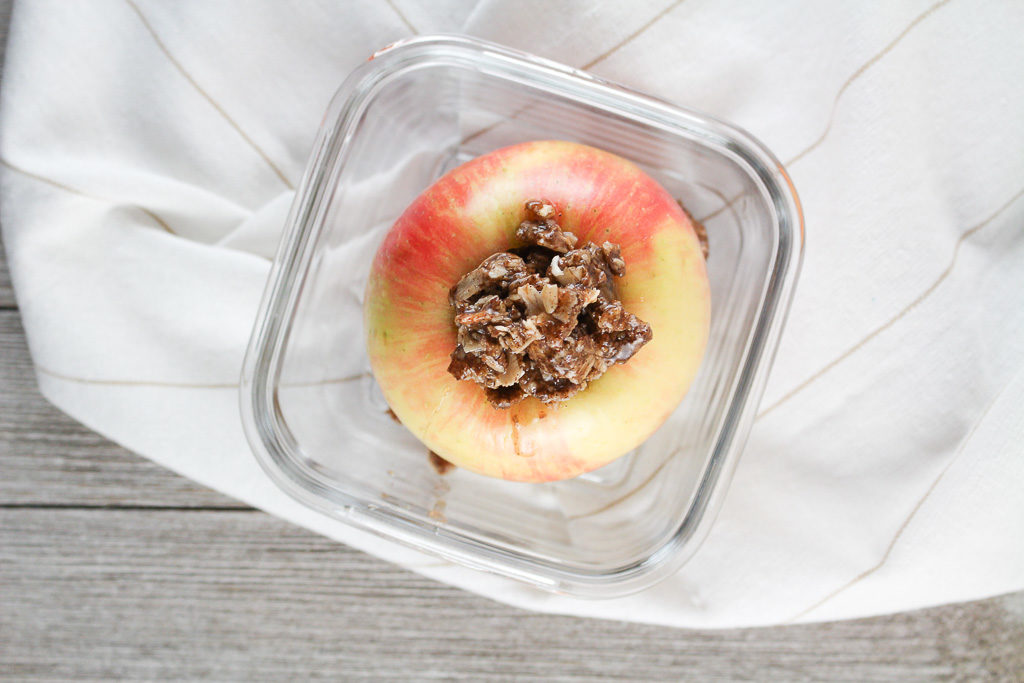
1 honeycrisp apple (or another variety like gala or granny smith) 2 tablespoons crumbled Kip’s Cinnamon Crunch Granola Bark 1/2 teaspoon butter, melted (or dairy-free, soy-free margarine) 1/2 teaspoon maple syrup 1/4 teaspoon ground cinnamon 1 tablespoon water
Instructions
Preheat the oven to 350ºF. Use a melon baller, carefully remove the stem and seeds from the apples, making a deep hole where the filling will go. In a small bowl, combine the crumbled Kip’s Cinnamon Crunch Granola Bark, butter, maple syrup, and ground cinnamon. Fill into the cavity of the apple. Add water to a small oven-safe baking dish and place the stuffed apple on top. Bake for 30 minutes, until apple, is fork tender. Remove from oven and allow to cool for a few minutes. Spoon the sauce drippings from the pan over the apples. Serve with ice cream, if desired.
This post may contain affiliate links. Read my privacy policy.
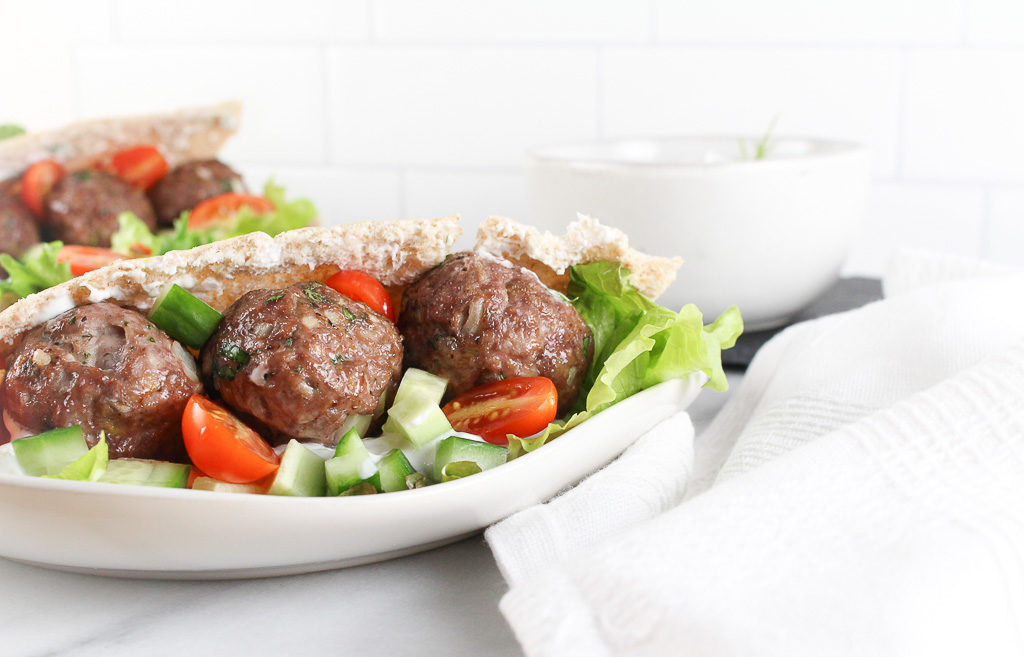
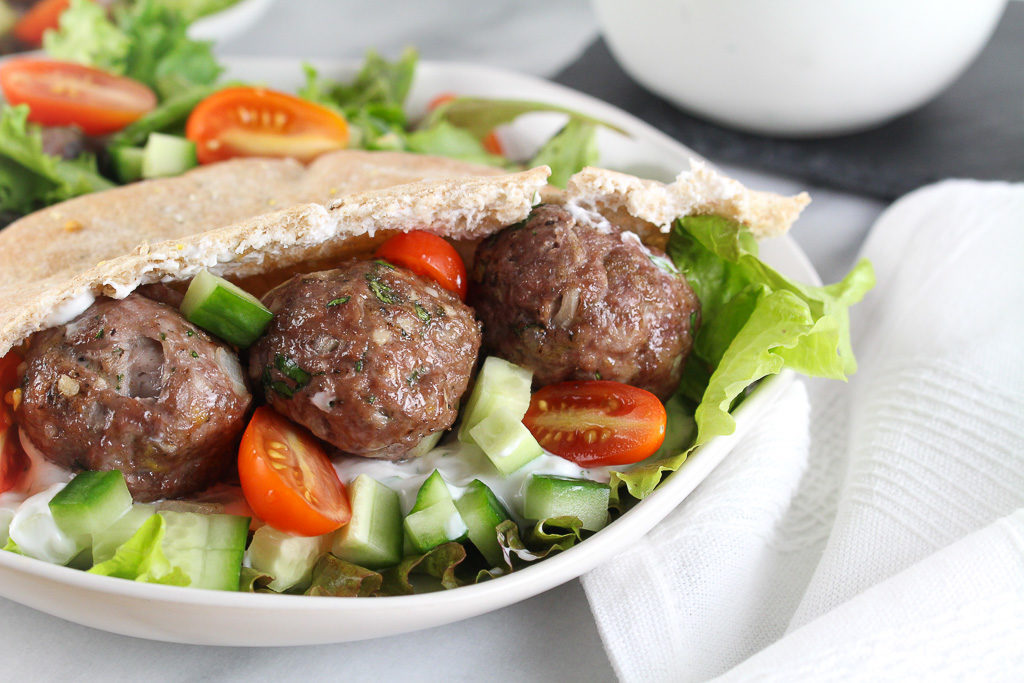
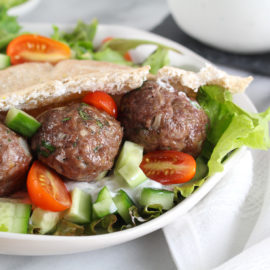
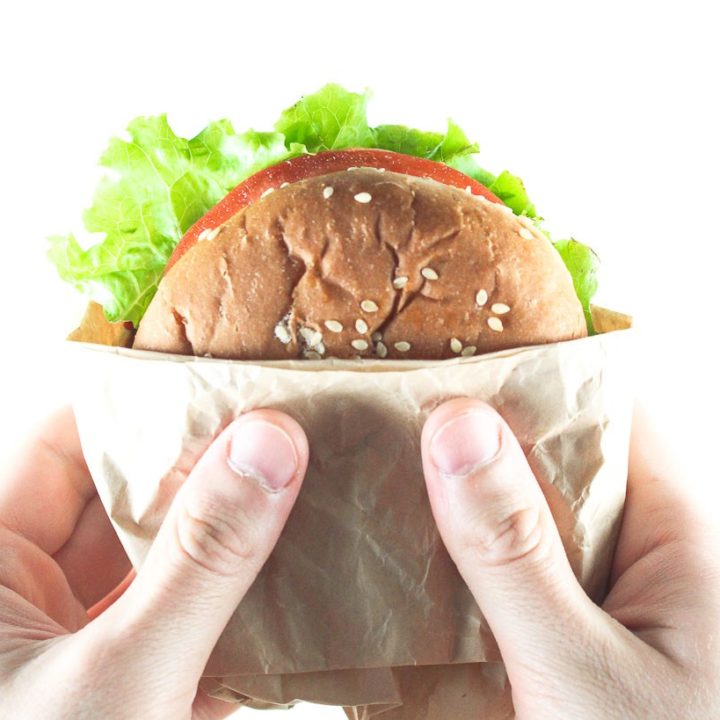
Do you cook with lamb? If you are new to cooking with lamb try starting with ground lamb and this Greek-Style Lamb Pita with Tzatziki Sauce. Lamb offers a protein-packed, flavorful alternative to the typical protein sources, like beef, chicken or turkey.
I had the wonderful opportunity to travel to the Goldring Center for Culinary Medicine at Tulane University a few months ago. When I was there, I was immersed with information, learning all about pasture-raised lamb, butchery, and cooking techniques for lamb with Nourish with Lamb.
Instead of being called a rancher, those who raise lamb are known as Shepards. Have you ever cooked with or prepared lamb? Lamb might seem intimidating if you’ve never worked with before, but this lean protein pairs well with global flavors and can be used in a variety of dishes.
Ground lamb is typically made from the shoulder and is incredibly moist and flavorful. Lamb is delicious in meatloaf, shepherd’s pie, tacos, casseroles, stews, lamb burgers, or in this case meatballs for pitas.
Did you know?
Lean lamb is a source of healthy, unsaturated fats. Nearly 40% of the fat in lean lamb is heart-healthy monounsaturated fat. On average, a 3-ounce serving of lamb is lean and has only 150 calories. Lean cuts include the leg and loin.
The 2015 Dietary Guidelines gives special recognition to the Mediterranean dietary pattern for its healthful eating approach. Lamb is a staple protein in a healthy Mediterranean-style diet, particularly in Greek cuisine. Lamb is nutrient-rich and on average, it’s an excellent source of protein, vitamin B12, niacin, zinc, and selenium and a good source of iron and riboflavin.
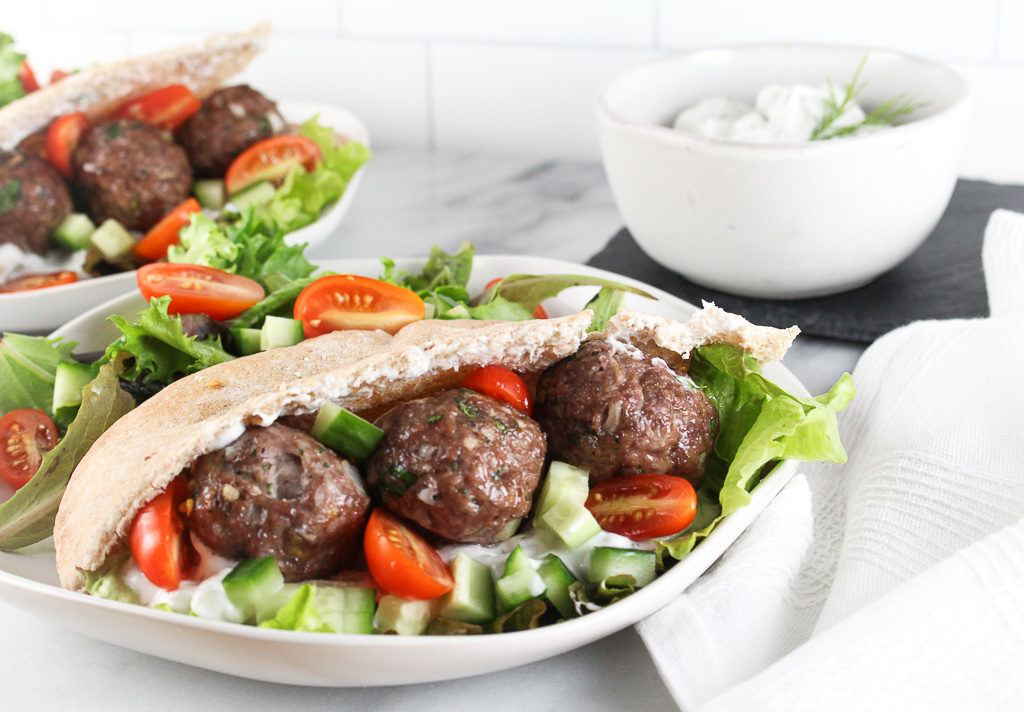
This pita with tzatziki sauce is a way to start on the path to a Mediterranean-style diet.
6 ounces plain Greek yogurt 1/2 cup seedless cucumber, peeled and finely chopped 1 tablespoon fresh dill, finely chopped 1 teaspoon red wine vinegar salt, to taste
For the Lamb Meatballs:
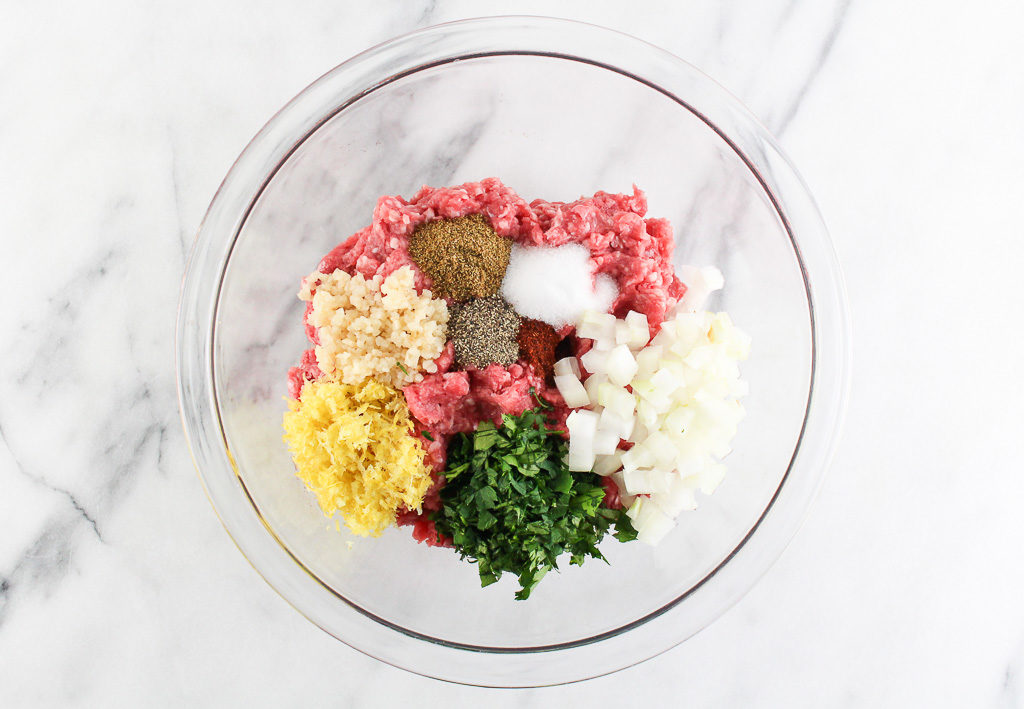
1 pound ground lamb 3 cloves garlic, minced 1/4 cup onion, finely chopped 2 tablespoons fresh parsley, chopped 1 tablespoon lemon zest 1/2 teaspoon ground cumin 1/2 teaspoon salt 1/2 teaspoon black pepper 1/4 teaspoon cayenne pepper, or more if more heat is desired
For the Pitas:
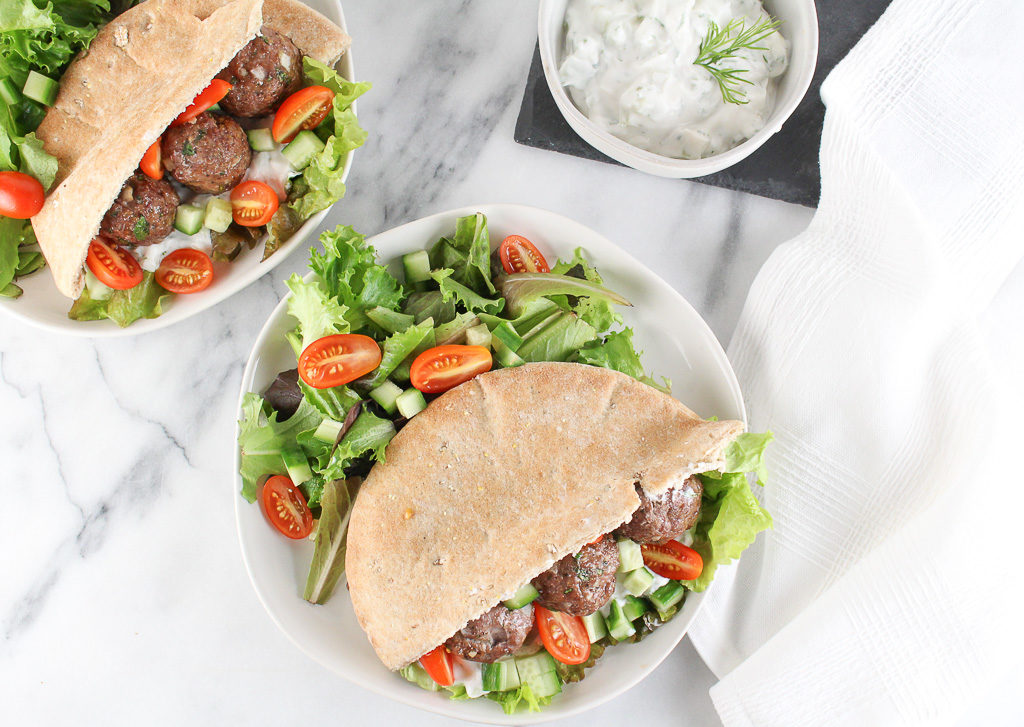
4 whole grain pita pockets, warmed 1/2 cup grape tomatoes, halved 1/2 cup seedless cucumber, chopped 2 cups lettuce, chopped
Instructions
For the Tzatziki Sauce: In a small bowl, combine yogurt, cucumber, dill, and red wine vinegar. Season with salt, to taste. Set aside.
For the Meatballs: Preheat the oven to 400°F. Place a wire rack on a sheet pan. Set aside. In a large bowl, combine lamb, garlic, parsley, lemon zest, salt, pepper, and cayenne pepper. Mix well to combine. Form small meatballs and place on the wire rack. Bake for 20-30 minutes or until internal temperature reaches 165°F. (cook time will vary depending on how large the meatballs are)
To assemble: In a pita pocket stuff pockets with lettuce, cucumber, and tomatoes. Add a smear of Tzatziki sauce and 3-4 meatballs per pita.
Notes
Meal prep tip: Make a double batch of these meatballs and freeze for later.
Keywords: lamb, sauce, Tzatziki, Greek
Recipe Card powered by
Tell me your favorite ways you cook with lamb! Drop a comment below or tag me on Instagram.
This post may contain affiliate links. Read my privacy policy.
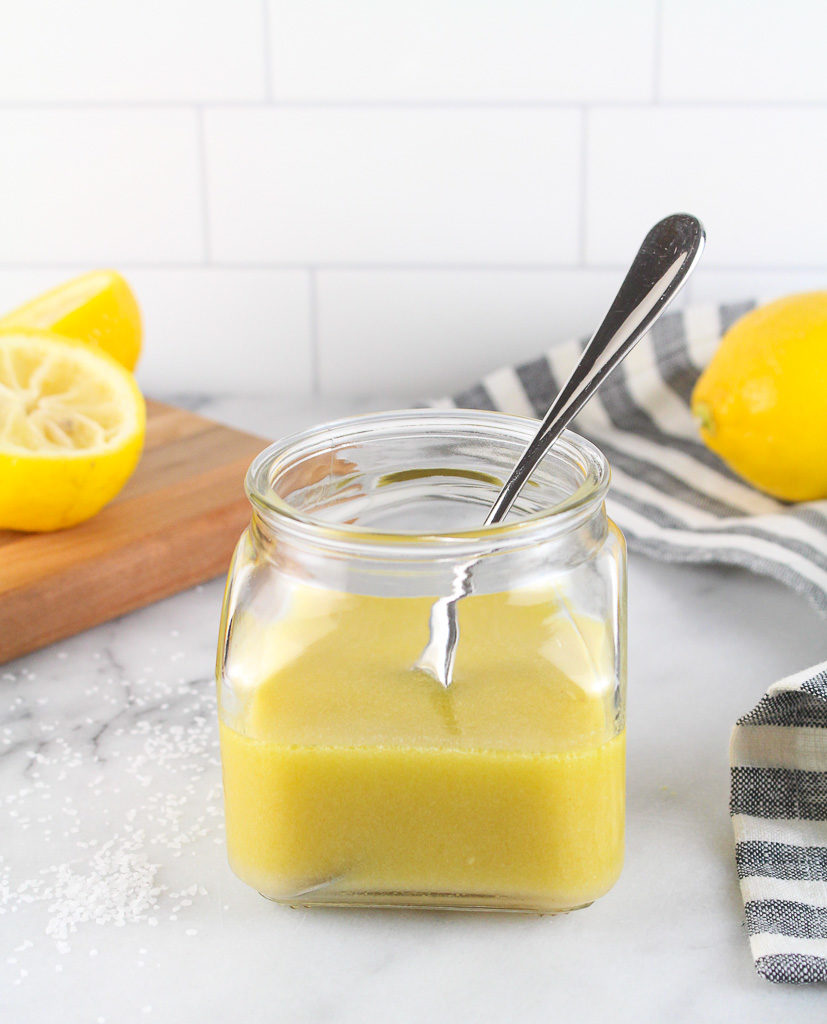
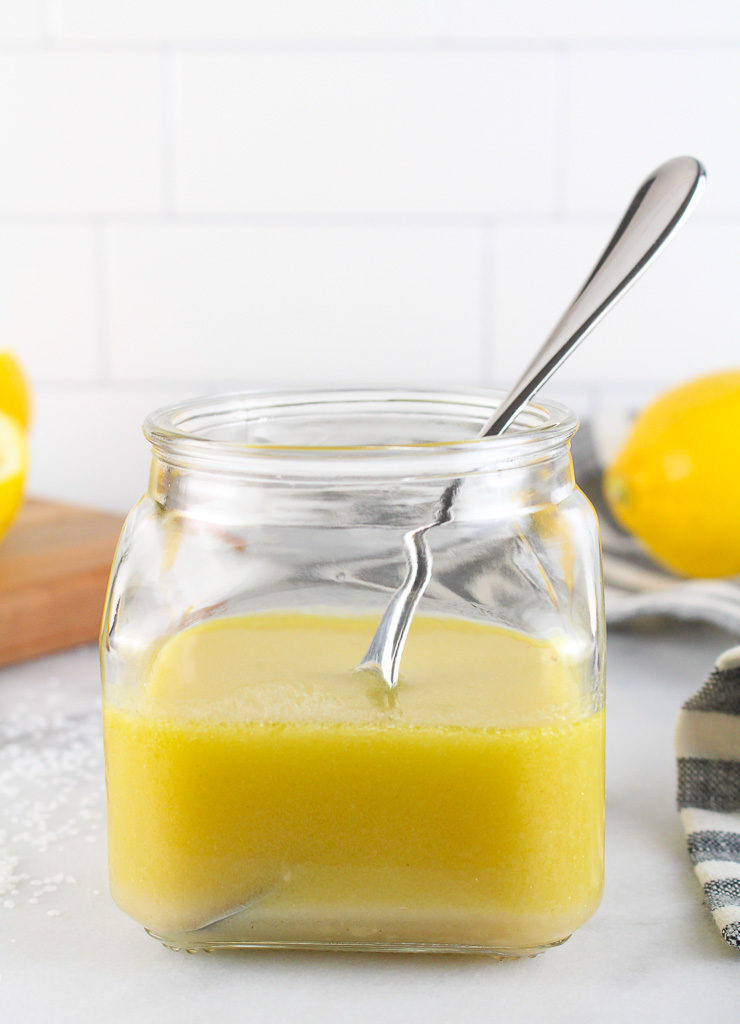
Brighten any salad, grain, or vegetable dish with this simple lemon vinaigrette. Made with ingredients you probably already have on hand, simply whip this up in a mason jar.
I don’t think people realize how EASY it is to make a homemade dressing. The most basic vinaigrette recipe is mixing an acid and a base. Then just add seasonings you enjoy. Simply pour ingredients into a mason jar and shake away. Your dressing is made! How easy was that? Plus, making it in a mason jar is ready to store any leftovers.
If you want to go beyond the basics, use this guide to build your own vinaigrette.
Create a homemade vinaigrette
Choose your acid:
This can be in the form of vinegar or citrus juice. Pick something that matches with your salad mix-ins. Opt for a sweet acid like white wine vinegar, white balsamic vinegar, or an orange juiced, for salads that have fruit.
Try acids like apple cider vinegar, balsamic vinegar, red wine vinegar, rice vinegar, lemon juice, lime juice, or other citrus juices.
Tip: Think about the components of your salad. If you have a salad with bright colors, avoid darker vinegar. Once the salad is dressed, those bright vibrant colors will look muddy. Remember – we eat with our eyes first!
Choose your base:
The base is oil. Use good quality oil. This can be a simple olive oil or fancy garlic and rosemary-infused walnut oil. Again think about the components of your salad. If there are avocados in your salad, why not try avocado oil?
Try oils like olive oil, avocado oil, walnut oil, pumpkin seed oil, hazelnut oil, or other flavor-infused oils.
Add seasonings:
If you are new to making dressings, simple olive oil and balsamic vinegar dressing with a pinch of salt and pepper will work just fine. Once you are comfortable making dressings, try amping it up with other seasonings.
Add a teaspoon of Dijon mustard to add a little tanginess and also to help create a creamier vinaigrette. Add a teaspoon of miso for an umami flavor. Try using fresh herbs for a pop of flavor. For a sweet vinaigrette, add a little maple syrup or honey.
Once you start playing around with different combinations, you’ll start to know what flavor combinations you like best!
This post may contain affiliate links. Read my privacy policy.
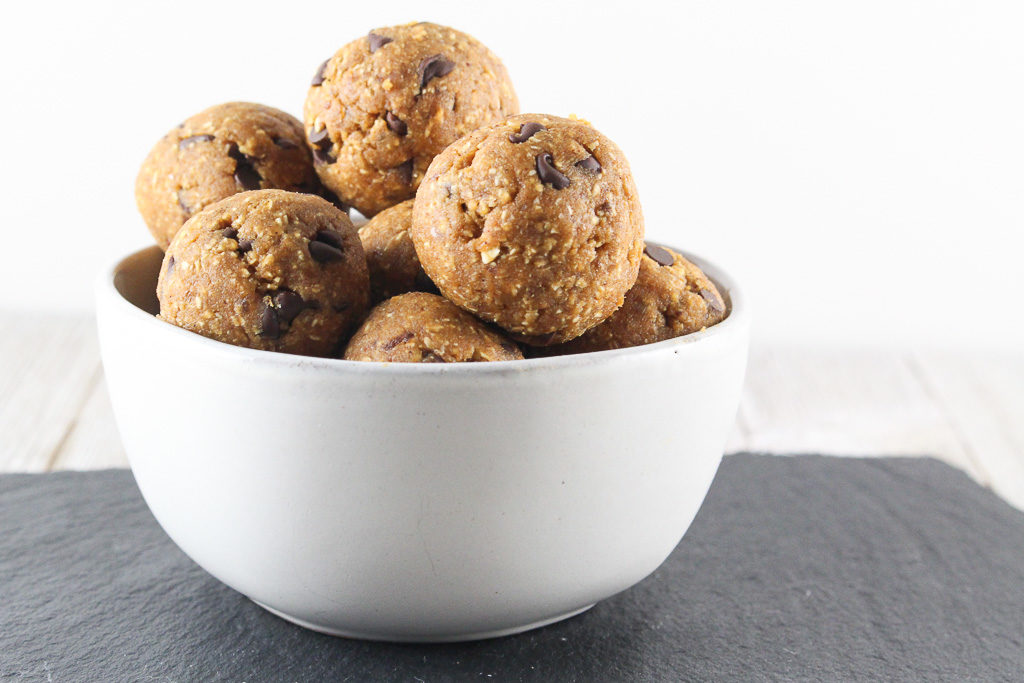
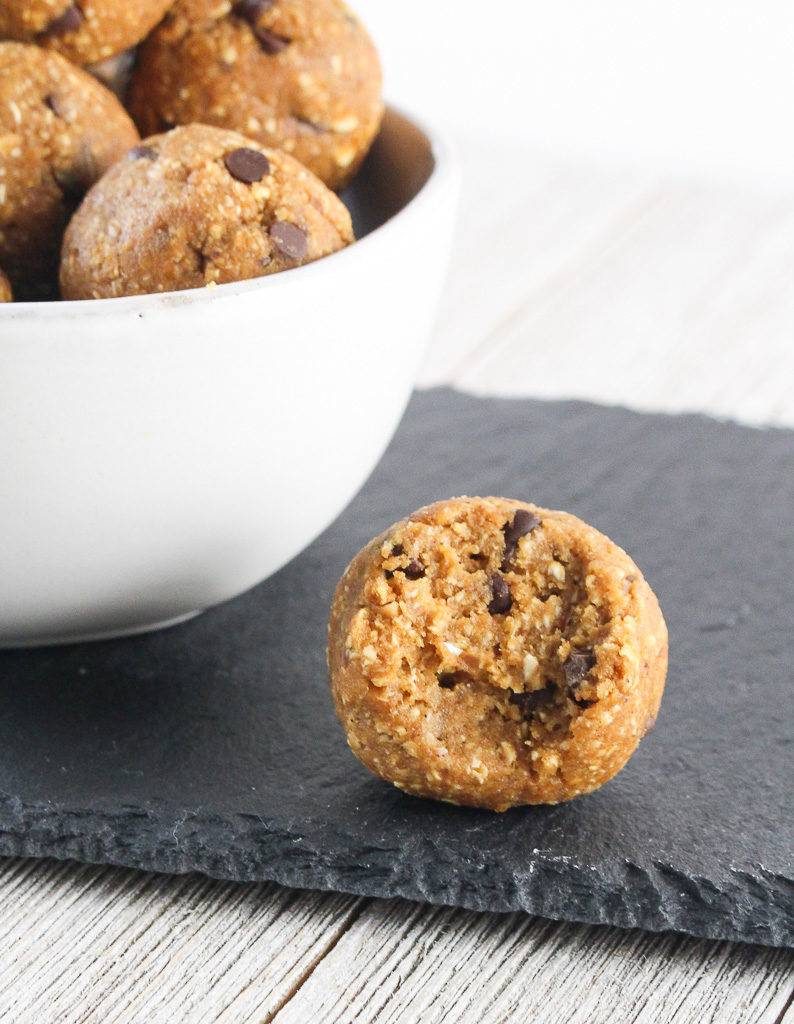
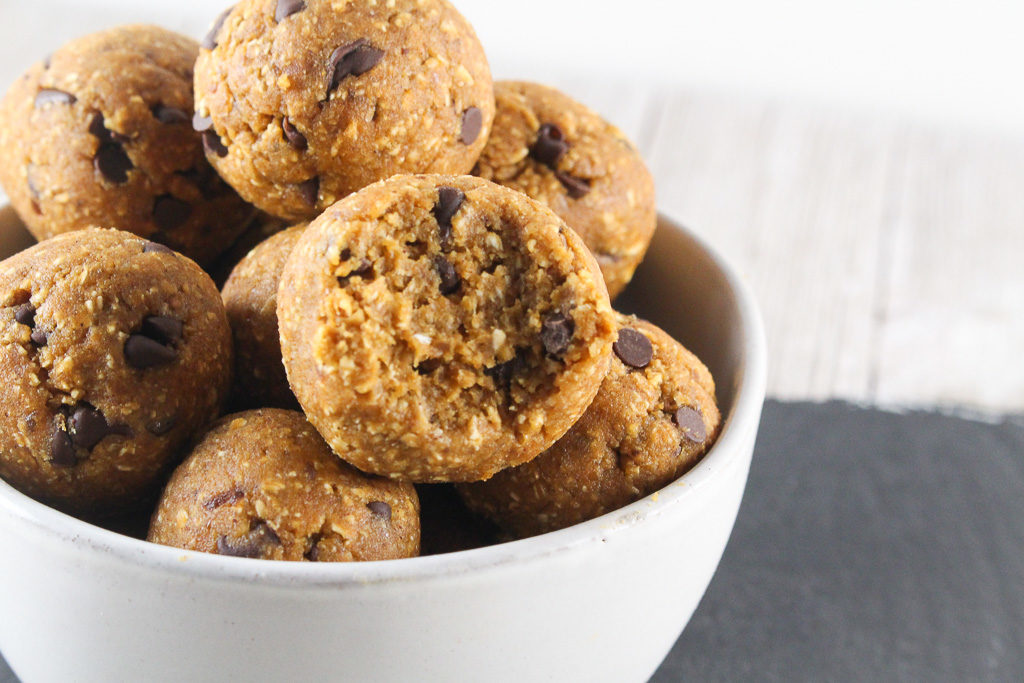
Do you ever have something on your to-do list that just keeps getting rolled over every time to a new to-do list? Welp. That’s posting this Pumpkin Pie Bites recipe. Sorry for holding out on you.
I know I am often the minority when it comes to the love of my paper planner. (Passion Planner to be exact) For the month of January, the pages are completely filled with meetings, cooking classes, presentations, parties, etc. I’m one of those people who likes being busy, but sometimes things fall through the cracks, like posting this recipe which has been sitting in draft for the past two weeks. #sorryivebeenbusy
A version of this recipe was developed with one of my awesome JWU interns. I have a sweet spot for JWU interns and I am a JWU alum myself. I love spending days in the kitchen as a full “test kitchen” days. It’s been fun working with JWU interns because we speak the same “culinary language”. This recipe was tested a few times until the texture and taste came out just right.
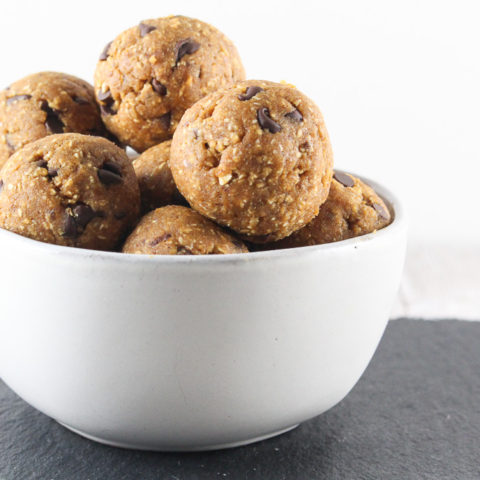
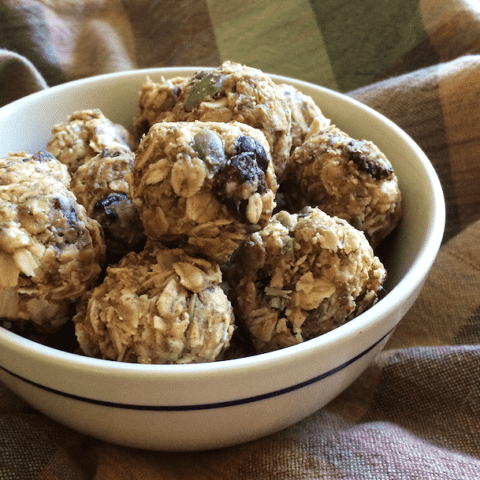
Batch cook these little energy bites for the week. They are the perfect on-the-go snack. Who says pumpkin season is over? Let’s keep the pumpkin around all year round!
Batch cook these bites for an energy-boosting snack during the day!
Ingredients
Scale
1/4 cup Medjool dates, pitted
boiling water, as needed
1/4 cup almond butter
1/4 cup pumpkin puree
2 teaspoons maple syrup
1 1/2 teaspoons pumpkin pie spice (or a mix of 1/2 tsp ginger, 1/2 tsp nutmeg, 1 tsp cinnamon)
1/4 teaspoon salt
2 tablespoon coconut flour*
1 1/2 cup oats
1/2 cup mini chocolate chips
Instructions
Soak the dates in boiling water for 10 minutes. Drain.
Combine all ingredients, except for the chocolate chips, in a food processor. Process until fairly smooth, stopping occasionally to scrape down the sides.
Transfer to a separate bowl and fold in chocolate chips. Chill in the fridge for at least 20 minutes.
Once chilled, scoop 1-tablespoon sized portions and roll into balls. The mixture makes about 16 bites. Store in the refrigerator in an airtight container.
Notes
If the dough is too sticky, pulse in additional coconut flour, 1/2 teaspoon at a time.
Keywords: pumpkin, pumpkin pie, energy bites, snack,
This post may contain affiliate links. Read my privacy policy.
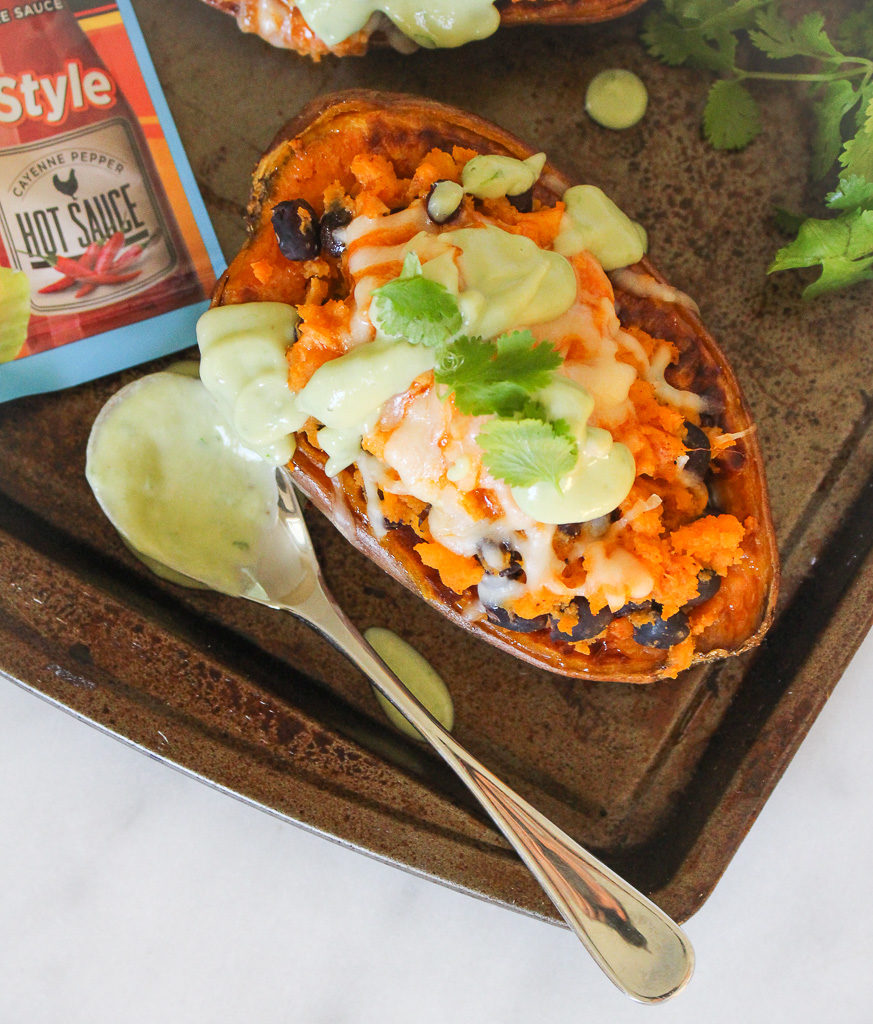
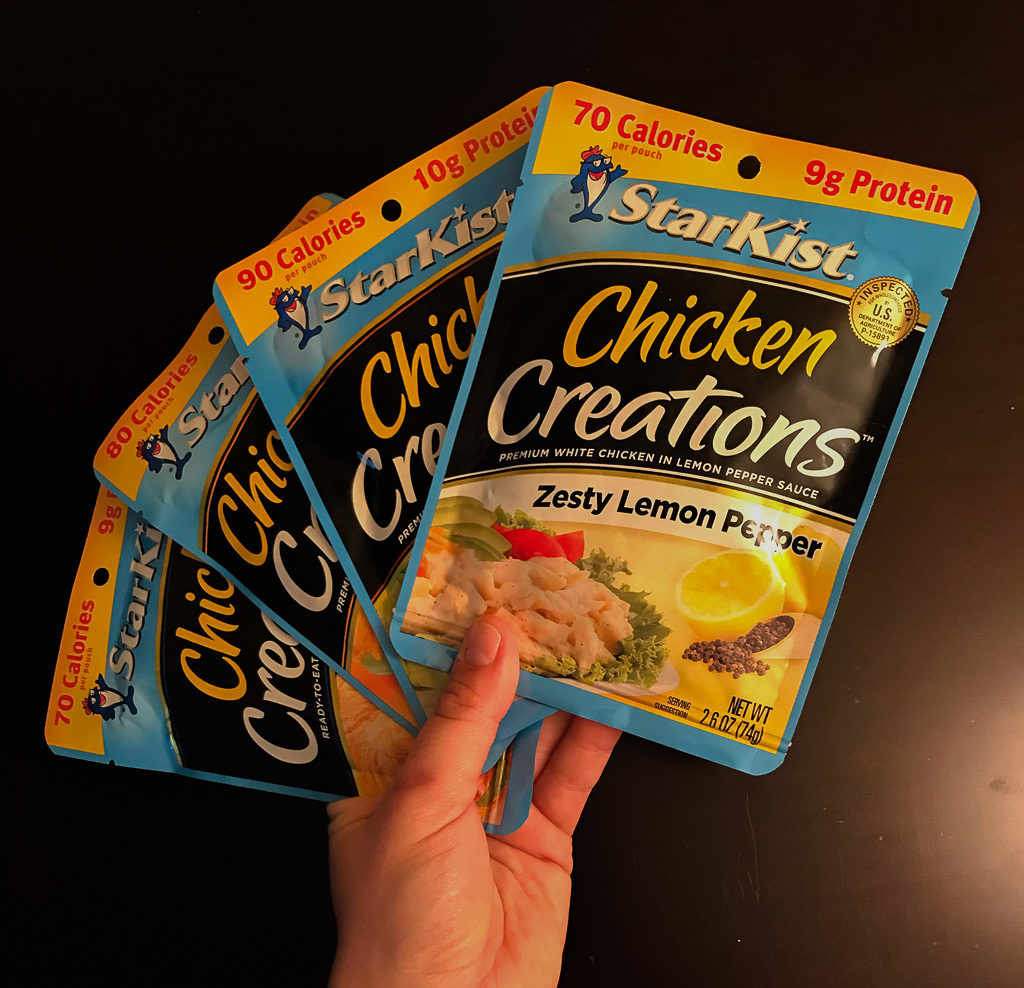
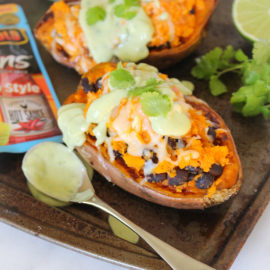
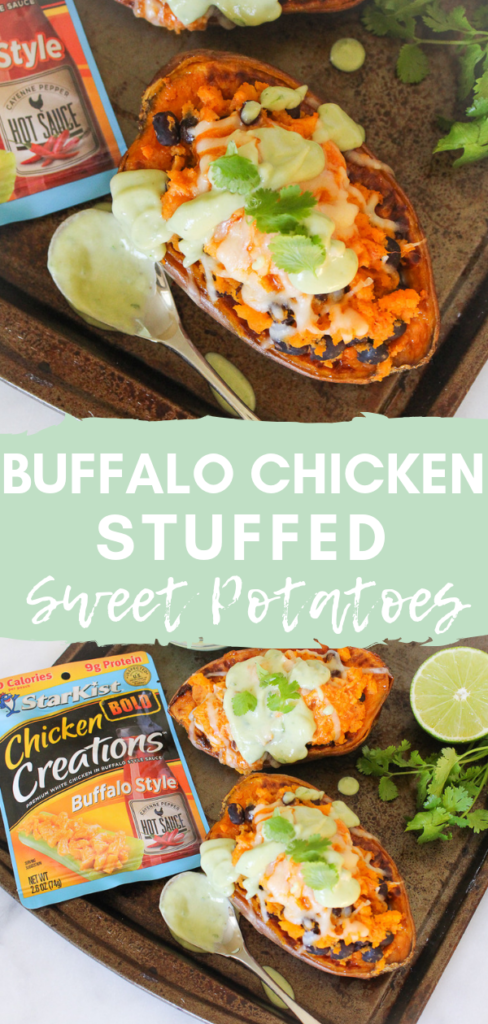
Whip up these quick and delicious Buffalo Chicken Stuffed Sweet Potatoes that have been sponsored by StarKist, but of course, all opinions expressed are my own. Thank you for like-minded brands for making this blog possible!
Traveling is always fun and like many of you, I make sure I am always packing plenty of food for my travel adventures. No one wants to be stuck in the car, train, or airplane hangry. One food group that sometimes is a struggle packing for travel is protein. I don’t want to be that person that whips out hard boiled eggs and be known as the stinky food traveler that gets stuck sitting next to me. StarKist’s new Chicken Creations are making protein on the go a cinch. These Chicken Creations come in a pouch that is ready to be on the move – just tear, eat, and go!
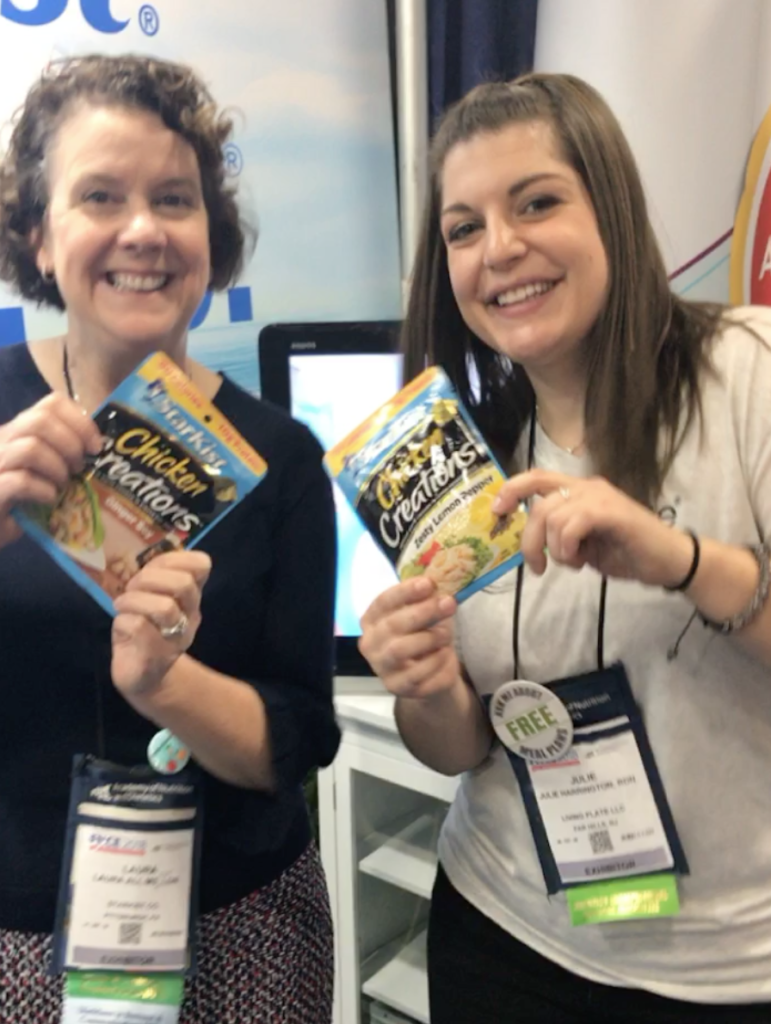
If we are friends on Instagram you saw that I recently was at FNCE (Food & Nutrition Conference & Expo), the world’s largest meeting of food and nutrition experts — more than 10,000 registered dietitian nutritionists, nutrition science researchers, policy makers, health-care providers, and industry leaders attend the annual meeting — and address key issues affecting the health of all Americans.
At FNCE, I spent most of my time at the expo hall connecting with RDN colleagues and businesses. I made a stop over to StarKist’s booth to chat with Laura Ali, MS, RDN, LDN of StarKist. I love that brands are hiring registered dietitians on staff to provide evidence-based nutrition. I wish more brands would do that! We chatted about StarKist’s new Chicken Creations pouches. If you didn’t know, they already have convenient pouches for tuna, salmon, and now chicken!
Image mid-boomerang!
Last week I posted on my Instagram stories, asking what you wanted to learn more about StarKist’s new tear and go Chicken Creations. You asked, they answered! I went back to Laura Ali, MS, RDN, LDN of StarKist with your questions and here is what she said.
Laura Ali, MS, RDN, LDN of StarKist answers your questions about StarKist Chicken Creations
Q: What defines “premium white chicken”? Does it come from chicken breast or other parts as well?
A: “Our chicken is 100% white meat with no dark meat added”
Q: How is the chicken cooked?
A: The chicken is lightly grilled and then cooked to a safe internal temperature before it is mixed with our seasonings and added to the pouch. It is then vacuum sealed and then retorted for sterility.
Q: What is the shelf life?
A: 3 years
Q: Is the pouch recyclable?
A: Not at this time. We are actively investigating options for how to recycle the pouch.
Q: What is the pouch made of?
A: The pouch is made of food grade materials. It has 4 separate layers of aluminum, polypropylene, nylon, and polyester.
Q: Can you heat the chicken in the pouch?
A: No, it is not a microwaveable pouch so you should remove the chicken and place it in a separate container to microwave.
Q: Will other flavors be coming out?
A: Our beaks are sealed! But you can be assured StarKist has a strong innovation agenda with many new products planned for the future!
I am all about quick and easy recipes. Coming back from FNCE, I didn’t have my usual meal prep done since I got home on a Tuesday evening. I was able to whip up this recipe from ingredients I had on hand. Having protein ready to go in my pantry was clutch. StarKist Chicken Creations are ready to eat as is. I’ve been also grabbing a pouch as I’m running out the door to top a simple salad with for quick and easy lunch. The possibilities are endless!
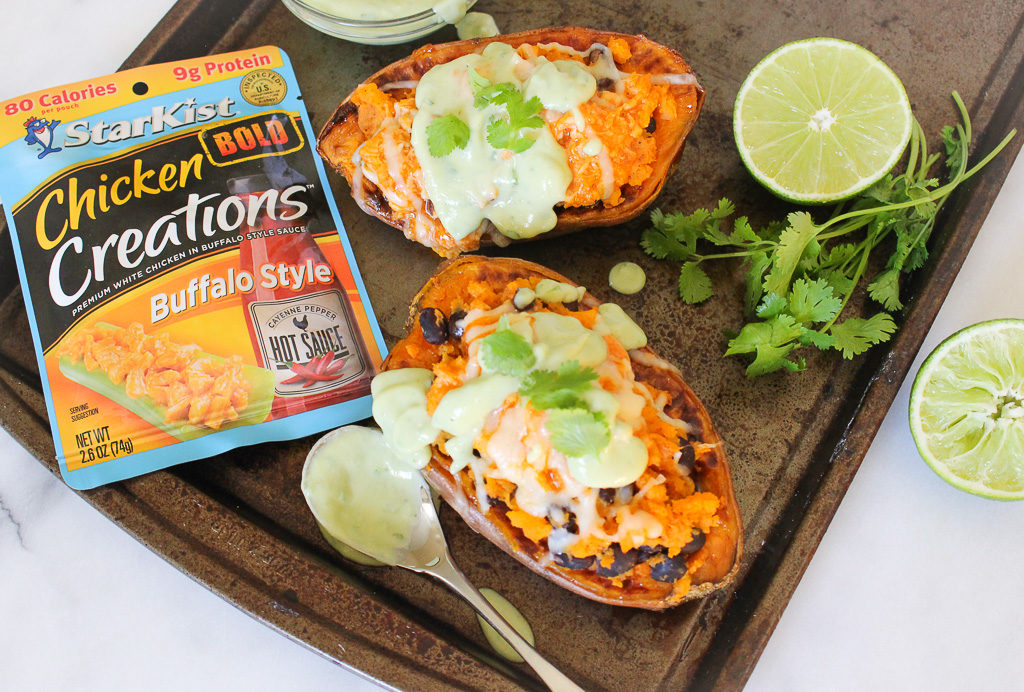
1 large sweet potato 1 teaspoon chili powder 2 teaspoons garlic powder 1/2 cup black beans 2 (2.6 oz.) packets of Starkist Chicken Creations BOLD Buffalo Style 1/4 cup mozzarella cheese
For the Avocado Lime Sauce: 1/2 avocado 1/4 cup plain yogurt 1/2 lime, juiced 2 tablespoons cilantro 2–3 tablespoons water (more if needed)
salt and pepper, to taste.
Instructions
Preheat the oven to 425 degrees F. Line a baking sheet with parchment paper, cut the sweet potatoes in half lengthwise, and place both halves flat side down on the baking sheet. Bake in the oven for 30 minutes.
Once the sweet potato halves are finished cooking, remove from the oven. Let cool enough to be able to handle. Scoop out the inside of the sweet potato halves and place in a bowl. Add the chili powder and garlic powder; mix together. Fold in the black beans.
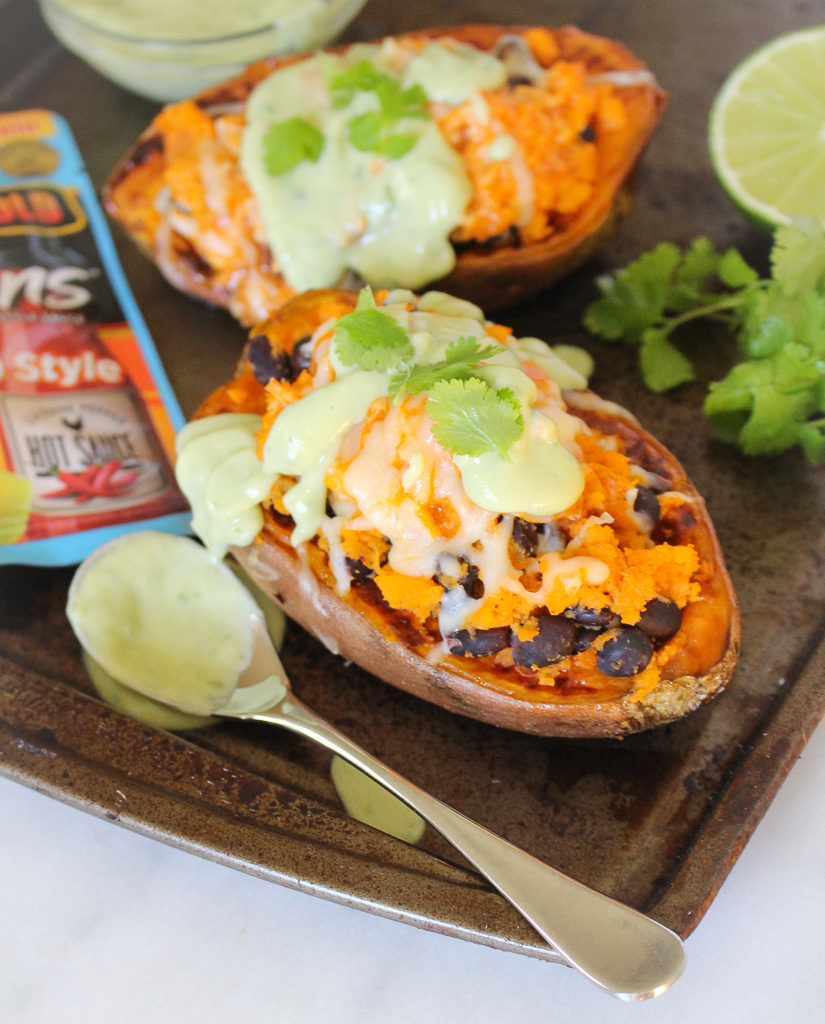
Scoop the mixture back into the sweet potato skins. Top each sweet potato with one packet of Starkist Chicken Creations BOLD Buffalo Style and sprinkle with mozzarella cheese. Place back in the oven for about 8-10 minutes or until heated through.
While sweet potatoes are cooking, combine avocado, yogurt, lime, cilantro, and water in a blender or a small food processor. Blend until smooth. Season with salt and pepper, to taste.
Remove sweet potatoes from the oven and drizzle with avocado sauce.
Notes
Don’t love buffalo sauce? Try this same recipe with one of Starkist’s Chicken Creations other flavors: Chicken Salad, Ginger Soy, or Zesty Lemon Pepper.
This post may contain affiliate links. Read my privacy policy.
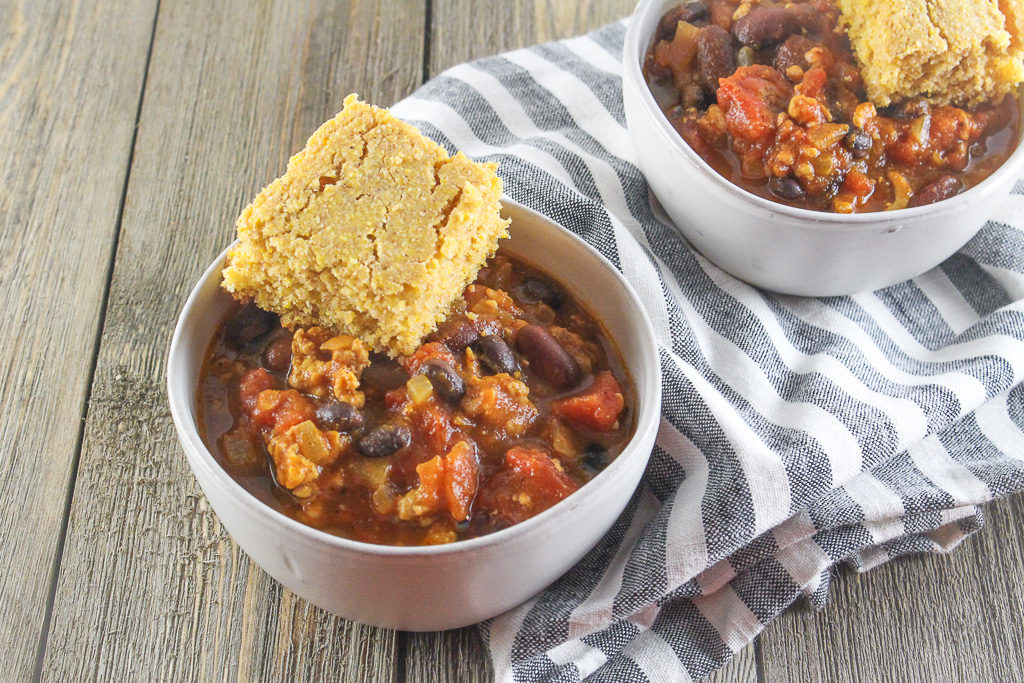
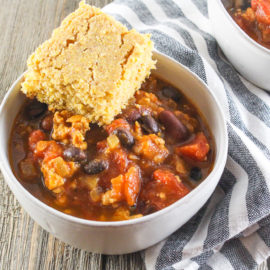
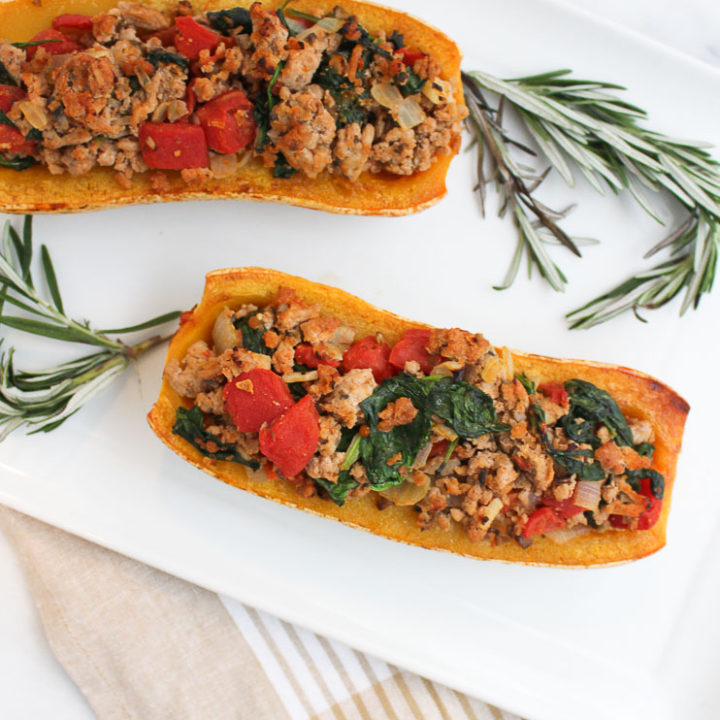
Pumpkin isn’t only for sweet recipes. Try switching things up and use pumpkin in a savory cooking application. Start with this Turkey Pumpkin Chili!
How is October already coming to an end? Fall is a busy time for me with conferences and a lot of work travel. Also during this time of year, I’m sure your Pinterest boards are being saturated with pumpkin everything! I am would say I am a self-proclaimed pumpkin lover, but my RD friend Maggie I would nominate as the president of the pumpkin lover’s club. She just came out with a pumpkin cookbook featuring 50 creative pumpkin flavored, shaped, & spiced recipes.
Did You Know?
A few years back I was at a conference and an RD from Nestle was there speaking about Libby’s canned pumpkin. That brand is a staple across supermarkets nationally. I’m sure many of you, like myself, stock up on Libby’s canned pumpkin this time of year. I was fascinated to learn they exclusively use Dickinson pumpkins, which are a special strain of pumpkins.
Why Dickinson Pumpkins?
Libby’s acquired the rights to the “Libby’s Select Dickinson” pumpkin in 1929 from the Dickinson family who brought it in the early 1800s from Kentucky. If you ever Google “Dickinson pumpkin” images that appear look like a pale, slightly misshapen butternut squash, not the jack-o-lantern pumpkin you may be thinking of. When Dickinson pumpkins are grown and cultivated just right, they yield a sweet, bright orange flesh that’s amazing in dishes from pies to pasta, and a healthier ingredient to swap into some of your favorite recipes.
Confession: One year I was a little too pumpkin obsessed. I ate it in my oats for breakfast, stirred it in my yogurt, made smoothies, breads, soups every. single. day. I had a tad too much beta-carotene and my palms started turning orange. Lesson learned.
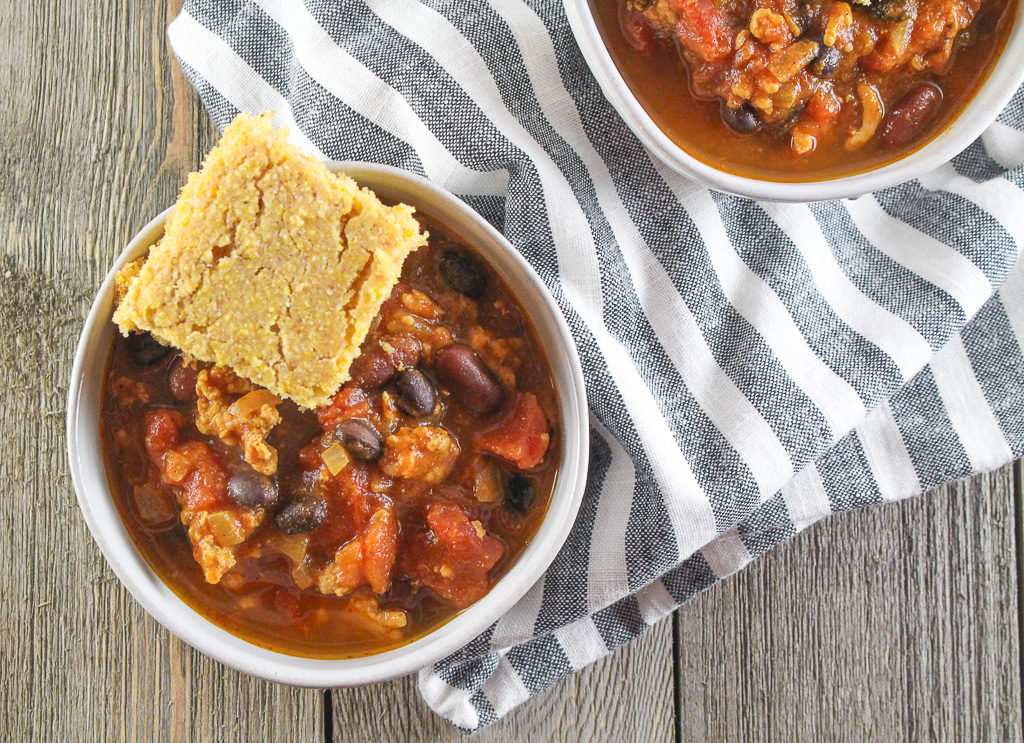
While pumpkin is used in sweet applications the majority of the time, pumpkin works well with savory applications. This chili is perfect for someone who isn’t too crazy about super spicy chili. It’s a mellow flavor with a hint of sweet. I feel like chili isn’t complete without a slice of cornbread. I always crumble up the cornbread right into the chili.
Heat oil in a large pot over medium heat. Add the onion and garlic. Cook until tender, about 5 minutes. Add the turkey, and cook until browned, stirring occasionally.
Stir in the chili powder, cumin, oregano, cinnamon, and cayenne pepper, and cook for 1-2 minutes.
Add in the diced tomatoes, pumpkin, chicken stock and beans, and stir to combine.
Bring the chili to a boil, then reduce the heat and simmer, uncovered, for 20 minutes.
Serve with cornbread.
Notes
This chili freezes well. Make a large batch and freeze half for another time.
This post may contain affiliate links. Read my privacy policy.
Have you ever had one of those aha moments at work where you just feel like, this is what I was meant to be doing? When I was younger and was asked, what do you want to be when you grow up, my answer wasn’t a dietitian/chef. Yes, I always loved cooking, but honestly, my response was less than typical than my other classmates who wanted to be teachers, police officers, and doctors. Mine was a whale trainer. Yup. I loved animals (and still do!) and became fascinated with orca whales when I was in 2nd grade.
So how did I get here? Well honestly, as a senior in high school I was like many others – I had no idea what I wanted to do. I was interested in plenty of careers, but nothing stood out to me to directly pursue. Since I was really unsure, I was looking at colleges that had a variety of offerings, but honestly, I really wanted to play a sport and Cabrini college was talking to me about playing field hockey. I went into my first year at Cabrini with a major in Health Professions.
As I was completing my gen-ed courses I started taking courses for my major and looking into the future with that major, I was thinking of all the things I wanted to do, but wouldn’t be able to pursue with just that degree. Along with a brutal first year at college (that is a whole other crazy story), I decided to leave Cabrini.
That summer was difficult. I felt lost. I definitely had the support of my friends and family during this time trying to figure out what I wanted to do next. It was to my benefit that my mom is a high school guidance counselor and has the inside scoop about a plethora of colleges as she helps high school seniors apply to college. When my mom suggested Johnson & Wales University, I was skeptical. Culinary school? But then I learned about their culinary nutrition program and I fell in love. I was always drawn to the health professional field and being able to merge my love of cooking with nutrition seemed like the perfect fit. I literally applied (and got in!) about a week before the semester started. Talk about fast decisions!
I look back on that summer and remind myself that whenever in a tough situation, things will work out and never settle for anything that doesn’t make you happy. I truly appreciate the opportunities I have within the culinary nutrition field. It feels like this is what I was meant to be doing. I hope my passion is transferred over to others when I present on culinary nutrition topics and demonstrations.
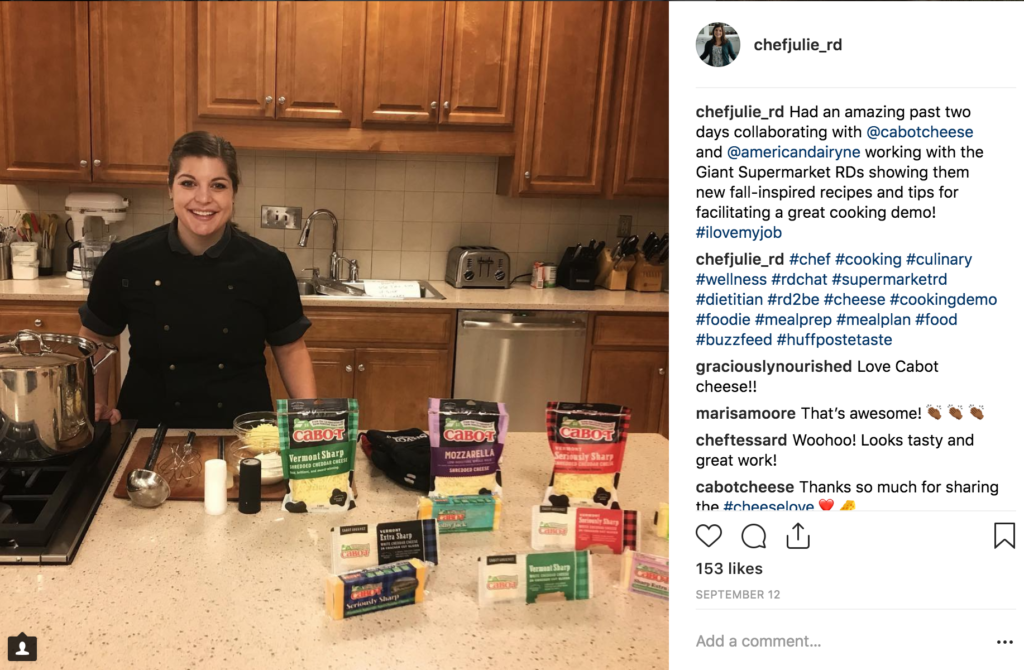
I love my job!
Last month I spent two days with Cabot and the NY American Dairy Council providing cooking demonstrations and cooking tips to Giant supermarket RD’s how to utilize seasonal fall ingredients, and of course Cabot cheese! They are gearing up for diabetes awareness month in November, so I helped develop educational materials and recipes to fit within their themes.
Traveling and presenting to other RD’s was definitely an aha moment feeling. Not many RD’s have a strong culinary background or had the opportunity to go to culinary school as I did.
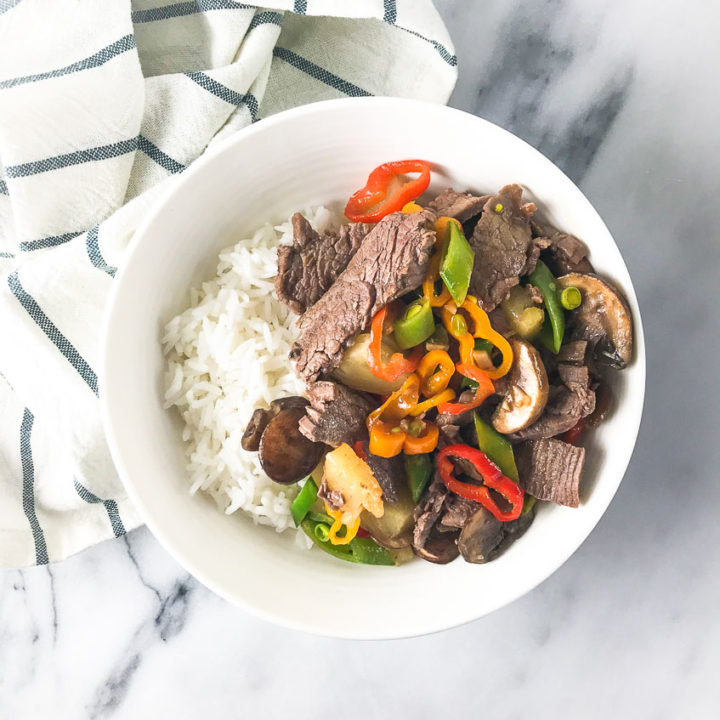
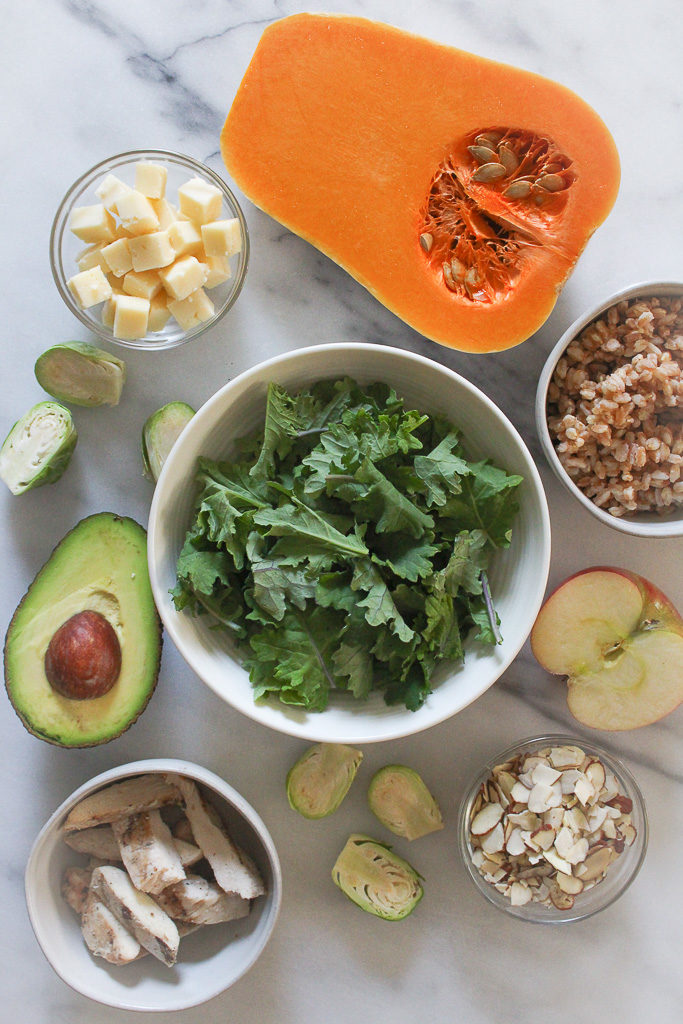
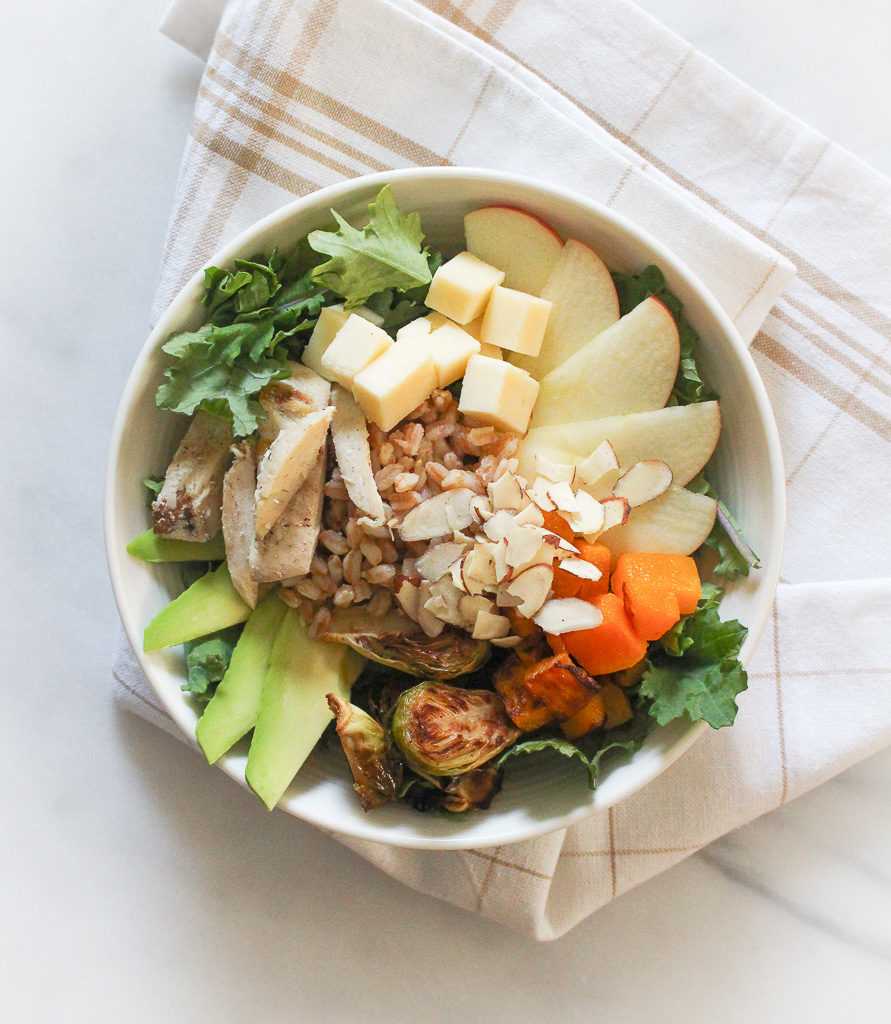
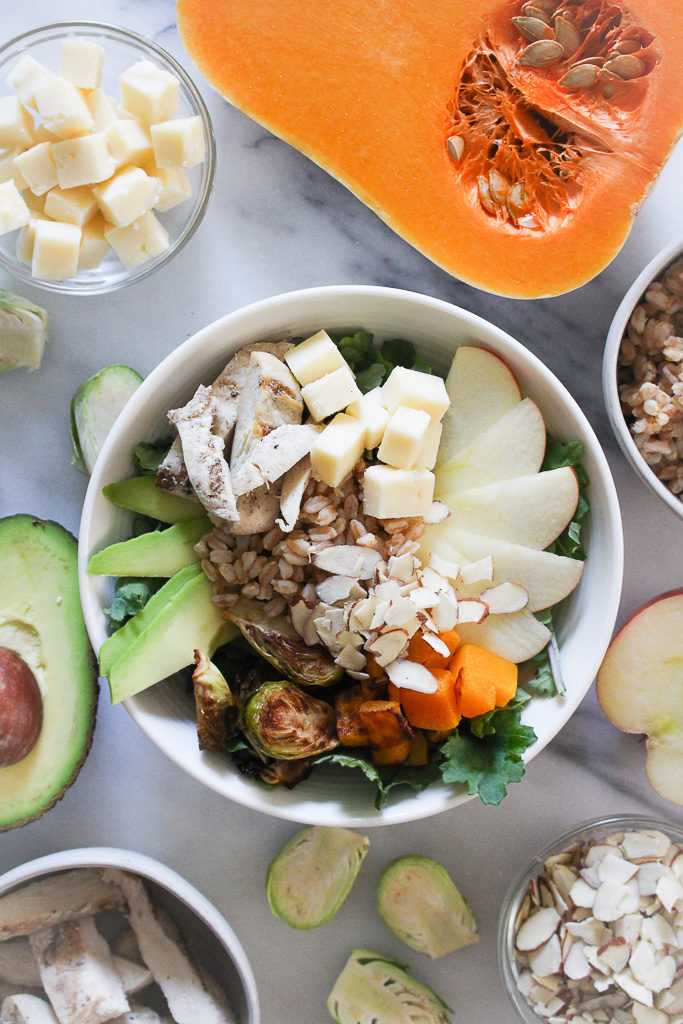
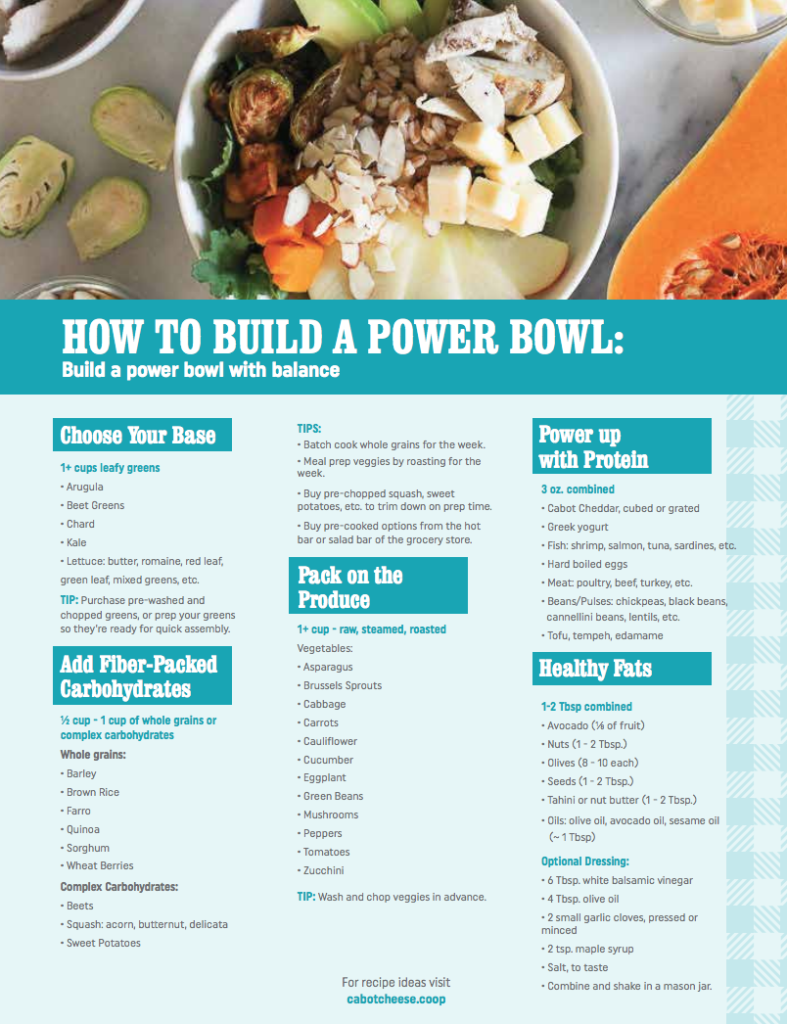
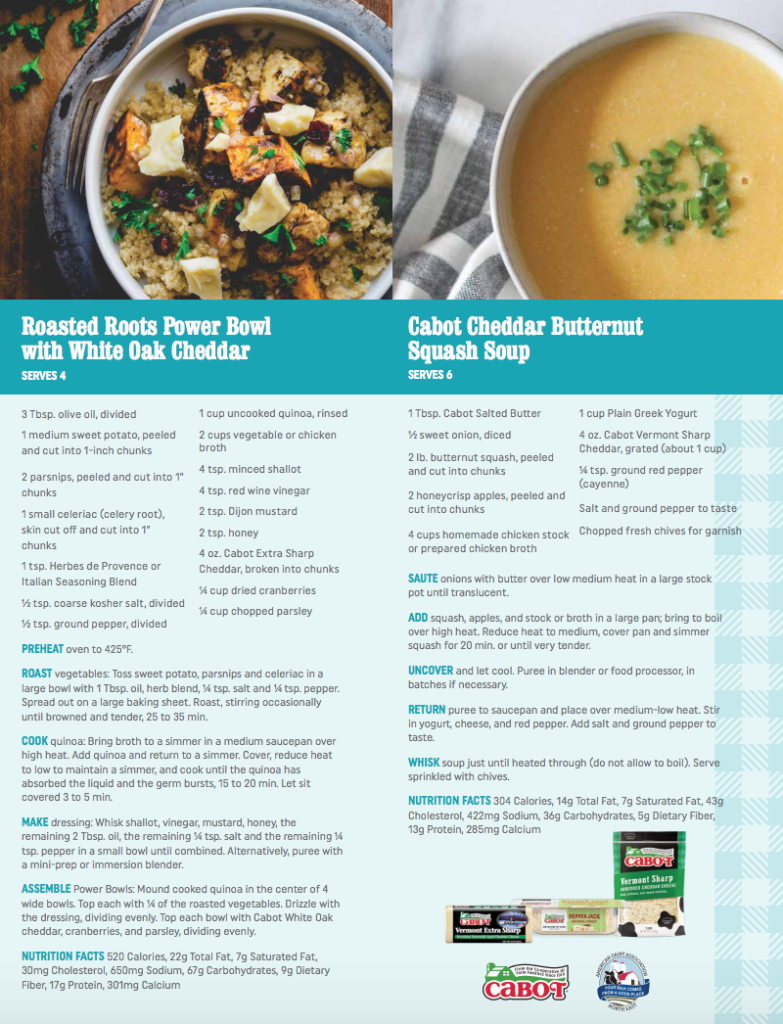
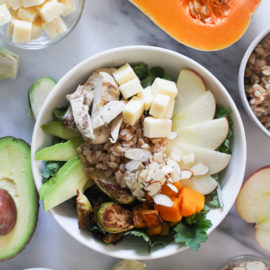
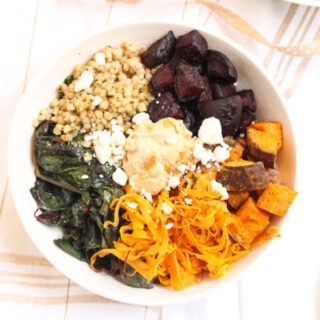
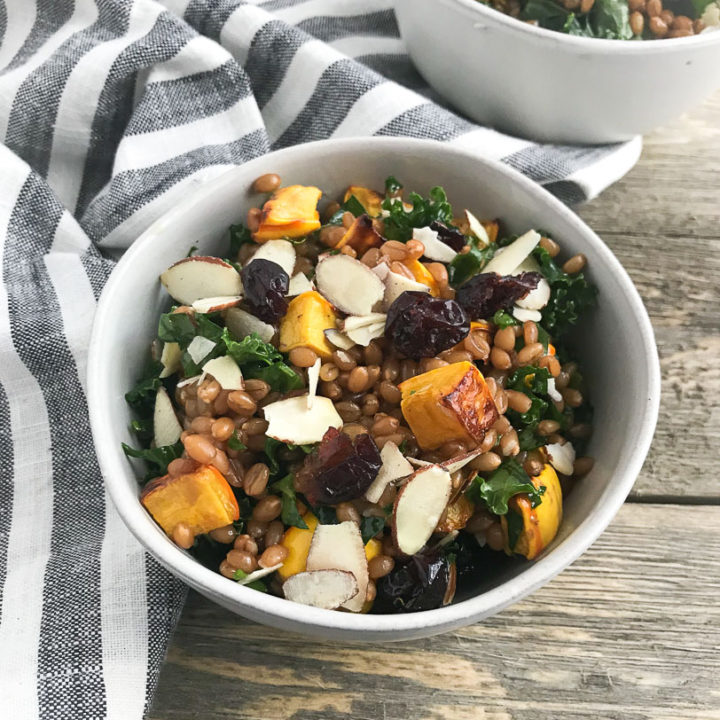
HOW TO BUILD A POWER BOWL WITH BALANCE
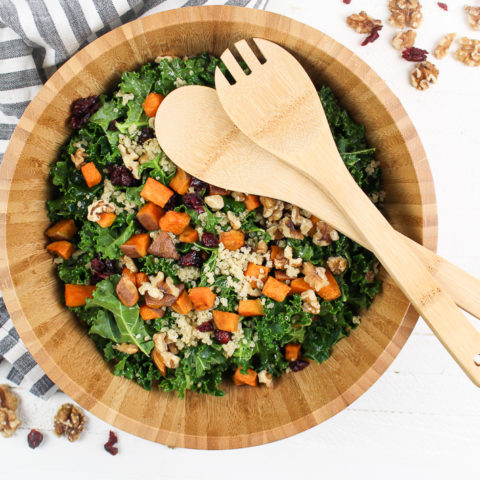
I had a lot of fun developing this recipe. Whenever you build a power bowl or nourish bowl (whatever you choose to call it), think about balance. Balancing food groups to be more full and satisfying. Balancing textures and flavors so every bite is more exciting.
What I love about these bowls is that you can customize them so many ways and never get bored. Plus, if you spend a little time meal prepping ingredients in advance a fancy bowl with a plethora of delicious ingredients can come together in minutes.
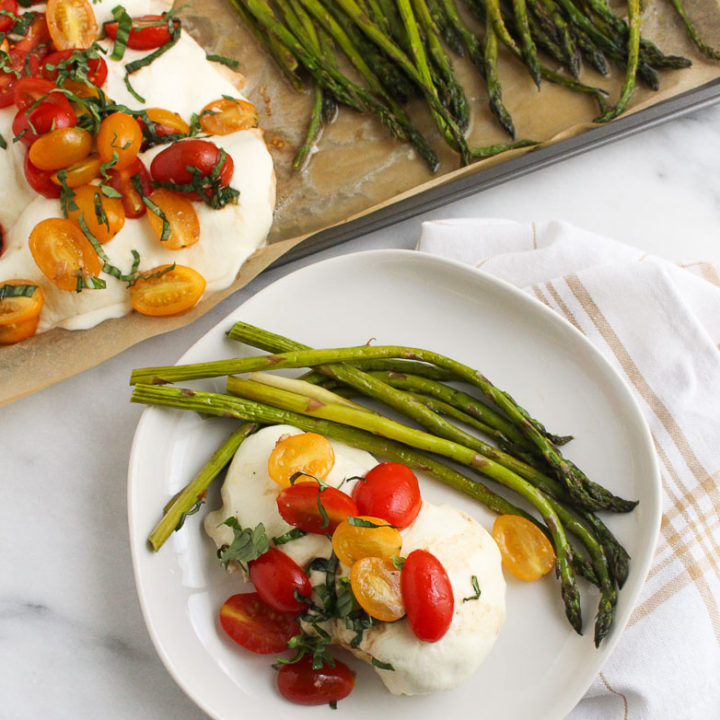
1–2 cups baby kale 1/2 cup farro, cooked 1/2 cup butternut squash, cubed and roasted 1/2 cup Brussels sprouts, roasted 1 small apple, sliced 3 oz. grilled chicken, chopped 1 oz. cheddar cheese, cubed (I love Cabot’s 1/4 avocado, sliced 1 tablespoon sliced almonds
Dressing: 6 tablespoons white balsamic vinegar 4 tablespoons olive oil 2 small garlic clove, pressed or minced 2 teaspoons maple syrup salt, to taste
Instructions
For the dressing: In a mason jar, combine white balsamic vinegar, olive oil, garlic, and maple syrup. Shake to combine. Season with salt to taste.
Add all ingredients into a bowl and toss together. Toss with salad dressing and serve.
Notes
The dressing will make extra. Save the remaining dressing for later use.
This recipe is great to prep all ingredients in advance and just toss together.
This post may contain affiliate links. Read my privacy policy.
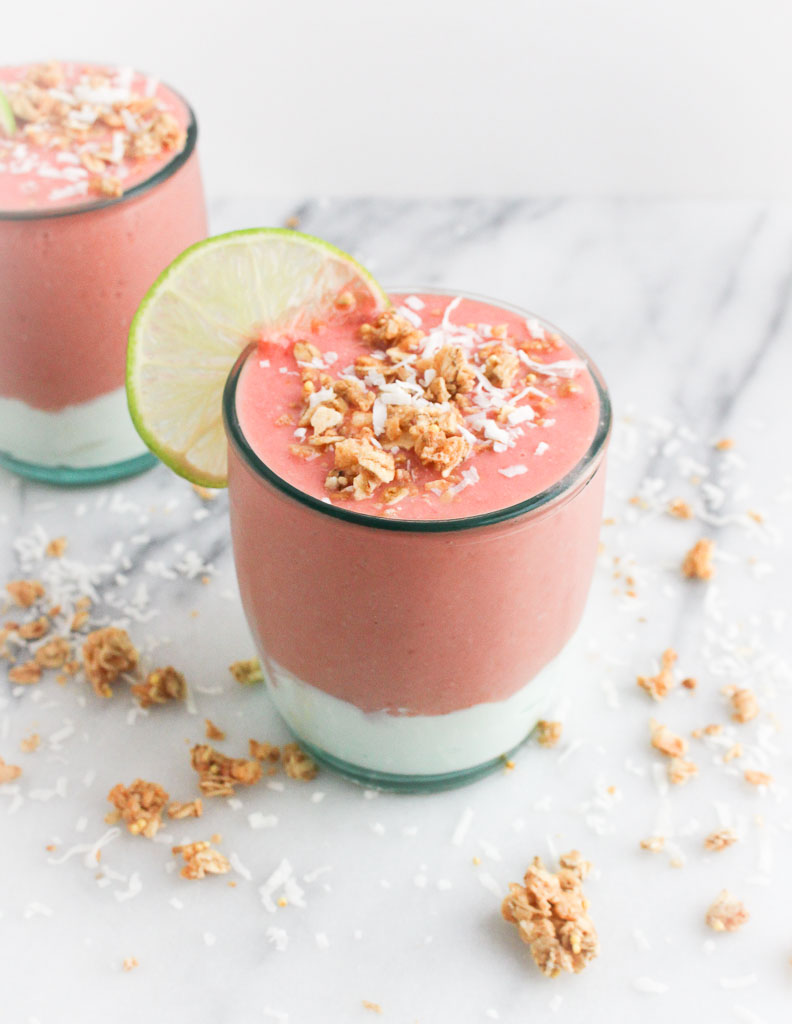
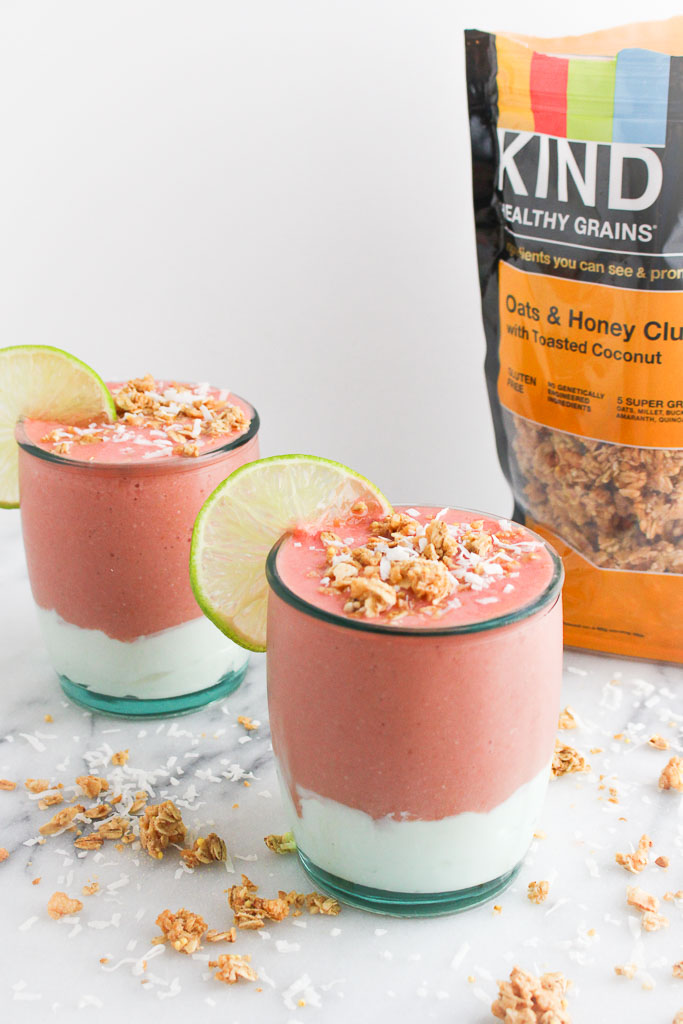
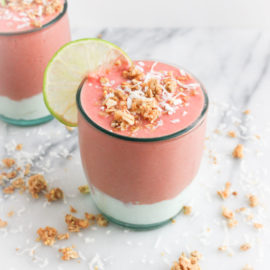
Smoothie or parfait – which do you prefer? Can’t decide? Neither can I! Get these best of both with this Mango Berry Smoothie Parfait.
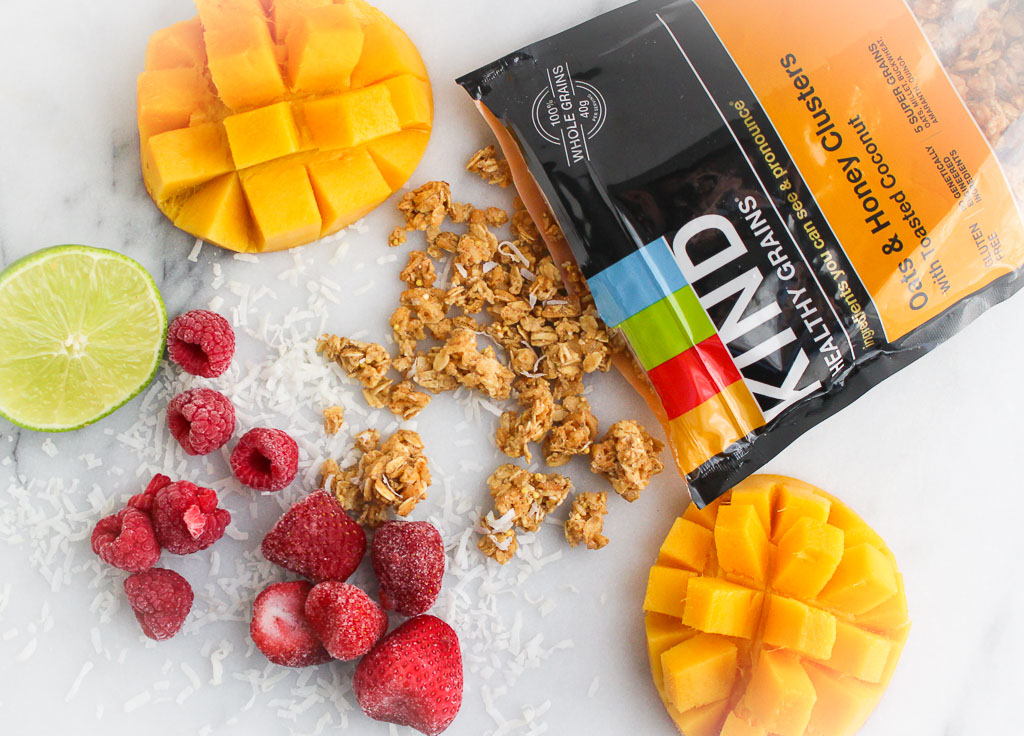
Disclosure: This post was sponsored by KIND Snacks for a recipe contest with Ahold Foods. This recipe was featured in Stop & Shop and Giants circular week of 9/20/18. Thanks for supporting the brands that make this blog possible!
Do you prefer smoothie bowls or parfaits?
Smoothie Bowls vs. Parfaits
Smoothie Bowls:
Making a smoothie bowl instead of an on-the-go drink can help practice mindful eating and encourage slower eating. It’s easy to suck down a smoothie in a few big gulps. By enjoying a smoothie bowl with a spoon it can help you slow down, be more aware of what you’re eating and pay attention to whether or not you are actually hungry. Plus you can add more toppings!
Parfaits:
A yogurt parfait is typically served in a tall glass with layers of several different ingredients. Yogurt is the star of the recipe, but many add-ins, such as fruit or granola, also make an appearance. I always prefer to make my own yogurt parfaits with ingredients and products I love. Be mindful when ordering a yogurt parfait out, as they are often loaded with added sugars. Also, sometimes if the glass is too narrow I am usually eating layer by layer until there is enough room to mix it all to get every flavor in one bite.
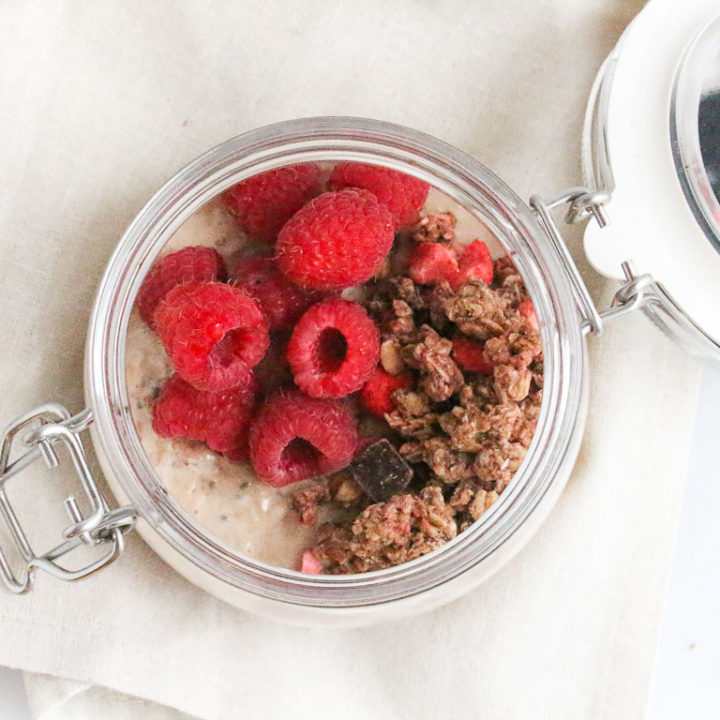
What about getting the best of both worlds create a smoothie parfait!
Most smoothies have bananas as the base. But what if you don’t like bananas? (Hi, Steph – this recipe is for you!) I love bananas, but I often get requests from clients for smoothies without banana based on their preferences.
Banana is often used as the base because it helps create a creamy and smooth consistency of a smoothie. Using the frozen berries with yogurt help mimic that same creamy consistency, but I felt like it was still missing something. By adding a handful of KIND oats & honey clusters gave it a thicker consistency what I was looking for.
This recipe is for anyone who can’t make up their mind what they want to eat. This happens often for me. I can never decide and tend to merge things together, which gave me the inspiration for this recipe.
This website uses cookies to improve your experience. We'll assume you're ok with this, but you can opt-out if you wish.AcceptRejectRead More
Privacy & Cookies Policy
Privacy Overview
This website uses cookies to improve your experience while you navigate through the website. Out of these, the cookies that are categorized as necessary are stored on your browser as they are essential for the working of basic functionalities of the website. We also use third-party cookies that help us analyze and understand how you use this website. These cookies will be stored in your browser only with your consent. You also have the option to opt-out of these cookies. But opting out of some of these cookies may affect your browsing experience.
Necessary cookies are absolutely essential for the website to function properly. This category only includes cookies that ensures basic functionalities and security features of the website. These cookies do not store any personal information.
Any cookies that may not be particularly necessary for the website to function and is used specifically to collect user personal data via analytics, ads, other embedded contents are termed as non-necessary cookies. It is mandatory to procure user consent prior to running these cookies on your website.