How to Store Asparagus to Help it Last Longer

Utilize these tips on how to select and store asparagus properly to help it last longer.

asparagus in a mason jar against a white tile background

Selecting Asparagus

Asparagus is most widely available from February to June, with April being the peak.

Did you know?
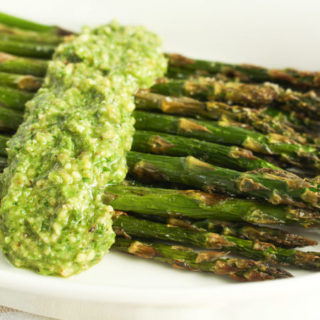
Size isn’t an indicator of quality or flavor; thick asparagus is just more mature than the thin variety. Instead, look for firm, straight, and plump stalks of asparagus vibrant in color. Avoid stems that are very firm, woody, and cracked. This is a sign of aging and drying out.

The tips, also called the buds, of asparagus, are just as important to pay attention to as the stalks. Look for asparagus tips that a tight and firm with a hint of dark green and purple color to them.

Notice that in the produce department or at the farmer’s market, the asparagus bunches are rubber-banded and lined up in a trough of water? If not and just lined up on the shelf, the asparagus has already started drying out resulting in more to trim off and less to eat, when ready to use.

There is nothing worse that taking out asparagus from the vegetable crisper to find either limp or dried out asparagus.

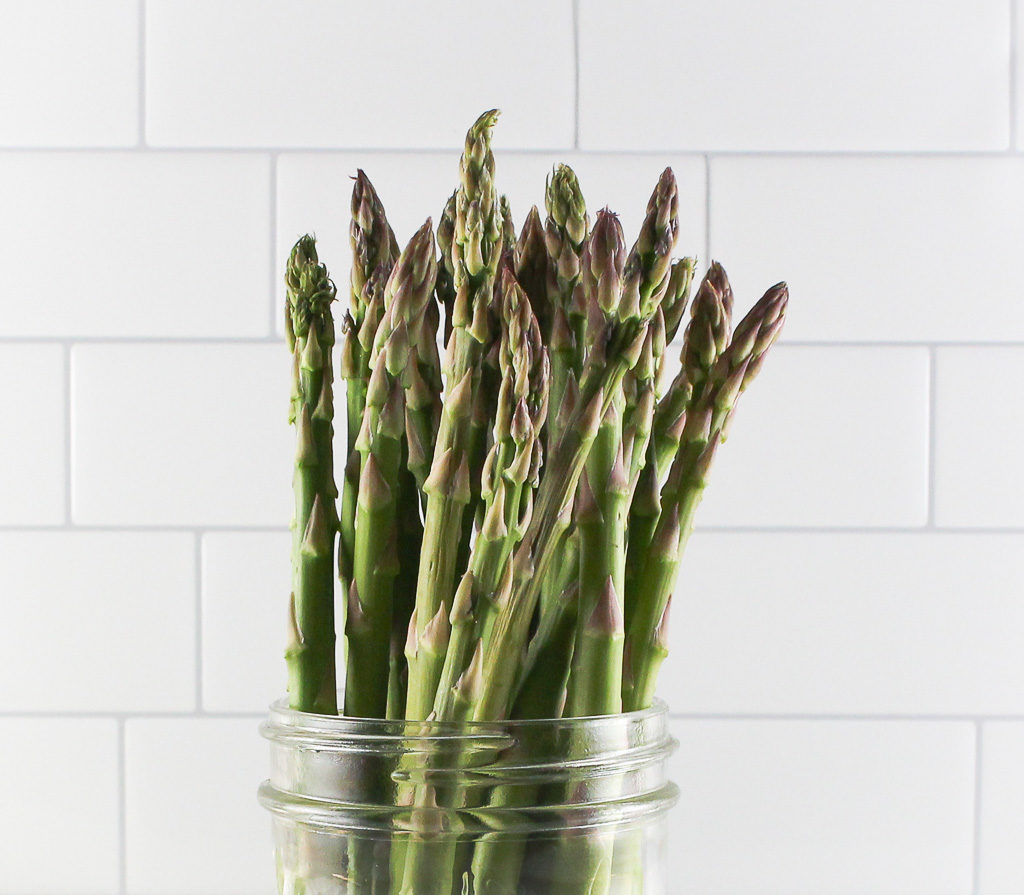
Asparagus will keep for a week or more in the refrigerator if stored properly. Treat asparagus like flowers, needing to be kept upright and moist in water to stay fresh.

The Best Way to Store Asparagus

  1. Right when you bring home asparagus from the grocery store or farmer’s market, trim about an inch off the ends of the asparagus.
  2. Stand the asparagus up in a glass jar and pour about an inch or two of water at the bottom, making sure all the ends are sitting in the water.
  3. Loosely cover the asparagus with a plastic bag and store in the refrigerator for up to a week. If the water looks cloudy, just change it as needed.
asparagus in a tall mason jar

Health Benefits of Asparagus

Asparagus, being packed with antioxidants is one of the top-ranked fruits and vegetables for its ability to neutralize cell-damaging free radicals. This may help slow the aging process and reduce inflammation. 

The green veggie is packed with good-for-you vitamins and minerals like vitamins A, C, E, K, and B6, as well as folate, iron, copper, calcium, protein, and fiber.

Kitchen Basics: Chef Knife

The chef knife – one of the most used pieces of kitchen equipment, but do you really know everything about it?

A chef knife, also known as a utility knife or French knife, is the most valuable tool as it can handle many tasks in the kitchen. Each part of the knife has a specific function. Understand these functions to help you better choose a chef knife that would be the best fit for you.

The chef knife - one of the most used pieces of kitchen equipment, but do you really know everything about it? Kitchen Basics: Get to know Your Chef Knife with Chef Julie Harrington, RD @ChefJulie_RD #chef #knife #chefknife #cookingtips #culinary #kitchenbasics

Each knife has a blade, handle, bolster, tang, and rivets.

Blade:

The blade is the sharp, flat portion of the knife used for cutting. Most knives are made from high-carbon stainless steel, which can be easily sharpened and resistant to rust and discoloration.

The chef knife - one of the most used pieces of kitchen equipment, but do you really know everything about it? Kitchen Basics: Get to know Your Chef Knife with Chef Julie Harrington, RD @ChefJulie_RD #chef #knife #chefknife #cookingtips #culinary #kitchenbasics

Knife blades have five parts: the point, tip, heel, edge, and spine.

  • The point is the foremost section of a knife tip that can be used as a piercing tool.
  • The tip is the front quarter of the knife blade. Most cutting is accomplished between the tip and the heel.
  • The heel is the rear portion of the blade. The heel is used to cut thick food items when more force is required.
  • The edge is the sharpest part of the knife blade that is between the tip and the heel.
  • The spine is not sharp and opposite the edge.

Handle:

The handle of the knife should be comfortable and properly fit the hand. The weight of the handle may differ, so find one that fits your hand best and is comfortable for you.

Bolsters:

Not all knives have bolsters. The bolster is a thick band of metal where the blade meets the handle. The purpose is to provide strength to the knife blade and to prevent slipping from the handle during the cutting process.

Tang and Rivets:

The tang is the tail of the knife blade that extends into the handle. The tang is secured to the handle with rivets. The rivets are metal fasteners to secure the tang to the handle. There are different kinds of tangs.

The chef knife - one of the most used pieces of kitchen equipment, but do you really know everything about it? Kitchen Basics: Get to know Your Chef Knife with Chef Julie Harrington, RD @ChefJulie_RD #chef #knife #chefknife #cookingtips #culinary #kitchenbasics
Source: 50 Effective Knife Techniques by Michael J. McGreal
  • A full tang extends to the end of the handle and typically contains several rivets.
  • A partial tang extends only a partial amount into the handle and had fewer rivets. Partial tangs are less durable but are lighter to handle.
  • A rat-tail tang is a narrow rod of metal that runs the length of the knife handle and no rivets are needed to hold it in place. Knives with a rat-tail tang are less durable than both a full and partial tang knives.

For me, investing in a good kitchen knife is key. Personally, the chef knife is the most used kitchen equipment I use daily.

These are the basics of your chef knife, but stay tuned for more information! Coming up we will talk about different styles of knives and their different uses.

Comment below of questions you have about your knives or kitchen equipment that I can answer in future posts!

This post may contain affiliate links. To find out more information, please read my disclosure statement.

References
50 effective knife techniques
Michael McGreal – American Technical Publishers – 2017


Lemon Vinaigrette

Brighten any salad, grain, or vegetable dish with this simple lemon vinaigrette. Made with ingredients you probably already have on hand, simply whip this up in a mason jar.

Lemon Vinaigrette in a small glass jar

I don’t think people realize how EASY it is to make a homemade dressing. The most basic vinaigrette recipe is mixing an acid and a base. Then just add seasonings you enjoy. Simply pour ingredients into a mason jar and shake away. Your dressing is made! How easy was that? Plus, making it in a mason jar is ready to store any leftovers.

Lemon Vinaigrette in a small glass jar

If you want to go beyond the basics, use this guide to build your own vinaigrette.

Create a homemade vinaigrette

Choose your acid:

This can be in the form of vinegar or citrus juice. Pick something that matches with your salad mix-ins. Opt for a sweet acid like white wine vinegar, white balsamic vinegar, or an orange juiced, for salads that have fruit. 

Try acids like apple cider vinegar, balsamic vinegar, red wine vinegar, rice vinegar, lemon juice, lime juice, or other citrus juices. 

Tip: Think about the components of your salad. If you have a salad with bright colors, avoid darker vinegar. Once the salad is dressed, those bright vibrant colors will look muddy. Remember – we eat with our eyes first! 

Choose your base:

The base is oil. Use good quality oil. This can be a simple olive oil or fancy garlic and rosemary-infused walnut oil. Again think about the components of your salad. If there are avocados in your salad, why not try avocado oil? 

Try oils like olive oil, avocado oil, walnut oil, pumpkin seed oil, hazelnut oil, or other flavor-infused oils. 

Add seasonings:

If you are new to making dressings, simple olive oil and balsamic vinegar dressing with a pinch of salt and pepper will work just fine. Once you are comfortable making dressings, try amping it up with other seasonings. 

Add a teaspoon of Dijon mustard to add a little tanginess and also to help create a creamier vinaigrette. Add a teaspoon of miso for an umami flavor. Try using fresh herbs for a pop of flavor. For a sweet vinaigrette, add a little maple syrup or honey. 

Lemon Vinaigrette in a small glass jar

Once you start playing around with different combinations, you’ll start to know what flavor combinations you like best!

Print
clock clock iconcutlery cutlery iconflag flag iconfolder folder iconinstagram instagram iconpinterest pinterest iconfacebook facebook iconprint print iconsquares squares iconheart heart iconheart solid heart solid icon
lemon vinaigrette in a small jar with lemons

Lemon Vinaigrette

  • Author: Chef Julie Harrington, RD
  • Prep Time: 5
  • Total Time: 5 minutes
  • Yield: 3/4 cup 1x
  • Category: dressing
  • Method: no-cook

Description

This lemon vinaigrette is incredibly easy to make. Drizzle it on all your salad and veggie recipes!


Ingredients

Scale
  • 1/3 cup olive oil
  • 2 lemons, juiced (approx 1/3 cup juice)
  • 1 teaspoon Dijon mustard
  • 1 teaspoon maple syrup
  • 2 garlic cloves, minced
  • salt and pepper, to taste

Instructions

Simply measure ingredients and add to a mason jar. Secure lid and shake. Season with salt and pepper, to taste.


Keywords: dressing, vinaigrette, homemade, mason jar, salad dressing, healthy fats, lemon, citrus, cooking tips

Recipe Card powered byTasty Recipes

Other recipes you may enjoy

Baking Soda vs. Baking Powder – What’s the Difference?

Let’s get nerdy! I love sharing new recipes with you, but I want to start diving more into the food science of food too. When a recipe calls for baking soda or baking powder, what is their purpose? What’s the difference between the two?
Baking Soda vs. Baking Powder - What's the difference via RDelicious Kitchen @RD_Kitchen #cooking #cookingtips #foodscience #science #baking
Let’s answer the first question: Is there a difference between baking soda and baking powder? YES!
My friend, who is an 8th-grade science teacher, says “Obviously, there is a difference. When you add baking soda to vinegar, it makes cool science volcanos and the other doesn’t.”
Welp, that’s all you need to know. Blog post over. Just kidding, there is so much more to learn! Baking soda and baking powder do have a lot in common, as they are both chemical leaveners, meaning they generate gas during the making and baking of a batter.
Some recipes may call for one or the other, or both, but just make sure you don’t confuse the two because they do have distinct differences.

Baking Soda:

Baking soda contains a single ingredient, sodium bicarbonate. When baking soda is combined with something acidic (think buttermilk, yogurt, citrus juice, vinegar, etc.), it produces carbon dioxide. This creates little bubbles that helps give rise to baked goods.
I know you might be thinking, I’ll just add more to get a better rise in my baked goods. Think again. Be careful not to add too much! When sodium bicarbonate is heated it produces sodium carbonate, which produced a metallic taste. No one wants a metallic tasting muffin. That metallic taste can be neutralized by the acid that is used in the recipe, while still giving our baked goods a pretty good rise.

Did you know?

You can also use baking soda to create homemade cleaners to freshen and clean up tough stains in your home. Learn ways you can use baking soda for cleaning purposes.
Baking Soda vs. Baking Powder - What's the difference via RDelicious Kitchen @RD_Kitchen #cooking #cookingtips #foodscience #science #baking

Baking Powder:

Baking powder is a mixture of baking soda and dry acid (plus, sometimes cornstarch). Yup, baking soda is one of the main ingredients in your baking powder. The acid that is typically used is cream of tartar. Cornstarch is often added in to keep the ingredients separate and dry.
The balance of acid (cream of tartar) and base (baking soda) is already balanced for you, so there will be no metallic aftertaste even if you go a little heavy handed with baking powder.
Baking powder only needs a liquid or moisture for a reaction to occur (no acid necessary). With baking powder, the chemical reaction that helps the product rise happens when the product is slowly heated. Baking powder allows for more flexibility because you can let the batter or dough sit for a little while before baking and still get the rise you’re after.
You might see some baking powders at the grocery store that say “double acting”. This means that a small amount of carbon dioxide is released and that some leavening occurs (bubbles) when the baking powder gets wet from wet ingredients, but the rest of the leavening occurs when the baked good is heated.

The bottom line:

To help you easily remember the difference between baking soda and baking powder, remember: Baking soda needs an acid.  Baking powder has an acid.

Baking soda = single ingredient.

Baking powder = poof in the oven.

RDelicious Kitchen @RD_Kitchen

Pin for later!

Baking Soda vs. Baking Powder - What's the difference via RDelicious Kitchen @RD_Kitchen #cooking #cookingtips #foodscience #science #baking

Guide to Herb & Spice Food Pairings

I’m sure you have a pantry full of herbs and spices. Not sure what to do with them? No problem! Use this handy guide to know what foods your herbs and spices pair best with.

Before we start talking about what to pair your herbs and spices with, let’s make sure you are storing them properly first.

Herb and Spice Storage Tips:

  • Keep spices and herbs away from heat, moisture, and direct sunlight. Even a commonly used herb like dried bay leaves should be kept away from the stove.
  • Don’t sprinkle spices and herbs directly from the bottle over a steaming pot. Steam can sneak into the spice bottle and sap your spices’ power. If you’re wondering why ground spices like allspice get hard and caked in the bottle, steam may be the culprit.
  • They don’t spoil, but spices and herbs do lose their strength. Old and weak seasonings will not deliver the taste that they should.
  • Make sure your measuring spoon is completely dry when you dip it into the bottle. The moisture can quickly ruin the flavor of an aromatic spice like cinnamon.
  • An inexpensive coffee grinder can also be deployed to grind whole seeds, cloves, and cinnamon sticks. Fresh-ground spices are especially flavorful.

If the recipe calls for fresh herbs, but you only have dried on hand, don’t worry. Just remember the ratio, 1 to 3. Because dried herbs have a more intense concentrated flavor, dried herbs can be substituted for fresh herbs at a ratio of 1 to 3.
Use the food pairings guide below to help utilize the herbs and spices in your kitchen pantry. Pin to save for a reference!
Herb & Spice Food Pairings via RDelicious Kitchen @RD_Kitchen #spices #herbs #cooking #seasonings #hearthealth #wellness #phytochemicals #lowsodium
Let’s get cooking!
RDelicious Kitchen @RD_Kitchen