Instant Pot Steel Cut Oats (+ Freezer-Friendly Tip)

Make mornings easier by meal prepping a batch of Instant Pot Steel Cut Oats for the week and follow a simple freezer-friendly tip to enjoy steel cut oats in just minutes.

steel cut oats in a small white bowl with blueberries and sliced almonds

Who has time to make a fresh batch of steel-cut oats in the morning? If you do, more power to you, but like many, I prefer extra sleep vs. waking up earlier to make breakfast from scratch.

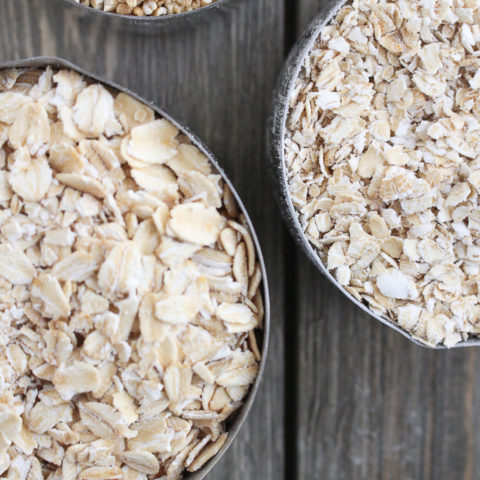
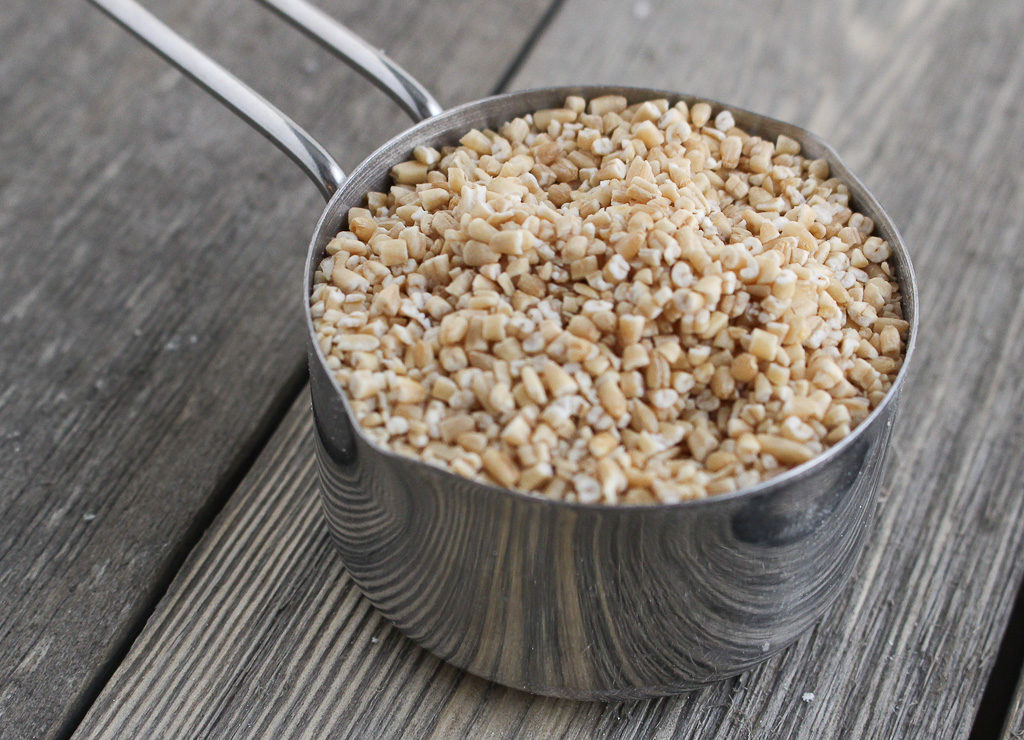
What Are Steel Cut Oats?

Steel cut oats are the least processed variety of oats, take the longest to cook, and maintain their texture better than others when it comes to a good bowl of oatmeal. It’s literally the whole oat, including the bran (the outermost layer). I previously talked about the differences between steel-cut, rolled, and quick oats.

Are Steel Cut Oats Healthy?

Yes! They are naturally gluten free for anyone with sensitivities and packed full of fiber. Most don’t know this, but one serving (without added toppings) has 7 grams of protein! Steel cut oats also have a lower glycemic index than others. Even if you don’t take the GI into consideration, know that this is a good concept for everyone, which means your body will digest it slower than other varieties and you will have less of a sugar spike.

steel cut oats in a metal measuring cup

Does Using the Instant Pot Save Time? 

By the time the Instant Pot comes to pressure, the cooking time, and the pressure release time it’s about the same. BUT the greatest thing is that it’s hands-free cooking. So no stirring constantly, wondering if they are ready, and you can do other stuff while you wait on your breakfast!

Instead of spending time each morning making a serving of steel-cut oats meal prep a large batch for the week. Steel-cut oats can easily be made over the stovetop, but I love using the Instant Pot to make steel-cut oats because just add your ingredients, press a few buttons, and done!

steel cut oats in a white bowl with toppings on a marble slab next to the Instant Pot

Ingredients for Instant Pot Steel Cut Oats 

steel cut oats
water
cinnamon sticks – if you don’t have these you can use ground cinnamon instead

How to Cook Steel Cut Oats in a Pressure Cooker

Pour the steel cut oats and water into the Instant Pot and stir. Add in the cinnamon sticks or ground cinnamon and stir once more. 

Place the lid on the Instant Pot and turn the valve to the sealing position. 

Cook for 6 minutes using manual pressure. 

When the timer goes off, allow the pressure cooker to release naturally for 20 minutes, then turn the valve to the venting position. 

Toss out the cinnamon sticks and give it a good stir. 

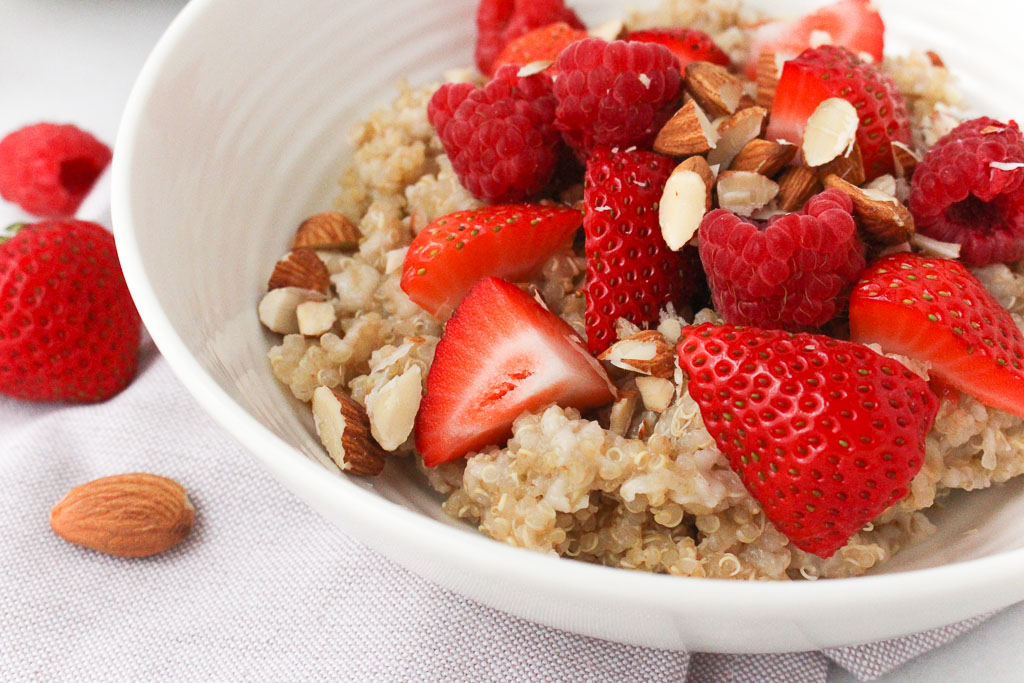
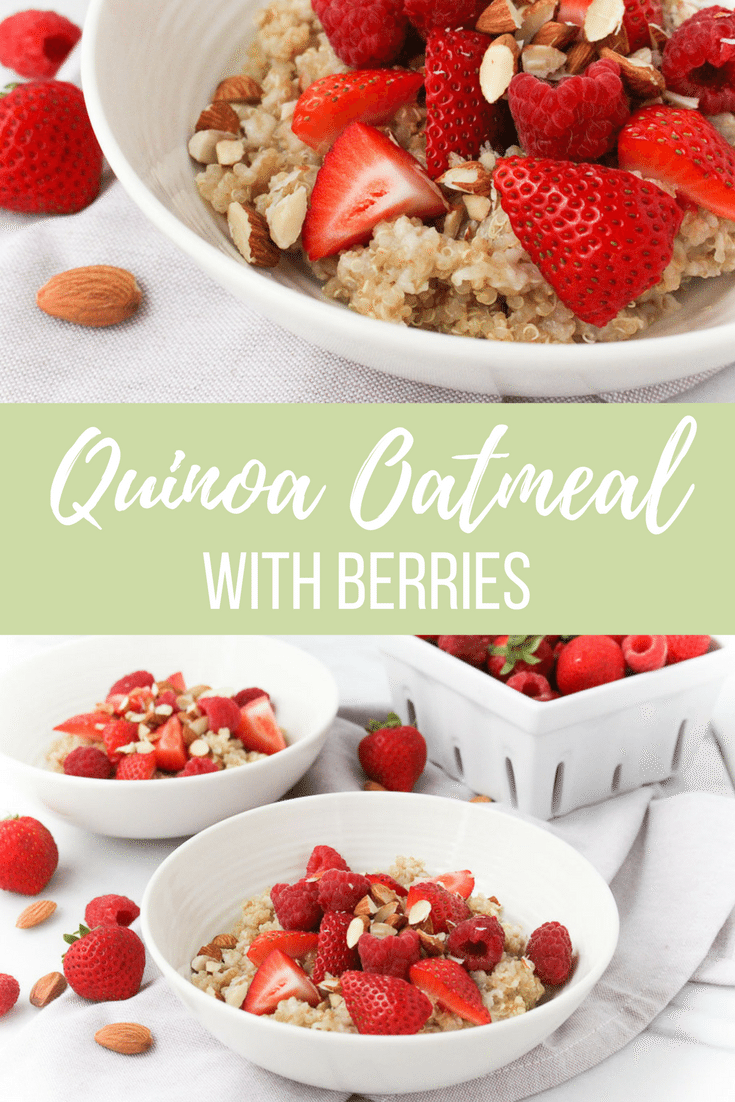
Serve with your favorite toppings!

Steel Cut Oatmeal Topping Ideas

I prefer to make the batch of steel-cut oats pretty plain because then there is the flexibility to add different toppings to create different flavor combinations. I do enjoy adding a cinnamon stick to the pot and the cinnamon flavor infuses into the oats. (This can easily be done with a few shakes of ground cinnamon too.) Here are some more ideas.

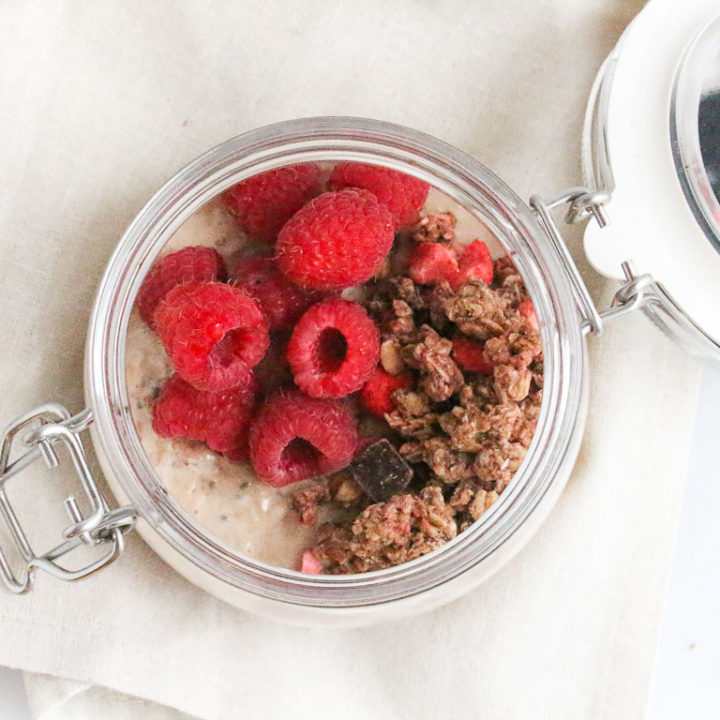
Bananas & Blueberries – a favorite combination! Add these on top just before serving

Syrup & Honey – Need just a touch of sweetness? Drizzle some maple syrup or honey over the oats once they come out of the Instant Pot 

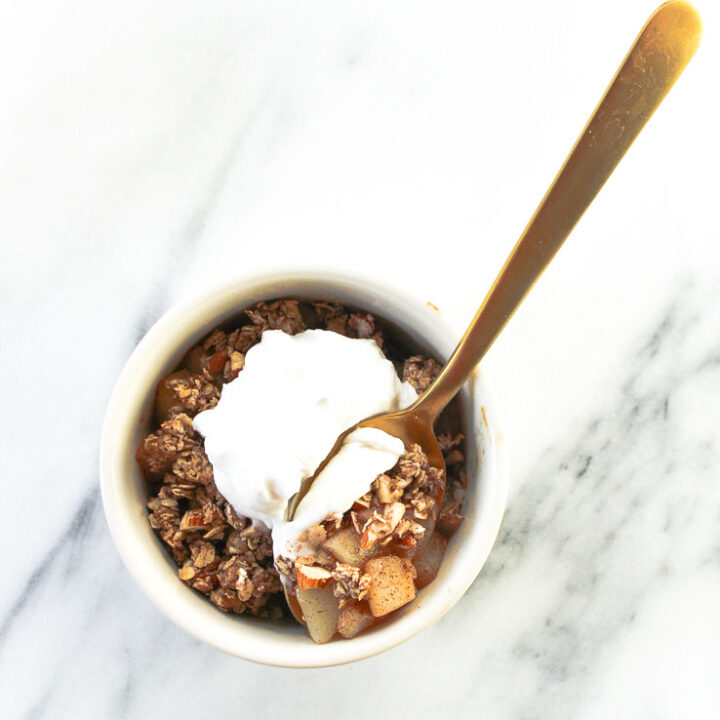
Pumpkin – you could add a couple of spoonfuls of pureed pumpkin before cooking, great for the fall! 

Apples – because that just makes sense with cinnamon! Dice them into small pieces (as even as possible) and stir before you cook or after as a topping. 

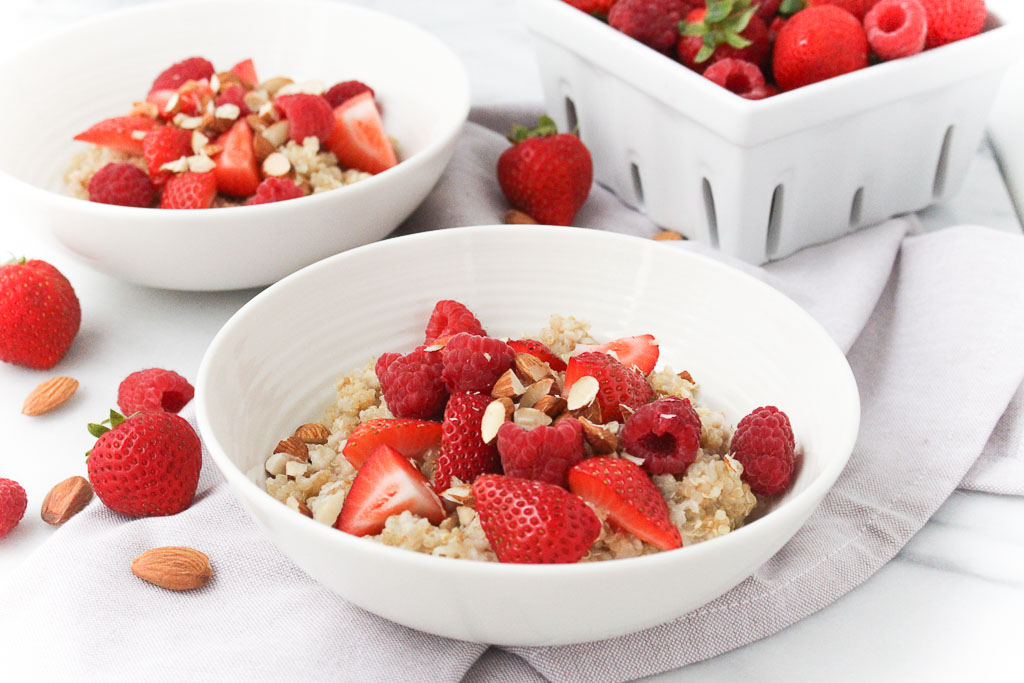
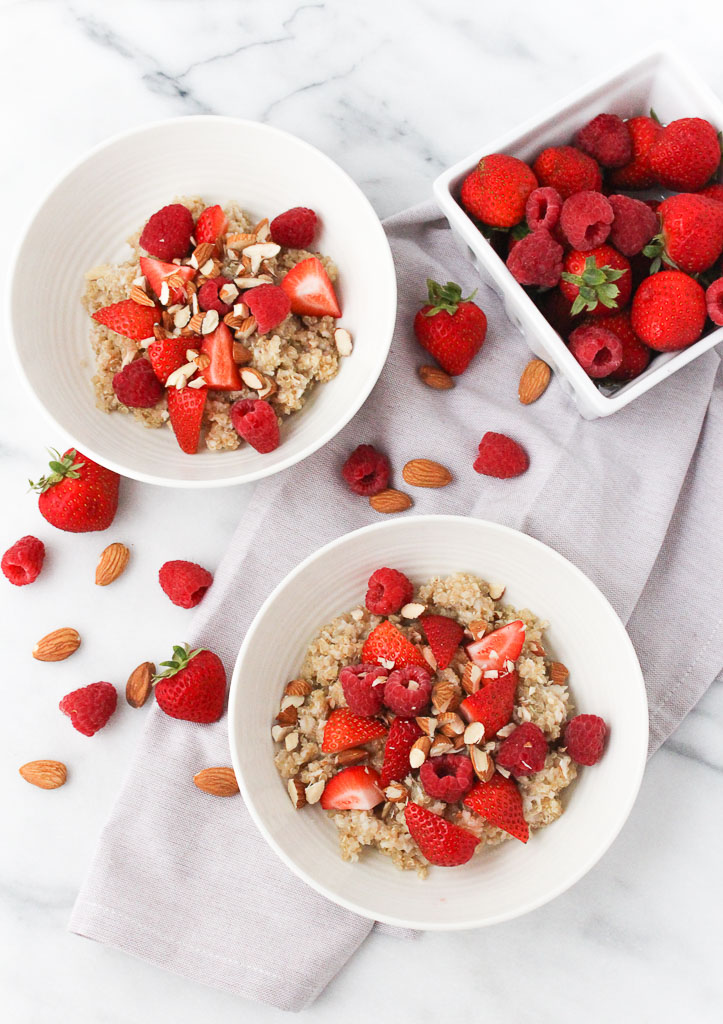
  • Other fresh fruit and berries
  • Nuts (almond, walnuts, pecans) 
  • Splash of milk to thin it out if needed.
  • Nut or seed butter
  • Chia seeds or ground flax meal

frozen steel cut oatmeal in a jumbo muffin tin

How Long Do Steel Cut Oats Last After Being Cooked? 

Once you have pressure cooked them, they stay fresh when kept in the refrigerator for up to a week. 

If you want to batch, I recommend freezing them. 

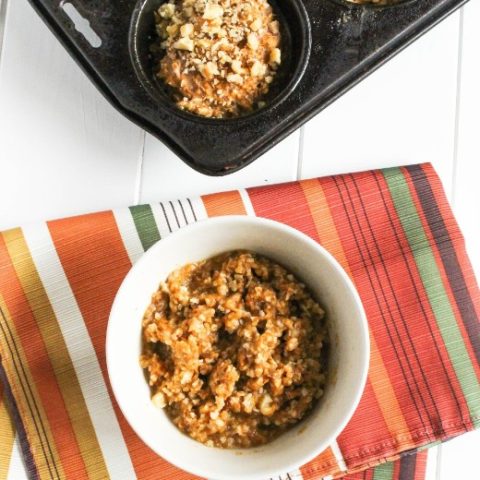
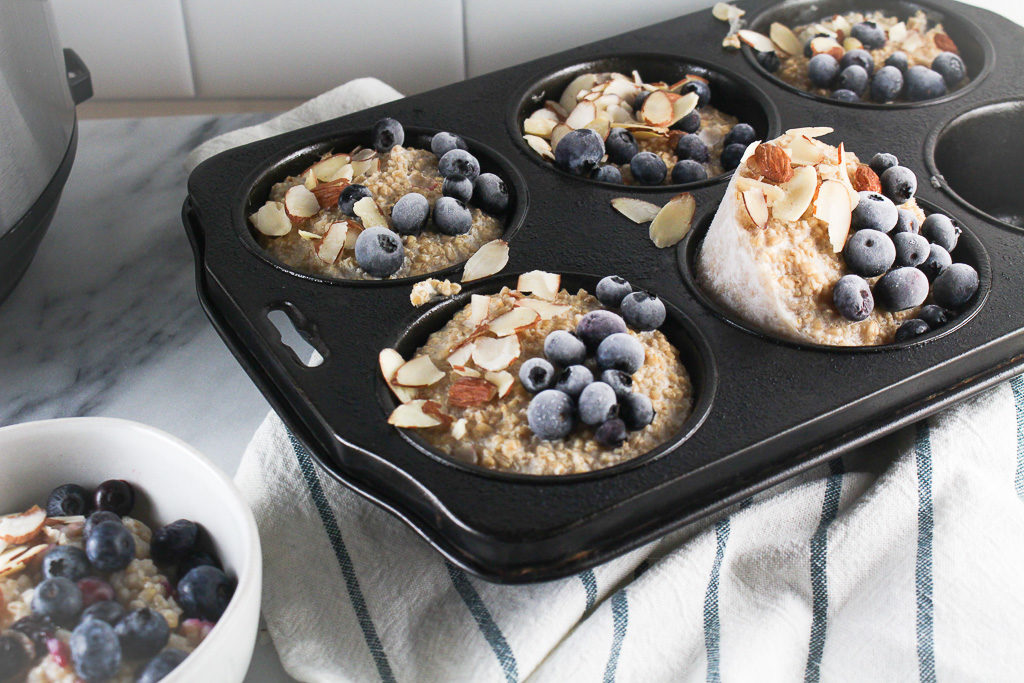
After making a batch of these Instant Pot Steel Cut Oats, spray a jumbo muffin tin with cooking spray and scoop about a cup of oats into each muffin tin well. Then add your favorite topping combinations.

Once hardened, dip the bottom of the muffin tin in warm water to help remove the single-serving steel cut oat portions and freeze in a container or bag for later use.

Then, simply add a single-serving portion of oats to a microwave-safe bowl with a few drops of water, and reheat in the microwave.

Print
clock clock iconcutlery cutlery iconflag flag iconfolder folder iconinstagram instagram iconpinterest pinterest iconfacebook facebook iconprint print iconsquares squares iconheart heart iconheart solid heart solid icon
Instant Pot Steel Cut Oats in a white bowl topped with blueberries and almonds

Instant Pot Steel Cut Oats

  • Author: Chef Julie Harrington, RD
  • Prep Time: 5
  • Cook Time: 6
  • Total Time: 11 minutes
  • Yield: 6
  • Category: Breakfast
  • Method: Instant Pot

Ingredients

Scale

2 1/2 cups steel cut oats
7 cups water
2 cinnamon sticks (or 1 teaspoon ground cinnamon)


Instructions

  1. Add steel cut oats, water, and cinnamon sticks to the Instant Pot and stir to combine.
  2. Secure Instant Pot lid and close the vent. Set Instant Pot on the manual setting for 6 minutes.
  3. When Instant Pot beeps, allow the pressure to naturally release for 20 minutes.
  4. Remove lid, discard cinnamon sticks, and stir oats to incorporate any water that has risen to the top.
  5. Serve with your favorite toppings. (Combination recommendation: blueberries, sliced almonds, and honey)

Notes

Leftover oats can be stored in the fridge for up to a week or utilize the freezer-friendly method.

Freezer-Friendly Method:
Spray a jumbo muffin tin with cooking spray and scoop about a cup of oats into each muffin tin well. Then add your favorite topping combinations. Once hardened, dip the bottom of the muffin tin in warm water to help remove the single-serving steel cut oat portions and freeze in a container or bag for later use.

Keywords: oatmeal, Instant Pot, steel cut oats, breakfast, cooking tip, oats

Recipe Card powered byTasty Recipes

Other recipes you may enjoy

Sheet Pan Steak and Veggies

Make dinnertime stress-free with this simple Sheet Pan Steak and Veggies recipe.

steak with veggies on a sheet pan

This post is sponsored by the NY Beef Council. Thank you for supporting brands that make this blog possible!

March is an exciting month for dietitians, as it is National Nutrition Month. National Nutrition Month® is an annual nutrition education and information campaign created by the Academy of Nutrition and Dietetics. The campaign, celebrated each year during the month of March, focuses attention on the importance of making informed food choices and developing sound eating and physical activity habits. In years past there was a theme to go along with National Nutrition Month’s initiative.

sheet pan with steak, broccoli, and squash

This year, I’ve teamed up with the NY Beef Council for National Nutrition Month to help make dinnertime less stressful with simple strategies and a delicious recipe.

We all seem busier than ever and dinnertime looks different for everyone. Getting home from long days at work, to juggling kids after school activities, or feeling exhausted and grabbing take out; every night the chore of dinner getting on the table can be stressful.

How can you make nourishing meals more manageable? Sheet pan dinners! Simply make a full dinner all on one pan. Sheet pan meals are great fresh out of the oven, but also really great as leftovers. Cook once, eat twice! Repurpose as is, eat over a whole grain, or enjoy over greens for a robust salad. The possibilities are endless!

sheet pan dinner with steak and veggies

When creating a sheet pan dinner, think about ingredients that will provide energy, protein, vitamins, and minerals. To this end, aim to eat a variety of delicious foods that balance the taste you love with good nutrition.

Beef is part of a satisfying heart-healthy lifestyle. All beef is a natural source of 10 essential nutrients such as protein, iron, zinc, and B vitamins. Research shows that lean beef enjoyed as part of a heart-healthy diet and exercises, can help lower cholesterol, lose weight, and lower blood pressure.

What is “lean” beef?

To be considered lean, a 3.5-oz serving of cooked beef must have less than 10 grams of total fat, 4.5 grams or less of saturated fat, and less than 95 mg of cholesterol. Look for the word “loin”, “round”, and 95% ground beef in the name when finding a lean cut of beef. A few samples of lean beef cuts are top sirloin steak, strip steak (top loin steak), tenderloin steak, or 95% lean ground beef.

Less stress dinnertime strategies:

Maximize your prep time

What are you more likely to cook with midweek? A head of unwashed broccoli still wrapped from the grocery store or the broccoli that is washed, trimmed, and stored in a produce bag ready to be cooked? I think we all know the answer here.

Create a plan

Look at your week ahead before you go grocery shopping and plan meals for the week. This will alleviate the “what’s for dinner?” question, prevent food waste, which will then in turn save you money.

Acknowledge the chaos

There are days that will just not go according to plan and that’s okay! To really make meals manageable, it’s important to be realistic with what to expect. Unrealistic expectations may set you up for a failed experience before the meal even begins. Plan for sheet pan dinners mid-week when you know you will be short on time.

Enjoy the moment

Whether you are dining solo or with a crowd take that time to enjoy the meal and be in the moment. Enjoy the company or the solidarity without outside distraction. We all need time to disconnect from technology.

Print
clock clock iconcutlery cutlery iconflag flag iconfolder folder iconinstagram instagram iconpinterest pinterest iconfacebook facebook iconprint print iconsquares squares iconheart heart iconheart solid heart solid icon
steak & veggies on a sheet pan

Sheet Pan Steak and Veggies

  • Author: Chef Julie Harrington, RD
  • Prep Time: 15
  • Cook Time: 16
  • Total Time: 31 minutes
  • Yield: 4
  • Category: dinner
  • Method: sheet pan

Description

Make dinnertime stress-free with this simple Sheet Pan Steak and Veggies recipe.


Ingredients

Scale

2 cups butternut squash, peeled and diced
3 cups broccoli florets
1 1/2 tablespoons olive oil, divided
4 cloves garlic, minced
1 1/2 teaspoons dried thyme
salt and pepper, to taste
1 pound strip steak


Instructions

  1. Preheat oven to broil (500°F). Coat a large baking sheet with cooking spray. Set aside.
  2. In a large pot of water, parboil squash for 5 minutes, to slightly soften. Drain and set aside.
  3. In a large bowl, combine butternut squash and broccoli. Add 1-tablespoon olive oil, half the garlic, 1-teaspoon of thyme to the vegetables, and salt and pepper, to taste; toss to combine. Add to the baking sheet in an even layer.
  4. Pat steak dry. Add to the baking sheet in between the vegetables. Brush steak with the remaining ½ tablespoon of olive oil and rub with the remaining ½ teaspoon thyme, garlic, salt, and pepper on both sides.
  5. Place in the oven and broil until steak is browned and charred at the edges; about 6-8 minutes.
  6. Remove from oven and flip the steak and toss the veggies. Cook for an additional 6-8 minutes for medium-rare, until an inserted thermometer, reads 145°F.

Notes

Cook time may vary due to the thickness of the steak. Use a digital thermometer to determine doneness.

Keywords: sheet pan, steak, beef, one pan meal, dinner

Recipe Card powered byTasty Recipes

References:
Sayer RD, et al. Equivalent reductions in body weight during the Beef WISE Study: Beef’s Role in Weight Improvement, Satisfaction, and Energy. Obes Sci Pract 2017. Available at: http://onlinelibrary.wiley.com/doi/10.1002/osp4.118/full

One-Pan Chicken Sausage & Gnocchi Sauté

This one-pan chicken sausage & gnocchi saute utilizes simple ingredients to create a delicious meal in minutes.

kale with chicken sausage and gnocchi

I never understood the mad rush to the grocery store when there is an inkling of news about the possibility of snow. Previously, working as a retail dietitian, the madness was unreal. The aisles with the bread and milk would be completely wiped out. I guess everyone’s instinct is to survive on bread and milk if they get snowed in? I’ll never understand.

Sausage, gnocchi, and kale in a white bowl

My kitchen isn’t always completely stocked and with news of snow, I’m the last person you will see heading to the grocery store. I don’t want to deal with the craziness!

I think it’s fun to poke around the kitchen utilizing what I have on hand to create new meal ideas. I always say that makes me feel like I am on an episode of “Chopped“. (minus the crazy ingredients like cow’s tongue the contestants get in their mystery baskets)

One Pan Chicken Sausage & Gnocchi Sauté in a white bowl on a marble slab

Each kitchen no matter how big or small has four kitchen zones: the refrigerator, freezer, pantry, and countertops. Don’t just open the fridge and just decide “there’s nothing to eat, let’s grab take out.” Utilize the ingredients in each zone to create a meal. This recipe uses all four kitchen zones to create a delicious and balanced meal.

What Kind of Gnocchi Should I Use? 

You can use the kind you find that are shelf-stable, frozen, and can even use cauliflower gnocchi instead of potato. 

The gnocchi is cooked separately to start with, which is why you can use multiple brands of varieties. 

If you haven’t tried Trader Joe’s gnocchi, you are truly missing out!

Ingredients for Chicken Sausage Gnocchi

Gnocchi – as I mentioned earlier you can choose your favorite 

Olive oil

Chicken sausage – these are the link kind

Garlic cloves

White beans – any variety will work 

Kale 

Chicken broth – try to get low sodium if you can

How to Make Chicken Sausage Gnocchi in Less Than 30 Minutes

Before we get started, go ahead and cook the gnocchi according to the instructions on the packaging. 

While that’s cooking, prep your kale by removing the ribs and chopping it coarsely. 

Then add a tablespoon of oil over medium heat and cook the chicken sausages, just until they are browned. Take them out of the pan and set aside. 

Using the same pan, heat the rest of the oil and add the minced garlic, drained white beans, and cooked gnocchi. 

Cook until the gnocchi and beans are warmed. Be sure to keep a close watch on the garlic, you do not want it to burn. You can turn down the heat if needed. 

Add the sausage links back to the pan followed by the kale and chicken broth. Stir and cover until the kale wilts. 

Take the lid off and continue cooking just to allow the excess liquid to evaporate. 

Top with some parm and serve! 

chicken sausage and gnocchi in a white bowl next to a dish towel

No need to rush to the grocery store when there is snow in the forecast. Just utilize what you have in each kitchen zone! And with simply one pan, chicken sausage & gnocchi saute came together in minutes.

Print
clock clock iconcutlery cutlery iconflag flag iconfolder folder iconinstagram instagram iconpinterest pinterest iconfacebook facebook iconprint print iconsquares squares iconheart heart iconheart solid heart solid icon
One Pan Chicken Sausage & Gnocchi Sauté in a white bowl

One Pan Chicken Sausage & Gnocchi Sauté

  • Author: Chef Julie Harrington, RD
  • Prep Time: 10
  • Cook Time: 25
  • Total Time: 35 minutes
  • Yield: 4
  • Category: dinner
  • Method: one pan

Description

One Pan Chicken Sausage & Gnocchi Sauté making meal time a breeze


Ingredients

Scale

10 oz. gnocchi*, cooked according to package directions
2 tablespoons olive oil, divided
4 links chicken sausage*, sliced on a bias
4 cloves garlic, minced
1 (15.5 oz.) can white beans, drained and rinsed
6 cups kale, ribs removed and roughly chopped
1/4 cup low-sodium chicken broth


Instructions

Cook gnocchi according to package directions. 

Heat 1 tablespoon of olive oil over medium-high heat. Cook chicken sausages until browned. Remove from pan and set aside.

Heat remaining 1 tablespoon of olive oil in the same pan. Add garlic, white beans and gnocchi. Saute until beans and gnocchi are warmed through. (Keep an eye on the garlic. Do not let it burn. Turn down heat if needed.)

Add chicken sausage back into the pan. Then, add kale and chicken broth. Stir to thoroughly combine ingredients. Cover until kale wilts. Remove lid and allow excess moisture to evaporate. 

Serve. Top with parmesan cheese, if desired. 


Notes

  • *Can use cauliflower gnocchi in this recipe, if desired.
    *I used Alfresco chicken sausage.

Keywords: kale, chicken, chicken sausage, one pan, gnocchi, white beans, beans, dinner

Recipe Card powered byTasty Recipes

This post may contain affiliate links. To find out more information, please read my disclosure statement.

other recipes you may enjoy

Turkey Pumpkin Chili

Pumpkin isn’t only for sweet recipes. Try switching things up and use pumpkin in a savory cooking application. Start with this Turkey Pumpkin Chili! 

Turkey Pumpkin Chili with a piece of cornbread in a white bowl

How is October already coming to an end? Fall is a busy time for me with conferences and a lot of work travel. Also during this time of year, I’m sure your Pinterest boards are being saturated with pumpkin everything! I am would say I am a self-proclaimed pumpkin lover, but my RD friend Maggie I would nominate as the president of the pumpkin lover’s club. She just came out with a pumpkin cookbook featuring 50 creative pumpkin flavored, shaped, & spiced recipes.

Turkey Pumpkin Chili with piece of cornbread in a white bowl

Did You Know?

A few years back I was at a conference and an RD from Nestle was there speaking about Libby’s canned pumpkin. That brand is a staple across supermarkets nationally. I’m sure many of you, like myself, stock up on Libby’s canned pumpkin this time of year. I was fascinated to learn they exclusively use Dickinson pumpkins, which are a special strain of pumpkins.

Why Dickinson Pumpkins?

Libby’s acquired the rights to the “Libby’s Select Dickinson” pumpkin in 1929 from the Dickinson family who brought it in the early 1800s from Kentucky. If you ever Google “Dickinson pumpkin” images that appear look like a pale, slightly misshapen butternut squash, not the jack-o-lantern pumpkin you may be thinking of. When Dickinson pumpkins are grown and cultivated just right, they yield a sweet, bright orange flesh that’s amazing in dishes from pies to pasta, and a healthier ingredient to swap into some of your favorite recipes.

Confession: One year I was a little too pumpkin obsessed. I ate it in my oats for breakfast, stirred it in my yogurt, made smoothies, breads, soups every. single. day. I had a tad too much beta-carotene and my palms started turning orange. Lesson learned.

While pumpkin is used in sweet applications the majority of the time, pumpkin works well with savory applications. This chili is perfect for someone who isn’t too crazy about super spicy chili. It’s a mellow flavor with a hint of sweet. I feel like chili isn’t complete without a slice of cornbread. I always crumble up the cornbread right into the chili.

Print
clock clock iconcutlery cutlery iconflag flag iconfolder folder iconinstagram instagram iconpinterest pinterest iconfacebook facebook iconprint print iconsquares squares iconheart heart iconheart solid heart solid icon
white bowl with turkey pumpkin chili with a piece of cornbread

Turkey Pumpkin Chili

  • Author: Chef Julie Harrington, RD
  • Prep Time: 10
  • Cook Time: 20
  • Total Time: 30 minutes
  • Yield: 6
  • Category: chili

Ingredients

Scale
  • 2 tablespoons olive oil
  • 1 medium onion, diced
  • 3 cloves garlic, minced
  • 1 lb. ground turkey breast
  • 1 1/2 tablespoons chili powder
  • 1 teaspoon cumin
  • 1/4 teaspoon cinnamon
  • 1/4 teaspoon cayenne pepper
  • 1 (28 oz) can no salt added diced tomatoes
  • 1 (15 oz) can pumpkin puree (not pie filling)
  • 2 cups low sodium chicken stock
  • 1 (15 oz) can black beans, drained & rinsed
  • 1 (15 oz) can red kidney beans, drained & rinsed
  • pinch of salt and pepper

Instructions

  1. Heat oil in a large pot over medium heat. Add the onion and garlic. Cook until tender, about 5 minutes. Add the turkey, and cook until browned, stirring occasionally.
  2. Stir in the chili powder, cumin, oregano, cinnamon, and cayenne pepper, and cook for 1-2 minutes.
  3. Add in the diced tomatoes, pumpkin, chicken stock and beans, and stir to combine.
  4. Bring the chili to a boil, then reduce the heat and simmer, uncovered, for 20 minutes.
  5. Serve with cornbread.

Notes

This chili freezes well. Make a large batch and freeze half for another time.

Keywords: chili, pumpkin, turkey,

Recipe Card powered byTasty Recipes

Other recipes you may enjoy

Pineapple Beef Stir Fry

Beef stir fry in a white bowl with white rice

This post is sponsored by The Beef Checkoff. Thanks for supporting brands that make this blog possible!

Dietitians are celebrating all month long because March is National Nutrition Month! This year’s theme is “Go Further with Food”. This theme encourages us to achieve the numerous benefits healthy eating habits offer while including a variety of healthful foods from all of the food groups on a regular basis.

Beef Up Nutrition Month - Understanding Beef Labeling + Pineapple Beef Stir Fry Recipe via RDelicious Kitchen @RD_Kitchen #sponsored by The Beef Checkoff

Previously working as a Supermarket RD, I quickly learned that a grocery store is a confusing place, especially in certain areas like the meat section.

It can be challenging grocery shopping for beef if you are unsure of the difference between flank steak and skirt steak. The different costs, categories, or even proper cooking techniques of various cuts of beef can throw off even a savvy home cook.

pineapple beef stir fry in a pan

At the supermarket meat case, each beef package label typically identifies the primal cut and the sub-primal cut name. It also includes the weight, price per pound, total price, sell-by date, and safe handling instructions. It may also include a grade, nutrition and preparation information, and the country of origin.

Understanding Beef Labeling + Pineapple Beef Stir Fry Recipe via RDelicious Kitchen @RD_Kitchen #sponsored by The Beef Checkoff #beef #stirfry #dinner #nutrition

It’s time to “Beef Up Nutrition Month” with decoding what the labels mean in the supermarket meat case.

BEEF QUALITY GRADING

The USDA divides beef into categories by different grades. Prime, Choice, and Select are the ones you will see at the grocery store.  The certain qualifications that determine the quality grade of beef are:

  • Distribution of marbling within the lean muscle at the 12th/13th rib
  • Age/maturity of the carcass
  • Color, texture, & firmness of the lean muscle

Prime-Grade Beef is the USDA’s highest designation. Coming from younger, well-fed cattle, this beef has more marbling with a firmer flesh. Prime-grade beef accounts for less than approximately five percent of the market in the United States, with the vast majority going to steakhouses and fancy hotels. Prime roasts and steaks are excellent for roasting, grilling, or broiling.


Choice-Grade Beef is of high quality and produced in highest quantity. Choice-grade beef has less marbling than Prime.  This is the standard option at supermarkets. Choice roast and steaks, especially from the rib and loin, will be very tender, juicy, and flavorful when roasted, grilled, or broiled. Less tender cuts are great for slow cooking.


Select-Grade Beef is slightly leaner than Prime and Choice because it has less marbling.  It can lack some tenderness, flavor, and juiciness as compared to the higher grades. Select grade beef often benefits from marinating prior to grilling or broiling. 1


Check out this easy to explore chart, outlining the various Grades of Beef.

NATURAL, GRASS-FED, ORGANIC – WHAT’S THE DIFFERENCE?

Beyond just the quality grade, beef comes along with additional labels. Package labeling can be very confusing.

All cattle spend the majority of their lives eating grass on pastures. But beef can be finished in a variety of ways, giving you choices when at the meat case in your local grocery store or at a restaurant.

“Natural” This label implies the beef has no artificial ingredients or colors added to it an is minimally processed. 2

“Naturally Raised” does have validity. As of 2009, the label ensures that the animals are free of antibiotics, never received growth-promoting hormones, never fed animal by-products, and may spend time at a feed yard. Naturally raised cattle may be either grain- or grass-finished.

“100% Organic Beef” means that the animals must be fed completely organic feed grains and have never received antibiotics and growth-promoting hormones. This is certified and inspected by the government. Organic beef cattle may be either grain- or grass-finished, as long as the USDA’s Agriculture Marketing Service certifies the feed is 100% organically grown and can be fed in a feed yard. 3

“Grass Finished” cattle spend their lives eating grass or foraging, but not always necessarily stay on a 100 percent grass-fed diet or finished on grass.  Some “grass-fed” cattle are still fed grain for their last few weeks to help fatten the cattle. Grass-fed cattle may or may not be given FDA-approved antibiotics to treat, prevent, or control disease and/or growth-promoting hormones. 2

Learn how to Decode the Label with this simple infographic.

Need help choosing lean beef or wondering what type of cooking method works best? Use the Beef. It’s what’s for dinner’s cooking guide.

WHY BEEF?

Beef provides you with 10 essential nutrients that support a heart-healthy lifestyle including protein, zinc, iron and B vitamins. The nutrients found in beef provide our bodies with the strength to thrive and grow throughout all the stages of life.

Beef is an excellent source of protein.

One 3-ounce cooked serving of beef provides approximately 50% of your Daily Value (25 grams) of this important nutrient—making it an excellent source! Protein helps maintain a healthy weight, as well as preserve and build muscle.

New research suggests it’s not only important to just get enough protein in at dinner or lunch but to spread it throughout your day for optimal health. Aim for 25-30 grams of protein at each meal. 4,5

What is considered lean?

6 Look for the word “round” or “loin” in its name when choosing lean cuts of beef.

Lean cuts include top sirloin steak, tenderloin steak, strip steak (or top loin steak), or 95% lean ground beef.

Print
clock clock iconcutlery cutlery iconflag flag iconfolder folder iconinstagram instagram iconpinterest pinterest iconfacebook facebook iconprint print iconsquares squares iconheart heart iconheart solid heart solid icon
pineapple beef stir fry with white rice in a white bowl

Pineapple Beef Stir Fry Recipe

  • Author: Chef Julie Harrington, RD
  • Prep Time: 30
  • Cook Time: 20
  • Total Time: 50 minutes
  • Yield: 4
  • Category: dinner

Description

Whip up this simple and delicious stir-fry for dinner.


Ingredients

Scale
  • 1 (8-ounce) can pineapple tidbits, 3 tablespoons juice reserved
  • 5 tsp rice vinegar
  • 1 tbsp low sodium soy sauce
  • 1 tbsp ketchup
  • 2 tsp brown sugar
  • 1 lb. flank steak, cut into strips
  • 1 tsp cornstarch
  • 3 tsp sesame oil, divided
  • 1 tbsp minced garlic
  • 1 cup sliced mushrooms
  • 1 cup snap peas
  • 1 sweet pepper, sliced

Instructions

  1. Whisk the reserved 3 tbsp pineapple juice, vinegar, soy sauce, ketchup, and sugar in a small bowl until smooth. Place beef in a medium bowl; toss with 2 tablespoons of the sauce. Let marinate for 20 minutes.
  2. Add cornstarch to the remaining sauce and whisk until smooth.
  3. Heat 2 teaspoons oil in a large nonstick pan over medium-high heat. Transfer the beef to the pan. Whisk any remaining marinade into the bowl of sauce. Cook the beef, stirring every 1 to 2 minutes, until tender, about 4-5 minutes. Transfer the beef to a plate.
  4. Add the remaining 1 tsp oil to the pan and heat over medium heat. Add garlic, stirring constantly, until fragrant, about 30 seconds. Add the mushrooms, snap peas and sweet pepper to cook, stirring often, until just tender, about 3 minutes. Pour in the sauce and cook, stirring, until thickened, about 30 seconds. Add the beef and pineapple and cook, until heated through.
  5. Serve over rice, quinoa, or cauliflower rice.

Keywords: stir fry, beef, dinner

Recipe Card powered byTasty Recipes

other recipes you may enjoy

Learn more about the health benefits of beef via Snacking in Sneakers
Fun Facts About Beef: Nutrients, Recipes, and a Free Printable Placemat! via Mama Teaches
Fresh Homemade Cheesy Beef-a-Roni via Brooklyn Active Mama
Slow Cooker Cuban Shredded Beef via Snacking in Sneakers
a Rafflecopter giveaway


References:
1. Inspection & Grading of Meat and Poultry: What Are the Differences?
2. Meat & Poultry Labeling Terms
3. Organic Labeling Standards
4. Paddon-Jones D, Rasmussen BB. Dietary protein recommendations and the prevention of sarcopenia. Curr Opin Clin Nutr Metab Care 2009;12:86-90
5. Mamerow MM, et al. Dietary protein distribution positively influences 24-h muscle protein synthesis in healthy adults. J Nutr 2014;144:876-80
6. U.S. Department of Agriculture, Food Safety, and Inspection Service. Beef from Farm to Table. Available at: https://www.fsis.usda.gov/wps/wcm/connect/c33b69fe-7041-4f50-9dd0-d098f11d1f13/Beef_from_Farm_to_Table.pdf?MOD=AJPERES
Grades of Beef
Decode the Label

Instant Pot Sesame Chicken

Skip takeout! It will take you less time to make this Instant Pot Sesame Chicken than it is to make a trip out for takeout. This easy dinner idea only takes 30 minutes to make and goes great with a side of rice and steamed broccoli!

white bowl with sesame chicken, broccoli, & rice.

There are just some nights where takeout seems like the easier option. Sesame chicken is one of my favorites when ordering takeout but never leaves me feeling the best. What if I told you, I’ve figured out a way to enjoy this signature takeout dish faster than it will take you to hop in the car and grab from a restaurant. Would you believe me?

You may also enjoy Instant Pot lemon ginger salmon and pressure cooker barbacoa beef tacos! Both are easy and cook so fast!

Why You’ll Love Sesame Chicken in the Instant Pot

Healthier than takeout: Cooking the chicken in the Instant Pot creates a crispy texture without a fryer, which how typical take-out restaurants cook this dish.

Simple sauce ingredients: You most likely have the majority of these ingredients already on hand. The soy sauce, ketchup, and red pepper flakes will cook with the chicken helping it stay tender while infusing flavors. The honey and cornstarch will help crisp up the chicken and thicken the sauce.

Easy Dinner and meal prep idea: Take it even one step further to make this dinner with ease. Utilize the steamable rice and broccoli found in the frozen aisle. Or keep putting your Instant Pot to work again by cooking rice and the broccoli in there too.

Instant Pot Sesame Chicken in a white bowl with broccoli and rice

Ingredients Needed

  • Chicken – I used boneless, skinless breasts but you can also use tenders since we are cutting the chicken in bite sized pieces.
  • cornstarch – This makes an excellent thickening agent when mixed with water and helps to get that crispy breading on the chicken.
  • sesame oil – adds that traditional flavor you are used to
  • soy sauce – go with the low sodium kind
  • ketchup
  • red pepper flakes – this is optional but adds just the right amount of spice.
  • honey
  • water
  • sesame seeds

How to Make Instant Pot Sesame Chicken

Mix a tablespoon of cornstarch with a pinch of salt in a small bowl. Toss the chicken so it’s completely covered.

Set the Instant Pot to saute and add a tablespoon of sesame oil. Once hot, saute the chicken until it’s browned.

Stir in the soy sauce, ketchup, and red pepper flakes if using. Lock the lid in place and switch the valve to the sealing position. Cook on high pressure for 3 minutes.

Once the timer goes off, carefully turn the valve to release the pressure. Remove the lid and add a teaspoon of sesame oil and honey. Stir to combine.

Whisk together the remaining water and cornstarch in a separate bowl to make a slurry.

Turn the Instant Pot back to saute and stir in the slurry. Continue stirring so the sauce thickens.

Top with sesame seeds and serve!

Tips for Making Homemade Sesame Chicken

  • If you like more spice, swap the ketchup for sriracha.
  • Don’t have cornstarch? Use a little flour instead.
  • To make this recipe gluten-free, substitute the soy sauce for tamari.
  • Toasting the sesame seeds adds more flavor, but it’s not a must!
  • Using sesame oil is essential. While you can substitute, you will miss out on the of the signature flavor of sesame chicken.
  • This recipe can be made using any electric pressure cooker, not just the Instant Pot.

Storage Instructions

Keep leftovers in an airtight container in the refrigerator for up to 4 days.

Can You Make Sesame Chicken on the Stovetop?

Yes! Follow the same instructions for breading the chicken. Saute it in a large skillet. Whisk the sauce ingredients in a small saucepan and cook until boiling, then reduce to a simmer to thicken. Stir in the slurry and remove from the heat once the desired consistency has been reached. Then toss to coat the chicken.

More Chicken Recipes to Try:

Print
clock clock iconcutlery cutlery iconflag flag iconfolder folder iconinstagram instagram iconpinterest pinterest iconfacebook facebook iconprint print iconsquares squares iconheart heart iconheart solid heart solid icon
homemade sesame chicken with white rice and broccoli in a white bowl

Instant Pot Sesame Chicken

  • Author: Chef Julie Harrington, RD
  • Prep Time: 10
  • Cook Time: 15
  • Total Time: 25 minutes
  • Yield: 4
  • Category: dinner
  • Method: Instant Pot
  • Cuisine: Chinese

Description

Skip takeout! It will take you less time to make this Instant Pot Sesame Chicken than it is to make a trip out for take out.


Ingredients

Scale
  • 1 pound boneless, skinless, chicken breast, cut into bite-size pieces
  • 2 tablespoons cornstarch, divided
  • 1 tablespoon + 1 teaspoon sesame oil, divided
  • 1/4 cup low sodium soy sauce
  • 1 1/2 tablespoons ketchup
  • pinch of red pepper flakes, optional
  • 1/4 cup honey
  • 2 tablespoons water
  • 2 teaspoons sesame seeds

Instructions

  1. In a small bowl, combine 1 tablespoon of cornstarch with a pinch of salt and pepper. Toss chicken to evenly and lightly coat.
  2. Preheat the Instant Pot and set to “saute”. Add 1 tablespoon sesame oil. Once the oil is hot, add the chicken and saute for 3-4 minutes, to brown.
  3. Stir in soy sauce, ketchup, and red pepper flakes, if using. Place the lid on the Instant Pot and seal the valve. Set to manual and 3 minutes cook time.
  4. When done, use the quick pressure release. When most of the steam is released, remove the lid. Add the remaining 1 teaspoon of sesame oil and honey. Stir to combine.
  5. In a small bowl, whisk together the remaining 1 tablespoon of cornstarch and water to make a slurry.
  6. Set Instant Pot back to saute, stir in the slurry and continue to stir as the sauce thickens to desired consistency, about 2 minutes.
  7. Top with sesame seeds.
  8. Serve over rice and steam broccoli.

Keywords: instant pot, sesame chicken, dinner

Recipe Card powered byTasty Recipes

Instant Pot Poached Pears

Present this stunning dessert at your next dinner party. These Instant Pot Poached Pears are an elegant dessert that takes minimal prep work.

Instant Pot Poached Pears via Chef Julie Harrington, RD @ChefJulie_RD #pears #poachespears #dessert #lowcarb #fruitdessert #pistachio #redwine

Present this stunning dessert at your next dinner party. These Instant Pot Poached Pears are an elegant dessert that takes minimal prep work.

Instant Pot Poached Pears via Chef Julie Harrington, RD @ChefJulie_RD #pears #poachespears #dessert #lowcarb #fruitdessert #pistachio #redwine

The Instant Pot is a single appliance that does the job of seven (yes, seven!) different kitchen appliances. It can handle the tasks of a slow cooker, electric pressure cooker, rice cooker, steamer, yogurt maker, sauté/browning pan, and a warming pot. Think of all those appliances taking up space in your kitchen that can be replaced by one.

7 Things You Need to Know About Your Instant Pot

Instant Pot Poached Pears via Chef Julie Harrington, RD @ChefJulie_RD #pears #poachespears #dessert #lowcarb #fruitdessert #pistachio #redwine

The red wine and pomegranate juice naturally add a beautiful color.

Why use bosc pears?

I feel like pears are often forgotten to use for desserts. Bosc pears (the variety I used in this recipe) have a more firm, dense flesh than other pear varieties, so they are ideal for use in baking, broiling, or poaching. They retain their shape and texture better than other varieties, and their flavor is less likely to be overwhelmed by the use of strong spices like cinnamon, clove, or nutmeg.

Print
clock clock iconcutlery cutlery iconflag flag iconfolder folder iconinstagram instagram iconpinterest pinterest iconfacebook facebook iconprint print iconsquares squares iconheart heart iconheart solid heart solid icon
pomegranate poached pears on a white plate

Instant Pot Poached Pears

  • Author: Chef Julie Harrington, RD
  • Prep Time: 8 minutes
  • Cook Time: 8 minutes
  • Total Time: 16 minutes
  • Yield: 4
  • Category: Dessert
  • Method: Instant Pot

Description

Present this stunning dessert at your next dinner party. These Instant Pot Poached Pears are an elegant dessert that takes minimal prep work.


Ingredients

Scale
  • 4 Bartlett pears
  • 2 ½ cups water
  • 1 ½ cup red wine
  • 1 cup 100% pomegranate juice
  • ½ cup sugar
  • 1 orange, juiced and zested
  • 1 tablespoon balsamic vinegar
  • 3 cinnamon sticks
  • 1 teaspoon whole cloves
  • 1/3 cup pistachios, chopped

Instructions

  1. Peel pears. If needed, slice the bottom so pear is able to stand straight up. Using a melon baller, scoop out seeds and core from the bottom.
  2. Add water, red wine, pomegranate juice, sugar, orange juice, orange zest, balsamic vinegar, cinnamon sticks, and whole cloves in the instant pot. Set instant pot on the sauté setting until liquid mixture begins to slightly simmer.
  3. Once the liquid begins to simmer, add pears and switch instant pot to manual setting. Cover and lock the Instant Pot lid and set for 8 minutes.
  4. When finished, let the steam release from Instant Pot. Remove the lid. Carefully remove pears and let cool.
  5. Turn the Instant Pot to saute and allow the juices to simmer for 10 minutes, or until reduced by half. Let cool and strain out the cinnamon sticks, cloves, and orange zest.
  6. Plate poached pears, by adding pear to a plate. Drizzle liquid to coat the pears and pool at the bottom of the dish. Sprinkle with chopped pistachios.
  7. Store extra pears the extra liquid in the refrigerator.

Keywords: #pears #poachespears #dessert #lowcarb #fruitdessert #pistachio #redwine

Recipe Card powered byTasty Recipes
Chef Julie Harrington, RD - Culinary Nutrition Consultant of chefjulierd.com

Other recipes you may enjoy

Quinoa Oatmeal with Berries

Ever tried quinoa for breakfast? Adding quinoa to your oatmeal in the morning adds an extra protein and fiber punch. This Quinoa Oatmeal with Berries recipe will keep you full all morning.
Quinoa Oatmeal with Berries via RDelicious Kitchen @RD_Kitchen
I’m sure everyone is back into their normal routines again. We’ve made it over the hump getting back into the groove after the fun summer months. I’ve never hit the snooze button so much in my life.

Celebrate Whole Grains Month:

The first couple weeks getting back into a solid routine are pretty tough, but the key was starting the day with a solid breakfast. September is back to school month, but did you know it is also Whole Grains Month! Are you a quinoa connoisseur or a fan of farro? Think you are savvy with whole grains? Test your skills on the Guess the Grains Quiz.
Quinoa Oatmeal with Berries via RDelicious Kitchen @RD_Kitchen
With a slightly nutty flavor, quinoa is a complete protein, which means that it contains all the essential amino acids our bodies can’t make on their own.

Using the same quinoa oatmeal base, this recipe can be easily customized with any flavors you like. Aim for a mix of carbohydrates, fiber, and protein for a balanced breakfast. This will help maintain stable blood sugars to avoid the mid-morning crash.
Quinoa Oatmeal with Berries via RDelicious Kitchen @RD_Kitchen
If you are used to the flavored sweetened packets and looking to transition to oatmeal with less added sugar, try using fruit and cinnamon to sweeten it up. My favorite trick is to heat frozen berries. They become all gooey and syrupy without adding added sugar.

Print

clock clock iconcutlery cutlery iconflag flag iconfolder folder iconinstagram instagram iconpinterest pinterest iconfacebook facebook iconprint print iconsquares squares iconheart heart iconheart solid heart solid icon
quinoa oatmeal with strawberries and raspberries in a white bowl

Quinoa Oatmeal with Berries

  • Author: Chef Julie Harrington, RD
  • Prep Time: 5
  • Cook Time: 7
  • Total Time: 12 minutes
  • Yield: 2
  • Category: Breakfast

Ingredients

Scale
  • 3/4 cup rolled oats
  • 2 cups milk
  • 2 tablespoons maple syrup
  • 1/2 cup quinoa, cooked
  • 1/2 cup strawberries, sliced
  • 1/2 cup raspberries
  • 1/4 cup raw almonds, chopped

Instructions

  1. Place oatmeal and milk in a saucepan, and bring to a boil. Stir over low heat for 5-7 minutes, until oatmeal begins to thicken. Stir in the maple syrup and cooked quinoa.
  2. Add oatmeal quinoa mixture to a bowl. Top with strawberries, raspberries, and almonds.

Keywords: oatmeal, quinoa, whole grain, breakfast

Recipe Card powered byTasty Recipes

Chef Julie Harrington, RD - Culinary Nutrition Consultant of chefjulierd.com

 Pin it for later!

Quinoa Oatmeal with Berries via RDelicious Kitchen @RD_Kitchen

Balsamic Kale and Vegetable Saute

This one pan Balsamic Kale and Vegetable Saute recipe can help get a side dish or dinner on the table in minutes.
Balsamic Kale and Vegetable Saute via RDelicious Kitchen @RD_Kitchen

This creation accidentally happened when I opened my refrigerator for dinner one night not knowing what I was going to have for dinner and just pulled out everything that I had.
I really liked how it turned out and now I purposely buy all these ingredients to make this recipe over and over again. Since my accidental recipe creation, I’ve made this recipe at least 3 more times already.
Balsamic Kale and Vegetable Saute via RDelicious Kitchen @RD_Kitchen
I mean, how easy is it? Just simply throw everything into one pan. With minimal prep and clean up, this is the perfect solution for a quick and easy weeknight meal.
Balsamic Kale and Vegetable Saute via RDelicious Kitchen @RD_Kitchen
Of course, you don’t have to create this exact combination. Use this recipe as a template and work with what vegetables you have. Any bean or other protein can be included as well.
Balsamic Kale and Vegetable Saute via RDelicious Kitchen @RD_Kitchen
What vegetable combination would you create this dish with?

Print

clock clock iconcutlery cutlery iconflag flag iconfolder folder iconinstagram instagram iconpinterest pinterest iconfacebook facebook iconprint print iconsquares squares iconheart heart iconheart solid heart solid icon
Balsamic Kale and Vegetable Saute in a white bowl

Balsamic Kale and Vegetable Saute

  • Author: Julie @ RDelicious Kitchen
  • Yield: 4

Ingredients

Scale
  • 1 tablespoon olive oil
  • 1 red onion, sliced
  • 1 red pepper, sliced
  • 2 cloves garlic, minced
  • 1 cup mushrooms, sliced
  • 1 (15 oz.) can chickpeas, drained and rinsed
  • 1-pint grape tomatoes, halved
  • 1 large bunch kale (~ 6 cups), chopped
  • 2 tablespoons balsamic vinegar
  • salt and pepper, to taste
  • (optional) parmesan cheese, to garnish

Instructions

  1. Add olive oil in a large skillet over medium heat. Saute the onions and peppers for about 1 minutes. Add garlic and cook for an additional minute, until garlic is fragrant.
  2. Add mushrooms and chickpeas. Cook until mushrooms are tender. (Use a lid to generate steam if the pan starts to become dry)
  3. Add kale, tomatoes, and balsamic vinegar. Toss vegetables to combine. Place a lid on top to allow kale to wilt. Remove lid and cook for an additional 2 minutes, removing excess liquid.
  4. Season with salt and pepper, as needed.
  5. Remove vegetable saute from the pan and garnish with parmesan cheese (if using).

Recipe Card powered byTasty Recipes

Did you make this recipe? Tag @rdeliciouskitchen on Instagram or send me a picture, I’d love to see! RDelicious Kitchen @RD_Kitchen

Pin it for later!

Balsamic Kale and Vegetable Saute via RDelicious Kitchen @RD_Kitchen

Cheesy Spinach Hummus Dip

May 13th is National Hummus Day! Celebrate with this Cheesy Spinach Hummus Dip.Cheesy Spinach Hummus Dip via RDelicious Kitchen @rd_kitchen
Disclosure: I received free samples of Sabra Hummus mentioned in this post. By posting this recipe I am entering a recipe contest sponsored by Sabra and am eligible to win prizes associated with the contest. I was not compensated for my time.
While it is perfectly acceptable to simply open a container of Sabra hummus and dive right in, to celebrate National Hummus Day, did you know hummus is very versatile in the kitchen?

Hummus = Happiness

Cheesy Spinach Hummus Dip via RDelicious Kitchen @rd_kitchen
I’ve recently been loving adding hummus to dressing and marinades. It adds great flavor and helps thicken it to create a creamy dressing. I recently made a lemon hummus tahini dressing for a grilled caesar salad recipe. So good!
Cheesy Spinach Hummus Dip via RDelicious Kitchen @rd_kitchen
Hummus is also an interesting idea for a coating in place of your typical dredging mixture. Next time you bread chicken cutlets, skip the milk and egg mixture and roll in a thin layer of hummus, then coat in a crunchy topping.

Cheesy Spinach Hummus Dip via RDelicious Kitchen @rd_kitchen
Don’t stop there! Hummus is also great in dip recipes to replace saturated fats with a heart-healthy plant-based protein hummus. A traditional warm spinach dip has at least one or a mixture of these calorically dense ingredients: cream cheese, mayonnaise, or sour cream. This Cheesy Hummus Spinach dip is just as creamy with swapping in hummus instead.
Cheesy Spinach Hummus Dip via RDelicious Kitchen @rd_kitchen
What is your favorite Sabra hummus flavor? My top three favorites are the classic, roasted red pepper, and olive tapenade. I recently saw a lemon twist flavor that I definitely need to try.

Print

clock clock iconcutlery cutlery iconflag flag iconfolder folder iconinstagram instagram iconpinterest pinterest iconfacebook facebook iconprint print iconsquares squares iconheart heart iconheart solid heart solid icon
Cheesy Spinach Hummus Dip in a baking dish with pita chips

Cheesy Spinach Hummus Dip

  • Author: Julie @ RDelicious Kitchen
  • Yield: 8

Ingredients

Scale
  • 1 (12 oz.) container Sabra Classic Hummus
  • 2 cloves garlic, minced
  • 2 cups spinach, chopped
  • 3/4 cups white cheddar cheese, shredded
  • 2 teaspoons Italian seasonings
  • 1/4 cup green onions, chopped + additional for garnish
  • 1/4 cup parmesan cheese

Instructions

  1. Preheat oven to 375˚F.
  2. Combine Sabra Classis Hummus, garlic, spinach, cheddar cheese, Italian seasonings, and scallions. Spread into small casserole dish. Sprinkle parmesan cheese over the top.
  3. Bake for 20 minutes or until heated through and cheese on top is melted.
  4. Top with additional green onions and serve with pita crackers or vegetables.

Recipe Card powered byTasty Recipes

Did you make this recipe? Tag @rdeliciouskitchen on Instagram or send me a pic, I’d love to see! RDelicious Kitchen @RD_KitchenCheesy Spinach Hummus Dip via RDelicious Kitchen @rd_kitchen
Click the image below to check out more Sabra recipes!