This post may contain affiliate links. Read my privacy policy.
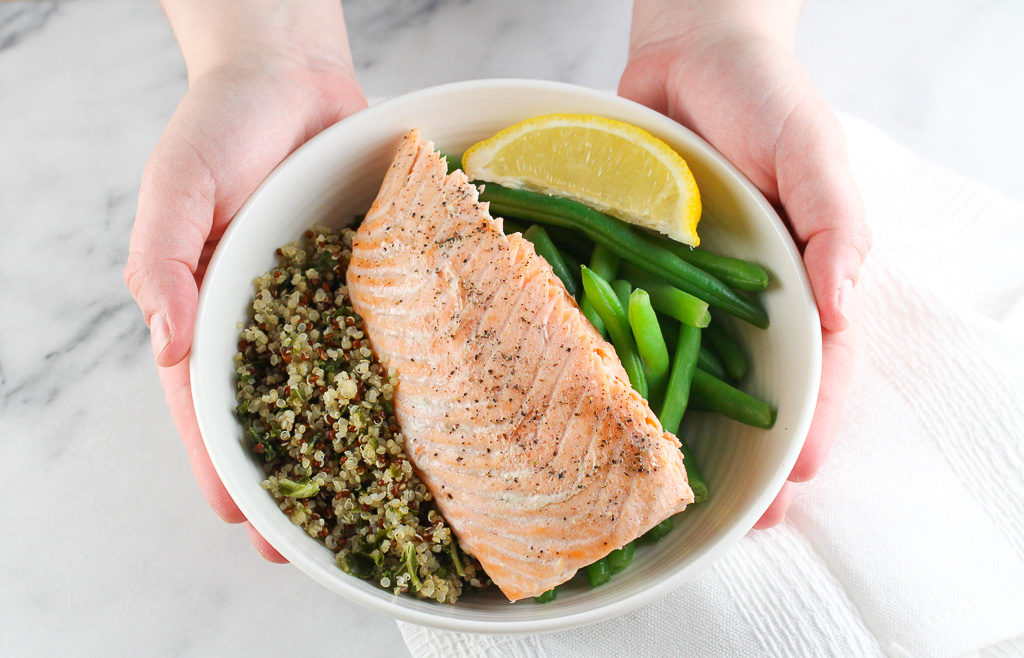
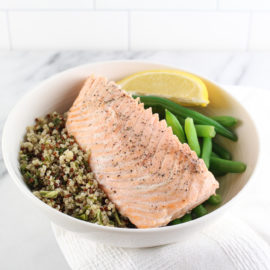
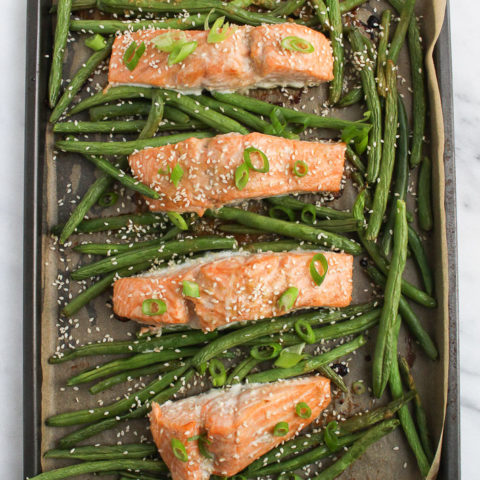
Instant Pot Lemon Ginger Salmon is a quick and easy 20 minute meal that’s also healthy and can be served with just about any side dish.
A lot of Instant Pot recipes are used for tough cuts of meat. The function of the Instant Pot creates steam under extreme pressure and forces its way to the tough fibers of the meat breaking them down to become tender.
But what if you have an already delicate protein like salmon?
You can still utilize the Instant Pot for more delicate proteins like salmon, but the Instant Pot is utilized a little differently.
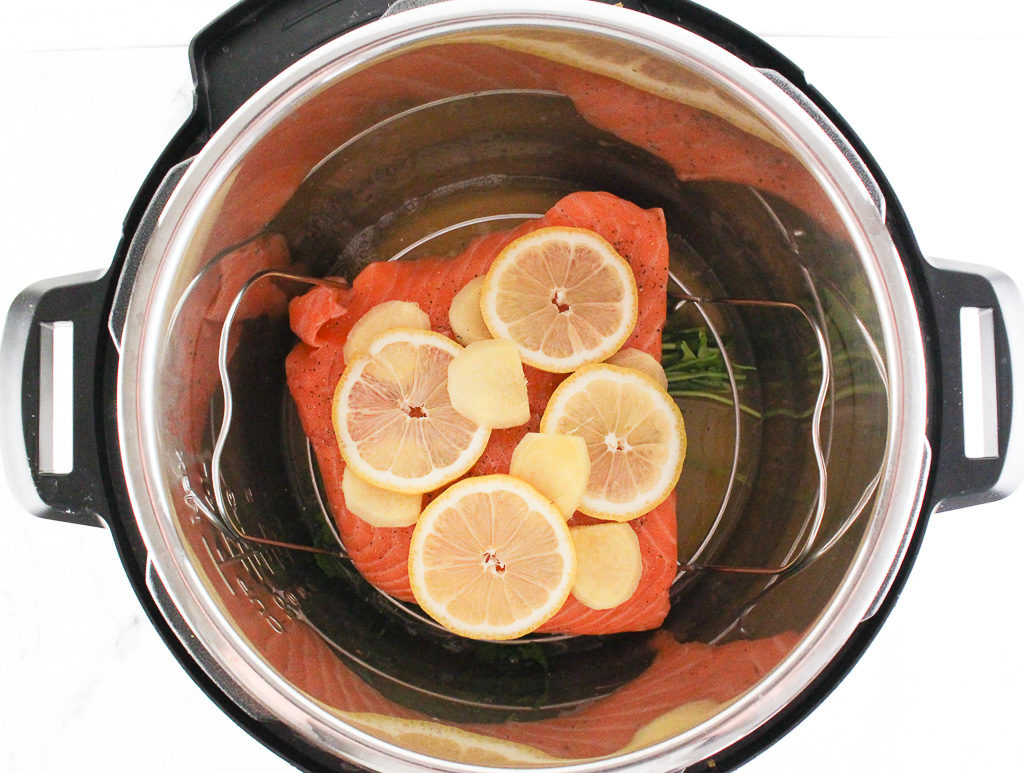
Instead of searing and submerging in liquid, utilize the steaming rack of the Instant Pot. Add a little liquid on the bottom which will steam the salmon and infuse flavors into the final product. For this recipe, I used vegetable broth and a few sprigs of parsley. Utilize different herbs to infuse flavors.
Why I Love Instant Pot Salmon
Tender and never dry or overcooked
Juicy, flavorful, and ready in less than 30 minutes
A great meal prep recipe
Minimal ingredients needed
Salmon Nutrition
Research shows eating seafood two to three times per week reduces the risk of death from any health-related cause. Seafood provides unique health benefits as a lean protein and is the best source for omega-3 fatty acids, which are healthy fats essential to human health and development.
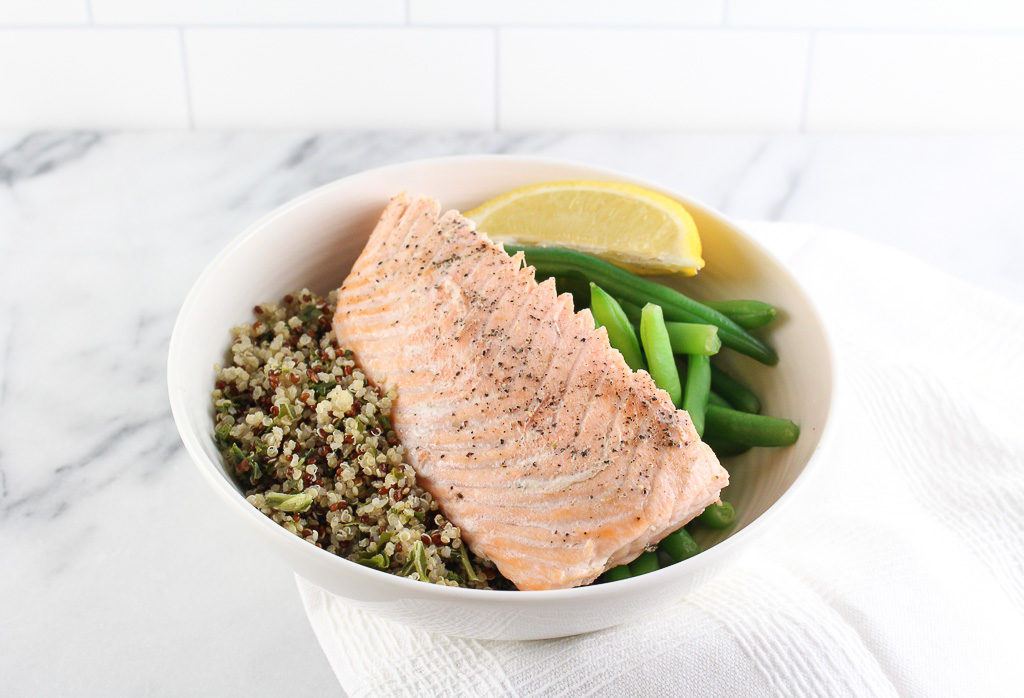
Use this simple and flavorful Instant Pot Lemon Ginger Salmon to help you meet the mark for enjoying seafood 2-3 times each week!
Embrace the unsaturated fats found in foods such as walnuts, seeds, plant oils, avocados, and fatty fish such as salmon, tuna, trout, sardines, mackerel, and herring.
Fats play an essential role in human health from head (brain) to toe (joints). Replacing just 5 percent of your caloric intake from so-called bad fats (like trans and saturated fat found in red meat) with unsaturated fat from seafood and plant-based foods can reduce your risk of death by 27 percent. (source)
Choosing the Best Salmon
There is no right or wrong choice when it comes to picking out salmon, but there are quite a few differences.
Wild, Farm-Raised, or Frozen?
It’s important to know that just because salmon can be frozen, doesn’t mean it loses its nutritional value. Frozen salmon is a great budget option and good seafood to have on hand in the freezer.
Farm raised salmon typically contains more fat because of the diet and environment the fish are in. Compared to wild salmon, which feed on other natural food sources. Wild caught salmon usually contains more minerals as well.
While both breeds have contaminants, they are higher in the farmed salmon, but stricter rules have been put in place.
Lemon Ginger Salmon Ingredients
vegetable broth
fresh parsley
salmon fillet
salt and pepper to taste
fresh ginger
lemon
How to Make Lemon Ginger Salmon in the Instant Pot
Pour the veggie broth into the Instant Pot and add the trivet in. Spray the trivet with cooking spray.
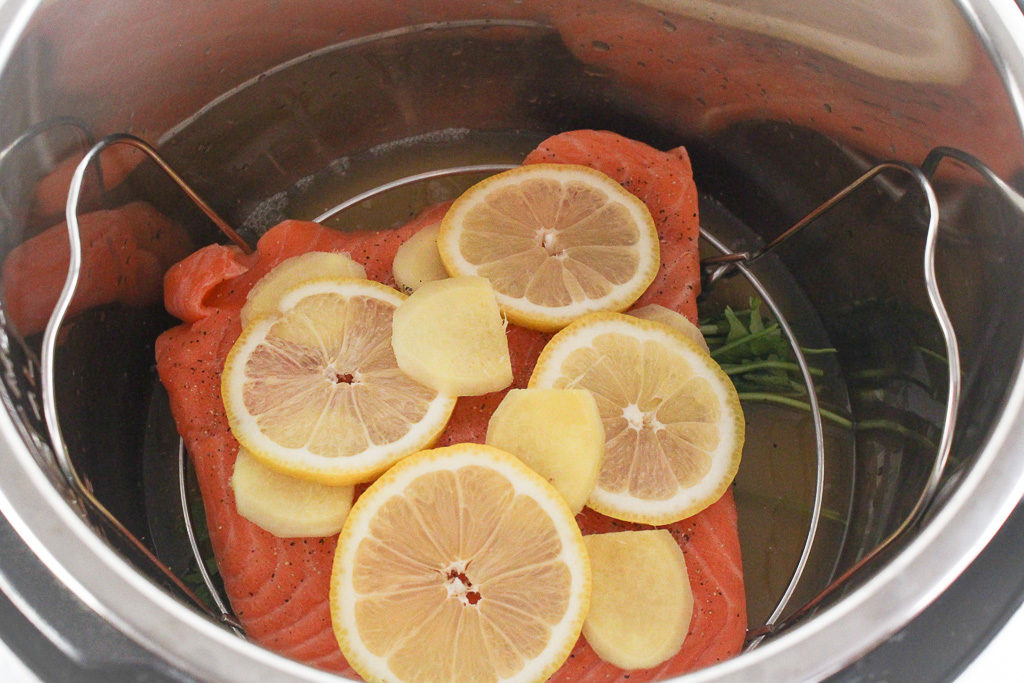
Skin side down, place the salmon on the rack, and season with salt and pepper. Lay the pieces of ginger and lemon on top. By simply laying the lemon and ginger on top of the salmon fillet, the flavors penetrate into the salmon fillet creating fresh and vibrant flavors.
Place the lid on and turn the valve to the sealing position. Cook on high pressure for 3 minutes.
Once it’s ready, turn the valve back to quickly release the pressure. Be careful and stand back, the steam is extremely hot.
Take the trivet out by grabbing the handles then transfer the salmon to serve.
Can You Use Frozen Salmon?
You can, just allow it time to thaw before adding it to the pressure cooker.
You’ll be soon adding this easy Instant Pot Lemon Ginger Salmon to your weekly dinner menu rotation.
Ingredients
Scale
1/2 cup vegetable broth 1 small bunch of fresh parsley 1 pound salmon fillet (about 1-inch thick) salt and pepper, to taste 1 small knob (about 2 tablespoons) fresh ginger, sliced 1 lemon, sliced
Instructions
Pour broth and parsley in the Instant Pot and then put in the steamer rack (coated with cooking spray) at the bottom, making sure the handles are extended up.
Place salmon, skin side down, on the steamer rack. Sprinkle with salt and pepper. Layer on pieces of ginger and lemon.
Close the Instant Pot and make sure vent is turned to “Sealing”. Plug it in, press “Steam” and press the + or – buttons to set it to 3 minutes. When the Instant Pot beeps that it’s done, quick release the pressure, being careful to stay out of the way of the steam that will shoot up. Press the “Warm/Cancel” button. Remove lid, and using hot pads, carefully remove rack with salmon and set on a plate.
Serve alongside a whole grain and vegetable for a complete meal.
Notes
Cooking time may vary. Depending on the thickness of your salmon, 3 minutes is perfect for a fillet that’s about 1 inch at its thickest part.
This post may contain affiliate links. Read my privacy policy.
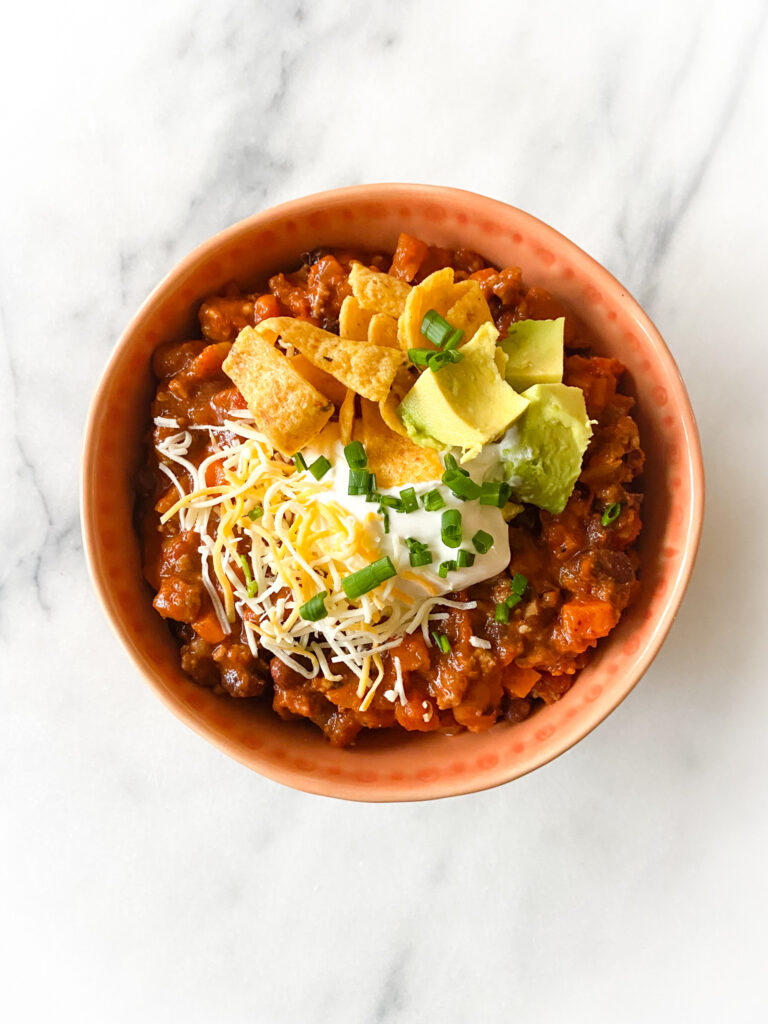
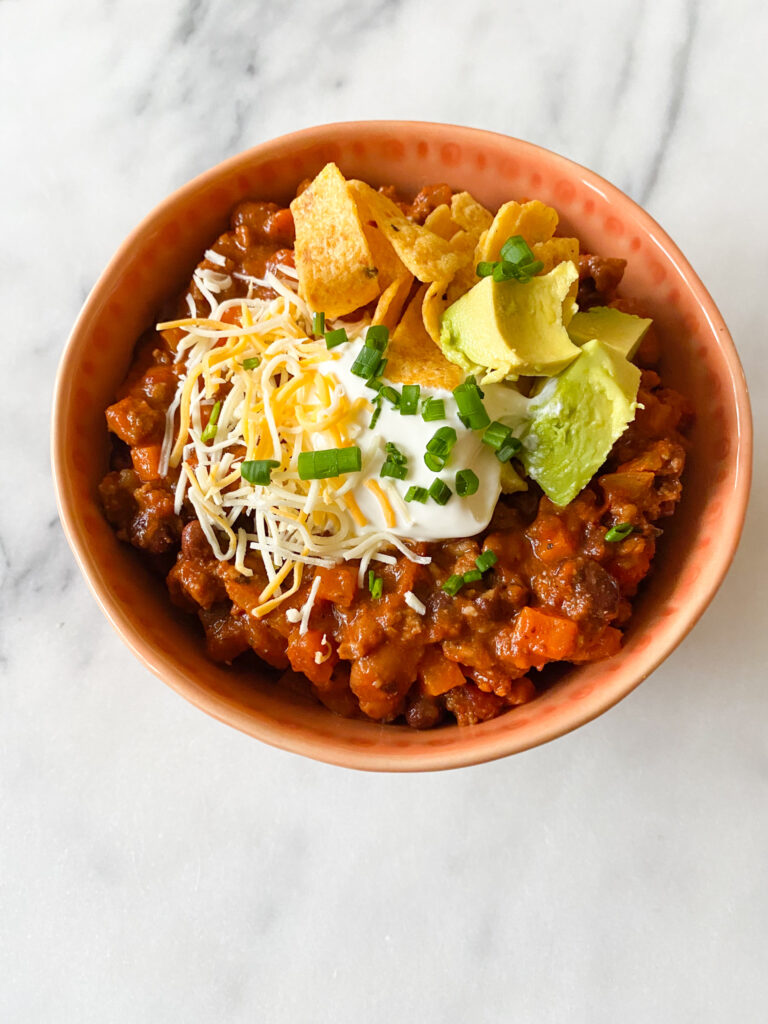
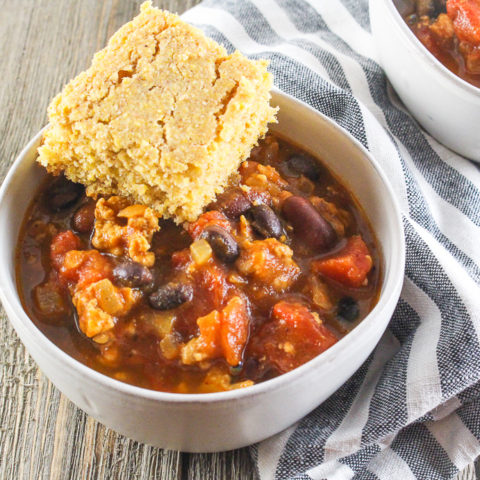
Are you ready to enjoy the best classic beef chili you have ever tasted? Made with hearty ingredients like ground beef and beans, and full of flavor from our chili seasonings.
This recipe was originally created for the Beef Throwdown with New York Beef Council
I love a good bowl of chili, but depending on where you live, chili can look a little different. So I decided to take it back to the good ole’ days and create a classic beef chili that has those traditional flavors, heartiness, and simple ingredients.
In case you are wondering, this is actually a healthy beef chili recipe and is packed full of protein. Obviously ground beef plays a big part, but the black beans and pinto beans are a good source of plant-based protein too.
Beef is a great source of iron and helps with muscle maintenance, growth, keeps you fuller because of the protein content, and is full of vitamins and minerals, including creatine.
One of my favorite things about this homemade chili is that it requires pantry staples. This means you probably already have most of the ingredients on hand so you may not even have to make a trip to the store!
Classic Beef Chili Ingredients
Protein: ground beef, black beans, pinto beans
Spices: salt, garlic (minced and powder), chili powder, cumin, oregano, salt
Veggies: carrots, onion, fire roasted crushed tomatoes, tomato paste, jalapeno
How to Make this Ground Beef Chili Recipe with Beans
Heat a large stock pot or Dutch oven over medium-high heat, then add the oil. Once the oil is hot, add the ground beef and salt. Brown the beef until it’s no longer pink.
Drain off the grease, but keep 1 to 2 tablespoons in the pot. Set the cooked ground beef to the side for now.
Add the diced onions and carrots, allow them to cook just until softened.
Place the jalapeno and garlic in, continuing cooking for another 2 minutes.
Sprinkle in the remaining spices, and stir to combine. Then add the tomato paste and stir until the veggies are coated and saute for 2 more minutes.
Pour in the roasted tomatoes and broth. Be sure to scrap the bottom when stirring to remove any bits that are stuck.
Stir in the beans and cooked beef, then bring the chili to a low simmer.
Cover and let it cook on low heat for at least 45 minutes. Chili is really great and flavorful when it cooks for at least 2 hours, so if you have the time, let it go longer.
Stir occasionally. If you find that it is becoming too thick, you can add a little water or broth.
Serve with your favorite toppings!
What Beef Can Be Used in Chili?
Because I was going for a classic recipe I chose ground beef, but there are tons of varieties of beef chilis. Here are a few cuts that are more popular:
Brisket – if you like corned beef or pastrami you would like brisket chili
Beef Chuck – because this cut is a little tougher, this is best for slow cooker chili
Meat from boneless short ribs – these are cheaper than bone in ribs
How to Store Healthy Beef Chili
Allow the chili to cool completely before transferring it to an airtight container and refrigerate. It will stay fresh for up to 4 days.
To freeze, place the chili in a freezer-friendly container and store for up to 2 months. You can also freeze in single-serving portions to make meal prep easier. If you want to reheat the full batch, store the chili flat in a plastic bag to save space in the freezer.
Hosting a Chili Bar Party
If you want to let your guests do the work or allow them to customize their chili to their liking try a chili bar.
Simply make the chili then set it out, along with all of the toppings. You could also transfer the chili to a slow cooker and place it on warm if you wanted to set up a table with all of the ingredients.
Chili bars are great for parties and game days, plus you hardly have to worry about entertaining full time!
Are you ready to enjoy the best classic beef chili you have ever tasted? Made with hearty ingredients like ground beef and beans, and full of flavor from our chili seasonings.
Toppings: sour cream, cheese, avocado, chives, tortilla chips, etc.
Instructions
Heat a large Dutch oven or pot over medium high heat. Add oil and let heat to medium high heat. Add the ground beef, breaking into small crumbles with a wooden spoon. Add salt and continue to cook until beef have browned and fully cooked.
Drain beef draining off most of the fat, but reserve 1-2 tablespoons in the pot. Add the onions and carrots. Sauté until soft. Add the jalapeno and garlic. Continue to sauté for another 1-2 minutes or until fragrant.
Add the chili powder, cumin, oregano, and garlic powder. Stir to combine. Add the tomato paste and stir to coat the vegetables. Sauté for about 2 minutes.
Pour in the fire roasted tomatoes and broth, scraping the bottom of the pan to lift anything that started to stick.
Stir in the beef, black beans, and pinto beans.
Bring chili to a low simmer. Cover the pot and allow to simmer on low heat for at least 45 minutes (ideally up to 2 hours to really develop the flavors!) Keep checking and stirring the chili every so often. If the chili becomes too thick, thin with additional broth or water.
This post may contain affiliate links. Read my privacy policy.
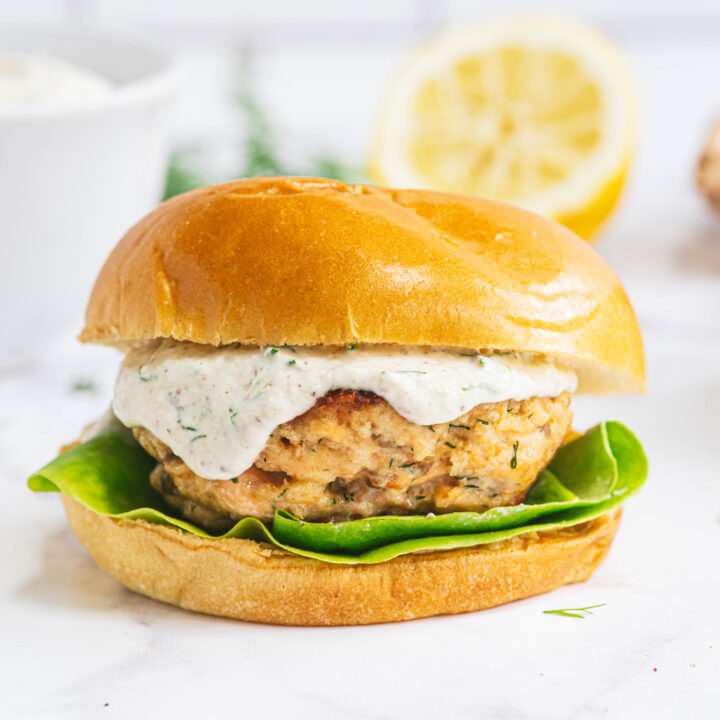
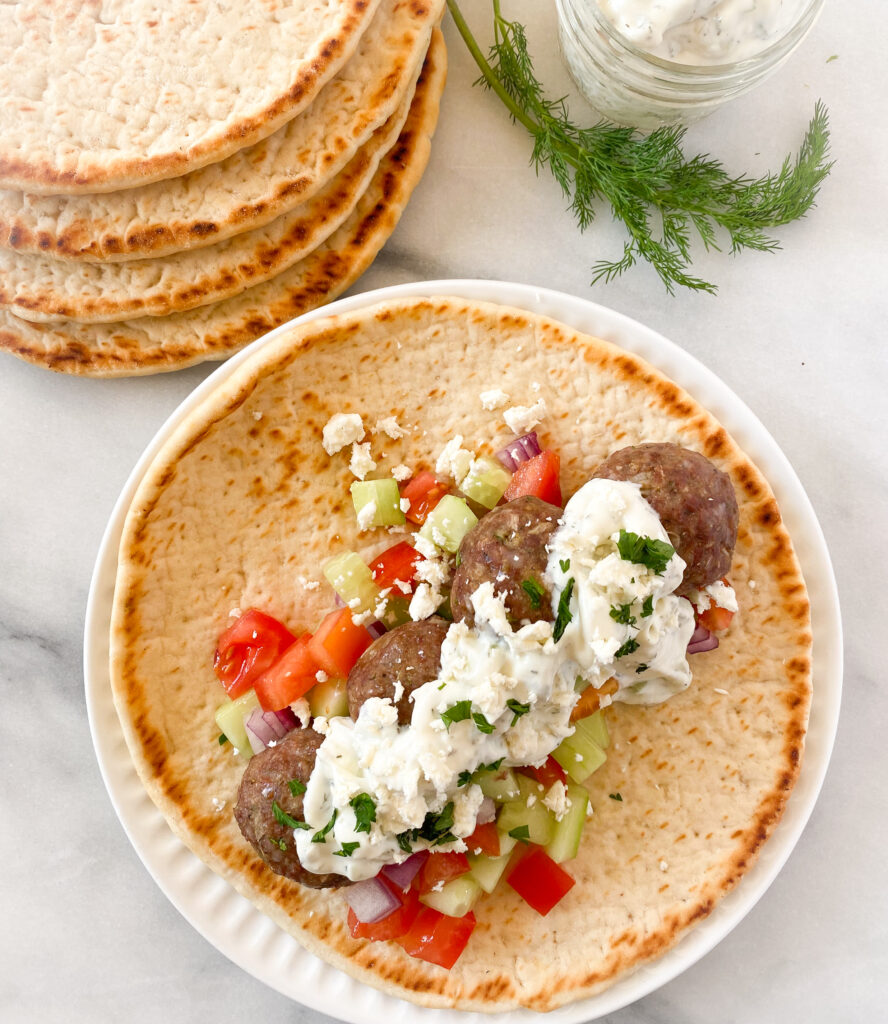
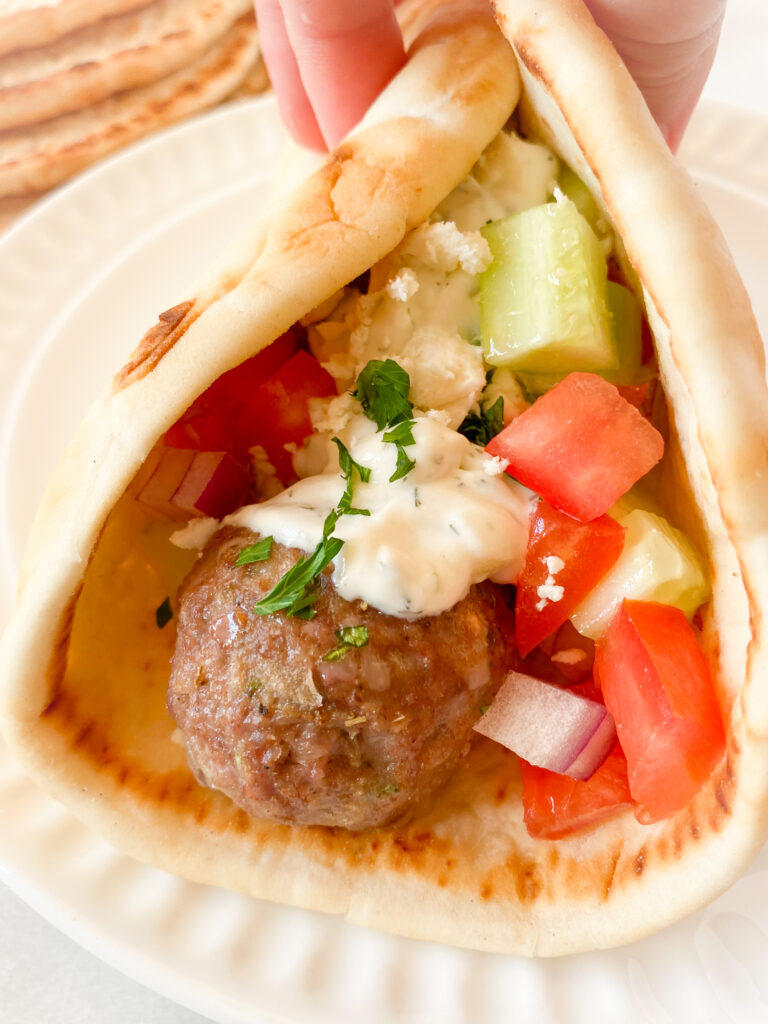
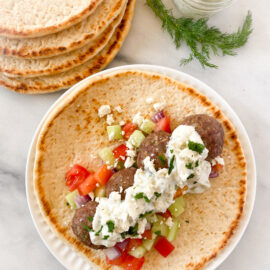
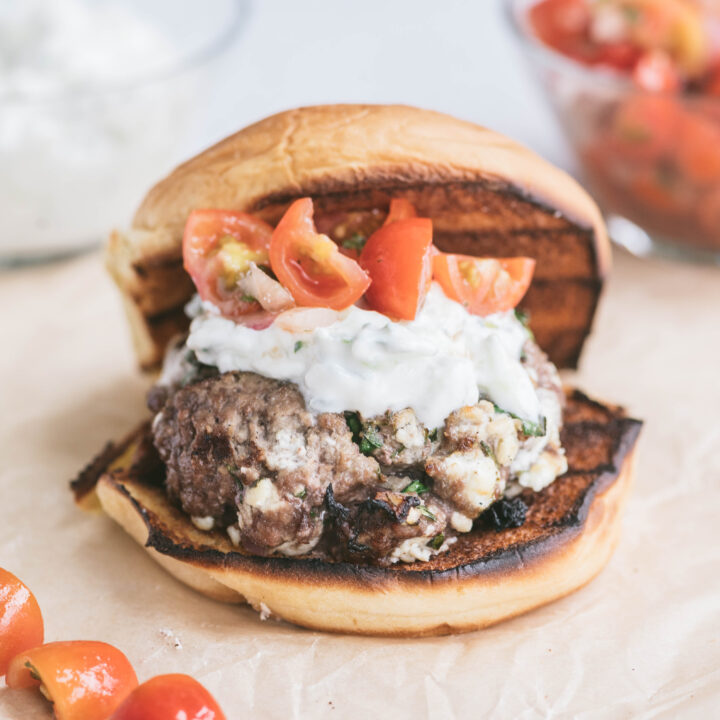
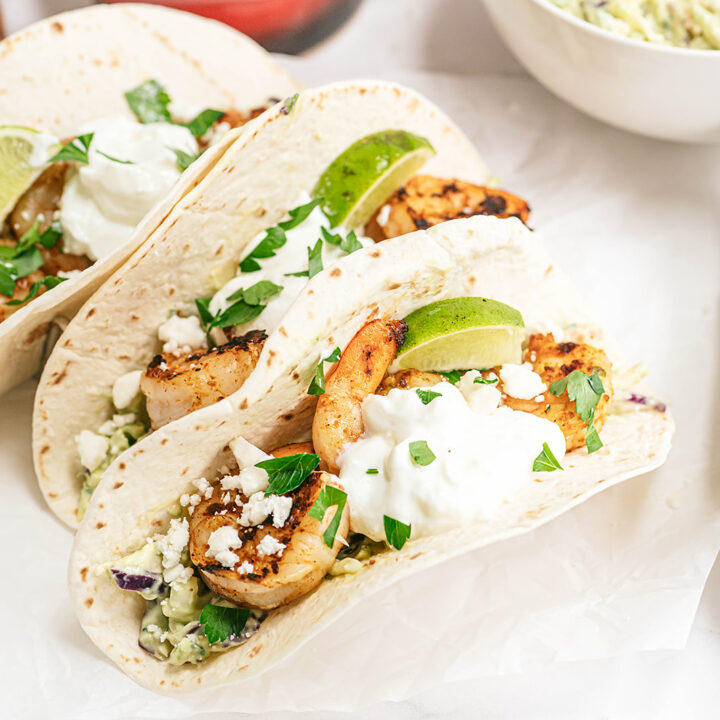
Beef Meatball Gyros have all of the traditional flavors and are topped with a homemade Greek yogurt tzatziki sauce that is better than any restaurant you have ever tasted!
Most of the time you probably don’t make gyros at home, because they seem a little complicated and they have to taste just right because you are comparing them to the best Greek takeout in town.
Using ground beef and making a meatball gyro is so much easier and when you top it with my famous greek yogurt tzatziki sauce it’s even better!
What Is Typically in a Gyro?
Traditional gyros are made from shaved lamb, beef, a combination of both, and sometimes chicken. If you were to see a behind-the-scenes view of an authentic Greek restaurant you would probably notice the vertical rotisserie. Also if you have ever been to a fair, you know what i am talking about.
The seasoned meat (it usually has a lot of herbs for the Greek flavor, heavy on the garlic) is served on a warm pita, topped with lettuce, onions, feta, and smothered in tzatziki.
Why Use Ground Beef?
Beef is an excellent source of protein, choline, iron, and other important vitamins that help our bodies stay healthy.
According to the New York Beef Council, “On average, a 3 ounce serving of beef provides half (25grams) of the Daily Value for protein, which is one of the most satisfying nutrients.”
It’s also an affordable meat that can go a long way when feeding larger families depending on the dish you are making.
Ingredients Needed for Ground Beef Meatball Gyros
panko breadcrumbs – no need to grab the seasoned kind just go with the plain
milk
lean ground beef
onion, grated
cloves of garlic
Egg
Spices: Italian parsley, cumin, oregano, thyme, salt, and pepper
What You Need for Greek Yogurt Tzatziki:
plain Greek yogurt
English cucumber
garlic
olive oil
fresh dill
Salt and black pepper
fresh lemon juice
Making the Greek Yogurt Tzatziki Sauce
Combine the Greek yogurt, cucumber, oil, spices, lemon juice, and cucumber into a small bowl. Taste, then adjust the seasonings as desired.
Place it in the fridge covered until you are ready to serve. You can also make it ahead of time if needed.
How to Make Homemade Gyros Using Ground Beef
Line a baking sheet with parchment paper or a silicone baking mat and preheat the oven to 450 degrees.
Stir together the plain breadcrumbs and milk in a large bowl. Let it sit for 5 minutes.
Then add the ground beef, eggs, and spices. Use a wooden spoon or your hands to mix the ingredients together. You want each meatball to have a little taste of all of the ingredients.
Pinch off small amounts of the beef mixture to make the meatballs or use a cookie or ice cream scoop for more precise measurement.
Place the meatballs on a baking sheet leaving a little bit of room in between each one.
Bake until the internal temperature reaches 160 degrees which should take no more than 18 minutes. Sometimes the cooking time may vary based on the size of your gyro meatballs.
Once they are ready, let them rest just a few minutes before making your gyro.
Assembling the Perfect Meatball Gyro
Combine the tomatoes, red onion, and cucumber in a small bowl and sprinkle with salt.
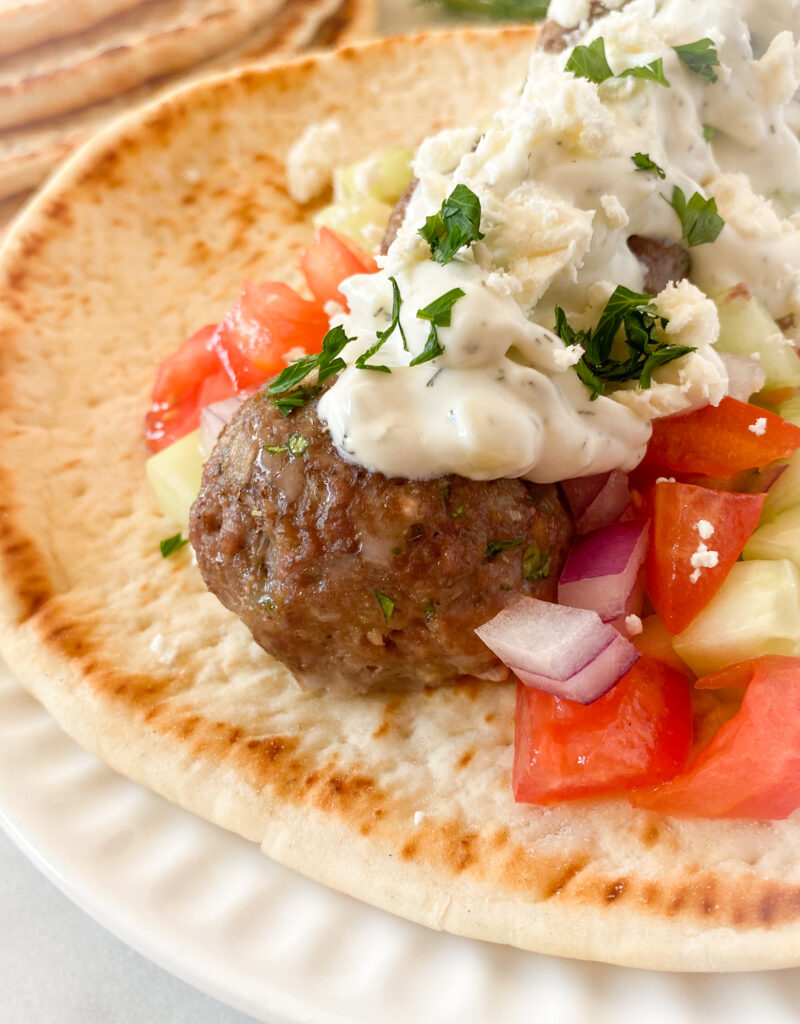
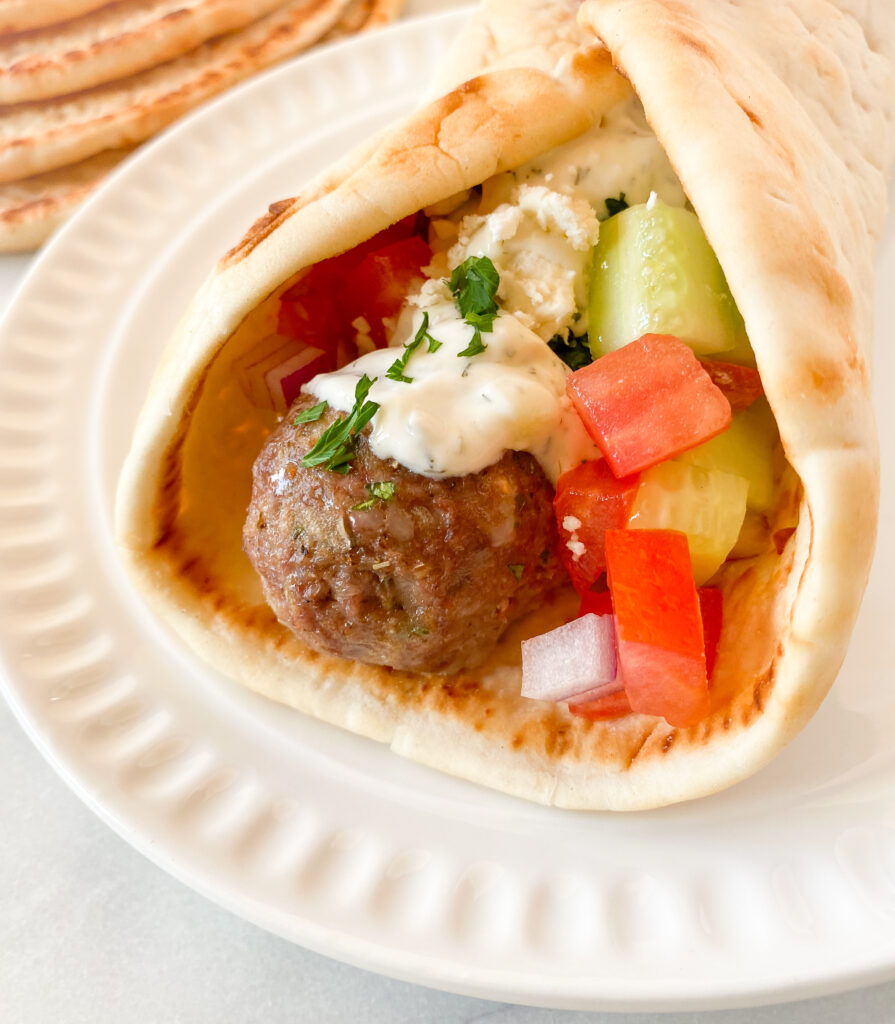
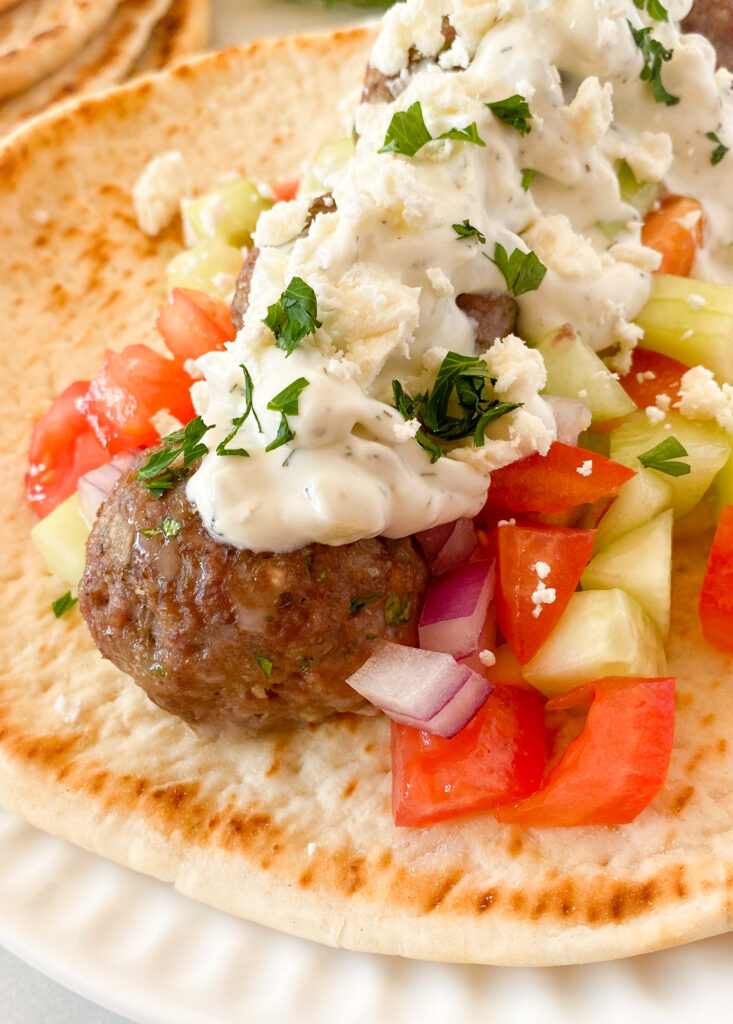
Add a few meatballs in the center of each flatbread (warm these first if you would like). Then spoon on the greek yogurt tzatziki sauce down the center, top with the cucumber mixture.
Add a little feta and chopped parsley, then wrap and serve!
Storing Leftovers
If you have any leftovers, store the meatballs, tzatziki, and cucumber mixture in the fridge for up to 4 days.
It’s best to assemble when you are ready to serve so your bread doesn’t get soggy!
Beef Meatball Gyros have all of the traditional flavors and are topped with a homemade greek yogurt tzatziki sauce that is better than any restaurant you have ever tasted!
Ingredients
Scale
For the Tzatziki sauce:
1 cup plain Greek yogurt
1/4 cup English cucumber, grated, pat dry with a paper towel
In a small bowl, combine the Greek yogurt, cucumber, garlic, olive oil, dill, salt, black pepper, and lemon juice. Adjust to taste. Cover and place in the refrigerator until ready to serve.
In a large bowl, stir together the panko breadcrumbs and milk. Set aside for 5 minutes.
Add the ground beef, onion, garlic, egg, parsley, cumin, oregano, thyme, salt, and black pepper. With a wooden spoon (I prefer to use my hands!) mix until ingredients are evenly dispersed through the meat mixture.
Form small meatballs, by using a small ice-cream scoop or eye-ball measurements, and place on the backing sheet.
Bake for 12-18 minutes or internal temperature reaches 160 degrees F. (Cook time will vary depending on the size of your meatballs.)
Allow meatballs to rest for at least 5 minutes before serving.
To assemble:
In a small bowl, combine the cucumber, tomatoes, and red onion. Sprinkle with salt.
Place a few meatballs down the center of each flatbread. Spoon a generous amount of Tzatziki sauce down the center next to the meatballs and top with a heaping spoonful of the tomato and cucumber mixture. Garnish with feta cheese and chopped parsley, if desired. Wrap up and enjoy!
This post may contain affiliate links. Read my privacy policy.
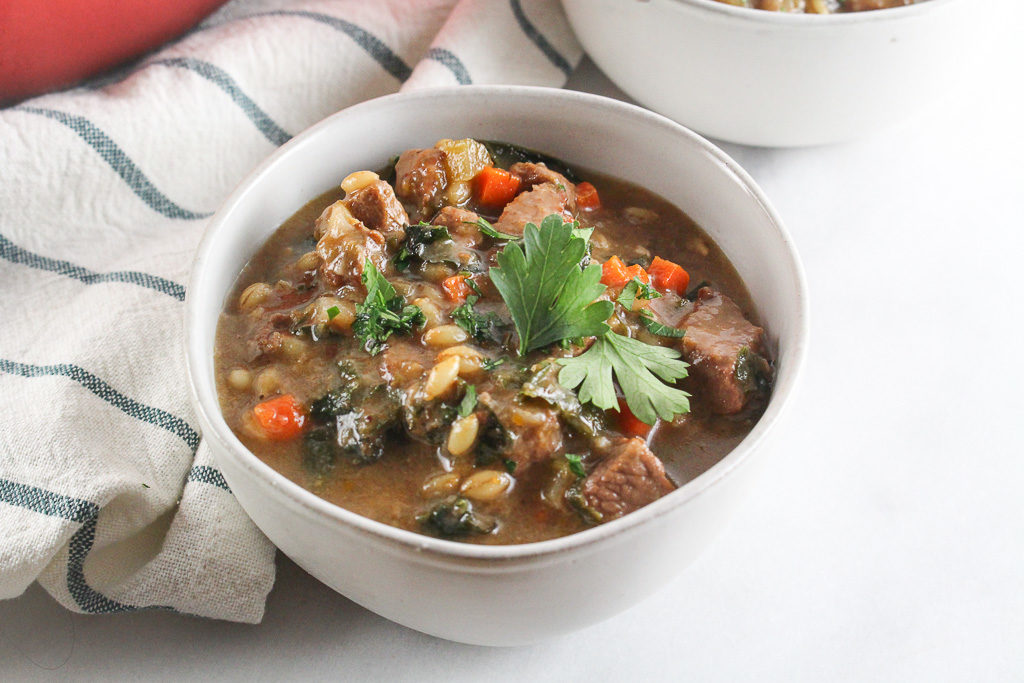
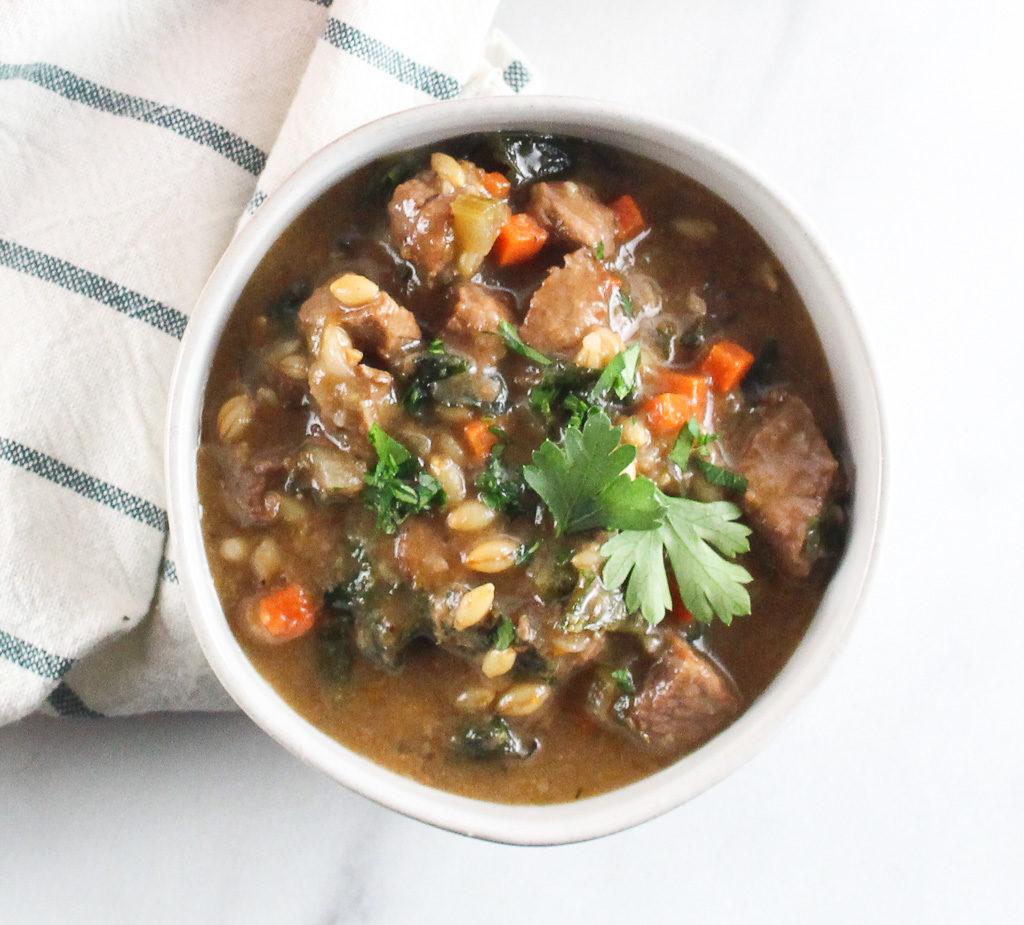
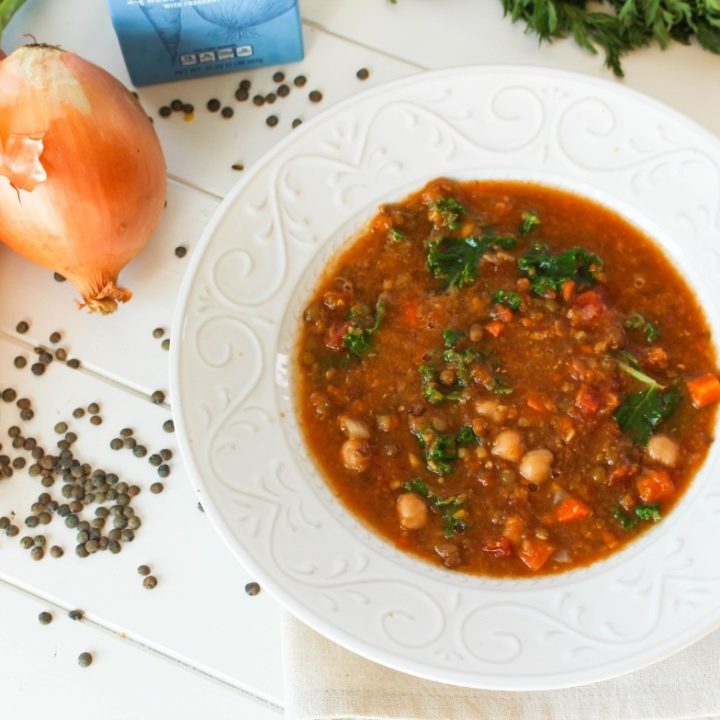
Cozy up to a bowl of Beef and Barley Soup. Not only can you add layers and layers of flavors, but they also can be balanced nutritionally.
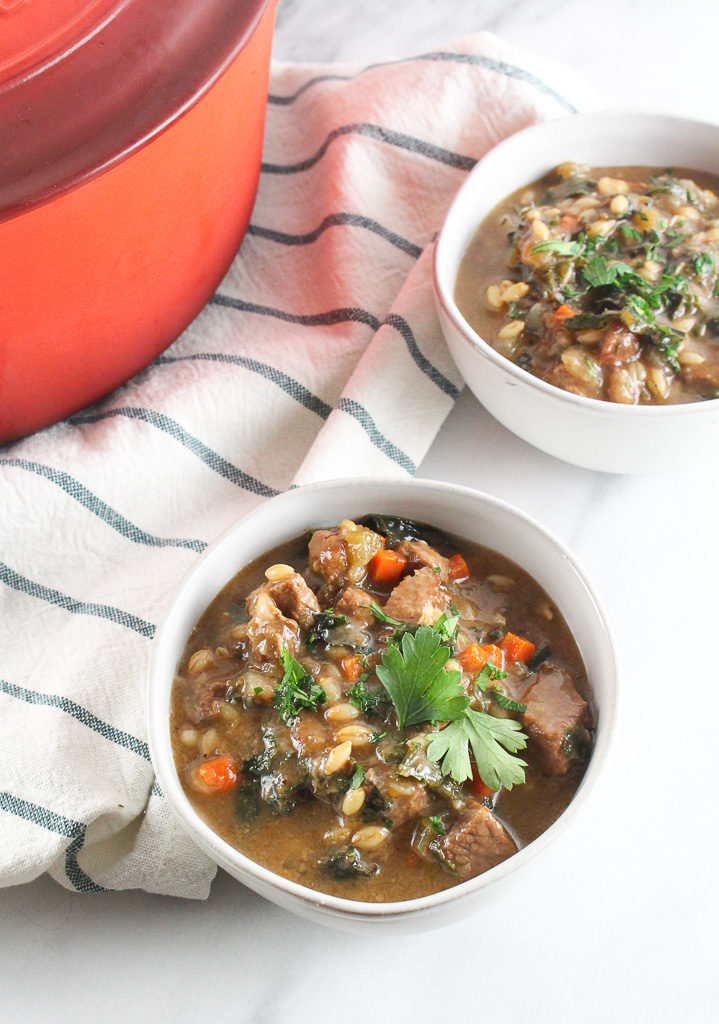
I am on a total soup and stew kick lately. Mainly because I can cook once and eat all week.
I am teaching three cooking classes this week, so cooking all day at work, the last thing I want to do when I get home it to cook again and wash more dishes!
What is Hulled Barley?
Aim to add more whole grains in soups and stews when you can. Barley is a fantastic whole grain. I chose to use hull-less barley. This type of barley has an outer hull that’s so loosely attached to the kernel that it generally falls off during harvesting. This cuts down on processing and ensures that all of the bran and germ are retained.
Ingredients for Beef and Barley Soup
all-purpose flour
Veggies: celery, carrots, garlic, kale, onion
Spices: salt, pepper, oregano, parsley
beef chuck roast – trim the fat if needed and dice into bite size pieces
olive oil
red wine
tomato paste
beef broth
water
hulless barley
kale
fresh parsley
How to Make Hulled Barley Soup
Once you have trimmed and diced the beef, add the flour, salt, and pepper to a shallow bowl or dish and dredge each piece. Shake off the excess flour if needed.
Add the olive oil to a large pot and heat over medium-high heat.
Brown the beef, turning as needed. You will need to do this step in batches because you don’t want to overload the pot. Once the meat has finished browning, remove and set aside.
Add the carrots, celery, diced onions, garlic, and oregano. Stirring occasionally, cook the veggies until they are soft.
Pour in the red wine to deglaze the bottom of the pot, scraping the brown bits. Simmer and reduce the red wine by half. Add in the tomato paste and stir.
Place the beef back in the pot, and add the water and broth.
Bring it to a boil then add the hulled barley.
Turn the heat down low, and simmer for 45 minutes. The meat should be tender and the barley should be cooked all the way through.
Be sure to stir it occasionally; this will keep the barley from sticking together.
Once the soup is done, remove the pot from the heat and the kale. Season with salt and pepper!
My Barley Soup is Too Thick, What Do I Do?
If you find that the soup is too thick for your liking after it is done simmering, add some more water until it reaches a consistency you are happy with.
Be sure to add the kale while the soup is still hot so it will wilt.
Store in an airtight container in the refrigerator up to 5 days.
This barley soup is great for freezing. Let it cool completely before placing it in the freezer. To serve again, reheat on the stovetop over low heat until it is warm all the way through.
Soups are great! Not only can you add layers and layers of flavors, but they also can be balanced nutritionally. Any good soup starts with mirepoix. I like to use dry herbs and spices in my soup recipes because you are able to add them during the cooking process, as they can stand up to the heat.
This beef and barley soup may take a little longer to prepare, but it’s worth the wait.
1lb boneless beef chuck roast, fat trimmed off and cubed
2tablespoonolive oil
1largeonion,chopped
1largecarrot,peeled and chopped
2stalkscelery, chopped
3clovesgarlic,minced
2 teaspoons dried oregano
1/2 cup red wine
3tablespoontomato paste
4cups low-sodium beef broth
4cupswater
3/4cup hulless barley
4 cups kale, spines removed and roughly chopped
1tablespoon fresh parsley, chopped
Instructions
In a shallow dish combine flour, salt, and pepper. Dredge the beef cubes with flour, shaking off excess flour.
Heat the olive oil in a Dutch oven (or large pot) over medium-high heat. Add the beef to the pot and cook just until the meat starts to brown, turning as needed. Do this in 2 or 3 batches, to not crowd the pot. Remove the meat from the pot and set aside.
In the same pot, add the chopped onion, carrots, celery, garlic, and oregano. Cook the vegetables until soft, about 5 minutes, stirring occasionally.
Deglaze the pan with red wine scraping the fond (the brown bits) from the bottom of the pan. Let simmer and reduce red wine by half. Add tomato paste and stir to coat the vegetables.
Add beef back to the pot with water and beef broth. Stir to combine.
Bring to a boil, add barley and turn down to a simmer for 45-50 minutes, until meat is tender and barley is cooked through. Stir occasionally so the barley won’t stick together. If you find that too much liquid has evaporated or the soup is too thick add more water as necessary until you get the desired consistency.
Remove soup from heat and stir in the kale while the soup is still hot to wilt. Season with salt and pepper, as needed.
Garnish with parsley, if using.
Notes
If you do not want to use wine, deglaze with additional beef broth.
This post may contain affiliate links. Read my privacy policy.
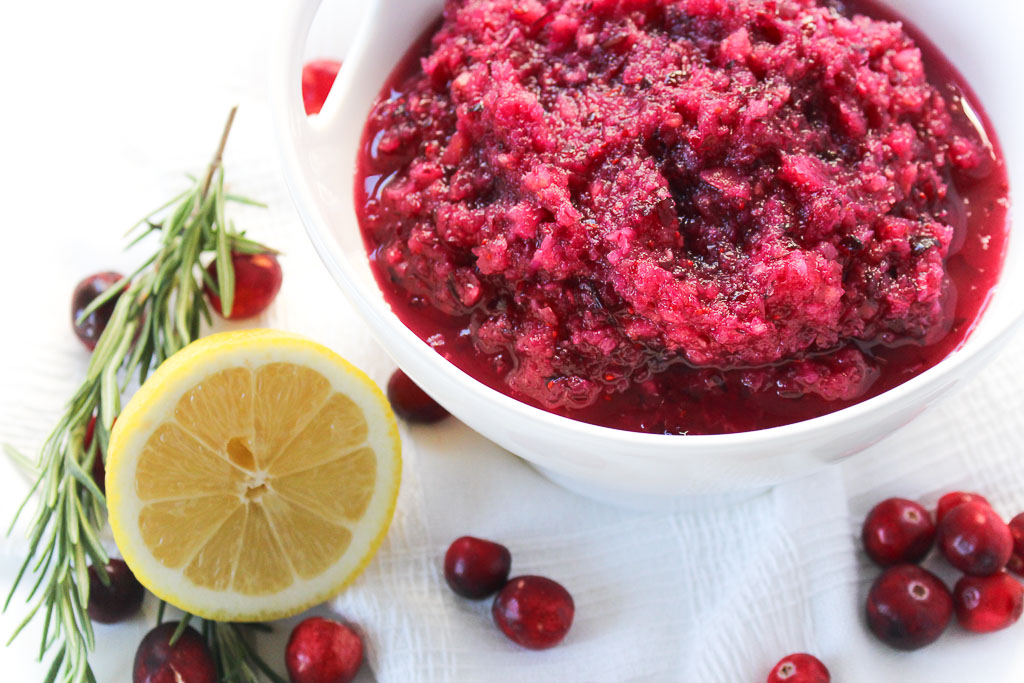
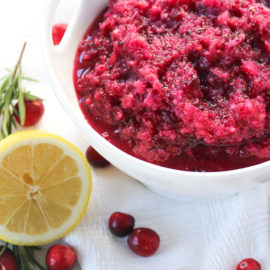
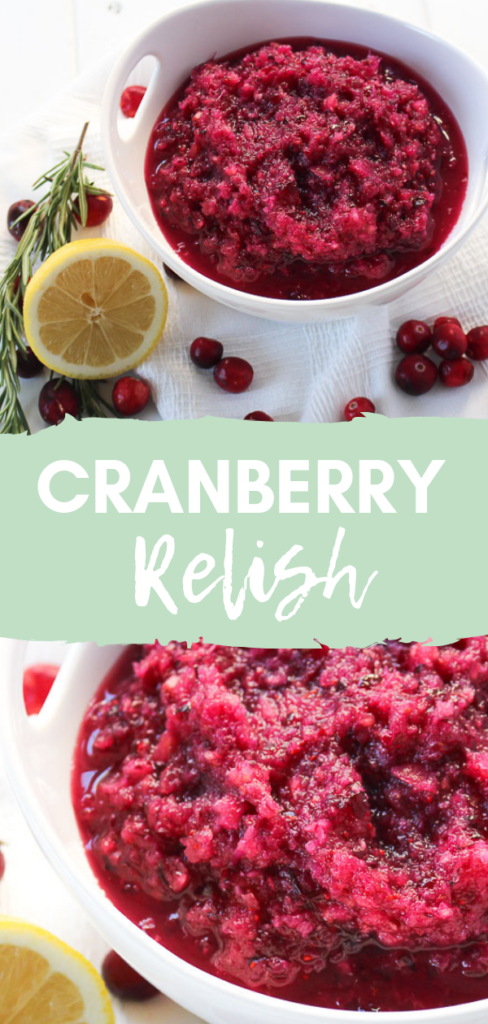
With just five simple ingredients this Cranberry Relish will add a pop of color and a side dish full of nutrients that will be a great addition to the table at any holiday gathering.
With Thanksgiving just a few days away, everyone is finalizing their Thanksgiving Day menu. Thanksgiving dinner is all about timing. What needs to be in/out the oven or stovetop. I am always a fan of the menu items that can be made ahead of time so you don’t have to worry about factoring that in the day of the festivities.
This recipe is inspired by one of my friend’s aunt’s recipe. (Hi Steph!) I was scrambling last week to get a menu together for my Thanksgiving cooking class at work. I’ve been teaching multiple Thanksgiving Day-themed cooking classes for work the past 3 years now. I get a lot of the same people attending the classes, so I didn’t want to repeat any previous recipes used in class.
I tend to catch up with family and friends on my way to and from work in the car. Whoever invented Bluetooth, thank you! I was chatting with Steph on my way home from work and I mentioned how I didn’t know what I was making yet for my class the next day. She was told me about her Aunt’s cranberry relish recipe that her family goes crazy for every year. What I really loved about it was it was only a few simple ingredients and everything goes right into a food processor. Plus, it is a recipe that can be made ahead of time. I did tweak the original recipe to make it healthier.
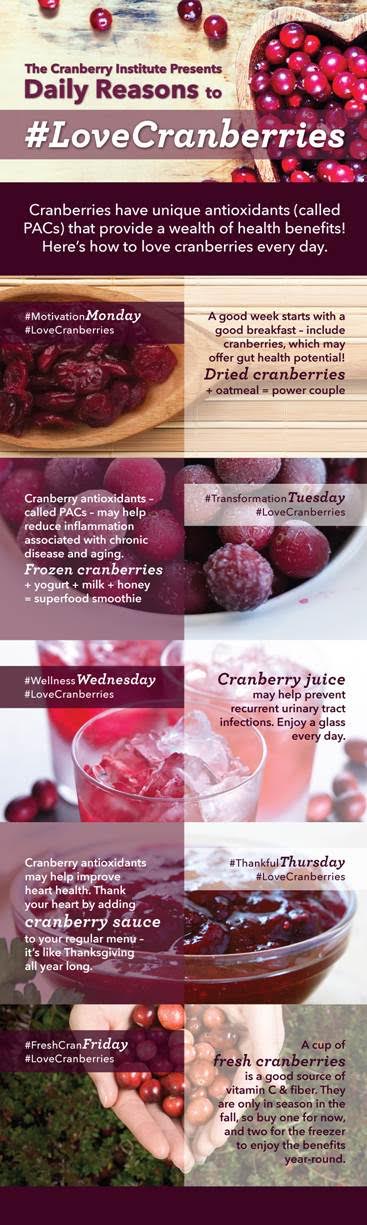
Cranberries: What’s So Great About Them?
I’m so glad you asked! Cranberries are actually full of antioxidants known as PACs, which may help reduce inflammation related to chronic diseases and aging.
A cup of fresh cranberries is a great source of fiber and Vitamin C, but the downside is that they only come into season during the fall.
The good news is that you can buy up several bags of fresh cranberries and freeze them to have year-round!
Also, research indicates that consumption of flavonoids in foods and beverages may decrease the risk of atherosclerosis.
In vitro and in vivo experiments with flavonoids demonstrate that flavonoids are dietary antioxidants and inhibit LDL oxidation, inhibit platelet aggregation and adhesion, inhibit enzymes involved in lipid and lipoprotein metabolism that affect the immune response to oxidized LDL and their uptake by endothelial macrophages, may induce endothelium-dependent vassorelaxation, and may increase reverse cholesterol transport and decrease total and LDL cholesterol.
Cranberries contain both hydroxycinnamic acids and flavonoids. The cranberry flavonoids belong to three groups: anthocyanins, flavonols, and proanthocyanidins, which make cranberries a great addition as part of a heart-healthy diet. Source: The Cranberry Insitute.
What You Need For Cranberry Relish
fresh cranberries
lemon
pineapple rings – I am using canned with the juice drained, you can use fresh if you would like.
sugar
honey
How To Make Cranberry Relish
Add the cranberries to the food processor and pulse until they begin breaking down. Depending on the size of your food processor you may have to do this in batches.
Slice the lemon into wedges and remove the seeds. Add the wedges, with the peel on, to the processor and pulse just until it breaks down.
Then add the sugar, honey, and pineapple rings. Continue pulsing until the relish reaches your desired consistency.
Can You Make Cranberry Relish with Nuts?
Yes! Because I recommend chilling cranberry relish overnight so all of the flavors come together, fold them in just before serving. Pecans and walnuts pair well with cranberry dishes, but you can add any variety of nuts.
I like smaller pieces, so if you have whole pecan or walnuts chop you can chop by hand or throw them in a food processor for a few pulses.
What’s the Difference Between Cranberry Sauce and Cranberry Relish?
Relish is made with raw ingredients that are blended together then chilled. Traditionally cranberry sauce is actually cooked (unless you are eating it from the can) and is much sweeter.
Can You Use Frozen Cranberries?
You can use frozen, just know the flavor is much more muted, but that’s usually the case when you swap frozen fruits and veggies for fresh.
Be sure you allow for some additional time so they can thaw completely. Then drain the cranberries to remove the excess liquid.
Cranberry Relish Serving Suggestions
In case you were wondering, here are some of the popular ways cranberry relish is served.
As a holiday side dish
Over Brie or cream cheese
With crackers – you could use a salty variety or graham crackers for a sweeter version
Topping – use the leftover to top off your pancakes, waffles, or yogurt bowls
How Long is Cranberry Relish Good For?
You can store it in the fridge for up to 5 days. This also means you can make it ahead of time if you are prepping for holiday meals to ease the stress!
Place cranberries in a large food processor and pulse to begin to break down the cranberries.
Cut lemon into small wedges and remove any seeds. Add the whole lemon to the food processor with the cranberries (do NOT remove the peel). Pulse to begin to break down the lemons with the cranberries.
Add pineapple, sugar, and honey. Pulse to reach desired consistency.
Let chill overnight to allow the flavors to come together.
Notes
*If using frozen cranberries, let thaw completely and drain to remove any excess liquid before preparing this recipe.
Keywords: cranberry relish, cranberry, side dish, thanksgiving, holiday
This post may contain affiliate links. Read my privacy policy.
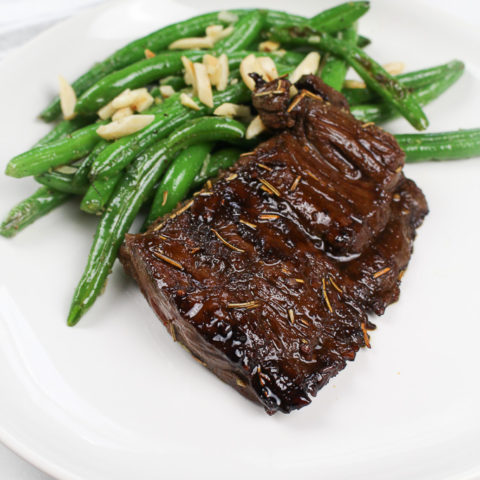
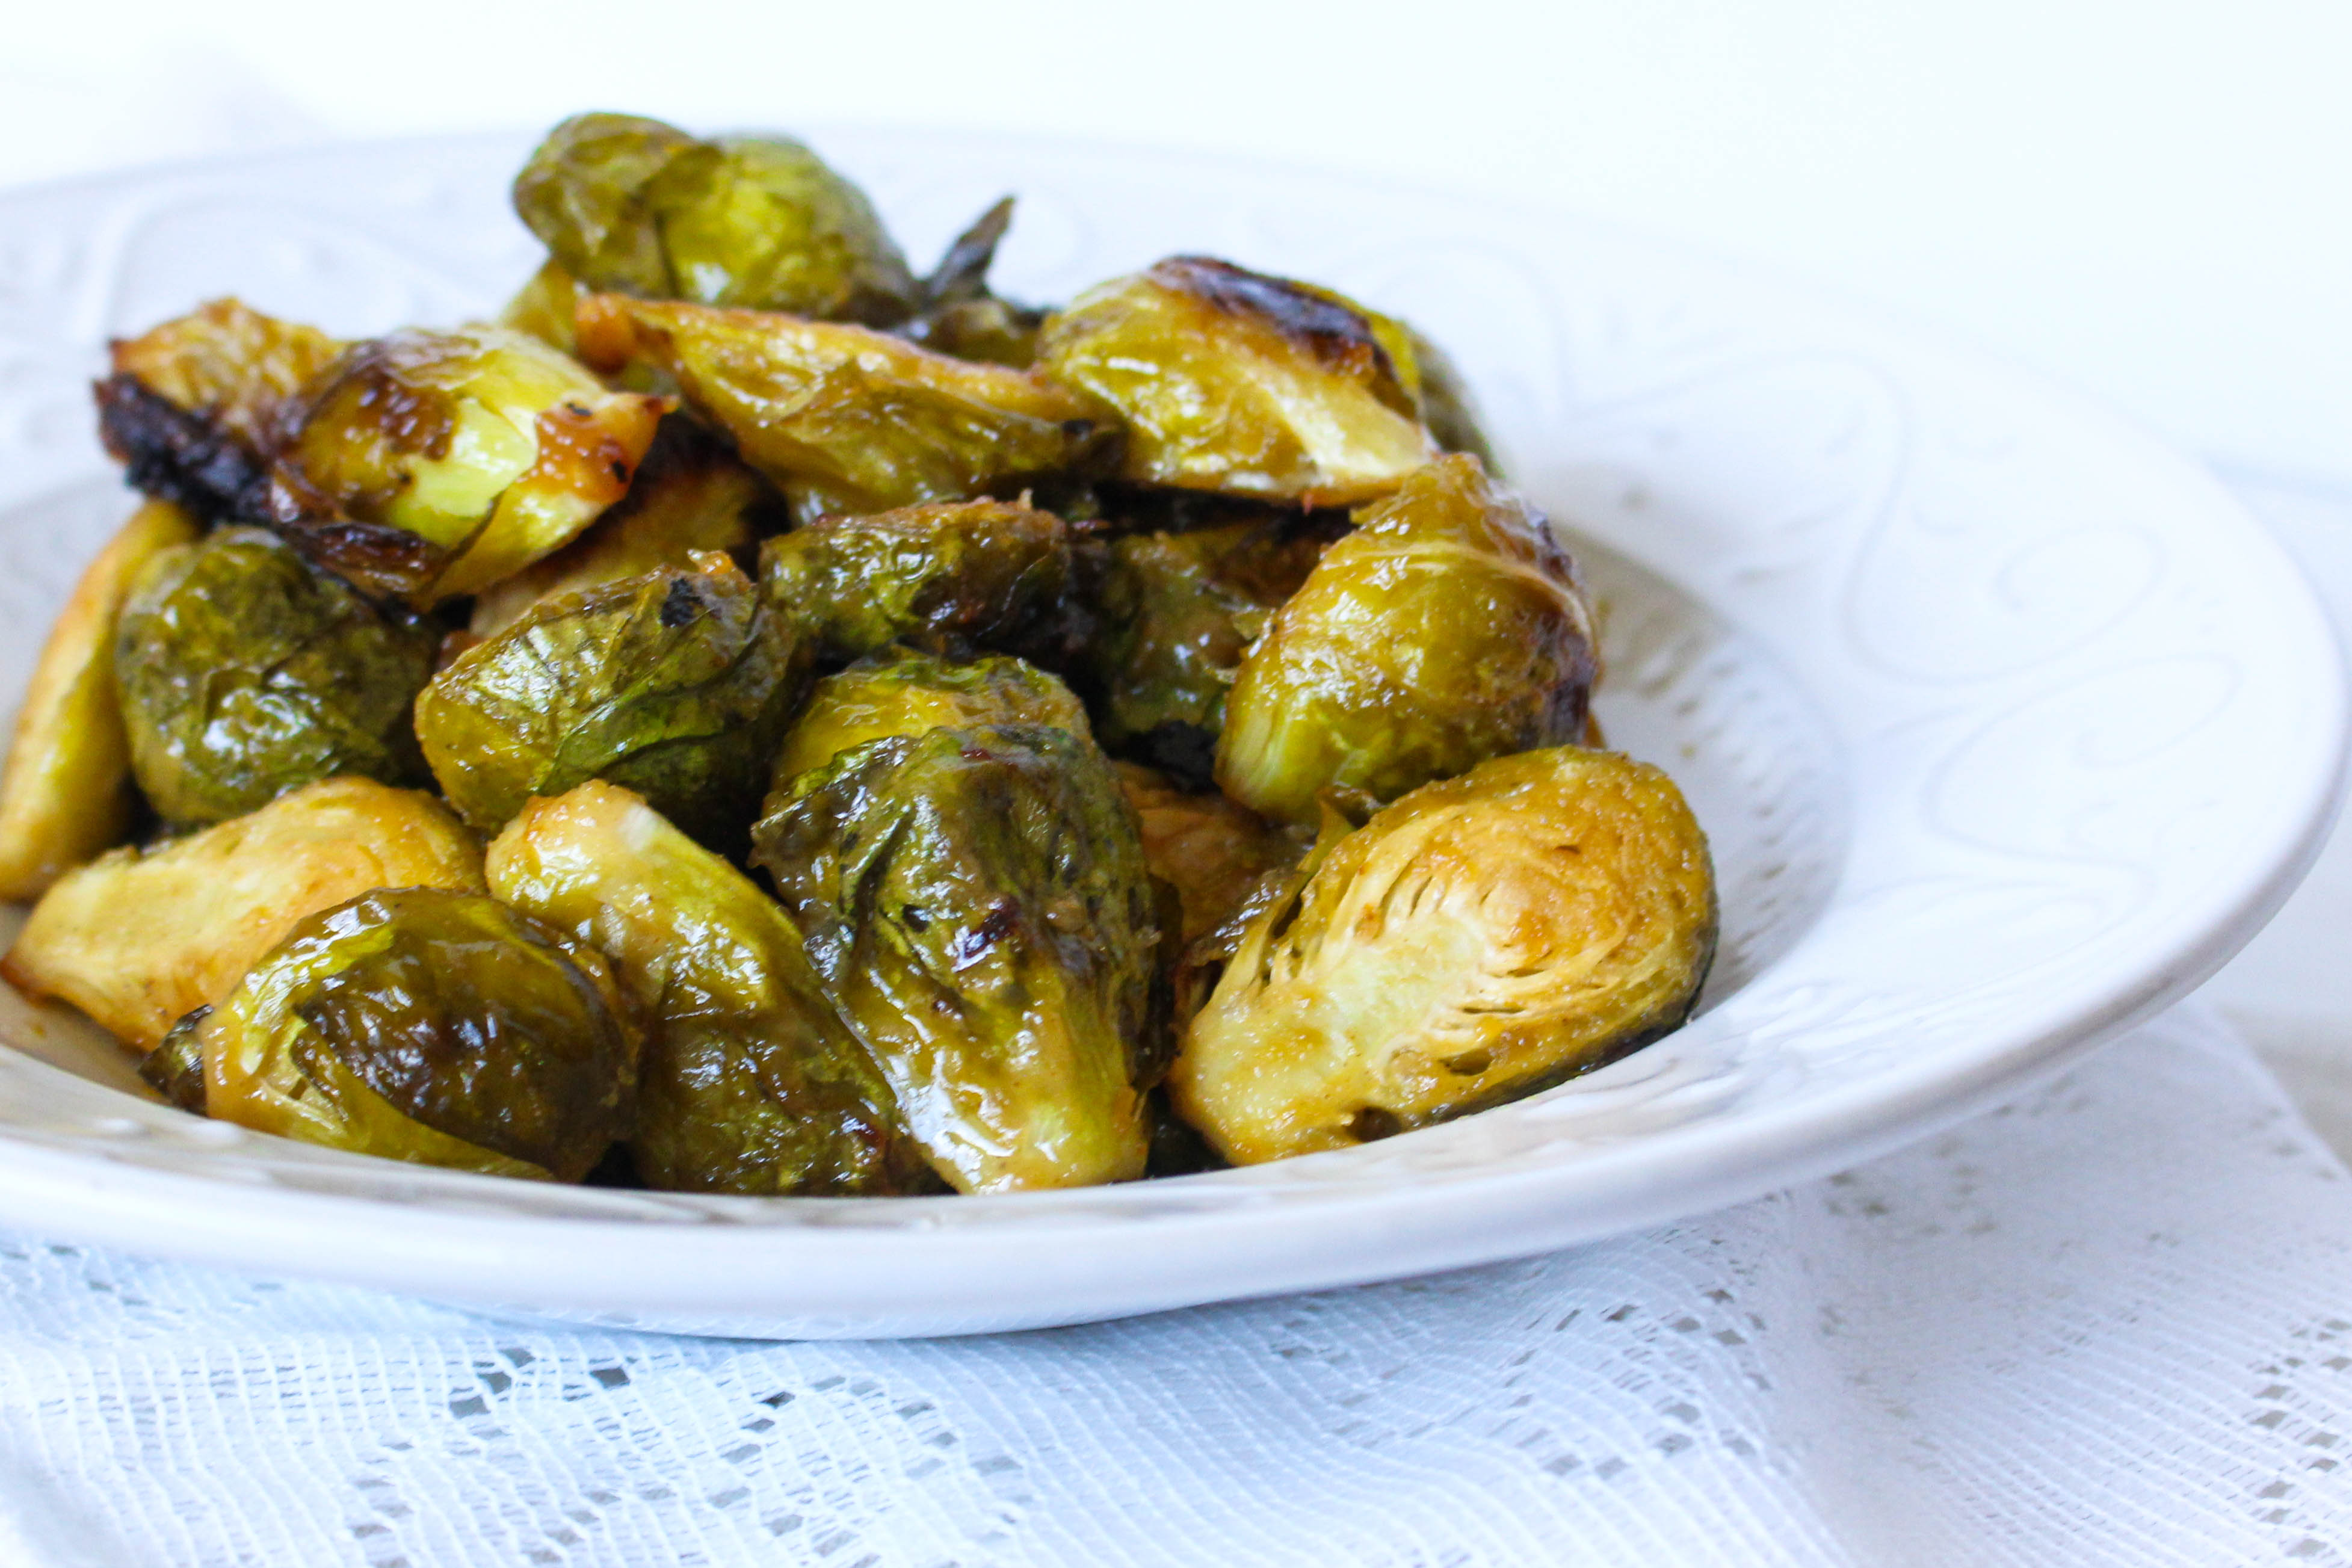
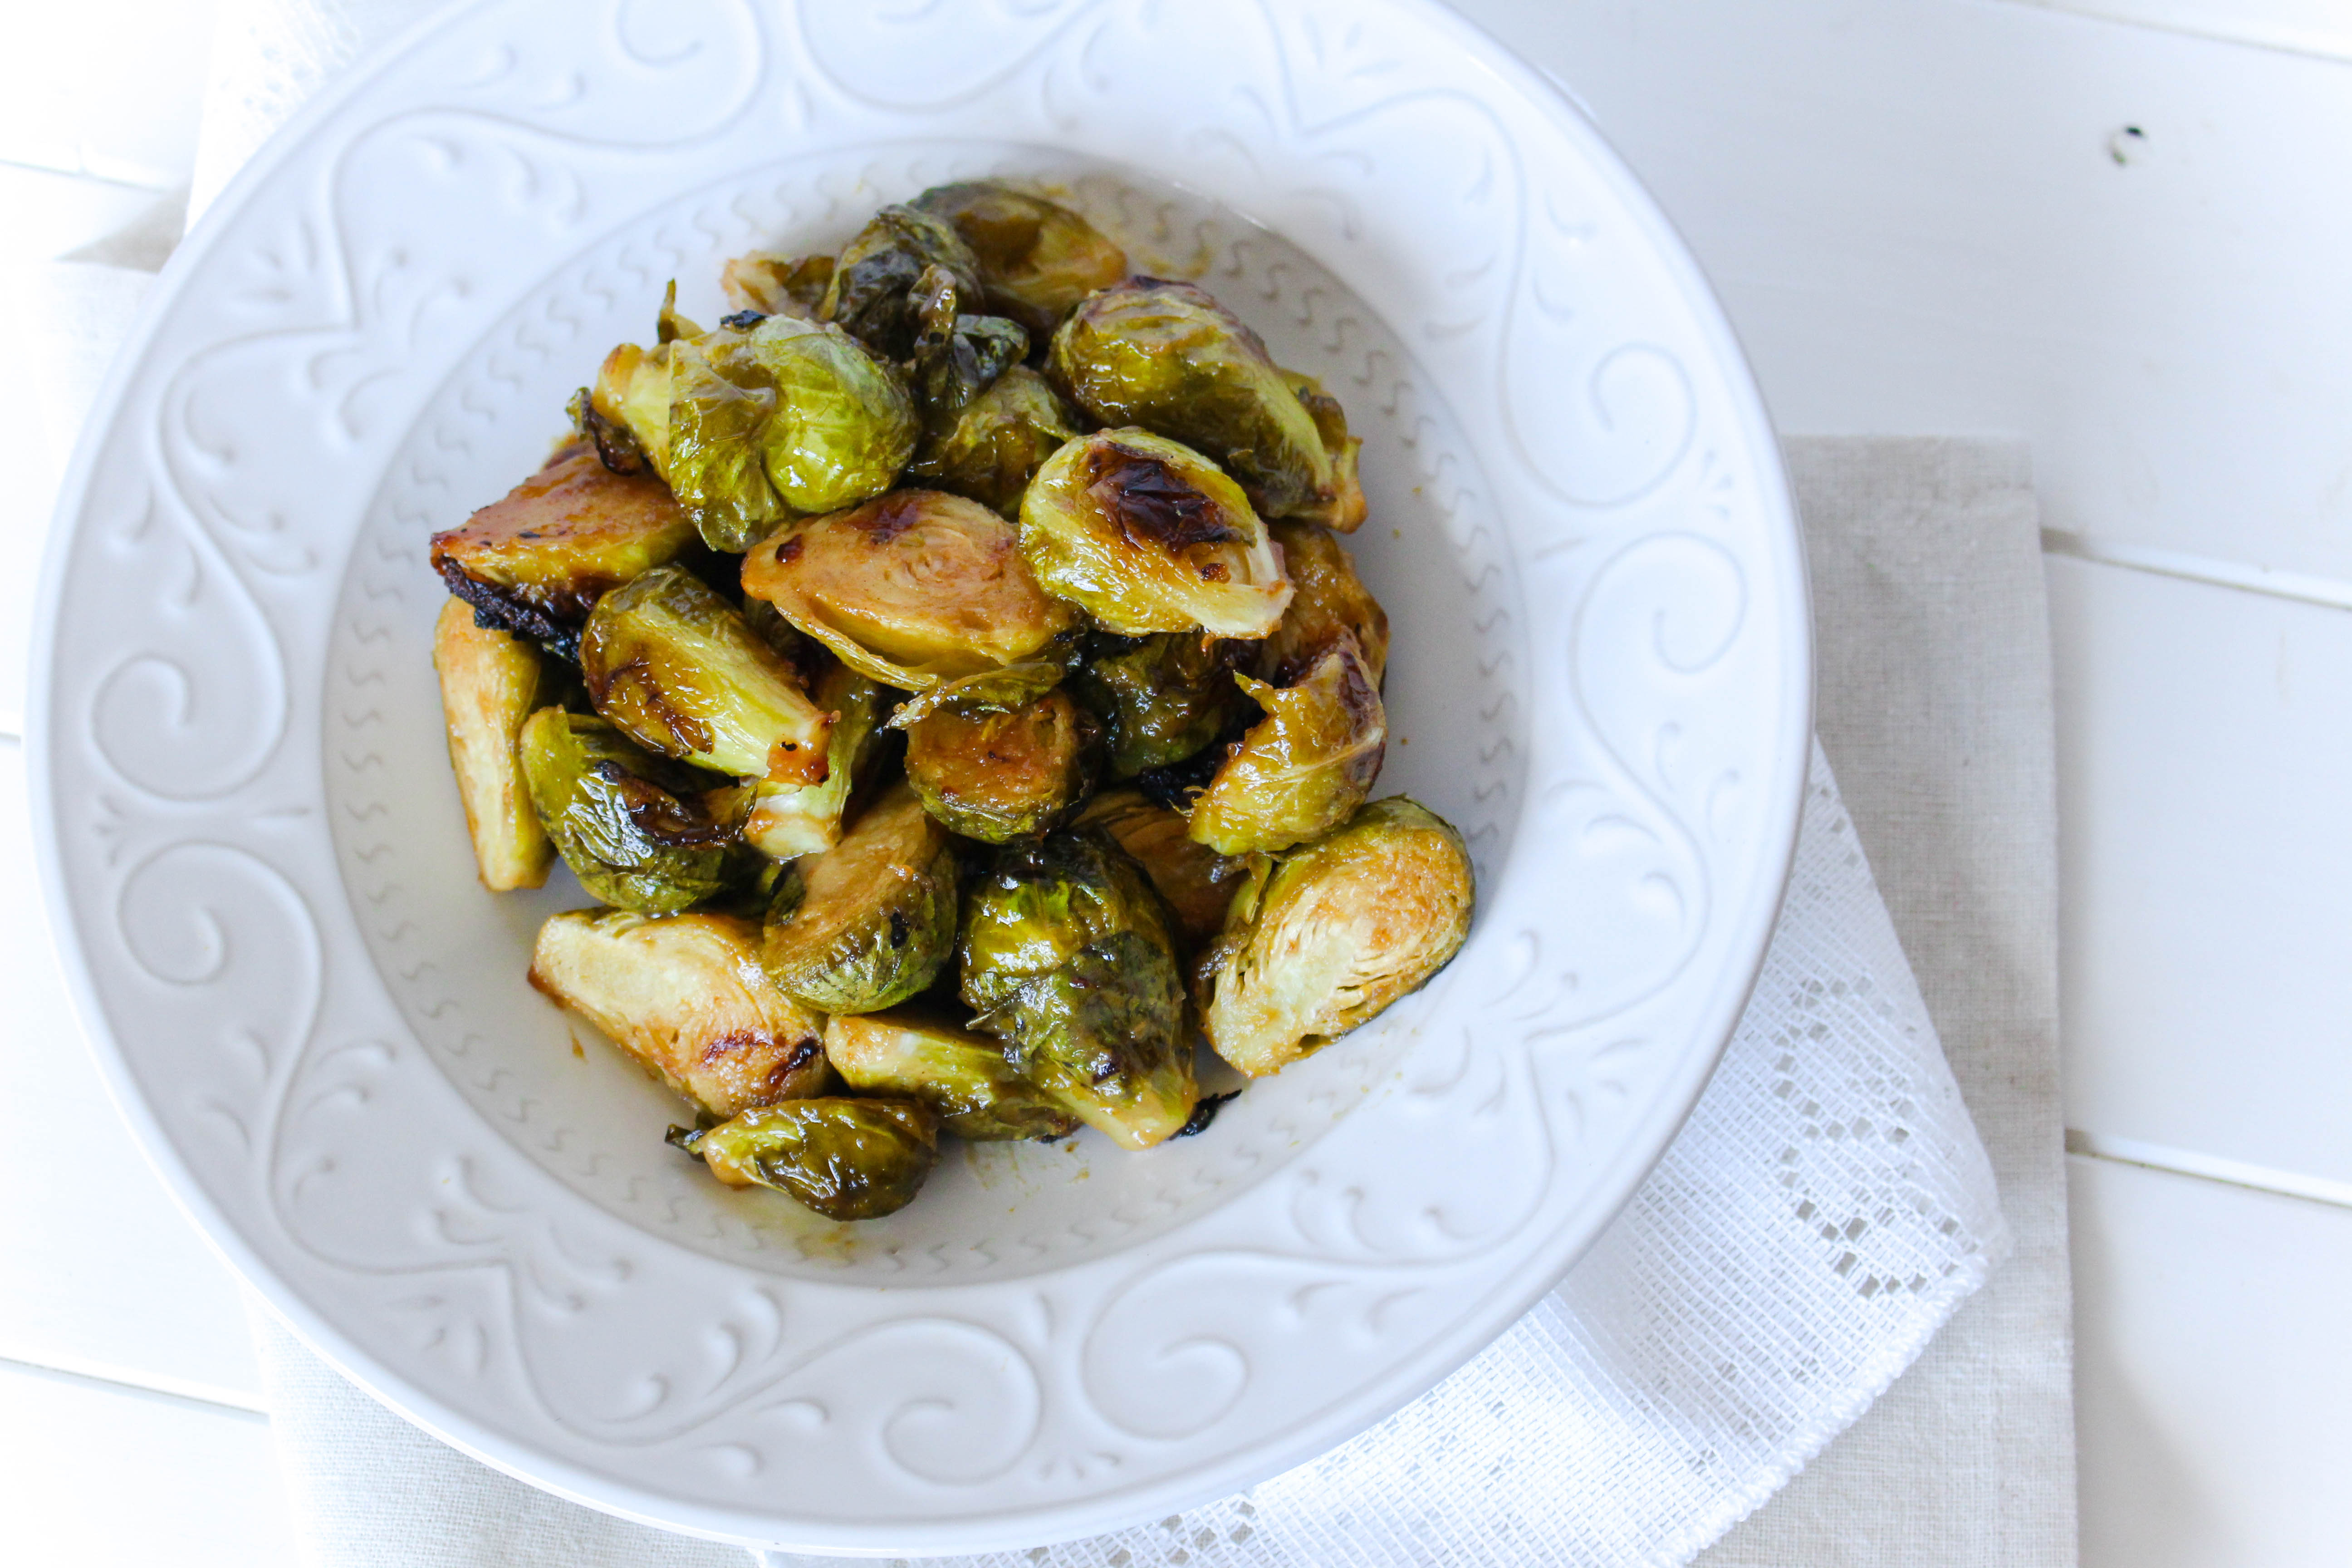
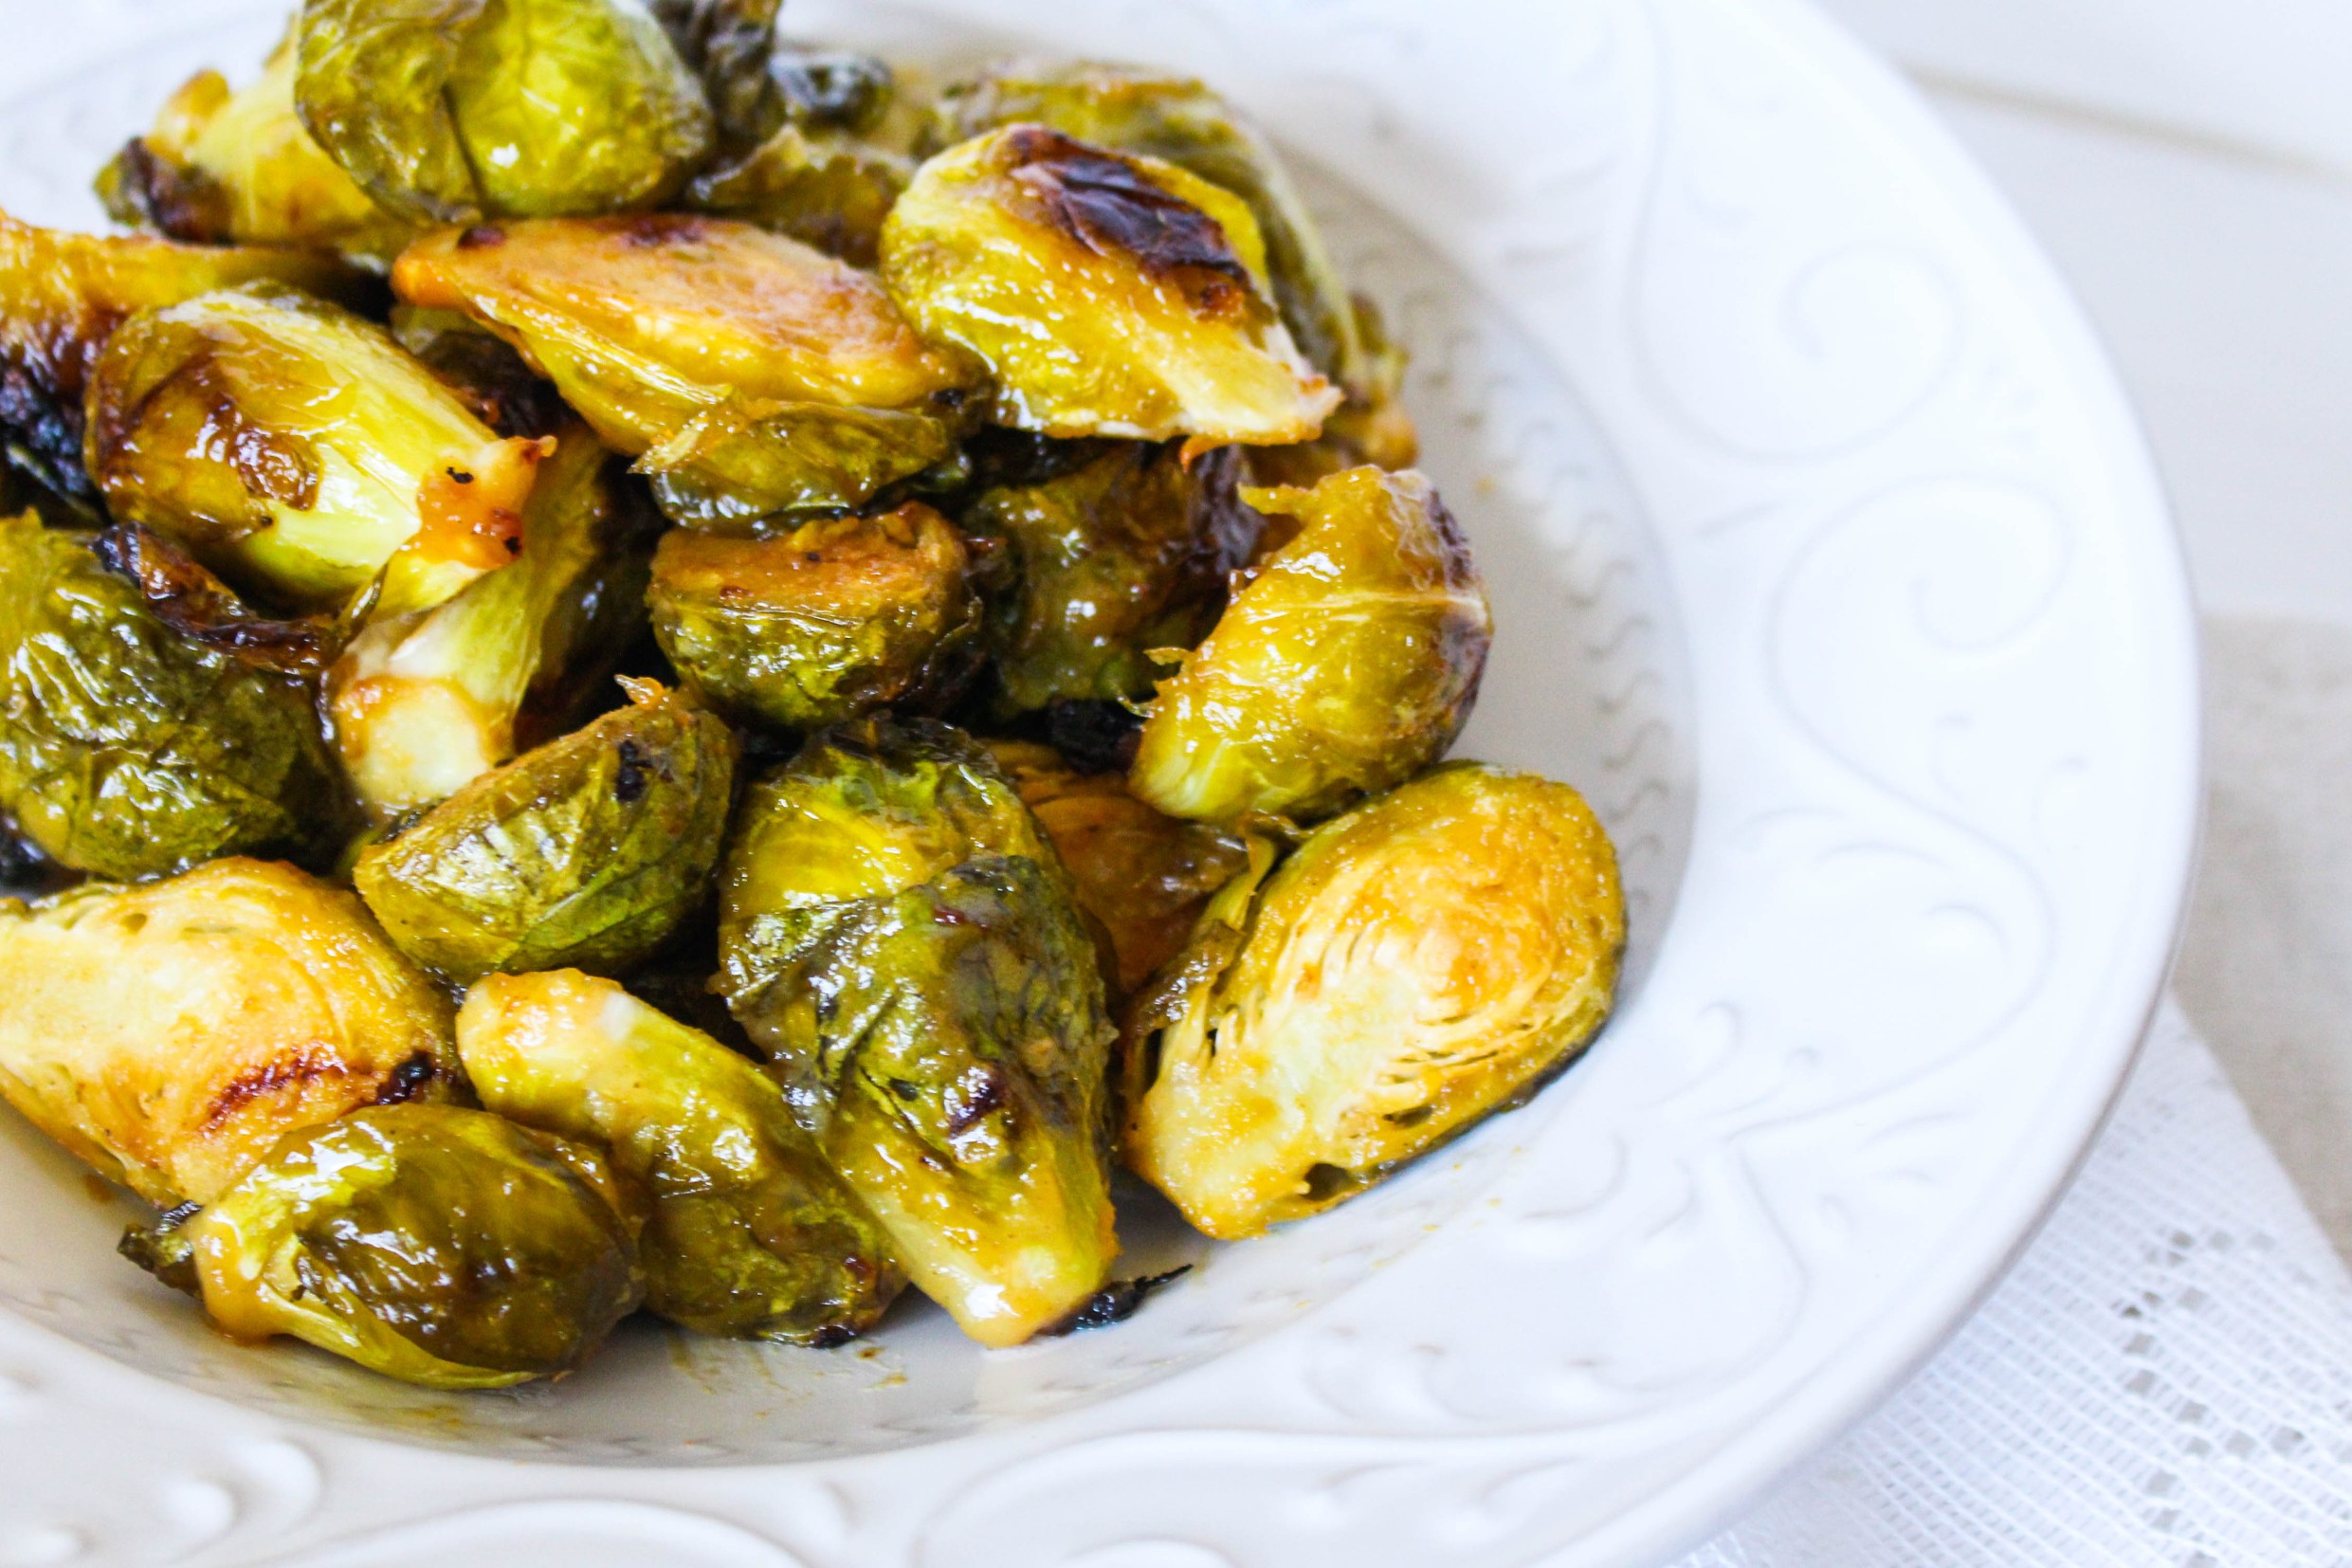
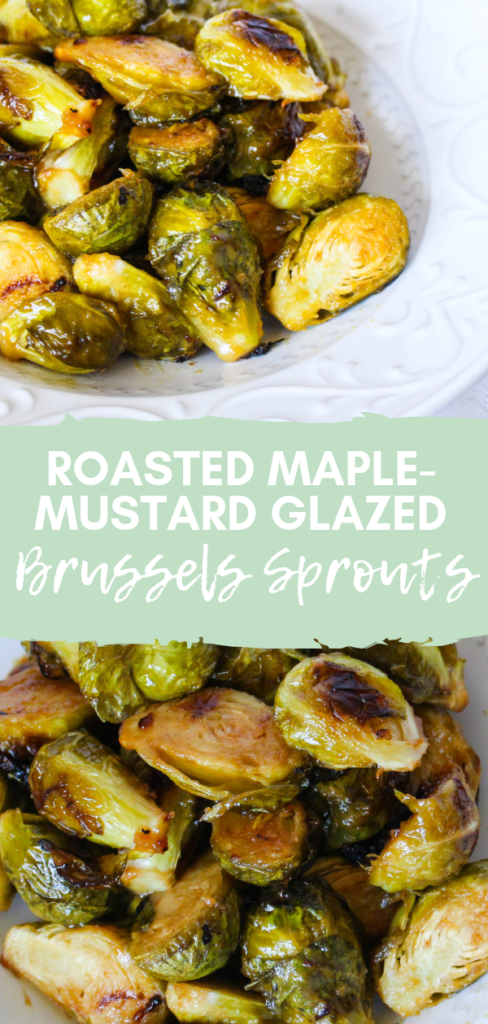
Roasted Maple Mustard Brussels Sprouts have just enough tang and the right amount of sweetness! The perfect side dish that pairs well with just about any meal!
Some people may turn their nose up at the thought of Brussels sprouts, but honestly, they just need to try cooking them a different way! The maple mustard glaze brings in so much flavor, adding a twist to just regular roasted sprouts.
With the holiday season just around the corner, these become a staple around our house. Once you try them I promise you will be eating this delicious side dish all year long!
Because this is a sheet pan recipe, it’s easy to make and almost hands off! So while these are great during the week, you can easily double or triple the recipe to feed a larger crowd without much more prep work.
Why I Love Brussels Sprouts
For starters, brussels sprouts are packed full of nutrients and rich in Vitamin K and Vitamin C. They also contain an antioxidant called kaempferol, that may help to reduce inflammation and promote a healthy heart.
If you aren’t a seafood lover, double up on your Brussels because they are one of the best plant-based sources of omega-3s!
So besides all of the amazing health benefits, Brussels sprouts can be cooked in so many ways which makes them really versatile in the kitchen. Simply changing out the sauce, glaze, or seasoning offers a whole new side dish. Let’s not forget they are great in salads when they are shredded too!
Ingredients for Maple Mustard Brussels Sprouts
lemon juice
Dijon mustard
maple syrup
olive oil
salt and pepper
Brussels sprouts
How to Make Roasted Maple Mustard Brussels Sprouts
Prep your baking sheet by spraying it with non-stick spray or using parchment paper and preheat your oven to 400 degrees.
Whisk together the lemon juice, mustard, maple syrup, oil, salt, and pepper in a large bowl.
Once you have halved and trimmed the Brussels sprouts, mix those in and stir until they are fully coated.
Pour the mixture in an even layer onto the baking sheets. You can drizzle the remaining glaze over if there’s any left in the bowl.
Roast for about 30 minutes or until the brussels are tender and caramelized. Stir them occasionally or flip with a spatula half way through.
Can You Use Frozen Brussels Sprouts?
You can if that’s all you have. Allow them to thaw completely before roasting.
Preheat oven to 400 degrees F. Prepare a large baking sheet with cooking spray and set aside.
In a large bowl, whisk together the lemon juice, Dijon mustard, maple syrup, olive oil, and salt and pepper.
Mix in the Brussels sprouts until they are fully coated. Pour the Brussels sprouts on an even layer on the baking sheet, drizzling any remaining glaze on top.
Roast for 25-30 minutes, stirring occasionally. Brussels sprouts should be tender and caramelized to your desired doneness.
Keywords: Brussels sprouts, roasting, vegetable side dish
This post may contain affiliate links. Read my privacy policy.
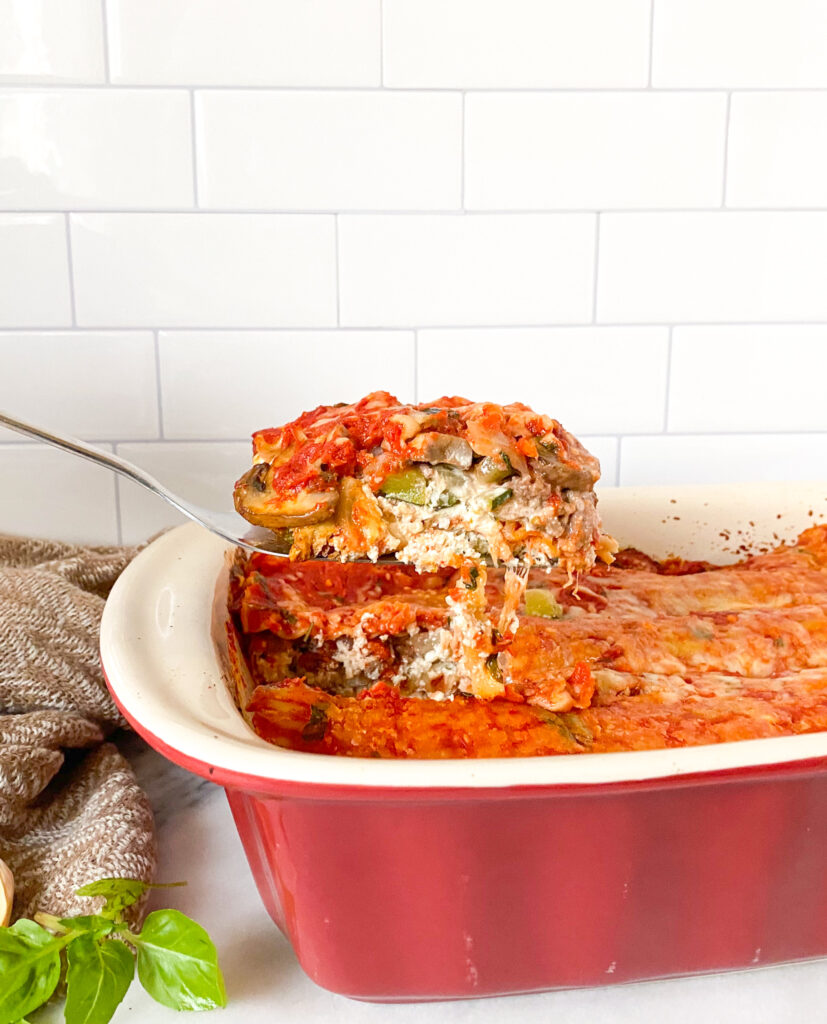
Lasagna is such an underrated dinner. Maybe, it is because when most people think of lasagna, the thought of having to assemble this meal detours many. Adding a little twist on a classic, try this Veggie-Packed Beef Lasagna.
This post is sponsored by the Northeast Beef Promotion Initiative, a subcontractor to the Beef Checkoff. Thank you for supporting brands that make this blog possible!
What if I told you I could provide you with
tips to make this meal both delicious and easy to prepare?
Lasagna is one of those recipes that can be made ahead, frozen for later, and a hearty meal that can help make weeknight meals a breeze. Also, depending on how you make this dish it can incorporate four of the five food groups all in one pan.
Dietitian Tip: Aim to have at least 3 food groups featured for meals (making one of those a fruit or vegetable!)
Each food group has its own properties which
can be beneficial for one’s health. Building colorful balanced plates can help
maintain healthy eating patterns, providing essential vitamins and minerals to
keep the body healthy. For example:
Grains: Grains have carbohydrates which provide our body with energy. Grains
are divided into 2 subgroups: Whole Grains and Refined Grains. Whole grains
contain the entire grain kernel ― the bran, germ, and endosperm. Refined grains
have been milled, a process that removes the bran and germ. Aim to make half of
your grains whole grains.
Protein: Is a building block for bones, muscles, cartilage, skin, and blood.
Fruits:
Contain vitamins, minerals and antioxidants which may
also help to protect you from chronic diseases.
Vegetables: Eating vegetables that are of different colors will help to provide
your body with important nutrients like fiber (can help you to feel fuller for
longer), folate (beneficial for fetus growth during pregnancy),and vitamins A
(aids in good vision) and C (aids in a strong immune system).
Dairy: Which has a strong association to improved bone health.
Can beef fit onto a healthy plate?
When building a balanced plate, beef goes
beyond just being a good source of protein.
Beef supplies 10 essential nutrients
including:
Iron – helps your body use oxygen
Choline – supports nervous system
development
Vitamins B6 & B12 – helps
maintain brain function and gives energy
Phosphorus – helps build bones and
teeth
Zinc – helps maintain a healthy
immune system
Niacin – supports energy
production and metabolism
Riboflavin – helps convert food
into fuel
Selenium – helps protect cells
from damage
One 3-ounce cooked serving of beef provides
approximately 50% of your Daily Value (25 grams) of this important
nutrient—making it an excellent source! Protein helps maintain a healthy
weight, as well as preserve and build muscle.
New research suggests it’s not only important to just get enough protein in at dinner or lunch but to spread it throughout your day for optimal health. Aim for 25-30 grams of protein at each meal.
EASY, DELICIOUS, BEEF AND VEGETABLE, LASAGNA
Does this lasagna recipe freeze well?
There is no reason to feel like you need to finish this meal in one night. This is a prime dish to freeze and heat back up on a future date. You may have already tried some of my other freezer friendly recipes like my Beef & Barley Soup, Freezer Oatmeal Cups, or Zucchini Carrot Fritters. Add this beef and vegetable lasagna to the list for nights when you have less time to prepare a meal for dinner.
How long can I freeze lasagna?
For the best results, freeze lasagna after it
has been assembled but before it’s been baked. Freezing food this way will help
maintain the lasagna’s cheese and noodle texture and prevent it from getting
soggy.
If you’ve already baked your lasagna, don’t
worry; it can still be frozen! The texture may be a little different than freshly
baked.
If properly stored, it will maintain best quality for about 2 to 3 months but will remain safe beyond that time.
How do I reheat lasagna?
When you’re ready to use your frozen lasagna,
transfer it to the refrigerator and let it defrost overnight. Then, take it out
of the fridge and let it sit at room temperature for about 30 minutes while
your oven preheats to 375°.
Remove the lasagna’s freezer wrappings, cover the top with new foil and bake for 60-70 minutes, or until heated through (a thermometer inserted in the center should read 165°). Remove the foil and bake the lasagna for 10 more minutes or until browned on the top. Pull the lasagna from the oven and let it sit for another 10 minutes before slicing into it.
Why are Family Meals Important?
It is easy to get caught up in after school
activities or with work assignments which can take away from sit down meals
with the family. But family meals are important for a variety of reasons such
as:
Regular family meals are linked to higher grades and self-esteem
Adults and children who eat at home more regularly are less likely to suffer from obesity
Family meals nourish the spirit, brain, and health of all family members.
Make it a Family Affair:
Another aspect that I love about this meal is
that it is easy enough so that the whole family can participate in creating
this dish.
This recipe is coming right in time to celebrate National Family Meals Month. This initiative is a nationwide event which encourages families to have at least one meal at home per week.
What if I have a picky eater?
No one wants to be a short order cook preparing separate meals for each family member. When introducing new foods or new recipes, start with what I like to call lateral shifts. Meaning, start with something they are familiar with – for instance traditional beef lasagna. Adding vegetables won’t drastically change the original, it just adds a new flair. Understanding your family’s preferences is also key. Knowing that if they see the vegetables is going to cause resistance, chop them finer or even puree them into the sauce. The more exposure to new lateral shift type meals, can be helpful.
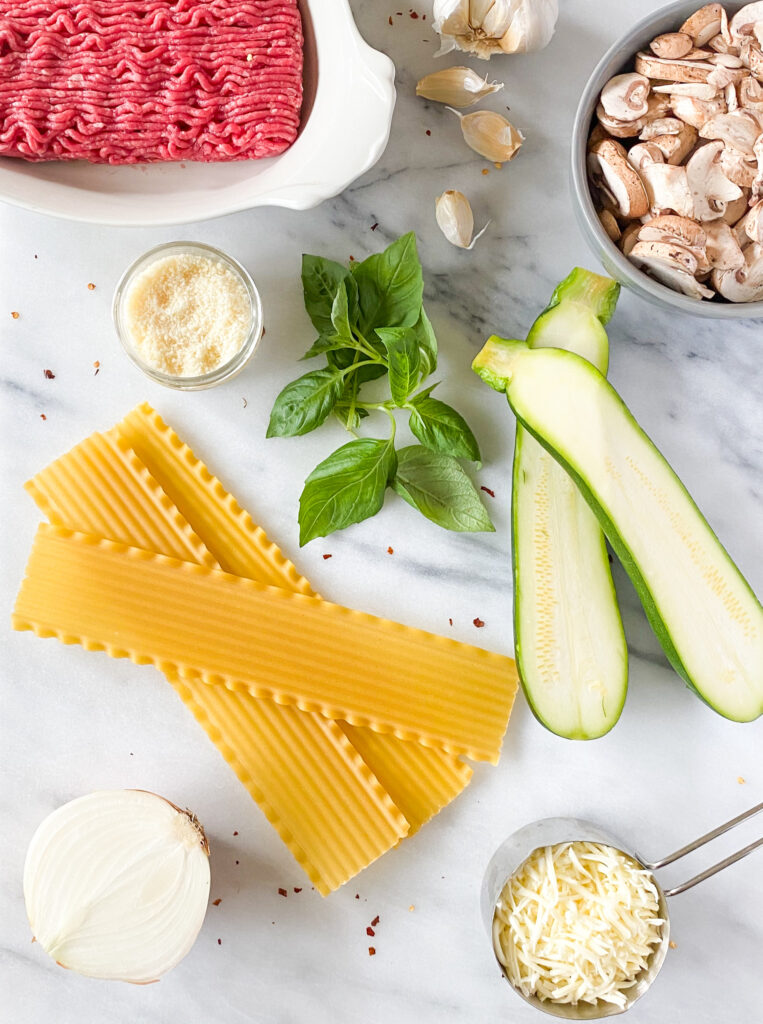
What You will Need to Create this Veggie-Packed Beef Lasagna
For the filling: 93% lean ground beef Olive oil Yellow onion Mushrooms Salt Zucchini Baby spinach
For the tomato sauce: Olive oil Garlic Crushed tomatoes Fresh basil Salt Crushed red pepper flakes
Don’t feel like making your own sauce? No worries! Substitute with 2 cups of your favorite prepared marinara sauce.
Remaining ingredients: Ricotta cheese Parmesan cheese Mozzarella cheese Egg Italian seasoning Salt Black pepper No-boil lasagna noodles (see notes in the recipe)
How to make this Veggie-Packed Beef Lasagna
Preheat your oven and coat a deep baking dish
with cooking spray.
Cook the ground beef, then remove from the
pan. Using the same pan (because who wants to wash more dishes), cook the
vegetables. Add beef back in and set aside.
Make the sauce by gently sautéing the garlic
(we don’t want it to burn, then add the remaining sauce ingredients to simmer
and allow flavors to develop.
Mix the ricotta cheese and some of the
parmesan cheese and mozzarella cheese. Add a beaten egg (this will help hold
the cheese mixture together and not seep out of the lasagna). Season with
Italian herbs, salt, and pepper.
To assemble, start with adding a layer of
tomato sauce on the bottom of the pan. Then layer in the order, noodles,
ricotta mixture, beef & veggie mixture, sauce, and sprinkle cheese. Top
with more lasagna noodles and repeat.
Wrap in parchment paper and bake!
Recipe Shortcuts:
To cut down on prep time, buy
pre-sliced mushrooms, & frozen diced onions, zucchini, and spinach. (Just
be mindful when swapping out with frozen to drain excess liquid when cooking)
Skip making your own sauce and use
your favorite jarred variety.
Freeze in individual servings for
pre-portioned leftovers instead of defrosting the whole dish.
Lasagna is such an underrated dinner. Maybe, it is because when most people think of lasagna, the thought of having to assemble this meal detours many. Adding a little twist on a classic, try this Veggie-Packed Beef Lasagna.
Ingredients
Scale
For the filling: 1-pound 93% lean ground beef 1 tablespoonolive oil 1 small yellow onion, chopped 1 (8 ounce) container sliced mushrooms ¼ teaspoon salt 1 cup zucchini, chopped into a small dice 1 cup baby spinach, roughly chopped
Tomato sauce*: 1 tablespoonolive oil 2 cloves garlic, minced 1 (28 ounce) crushed tomatoes ¼ cup fresh basil, chiffonade (ribbon like slices) + additional for garnish ½ teaspoon salt ¼ teaspoon crushed red pepper flakes, more or less as desired
Remaining ingredients: 2 cups (16 ounces) ricotta cheese 3/4 cup parmesan cheese, divided 2 cups freshly grated mozzarella cheese, divided 1 egg, beaten 1 tablespoon Italian seasoning ¼ teaspoon salt, to taste Freshly ground black pepper, to taste 9 no-boil lasagna noodles*
Instructions
Preheat the oven to 425 degrees Fahrenheit. Coat a 9×13-inch deep baking dish with cooking spray.
In a large skillet over medium-high heat, add ground beef breaking apart into small crumbles. Cook until meat has browned, no longer pink, about 6-8 minutes. Remove beef from the pan, drain any excess fat from the beef and set beef aside.
Return skillet to medium heat. Add olive oil. Sauté onions and mushrooms until tender. During the cooking process add salt to help draw out excess moisture. Once excess moisture has evaporated, add the zucchini, and continue to cook until tender. Add spinach and continue to cook until wilted and excess moisture has evaporated. Add beef back to the veggie mixture, stir to combine. Remove from heat and set aside.
In a medium pot add olive oil over low heat. Sauté garlic for about 1 minute or until fragrant, being careful not to burn. Pour in the crushed tomatoes, basil, salt, and crushed red pepper flakes. Bring to a simmer to allow the flavors to come together.
In a medium bowl, add the ricotta, ¼ cup parmesan, 3/4 cup mozzarella, egg, Italian seasoning, salt, and pepper. Mix well until combined.
To assemble: Spread 1 cup of tomato sauce evenly over the bottom of a baking dish. Layer 3 lasagna noodles on top (snap off their ends to fit, and/or overlap their edges as necessary). Spread half of the ricotta cheese mixture evenly over the noodles. Top with half the beef & veggie mixture. Then spread 1 cup tomato sauce on top and sprinkle 1/2 cup of shredded mozzarella and 2 tablespoons of parmesan cheese. Top with 3 more lasagna noodles and repeat the previous order. Then top with remaining 3 lasagna noodles, remaining sauce and sprinkle remaining mozzarella and parmesan cheese on top.
Wrap a sheet of parchment paper or foil around the top of the lasagna (not letting it touch the cheese). Bake, covered, for 20 minutes, then remove the cover, rotate the pan by 180° and continue cooking for about 10 to 12 more minutes, until the cheese is melted and slightly bubbling on the sides.
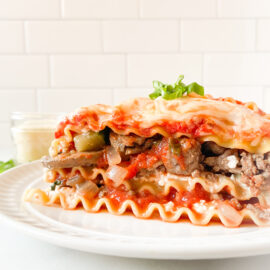
Remove from the oven and let the lasagna cool for 15 to 20 minutes, so it has time to set and cool down to a reasonable temperature. Sprinkle additional basil over the top, then slice and serve. Top with additional sauce or cheese, as desired.
Notes
Looking to save a step? Substitute the tomato sauce with 2 cups of prepared marinara sauce.
At the grocery store I see lasagna noodles as “no-boil” or “oven-ready” lasagna sheets. Read package directions as some brands need additional liquid.
Can’t find no boil or oven-ready lasagna noodles? Buy regular lasagna noodles, cook according to package directions, and use the same way. Cook time may decrease.
Keywords: lasagna, beef lasagna, family meal, dinner recipe, easy dinner
References: Paddon-Jones D, Rasmussen BB. Dietary protein recommendations and the prevention of sarcopenia. Curr Opin Clin Nutr Metab Care 2009;12:86-90
Mamerow MM, et al. Dietary protein distribution positively influences 24-h muscle protein synthesis in healthy adults. J Nutr 2014;144:876-80
This post may contain affiliate links. Read my privacy policy.
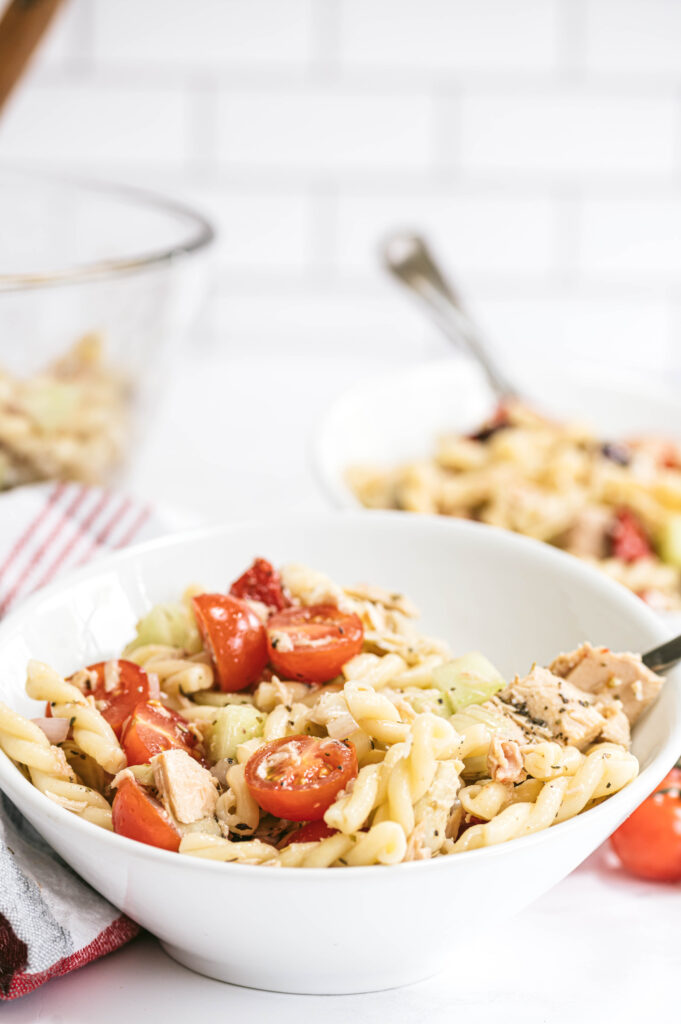
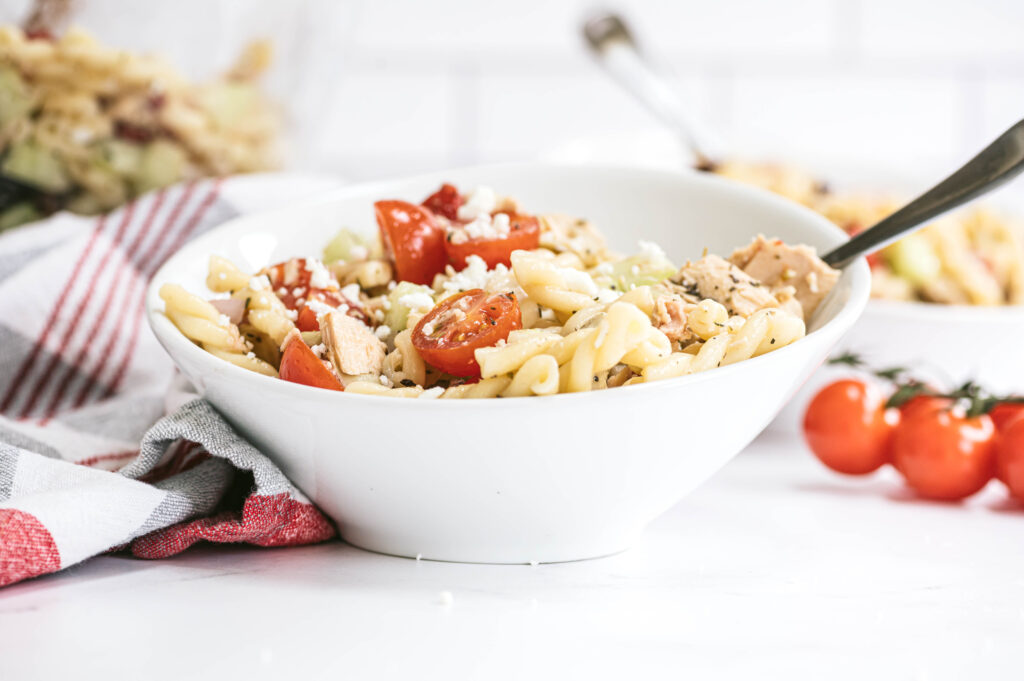
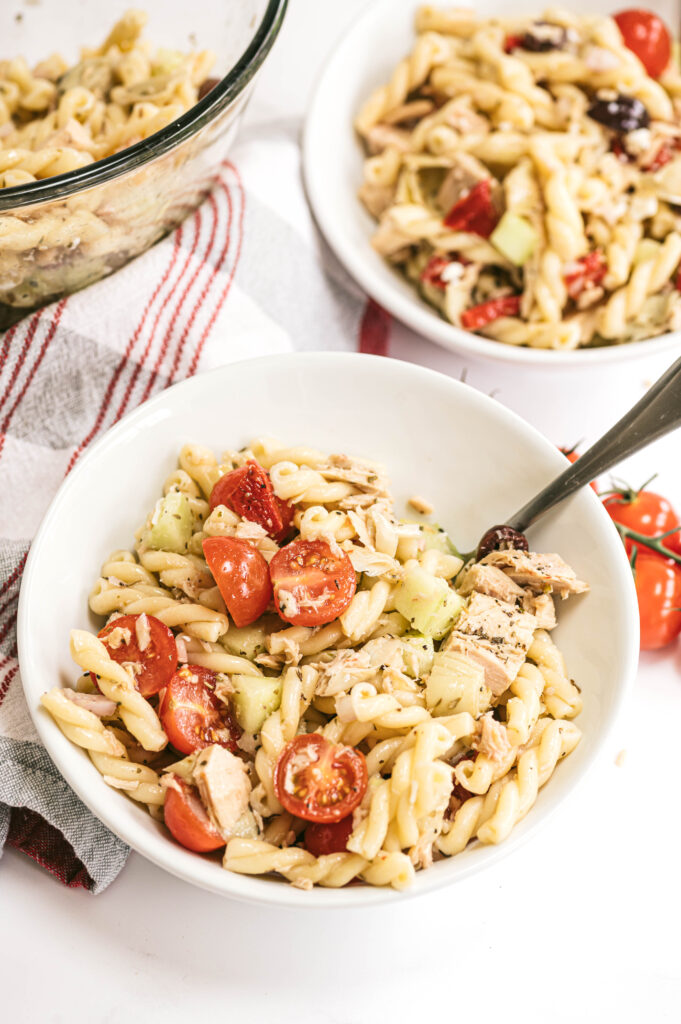
Mediterranean Tuna Pasta Salad is a great party dish and is even better when it comes to meal prepping lunches!
When it comes to using tuna in recipes, sometimes the easy ones can be boring, especially when it comes to making lunches. The Mediterranean flavors and pasta add a whole new dimension to tuna salad!
Not only is tuna an excellent source of vitamin D and omega 3s but it’s also a lean meat that is packed full of protein. Adding in more protein keeps you fuller longer, leads to less snacking, and supports overall health. Because it is a lean meat, that means it’s lower in calories but has a high nutritional value.
In addition to all of these other nutrition benefits, a serving of tuna is a good source of selenium, iodine, B6, iron, and potassium.
Did you know that eating seafood twice a week could help to improve your omega-3 levels and reduce your risk for cardiovascular disease? Just a simple shift in your eating pattern can put you on a positive path to improve your heart health.
Another reason I love this recipe is that canned tuna is affordable and budget-friendly so you don’t have to break the bank to eat healthier in this case! Not to mention most of the ingredients you need are pantry staples, which means you probably already have them at home, win, win!
Wait! Isn’t Tuna Full of Mercury?
Tuna fish does have a higher mercury content than others, but when you are using canned tuna, it’s less because they use smaller fish. Also, light tuna tends to contain less mercury than white tuna.
What’s the Difference Between White Tuna and Light Tuna?
White tuna is also known as albacore, whereas the term light tuna includes a variety of different species.
Light tuna typically has more flavor, is flakier, and is pinker in color. Albacore is usually consumed in bigger chunks or steaks, compared to light tuna which is much smaller pieces and is normally what is found in canned tuna.
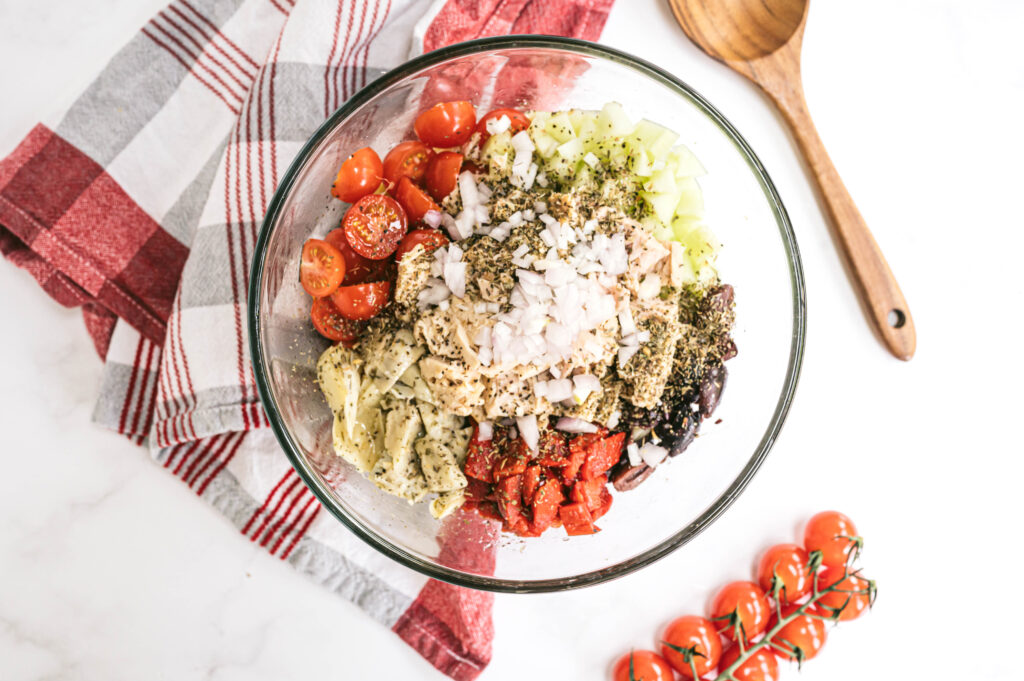
Ingredients Needed For Mediterranean Tuna Pasta Salad
Pasta – I like using penne, fusilli, or bow ties
Canned tuna – try to find the kind that is packed in olive oil
Cucumber
Cherry tomatoes
Kalamata olives
Roasted red peppers
Marinated artichokes
Shallot
Feta cheese – you could also use another white cheese
Red wine vinegar
Oregano – Italian seasoning works well too!
Why You Shouldn’t Drain the Canned Tuna
In most canned tuna recipes, they call for the tuna to be drained first. In this case, you DO NOT want to drain the tuna! Not only is the olive oil used for the dressing, but it also mixes with some of the tuna’s natural fat, so some of its omega-3 fatty acids (along with the nutrition) also go down the sink when you drain oil-packed tuna.
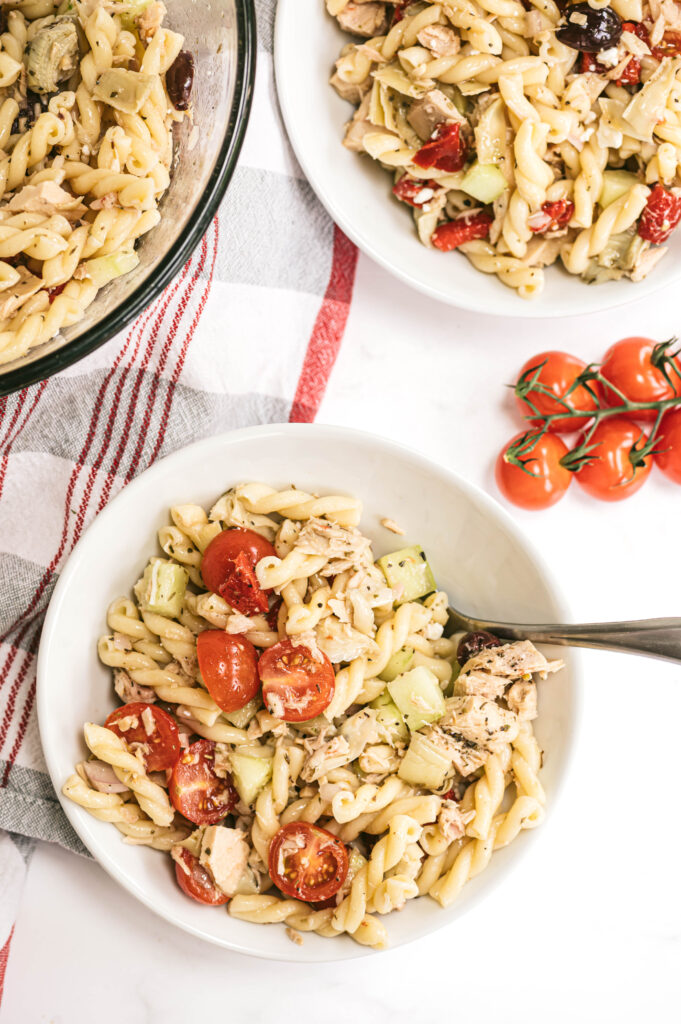
How to Make Tuna Salad with Pasta
Before we make the salad, start by cooking the pasta according to the instructions on the package. When it’s al dente, drain it and set aside. Be sure it has cooled completely before adding it to the other ingredients.
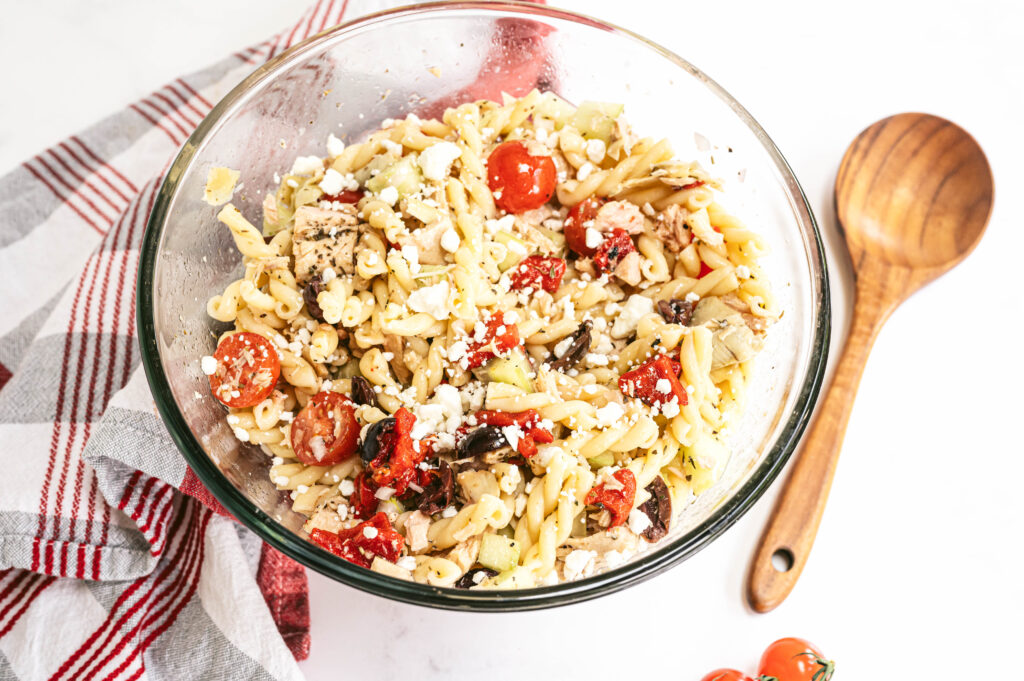
In a large bowl combine the tuna, diced cucumbers and tomatoes, pitted olives, shallots, roasted red peppers, artichokes, cheese, red wine vinegar, cooled pasta, and oregano.
Stir to combine, making sure the tuna is broken up and all of the ingredients are coated well.
Add some salt and pepper to taste, then you are ready to serve!
What Kind of Pasta is the Best for Tuna Salad
As I mentioned before I like to use penne, fusilli, or bow ties. You can also use brands like Banza for added protein and as a gluten free option. If you prefer whole wheat, that’s fine too!
How To Store
Tuna pasta salad is the best when it is eaten within the first 2 days of cooking. However, as long as it is refrigerated in an airtight container it will last up to 5 days.
Mediterranean Tuna Pasta Salad is a great party dish and is even better when it comes to meal prepping lunches!
Ingredients
Scale
1/2 pound pasta (like penne, fusilli, bow ties) 2 (4.5 oz) cans tuna, packed in olive oil 1 cup English cucumber, peeled and diced 1 cup cherry tomatoes, halved 1/2 cup kalamata olives, pitted, halved 1/2 cup roasted red peppers, diced 1/2 cup marinated artichokes, quartered 1 tablespoon shallot, finely minced 1/4 cup feta cheese, crumbled 2 tablespoons red wine vinegar 2 teaspoons dried oregano (or Italian seasoning) salt and pepper, to taste
Instructions
Cook pasta according to package directions. Let cool.
In a large bowl, combine the pasta, tuna, cucumber, tomatoes, olives, roasted red peppers, artichokes, shallot, feta cheese, red wine vinegar, and oregano. Toss to combine making sure the tuna is broken up and all ingredients are distributed throughout the mixture.
Season with salt and pepper, to taste.
Notes
Can use alternative pasta choices like a bean-based pasta, whole grain pasta, or any pasta of choice.
Keywords: pasta salad, pasta, tuna, tuna salad, mediterranean
This post may contain affiliate links. Read my privacy policy.
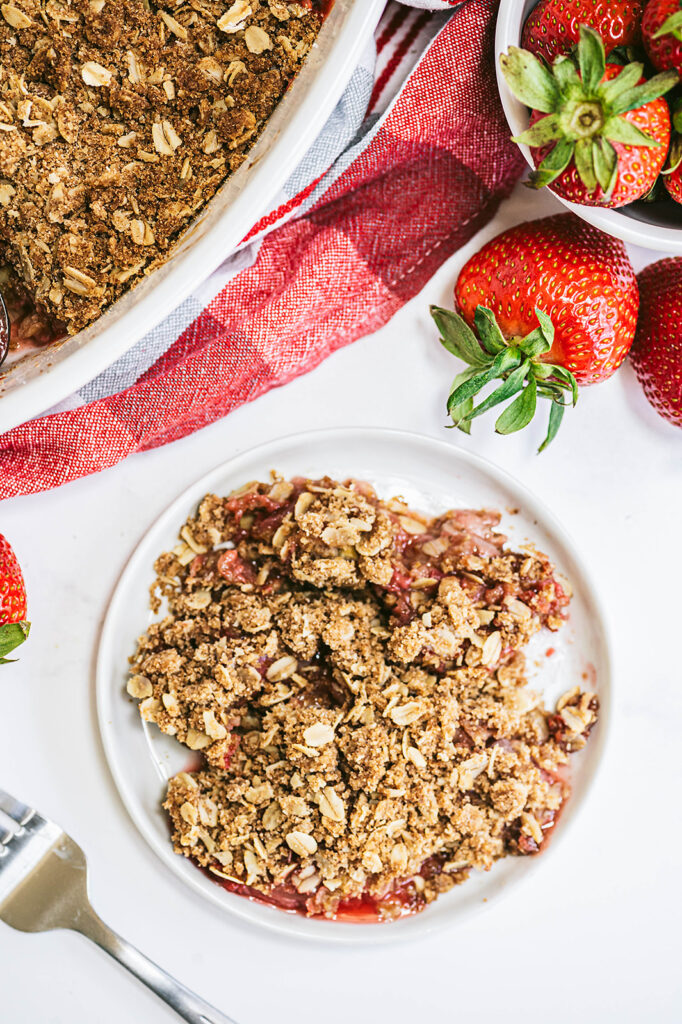
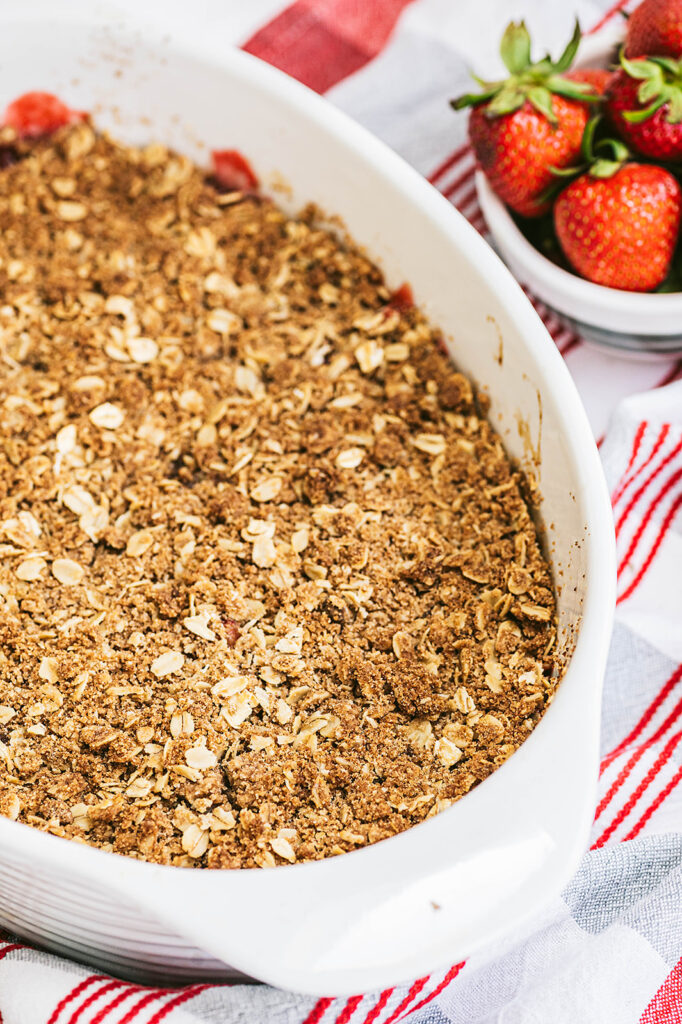
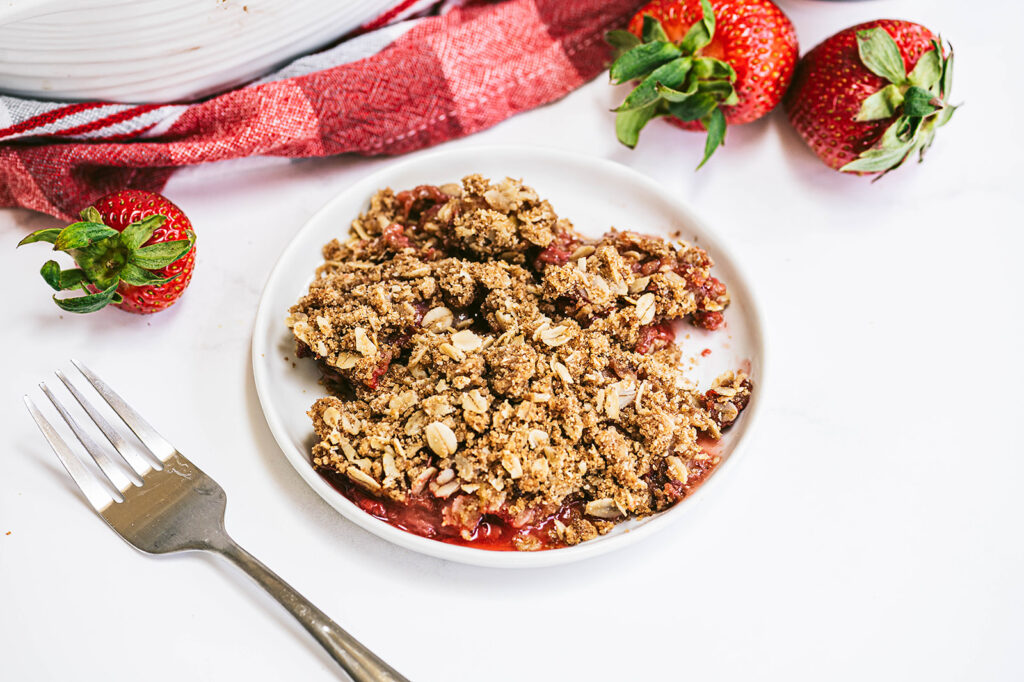
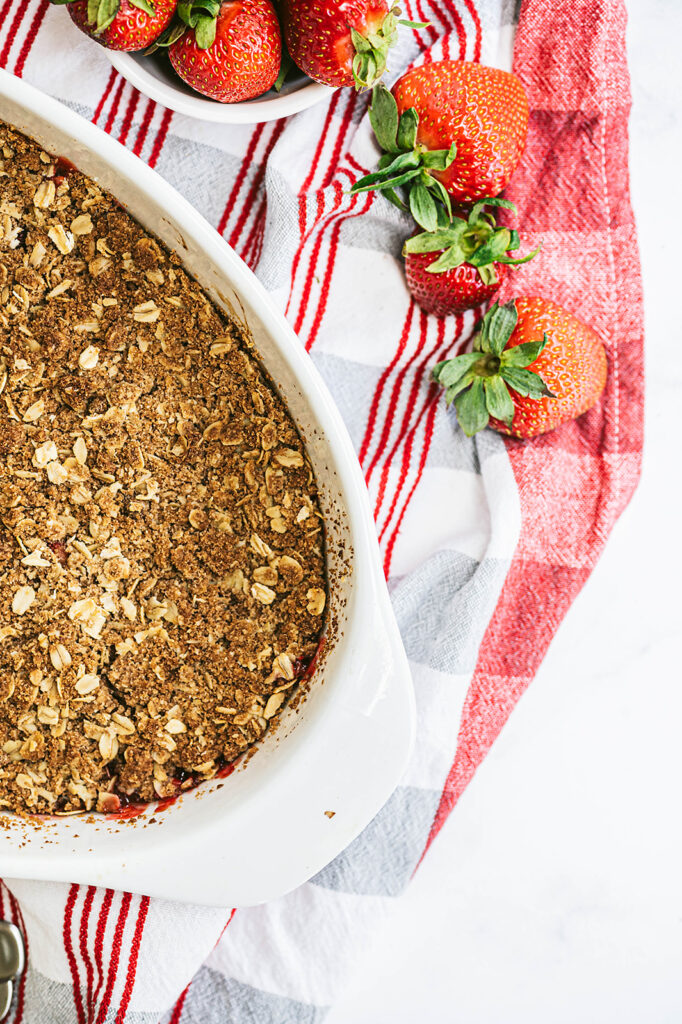
This Strawberry Rhubarb Crisp is an easy fruit dessert that can be made year-round and what makes it even better is the oat streusel topping!
Normally we see fruit desserts throughout the spring and summer seasons, but Strawberry Rhubarb crisp can truly be made any time of the year!
Both of these fruits are filled with antioxidants and packed full of vitamins and nutrients that have anti-inflammatory properties and have been shown to decrease risks of certain diseases.
Did you know that frozen fruit is just as healthy as fresh? Fruits are picked and frozen at peak ripeness, and studies show that they retain a comparable vitamin, mineral, and phytochemical content to their fresh counterparts.
If you love recipes that have a crisp topping, don’t leave before you check out my Almond Pear Crisp for Two!
Crisp, Cobbler, Crumble: What’s the Difference?
Sometimes these terms are used interchangeably but there is actually a difference! All of these types of recipes usually contain fruit, but it’s the topping that makes the difference!
A cobbler typically has a doughy, biscuit-like topping. When you think of cobblers you are probably thinking about your grandma’s traditional recipe that has been passed down for ages!
Crumbles are more like a streusel topping, but they don’t contain any oats.
If it’s a true crisp, it will definitely have oats in the topping!
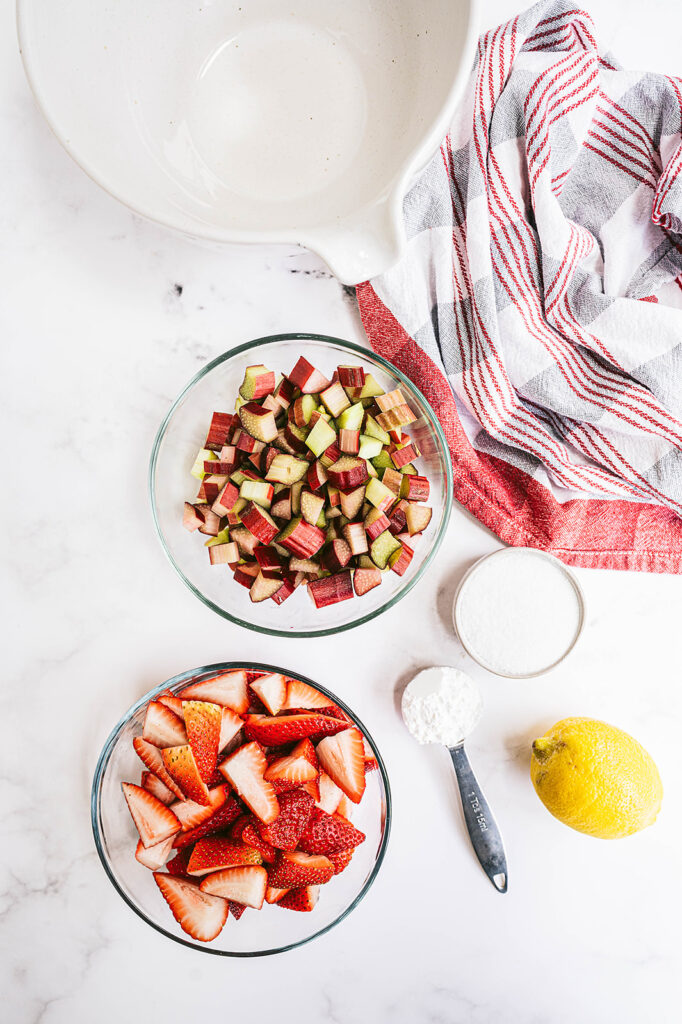
What You Need to Make Strawberry Rhubarb Crisp with Streusel Topping
For the filling:
fresh strawberries
rhubarb
granulated sugar – you can also swap this for coconut or maple sugar
cornstarch
lemon juice
salt
For the topping:
light brown sugar
old-fashioned rolled oats – Bob’s Red Mill is a great option!
whole-wheat pastry flour
unsalted butter – be sure to set it out in time so it can soften up
How to Make a Crisp with Strawberries and Rhubarb
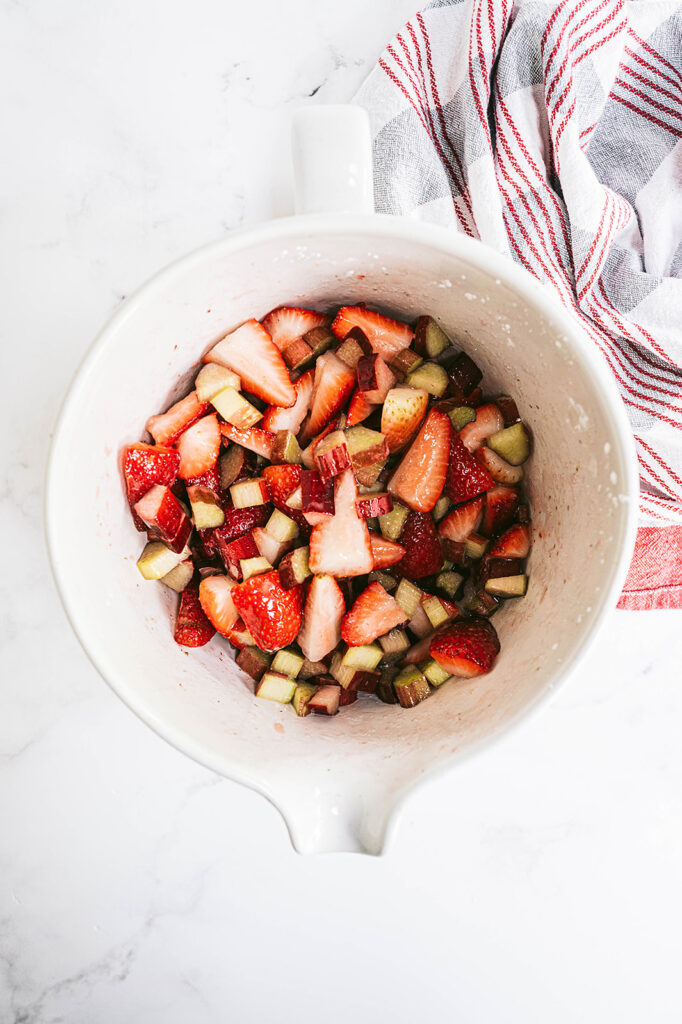
Go ahead and preheat your oven to 350 degrees and spray your baking dish with non-stick cooking spray.
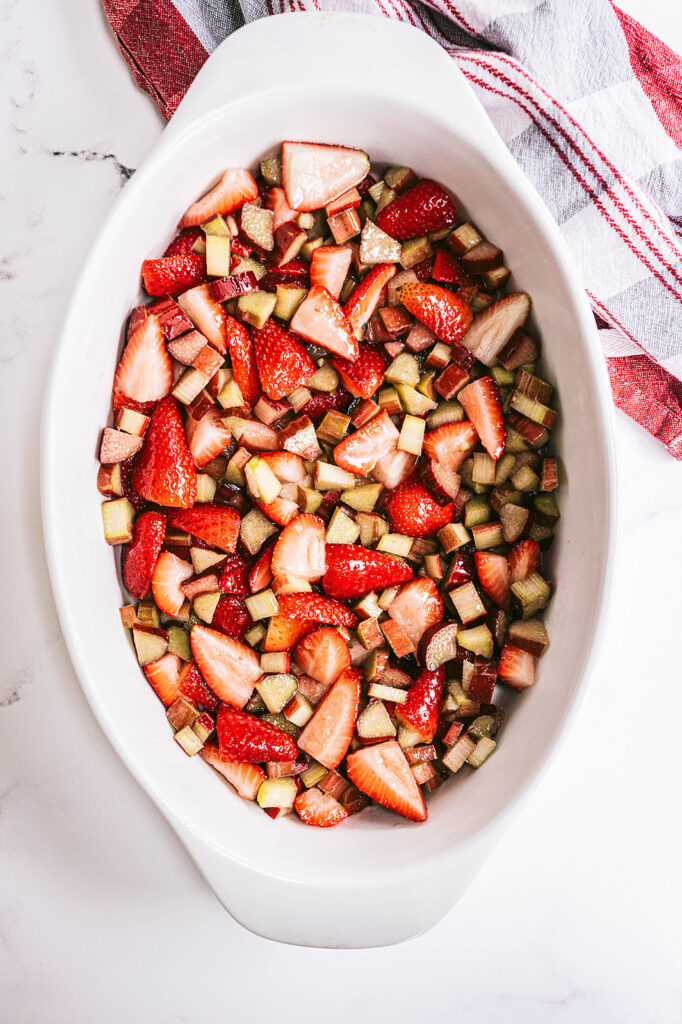
In a large mixing bowl, combine granulated sugar, lemon juice, cornstarch, strawberries, rhubarb, and salt. Stir together then transfer the mixture to your baking dish.
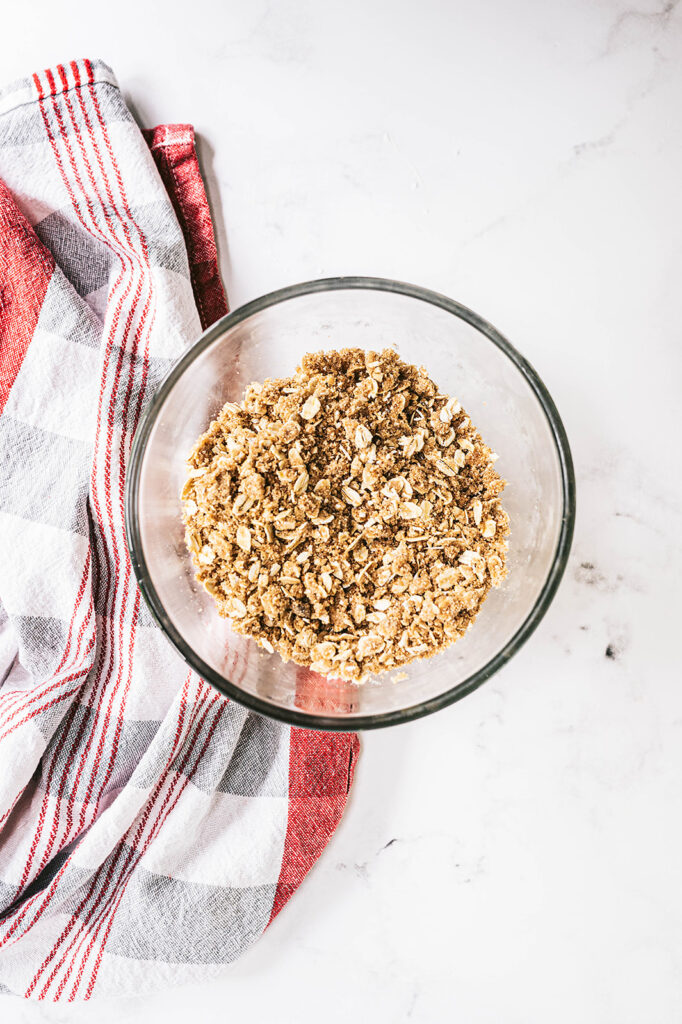
Now let’s make the streusel topping!
In a medium bowl, add the oats, flour, brown sugar, and 4 tablespoons of butter. Stir it all together until it’s combined well. Add additional butter ( one to two tablespoons) if it seems too dry.
Crumble the topping over the mixture into a baking dish.
Bake until the top of the crisp is golden, which will take about 35 to 50 minutes.
Once it has finished baking, let it cool on a wire rack before serving.
You can serve it warm or at room temperature!
What If I Don’t Have Whole Wheat Pastry Flour?
A nice substitute when you don’t have whole wheat pastry flour is a 1:1 ratio of all purpose flour and whole wheat flour.
Crisp Topping and Serving Suggestions
This strawberry rhubarb crisp is perfect just the way it is, but here are some great ideas for serving and other variations
Serve with a scoop of your favorite vanilla ice cream
Sprinkle some nuts into the streusel topping for a nice crunch
Can This Recipe Be Made Vegan Friendly?
Sure! To make this crisp vegan, simply use a plant based butter!
Need a Gluten Free Option?
If you want to make the topping using gluten free ingredients, make sure the oats are gluten free and swap the pastry flour or almond flour instead!
Can You Use Frozen Strawberries and Rhubarb?
If you want to make this fruit crisp and you don’t have a chance to grab fresh strawberries and rhubarb, or maybe they are out of season you can use frozen instead.
Be sure that the fruit is thawed completely and drained so that the crisp does not come out soggy from the excess liquid.
This Strawberry Rhubarb Crisp is an easy fruit dessert that can be made year round and what makes it even better is the oat streusel topping!
Ingredients
For the filling: 3 cups quartered fresh strawberries 3 cups sliced fresh rhubarb or thawed frozen rhubarb* ¼ cup granulated sugar 1 tablespoon cornstarch 1 tablespoon lemon juice ¼ teaspoon salt
For the topping: ½ cup lightly packed light brown sugar ½ cup old-fashioned rolled oats ⅓ cup whole-wheat pastry flour 4–6 tablespoons unsalted butter, softened
Instructions
Preheat the oven to 350 degrees F. Coat an 11-by-7-inch baking dish with cooking spray.
In a large bowl, combine strawberries, rhubarb, granulated sugar, cornstarch, lemon juice, and salt, transfer to the prepared baking dish.
To prepare topping: Combine brown sugar, oats, flour, and butter (starting with 4 tablespoons of butter) in a medium bowl; stir until thoroughly combined. If mixture seems to dry, add additional 1-2 tablespoons of butter. Crumble the topping evenly over the strawberry-rhubarb mixture.
Bake the crisp until the topping is golden, 35 to 40 minutes. Cool on a wire rack for 5 minutes; serve warm or at room temperature.
Notes
If using frozen rhubarb or strawberries, thaw then be sure to drain any excess liquid.
This post may contain affiliate links. Read my privacy policy.
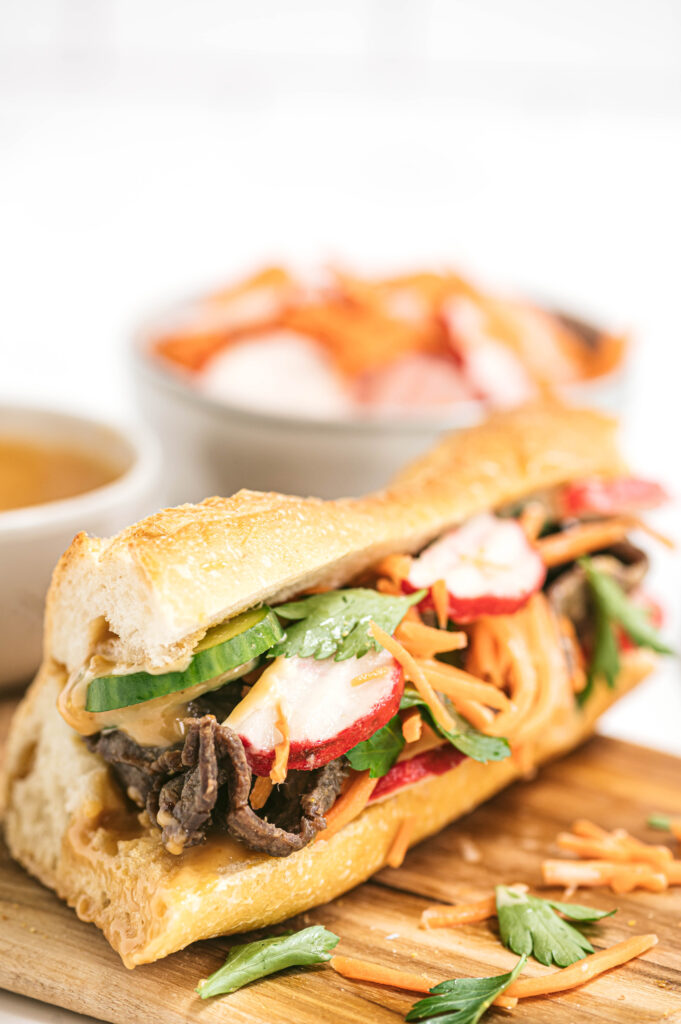
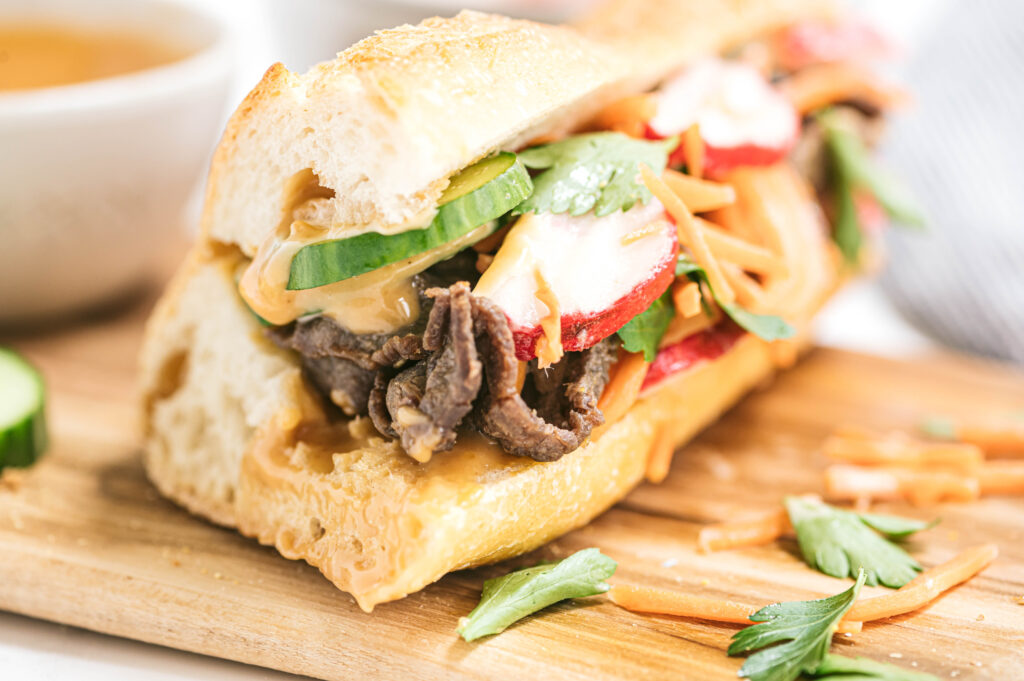
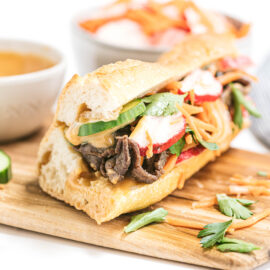
This Beef Banh Mi offers so many interesting flavors and textures in one
bite. This recipe for a banh mi sandwich starts with a crusty roll that’s piled
high with tender grilled beef, pickled vegetables, and fresh herbs.
This post is sponsored by the Northeast Beef Promotion Initiative a subcontractor to the Beef Checkoff. Thank you for supporting brands that make this blog possible!
Banh Mi is a Vietnamese
sandwich that has depths of flavor. Banh Mi has its origins in French
colonialism in Vietnam, with bread being brought into the country by the
French. The Banh Mi became popular when it was sold on street corners as an
inexpensive fast food option for workers who needed to eat on-the-go. It’s
popularity has resurged recently with new versions of Banh Mi, using other
proteins such as beef, shrimp, or tofu instead of pork, providing even more
flavor options!
In culinary school, one of
my practicals for my World Cuisine class I was assigned to Vietnam and had to
make a dish highlighting the flavors of that cuisine. I went with a more
traditional Banh Mi, using pork, daikon radish, shrimp paste, and making the
bread from scratch!
I added my own twist to the classic, swapping out pork for beef while still maintaining the traditional Vietnamese flavors.
History of Vietnamese flavor profiles
Vietnamese cooking is all about balance. The five flavors of Vietnamese cuisine are sour, bitter, spicy, salty
and sweet. Interestingly enough, recipes vary from region to region and city to
city but share a common theme of contrasting flavors and textures.
The food of the north is heavily influenced by China. As you move south, there is more flavor-blending with Thailand and Cambodia. The tropical climate down south sustains rice paddies, coconut groves, jackfruit trees, and herb gardens. Southern Vietnamese food tends to be sweeter than northern Vietnamese food: sweeter broths for pho; use of palm sugar in savory dishes; and popular taffy-like coconut candies made with coconut cream are made from a mix with milk and sugar.
Staple Ingredients of Vietnamese Cuisine
You may have some of
these staple Vietnamese ingredients already in your pantry. Here are a few
ingredients you will most likely find in any Vietnamese recipe.
Fish Sauce: Fish sauce is a condiment made by fermenting fish with salt. It has an intense, salty flavor which when combined with the sweetness of Vietnamese dishes help balance out flavors
Shrimp Paste: This potent paste is made from fermented shrimp or krill that has been mashed together with salt then dried to produce the salty, pungent paste.
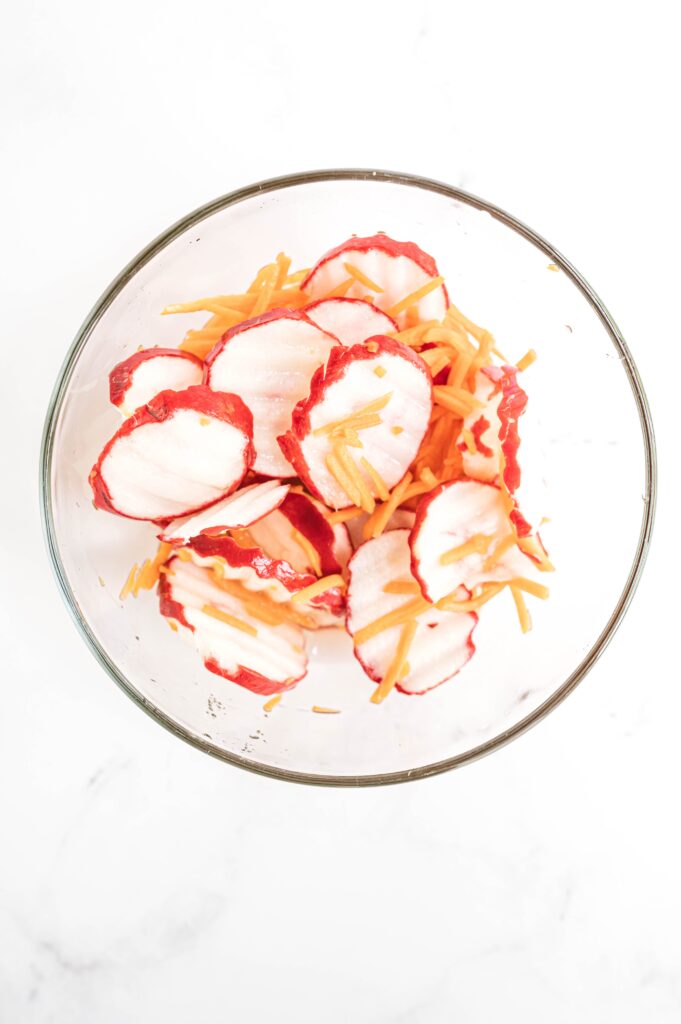
Pickled Vegetables: Pickled vegetables are a staple in Vietnamese cuisine. Pickling is an ancient preservation technique that doesn’t require refrigeration and has been used for centuries across the world to preserve food.
Oyster Sauce: Oyster sauce is a condiment made from oysters that are cooked and mashed.
Sambal Oelek (chili paste): A chili paste usually consisting of chopped red chilies, garlic, shallots and vinegar. It’s used as a spicy flavoring for dishes such as satay or fried rice but it also makes an appearance in many Vietnamese recipes including Banh Mi!
Hoisin Sauce: Hoisin sauce is an Asian condiment made from soybeans, garlic and spices. The sauce provides sweet and salty flavors as well as some heat but not too much!
Cilantro: Cilantro is a herb that has a citrusy, peppery flavor. It’s often used in Vietnamese cuisine because it can be added to dishes without overpowering the other flavors.
Lemongrass: The herb is most commonly used to braise meats, often with fish sauce, sugar, and chilies. It adds lemony, bright, and citrusy notes.
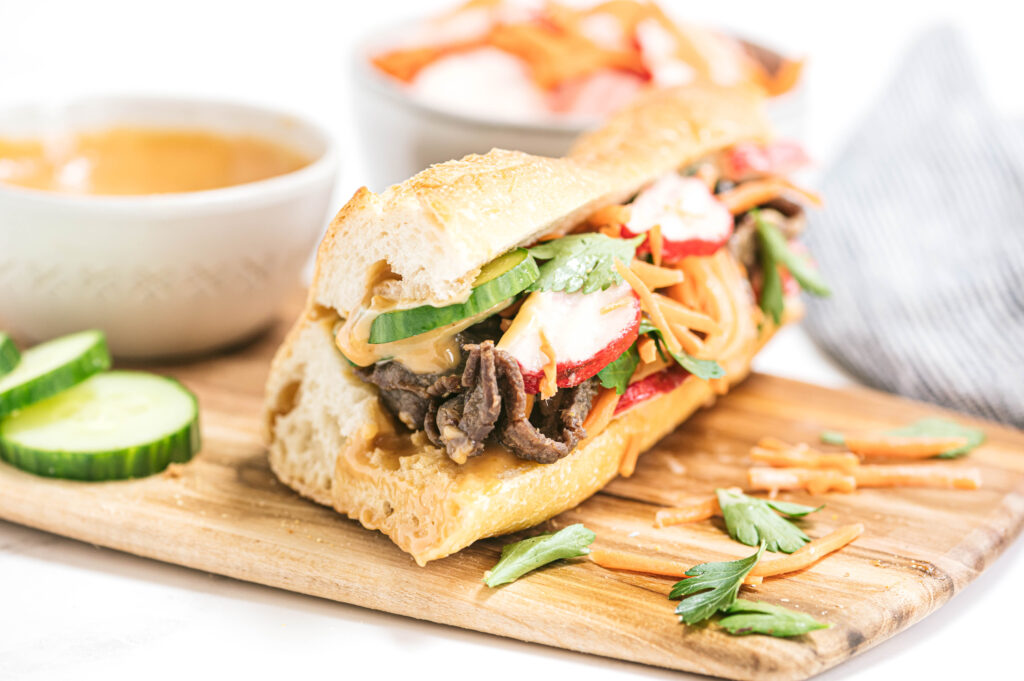
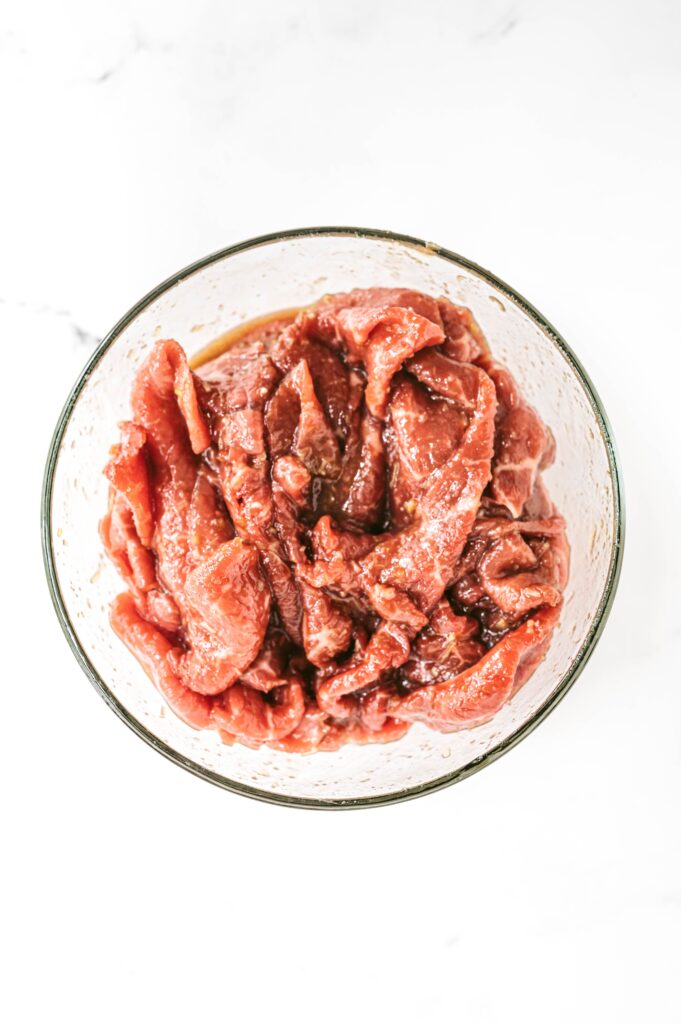
Ways to tenderize beef
Beef is a very hearty and rich meat with a natural taste of umami. It’s
also popularly used in Vietnamese recipes. When using leaner cuts of beef, they
contain less fat, so marinating the meat to maximize flavor and help tenderize
the meat is key.
A marinade works by breaking down
the muscle fibers and helping to soften connective tissues. Some ingredients
that are good for marinating beef include: soy sauce, ginger, garlic, vinegar
or lime juice. This recipe uses Vietnamese flavor profile utilizing:
soy sauce
fish sauce
brown sugar
lemongrass
garlic
sesame oil
Tips for marinades
You will need approximately 1/4 to
1/2 cup of marinade for every pound of beef
Always marinate in the
refrigerator, not at room temperature
Before cooking, remove beef from
marinade and pat dry with a paper towel to promote even browning and prevent
steaming
Cooking Tips
For this Banh Mi
recipe, follow these few tips listed within the recipe below.
To help easily slice
the sirloin, place in the freezer for 10-15 minutes. Use a sharp knife and cut
across the grain. Cutting across the grain means to slice perpendicular to the
fibers, so the fibers in cut pieces of meat become much shorter, making it
easier to chew them.
Use the white part
of the lemon grass. Peel away the hard chewy parts, and mince the softer middle
white part of the stem.
Utilize a peeler to
create carrot ribbons or use a mandolin to create julienne slices.
While this recipe may look like a lot of mini recipes within one recipe, it’s worth it. You can thank me later as you are chowing down 😉
Adding a twist to the classic Beef Banh Mi by swapping out pork for beef while still maintaining the traditional Vietnamese flavors.
Ingredients
Scale
For the pickled vegetables: 3/4 cup radish, thinly sliced 3/4 cup carrot, peeled and julienned 1/4 cup rice vinegar 1 tablespoon granulated sugar 1 tablespoon water 1/4 teaspoon salt
For the beef: 2 tablespoons low-sodium soy sauce 2 tablespoons fish sauce 2 tablespoons dark brown sugar 2 tablespoons lemongrass, white parts only, finely minced 2 cloves garlic, finely minced 2 teaspoons sesame oil 1/4 teaspoon salt 1 tablespoon canola oil 1 lb. sirloin, thinly sliced
For the sauce: 1/2 cup mayonnaise 2 tablespoons hoisin sauce 1 teaspoon garlic powder
For the sandwiches: 1 French baguette, cut into 4 pieces, then split lengthwise, toasted if desired 1/4 cup cilantro leaves 1/2 cup English cucumber, thinly sliced
Instructions
Combine carrots and radishes in a bowl; set aside. In a small bowl, whisk together the rice vinegar, sugar, and salt, until sugar dissolves. Pour over vegetables. Cover and refrigerate until ready to serve.
In a bowl, whisk together the soy sauce, fish sauce, brown sugar, lemongrass, garlic, sesame oil, and salt. Add the thinly sliced steak and coat with the marinade. Cover with plastic wrap and refrigerate for at least 30 minutes.
In a large skillet, heat canola oil over medium heat. Add the marinated beef. Cook without stirring for 4 minutes. Give it a stir and continue to cook for 1 minute.
In a small bowl, whisk together the mayonnaise, hoisin sauce, and garlic powder.
Spread mayo mixture on bottom half of the bread. Layer cucumbers, cilantro beef, then pickled veggies. Place on the top half and slice crosswise before serving.
This website uses cookies to improve your experience. We'll assume you're ok with this, but you can opt-out if you wish.AcceptRejectRead More
Privacy & Cookies Policy
Privacy Overview
This website uses cookies to improve your experience while you navigate through the website. Out of these, the cookies that are categorized as necessary are stored on your browser as they are essential for the working of basic functionalities of the website. We also use third-party cookies that help us analyze and understand how you use this website. These cookies will be stored in your browser only with your consent. You also have the option to opt-out of these cookies. But opting out of some of these cookies may affect your browsing experience.
Necessary cookies are absolutely essential for the website to function properly. This category only includes cookies that ensures basic functionalities and security features of the website. These cookies do not store any personal information.
Any cookies that may not be particularly necessary for the website to function and is used specifically to collect user personal data via analytics, ads, other embedded contents are termed as non-necessary cookies. It is mandatory to procure user consent prior to running these cookies on your website.