Cookie Dough Smoothie Bowl

When breakfast sounds and tastes like dessert, this Cookie Dough Smoothie Bowl it worth waking up for.
Cookie Dough Smoothie Bowl via RDelicious Kitchen @RD_Kitchen

Cookie dough for breakfast.

Yup, you heard that correctly. I love making cookie dough desserts with chickpeas. I had some leftover chickpeas in my refrigerator, but not enough to make one of my signature desserts, cookie dough bites.
Cookie Dough Smoothie Bowl via RDelicious Kitchen @RD_Kitchen
I never thought I would be adding pulses to breakfast, but this fun creation adds a fun flair to breakfast, plus packs in extra fiber and protein. Remember cookie crisps? I feel like this is the adult version. Make a larger batch and enjoy these mini cookie dough bites when craving a sweet treat.
Cookie Dough Smoothie Bowl via RDelicious Kitchen @RD_Kitchen

The smoothie.

With the extra addition of these little cookie dough bites, keeping the smoothie bowl simplistic is key. Just banana, almond butter, milk, and vanilla protein powder. The protein powder creates a fluffy texture to the smoothie bowl and adds satiety to feel full throughout the morning.

Cookie Dough Smoothie Bowl via RDelicious Kitchen @RD_Kitchen

Print
clock clock iconcutlery cutlery iconflag flag iconfolder folder iconinstagram instagram iconpinterest pinterest iconfacebook facebook iconprint print iconsquares squares iconheart heart iconheart solid heart solid icon
cookie dough smoothie with a gold spoon in a white bowl

Cookie Dough Smoothie Bowl

  • Author: Julie @ RDelicious Kitchen
  • Yield: 1

Ingredients

Scale
  • 1/4 cup chickpeas, skins removed
  • 1 teaspoon maple syrup
  • 2 teaspoons almond butter
  • 2 teaspoons mini chocolate chips
  • 1 small banana, frozen
  • 1 tablespoon almond butter
  • 1 scoop vanilla protein powder
  • 3/4 cup milk of choice

Instructions

  1. For the cookie dough bites: In a small bowl, combine chickpeas, maple syrup, and 1 teaspoon almond butter. Mash to combine. Fold in mini chocolate chips. Roll into small balls. Refrigerate for at least 15 minutes, or overnight.
  2. For the smoothie: In a blender, combine banana, 1 tablespoon almond butter, vanilla protein powder, and milk. Blend to combine.
  3. For a thinner consistency, add water. For a thicker consistency, add ice.
  4. Pour smoothie into a bowl and top with chickpea cookie dough bites.

Recipe Card powered byTasty Recipes


Did you make this recipe? Tag @rdeliciouskitchen on Instagram or send me a picture, I’d love to see!

RDelicious Kitchen @RD_Kitchen

 Pin this recipe for later!

Cookie Dough Smoothie Bowl via RDelicious Kitchen @RD_Kitchen

Strawberry Lemon Ricotta Filled Crepes

Traveling always inspires me to create my favorite travel eats at home. My recent France trip inspired me to make these Strawberry Lemon Ricotta Filled Crepes.

Strawberry Lemon Ricotta Filled Crepes - Even if you prefer sweet or savory crepes, this crepe recipe is the perfect base for any filling. Recipe via Chef Julie Harrington, RD @ChefJulie_RD #crepes #french #france #lemon #strawberry #ricotta #breakfast

If you have been following my Instagram stories, you know last week I was traveling all around France with my sisters. Read my travel recap here: Part One & Part Two.

I love traveling because I always become inspired to develop new recipes for my blog. The first thing that I recreated the day after I came home was crepes! We had plenty of delicious crepes throughout our travels through France. The little crepe stands that we ordered crepes from, had their crepe making down to a science.

Strawberry Lemon Ricotta Filled Crepes - Even if you prefer sweet or savory crepes, this crepe recipe is the perfect base for any filling. Recipe via Chef Julie Harrington, RD @ChefJulie_RD #crepes #french #france #lemon #strawberry #ricotta #breakfast

It was amazing to see how fast and seamless they worked. Their flipping skills are far more superior to mine. You guys know I even struggle with flipping pancakes, so I tend to make waffles instead!

Don’t worry, you don’t need any fancy crepe pans and tools to create delicious crepes in your own kitchen. You’ll just need a large nonstick pan, rubber spatula, and a little patience. It’s best to make the batter the night before and let it rest overnight in the refrigerator, allowing the flour to fully absorb into the liquid and give the gluten a chance to relax.

Strawberry Lemon Ricotta Filled Crepes - Even if you prefer sweet or savory crepes, this crepe recipe is the perfect base for any filling. Recipe via Chef Julie Harrington, RD @ChefJulie_RD #crepes #french #france #lemon #strawberry #ricotta #breakfast

While it was tempting stuff my crepe with Nutella that I enjoyed in France, I wanted to try something new and a little lighter. The strawberries I picked up from the farmer’s market were perfect, so they definitely had to make an appearance in these crepes.

Strawberry Lemon Ricotta Filled Crepes - Even if you prefer sweet or savory crepes, this crepe recipe is the perfect base for any filling. Recipe via Chef Julie Harrington, RD @ChefJulie_RD #crepes #french #france #lemon #strawberry #ricotta #breakfast

Crepes are a great blank canvas to be creative with fillings. Next time I will recreate a savory crepe that I enjoyed with Kelly when we were traveling at a conference.

Strawberry Lemon Ricotta Filled Crepes - Even if you prefer sweet or savory crepes, this crepe recipe is the perfect base for any filling. Recipe via Chef Julie Harrington, RD @ChefJulie_RD #crepes #french #france #lemon #strawberry #ricotta #breakfast

Do you prefer sweet or savory crepes? Comment below of your preferred favorite filling.

Print
clock clock iconcutlery cutlery iconflag flag iconfolder folder iconinstagram instagram iconpinterest pinterest iconfacebook facebook iconprint print iconsquares squares iconheart heart iconheart solid heart solid icon
crepes with strawberry lemon ricotta filling in a white plate with gold fork

Crepes with Strawberry Lemon Ricotta Filling

  • Author: Chef Julie Harrington, RD
  • Prep Time: 15
  • Cook Time: 15
  • Total Time: 30 minutes
  • Yield: 6
  • Category: Breakfast
  • Method: Stovetop
  • Cuisine: French

Description

Traveling inspires new recipes. With a recent trip to France, make these delicious crepes with a strawberry lemon ricotta filling in the comfort of your own home. 


Ingredients

Scale
  • 1/2 cup white whole wheat flour
  • 1/2 cup oat flour
  • 1 teaspoon sugar (optional)
  • 1/4 teaspoon salt
  • 3 eggs
  • 1/2 cup milk
  • 2 tablespoons canola oil
  • 1/2 cup seltzer
  • Filling:
  • 2 cups ricotta cheese
  • 1 lemon, zested
  • 2 tablespoons fresh lemon juice
  • 2 tablespoons seedless strawberry jam
  • 6 strawberries, finely chopped

Instructions

  1. In a blender combine white whole wheat flour, oat flour, sugar (if using), eggs, milk, and canola oil. Blend until smooth. Transfer to a bowl and cover with a lid. Refrigerate overnight.
  2. For the filling: Combine ricotta cheese, lemon zest, lemon juice, and strawberry jam. Stir to combine. Fold in chopped strawberries.
  3. Slowly whisk in the seltzer into the batter. Coat a large nonstick pan with generously cooking spray. Heat over medium-high heat. Ladle 1/3 cup of batter into the center of the pan. Immediately tilt and rotate pan to spread evenly over the whole pan.
  4. Cook until the bottom has slightly browned. Using a rubber spatula quickly flip the crepe and cook until the other side has browned. Remove from pan. Coat pan with cooking spray again and repeat with remaining batter.
  5. To assemble, place the crepe on a plate and spread filling over half of the crepe. Fold opposite side over the filling to create a half-moon shape, then fold again into a triangle.
  6. Top with additional ricotta cheese, strawberries, and lemon zest, if desired.
  7. See notes for storage of crepes.

Notes

Refrigerate crepes between sheets of wax paper and wrapped in plastic for up to 2 days.

Keywords: crepes, France, lemon, strawberry, ricotta, travel

Recipe Card powered byTasty Recipes
Chef Julie Harrington, RD - Culinary Nutrition Consultant of chefjulierd.com

 Pin this recipe for later!

Strawberry Lemon Ricotta Filled Crepes - Even if you prefer sweet or savory crepes, this crepe recipe is the perfect base for any filling. Recipe via Chef Julie Harrington, RD @ChefJulie_RD #crepes #french #france #lemon #strawberry #ricotta #breakfast

Green Goddess Smoothie Bowl

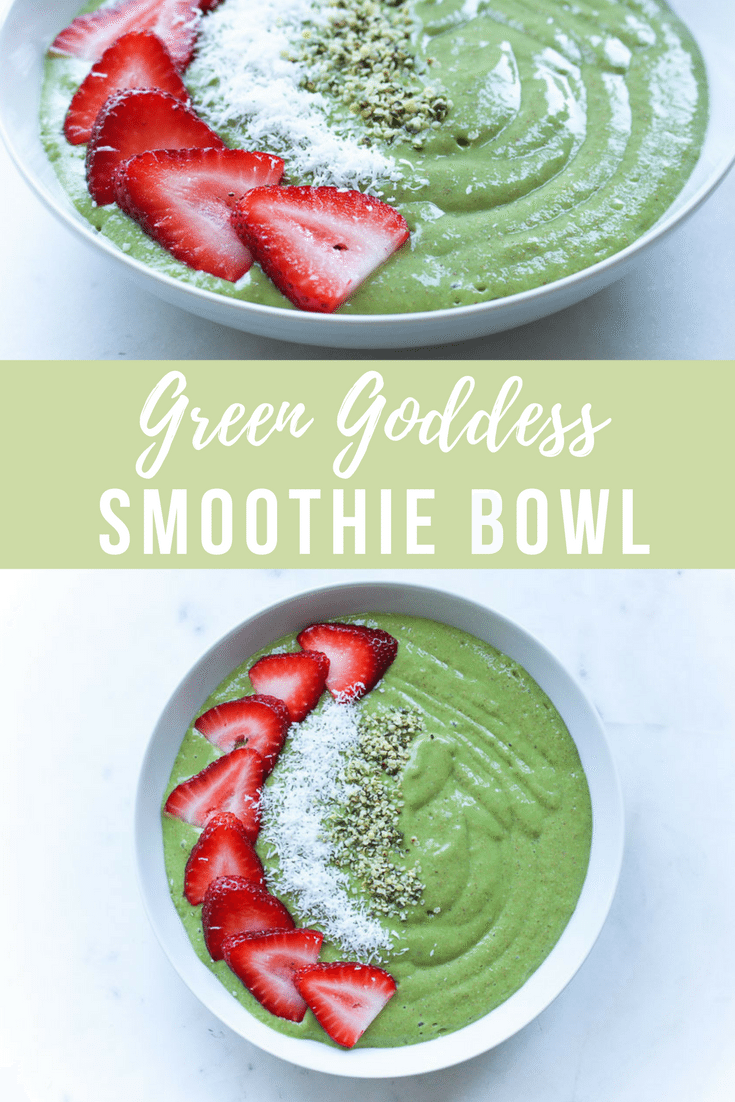
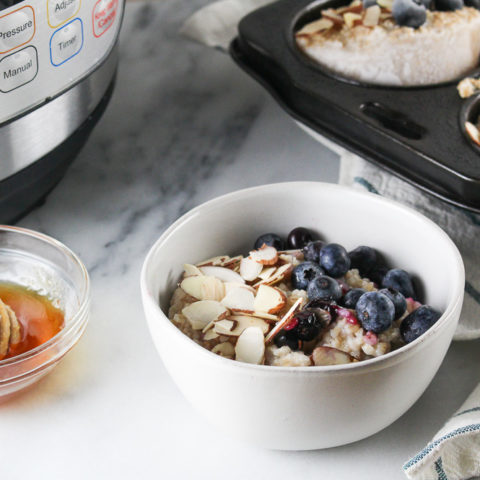
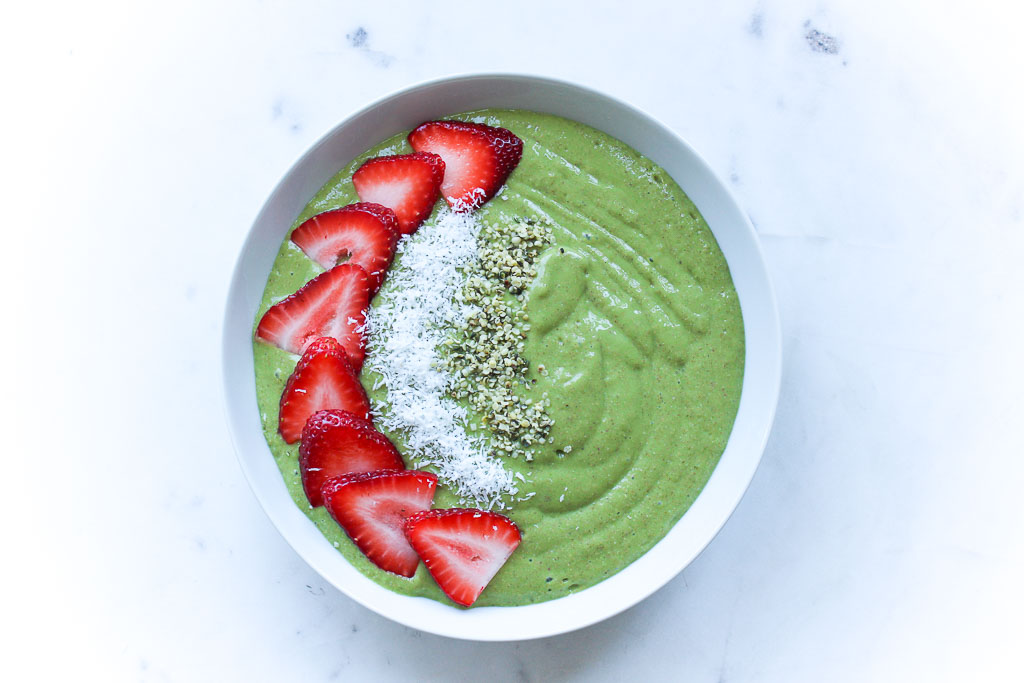
Start your morning with this Green Goddess Smoothie Bowl. 
Green Goddess Smoothie Bowl
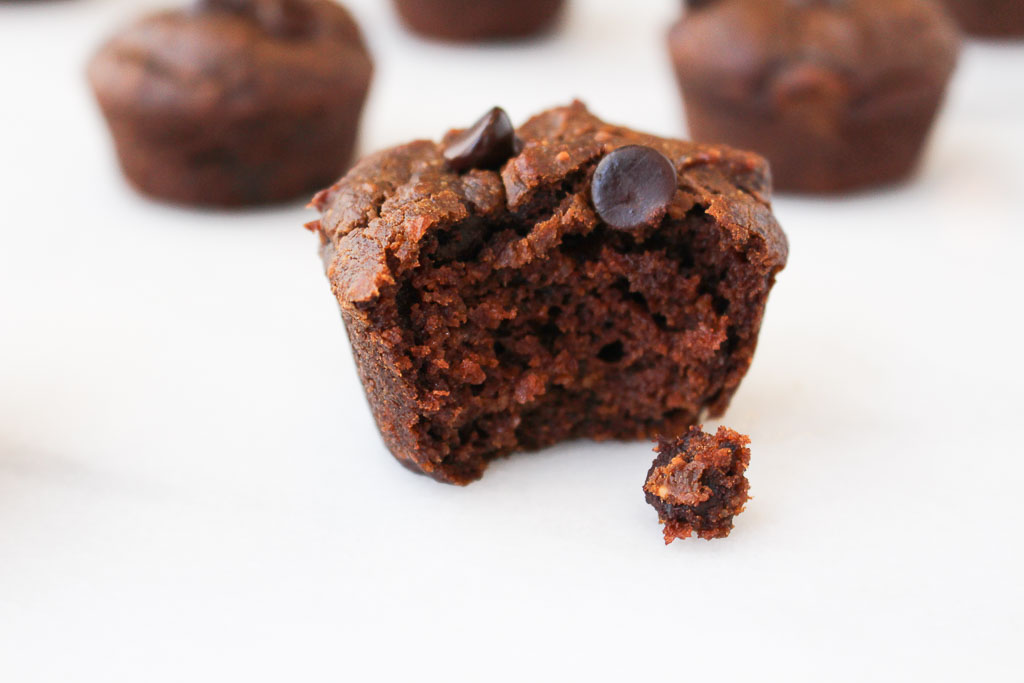
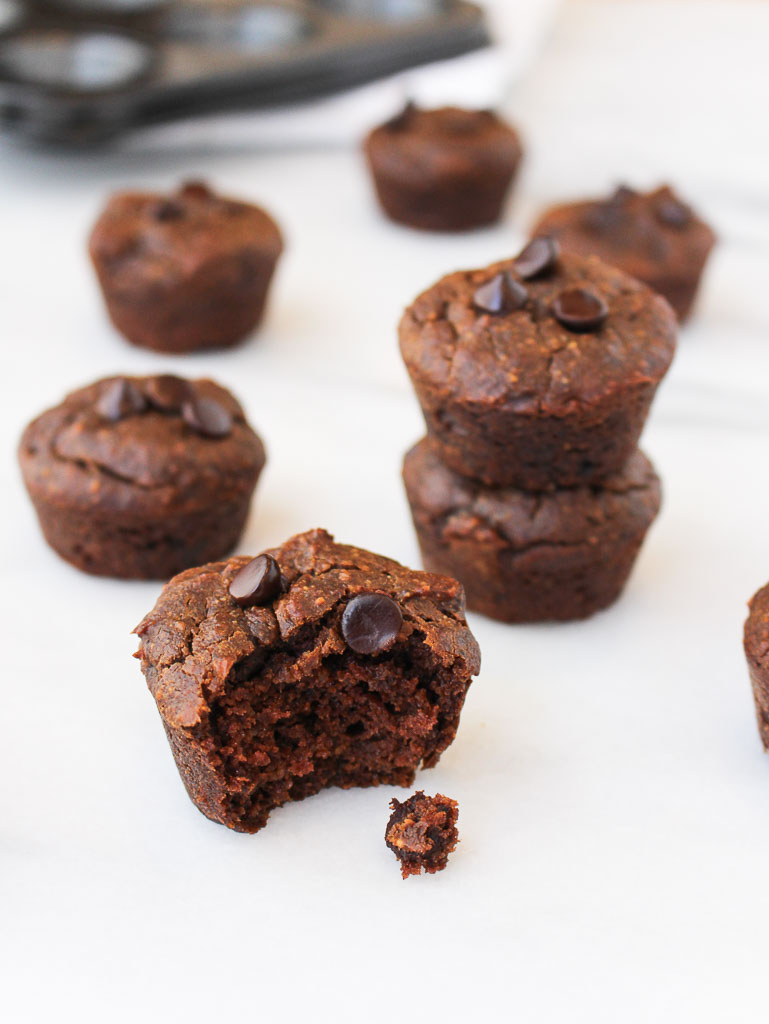
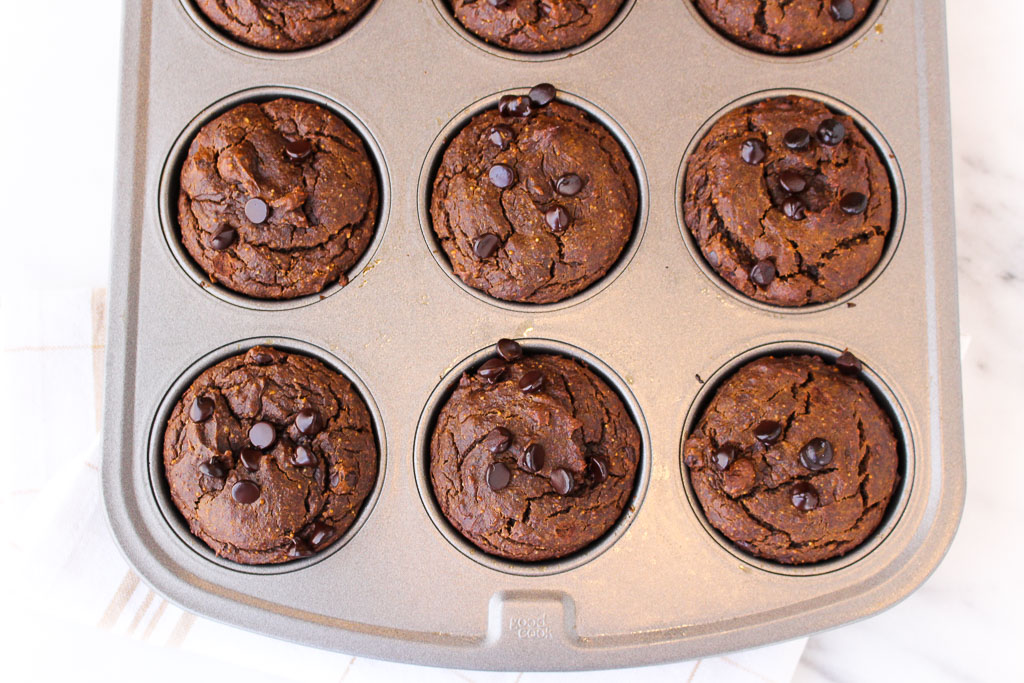
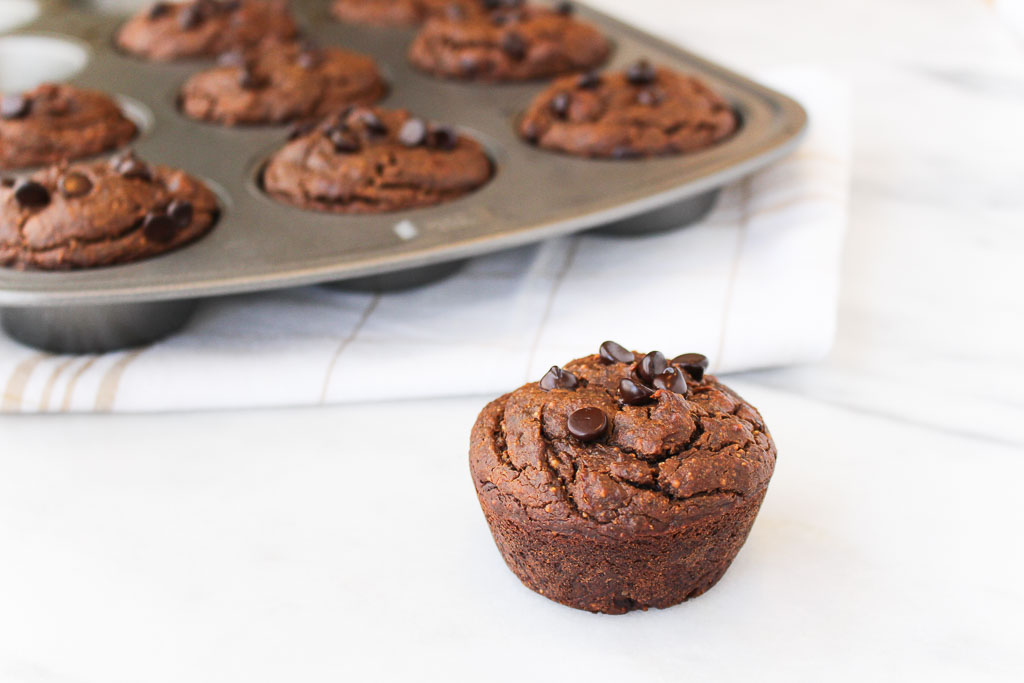
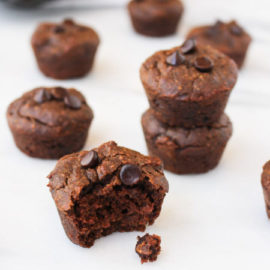
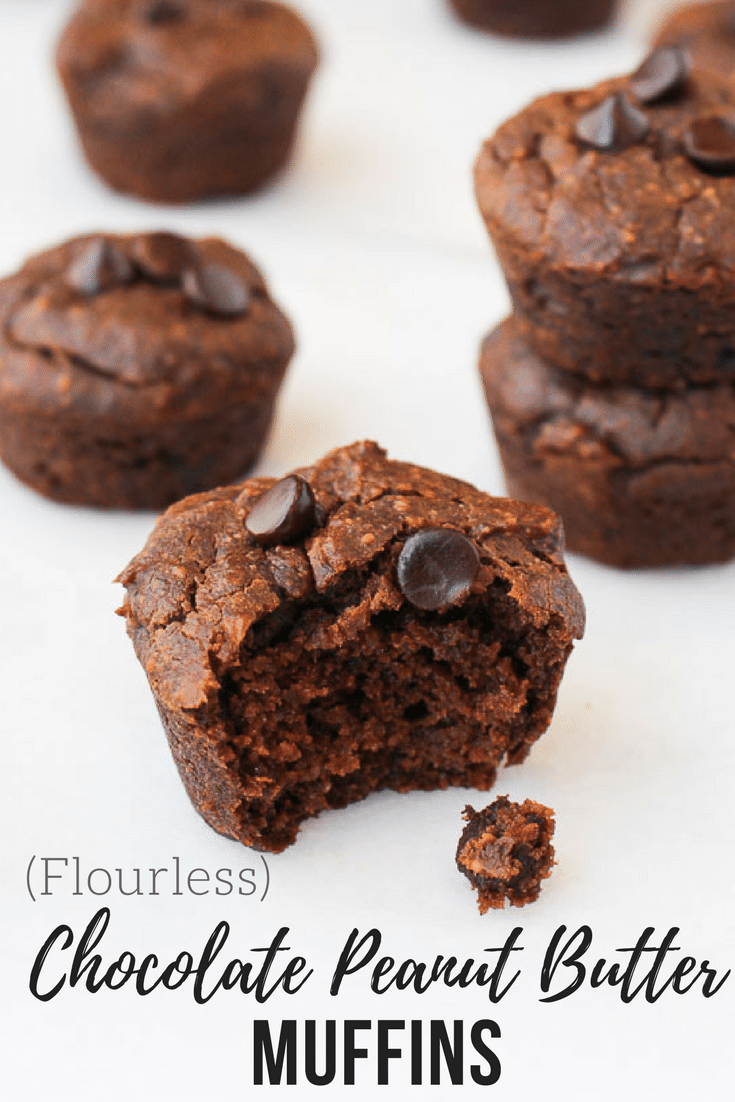
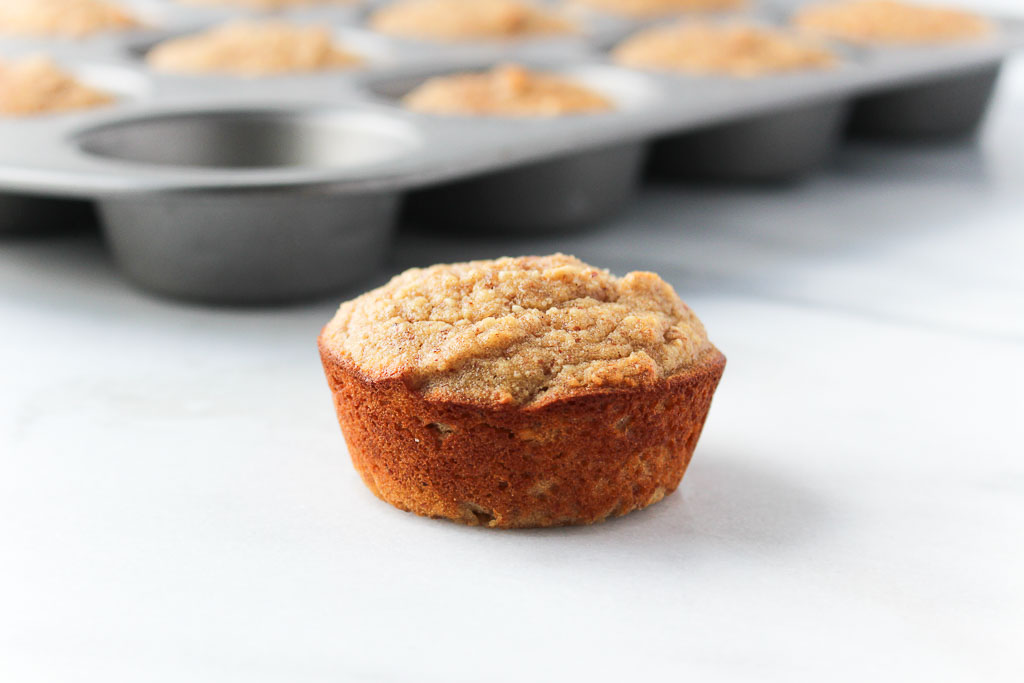
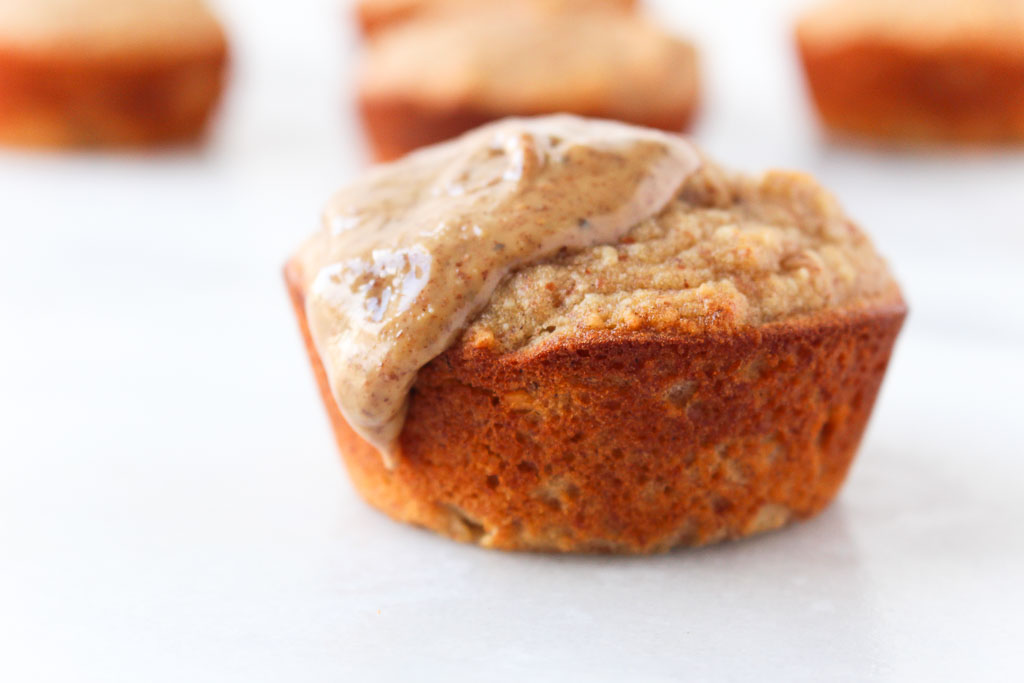
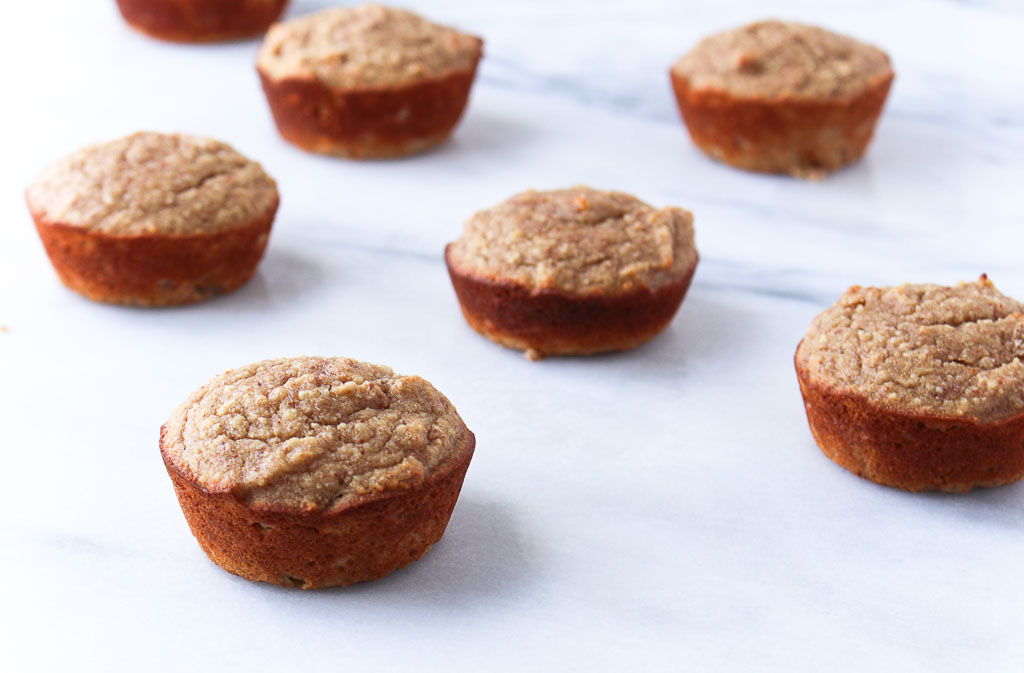
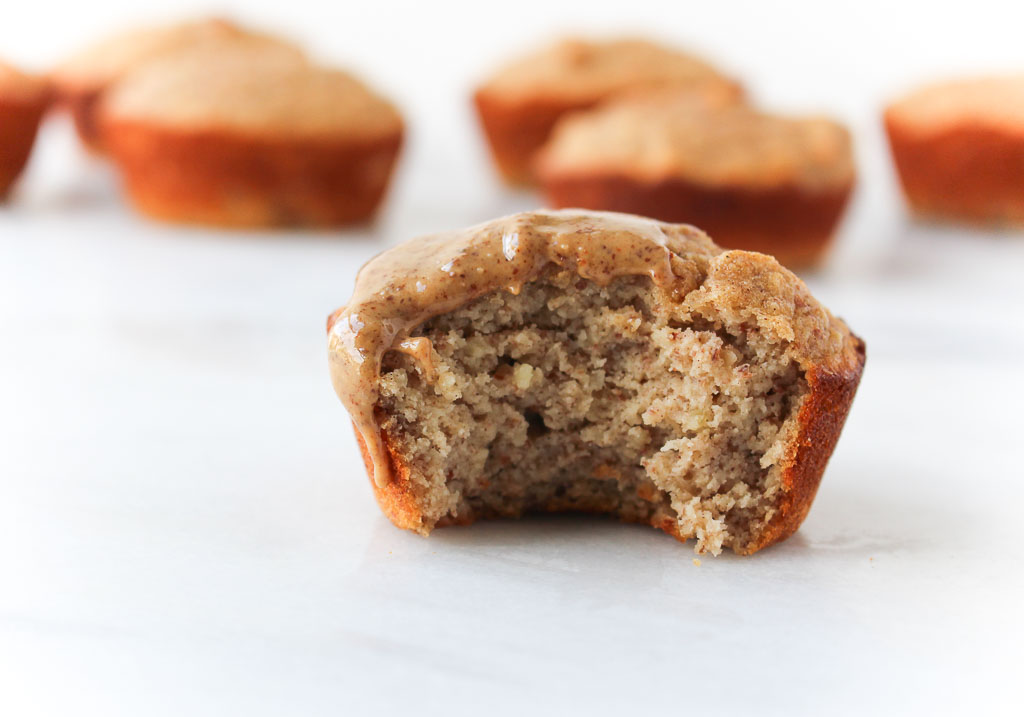
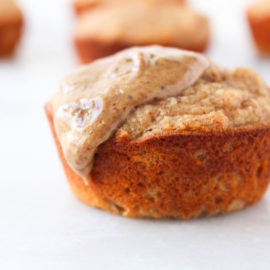
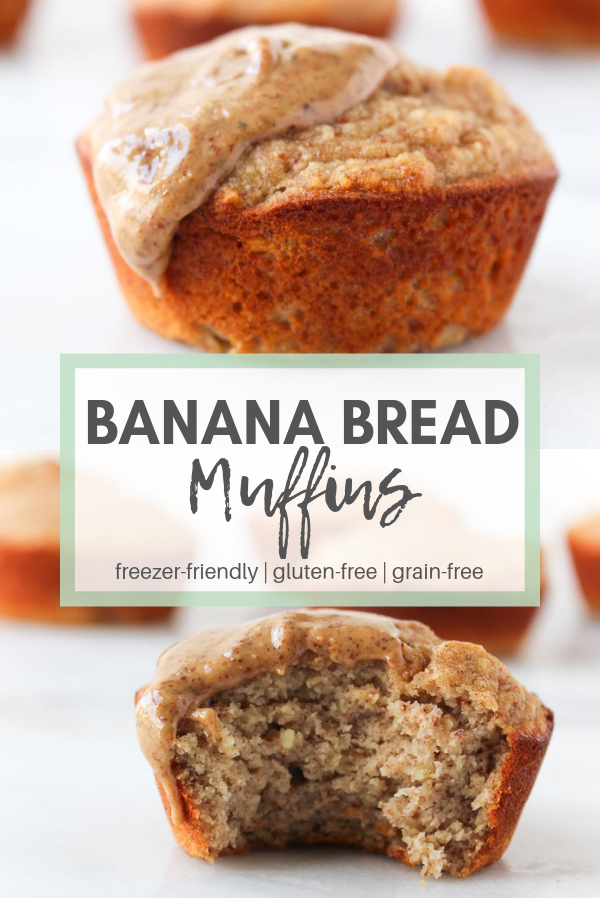
I haven’t had the best luck lately. When I was bringing groceries into my apartment, my canvas bag strap broke and the eggs in my bag ended up all over the floor of my kitchen. Back to the store I went because I was shooting a video for my Flourless Peanut Butter Chocolate Muffins that day.

Then, you may have seen on Instagram that I ended up with 3 stitches on my finger this week.
@RDeliciousKitchen Instagram
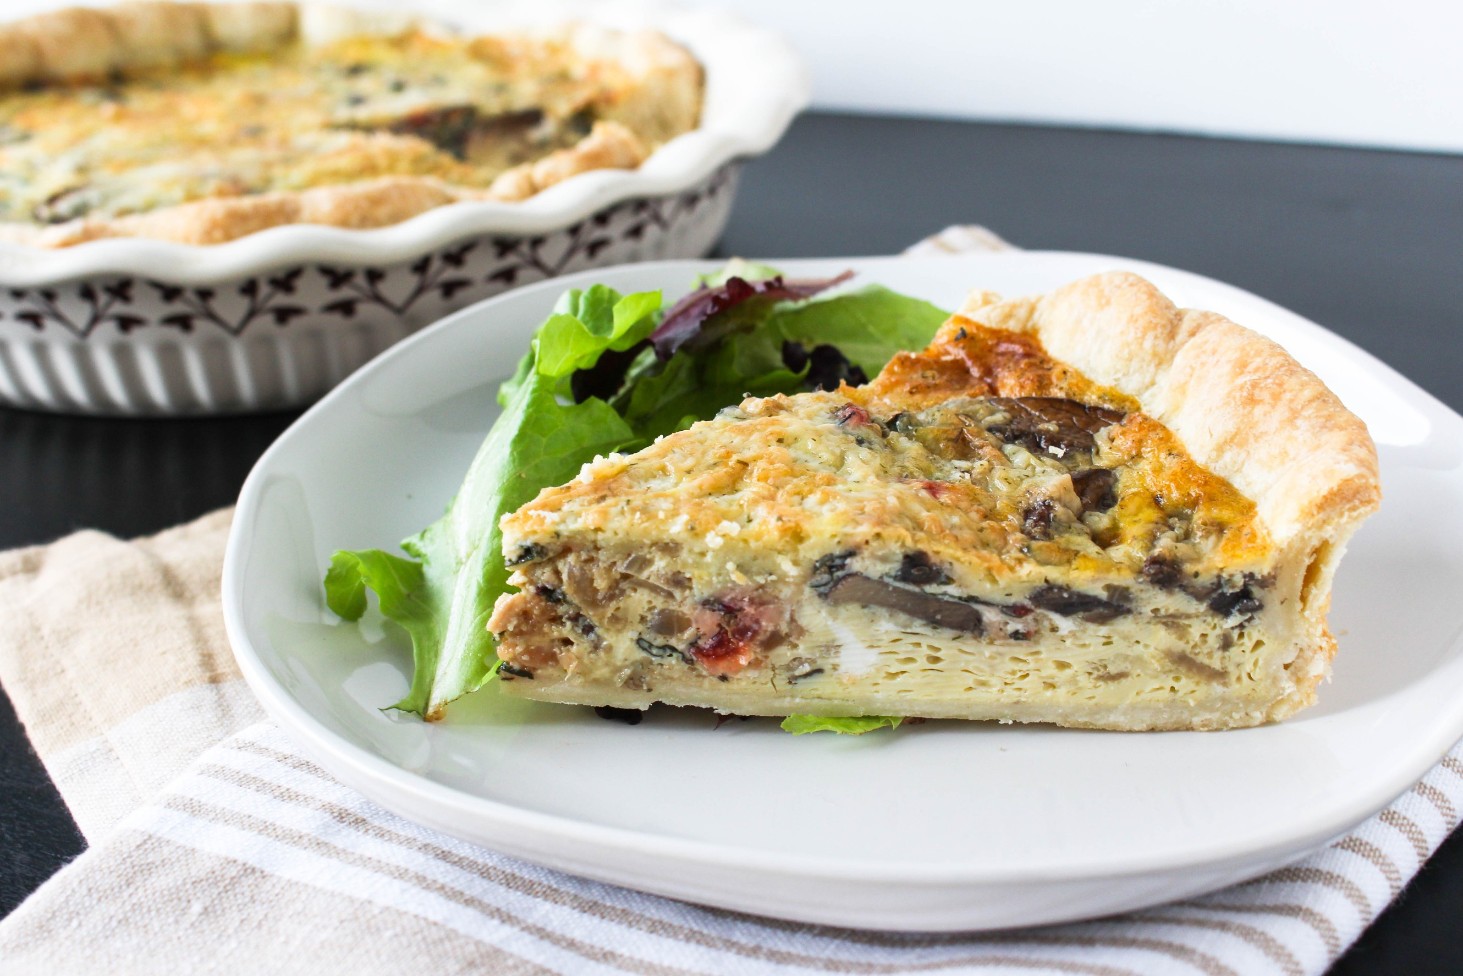
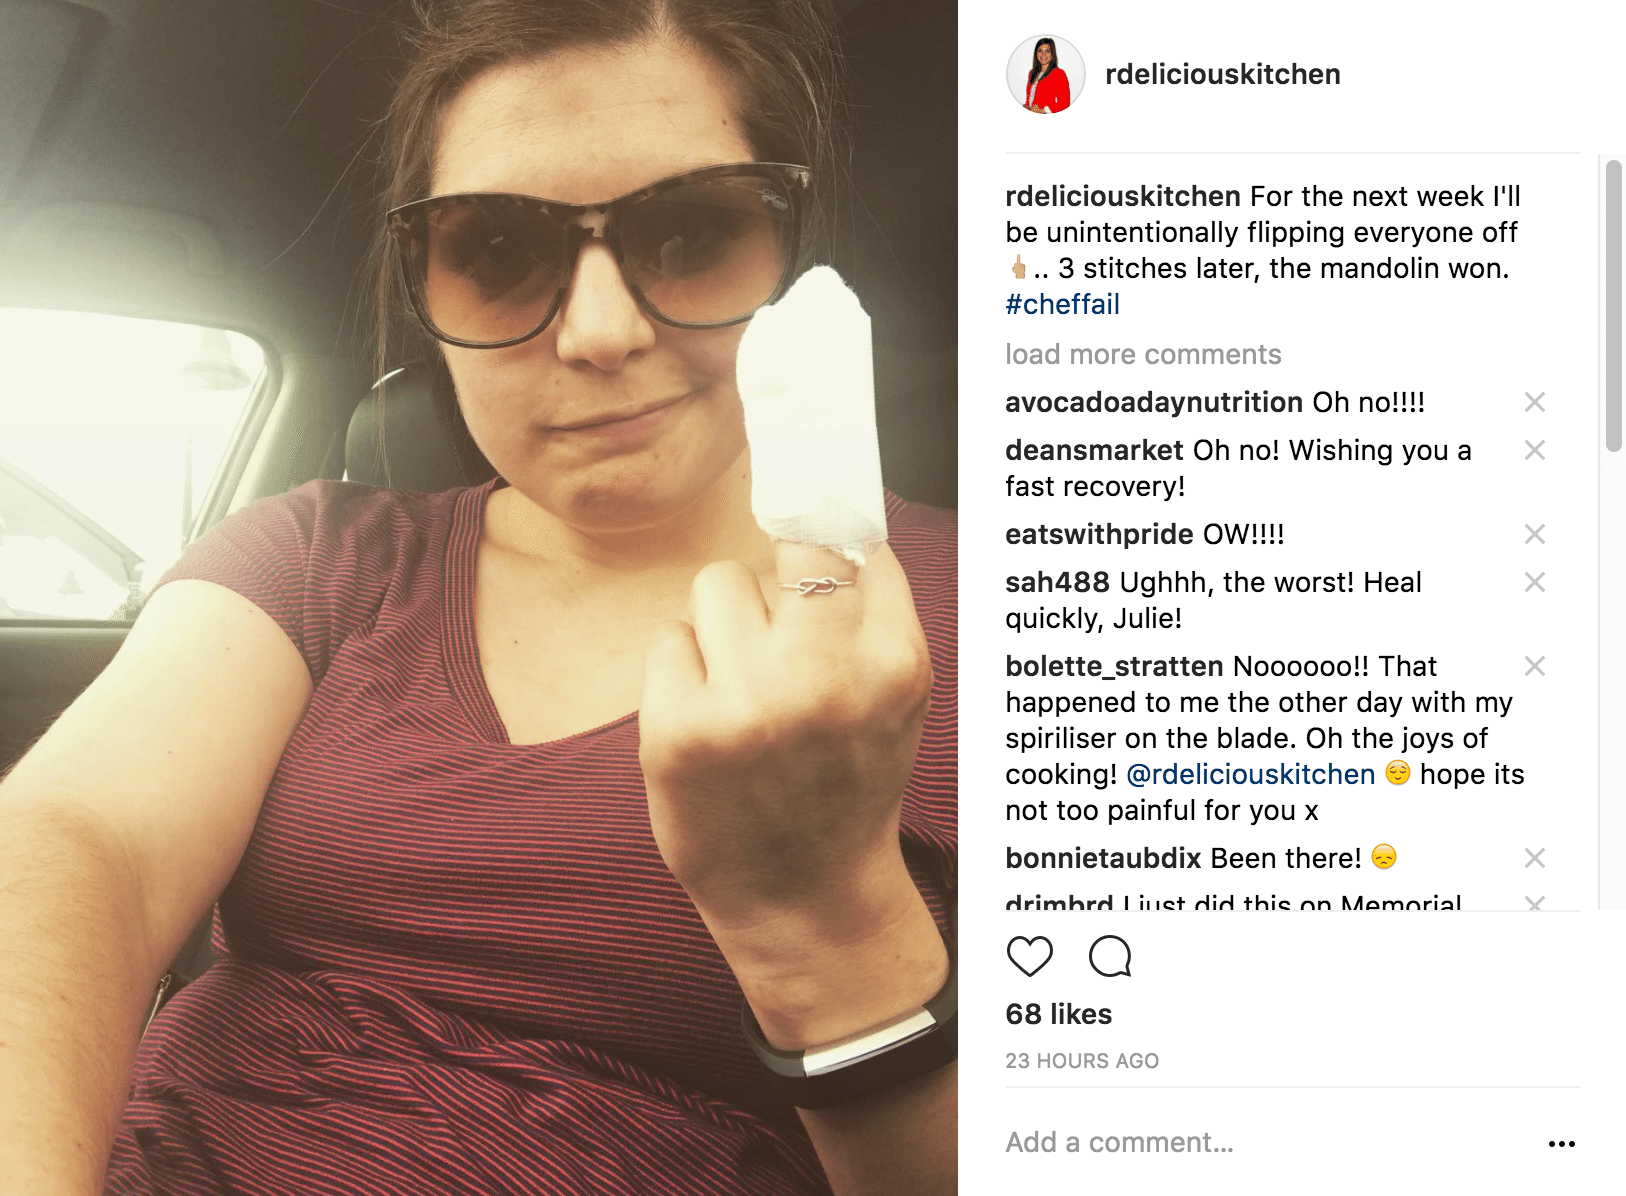
Thursday, I was at Living Plate getting ready for a cooking class and washing a mandolin and accidentally sliced my finger. I headed to urgent care while two interns continued to prep for the class. These dietetic interns just started working with me and with my little accident, they saved the day! I got stitched up, headed back and the class was ready to go. The interns were rock stars! The class was ready to go and the class was a success!
Green Goddess Smoothie Bowl
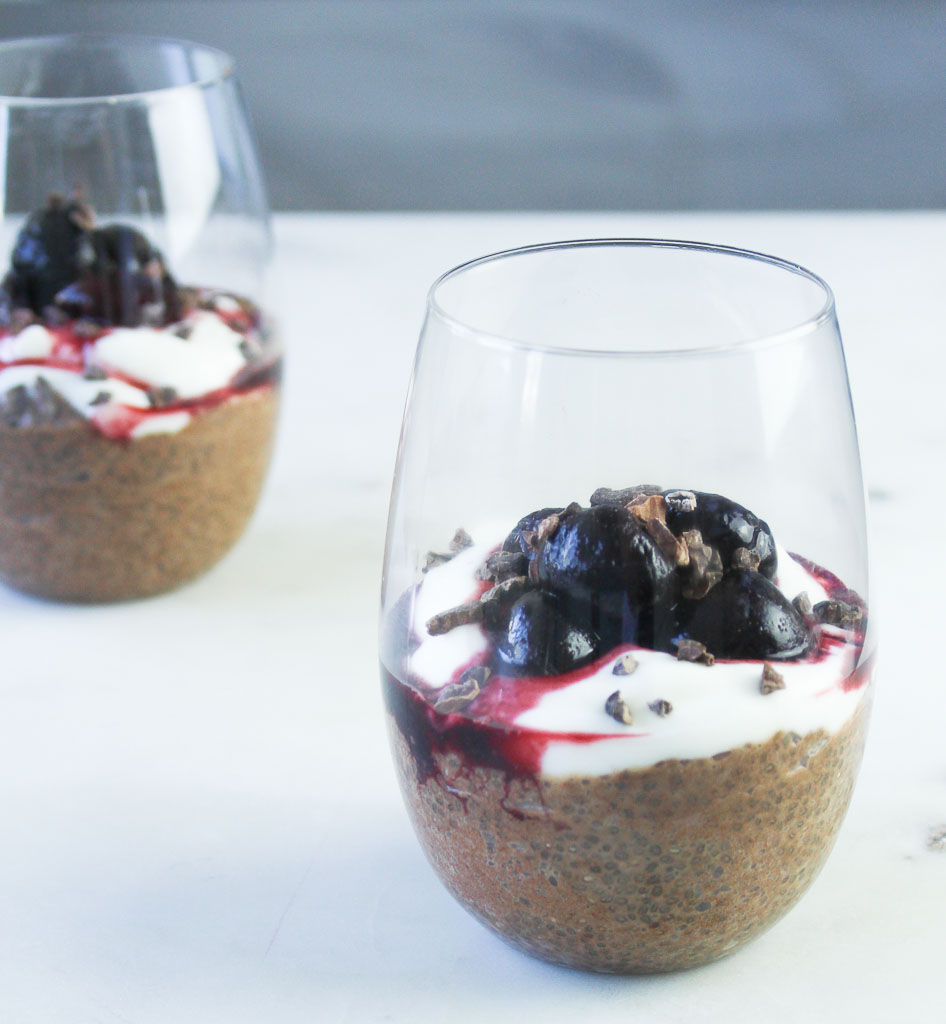
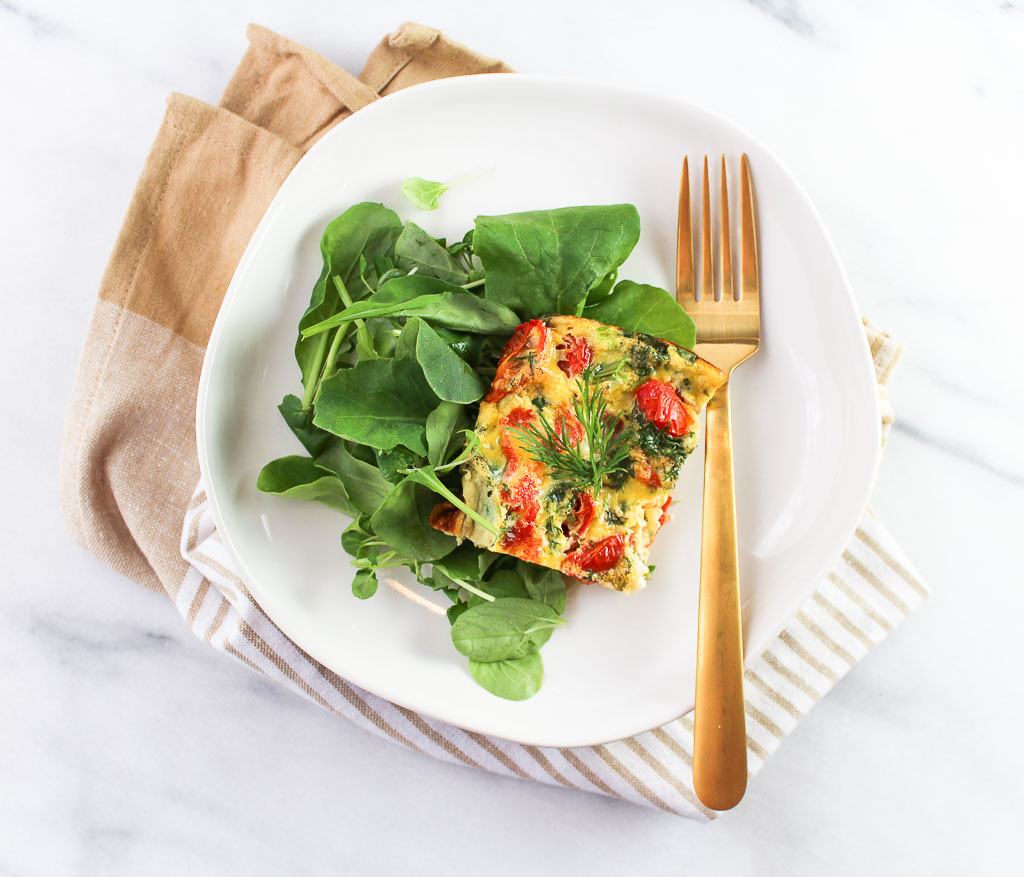
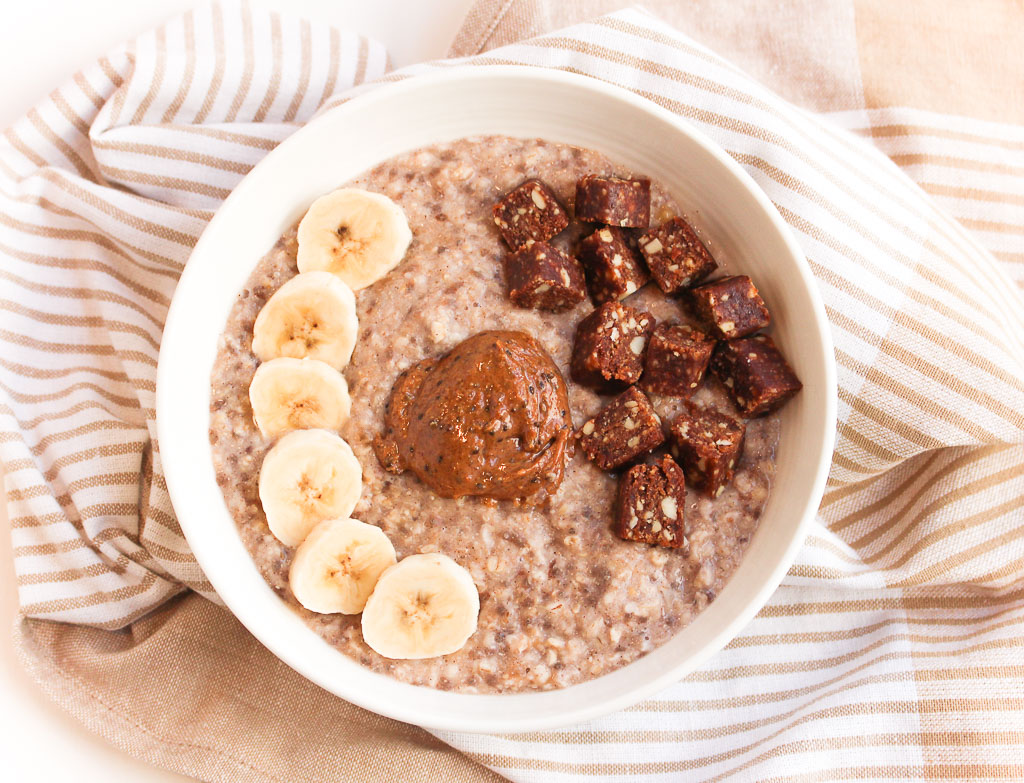
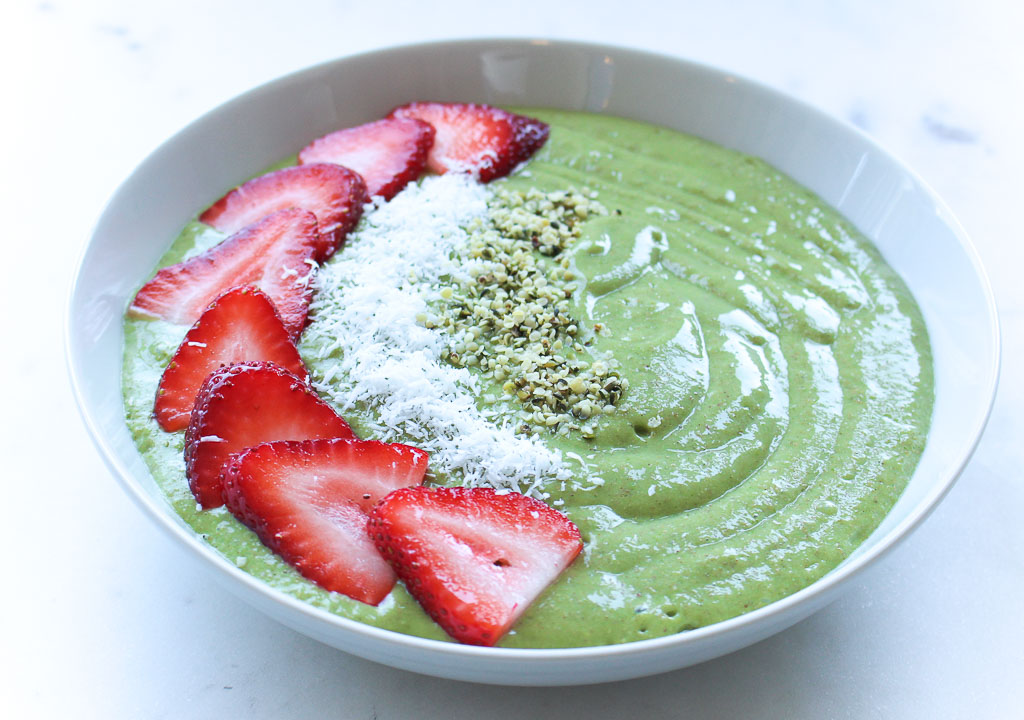
So maybe it really wasn’t a bad luck week, more like a clumsy week. Yes, I may have had my kerfuffle moments, but one thing that was consistently great this week, was breakfast. This Green Goddess Smoothie Bowl was enjoyed all week. I’ve been on a total smoothie kick lately and have been making this exact combo daily. I really do enjoy the act of eating smoothie bowls with a spoon. It helps practice mindful eating and you get to enjoy it for so much longer.
After every storm is a rainbow because I am now sitting on Lake Champlain with my bff’s in Vermont for the weekend. Girls weekend!
Lake Champlain, Vermont
What is everyone doing this weekend? 

Print

clock clock iconcutlery cutlery iconflag flag iconfolder folder iconinstagram instagram iconpinterest pinterest iconfacebook facebook iconprint print iconsquares squares iconheart heart iconheart solid heart solid icon
green smoothie in a white bowl with strawberries and coconut

Green Goddess Smoothie Bowl

  • Author: Julie @ RDelicious Kitchen

Ingredients

Scale
  • 1/4 cup mango, frozen
  • 1/2 avocado
  • 1/2 small banana [frozen is best for creaminess]
  • 1 cup spinach
  • 3 strawberries
  • 2 tablespoons chia seeds
  • 1 teaspoon cinnamon
  • 1 cup unsweetened almond milk
  • (optional toppings): hemp hearts, sliced strawberries, unsweetened coconut

Instructions

  1. Add all ingredients into a blender and blend until smooth.
  2. Pour into a bowl and top with your favorite toppings.

Recipe Card powered byTasty Recipes

Did you make this recipe? Tag @rdeliciouskitchen on Instagram or send me a pic, I’d love to see!RDelicious Kitchen @RD_KitchenPin this recipe for later!

Green Goddess Smoothie Bowl

Cheesy Cauliflower Waffles

Take out your waffle maker and whip up a batch of these Cheesy Cauliflower Waffles (aka. “Cauli-Waffles”) for a fun new breakfast!

close up image of a cheesy cauliflower waffle

As a food blogger and recipe developer, I always have recipe ideas running through my mind. This “cauli-waffle” idea was inspired when I was organizing my kitchen gadgets and found my waffle maker buried in the back of one of my cabinets. I honestly forget what kitchen gadgets that I have sometimes. Hi, my name is Julie and I am a kitchen gadget hoarder.

cauliflower waffle with a fried egg, tomato, and avocado

I set my waffle maker on my counter and was planning on making waffles for a fun weekend breakfast, but when I woke up Saturday morning, I was craving savory rather than sweet. The plan for the cauliflower rice that was sitting in my fridge was to make my Hawaiian Chicken Cauliflower Fried Rice for dinner that night, was used for my breakfast instead.

Cheesy Cauliflower Waffles

This is going to become one of my brunch staples. I topped my waffle with a fried egg, avocado, and tomato slices. Now that is what I call a savory breakfast.

Cheesy Cauliflower Waffles topped with a fried egg, tomato, and avocado

I am going to assume they freeze well. I really can’t say since they were all devoured that morning.. oops! I would recommend warming them in the oven if you do have leftovers. 

cauliflower waffles on a marble slab

Have you ever made a savory dish using your waffle iron?

Print
clock clock iconcutlery cutlery iconflag flag iconfolder folder iconinstagram instagram iconpinterest pinterest iconfacebook facebook iconprint print iconsquares squares iconheart heart iconheart solid heart solid icon
Cheesy Cauliflower Waffles with fried egg, tomato, and avocado

Cheesy Cauliflower Waffles

  • Author: Chef Julie Harrington, RD
  • Prep Time: 15
  • Cook Time: 20
  • Total Time: 35 minutes
  • Yield: 4
  • Category: Breakfast
  • Method: Waffle Maker
  • Cuisine: American

Description

Take out your waffle maker and whip up a batch of these Cheesy Cauliflower Waffles (aka. “Cauli-Waffles”) for a fun new breakfast!


Ingredients

Scale
  • 3 cups cauliflower rice
  • 3 scallions, chopped
  • 1/2 cup cheddar cheese, shredded (I used Cabot!)
  • 2 cloves garlic, minced
  • 1 egg, whisked
  • salt and pepper, to taste

Instructions

  1. Place your cauliflower rice into a microwave-safe dish. Add a teaspoon of water, (which will help to steam the cauliflower). Cover the dish with a damp paper towel. Cook for 2-3 minutes.
  2. Leave your cauliflower rice covered, to stand for 5 minutes. Transfer to a clean towel or paper towel and press to remove any excess moisture, which can make your dish soggy.
  3. Add cauliflower, scallions, cheddar cheese, and garlic in a bowl. Toss to combine. Fold in whisked egg until all ingredients are coated. Season with salt and pepper.
  4. Heat waffle iron. Spray waffle iron well with cooking spray. Add 3/4 cup of the cauli-waffle mixture to the waffle iron and cook 3-4 minutes until the desired doneness. (I like them extra crispy!)
  5. Remove cauli-waffle from waffle iron and spray again before making your next waffle. Repeat process until 4 waffles are made.
  6. Enjoy as is or top with a fried egg, tomato slices, and avocado.

Keywords: Waffle, cauliflower, low carb, savory, cheesy

Recipe Card powered byTasty Recipes

other recipes you may enjoy

Black Forest Chia Pudding

For breakfast, snack, or dessert, this Black Forest Chia Pudding will fill you up and satisfy your sweet tooth at the same time.https://chefjulierd.com/When I first tried kombucha, I didn’t understand how anyone could drink it, but now I LOVE it. Same goes for chia pudding. The first time I tried it, I hated the texture, but now it is something I really enjoy.

It’s funny how your taste buds change and adapt over time. This is why I when I teach kids classes, I encourage them to try a new food at least 5 times in 5 different ways. According to Ellyn Satter Institute, unfamiliar foods may have to be presented 15 or 20+ times. This goes for picky eater adults too!
https://chefjulierd.com/Over time and trying chia pudding a few different ways the texture actually grew on me and now I really enjoy it. Plus, it’s been fun creating new versions to the same chia base.
Tip: If you don’t enjoy the texture of chia pudding, whip it in a food processor or blender and it becomes a fluffy mousse consistency.
https://chefjulierd.com/What’s a better way to enjoy chia pudding, no other than a tasty black forest cake dessert! The delicious chocolate chia base, with a creamy layer, topped with sweet black cherries, and cocoa nibs, it doesn’t get much better than this!
With wholesome ingredients, this can be served as breakfast, snack, or dessert!

Print

clock clock iconcutlery cutlery iconflag flag iconfolder folder iconinstagram instagram iconpinterest pinterest iconfacebook facebook iconprint print iconsquares squares iconheart heart iconheart solid heart solid icon
black forest chia pudding in a glass

Black Forest Chia Pudding

  • Author: Julie @ RDelicious Kitchen
  • Yield: 2

Ingredients

Scale
  • 1/3 cup chia seeds
  • 2 tablespoons raw cacao powder (or unsweetened cocoa powder)
  • 1 1/4 cups unsweetened non-dairy milk
  • 1 tablespoon maple syrup
  • 1/2 cup frozen dark cherries, thawed
  • 1/2 cup plain yogurt
  • 1 tablespoon cocoa nibs

Instructions

  1. In a small bowl, whisk together chia seeds, cacao powder, almond milk, and maple syrup. Divide into two containers. Store in the refrigerator overnight for the mixture to thicken.
  2. Top chia pudding with 1/4 cup yogurt, 1/4 cup cherries, and half tablespoon cocoa nibs in each container.

Recipe Card powered byTasty Recipes

RDelicious Kitchen @RD_Kitchen
Black Forest Chia Pudding via RDelicious Kitchen @RD_Kitchen

Swiss Chard and Mushroom Quiche

Whether you are pleasing a crowd for brunch or simply meal prepping for the upcoming week, add a Swiss Chard and Mushroom Quiche to the menu for a veggie and protein-packed breakfast!

Swiss Chard and Mushroom Quiche via RDelicious Kitchen @RD_Kitchen
I love a good quiche, but I’m a little OCD on the ratios when I make mine. I crave the perfect balance of crust, filling, and eggy-ness.

  • Crust thin enough but thick enough to enjoy delicious flaky crust in every bite.
  • Plenty of filling. Quiches are typically filled with vegetables, protein, and cheese. I like when each bite incorporates all the flavors of the filling.
  • The perfect balance of fluffy eggs. This kind of goes hand in hand with the filling part, and even amount of filling and eggs.

Swiss Chard and Mushroom Quiche via RDelicious Kitchen @RD_Kitchen
I used red swiss chard with mushrooms as the stars for the filling. What’s fun about quiche is you can play around with the ingredients to create your favorite combo! Plus, it’s an easy (and tasty) way to incorporate vegetables in the morning.


Swiss Chard and Mushroom Quiche via RDelicious Kitchen @RD_Kitchen
The magic of this quiche is the cheese. Cabot’s garlic & herb cheddar is out of this world. It is so creamy with a rich garlic and herb flavor, finishing with the subtle bite from the cheddar. Did you know many of Cabot’s cheese is lactose free? How can cheese be lactose free, you may wonder. The removal of lactose occurs naturally during the cheese making process. Just look for the “Lactose-Free” icon on the packaging of your favorite Cabot cheese products if you are looking for a  naturally lactose-free cheese.
Swiss Chard and Mushroom Quiche via RDelicious Kitchen @RD_KitchenI have a pretty deep pie plate that I used for this quiche. If you don’t have as deep of a dish, you may want to scale back a little on the amount of eggs. I did note that in the recipe’s note section, but just in case, I thought I would remind you again 😉
What’s your favorite quiche combo?

Print
clock clock iconcutlery cutlery iconflag flag iconfolder folder iconinstagram instagram iconpinterest pinterest iconfacebook facebook iconprint print iconsquares squares iconheart heart iconheart solid heart solid icon
Swiss Chard and Mushroom Quiche on a white plate

Swiss Chard and Mushroom Quiche

  • Author: Julie @ RDelicious Kitchen
  • Cook Time: 40 mins
  • Total Time: 40 mins
  • Yield: 8-12 1x

Ingredients

Scale
  • For the crust:
  • 1 1/4 cups all-purpose flour
  • 1 tsp salt
  • 1/2 cup (1 stick) unsalted butter
  • 2 tbsp to 1/4 cup ice water
  • For the quiche:
  • 2 tbsp olive oil
  • 1/2 large onion, sliced
  • 2 tbsp garlic, minced
  • 1 1/2 cups mini portabello mushrooms, sliced
  • 1 tbsp balsamic vinegar
  • 2 heaping cups red swiss chard, chopped (or any dark leafy green)
  • 4 oz Cabot garlic & herb cheddar cheese, shredded
  • 68 eggs* (see note)
  • 1/2 cup low-fat milk

Instructions

  1. Whisk together the flour and salt.
  2. Dice the butter into small cubes. Using a pastry blender (or fork) work the butter into the flour until it’s well-distributed, but not fully incorporated.
  3. Tossing with a fork, drizzle in the ice water. Stop adding water when the dough starts to come together, and grab it in your hands.
  4. Gather the dough into a ball. Gently shape each dough into a rough disk. For better texture, chill the dough for at least 30 minutes before rolling. Roll into an even circle. Place into pie dish and pinch the edges along the sides for the crust. Set aside until ready to use.
  5. In a large skillet, heat olive oil over low-medium heat. Cook onions for 20 minutes, until caramelized. Add the garlic and mushrooms and cook until mushrooms are tender. Add the balsamic vinegar and let reduce to about half. Toss in the swiss chard to coat with vegetables until just beginning to wilt.
  6. In a large bowl, whisk together eggs and milk. Season with salt and pepper.
  7. Sprinkle half the garlic & herb cheddar cheese at the bottom of the quiche crust. In an even layer add the swiss chard and mushroom mixture. Pour in the eggs. Top with remaining cheese.
  8. Bake in the oven for 35-40 minutes, until the edge of the crust has browned and the filling appears set.

Notes

Pie crust recipe adapted from King Arthur Flour’s all-butter pie crust.

I used a deep pie dish which was able to fit 8 eggs. If your pie plate is more shallow use 6 eggs.

Recipe Card powered byTasty Recipes


Flourless Chocolate Peanut Butter Muffins

You won’t believe that these Chocolate Peanut Butter Muffins are flourless! Made with wholesome ingredients these muffins can be part of a healthy breakfast or enjoyed as a decadent dessert.
Flourless Chocolate Peanut Butter Muffins via RDelicious Kitchen @RD_KitchenDisclaimer: I am warning you, if you make these, they may not last a week in your house. They didn’t in mine! I found ways to enjoy these muffins with almost any meal. Crumble on top of smoothie bowls for breakfast, pair with a yogurt parfait for lunch, top with peanut butter for the ultimate dessert.

Flourless Chocolate Peanut Butter Muffins via RDelicious Kitchen @RD_Kitchen

Flourless Chocolate Peanut Butter Muffins via RDelicious Kitchen @RD_KitchenWhenever I offer baked goods to my family and friends, they tend to be a little skeptical thinking that there is no way there is a “healthier” option that STILL tastes good. My dad’s famous words are “what’s in this” before he tries anything I make. My response is the typical eye roll with “JUST TRY IT!”. Even though my dad may question everything I make, he still always tries it. Making a flourless muffin that tastes as indulgent as dessert, this is one recipe no one will pass on. Flourless Chocolate Peanut Butter Muffins via RDelicious Kitchen @RD_KitchenFlourless Chocolate Peanut Butter Muffins via RDelicious Kitchen @RD_Kitchen

Print

clock clock iconcutlery cutlery iconflag flag iconfolder folder iconinstagram instagram iconpinterest pinterest iconfacebook facebook iconprint print iconsquares squares iconheart heart iconheart solid heart solid icon
Flourless Chocolate Peanut Butter Muffins

Flourless Chocolate Peanut Butter Muffins

  • Author: Julie @ RDelicious Kitchen
  • Yield: 14 1x

Ingredients

Scale
  • 2 eggs, (at room temp) beaten
  • 2 cups natural peanut butter (or almond butter)
  • 1/2 cup maple syrup
  • 1 1/2 cups pumpkin puree
  • 6 tablespoons unsweetened cacao powder (or unsweetened cocoa powder)
  • 2 teaspoons baking soda
  • 2 teaspoons vanilla extract
  • 1/2 cup dark chocolate chips

Instructions

  1. Preheat oven to 350 degrees F. Spray a muffin tray with cooking spray or line with parchment liners.
  2. In a large bowl, combine eggs, peanut butter, maple syrup, pumpkin puree, cacao powder, baking soda, and vanilla extract. Whisk together until smooth and creamy.
  3. Fold in the chocolate chips.
  4. Fill muffin tins 3/4 full.
  5. Bake for 30-35 minutes, until a toothpick, comes out clean.

Recipe Card powered byTasty Recipes

RDelicious Kitchen @RD_Kitchen Flourless Chocolate Peanut Butter Muffins via RDelicious Kitchen @RD_Kitchen

Smoked Salmon and Dill Sheet Pan Frittata

Serve eggs family-style with this Smoked Salmon and Dill Sheet Pan Frittata that will kick your breakfast or brunch up a notch.
Smoked Salmon and Dill Sheet Pan Frittata via Chef Julie Harrington, RD @ChefJulie_RD #smokedsalmon #salmon #breakfast #frittata #eggs #sheetpan #seafoodWay back when one of my first jobs was at a bagel shop. It was one of my favorite jobs. I worked with my friends and got to enjoy endless bagels and coffee. The only downside was getting to work at 5:00 am on a weekend.
Smoked Salmon and Dill Sheet Pan Frittata via Chef Julie Harrington, RD @ChefJulie_RD #smokedsalmon #salmon #breakfast #frittata #eggs #sheetpan #seafoodNow, I love enjoying a leisurely brunch on the weekend. One thing the bagel shop introduced me to was smoked salmon or also known as lox. I still remember this one customer who always ordered – an everything bagel with cream cheese, lox, tomato, red onion, and capers. Of course, I had to try it.

Smoked Salmon and Dill Sheet Pan Frittata via Chef Julie Harrington, RD @ChefJulie_RD #smokedsalmon #salmon #breakfast #frittata #eggs #sheetpan #seafoodThat’s when my smoked salmon love affair began. It is now a staple at my brunches. I love the addition of the smoked salmon in this frittata. Plus, baking it in the sheet pan makes it so easy to serve! Smoked Salmon and Dill Sheet Pan Frittata via Chef Julie Harrington, RD @ChefJulie_RD #smokedsalmon #salmon #breakfast #frittata #eggs #sheetpan #seafoodOften times the term lox and smoked salmon are used interchangeably, but there is a difference. Lox was traditionally only made from the belly of salmon. The salmon is salt-cured or brined but never cooked or even smoked. It has a very smooth silky texture. Smoked salmon is a much more generic term than lox. Smoked salmon can be made from any part of the fish, and it starts with salt curing or brining, just as in lox.

Print

clock clock iconcutlery cutlery iconflag flag iconfolder folder iconinstagram instagram iconpinterest pinterest iconfacebook facebook iconprint print iconsquares squares iconheart heart iconheart solid heart solid icon
piece of Smoked Salmon and Dill Sheet Pan Frittata on a white plate with a gold fork

Smoked Salmon and Dill Sheet Pan Frittata

  • Author: Chef Julie Harrington, RD
  • Prep Time: 10 mins
  • Cook Time: 20 mins
  • Total Time: 30 mins
  • Yield: 8
  • Category: Breakfast
  • Method: Oven-Baked

Ingredients

Scale
  • 12 eggs
  • 5 ounces smoked salmon (lox), chopped
  • 3 scallions, chopped
  • 1/2 cup dill, roughly chopped
  • 1-pint grape tomatoes, sliced in half
  • salt and pepper, to taste

Instructions

  1. Prep:
  2. Preheat the oven to 350 degrees F. Spray a 13×9 inch deep baking dish with cooking spray. Set aside.
  3. Whisk eggs in a large bowl. Season with salt and pepper.
  4. Spread smoked salmon, scallions, dill, and grape tomatoes evenly in the bottom of the baking dish.
  5. Gently pour eggs over the smoked salmon mixture.
  6. Bake in the oven for 20 minutes, until eggs are cooked through and top begins to brown.

Keywords: #smokedsalmon #salmon #breakfast #frittata #eggs #sheetpan #seafood

Recipe Card powered byTasty Recipes

Chef Julie Harrington, RD - Culinary Nutrition Consultant of chefjulierd.com

Smoked Salmon and Dill Sheet Pan Frittata via Chef Julie Harrington, RD @ChefJulie_RD #smokedsalmon #salmon #breakfast #frittata #eggs #sheetpan #seafood

Jumbo Skillet Apple Pancake

Serve pancakes family style with this (grain-free) Jumbo Skillet Apple Pancake.
Jumbo Skillet Apple Pancake via Chef Julie Harrington, RD @ChefJulie_RD #pancake #jumbopancake #apple #glutenfree #breakfast #brunchConfession: I am a terrible pancake flipper. I am a waffle maker pro, but when it comes to pancakes, I fall short.

It’s either I am too eager to flip them before they are ready or the flipping process is just a disaster, like how I flipped it right on top on my other pancakes and I just made one giant pancake mound. Culinary school graduate fail.
Jumbo Skillet Apple Pancake via Chef Julie Harrington, RD @ChefJulie_RD #pancake #jumbopancake #apple #glutenfree #breakfast #brunchI was going to attempt to make this recipe into individual pancakes, but instead of the hassle of making a bunch of pancakes, I tried making one giant pancake and let me tell you.. it was the best idea I’ve ever had.
Jumbo Skillet Apple Pancake via Chef Julie Harrington, RD @ChefJulie_RD #pancake #jumbopancake #apple #glutenfree #breakfast #brunchThis giant pancake can now be served family style, so no more waiting for your stack on Sunday morning when everyone else is chowing down. Plus, no more pancake flipping disasters!
I opted to top mine with apple slices this time, but now I am thinking of all the topping options I want to try. This is going to become a staple on my weekends. Bonus, it heats up well too!
Jumbo Skillet Apple Pancake via Chef Julie Harrington, RD @ChefJulie_RD #pancake #jumbopancake #apple #glutenfree #breakfast #brunch

Print

clock clock iconcutlery cutlery iconflag flag iconfolder folder iconinstagram instagram iconpinterest pinterest iconfacebook facebook iconprint print iconsquares squares iconheart heart iconheart solid heart solid icon
Jumbo Skillet Apple Pancake in a baking pan

Jumbo Skillet Apple Pancake

  • Author: Chef Julie Harrington, RD
  • Prep Time: 10
  • Cook Time: 20
  • Total Time: 30 minutes
  • Yield: 6
  • Category: Breakfast
  • Method: Oven-Baked

Description

Serve pancakes family style with this (grain-free) Jumbo Skillet Apple Pancake.


Ingredients

Scale
  • 4 eggs
  • ¾ cup full-fat coconut milk, from the can
  • 1 tablespoon maple syrup
  • 1 teaspoon almond flour
  • 2 tablespoons arrowroot starch (or tapioca starch)
  • 2 teaspoons cinnamon, plus more for garnish
  • ¼ teaspoon baking powder
  • 1/8 teaspoon sea salt
  • 1 tablespoon coconut oil
  • 1 apple (such as a Honeycrisp Pink Lady), peeled, cored, and thinly sliced

Instructions

  1. Place a large cast iron skillet in the oven. Preheat the oven to 450 degrees F, leaving the skillet inside during preheating.
  2. In a large bowl, whisk together the eggs, coconut milk, maple syrup, and vanilla. In a separate bowl, whisk together the almond flour, arrowroot starch, cinnamon, baking powder, and salt. Pour the dry ingredients into the egg mixture and stir until fully combined.
  3. Carefully remove the hot skillet from the oven and add the coconut oil. Swirl it around the pan to coat the bottom and sides. Carefully pour the batter into the skillet. Gently place the apple slices on top. Bake for 15-20 minutes, or until golden brown and slightly puffed.
  4. Serve sprinkled with extra cinnamon and drizzle with maple syrup, if desired.

Notes

adapted from Paleo Magazine

Keywords: #pancake #jumbopancake #apple #glutenfree #breakfast #brunch

Recipe Card powered byTasty Recipes

Chef Julie Harrington, RD - Culinary Nutrition Consultant of chefjulierd.com


Jumbo Skillet Apple Pancake via Chef Julie Harrington, RD @ChefJulie_RD #pancake #jumbopancake #apple #glutenfree #breakfast #brunch

(Gluten-Free) Banana Bread Muffins

Pair with breakfast or add as a snack, these gluten-free Banana Bread Muffins can fit into any part of your day.

Banana Bread Muffins - Pair with breakfast or add as a snack, these gluten-free Banana Bread Muffins can fit into any part of your day. via Chef Julie Harrington @ChefJulie_RD #muffin #glutenfree #grainfree #baking #breakfast #snack

One of the cooking goals that I’ve been working on is working with flour alternatives. There are so many varieties of flours (almond flour, quinoa flour, coconut flour, oat flour, plus so many more!) on the shelves in the grocery store and I’ve been intrigued. Mainly, because I am a food science nerd and I want to learn and understand their baking properties, but also I think many of us are trying to trim back on the amount of refined grains we are consuming (ie. white flour), so it’s been a fun challenge baking with these flour alternatives.

Banana Bread Muffins - Pair with breakfast or add as a snack, these gluten-free Banana Bread Muffins can fit into any part of your day. via Chef Julie Harrington @ChefJulie_RD #muffin #glutenfree #grainfree #baking #breakfast #snack

I’ve quickly learned that these alternative flours do not have that perfect 1:1 ratio. FYI, coconut flour sucks up so much moisture. I tried baking cookies with coconut flour and when I picked one up it crumbled right in my hand. Note to self: Add more liquid and maybe pair coconut flour with other flours too. (I’m still working on that recipe!)

Banana Bread Muffins - Pair with breakfast or add as a snack, these gluten-free Banana Bread Muffins can fit into any part of your day. via Chef Julie Harrington @ChefJulie_RD #muffin #glutenfree #grainfree #baking #breakfast #snack

I had received a bag of almond flour when I was on the trip with California Almond Board and I feel like it’s been calling my name to bake with it every time I open my pantry and see it.

Banana Bread Muffins - Pair with breakfast or add as a snack, these gluten-free Banana Bread Muffins can fit into any part of your day. via Chef Julie Harrington @ChefJulie_RD #muffin #glutenfree #grainfree #baking #breakfast #snack

When you have overripe bananas, bake some banana bread muffin.

Print
clock clock iconcutlery cutlery iconflag flag iconfolder folder iconinstagram instagram iconpinterest pinterest iconfacebook facebook iconprint print iconsquares squares iconheart heart iconheart solid heart solid icon
Gluten-Free Banana Bread Muffins with nut butter

Banana Bread Muffins

  • Author: Chef Julie Harrington, RD
  • Prep Time: 15
  • Cook Time: 35
  • Total Time: 50 minutes
  • Yield: 12 1x
  • Category: Muffin
  • Method: Baking

Description

Pair with breakfast or add as a snack, these grain-free Banana Bread Muffins can fit into any part of your day.


Ingredients

Scale
  • 3 eggs
  • 3 bananas
  • 1/3 cup maple syrup
  • 1 tsp vanilla extract
  • 1/3 cup plain Greek yogurt
  • 1 3/4 cup almond flour
  • 1/4 cup coconut flour
  • 1 teaspoon baking powder
  • 11/2 teaspoon cinnamon
  • 1/8 teaspoon salt

Instructions

  1. Preheat oven to 350 degrees F. Spray a muffin tin with cooking spray and set aside.
  2. In a food processor or blender, blend the eggs, bananas, maple syrup, and vanilla extract, until blended through and fluffy (to incorporate air). Pour into a bowl and fold in the yogurt.
  3. In a separate bowl, sift together the almond flour, coconut flour, baking powder, cinnamon, and salt.
  4. Fold wet ingredients into dry and stir until just combined.
  5. Pour muffin batter into muffin tins and bake for 30-35 minutes or until golden brown. (Insert a toothpick into the center of a muffin at they are done when it comes out clean. Center will also spring back when pressed.)

Keywords: muffin, grain-free, gluten-free, baking

Recipe Card powered byTasty Recipes
Chef Julie Harrington, RD - Culinary Nutrition Consultant of chefjulierd.com
Banana Bread Muffins - Pair with breakfast or add as a snack, these gluten-free Banana Bread Muffins can fit into any part of your day. via Chef Julie Harrington @ChefJulie_RD #muffin #glutenfree #grainfree #baking #breakfast #snack