Pear Walnut Muffins

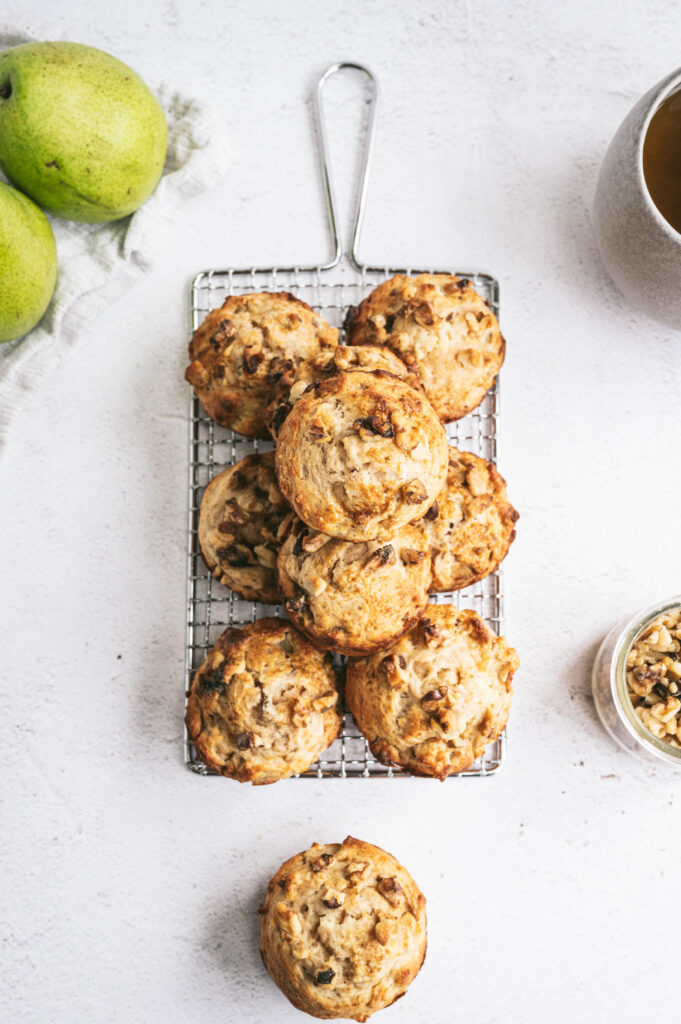
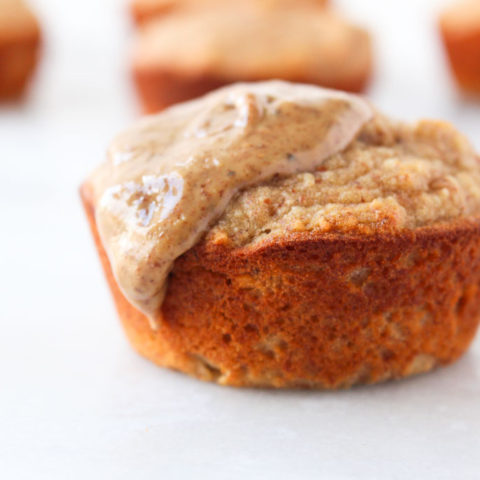
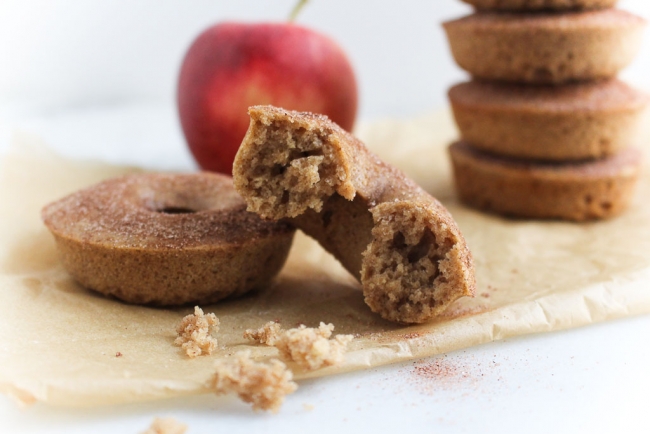
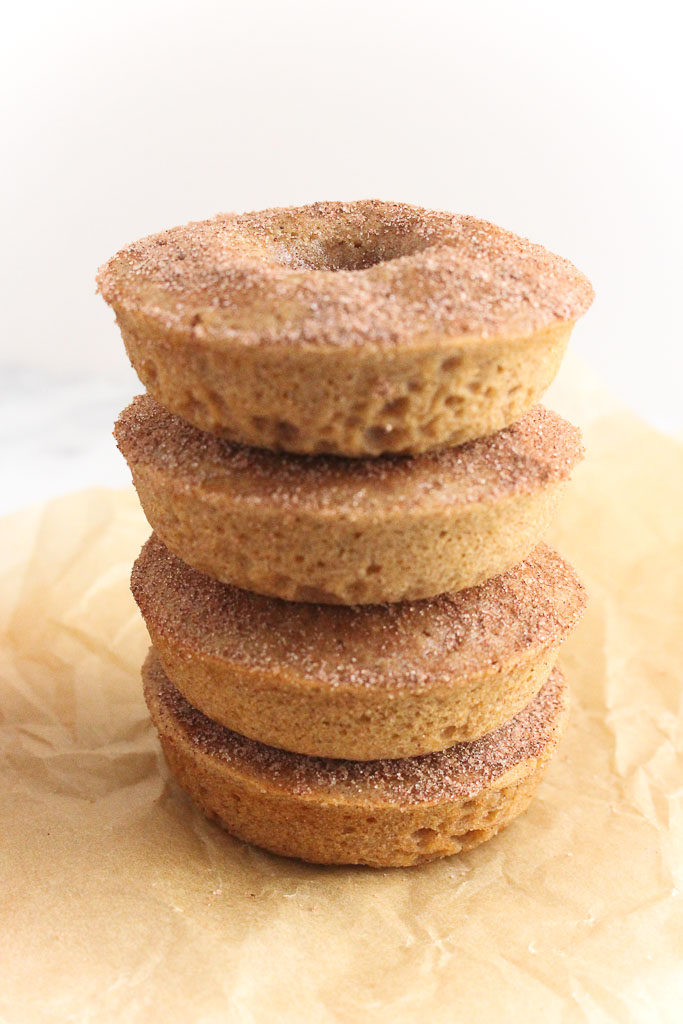
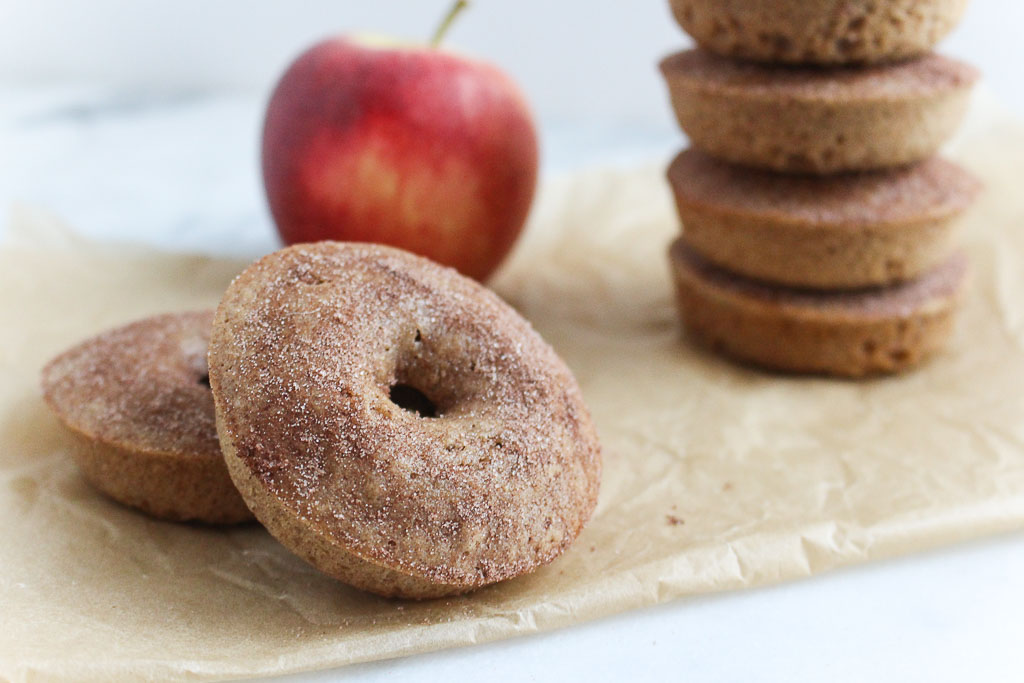
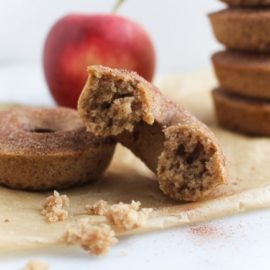
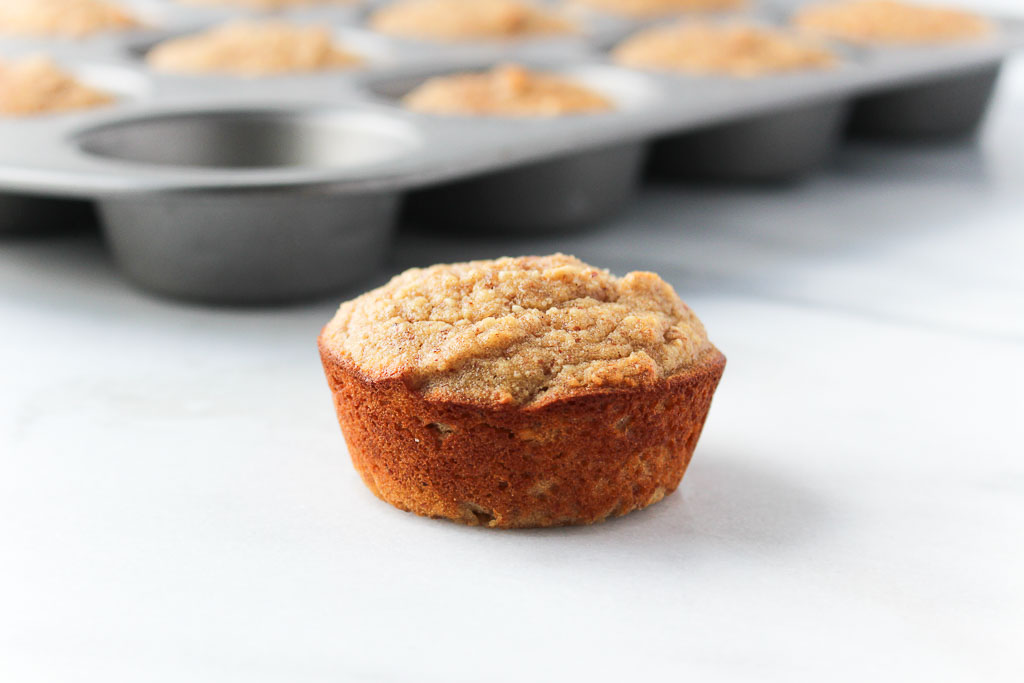
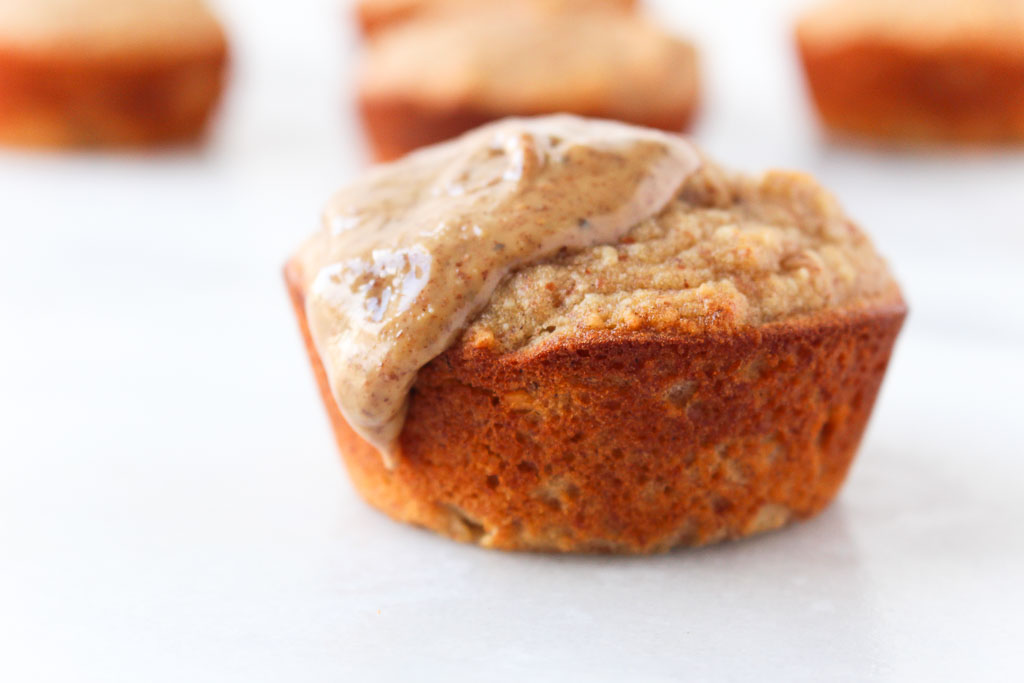
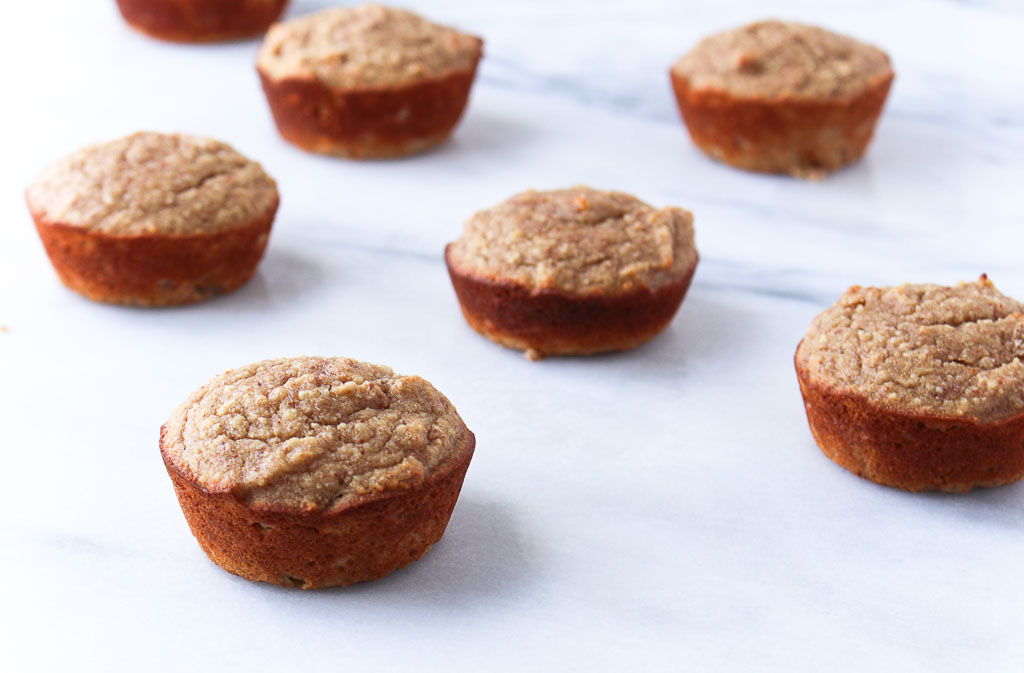
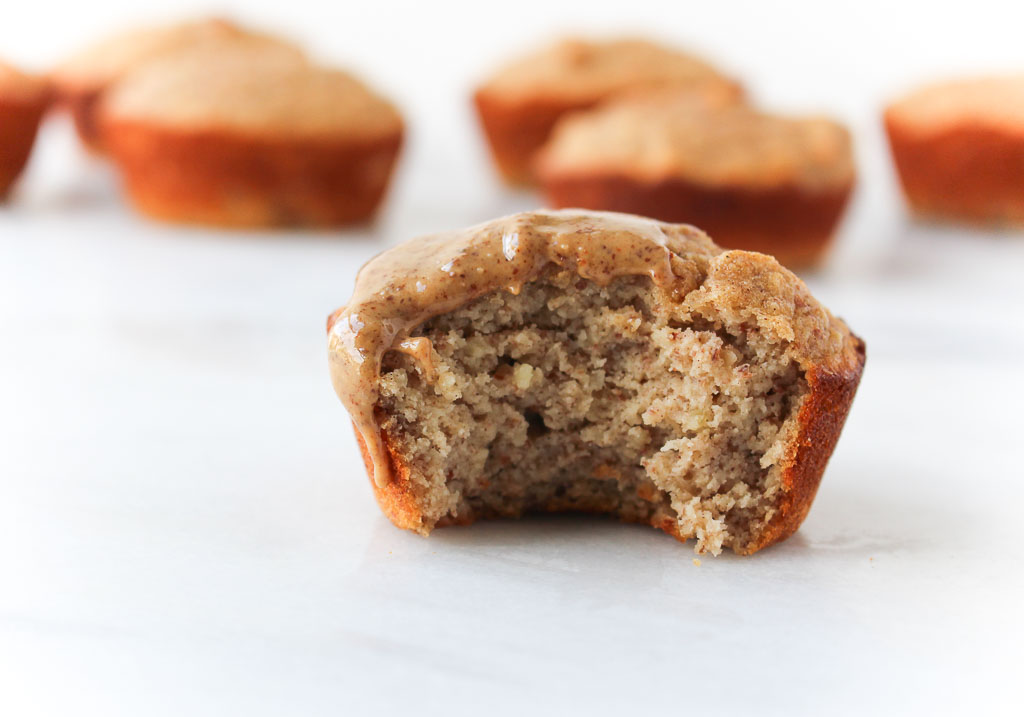
Enjoy as part of breakfast or alone as a snack. These Pear Walnut Muffins are simple to make with big flavor.

Pear walnut muffins stacked on top of each other
pear walnut muffins stacked on top of each other on a cooling rack

How to know if a pear is ripe

Remember to “check the neck”. Pears are one of the few fruits that don’t ripen on the tree. Pears are harvested when they reach maturity, and when left at room temperature pears slowly ripen from the inside out.

Apply gentle pressure to the neck of the pear with your thumb. If it yields to pressure, it’s ripe.

What’s different about green anjou pears?

Anjou pears have a more egg shape appearance. Their dense flesh holds up well in heated applications like baking, poaching, roasting, or grilling and they are delicious when sliced fresh in salads or eaten as an out-of-hand snack.

pear walnut muffin cut in half on a white plate

How to make Pear Walnut Muffins

The recipe for these pear walnut muffins is pretty much a straight forward muffin recipe.

  1. Pour wet ingredients into dry ingredients.
  2. Fold in mix-ins.
  3. Bake!

Recipe Notes:

Why sift flour?

Sifted flour is much lighter than unsifted flour and easier to mix into other ingredients when forming a cake or muffin batter. When flour is sifted with other dry ingredients, it helps combine them evenly before they are mixed with other ingredients.

Be mindful of the size.

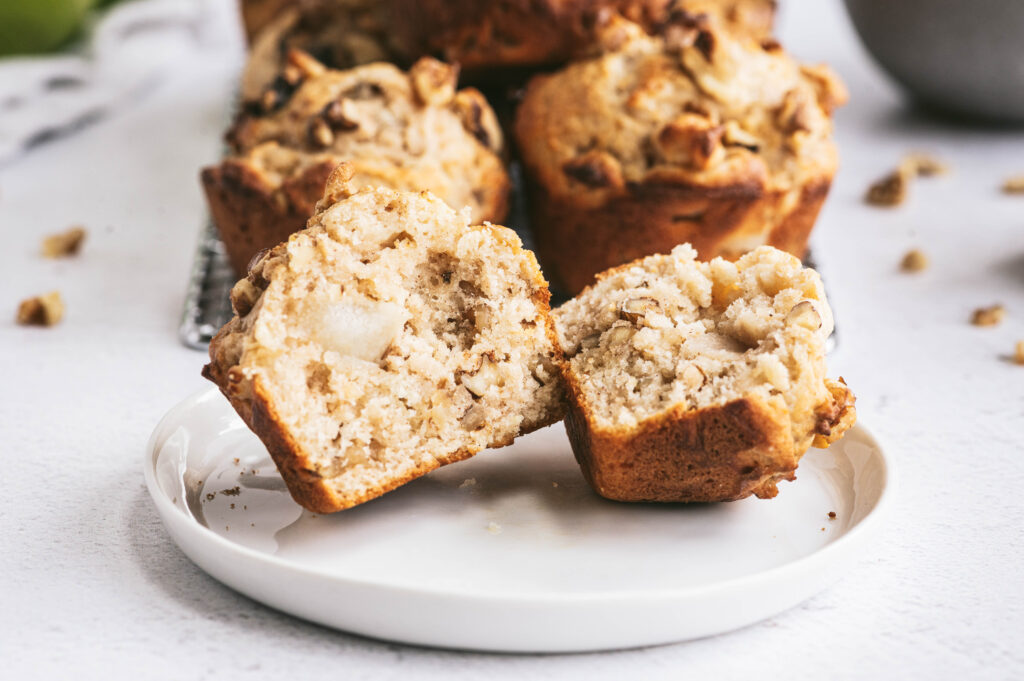
When chopping ingredients to mix into the batter, be mindful of the size. Chop ingredients in an even size. For the pears in this recipe, think about each bite of the muffin – big enough to note the taste and texture but not too big that it takes over.
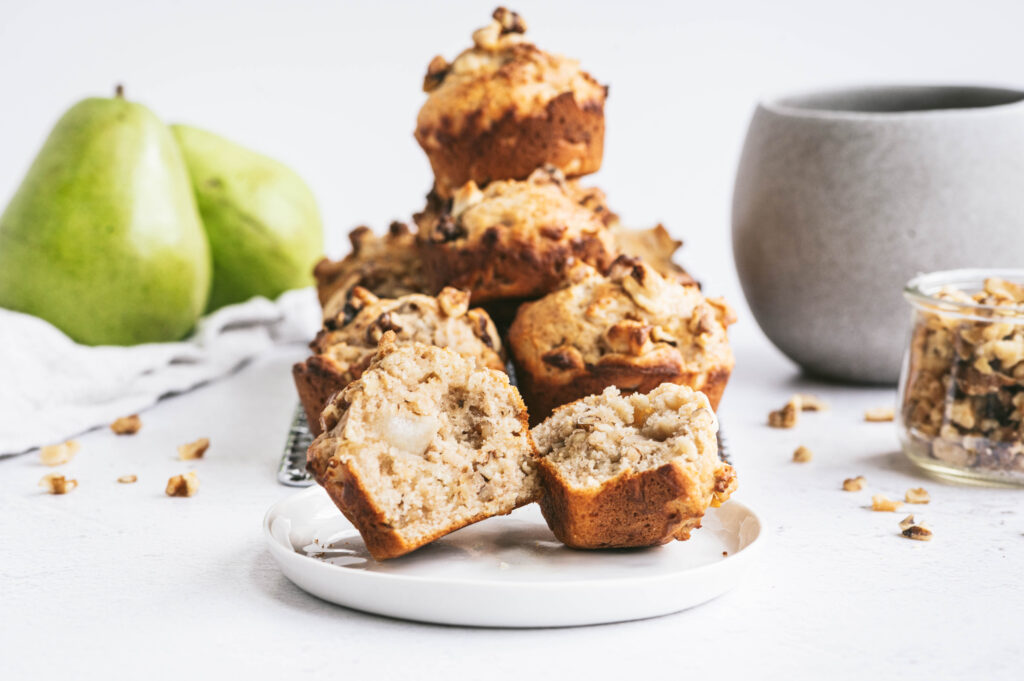
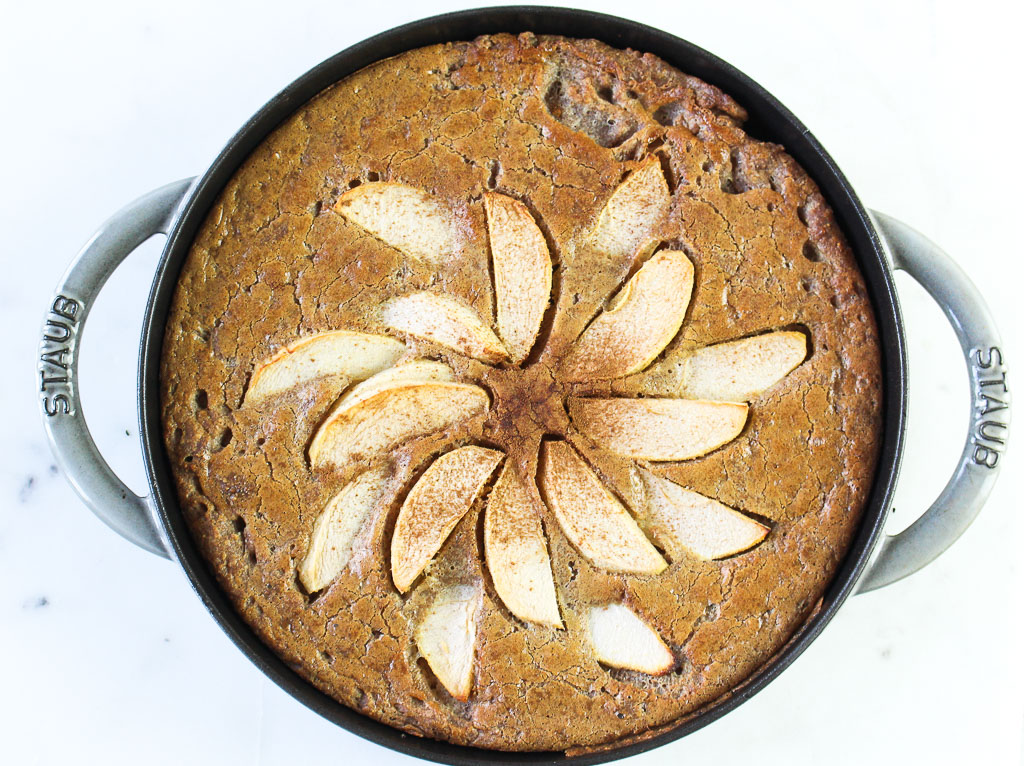
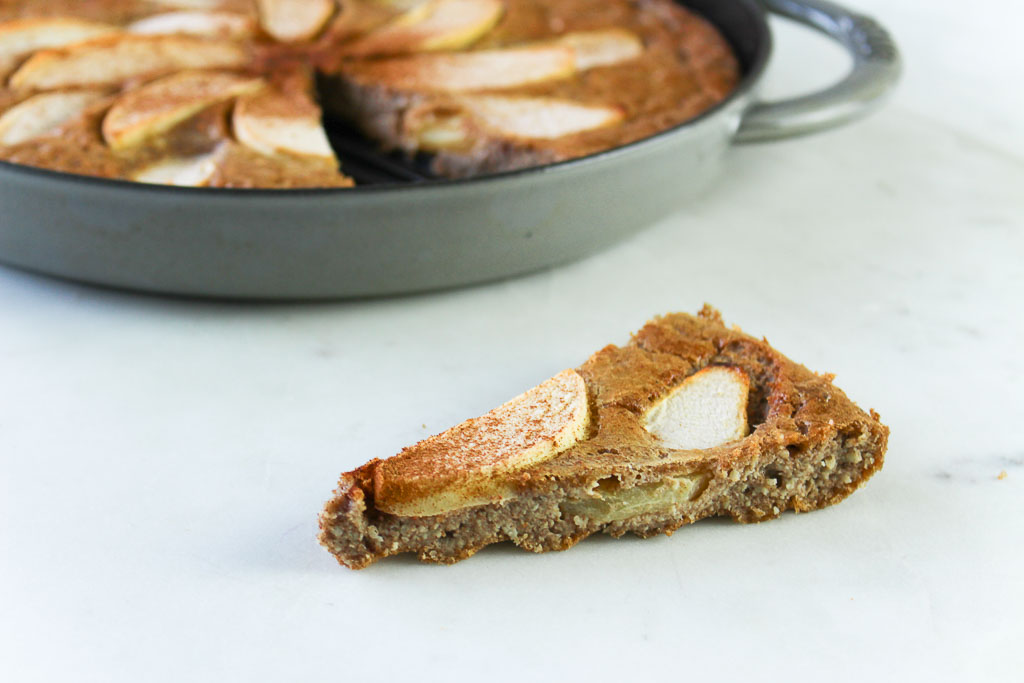
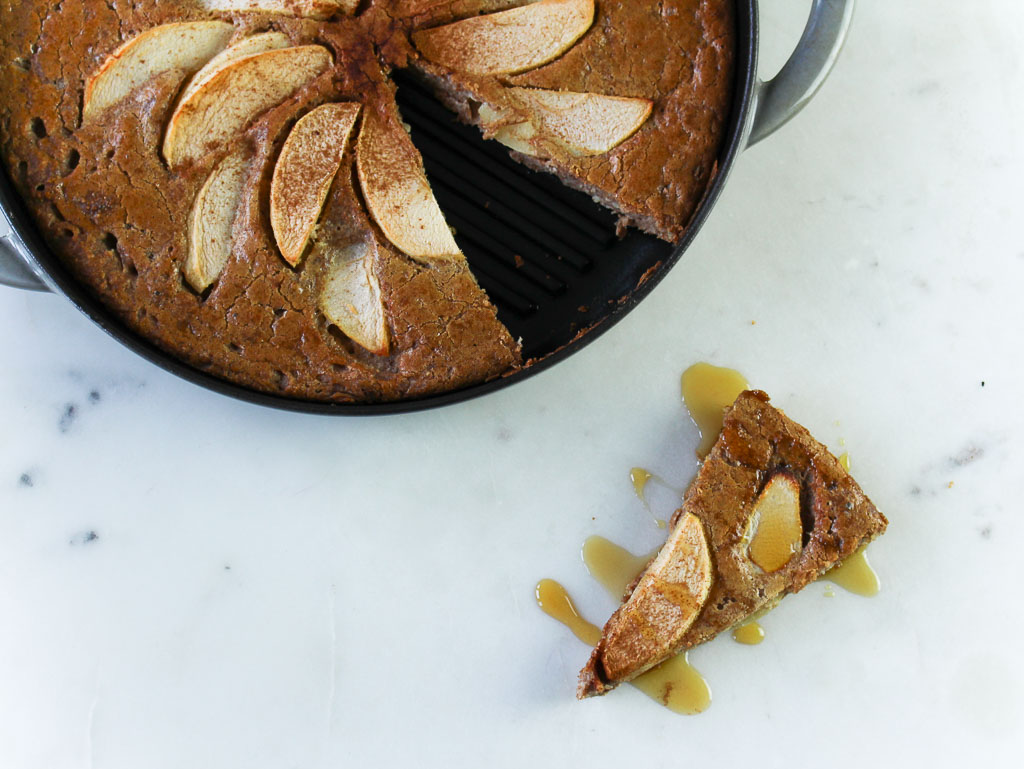
Print
clock clock iconcutlery cutlery iconflag flag iconfolder folder iconinstagram instagram iconpinterest pinterest iconfacebook facebook iconprint print iconsquares squares iconheart heart iconheart solid heart solid icon
Pear walnut muffins stacked on top of each other

Pear Walnut Muffins

  • Author: Chef Julie Harrington, RD
  • Prep Time: 15
  • Cook Time: 20
  • Total Time: 35 minutes
  • Yield: 10
  • Category: muffin
  • Method: baking

Description

These pear walnut muffins are the perfect addition to a breakfast or enjoy alone as a snack. Learn baking tips to create perfect muffins every time!


Ingredients

1 large ripe pear peeled, cored and diced (preferably d’Anjou)
1 teaspoon cinnamon
1 tablespoon packed brown sugar
1 1/4 cups all-purpose flour
1/4 teaspoon salt
1 1/4 teaspoons baking powder
1/8 teaspoon baking soda
1/3 cup granulated sugar
1 large egg
1/2 cup full-fat Greek yogurt
1/4 cup apple cider
1/4 cup unsalted butter melted and cooled slightly
1/2 teaspoon vanilla extract
¾ cup chopped walnuts

Optional topping:
coconut sugar or coarse sugar
chopped walnuts


Instructions

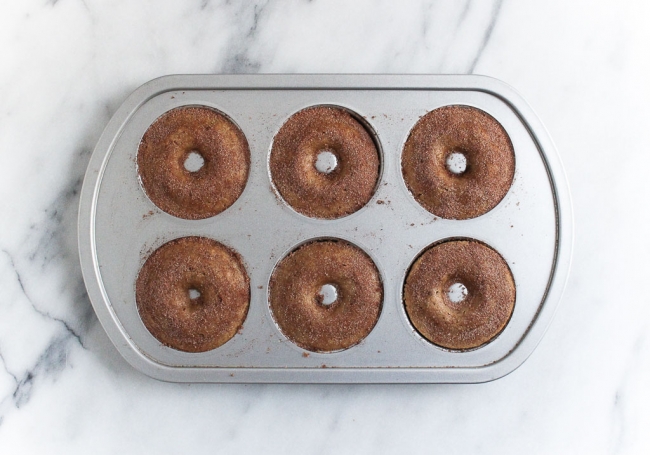
  1. Preheat oven to 400 degrees F.  Grease a muffin tin with cooking spray. Set aside.
  2. In a small bowl, mix together diced pears, cinnamon, and brown sugar. Set aside.
  3. In a large mixing bowl sift together flour, salt, baking powder, baking soda, and granulated sugar. Make a well in the center of the dry ingredients. 
  4. In a medium mixing bowl whisk together the egg, Greek yogurt, apple cider, butter, and vanilla, until smooth. 
  5. Pour the wet ingredients into the dry ingredients. Gently fold together until the dry ingredients are just moistened.
  6. Add the walnuts and pear mixture and any accumulated juice to the batter. Gently fold with a spatula until the pecans and pears are incorporated.
  7. Divide the batter between the muffin wells. Sprinkle the tops of the muffins generously with coconut sugar and chopped walnuts. Allow the muffins to rest for 10 to 15 minutes before baking.
  8. Bake for 15 to 20 minutes or until a toothpick inserted in the center comes out with no wet batter.
  9. Cool the muffins in the pan for 10 minutes, then remove to a wire rack to cool completely.

Notes

Why sift flour? Sifted flour is much lighter than unsifted flour and easier to mix into other ingredients when forming a cake or muffin batter. When flour is sifted with other dry ingredients, it helps combine them evenly before they are mixed with other ingredients.

Keywords: pear, walnut, muffins, baked goods, baking

Recipe Card powered byTasty Recipes

How to freeze muffins and prevent freezer burn

Cool muffins completely before wrapping and freezing. To freeze, wrap securely in foil or freezer wrap, or place in freezer bags. Be sure to remove as much excess air within the bag as possible. Muffins can be stored frozen for up to 3 months.

Chocolate Chip Zucchini Bread

Do you have an overabundance of zucchini from your garden or the farmer’s market? Turn it into this delicious Chocolate Chip Zucchini Bread. With only a hint of sweetness, this can be enjoyed with any meal or snack.

Chocolate Chip Zucchini Bread on a marble slab

I tend to enjoy cooking more as you can adjust the taste as you go and have more control throughout the process of a dish during the cooking process. For me, baking (especially when developing a new recipe), is much more intimidating. Why? Because you measure, mix, pour into a pan… and then hope for the best! Once that timer goes off you find out if it’s a win or a flop.

This quickbread is a little denser than regular quick bread, as I used half whole wheat flour. When I bake I try to squeeze in whole grains where I can. My favorite whole grain flours to bake with are whole wheat flour and oat flour. I’ve also been experimenting with almond flour and coconut flour too, which totally throw you for a curveball because they have very different baking properties.

Why We Love Zucchini 

Just like most green vegetables, zucchini is a great source of vitamins and minerals including Vitamin C. 

It can be cooked in so many ways, including baking. You can eat it raw or cooked. 

If you have little ones, because of its mild taste you can sneak these veggies into baking recipes and they won’t even know it’s there but still get added nutrition!

Chocolate Chip Zucchini Bread sliced on a marble slab

When is Zucchini in Season and the Freshest?

Zucchini is primarily considered a summer veggie with its peak season being June through late August. However, most local markets and stores have zucchini available year-round, which is great because zucchini bread is popular around the fall, winter, and other holidays. 

What You Need For Chocolate Chip Zucchini Bread

eggs

unsweetened applesauce

brown sugar

vanilla extract

whole wheat flour

all-purpose flour

salt

baking soda

baking powder

cinnamon

shredded zucchini

chocolate chips

How to Make Zucchini Bread with Chocolate Chips 

Prep your loaf pan by spraying some non-stick spray. You can also use parchment paper if you choose. 

Preheat the oven to 350 degrees. 

Start by shredding the zucchini. Once you are finished try to get rid of as much moisture as possible by pressing firmly with paper towels. 

Whisk together the eggs, sugar, applesauce, and vanilla in a large bowl until the mixture is smooth. 

Grab another mixing bowl and sift together your flours, baking soda, baking powder, salt, and cinnamon. 

Gently fold in the zucchini, being careful not to overmix. By folding the zucchini in you don’t have to worry about clumps, instead you will get a little bit in every bite.

Pour the dry ingredients into the bowl with the egg mixture slowly while constantly stirring. Add just a little at a time. 

Toss in the chocolate chips and fold just until they are distributed evenly. 

Pour the zucchini bread batter in the 9×5 loaf pan. 

Bake for about 50 minutes. Check it with a toothpick to be sure that it is done. If it is, the toothpick will come out clean. 

Take the bread from the oven and let it rest for at least 15 minutes before transferring it out of the loaf pan. 

Cool completely before slicing so it doesn’t fall apart.

Chocolate Chip Zucchini Bread on a marble slab with chocolate chips sprinkled on top and around the loaf

Variations of Zucchini Bread 

  • Want to make banana zucchini bread? Simply swap the applesauce for mashed bananas!
  • Feel free to use any variety of chocolate (white, semi-sweet, dark, or milk). 
  • Add in some nuts for a nice crunch! Walnuts are my favorite to add to quick bread recipes.

Tips for Baking with Zucchini 

  • Do you have to peel zucchini before using it? Nope! Generally speaking, zucchini is not a veggie that needs peeling before eating. 
  • Zucchini contains a lot of moisture, so always follow the recipe when it comes to knowing whether or not to leave it or to remove as much as possible. 
  • To shred zucchini, you can use one of the sides of your cheese grater so no fancy equipment needed! 

How to Store Zucchini Bread with Chocolate Chips 

Wrap the zucchini loaf in plastic wrap and you can store it at room temperature for at least 4 days. You can also refrigerate it if you would rather do that. 

To freeze, secure the cooled loaf in plastic wrap and place it in a freezer bag. Some also prefer to wrap it in another layer using aluminum foil. Freezing for later is a great idea when making multiple batches or if you want to make it ahead of time for special occasions.

Print
clock clock iconcutlery cutlery iconflag flag iconfolder folder iconinstagram instagram iconpinterest pinterest iconfacebook facebook iconprint print iconsquares squares iconheart heart iconheart solid heart solid icon
Chocolate Chip Zucchini Bread on a marble slab with a knife and napkin

Chocolate Chip Zucchini Bread

  • Author: Chef Julie Harrington, RD
  • Prep Time: 15 minutes
  • Cook Time: 55 minutes
  • Total Time: 1 hour 10 minutes
  • Yield: 12 1x
  • Category: baked goods
  • Method: oven
  • Cuisine: American

Ingredients

Scale

3 eggs
1/2 cup unsweetened applesauce
1/2 cup brown sugar
1 teaspoon vanilla extract
1 1/2 cups whole wheat flour

1 1/2 cups all-purpose flour
1/2 teaspoon salt
1/2 teaspoon baking soda
1 teaspoon baking powder
1 tablespoon cinnamon
3 cups shredded zucchini (about 2 zucchinis)
1 cup chocolate chips


Instructions

  1. Preheat the oven to 350 degrees F. Grease a 9×5 inch loaf pan with cooking spray.
  2. Shred zucchini. Using paper towels press as much moisture you can from the zucchini.
  3. In a large bowl, whisk together the eggs, applesauce, brown sugar, and vanilla until smooth.
  4. In a separate bowl, sift together whole wheat flour, all-purpose flour, salt, baking soda, baking powder, and cinnamon. Fold zucchini into flour. This will help zucchini being dispersed throughout the bread vs. clumping together.
  5. Add the dry ingredients to the wet ingredients, a little at a time, mixing until well combined.
  6. Fold in the chocolate chips until they are evenly distributed throughout the batter.
  7. Pour the batter into the prepared loaf pan. Bake for 50-55 minutes, until a toothpick inserted in the middle and comes out clean.
  8. Remove the bread from the oven, and let it cool for 10-15 minutes before taking it out of the loaf pan. Cool completely before slicing.

Keywords: zucchini bread, zucchini, chocolate chips, baking, whole grain,

Recipe Card powered byTasty Recipes

This recipe was originally posted in 2013. The recipes, images, and content have been updated.

Other recipes you may enjoy

Peanut Butter Oat Bars

These Peanut Butter Oat Bars are soft, chewy, and subtly sweet to add to a balanced breakfast or enjoyed as a snack.

homemade oat bars on a black slate

Dear future children, please do not have a peanut allergy. Your future peanut butter addict’s mom will be very sad. Peanut butter is a staple food in my diet. I can confidently say I enjoy peanut butter pretty much every day.

Did you know?

It takes about 540 peanuts to make a 12-ounce jar of peanut butter. (source)

Health benefits of peanut butter

Replacing saturated fat with similar amounts of unsaturated fats may reduce the risk of heart disease. One serving of dry-roasted peanuts (30 grams) contains 12 grams of unsaturated fat, only two grams of saturated fat, and no trans fat. 

Peanuts are an excellent source of (20% of the Daily Value):

  • Niacin: Niacin is an important B vitamin that helps to convert food to energy, aids with the digestive and nervous system, and helps the skin.
  • Manganese: Manganese is important for processing cholesterol, and nutrients like carbohydrates and protein.
    (source)
homemade snack bars on a black marble slab

Just one bowl, these bars are easy to whip up. Pair with a piece of fruit and/or yogurt for breakfast, or enjoy alone as a snack. If you are peanut butter obsessed like me, I even added a smear of peanut butter on top.

Peanut Butter Oat Bars stacked on top of each other

I kept this Peanut Butter Oat Bars recipe simple, but of course, you can add your own twist. Stir in chocolate chips, some nuts or seeds. I’m even curious to try tahini in place of the peanut butter.

Print
clock clock iconcutlery cutlery iconflag flag iconfolder folder iconinstagram instagram iconpinterest pinterest iconfacebook facebook iconprint print iconsquares squares iconheart heart iconheart solid heart solid icon
close up image of peanut butter oat bars

Peanut Butter Oat Bars

  • Author: Chef Julie Harrington, RD
  • Prep Time: 15
  • Cook Time: 30
  • Total Time: 45 minutes
  • Yield: 8
  • Category: Baked Good
  • Method: Baking

Description

These Peanut Butter Oat Bars are soft, chewy, and subtly sweet to add to a balanced breakfast or enjoyed as a snack.


Ingredients

Scale

1/2 cup natural peanut butter, melted
1/2 cup coconut oil, melted
1 small ripe banana, mashed
1/4 cup maple syrup
2 eggs
1 teaspoon vanilla extract
1 teaspoon ground cinnamon
1 1/2 cups rolled oats
1/2 cup finely ground flaxseed (see notes)


Instructions

  1. Preheat the oven to 350°F. Coat an 8×8 baking pan with cooking spray and set aside.
  2. In a large bowl, whisk together peanut butter, coconut oil, banana, maple syrup, eggs, and vanilla extract until well combined.
  3. Stir in cinnamon, rolled oats, and flaxseed, until well combined.
  4. Pour into the prepared baking dish and spread in an even layer. Bake for 25-30 minutes until edges are lightly browned and a toothpick inserted in the middle comes out clean.
  5. Cool for 15 minutes before slicing into squares. 

Notes

I used Manitoba Milling Co. Smooth Whole-Milled Flaxseed, which is more of a powdery/flour texture. 

Add chocolate chips or nuts, sprinkled on top or folded into the batter, as desired.

Keywords: peanut butter, oats, bars, breakfast, snack, whole grain,

Recipe Card powered byTasty Recipes

Other recipes you may enjoy

Peach Walnut Crisp

Peach Walnut Crisp is a simple summer dessert recipe, full of juicy peaches and a thick walnut crumb topping that everyone will love. Peach Walnut Crisp via RDelicious Kitchen @rdkitchenDuring the summer months, I love desserts that incorporate fresh produce. Pie is one of my favorite desserts, but my favorite parts are the middle and the crumble on top. Making a fruit crisp is the answer for me!

What’s the Difference Between a Cobbler, Crumble, and Crisp?

Crumbles and crisps are very similar, with the name crumble originating from England. They both contain fresh fruit with a streusel-like topping that gets baked until the fruit is cooked. The original difference between the two lay in the streusel topping: crisps would contain oats and crumbles would not. (source)


Peaches are starting to take over the produce department and as I was eating the juiciest peach on my way home from work and dripping peach juice down my arms and all over my car (not the smartest snack choice for the car) when I came up with this recipe idea.
Peach Walnut Crisp via RDelicious Kitchen @rdkitchen

Peaches may be the seasonal featured ingredient of this recipe, but paired with this amazing thick walnut crisp topping, walnuts are the true star. Walnuts are a delicious and versatile ingredient that is the perfect complement to other whole foods for nutritious, tasty recipes.

Did you know?
Unique among nuts, walnuts contain the highest amount of ALA.


What is ALA?
Alpha-linolenic acid (ALA), is the plant-based omega-3 essential fatty acid, required by the human body. As one of the best plant food sources of omega-3s, a one-ounce serving of walnuts provides 2.5 grams of ALA. A growing body of scientific evidence is beginning to uncover a variety of benefits that ALA/omega-3s may provide to our bodies. While most nuts contain monounsaturated fats, only walnuts are comprised primarily of polyunsaturated fat (13 grams out of 18 grams total fat). Dietary guidelines recommend that people keep total fat intake between 20 to 35 percent of calories, with most fats coming from sources of polyunsaturated and monounsaturated fatty acids. Walnuts provide important components of a healthy diet – an ounce of walnuts has 2.5 grams of the essential plant-based omega-3 alpha-linolenic acid (ALA), and 4 grams of protein and 2 grams of fiber to keep you feeling full.
Peach Walnut Crisp via RDelicious Kitchen @rdkitchen
I get a lot of questions of how to store nuts in your home kitchen. I turned to the California Walnut Commission to get the most accurate answers from walnut experts!

You can maintain the fresh taste of California walnuts by keeping them cold. Walnuts go rancid when exposed to warm temperatures for long periods of time. Heat causes the fat in walnuts to change the structure, which creates off odors and flavors. Fresh walnuts smell mildly nutty and taste sweet. If your walnuts smell like paint thinner, you know they’re rancid. And if they’re rancid, you should throw them away!

When you bring walnuts home from the store, the best place to store them is in your refrigerator or freezer, depending on when you’re going to use them. If you’re going to use the walnuts right away, place them in your refrigerator. If you’ll be storing them for a month or longer, store them in your freezer. If you buy walnuts in sealed packaging, you can store the walnuts in their original packaging. Once you open the bag, transfer the walnuts to an airtight container to maintain freshness. If you buy bulk walnuts, either in-shell or shelled, place the walnuts in an airtight container for long-term cold storage.
Peach Walnut Crisp via RDelicious Kitchen @rdkitchenHappy baking!

Print

clock clock iconcutlery cutlery iconflag flag iconfolder folder iconinstagram instagram iconpinterest pinterest iconfacebook facebook iconprint print iconsquares squares iconheart heart iconheart solid heart solid icon
Peach walnut crisp in a baking dish and white bowl

Peach Walnut Crisp

  • Author: Julie @ RDelicious Kitchen
  • Prep Time: 15 mins
  • Cook Time: 30 mins
  • Total Time: 45 mins
  • Yield: 4
  • Category: Dessert

Description

Enjoy this Peach Walnut Crisp for a sweet (and healthy) treat!


Ingredients

Scale
  • 4 large peaches, peeled, pitted, and sliced
  • 1 1/2 tablespoons arrowroot starch (or cornstarch)
  • 2 teaspoons cinnamon, divided
  • 1/3 cup rolled oats
  • 1 cup walnuts, chopped
  • 2 tablespoons oat flour
  • 2 tablespoons coconut sugar
  • 1/8 teaspoon salt
  • 2 tablespoons maple syrup
  • 2 tablespoons coconut oil (not melted)

Instructions

  1. Preheat oven to 350 degrees F. Coat an 8-inch baking dish with cooking spray. Set aside.
  2. In a large bowl, gently toss peach slices with arrowroot and 1/2 teaspoon cinnamon until evenly coated. Pour in an even layer at the bottom of the baking dish.
  3. In another bowl, combine the rolled oats, walnuts, oat flour, coconut sugar, and salt. Stir to combine. Mix in the maple syrup and coconut oil. Knead with the back of a fork or finger to create a crumb-like texture. Evenly layer on top of the peach slices in the baking dish.
  4. Bake in the oven for 30 minutes, until crumble is golden brown.
  5. Remove from oven and let cool for at least 30 minutes on a cooling rack. This will allow the peach mixture set.

Recipe Card powered byTasty Recipes

Chef Julie Harrington, RD - Where food and love meet in the kitchen @ChefJulie_RD

Peach Walnut Crisp by Chef Julie Harrington, RD @ChefJulie_RD #peach #crisp #dessert #crumble #fruitcrumble

This recipe was originally posted in June 2018. The recipe was too good, so nothing changed there. I just spruced up the post with my new website. 

Recipe ReDux

Whole Grain Orange Cranberry Bread

Have your house smell like the holiday season when you bake this Whole Grain Orange Cranberry Bread. Bake loaves as holiday gifts that your friends and family will love and they won’t even know it’s lightened up!

Orange cranberry bread on a white serving tray next to an orange half


I absolutely love baking during this time of year. Many gifts I like to give come in the form of food. When I was younger, I used to help my mom bake mini quickbreads to give to our neighbors, teachers, mailman, etc. to spread the holiday cheer. They were always wrapped with a nice bow and a little note attached. Everyone likes a homemade treat to enjoy during the hectic holiday season.


I’ve been playing around with using different types of flours in my baking recipes lately. I have not yet mastered understanding gluten free flours yet (I’m talking to you coconut flour – you dry crumbly mess!), but I am getting better with other whole grain flours.


Do you love baking as much as I do? I try to incorporate more whole grains vs. refined grains into my daily diet and during the holiday season, I do love baking, so why not add some whole grains here too!

The orange-cranberry combo is such a classic and always reminds me of the holiday season. While the holiday season may bring some indulgences with it, you still can make recipes taste indulgent with a healthy twist like this whole grain orange cranberry bread, by switching to whole grains, trimming back on sugar, and adding wholesome fruit.

top shot of healthy cranberry bread next to cranberries and an orange

What is White Whole Wheat Flour?

The look of this recipe may be deceiving when I tell you I used a whole wheat flour. Hmmm.. shouldn’t it be browner? Enter – White WholeWheat Flour. Sounds like a contradiction, right?

White wheat is a different type of wheat that has no major genes for bran color (unlike traditional “red” wheat which has one to three bran color genes). An easy way to think of it is as a sort of albino wheat. The bran of white wheat is not only lighter in color but it’s also milder in flavor, making whole white wheat more appealing to many people accustomed to the taste of refined flour.

The term “white flour” has often been used to mean “refined flour,” so “whole white wheat flour” sounds like a contradiction in terms. But it is simply WHOLE flour – including the bran, germ and endosperm – made from WHITE wheat. – source, Oldways

White whole wheat flour is a whole grain and a much easier solution to add in whole grains into your favorite baking recipes without compromising appearance, taste, and texture.

I’ve noticed in baking white whole wheat flour is not as dense as a regular whole wheat flour, but more of the perfect balance in between of all-purpose flour and whole wheat flour.

healthy cranberry quick bread sliced and ready to serve

Ingredients Needed For Healthy Cranberry Bread

white whole wheat flour

sugar

 salt

 baking powder

 baking soda

Oranges – these are going to be juiced and zested, so skip the store bought

 milk – you can use dairy or plant based, your choice!

Greek yogurt

 eggs

 vanilla extract

cranberries

For the glaze:

orange juice

powdered sugar

two slices of whole grain cranberry bread on a small plate next to the loaf

How To Make Whole Grain Cranberry Orange Bread 

Prep your loaf pan by spraying with non-stick spray or use parchment paper and preheat the oven to 375 degrees. 

In a medium-size mixing bowl sift together the flour, salt, sugar, baking powder, and baking soda. 

Using an electric mixer (hand or stand) combine the orange juice, milk, yogurt, eggs, and vanilla extract. 

Once it’s smooth, add the dry ingredients into the wet and continue mixing.

Fold in the cranberries. 

Pour the batter into the loaf pan and bake until a toothpick comes out clean. This should take about 35 to 40 minutes. 

Once the cranberry bread has finished baking, allow it to cool on a baking rack while you make the glaze. 

Whisk together the sifted powdered sugar and orange juice. Then drizzle on top! You want to be sure the loaf has cooled some or else the glaze will just run off. 

Can I Use Frozen Cranberries?

While fresh cranberries have the best flavor, you can use frozen if that’s what you have. Be sure they are thawed completely before using and try to remove as much excess water as you can.

Health Benefits of Cranberries:

Cranberries naturally contain the flavonoid, proanthocyanidin (PAC) and other polyphenols that have potential health benefits, including reducing the risk of heart disease. Plus, just one cup of fresh cranberries contain 5.1 grams of fiber, 94 mg of potassium, and over 20% of the Daily Value for vitamin C. Nutrition information provided by the Cranberry Institute

Orange Cranberry Bread via RDelicious Kitchen @rdkitchen #wholegrain #orange #cranberry #bread #quickbread #loaf #baking #seasonal #healthy #bakedgoods #holiday #healthyholiday


I caught myself cutting off a piece here and there every time I walked through the kitchen. Get ready friends and family, this Whole Grain Orange Cranberry Bread is going to be delivered to you with a ribbon and a special note from me this holiday season!

Print
clock clock iconcutlery cutlery iconflag flag iconfolder folder iconinstagram instagram iconpinterest pinterest iconfacebook facebook iconprint print iconsquares squares iconheart heart iconheart solid heart solid icon
whole grain orange cranberry bread sliced on a white platter

Whole Grain Orange Cranberry Bread

  • Author: Chef Julie Harrington, RD
  • Yield: 812 1x
  • Category: quickbread, holiday

Description

Have your house smell like the holiday season when you bake this Whole Grain Orange Cranberry Bread. Bake loaves as holiday gifts that your friends and family will love and they won’t even know it’s lightened up!


Ingredients

Scale
  • 2 cups white whole wheat flour
  • ⅓ cup sugar
  • ¼ tsp salt
  • 2 tsp baking powder
  • ½ tsp baking soda
  • 2 oranges, juiced and zest (reserving 1 tbsp juice)
  • ½ cup milk
  • 2 tbsp plain Greek yogurt
  • 2 eggs
  • 1 tsp vanilla extract
  • 1½ cups fresh cranberries, chopped
  • For the glaze:
  • 1 tbsp reserved orange juice
  • 1 tbsp powdered sugar, sifted

Instructions

  1. Preheat the oven to 375 degrees F. Spray a loaf pan with cooking spray, set aside.
  2. In a medium bowl, sift together white whole wheat flour, sugar, salt, baking powder, and baking soda.
  3. In a large bowl, with an electric mixer, beat together orange juice, milk, yogurt, eggs, and vanilla extract. Mix dry ingredients into wet ingredients slowly, until just combined. Fold in cranberries.
  4. Bake in the oven for 35-40 minutes, until golden brown and a toothpick inserted in the center, comes out clean.
  5. Let cool on a rack. Meanwhile whisk together the reserved orange juice and powdered sugar. Drizzle on top of the loaf. Slice and enjoy!

Keywords: quickbread, holiday, orange cranberry

Recipe Card powered byTasty Recipes
Chef Julie Harrington, RD - Culinary Nutrition Consultant of chefjulierd.com

Pin for later!

Healthy cranberry loaf bread next to cranberries and orange half with text overlay
 

Baked Apple Cider Donuts

Enjoy the taste of Fall with these Baked Apple Cider Donuts!

Baked apple cider donut cut in half on parchment paper

This is my favorite time of year. The fall crisp air means, scarves, boots, and apple picking! I go apple picking every year and I always have to get an apple cider donut when I am at the orchard. You now can make them in the comfort of your own home with this donut recipe. 

baked apple cider donuts in donut baking pan on a marble slab

These donuts are baked instead of fried and use white whole-wheat flour to incorporate more whole grains. White whole-wheat flour – sounds like a contradiction, right?

What is white whole wheat flour?

“White wheat is a different type of wheat that has no major genes for bran color (unlike traditional “red” wheat which has one to three bran color genes). An easy way to think of it is as a sort of albino wheat. The bran of white wheat is not only lighter in color but it’s also milder in flavor, making whole white wheat more appealing to many people accustomed to the taste of refined flour.

baked apple cider donuts stacked on top of each other

If you don’t have a donut pan, you can always use a muffin tin. Cook time may vary. To check for doneness, insert a toothpick in the center and see if it comes out clean.

baked apple cider donuts on top of each other on parchment paper
Print
clock clock iconcutlery cutlery iconflag flag iconfolder folder iconinstagram instagram iconpinterest pinterest iconfacebook facebook iconprint print iconsquares squares iconheart heart iconheart solid heart solid icon
image of apple cider donut half topped on other donut

Baked Apple Cider Donuts

  • Author: Chef Julie Harrington, RD
  • Prep Time: 10
  • Cook Time: 15
  • Total Time: 25 minutes
  • Yield: 6
  • Category: dessert
  • Method: baking
  • Cuisine: american

Ingredients

Scale

For the donuts:
1 cup white whole-wheat flour
1/3 cup sugar
½ teaspoon baking powder
¼ teaspoon salt
¾ teaspoon cinnamon
¼ teaspoon nutmeg
1/8 teaspoon ground all spice
1/8 teaspoon ground ginger
1 egg
2 tablespoons butter, melted
½ cup apple cider

Cinnamon sugar topping:

½ tablespoon sugar
¼ teaspoon cinnamon


Instructions

  1. Preheat oven to 350 degrees F. Coat donut pan with cooking spray.
  2. In a large bowl, sift white whole-wheat flour, sugar, baking powder, salt, cinnamon, nutmeg, all spice, and ginger.
  3. In another bowl, whisk together egg, melted butter, and apple cider.
  4. Mix the wet ingredients into the dry ingredients until just combined.
  5. Add batter to piping bag or large ziplock bag (cutting off the corner) and pipe batter into donut pan.
  6. Bake for 15 minutes, until a toothpick comes out clean.
  7. As donuts are baking, combine additional sugar and cinnamon; set aside.
  8. Remove donuts from the oven. Sprinkle evenly with the cinnamon and sugar mixture while donuts are warm. Let slightly cool before removing from the pan.

Keywords: donuts, apple cider, baked donuts, dessert

Recipe Card powered byTasty Recipes
Chef Julie Harrington, RD - Culinary Nutrition Consultant of chefjulierd.com

Other recipes you may enjoy

Sun Dried Tomato Corn Muffins

Rise and shine with a savory muffins breakfast. Try a savory twist on breakfast muffins with these Sun Dried Tomato Corn Muffins. 
Sun Dried Tomato Corn Muffins via RDelicious Kitchen @RD_Kitchen

This month, Recipe ReDux members were challenged to create new healthy takes on eating savory or dinner-inspired dishes for breakfast.
Growing up in an Italian family, bread was accompanied with dinner on the side with any dish. We did eat a lot of Italian dishes growing up, so fresh Italian bread was typically served with those dinners. The times we strayed away from our Italian roots, there was still bread on the table and often cornbread since that was one of my sister’s favorites.
Sun Dried Tomato Muffins via RDelicious Kitchen @RD_Kitchen
I remember not thinking some of the dinners didn’t pair well with the sweet corn bread, so I took the opportunity with this challenge to change it up a little and create a savory corn muffin.

Sun Dried Tomato Muffins via RDelicious Kitchen @RD_Kitchen
These savory corn muffins were great on their own. I also melted a little cheddar cheese on top. My mind instantly started thinking of recipes to pair these muffins with, like a hearty soup, chili, or sauteed collard greens. These would even be great cut up and turned into a savory corn bread stuffing.
Sun Dried Tomato Muffins via RDelicious Kitchen @RD_Kitchen

Do you prefer savory or sweet corn muffins?  

Print

clock clock iconcutlery cutlery iconflag flag iconfolder folder iconinstagram instagram iconpinterest pinterest iconfacebook facebook iconprint print iconsquares squares iconheart heart iconheart solid heart solid icon

Sun Dried Tomato Corn Muffins

  • Author: Julie @ RDelicious Kitchen
  • Yield: 8

Ingredients

Scale
  • 1 ¼ cup finely ground cornmeal
  • ½ cup white whole-wheat flour
  • 1 ½ teaspoon baking powder
  • ½ teaspoon baking soda
  • ¼ teaspoon salt
  • 1 tablespoon butter, melted
  • 1 egg
  • 1 teaspoon vanilla extract
  • ½ cup plain full fat (or 2%) Greek yogurt
  • 2 tablespoons honey
  • ¼ cup milk
  • 3/4 cup sun-dried tomatoes, chopped

Instructions

  1. Preheat oven to 350 degrees F. Spray eight wells of the muffin tin with cooking spray.
  2. In a medium bowl, whisk together cornmeal, flour, baking powder, baking soda, and salt.
  3. In a small bowl, whisk together melted butter, egg, vanilla extract, yogurt, honey, and milk.
  4. Stir wet ingredients into dry ingredients. Mix until just combined. Fold in sun-dried tomatoes.
  5. Scoop about 1/3 cup of batter into eight muffin wells.
  6. Bake for 13-15 minutes or until tops turn golden and center feels firm to the touch.

Recipe Card powered byTasty Recipes

Did you make this recipe? Tag @rdeliciouskitchen on Instagram or send me a picture, I’d love to see!
RDelicious Kitchen @RD_Kitchen

 Pin it for later!

Sun Dried Tomato Muffins via RDelicious Kitchen @RD_Kitchen

Check out more savory recipes from Recipe ReDux members!

Carrot Cake Donuts

A recipe fail turned into recipe win! I was testing a batch of carrot cake muffins and they didn’t rise enough creating that perfect golden muffin top I was looking for. Instead of wasting the extra batter, I piped them into a donut pan. Voila! Carrot cake donuts! Pop on over to Rachael’s, Avocado a Day Nutrition’s blog, where I am sharing this Carrot Cake Donut recipe!
Carrot Cake Donuts via RDelicious Kitchen @RDelicious Kitchen
Did you make this recipe? Tag @rdeliciouskitchen on Instagram or send me a pic, I’d love to see!
RDelicious Kitchen @RD_Kitchen

Flourless Chocolate Peanut Butter Muffins

You won’t believe that these Chocolate Peanut Butter Muffins are flourless! Made with wholesome ingredients these muffins can be part of a healthy breakfast or enjoyed as a decadent dessert.
Flourless Chocolate Peanut Butter Muffins via RDelicious Kitchen @RD_KitchenDisclaimer: I am warning you, if you make these, they may not last a week in your house. They didn’t in mine! I found ways to enjoy these muffins with almost any meal. Crumble on top of smoothie bowls for breakfast, pair with a yogurt parfait for lunch, top with peanut butter for the ultimate dessert.

Flourless Chocolate Peanut Butter Muffins via RDelicious Kitchen @RD_Kitchen

Flourless Chocolate Peanut Butter Muffins via RDelicious Kitchen @RD_KitchenWhenever I offer baked goods to my family and friends, they tend to be a little skeptical thinking that there is no way there is a “healthier” option that STILL tastes good. My dad’s famous words are “what’s in this” before he tries anything I make. My response is the typical eye roll with “JUST TRY IT!”. Even though my dad may question everything I make, he still always tries it. Making a flourless muffin that tastes as indulgent as dessert, this is one recipe no one will pass on. Flourless Chocolate Peanut Butter Muffins via RDelicious Kitchen @RD_KitchenFlourless Chocolate Peanut Butter Muffins via RDelicious Kitchen @RD_Kitchen

Print

clock clock iconcutlery cutlery iconflag flag iconfolder folder iconinstagram instagram iconpinterest pinterest iconfacebook facebook iconprint print iconsquares squares iconheart heart iconheart solid heart solid icon
Flourless Chocolate Peanut Butter Muffins

Flourless Chocolate Peanut Butter Muffins

  • Author: Julie @ RDelicious Kitchen
  • Yield: 14 1x

Ingredients

Scale
  • 2 eggs, (at room temp) beaten
  • 2 cups natural peanut butter (or almond butter)
  • 1/2 cup maple syrup
  • 1 1/2 cups pumpkin puree
  • 6 tablespoons unsweetened cacao powder (or unsweetened cocoa powder)
  • 2 teaspoons baking soda
  • 2 teaspoons vanilla extract
  • 1/2 cup dark chocolate chips

Instructions

  1. Preheat oven to 350 degrees F. Spray a muffin tray with cooking spray or line with parchment liners.
  2. In a large bowl, combine eggs, peanut butter, maple syrup, pumpkin puree, cacao powder, baking soda, and vanilla extract. Whisk together until smooth and creamy.
  3. Fold in the chocolate chips.
  4. Fill muffin tins 3/4 full.
  5. Bake for 30-35 minutes, until a toothpick, comes out clean.

Recipe Card powered byTasty Recipes

RDelicious Kitchen @RD_Kitchen Flourless Chocolate Peanut Butter Muffins via RDelicious Kitchen @RD_Kitchen

Jumbo Skillet Apple Pancake

Serve pancakes family style with this (grain-free) Jumbo Skillet Apple Pancake.
Jumbo Skillet Apple Pancake via Chef Julie Harrington, RD @ChefJulie_RD #pancake #jumbopancake #apple #glutenfree #breakfast #brunchConfession: I am a terrible pancake flipper. I am a waffle maker pro, but when it comes to pancakes, I fall short.

It’s either I am too eager to flip them before they are ready or the flipping process is just a disaster, like how I flipped it right on top on my other pancakes and I just made one giant pancake mound. Culinary school graduate fail.
Jumbo Skillet Apple Pancake via Chef Julie Harrington, RD @ChefJulie_RD #pancake #jumbopancake #apple #glutenfree #breakfast #brunchI was going to attempt to make this recipe into individual pancakes, but instead of the hassle of making a bunch of pancakes, I tried making one giant pancake and let me tell you.. it was the best idea I’ve ever had.
Jumbo Skillet Apple Pancake via Chef Julie Harrington, RD @ChefJulie_RD #pancake #jumbopancake #apple #glutenfree #breakfast #brunchThis giant pancake can now be served family style, so no more waiting for your stack on Sunday morning when everyone else is chowing down. Plus, no more pancake flipping disasters!
I opted to top mine with apple slices this time, but now I am thinking of all the topping options I want to try. This is going to become a staple on my weekends. Bonus, it heats up well too!
Jumbo Skillet Apple Pancake via Chef Julie Harrington, RD @ChefJulie_RD #pancake #jumbopancake #apple #glutenfree #breakfast #brunch

Print

clock clock iconcutlery cutlery iconflag flag iconfolder folder iconinstagram instagram iconpinterest pinterest iconfacebook facebook iconprint print iconsquares squares iconheart heart iconheart solid heart solid icon
Jumbo Skillet Apple Pancake in a baking pan

Jumbo Skillet Apple Pancake

  • Author: Chef Julie Harrington, RD
  • Prep Time: 10
  • Cook Time: 20
  • Total Time: 30 minutes
  • Yield: 6
  • Category: Breakfast
  • Method: Oven-Baked

Description

Serve pancakes family style with this (grain-free) Jumbo Skillet Apple Pancake.


Ingredients

Scale
  • 4 eggs
  • ¾ cup full-fat coconut milk, from the can
  • 1 tablespoon maple syrup
  • 1 teaspoon almond flour
  • 2 tablespoons arrowroot starch (or tapioca starch)
  • 2 teaspoons cinnamon, plus more for garnish
  • ¼ teaspoon baking powder
  • 1/8 teaspoon sea salt
  • 1 tablespoon coconut oil
  • 1 apple (such as a Honeycrisp Pink Lady), peeled, cored, and thinly sliced

Instructions

  1. Place a large cast iron skillet in the oven. Preheat the oven to 450 degrees F, leaving the skillet inside during preheating.
  2. In a large bowl, whisk together the eggs, coconut milk, maple syrup, and vanilla. In a separate bowl, whisk together the almond flour, arrowroot starch, cinnamon, baking powder, and salt. Pour the dry ingredients into the egg mixture and stir until fully combined.
  3. Carefully remove the hot skillet from the oven and add the coconut oil. Swirl it around the pan to coat the bottom and sides. Carefully pour the batter into the skillet. Gently place the apple slices on top. Bake for 15-20 minutes, or until golden brown and slightly puffed.
  4. Serve sprinkled with extra cinnamon and drizzle with maple syrup, if desired.

Notes

adapted from Paleo Magazine

Keywords: #pancake #jumbopancake #apple #glutenfree #breakfast #brunch

Recipe Card powered byTasty Recipes

Chef Julie Harrington, RD - Culinary Nutrition Consultant of chefjulierd.com


Jumbo Skillet Apple Pancake via Chef Julie Harrington, RD @ChefJulie_RD #pancake #jumbopancake #apple #glutenfree #breakfast #brunch