This post may contain affiliate links. Read my privacy policy.
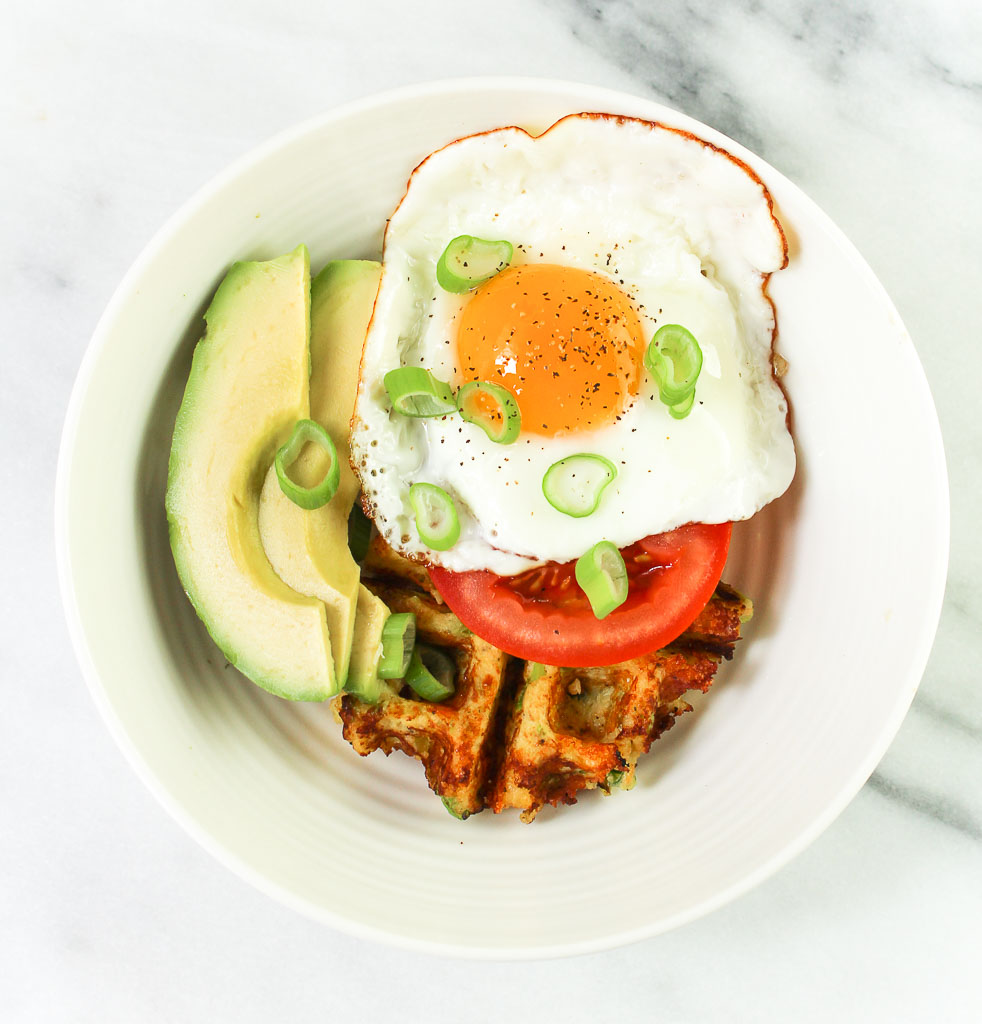
Take out your waffle maker and whip up a batch of these Cheesy Cauliflower Waffles (aka. “Cauli-Waffles”) for a fun new breakfast!

As a food blogger and recipe developer, I always have recipe ideas running through my mind. This “cauli-waffle” idea was inspired when I was organizing my kitchen gadgets and found my waffle maker buried in the back of one of my cabinets. I honestly forget what kitchen gadgets that I have sometimes. Hi, my name is Julie and I am a kitchen gadget hoarder.

I set my waffle maker on my counter and was planning on making waffles for a fun weekend breakfast, but when I woke up Saturday morning, I was craving savory rather than sweet. The plan for the cauliflower rice that was sitting in my fridge was to make my Hawaiian Chicken Cauliflower Fried Rice for dinner that night, was used for my breakfast instead.

This is going to become one of my brunch staples. I topped my waffle with a fried egg, avocado, and tomato slices. Now that is what I call a savory breakfast.
I am going to assume they freeze well. I really can’t say since they were all devoured that morning.. oops! I would recommend warming them in the oven if you do have leftovers.
Have you ever made a savory dish using your waffle iron?

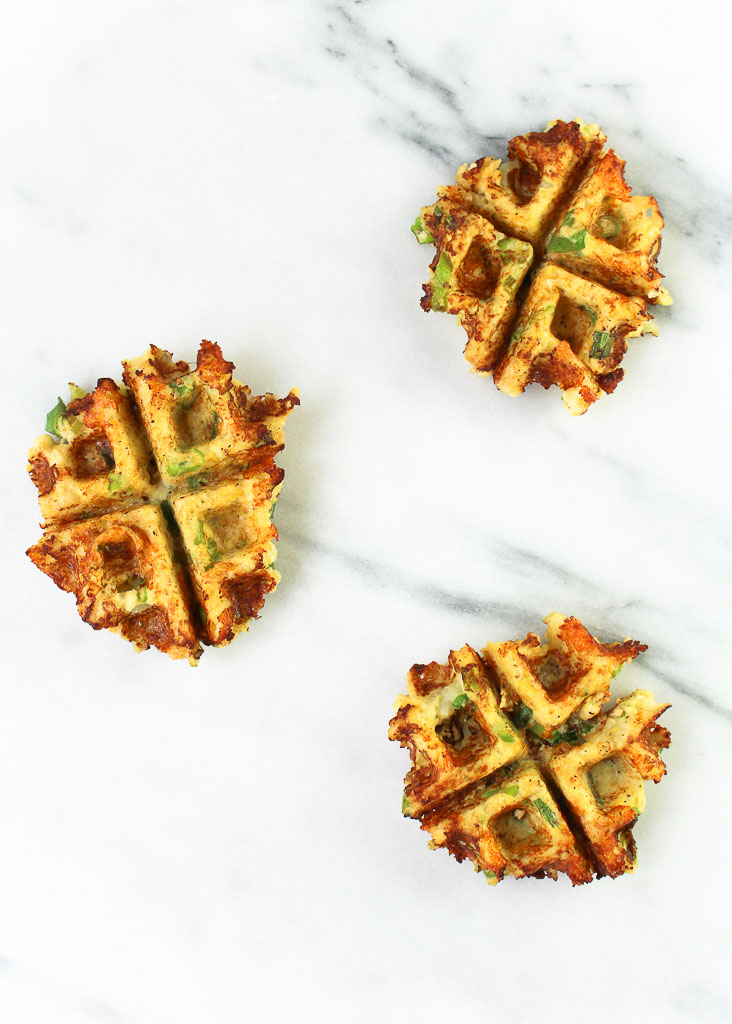
Cheesy Cauliflower Waffles
- Prep Time: 15
- Cook Time: 20
- Total Time: 35 minutes
- Yield: 4
- Category: Breakfast
- Method: Waffle Maker
- Cuisine: American
Description
Take out your waffle maker and whip up a batch of these Cheesy Cauliflower Waffles (aka. “Cauli-Waffles”) for a fun new breakfast!
Ingredients
- 3 cups cauliflower rice
- 3 scallions, chopped
- 1/2 cup cheddar cheese, shredded (I used Cabot!)
- 2 cloves garlic, minced
- 1 egg, whisked
- salt and pepper, to taste
Instructions
- Place your cauliflower rice into a microwave-safe dish. Add a teaspoon of water, (which will help to steam the cauliflower). Cover the dish with a damp paper towel. Cook for 2-3 minutes.
- Leave your cauliflower rice covered, to stand for 5 minutes. Transfer to a clean towel or paper towel and press to remove any excess moisture, which can make your dish soggy.
- Add cauliflower, scallions, cheddar cheese, and garlic in a bowl. Toss to combine. Fold in whisked egg until all ingredients are coated. Season with salt and pepper.
- Heat waffle iron. Spray waffle iron well with cooking spray. Add 3/4 cup of the cauli-waffle mixture to the waffle iron and cook 3-4 minutes until the desired doneness. (I like them extra crispy!)
- Remove cauli-waffle from waffle iron and spray again before making your next waffle. Repeat process until 4 waffles are made.
- Enjoy as is or top with a fried egg, tomato slices, and avocado.
Keywords: Waffle, cauliflower, low carb, savory, cheesy