This post may contain affiliate links. Read my privacy policy.
A comforting, satisfying plant-based bowl, this Roasted Root Vegetable Power Bowl is the perfect colorful fall dinner to cozy up to on a chilly night.
Fall is my favorite season! I just love the cool, crisp weather, the beautiful fall foliage, and of course the food!
This time of year, I find myself roasting vegetables daily. Roasting is one of my favorite cooking methods for veggies, but there’s something about cracking the windows on a cool fall evening and cozying up with fluffy blankets with a warm comforting meal.
Recipe ReDux members were challenged to create a plant protein power bowl, packed with protein, fiber and color, plant power bowls are trendy and delicious.

I decided to use sorghum as my whole grain in this recipe because I was inspired when I met Katie Cavuto, RD at the sorghum booth at FNCE this past weekend. She just released a new cookbook “Whole Cooking and Nutrition” and I was able to sample her sorghum recipe.
Have you ever used sorghum before? When I counsel clients, I encourage them to expand their variety of whole grains in their diet. I often see that their first swap is switching white bread to whole wheat bread or white rice to brown rice, which is great, but I don’t want them to just stop there.
Ancient grains, like sorghum, have more nutrition bang for your buck. Sorghum, which doesn’t have an inedible hull like some other grains, is commonly eaten with all its outer layers, thereby retaining the majority of its nutrients. One serving of sorghum contains 5 grams of fiber and is a good source of iron!
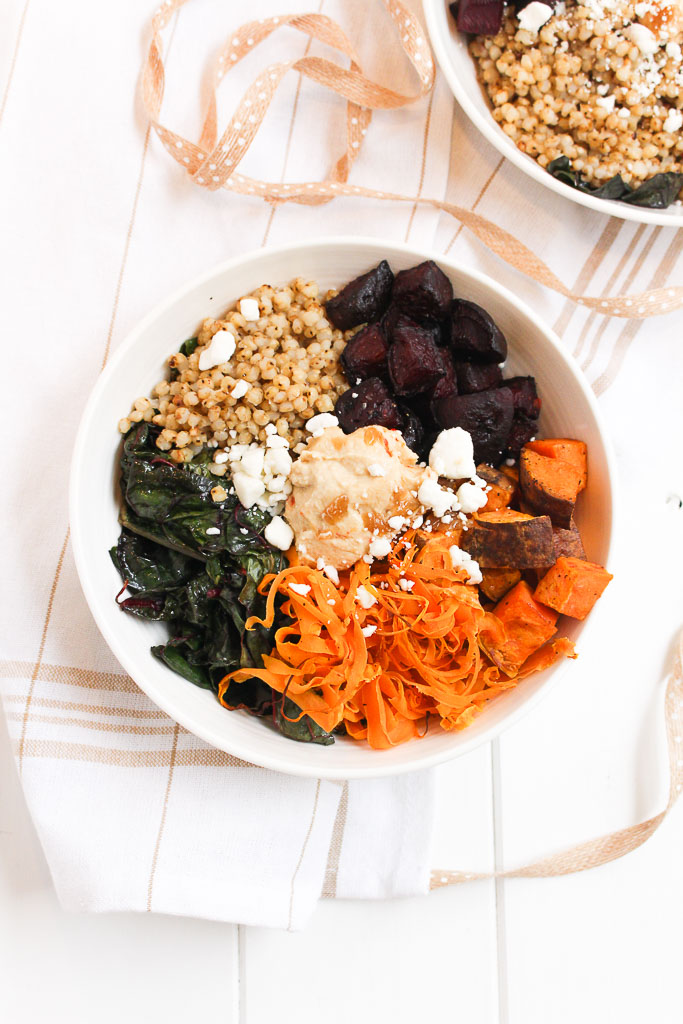
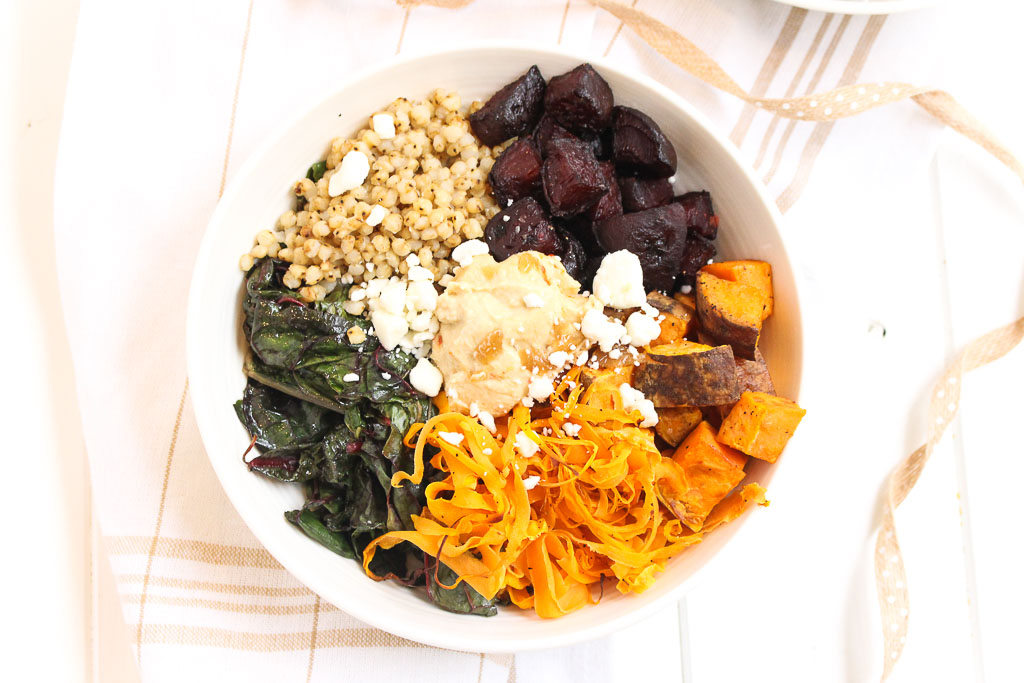
I absolutely love how colorful this recipe is. More colors = more nutrients. Another plus is it’s so simple to make. Simply place your veggies on a pan to roast as you prep the remaining ingredients.
If you want a shortcut, you can use Love Beets instead of the mess of peeling beets at home. Love Beets come peeled, steamed and vacuum packed.
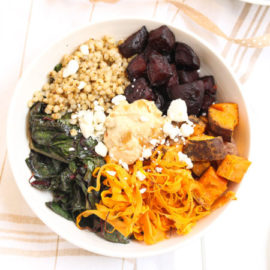
Roasted Root Vegetable Power Bowl
- Yield: 4
Ingredients
- 2 sweet potatoes, chopped
- 4 beets, peeled and chopped
- 4 carrots, peeled
- 2 tablespoons olive oil, divided
- 1 bunch Swiss chard, roughly chopped
- 1 tablespoon garlic powder
- 1 tablespoon apple cider vinegar
- 1 cup sorghum
- 4 cups water
- 1/4 cup hummus (your favorite flavor!)
- 1/4 cup goat cheese, crumbled
- salt and pepper, to taste
Instructions
- Preheat the oven to 400 degrees F. Coat a large baking sheet with cooking spray. Toss sweet potatoes and beets with 1 tablespoon olive oil and sprinkle with salt and pepper. Bake for 15 minutes.
- Using a peeler, create long strands of carrots. Remove vegetables from oven, add carrots and toss. Bake for an additional 10-15 minutes until vegetables are fork tender. Remove from oven.
- In a large bowl, massage Swiss chard leaves with olive oil and apple cider vinegar. Add garlic powder, salt and pepper. Add Swiss chard on a large baking sheet. Roast for 10 minutes until Swiss chard is tender (not crispy).
- As vegetables are roasting, cook the sorghum. Add sorghum and water to a pot. Bring to a boil; cook 5 minutes. Turn heat down to low; cover and cook for about 45 minutes or until tender-firm. (for an extra boost of flavor, add a splash of vegetable stock with the water) Season with salt and pepper.
- Assemble your bowls, by adding sections of sweet potatoes, beets, carrots, Swiss chard, and sorghum. Add a dollop of hummus and sprinkle with goat cheese. Serve warm.