This post may contain affiliate links. Read my privacy policy.
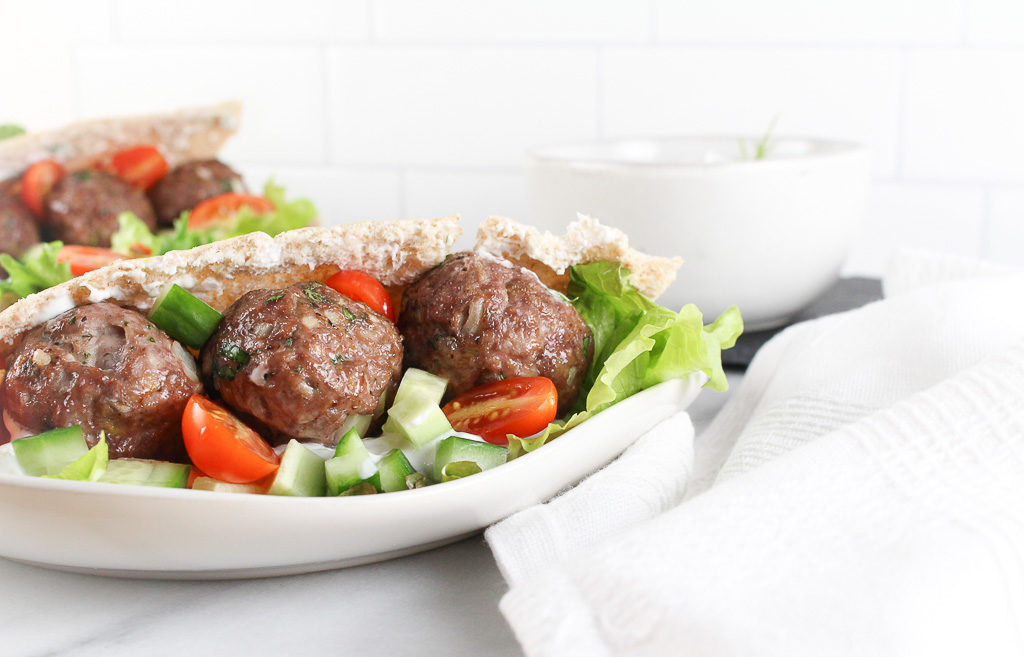
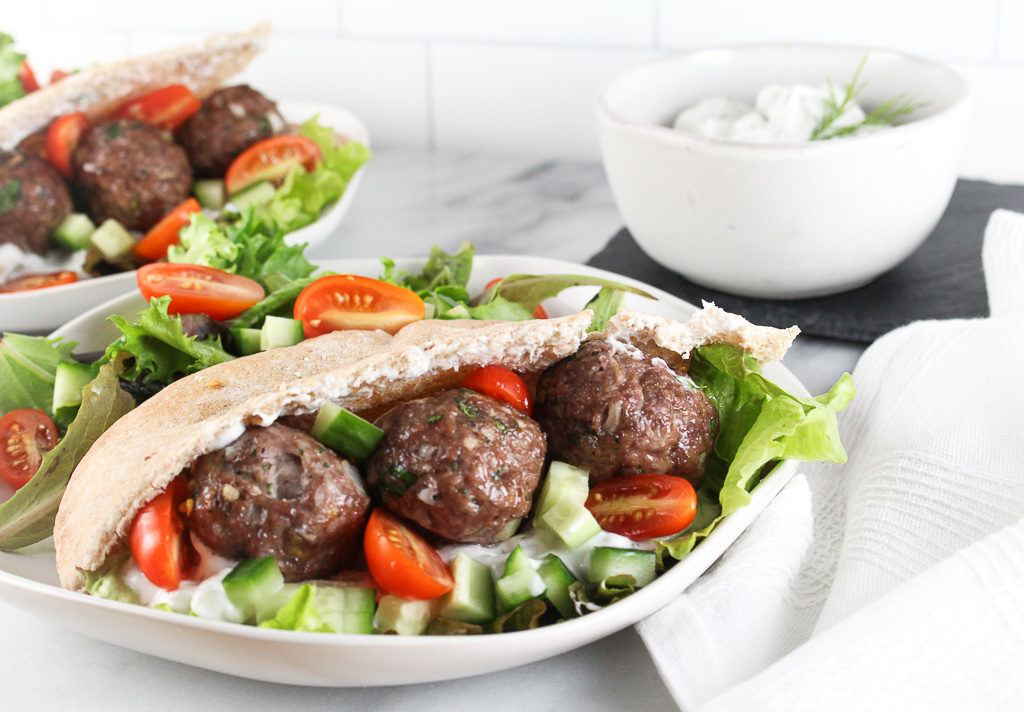
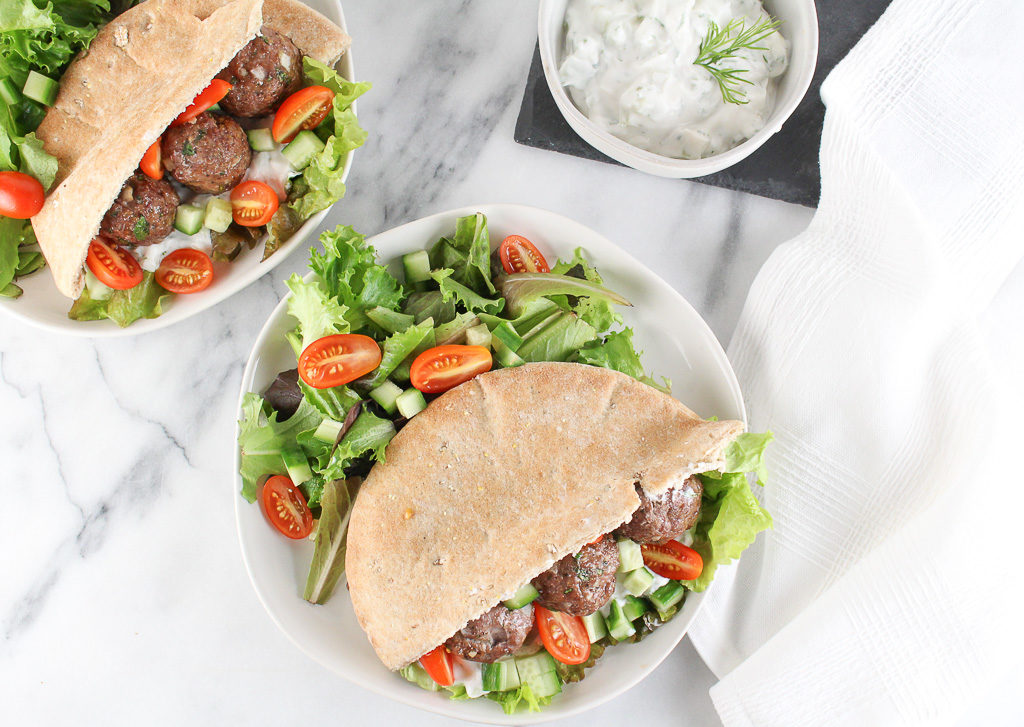
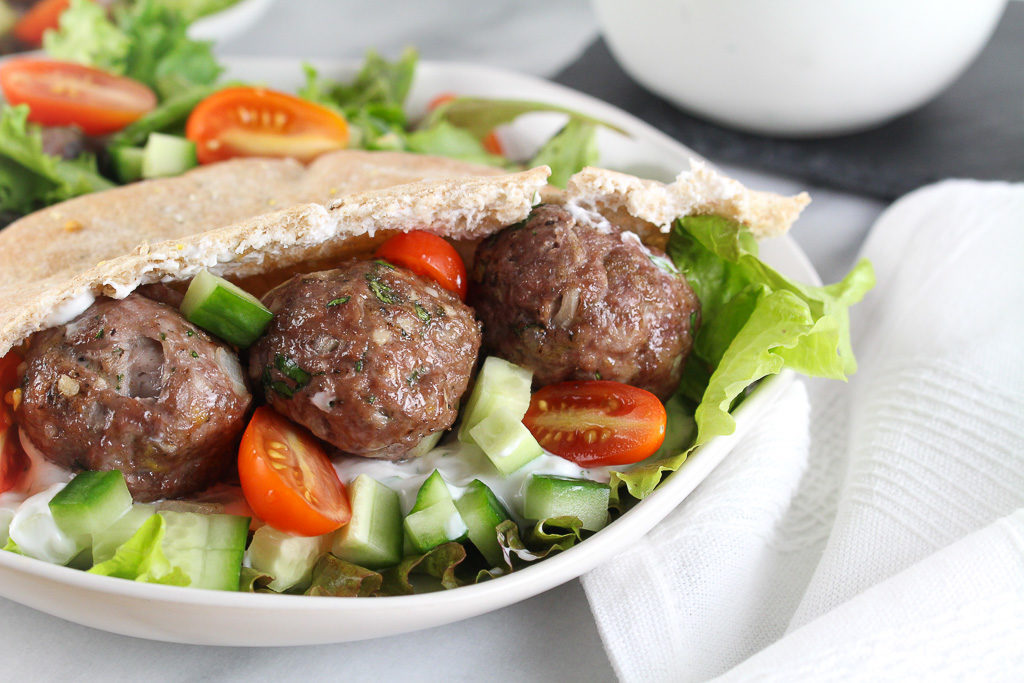
Do you cook with lamb? If you are new to cooking with lamb try starting with ground lamb and this Greek-Style Lamb Pita with Tzatziki Sauce. Lamb offers a protein-packed, flavorful alternative to the typical protein sources, like beef, chicken or turkey.
I had the wonderful opportunity to travel to the Goldring Center for Culinary Medicine at Tulane University a few months ago. When I was there, I was immersed with information, learning all about pasture-raised lamb, butchery, and cooking techniques for lamb with Nourish with Lamb.
Instead of being called a rancher, those who raise lamb are known as Shepards. Have you ever cooked with or prepared lamb? Lamb might seem intimidating if you’ve never worked with before, but this lean protein pairs well with global flavors and can be used in a variety of dishes.
Ground lamb is typically made from the shoulder and is incredibly moist and flavorful. Lamb is delicious in meatloaf, shepherd’s pie, tacos, casseroles, stews, lamb burgers, or in this case meatballs for pitas.
Did you know?
Lean lamb is a source of healthy, unsaturated fats. Nearly 40% of the fat in lean lamb is heart-healthy monounsaturated fat. On average, a 3-ounce serving of lamb is lean and has only 150 calories. Lean cuts include the leg and loin.
The 2015 Dietary Guidelines gives special recognition to the Mediterranean dietary pattern for its healthful eating approach. Lamb is a staple protein in a healthy Mediterranean-style diet, particularly in Greek cuisine. Lamb is nutrient-rich and on average, it’s an excellent source of protein, vitamin B12, niacin, zinc, and selenium and a good source of iron and riboflavin.
This pita with tzatziki sauce is a way to start on the path to a Mediterranean-style diet.
6 ounces plain Greek yogurt 1/2 cup seedless cucumber, peeled and finely chopped 1 tablespoon fresh dill, finely chopped 1 teaspoon red wine vinegar salt, to taste
For the Lamb Meatballs:
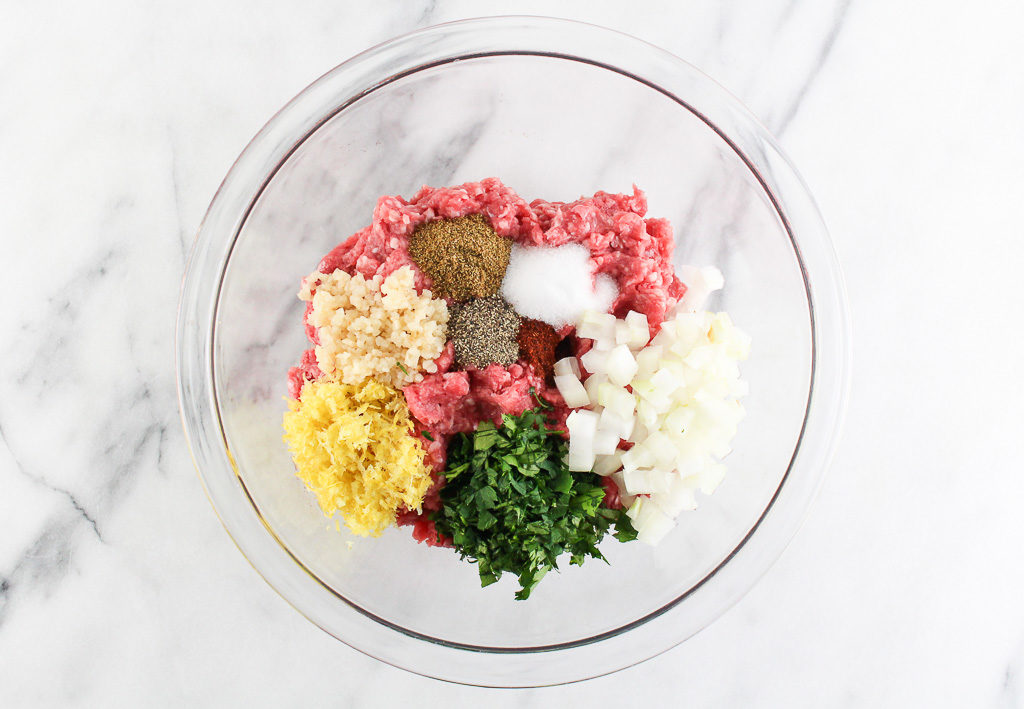
1 pound ground lamb 3 cloves garlic, minced 1/4 cup onion, finely chopped 2 tablespoons fresh parsley, chopped 1 tablespoon lemon zest 1/2 teaspoon ground cumin 1/2 teaspoon salt 1/2 teaspoon black pepper 1/4 teaspoon cayenne pepper, or more if more heat is desired
For the Pitas:
4 whole grain pita pockets, warmed 1/2 cup grape tomatoes, halved 1/2 cup seedless cucumber, chopped 2 cups lettuce, chopped
Instructions
For the Tzatziki Sauce: In a small bowl, combine yogurt, cucumber, dill, and red wine vinegar. Season with salt, to taste. Set aside.
For the Meatballs: Preheat the oven to 400°F. Place a wire rack on a sheet pan. Set aside. In a large bowl, combine lamb, garlic, parsley, lemon zest, salt, pepper, and cayenne pepper. Mix well to combine. Form small meatballs and place on the wire rack. Bake for 20-30 minutes or until internal temperature reaches 165°F. (cook time will vary depending on how large the meatballs are)
To assemble: In a pita pocket stuff pockets with lettuce, cucumber, and tomatoes. Add a smear of Tzatziki sauce and 3-4 meatballs per pita.
Notes
Meal prep tip: Make a double batch of these meatballs and freeze for later.
Keywords: lamb, sauce, Tzatziki, Greek
Recipe Card powered by
Tell me your favorite ways you cook with lamb! Drop a comment below or tag me on Instagram.
This post may contain affiliate links. Read my privacy policy.
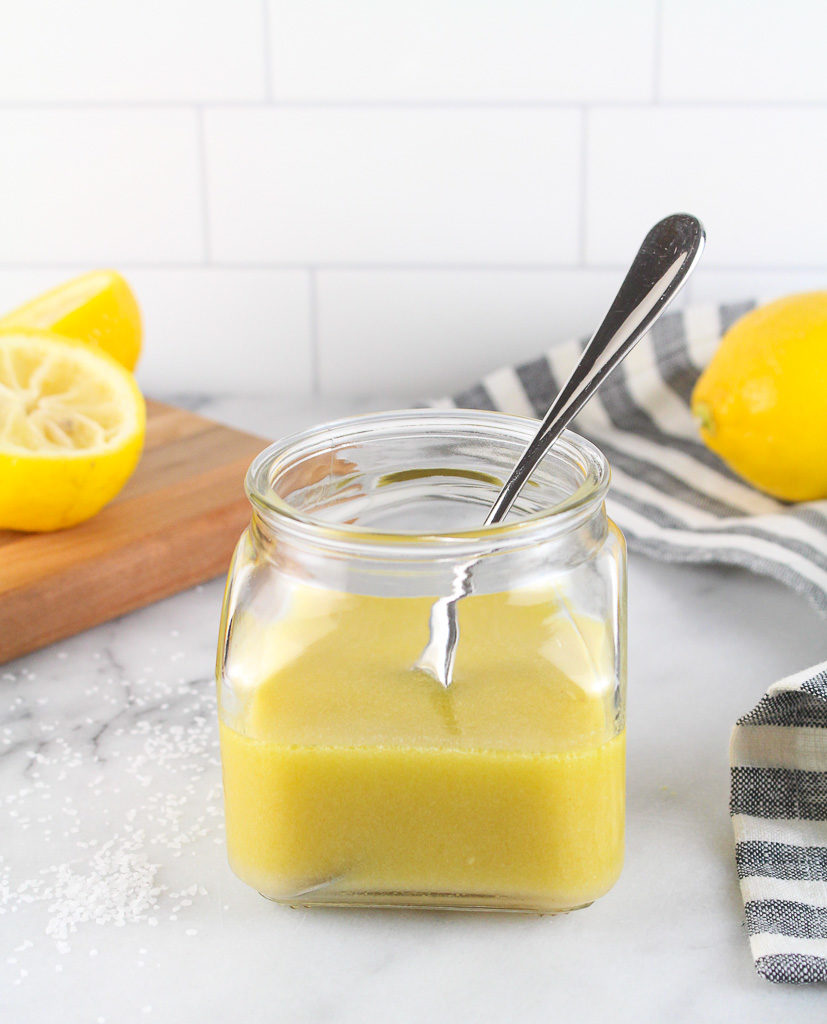
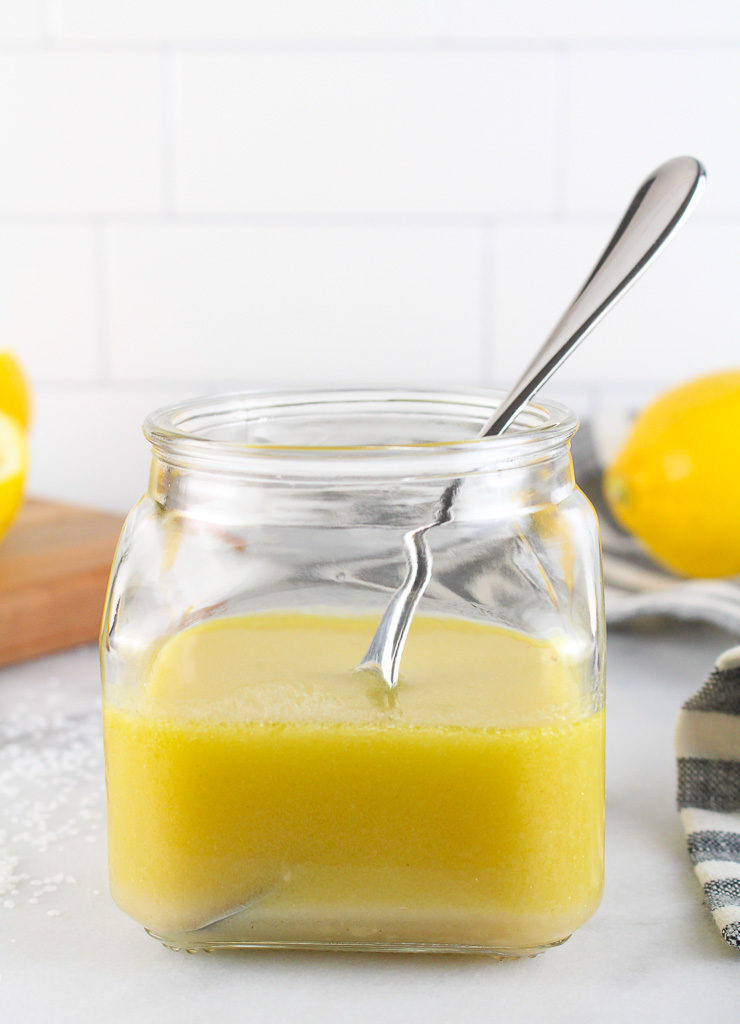
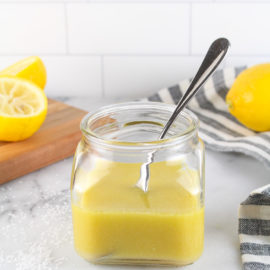
Brighten any salad, grain, or vegetable dish with this simple lemon vinaigrette. Made with ingredients you probably already have on hand, simply whip this up in a mason jar.
I don’t think people realize how EASY it is to make a homemade dressing. The most basic vinaigrette recipe is mixing an acid and a base. Then just add seasonings you enjoy. Simply pour ingredients into a mason jar and shake away. Your dressing is made! How easy was that? Plus, making it in a mason jar is ready to store any leftovers.
If you want to go beyond the basics, use this guide to build your own vinaigrette.
Create a homemade vinaigrette
Choose your acid:
This can be in the form of vinegar or citrus juice. Pick something that matches with your salad mix-ins. Opt for a sweet acid like white wine vinegar, white balsamic vinegar, or an orange juiced, for salads that have fruit.
Try acids like apple cider vinegar, balsamic vinegar, red wine vinegar, rice vinegar, lemon juice, lime juice, or other citrus juices.
Tip: Think about the components of your salad. If you have a salad with bright colors, avoid darker vinegar. Once the salad is dressed, those bright vibrant colors will look muddy. Remember – we eat with our eyes first!
Choose your base:
The base is oil. Use good quality oil. This can be a simple olive oil or fancy garlic and rosemary-infused walnut oil. Again think about the components of your salad. If there are avocados in your salad, why not try avocado oil?
Try oils like olive oil, avocado oil, walnut oil, pumpkin seed oil, hazelnut oil, or other flavor-infused oils.
Add seasonings:
If you are new to making dressings, simple olive oil and balsamic vinegar dressing with a pinch of salt and pepper will work just fine. Once you are comfortable making dressings, try amping it up with other seasonings.
Add a teaspoon of Dijon mustard to add a little tanginess and also to help create a creamier vinaigrette. Add a teaspoon of miso for an umami flavor. Try using fresh herbs for a pop of flavor. For a sweet vinaigrette, add a little maple syrup or honey.
Once you start playing around with different combinations, you’ll start to know what flavor combinations you like best!
This post may contain affiliate links. Read my privacy policy.
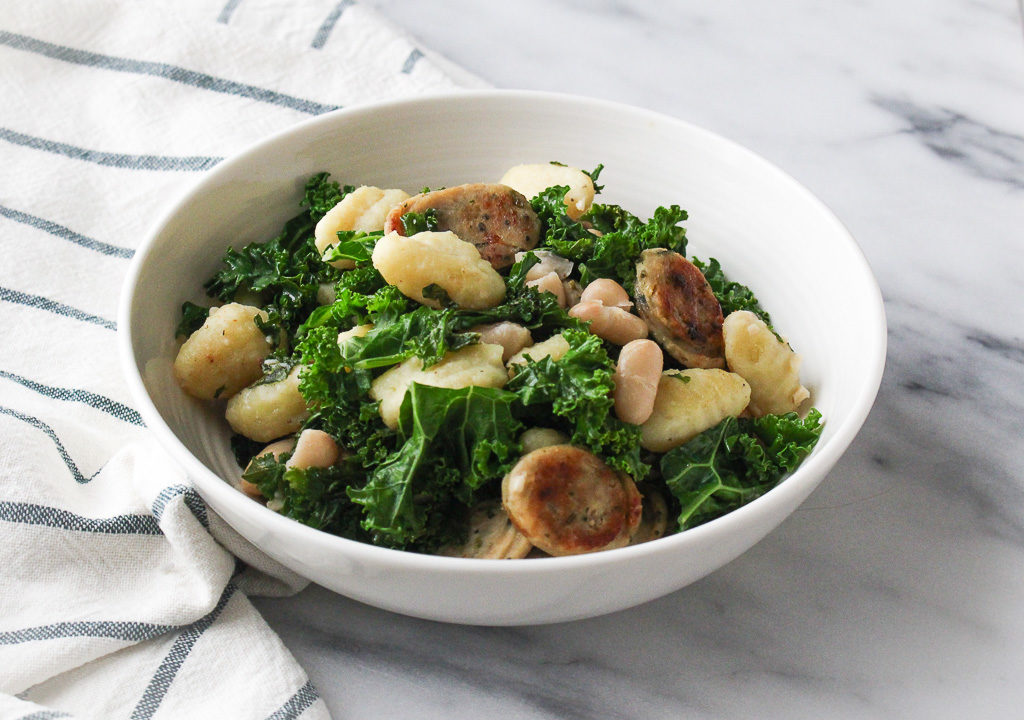
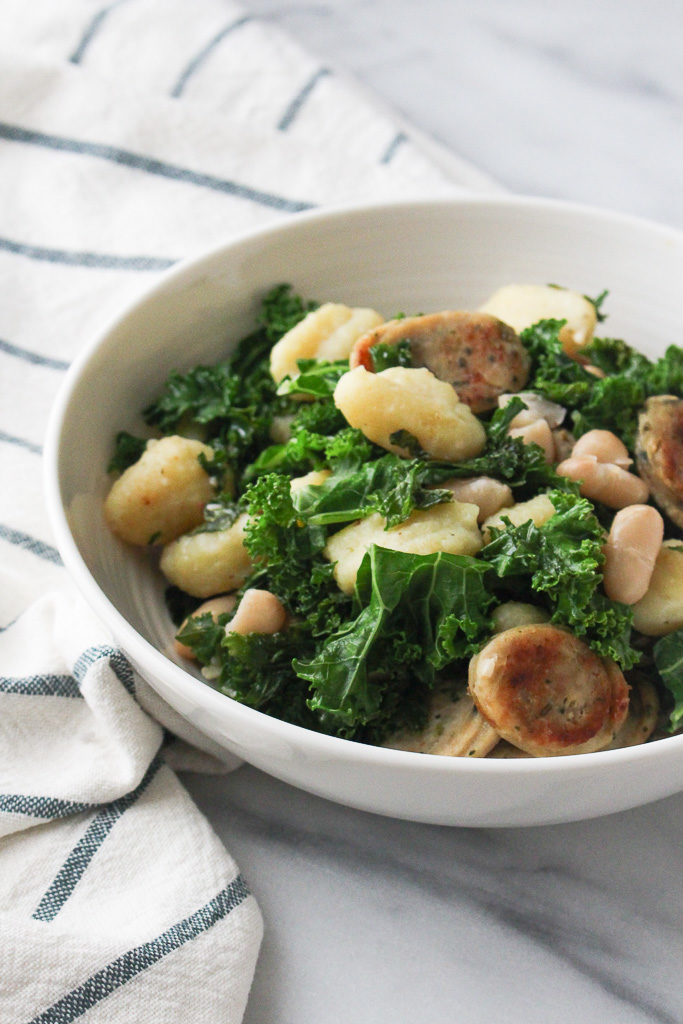
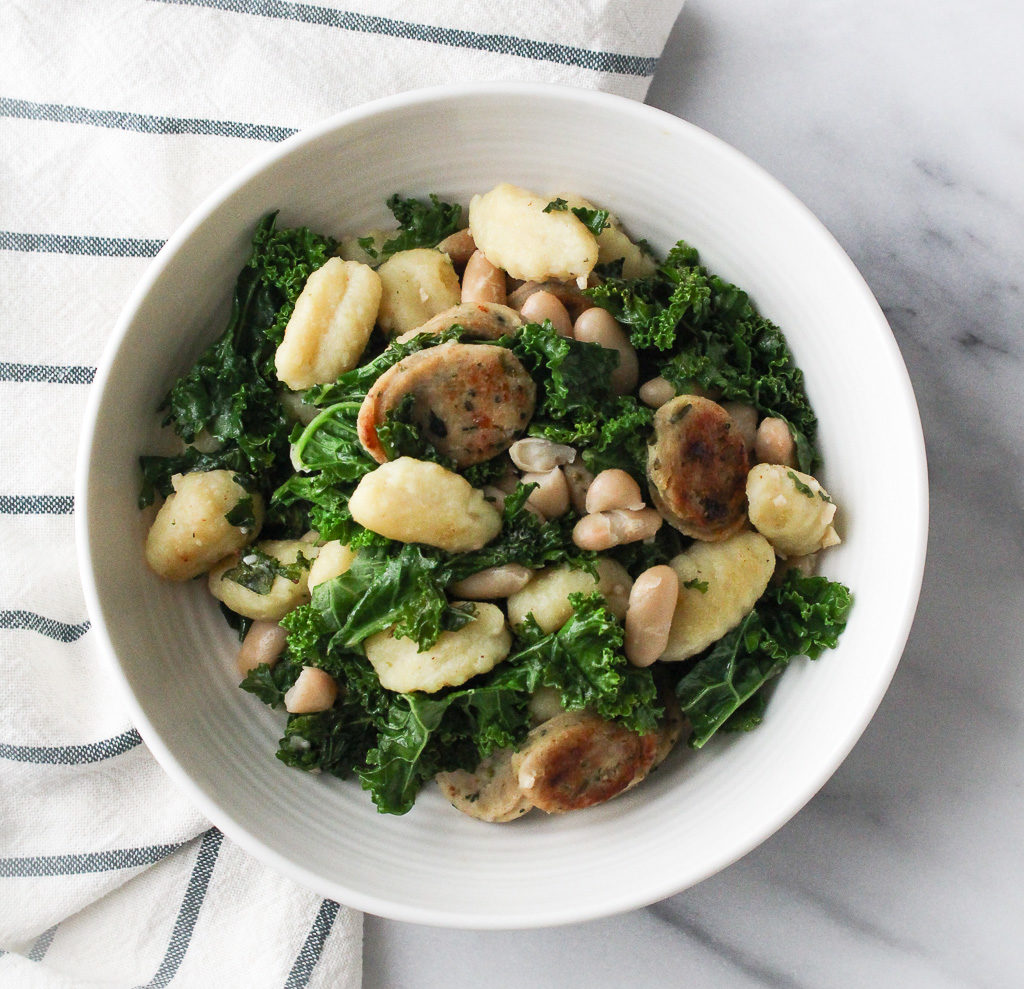
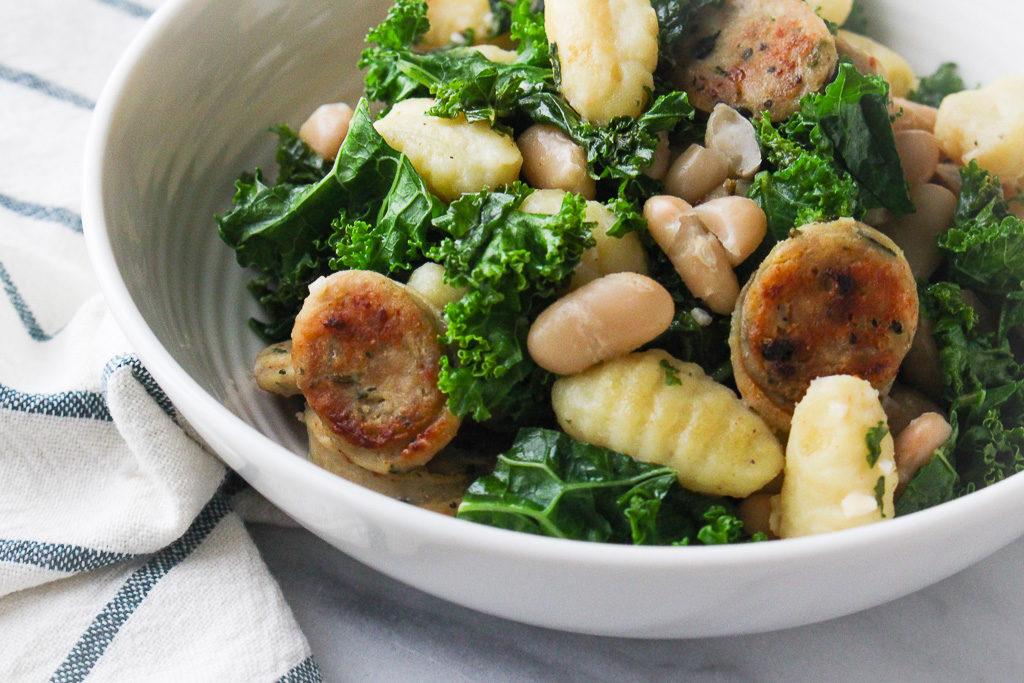
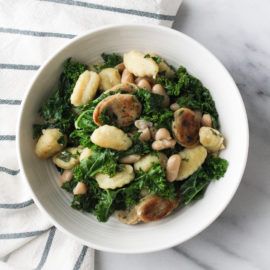
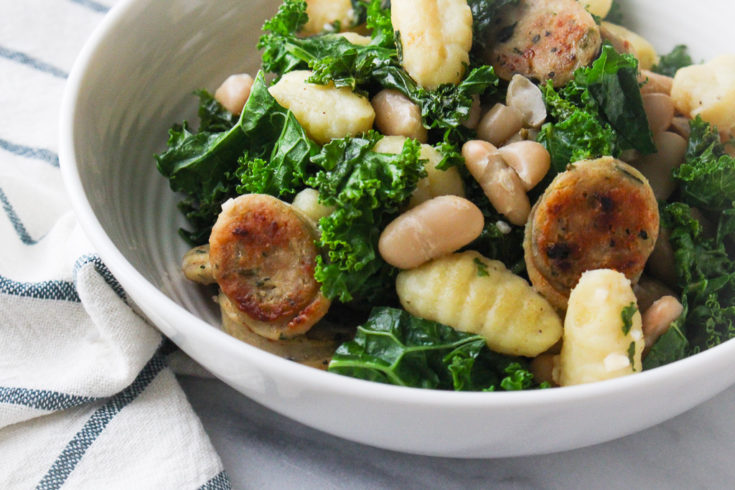
This one-pan chicken sausage & gnocchi saute utilizes simple ingredients to create a delicious meal in minutes.
I never understood the mad rush to the grocery store when there is an inkling of news about the possibility of snow. Previously, working as a retail dietitian, the madness was unreal. The aisles with the bread and milk would be completely wiped out. I guess everyone’s instinct is to survive on bread and milk if they get snowed in? I’ll never understand.
My kitchen isn’t always completely stocked and with news of snow, I’m the last person you will see heading to the grocery store. I don’t want to deal with the craziness!
I think it’s fun to poke around the kitchen utilizing what I have on hand to create new meal ideas. I always say that makes me feel like I am on an episode of “Chopped“. (minus the crazy ingredients like cow’s tongue the contestants get in their mystery baskets)
Each kitchen no matter how big or small has four kitchen zones: the refrigerator, freezer, pantry, and countertops. Don’t just open the fridge and just decide “there’s nothing to eat, let’s grab take out.” Utilize the ingredients in each zone to create a meal. This recipe uses all four kitchen zones to create a delicious and balanced meal.
What Kind of Gnocchi Should I Use?
You can use the kind you find that are shelf-stable, frozen, and can even use cauliflower gnocchi instead of potato.
The gnocchi is cooked separately to start with, which is why you can use multiple brands of varieties.
If you haven’t tried Trader Joe’s gnocchi, you are truly missing out!
Ingredients for Chicken Sausage Gnocchi
Gnocchi – as I mentioned earlier you can choose your favorite
How to Make Chicken Sausage Gnocchi in Less Than 30 Minutes
Before we get started, go ahead and cook the gnocchi according to the instructions on the packaging.
While that’s cooking, prep your kale by removing the ribs and chopping it coarsely.
Then add a tablespoon of oil over medium heat and cook the chicken sausages, just until they are browned. Take them out of the pan and set aside.
Using the same pan, heat the rest of the oil and add the minced garlic, drained white beans, and cooked gnocchi.
Cook until the gnocchi and beans are warmed. Be sure to keep a close watch on the garlic, you do not want it to burn. You can turn down the heat if needed.
Add the sausage links back to the pan followed by the kale and chicken broth. Stir and cover until the kale wilts.
Take the lid off and continue cooking just to allow the excess liquid to evaporate.
Top with some parm and serve!
No need to rush to the grocery store when there is snow in the forecast. Just utilize what you have in each kitchen zone! And with simply one pan, chicken sausage & gnocchi saute came together in minutes.
One Pan Chicken Sausage & Gnocchi Sauté making meal time a breeze
Ingredients
Scale
10 oz. gnocchi*, cooked according to package directions 2 tablespoons olive oil, divided 4 links chicken sausage*, sliced on a bias 4 cloves garlic, minced 1 (15.5 oz.) can white beans, drained and rinsed 6 cups kale, ribs removed and roughly chopped 1/4 cup low-sodium chicken broth
Instructions
Cook gnocchi according to package directions.
Heat 1 tablespoon of olive oil over medium-high heat. Cook chicken sausages until browned. Remove from pan and set aside.
Heat remaining 1 tablespoon of olive oil in the same pan. Add garlic, white beans and gnocchi. Saute until beans and gnocchi are warmed through. (Keep an eye on the garlic. Do not let it burn. Turn down heat if needed.)
Add chicken sausage back into the pan. Then, add kale and chicken broth. Stir to thoroughly combine ingredients. Cover until kale wilts. Remove lid and allow excess moisture to evaporate.
Serve. Top with parmesan cheese, if desired.
Notes
*Can use cauliflower gnocchi in this recipe, if desired. *I used Alfresco chicken sausage.
Keywords: kale, chicken, chicken sausage, one pan, gnocchi, white beans, beans, dinner
Recipe Card powered by
This post may contain affiliate links. To find out more information, please read my disclosure statement.
This post may contain affiliate links. Read my privacy policy.
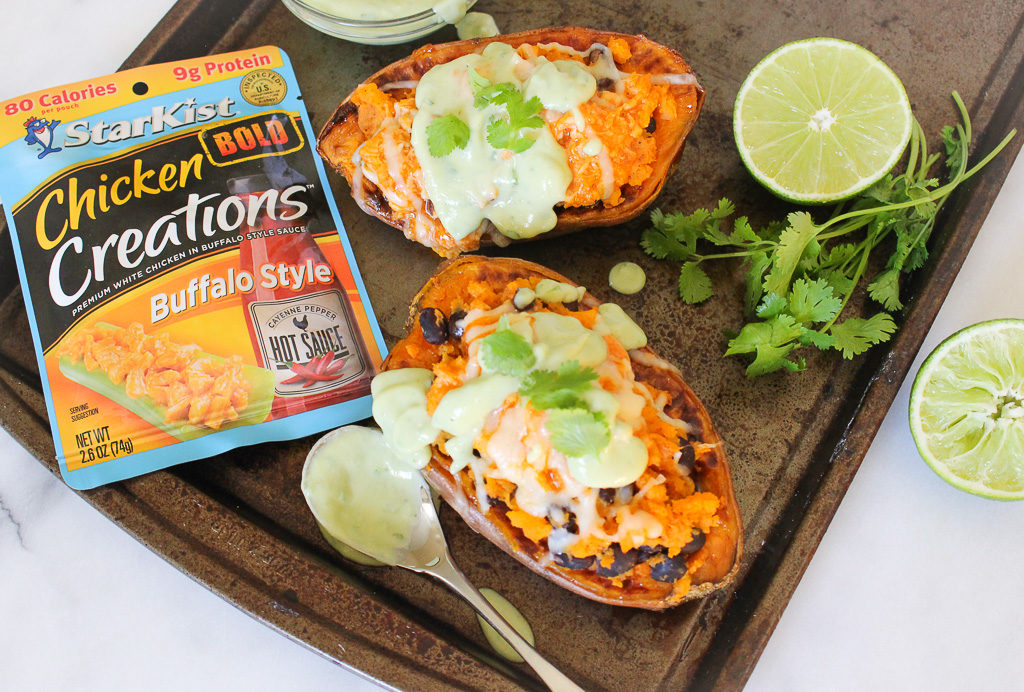
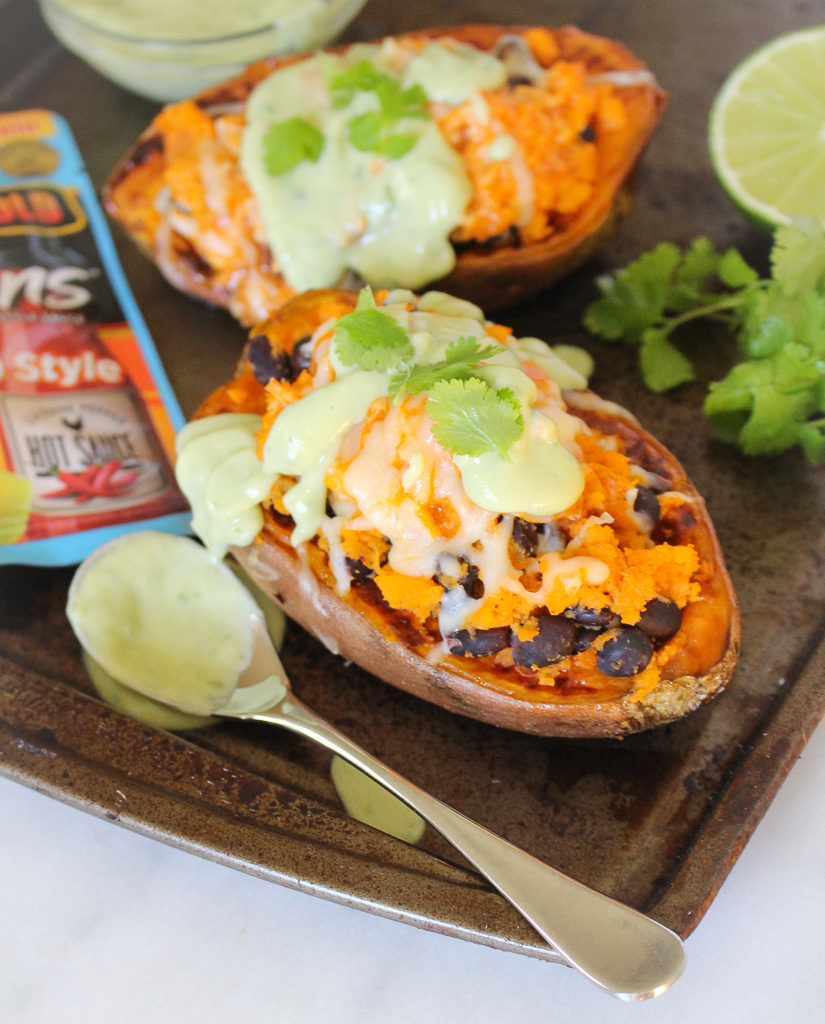
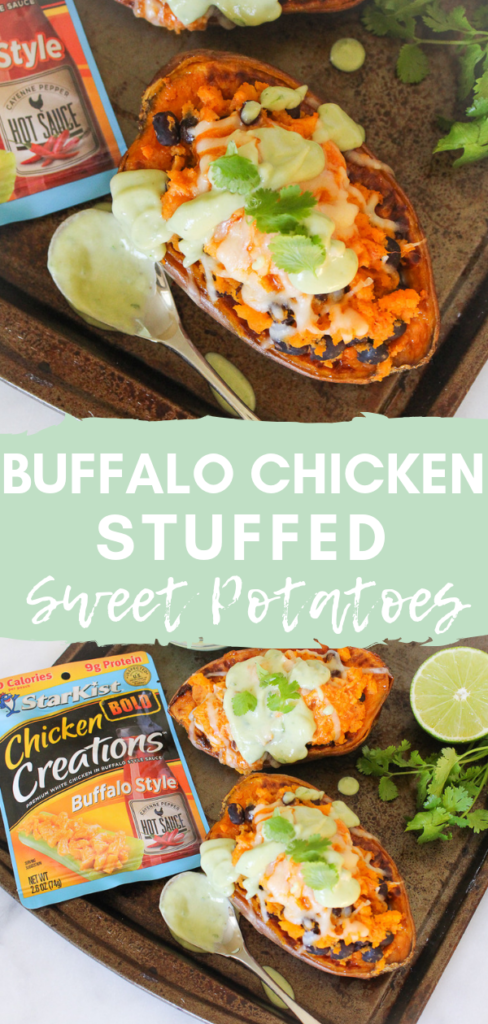
Whip up these quick and delicious Buffalo Chicken Stuffed Sweet Potatoes that have been sponsored by StarKist, but of course, all opinions expressed are my own. Thank you for like-minded brands for making this blog possible!
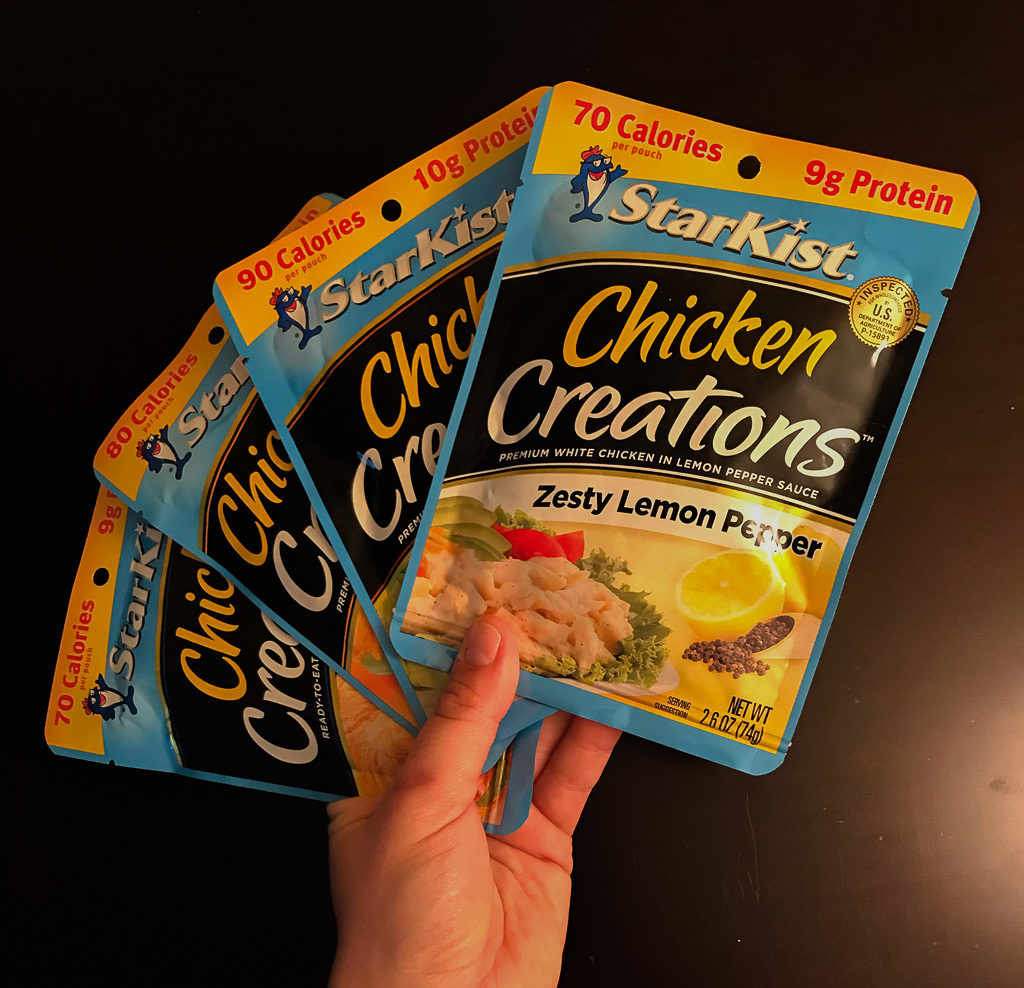
Traveling is always fun and like many of you, I make sure I am always packing plenty of food for my travel adventures. No one wants to be stuck in the car, train, or airplane hangry. One food group that sometimes is a struggle packing for travel is protein. I don’t want to be that person that whips out hard boiled eggs and be known as the stinky food traveler that gets stuck sitting next to me. StarKist’s new Chicken Creations are making protein on the go a cinch. These Chicken Creations come in a pouch that is ready to be on the move – just tear, eat, and go!
If we are friends on Instagram you saw that I recently was at FNCE (Food & Nutrition Conference & Expo), the world’s largest meeting of food and nutrition experts — more than 10,000 registered dietitian nutritionists, nutrition science researchers, policy makers, health-care providers, and industry leaders attend the annual meeting — and address key issues affecting the health of all Americans.
At FNCE, I spent most of my time at the expo hall connecting with RDN colleagues and businesses. I made a stop over to StarKist’s booth to chat with Laura Ali, MS, RDN, LDN of StarKist. I love that brands are hiring registered dietitians on staff to provide evidence-based nutrition. I wish more brands would do that! We chatted about StarKist’s new Chicken Creations pouches. If you didn’t know, they already have convenient pouches for tuna, salmon, and now chicken!
Image mid-boomerang!
Last week I posted on my Instagram stories, asking what you wanted to learn more about StarKist’s new tear and go Chicken Creations. You asked, they answered! I went back to Laura Ali, MS, RDN, LDN of StarKist with your questions and here is what she said.
Laura Ali, MS, RDN, LDN of StarKist answers your questions about StarKist Chicken Creations
Q: What defines “premium white chicken”? Does it come from chicken breast or other parts as well?
A: “Our chicken is 100% white meat with no dark meat added”
Q: How is the chicken cooked?
A: The chicken is lightly grilled and then cooked to a safe internal temperature before it is mixed with our seasonings and added to the pouch. It is then vacuum sealed and then retorted for sterility.
Q: What is the shelf life?
A: 3 years
Q: Is the pouch recyclable?
A: Not at this time. We are actively investigating options for how to recycle the pouch.
Q: What is the pouch made of?
A: The pouch is made of food grade materials. It has 4 separate layers of aluminum, polypropylene, nylon, and polyester.
Q: Can you heat the chicken in the pouch?
A: No, it is not a microwaveable pouch so you should remove the chicken and place it in a separate container to microwave.
Q: Will other flavors be coming out?
A: Our beaks are sealed! But you can be assured StarKist has a strong innovation agenda with many new products planned for the future!
I am all about quick and easy recipes. Coming back from FNCE, I didn’t have my usual meal prep done since I got home on a Tuesday evening. I was able to whip up this recipe from ingredients I had on hand. Having protein ready to go in my pantry was clutch. StarKist Chicken Creations are ready to eat as is. I’ve been also grabbing a pouch as I’m running out the door to top a simple salad with for quick and easy lunch. The possibilities are endless!
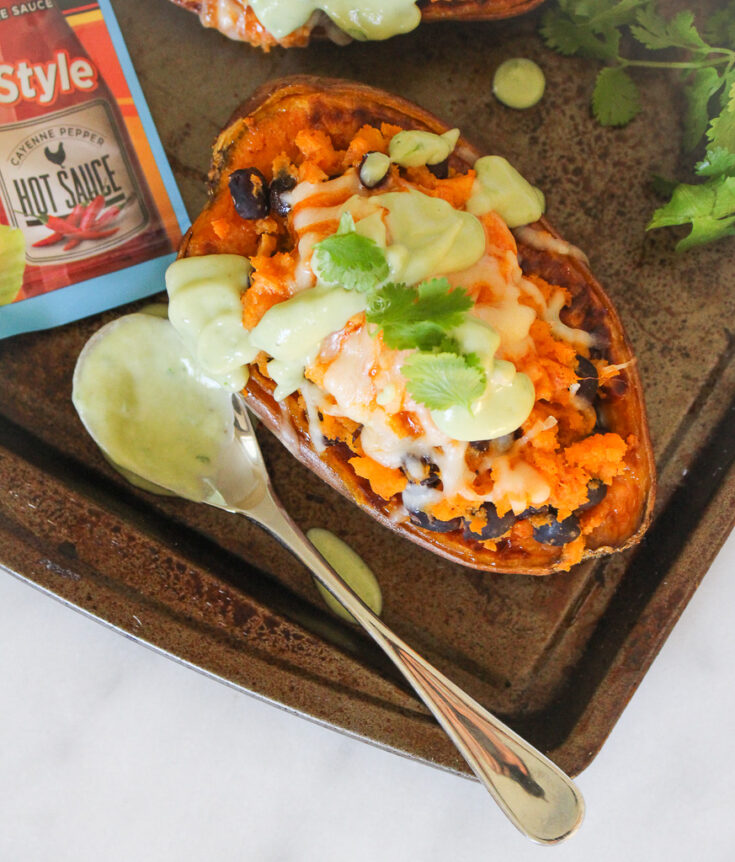
1 large sweet potato 1 teaspoon chili powder 2 teaspoons garlic powder 1/2 cup black beans 2 (2.6 oz.) packets of Starkist Chicken Creations BOLD Buffalo Style 1/4 cup mozzarella cheese
For the Avocado Lime Sauce: 1/2 avocado 1/4 cup plain yogurt 1/2 lime, juiced 2 tablespoons cilantro 2–3 tablespoons water (more if needed)
salt and pepper, to taste.
Instructions
Preheat the oven to 425 degrees F. Line a baking sheet with parchment paper, cut the sweet potatoes in half lengthwise, and place both halves flat side down on the baking sheet. Bake in the oven for 30 minutes.
Once the sweet potato halves are finished cooking, remove from the oven. Let cool enough to be able to handle. Scoop out the inside of the sweet potato halves and place in a bowl. Add the chili powder and garlic powder; mix together. Fold in the black beans.
Scoop the mixture back into the sweet potato skins. Top each sweet potato with one packet of Starkist Chicken Creations BOLD Buffalo Style and sprinkle with mozzarella cheese. Place back in the oven for about 8-10 minutes or until heated through.
While sweet potatoes are cooking, combine avocado, yogurt, lime, cilantro, and water in a blender or a small food processor. Blend until smooth. Season with salt and pepper, to taste.
Remove sweet potatoes from the oven and drizzle with avocado sauce.
Notes
Don’t love buffalo sauce? Try this same recipe with one of Starkist’s Chicken Creations other flavors: Chicken Salad, Ginger Soy, or Zesty Lemon Pepper.
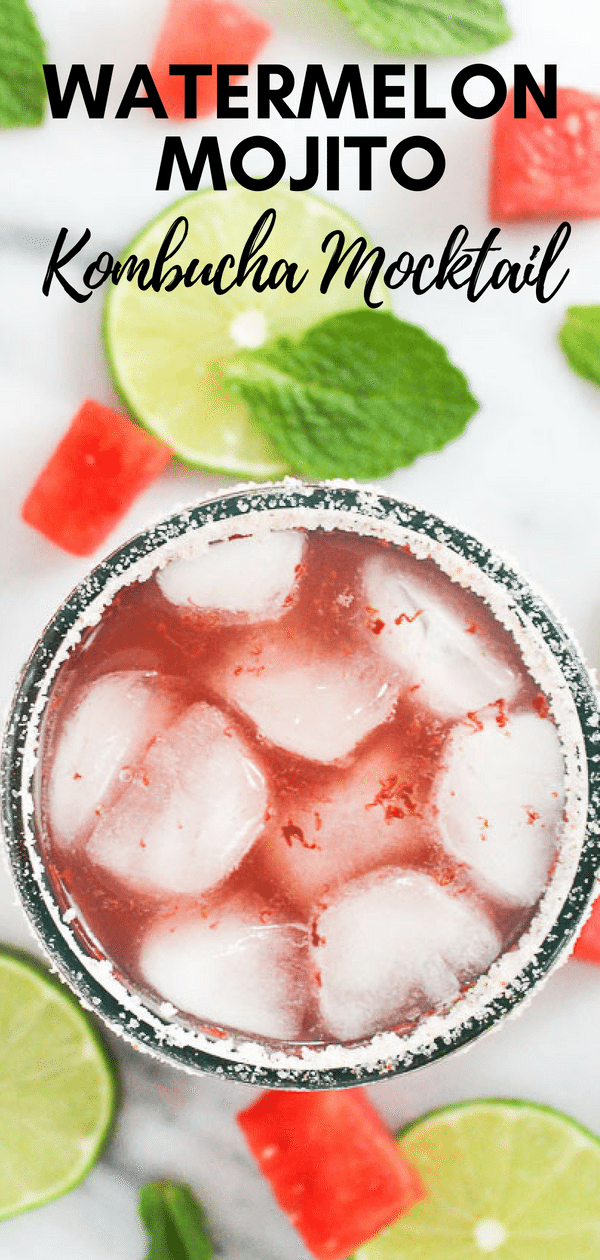
Sip on this refreshing Watermelon Mojito Kombucha Mocktails and set up a fun drink station to wow your guests this summer.
I’ve come to really enjoy kombucha.
What is kombucha?
Kombucha is a fermented tea that naturally contains probiotics. These probiotics are actually good bacteria that line your digestive tract and support your immune system, as they absorb nutrients and fight infection and illness.
With its health benefits, I wanted to make it into a fun mocktail instead of just drinking it straight. Kombucha comes in many flavors, which ranges in many colors to create a variety of colorful mocktails.
What’s a better way to enjoy your Kombucha Mocktail than with a perfectly styled drink station? A bar cart makes the perfect base for your drink station along with being a great conversation starter. They’re easy to move around your house or even outside for entertaining. The best part is that there really is a bar cart out there to match any design style or budget. You can find a glam rose gold cart with leather accents or more rustic wooden piece that’s perfect for housing all of the accouterments for fixing the perfect mocktail. Pick your favorite cart and you’ll have no problem creating a fun drink station in your home.
Large glass beverage dispensers are perfect for making a statement atop your bar cart. The bright fun color of your kombucha along with any floating fruit slices or herbs will become a tantalizing focal point for guests! This dispenserfrom Crate & Barrel has a trendy wooden stand or if you’re looking for more variety this set has two dispensers with cute chalkboard labels to tell your drinks apart. You can supplement your beverage dispensers with elegant carafes of juices or fizzy drinks for plenty of customization.
Next, add a few fun touches to really bring your station to life. There are practical additions like printed napkins or bright straws that are always sure to be a hit. A stack of books is a great way to show off your personality and can be a fun conversation starter for guests. In their post on bar cart styling tips, the professional designers at Havenly suggest hanging a piece of art above your cart to give the area a finished look. No matter how you decide to accessorize your drink station, adding thoughtful touches of your personality will elevate it from a simple beverage center to a stylish focal point in your home.
Accenting your station with a small potted plant atop your cart gives it a perfect touch of vibrancy and life! From succulents to bouquets of fresh flowers, plants are a great accessory for any style of decor. For extra fun, use a small herb planter set to showcase live garnishes for the drinks you’re serving, like some fresh mint for my Watermelon Mojito Kombucha Mocktail. Include a small pair of scissors so guests can snip their own fresh herbs for adding to their beverages.
Finally, when styling a drink station, your glassware is more than just functional. Pick out some fun glasses that match your personality and show them off on top of your bar cart like a decor piece. Cut crystal glasses are always a classic choice for some sophisticated sparkle or just grab some cute mason jars if your style is more casual. Varying the sizes and shapes of your glassware will add some fun diversity to the look of your station.
Put it all together atop your cart and you’ll have a perfectly adorable station for showing off your kombucha mocktails in style! Design style tips provided by Havenly. I was not compensated for this post. All thoughts and opinions are my own.
This post may contain affiliate links. Read my privacy policy.
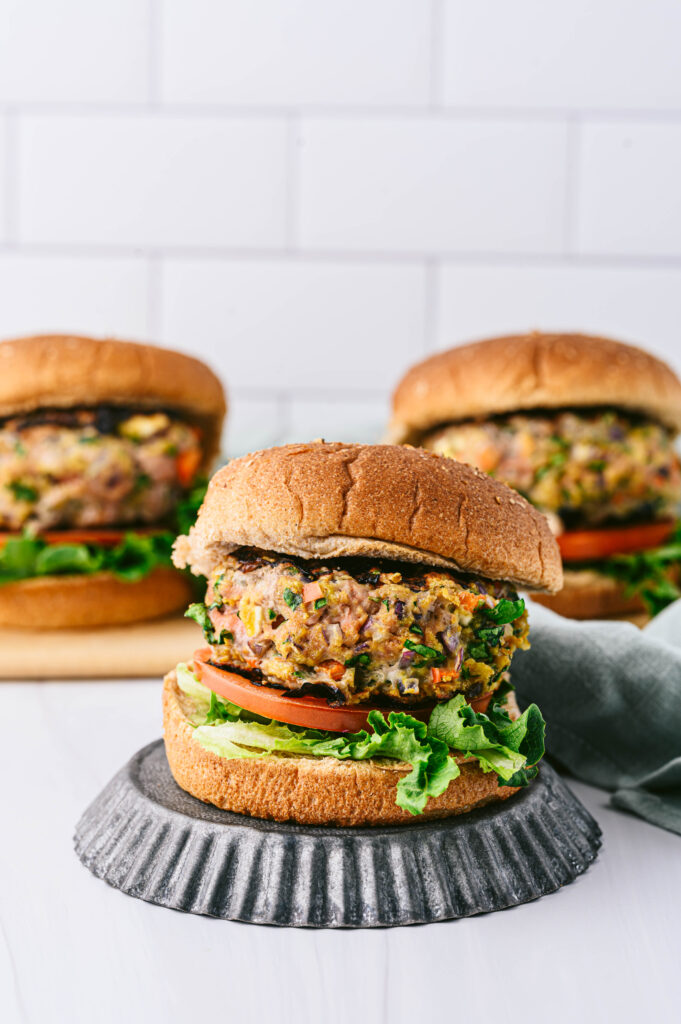
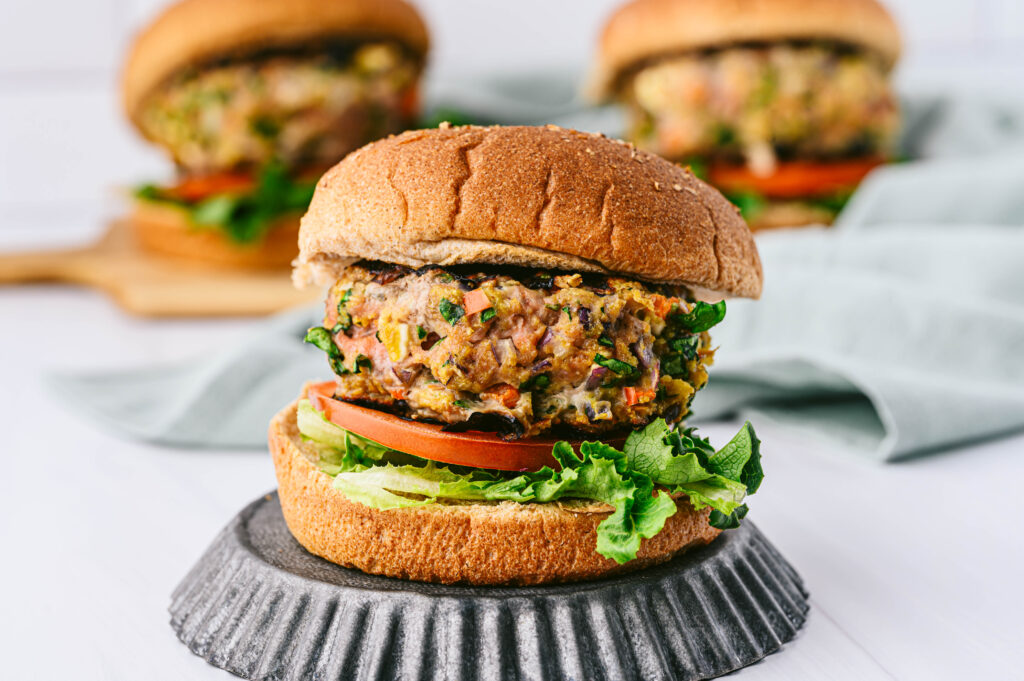
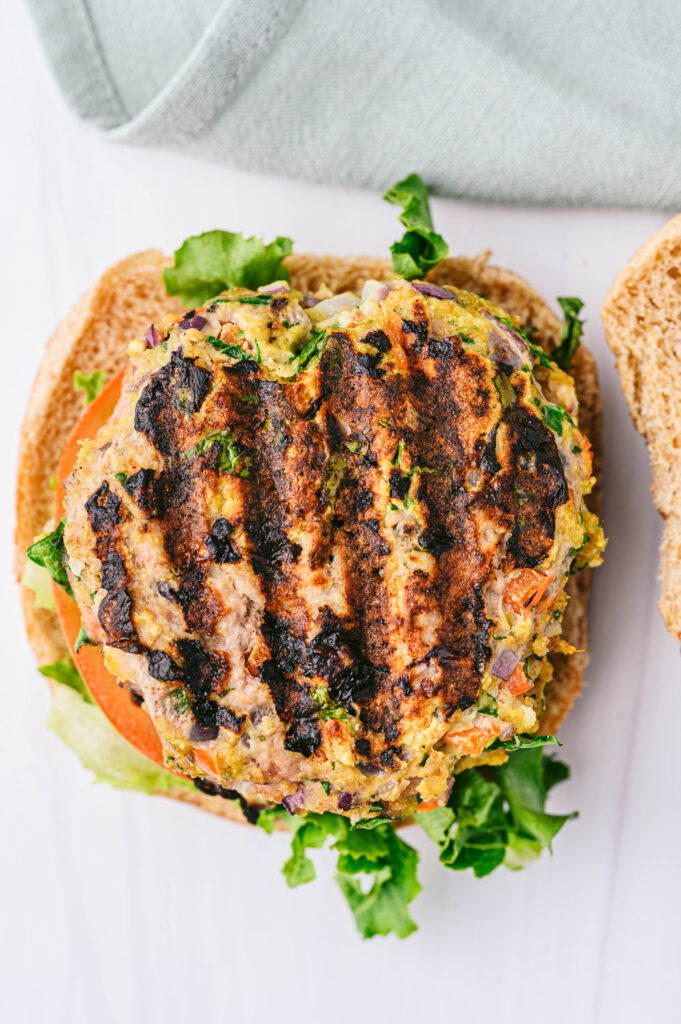
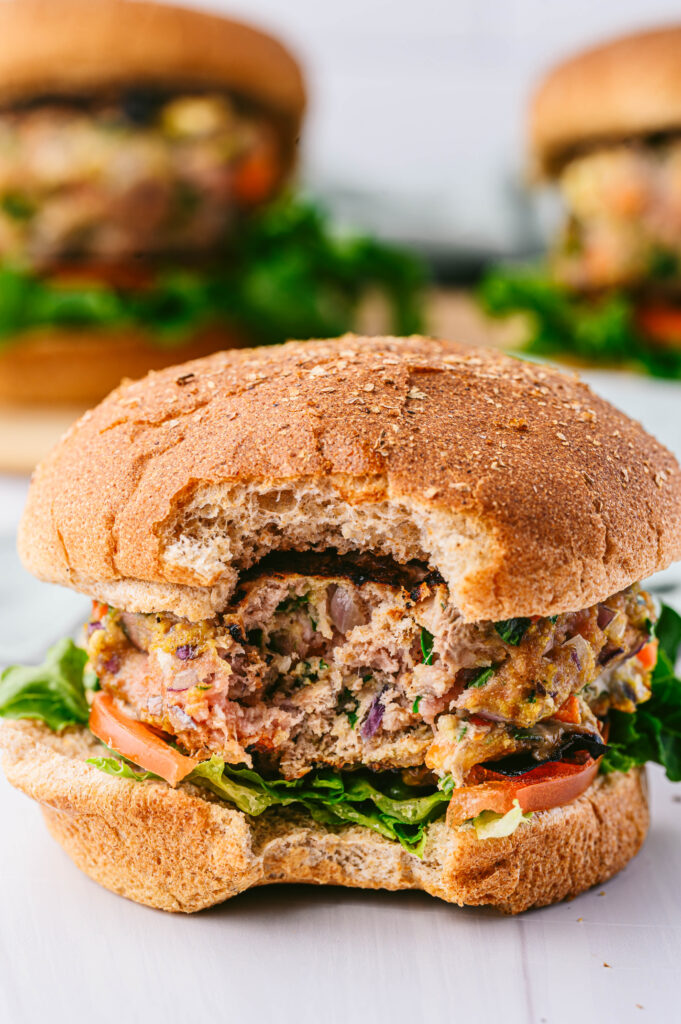
These Spinach Turkey Burgers are delicious on and off the grill! . Learn how to keep a turkey burger juicy no matter which way you choose to cook it!
It’s officially grilling season! Grilling is a healthy cooking technique. This cooking method exposes food to direct heat, leaving grilled food evenly charred on the outside and juicy in the inside. It is also a lower-fat cooking method because the fat will drip from the grill grates. Grilling can be for meats, vegetables, and fruit. Have you ever had grilled pineapple? It’s delicious!
Why You’ll Love Turkey Spinach Burgers
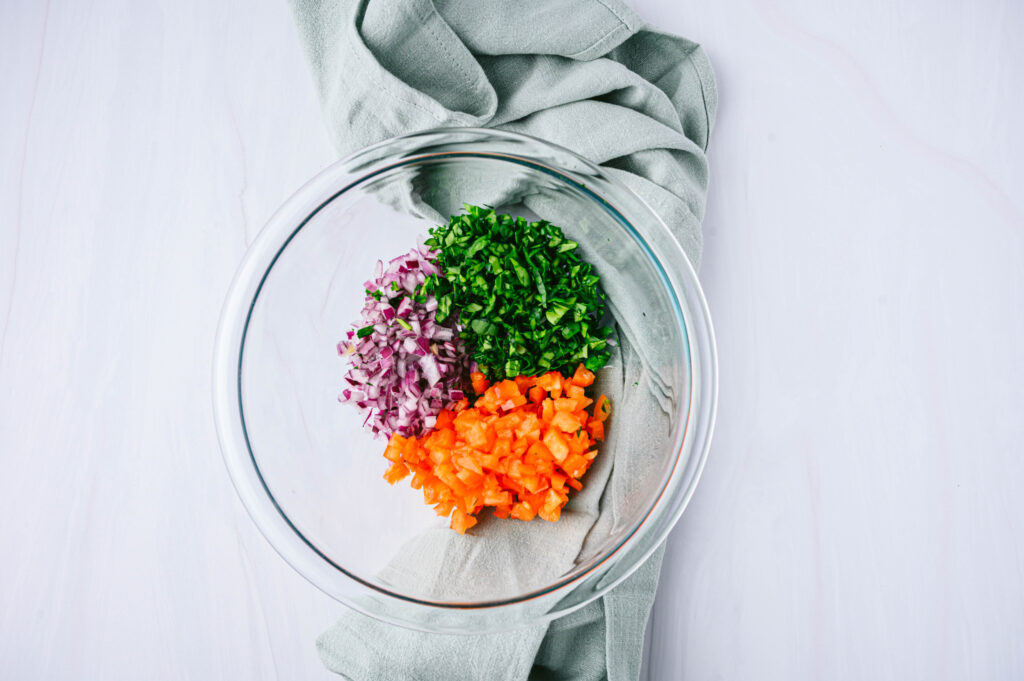
So often I hear complaints that turkey burgers are dry and chewy because they are very lean. Indeed, ground turkey breast is very lean with only 1% fat. Knowing that, how can we add more flavors, more moisture, and even stretch your dollar? Veggies!
Finely chopping veggies and incorporating them into the ground turkey will help keep the burger moist and tender. When cooked the water content from the vegetables is released, leaving you with a juicy burger.
Plus, by bulking up the ground turkey with veggies, it creates more burger patties, significantly stretching your dollar. One pound of ground meat often serves four, but with adding veggies it stretches it to six servings.
I call these confetti burgers because there are flecks of colors throughout the burger patty. The key is finely chopping vegetables so they evenly disperse throughout the patty. Play around with different veggies that you like. I always aim to add at least three different colors into the mix.
They provide a more distinct smoky flavor along with that amazing backyard aroma. It’s such a tease when I’m running through the neighborhood and all I smell are my neighbors grilling. Scented wood chips or charcoal will bring the additional flavor. However, charcoal can be a little messy and sometimes tricky to regulate the temperature
Gas Grills
Just turn on a switch and your gas grill is fired up and ready to go. You are able to easily regulate the temperature and often gas grills have different settings that you can easily regulate areas of the grill at different temperatures. You won’t really get that smoky flavor, but you are able to cook various items on the grill at the same.
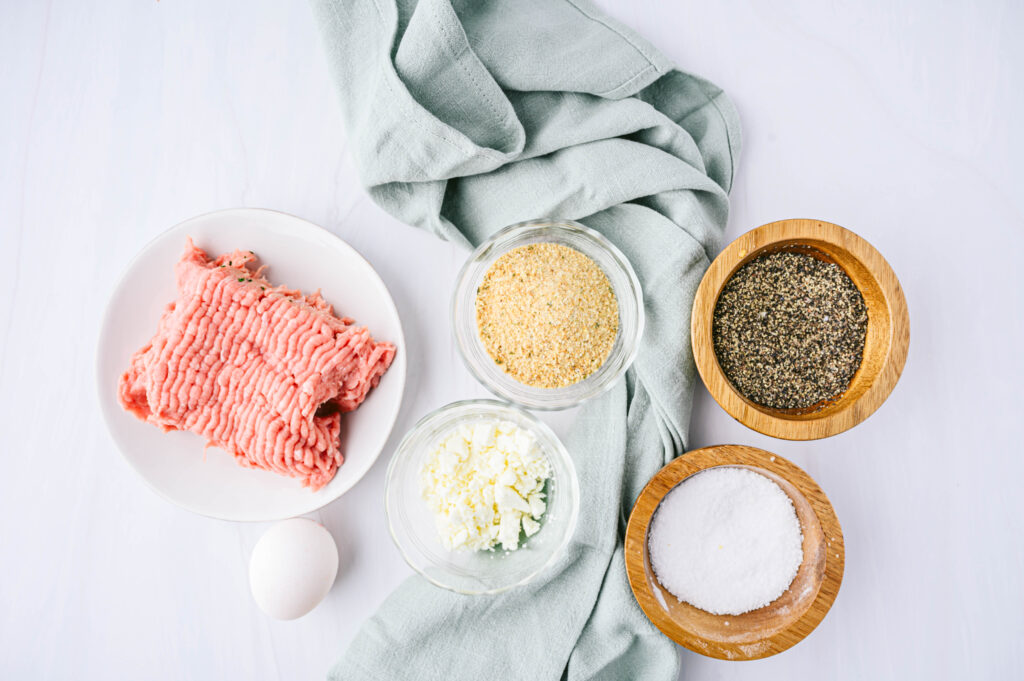
Ingredients Needed for Spinach Feta Turkey Burgers
red bell pepper
red onion
spinach
ground turkey breast
feta cheese
breadcrumbs
egg
salt and pepper
How to Make Turkey Veggie Burgers
Prep all of the vegetables and preheat the grill.
Combine the ground turkey, feta cheese, egg, salt, pepper, and breadcrumbs in large mixing bowl.
Mix together with your hands until the ingredients are incorporated. Form 6 patties.
Grill each burger 5-7 minutes on each side or until the internal temperature reaches 165 degrees.
Serve on a whole wheat bun with your favorite toppings!
Can You Make These on the Stovetop or in the Oven?
Yes. Bake for 15 minutes at 350 degrees.
For the stovetop, get a skillet nice and hot and add a little oil. Cook for the burgers for several minutes on each side.
Tips for Making
Be careful when flipping the burgers and only flip one time. These can be delicate, you don’t want them to fall apart.
To make ahead of time you can store the patties in the fridge or freeze them until you are ready to serve.
While these go great with traditional toppings, you can also add a little tzatziki sauce for a whole new flavor.
Avoid using frozen spinach. It has too much moisture and it will be hard to keep the turkey burgers together.
Use a veggie chopper to get the vegetables nice and small.
What Do Turkey Burgers Go With
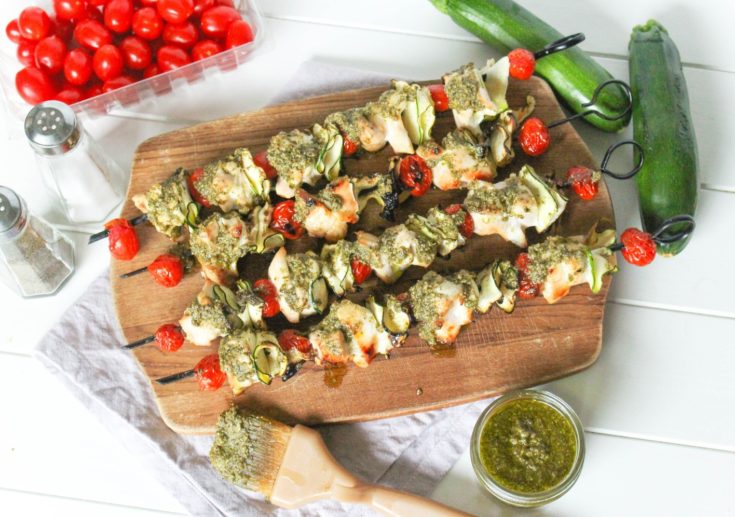
Of course you can always serve them with fries or wedges, but here are a few of my other favorite side dishes.
This post may contain affiliate links. Read my privacy policy.
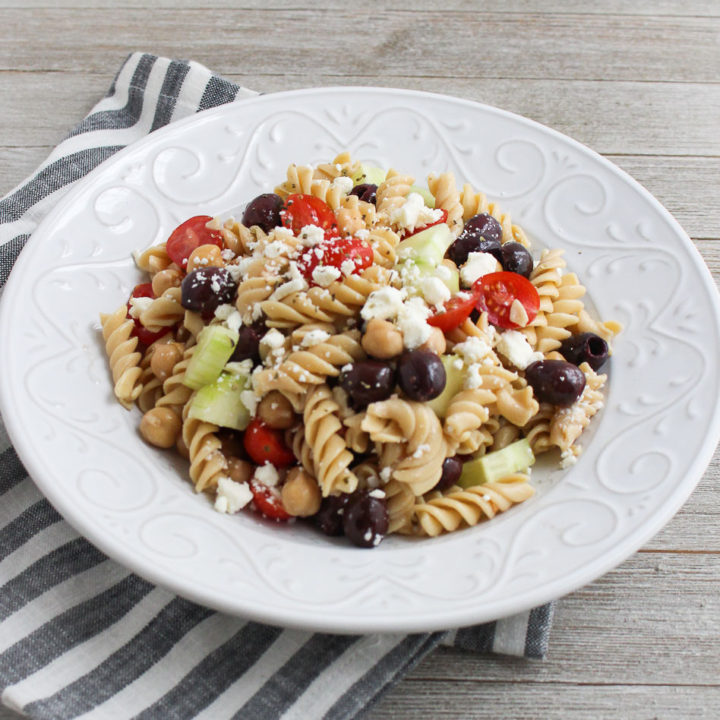
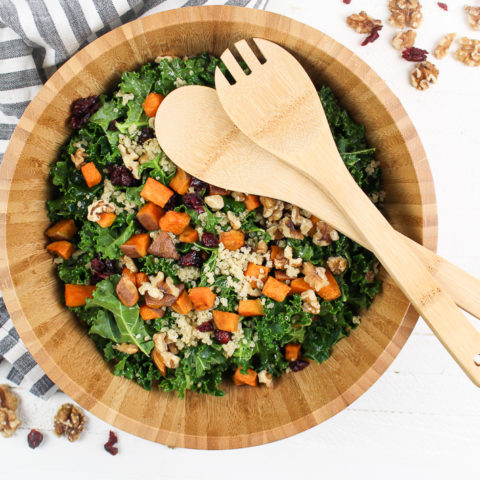
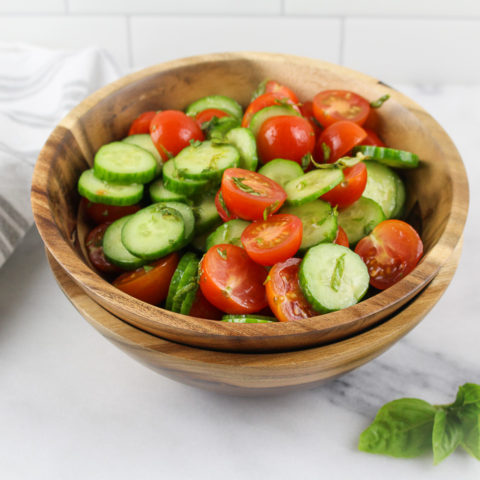
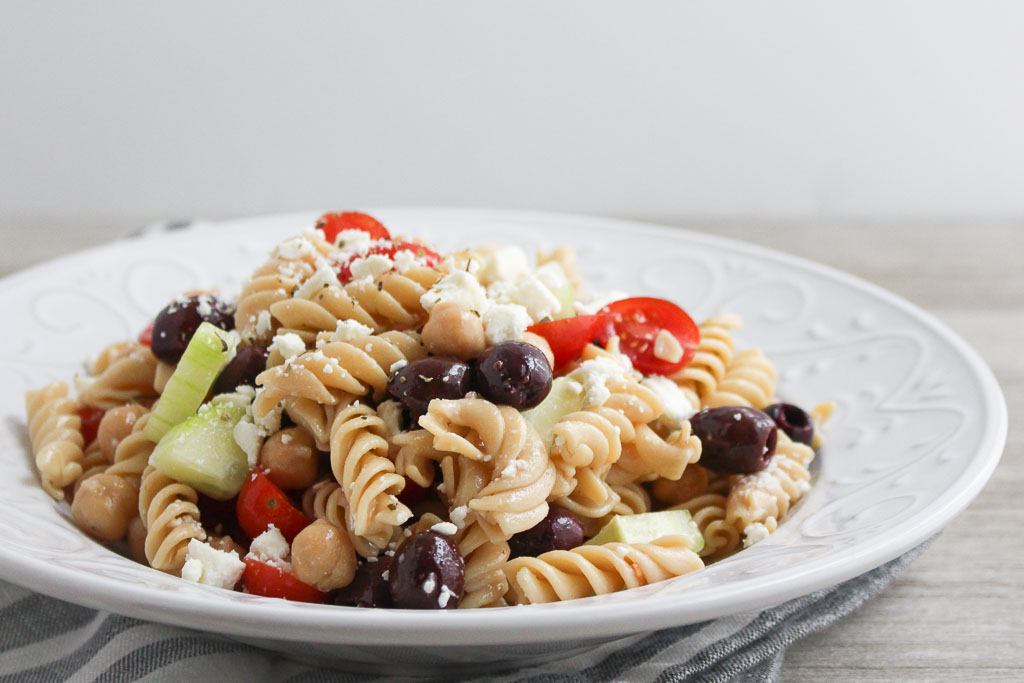
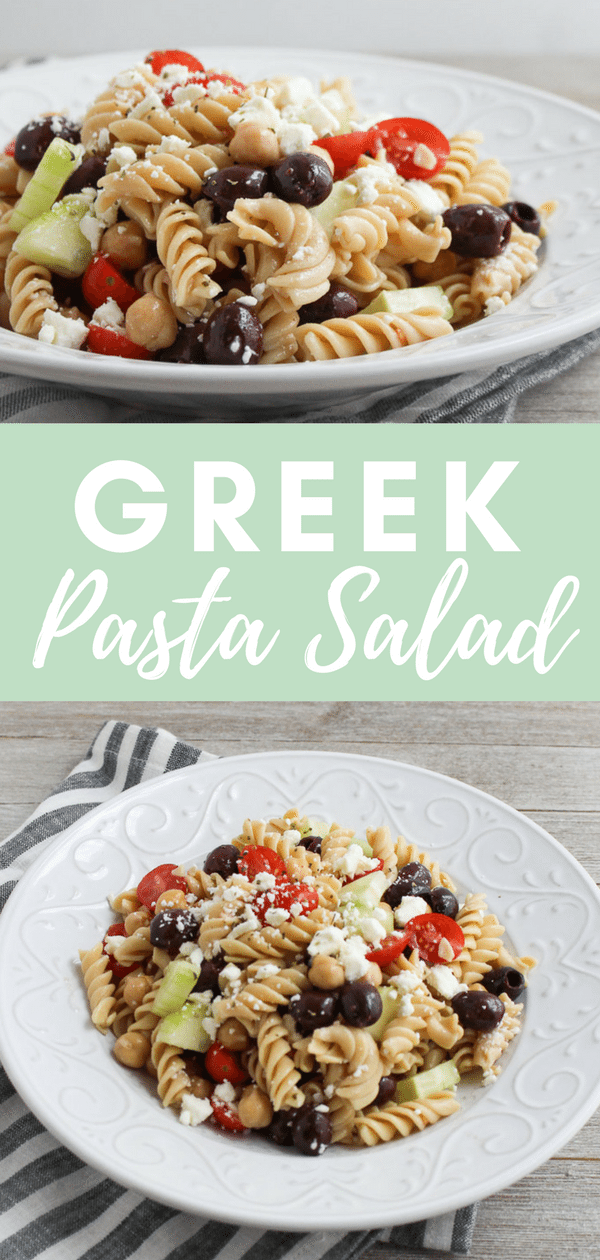
Did you know April 23rd is picnic day? What are your favorite picnic recipes? Add this Greek Pasta Salad to your next picnic spread.
I had many summer jobs during high school and in between college semesters. One of them was at an outdoor catering business. We did a lot of BBQ’s and graduation parties, which served the classic outdoor fair, including burgers, hot dogs, barbeque chicken, and ribs. Plus, the typical sides like, potato salad, pasta, salad, and coleslaw.
Making the sides was one of the tasks I simply dreaded. With catering, every recipe is made in mass quantities to serve a crowd.
Do you have a certain food or ingredient that just skeeves you out? For me it’s mayonnaise. For a large party, I would have to make potato salad in these large buckets and wear these giant gloves to toss the mayonnaise in.
I used Banza pasta for this recipe. I feel like there are never enough plant-based protein options available at barbeques. This is a great way to have a protein-packed option for those who don’t eat meat and want to enjoy this as more of a meal than a side dish.
This post may contain affiliate links. Read my privacy policy.
These pancakes are whole grain and gluten-free, making them a perfect fit for any pancake enthusiast!
Why I love Oat Flour Pancakes
I used to be “anti pancake” because I am the worst at flipping them. Really, it was that I was impatient and tried to flip them too early before they set.
When my sisters and I were little, my dad was the only one who was allowed to cut our pancakes. He would keep them perfectly stacked and cut them into perfect triangles. I was more of a syrup dunker than a drizzler. I would take each triangle and dunk it into the “good syrup”. My aunt lives in Vermont and she would send us delicious locally made maple syrup.
Using whole grains for pancakes
The problem with pancakes is that I never felt satisfied after eating them. Adding whole grains as the base of pancakes can help solve that solution.
I used oat flour as the base. You could just buy oat flour, but it’s pretty easy to make. Just take rolled oats or instant oats and pulse them in a food processor until they resemble a light fluffy flour. Oat flour still contains all part of the whole grain, but not as dense as whole wheat flour, yielding a fluffier pancake.
The secret to creating fluffy pancakes
Vinegar in pancakes? Yes! It’s the secret to help activate the baking powder and helps the pancakes puff and become fluffy.
I’ve tried some other methods like adding seltzer to the batter or whipping the egg whites separately from the egg yolks before combining them. Both methods do work, but I don’t always have seltzer on hand, and mixing egg whites separately makes more messy bowls. I don’t know about you, but the fewer dishes to clean, the better!
Syrup dunker or drizzler?
Are you a syrup dunker or drizzler? Most of the time I ditch the syrup and use frozen fruit like wild blueberries. When frozen berries defrost they become all gooey and syrupy. Other times, I’ll spread peanut butter or yogurt between the layers. I really just go with what I’m craving at the time. How do you top your pancakes?
This post may contain affiliate links. Read my privacy policy.
This post is sponsored by The Beef Checkoff. Thanks for supporting brands that make this blog possible!
Dietitians are celebrating all month long because March is National Nutrition Month! This year’s theme is “Go Further with Food”. This theme encourages us to achieve the numerous benefits healthy eating habits offer while including a variety of healthful foods from all of the food groups on a regular basis.
Previously working as a Supermarket RD, I quickly learned that a grocery store is a confusing place, especially in certain areas like the meat section.
It can be challenging grocery shopping for beef if you are unsure of the difference between flank steak and skirt steak. The different costs, categories, or even proper cooking techniques of various cuts of beef can throw off even a savvy home cook.
At the supermarket meat case, each beef package label typically identifies the primal cut and the sub-primal cut name. It also includes the weight, price per pound, total price, sell-by date, and safe handling instructions. It may also include a grade, nutrition and preparation information, and the country of origin.
It’s time to “Beef Up Nutrition Month” with decoding what the labels mean in the supermarket meat case.
BEEF QUALITY GRADING
The USDA divides beef into categories by different grades. Prime, Choice, and Select are the ones you will see at the grocery store. The certain qualifications that determine the quality grade of beef are:
Distribution of marbling within the lean muscle at the 12th/13th rib
Age/maturity of the carcass
Color, texture, & firmness of the lean muscle
Prime-Grade Beef is the USDA’s highest designation. Coming from younger, well-fed cattle, this beef has more marbling with afirmer flesh. Prime-grade beef accounts for less than approximately five percent of the market in the United States, with the vast majority going to steakhouses and fancy hotels. Prime roasts and steaks are excellent for roasting, grilling, or broiling.
Choice-Grade Beef is of high quality and produced in highest quantity. Choice-grade beef has less marbling than Prime. This is the standard option at supermarkets. Choice roast and steaks, especially from the rib and loin, will be very tender, juicy, and flavorful when roasted, grilled, or broiled. Less tender cuts are great for slow cooking.
Select-Grade Beef is slightly leaner than Prime and Choice because it has less marbling. It can lack some tenderness, flavor, and juiciness as compared to the higher grades. Select grade beef often benefits from marinating prior to grilling or broiling. 1
Check out this easy to explore chart, outlining the various Grades of Beef.
NATURAL, GRASS-FED, ORGANIC – WHAT’S THE DIFFERENCE?
Beyond just the quality grade, beef comes along with additional labels. Package labeling can be very confusing.
All cattle spend the majority of their lives eating grass on pastures. But beef can be finished in a variety of ways, giving you choices when at the meat case in your local grocery store or at a restaurant.
“Natural” This label implies the beef has no artificial ingredients or colors added to it an is minimally processed. 2
“Naturally Raised” does have validity. As of 2009, the label ensures that the animals are free of antibiotics, never received growth-promoting hormones, never fed animal by-products, and may spend time at a feed yard. Naturally raised cattle may be either grain- or grass-finished.
“100% Organic Beef” means that the animals must be fed completely organic feed grains and have never received antibiotics and growth-promoting hormones. This is certified and inspected by the government. Organic beef cattle may be either grain- or grass-finished, as long as the USDA’s Agriculture Marketing Service certifies the feed is 100% organically grown and can be fed in a feed yard. 3
“Grass Finished” cattle spend their lives eating grass or foraging, but not always necessarily stay on a 100 percent grass-fed diet or finished on grass. Some “grass-fed” cattle are still fed grain for their last few weeks to help fatten the cattle. Grass-fed cattle may or may not be given FDA-approved antibiotics to treat, prevent, or control disease and/or growth-promoting hormones. 2
Need help choosing lean beef or wondering what type of cooking method works best? Use the Beef. It’s what’s for dinner’s cooking guide.
WHY BEEF?
Beef provides you with 10 essential nutrients that support a heart-healthy lifestyle including protein, zinc, iron and B vitamins. The nutrients found in beef provide our bodies with the strength to thrive and grow throughout all the stages of life.
Beef is an excellent source of protein.
One 3-ounce cooked serving of beef provides approximately 50% of your Daily Value (25 grams) of this important nutrient—making it an excellent source! Protein helps maintain a healthy weight, as well as preserve and build muscle.
New research suggests it’s not only important to just get enough protein in at dinner or lunch but to spread it throughout your day for optimal health. Aim for 25-30 grams of protein at each meal. 4,5
What is considered lean?
6 Look for the word “round” or “loin” in its name when choosing lean cuts of beef.
Lean cuts include top sirloin steak, tenderloin steak, strip steak (or top loin steak), or 95% lean ground beef.
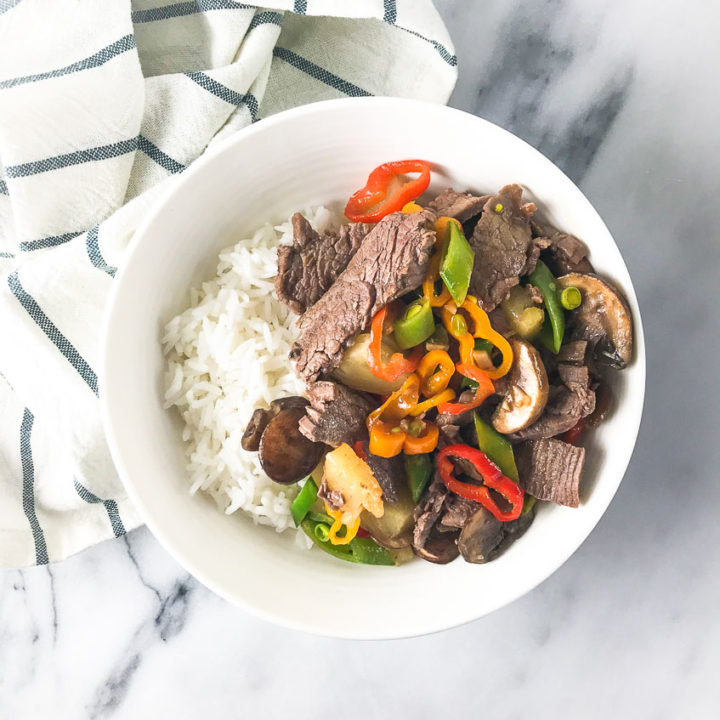
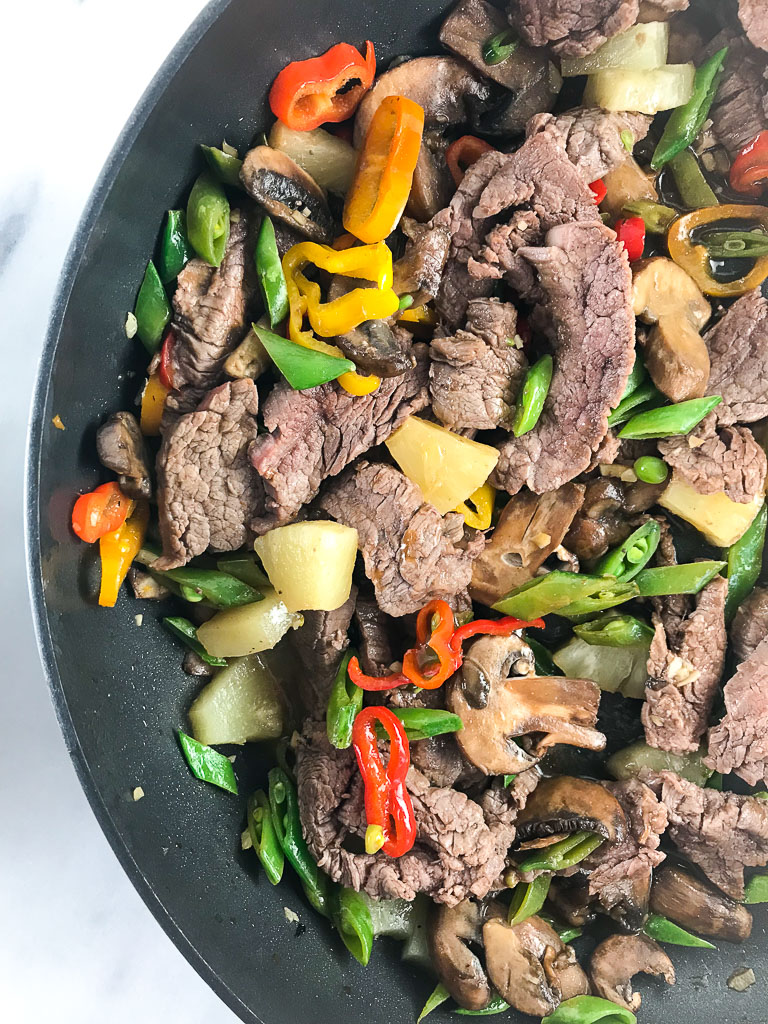
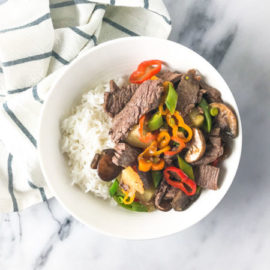
Whip up this simple and delicious stir-fry for dinner.
Ingredients
Scale
1 (8-ounce) can pineapple tidbits, 3 tablespoons juice reserved
5 tsp rice vinegar
1 tbsp low sodium soy sauce
1 tbsp ketchup
2 tsp brown sugar
1 lb. flank steak, cut into strips
1 tsp cornstarch
3 tsp sesame oil, divided
1 tbsp minced garlic
1 cup sliced mushrooms
1 cup snap peas
1 sweet pepper, sliced
Instructions
Whisk the reserved 3 tbsp pineapple juice, vinegar, soy sauce, ketchup, and sugar in a small bowl until smooth. Place beef in a medium bowl; toss with 2 tablespoons of the sauce. Let marinate for 20 minutes.
Add cornstarch to the remaining sauce and whisk until smooth.
Heat 2 teaspoons oil in a large nonstick pan over medium-high heat. Transfer the beef to the pan. Whisk any remaining marinade into the bowl of sauce. Cook the beef, stirring every 1 to 2 minutes, until tender, about 4-5 minutes. Transfer the beef to a plate.
Add the remaining 1 tsp oil to the pan and heat over medium heat. Add garlic, stirring constantly, until fragrant, about 30 seconds. Add the mushrooms, snap peas and sweet pepper to cook, stirring often, until just tender, about 3 minutes. Pour in the sauce and cook, stirring, until thickened, about 30 seconds. Add the beef and pineapple and cook, until heated through.
This post may contain affiliate links. Read my privacy policy.
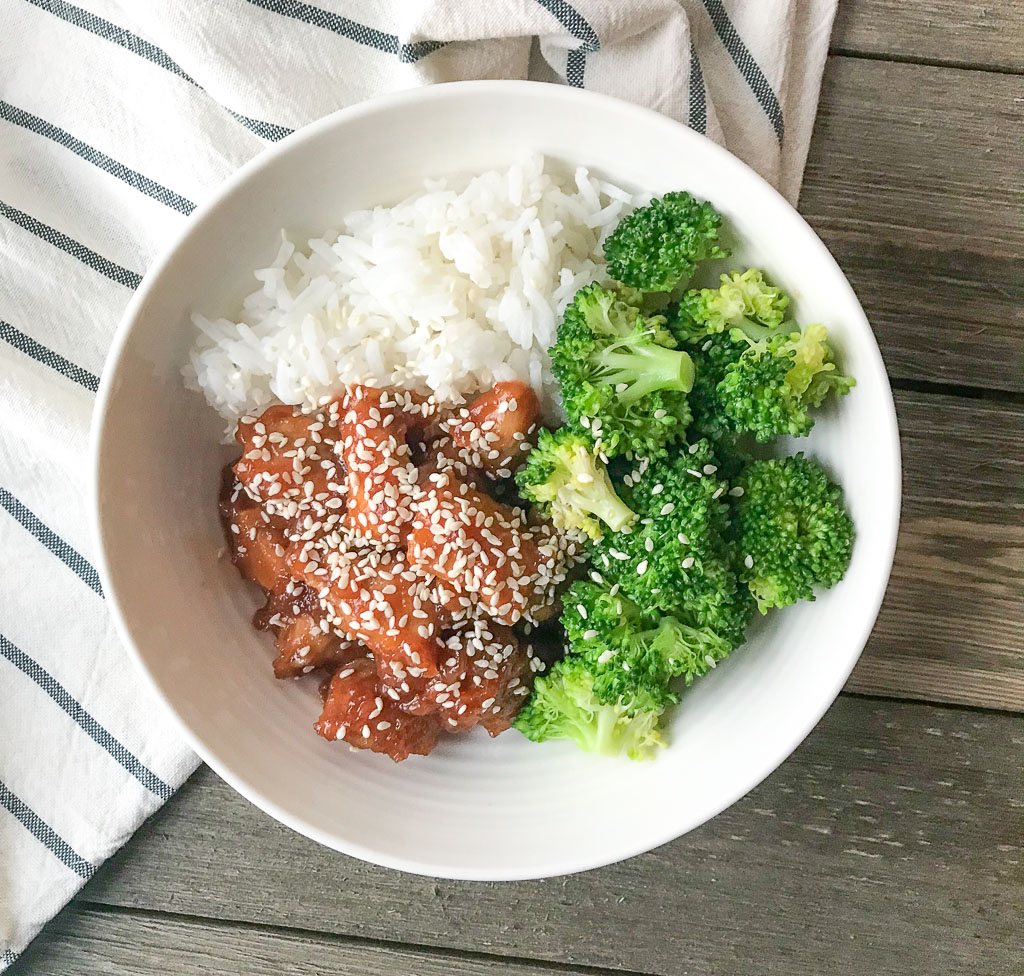
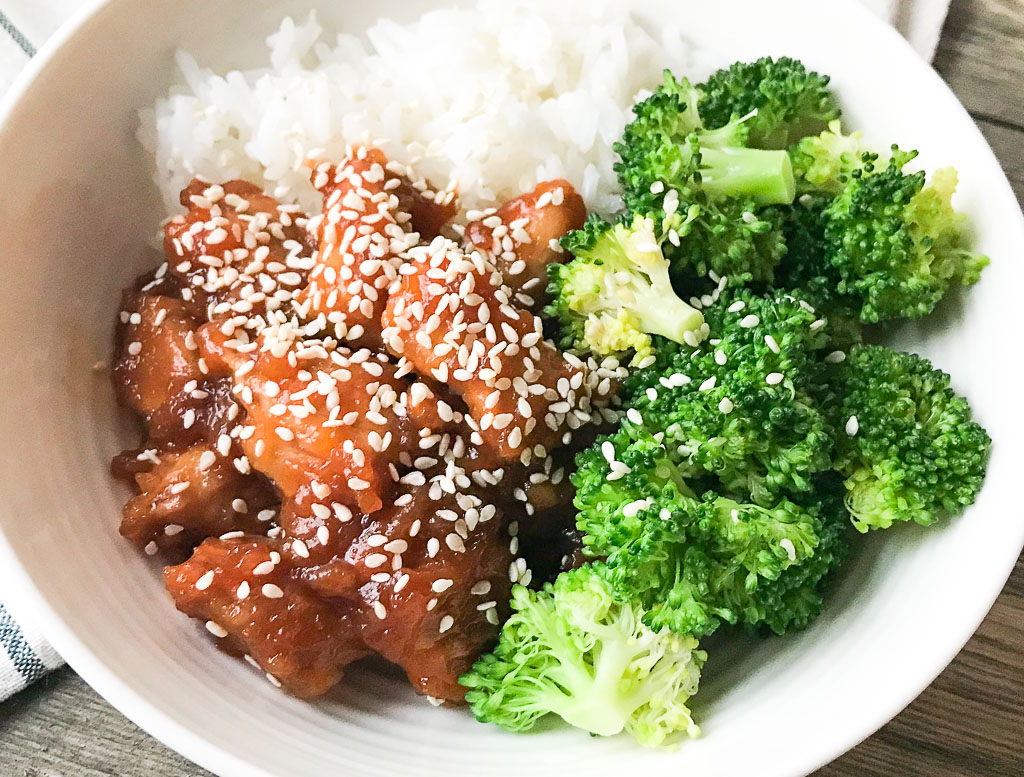
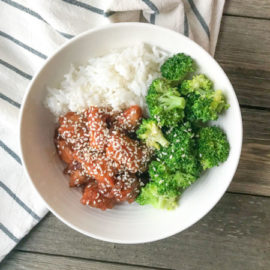
Skip takeout! It will take you less time to make this Instant Pot Sesame Chicken than it is to make a trip out for takeout. This easy dinner idea only takes 30 minutes to make and goes great with a side of rice and steamed broccoli!
There are just some nights where takeout seems like the easier option. Sesame chicken is one of my favorites when ordering takeout but never leaves me feeling the best. What if I told you, I’ve figured out a way to enjoy this signature takeout dish faster than it will take you to hop in the car and grab from a restaurant. Would you believe me?
Healthier than takeout: Cooking the chicken in the Instant Pot creates a crispy texture without a fryer, which how typical take-out restaurants cook this dish.
Simple sauce ingredients: You most likely have the majority of these ingredients already on hand. The soy sauce, ketchup, and red pepper flakes will cook with the chicken helping it stay tender while infusing flavors. The honey and cornstarch will help crisp up the chicken and thicken the sauce.
Easy Dinner and meal prep idea: Take it even one step further to make this dinner with ease. Utilize the steamable rice and broccoli found in the frozen aisle. Or keep putting your Instant Pot to work again by cooking rice and the broccoli in there too.
Ingredients Needed
Chicken – I used boneless, skinless breasts but you can also use tenders since we are cutting the chicken in bite sized pieces.
cornstarch – This makes an excellent thickening agent when mixed with water and helps to get that crispy breading on the chicken.
sesame oil – adds that traditional flavor you are used to
soy sauce – go with the low sodium kind
ketchup
red pepper flakes – this is optional but adds just the right amount of spice.
honey
water
sesame seeds
How to Make Instant Pot Sesame Chicken
Mix a tablespoon of cornstarch with a pinch of salt in a small bowl. Toss the chicken so it’s completely covered.
Set the Instant Pot to saute and add a tablespoon of sesame oil. Once hot, saute the chicken until it’s browned.
Stir in the soy sauce, ketchup, and red pepper flakes if using. Lock the lid in place and switch the valve to the sealing position. Cook on high pressure for 3 minutes.
Once the timer goes off, carefully turn the valve to release the pressure. Remove the lid and add a teaspoon of sesame oil and honey. Stir to combine.
Whisk together the remaining water and cornstarch in a separate bowl to make a slurry.
Turn the Instant Pot back to saute and stir in the slurry. Continue stirring so the sauce thickens.
Top with sesame seeds and serve!
Tips for Making Homemade Sesame Chicken
If you like more spice, swap the ketchup for sriracha.
Don’t have cornstarch? Use a little flour instead.
To make this recipe gluten-free, substitute the soy sauce for tamari.
Toasting the sesame seeds adds more flavor, but it’s not a must!
Using sesame oil is essential. While you can substitute, you will miss out on the of the signature flavor of sesame chicken.
This recipe can be made using any electric pressure cooker, not just the Instant Pot.
Storage Instructions
Keep leftovers in an airtight container in the refrigerator for up to 4 days.
Can You Make Sesame Chicken on the Stovetop?
Yes! Follow the same instructions for breading the chicken. Saute it in a large skillet. Whisk the sauce ingredients in a small saucepan and cook until boiling, then reduce to a simmer to thicken. Stir in the slurry and remove from the heat once the desired consistency has been reached. Then toss to coat the chicken.
Skip takeout! It will take you less time to make this Instant Pot Sesame Chicken than it is to make a trip out for take out.
Ingredients
Scale
1 pound boneless, skinless, chicken breast, cut into bite-size pieces
2 tablespoons cornstarch, divided
1 tablespoon + 1 teaspoon sesame oil, divided
1/4 cup low sodium soy sauce
1 1/2 tablespoons ketchup
pinch of red pepper flakes, optional
1/4 cup honey
2 tablespoons water
2 teaspoons sesame seeds
Instructions
In a small bowl, combine 1 tablespoon of cornstarch with a pinch of salt and pepper. Toss chicken to evenly and lightly coat.
Preheat the Instant Pot and set to “saute”. Add 1 tablespoon sesame oil. Once the oil is hot, add the chicken and saute for 3-4 minutes, to brown.
Stir in soy sauce, ketchup, and red pepper flakes, if using. Place the lid on the Instant Pot and seal the valve. Set to manual and 3 minutes cook time.
When done, use the quick pressure release. When most of the steam is released, remove the lid. Add the remaining 1 teaspoon of sesame oil and honey. Stir to combine.
In a small bowl, whisk together the remaining 1 tablespoon of cornstarch and water to make a slurry.
Set Instant Pot back to saute, stir in the slurry and continue to stir as the sauce thickens to desired consistency, about 2 minutes.
Top with sesame seeds.
Serve over rice and steam broccoli.
Keywords: instant pot, sesame chicken, dinner
Recipe Card powered by
FREE Ebook
Get on the list and download my free Knife Basics & Skills Ebook!
This website uses cookies to improve your experience. We'll assume you're ok with this, but you can opt-out if you wish.AcceptRejectRead More
Privacy & Cookies Policy
Privacy Overview
This website uses cookies to improve your experience while you navigate through the website. Out of these, the cookies that are categorized as necessary are stored on your browser as they are essential for the working of basic functionalities of the website. We also use third-party cookies that help us analyze and understand how you use this website. These cookies will be stored in your browser only with your consent. You also have the option to opt-out of these cookies. But opting out of some of these cookies may affect your browsing experience.
Necessary cookies are absolutely essential for the website to function properly. This category only includes cookies that ensures basic functionalities and security features of the website. These cookies do not store any personal information.
Any cookies that may not be particularly necessary for the website to function and is used specifically to collect user personal data via analytics, ads, other embedded contents are termed as non-necessary cookies. It is mandatory to procure user consent prior to running these cookies on your website.