B.A.L.T. – Bacon, Avocado, Lettuce, Tomato Sandwich

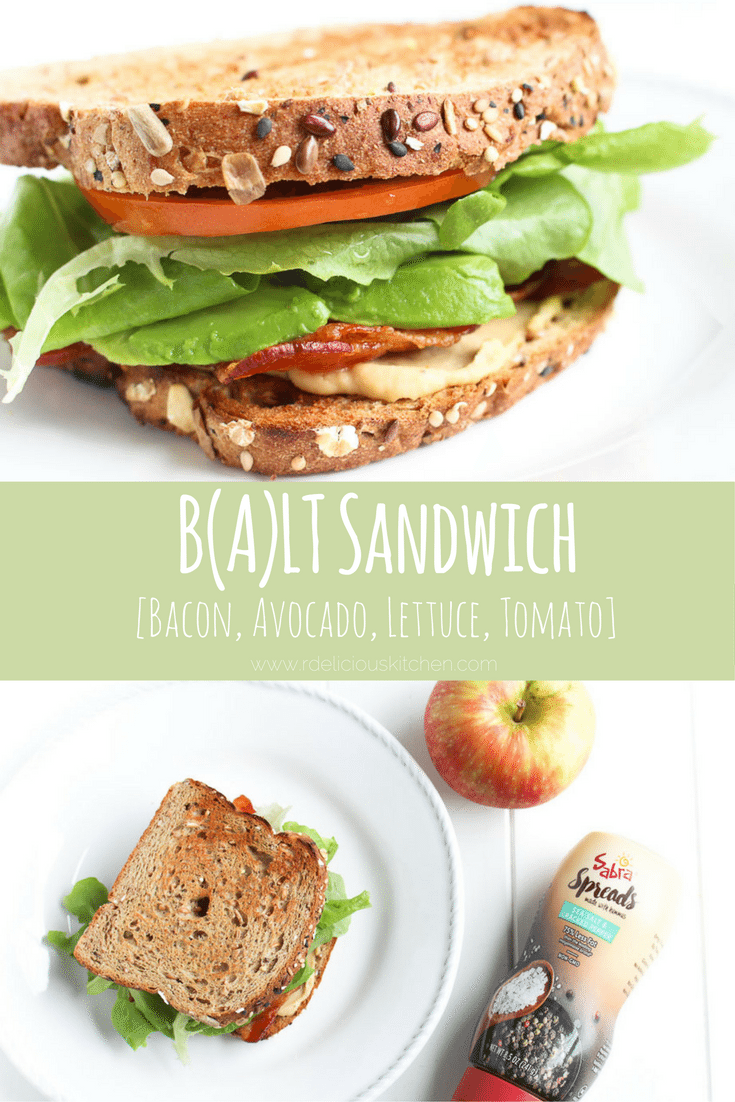
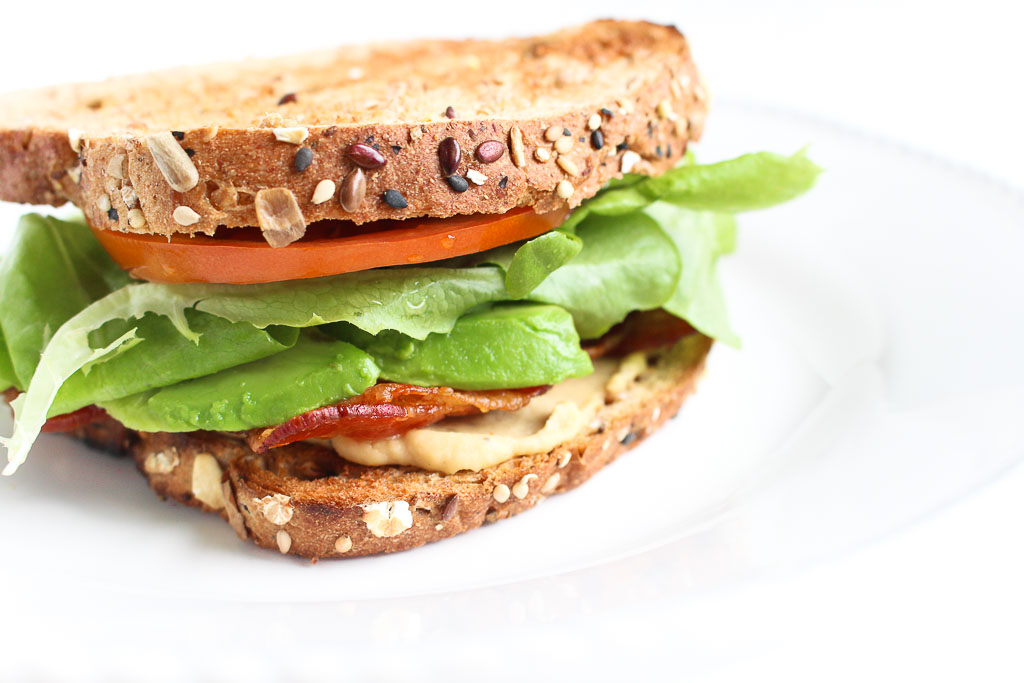
A classic B.L.T. with a little twist! Adding the “A” (avocado) and a creamy spread takes this average BLT up a notch. Don’t skip out on quality ingredients when you assemble this sandwich.
BALT - Bacon, Avocado, Lettuce, Tomato Sandwich via RDelicious Kitchen @RD_KitchenI received free samples of Sabra Spreads mentioned in this post. By posting this recipe I am entering a recipe contest sponsored by Sabra and am eligible to win prizes associated with the contest. I was not compensated for my time.
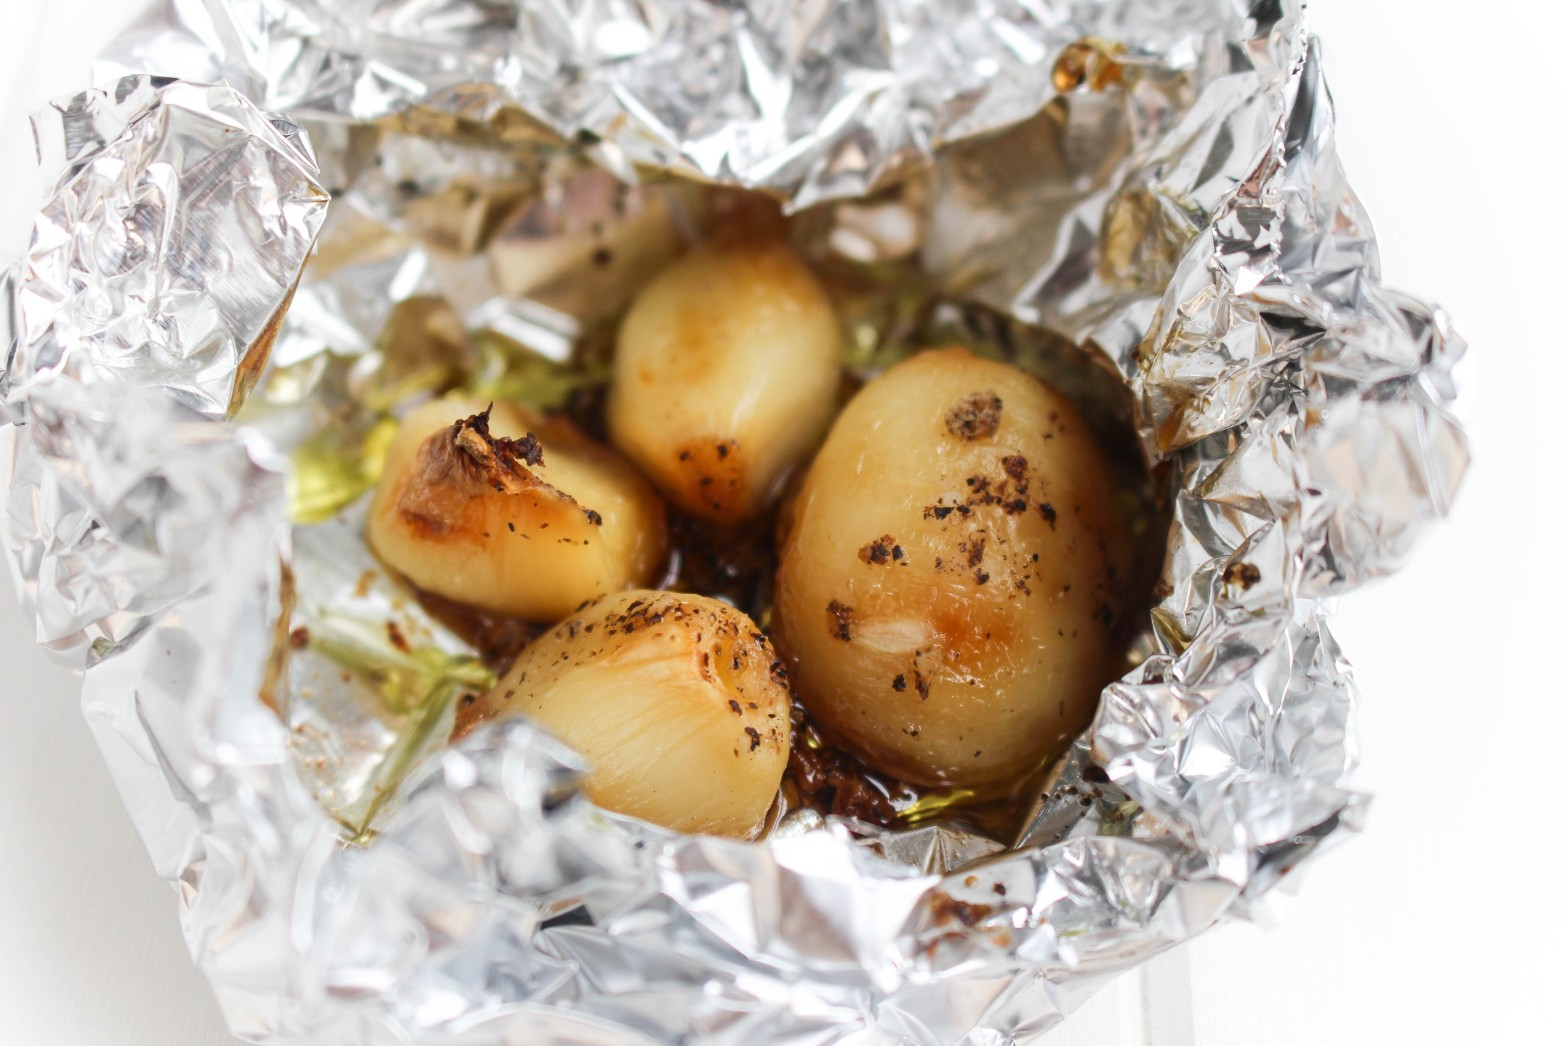
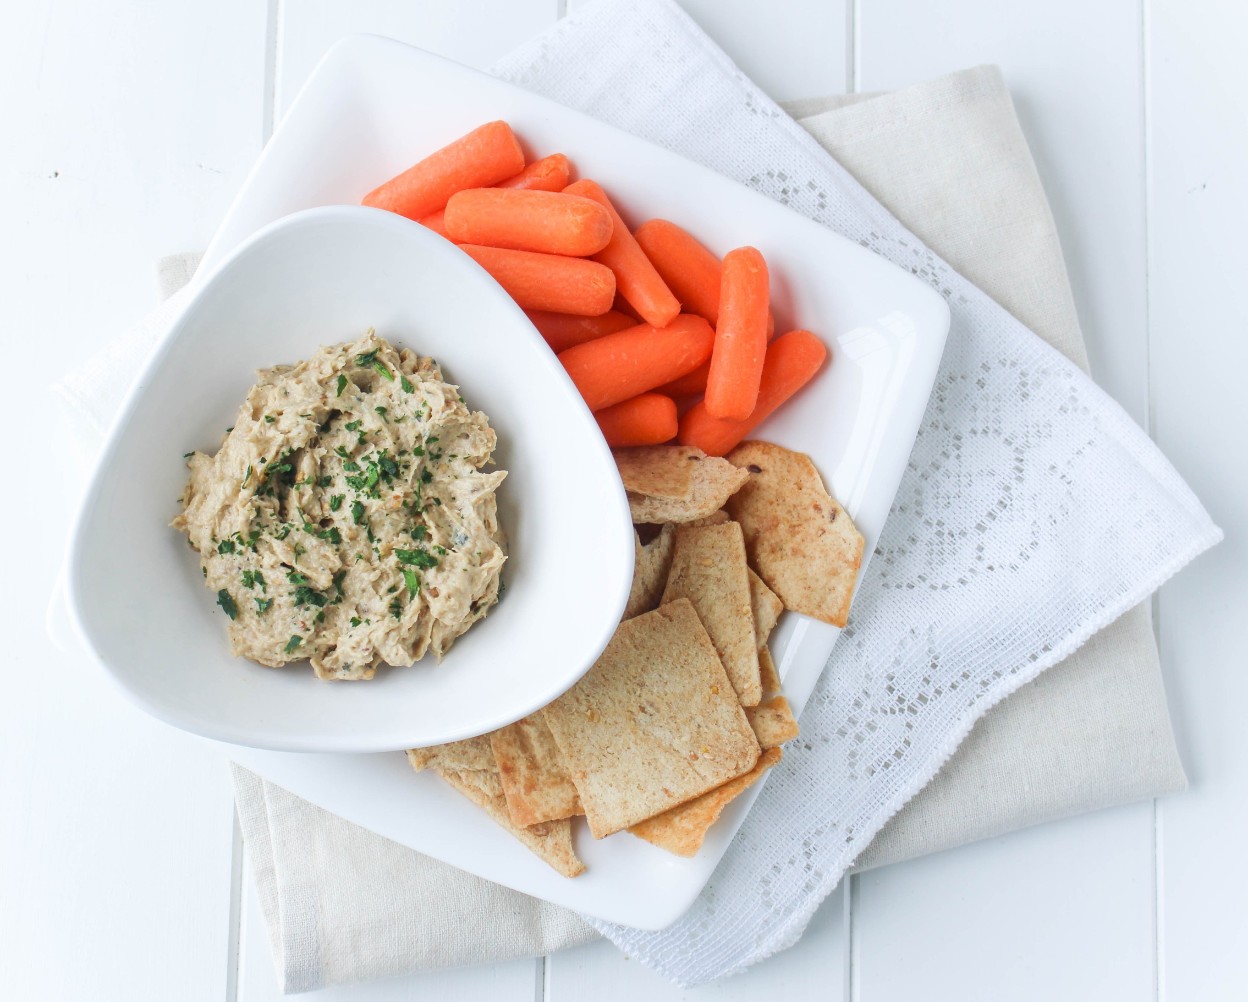
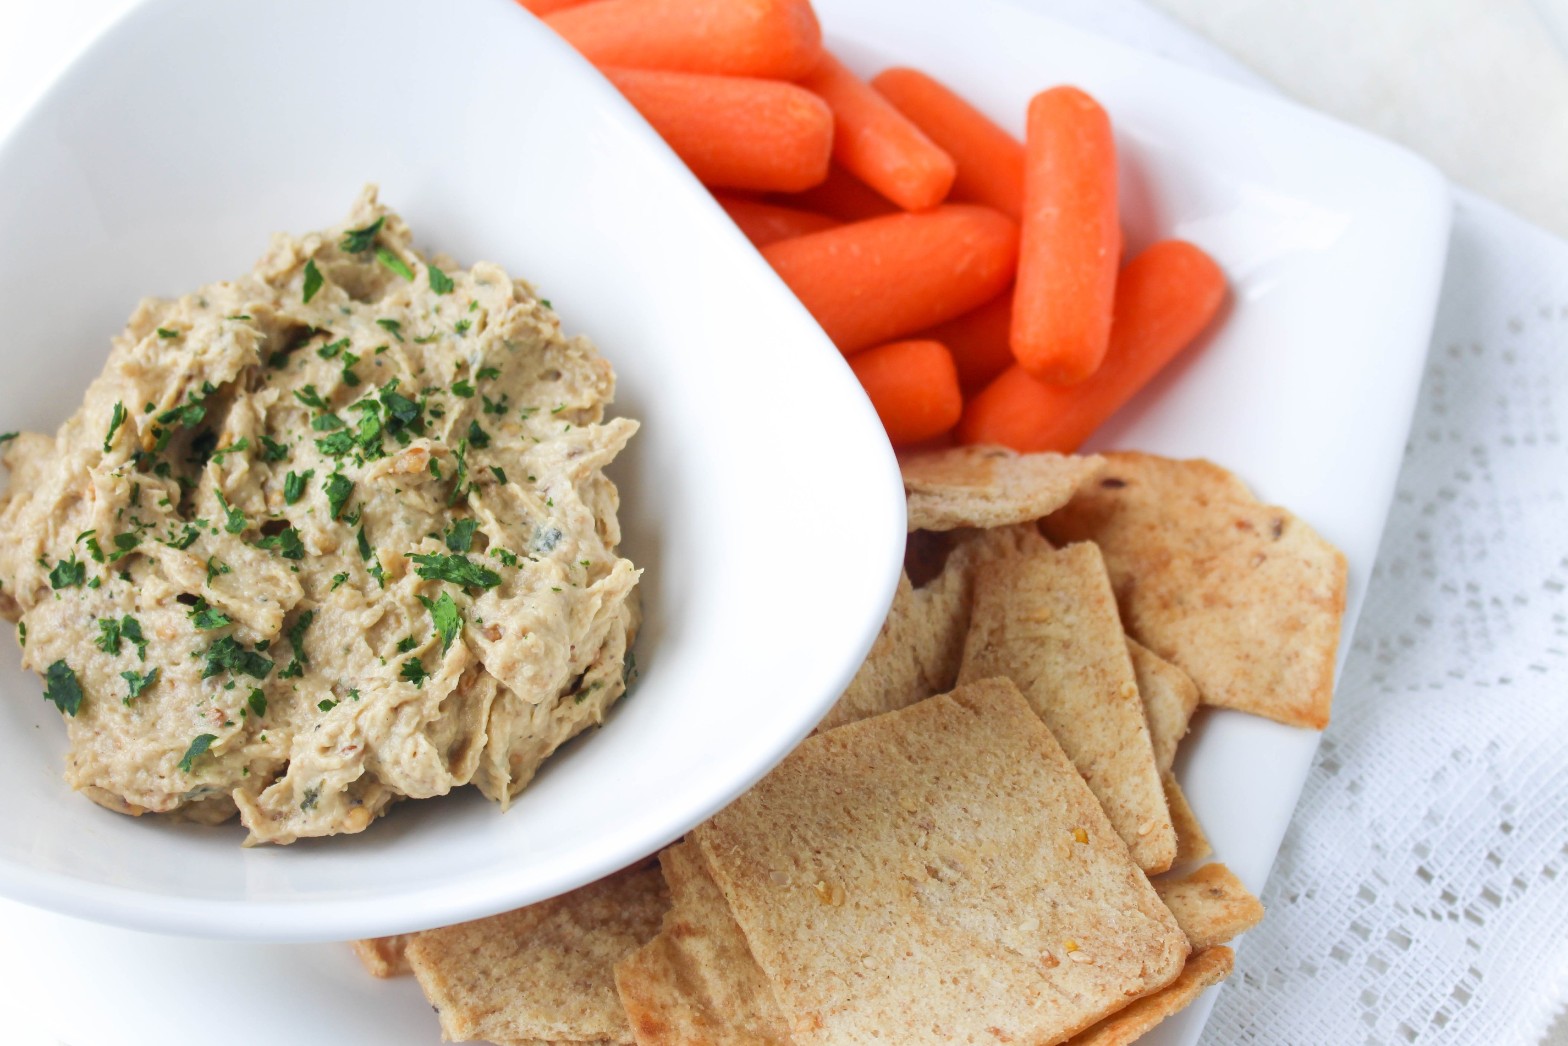
Have you seen the new Sabra spreads hit the shelves at your local grocery store? I was excited when Sabra sent me all three flavors to experiment with in the kitchen. The flavors are honey mustard, garlic herb, and sea salt and cracked pepper. I had so many recipe ideas running through my head. These spreads will definitely be making an appearance here in the future. With these fresh ingredients and flavors the new Sabra spreads will become a staple condiment in my refrigerator.
BALT - Bacon, Avocado, Lettuce, Tomato Sandwich via RDelicious Kitchen @RD_KitchenWhen it comes to a BLT, you need quality ingredients. I decided just a BLT just wouldn’t suffice and needed a little extra flavor. I turned it into a B.A.L.T. with slices of avocado. I love sandwiches when you can really taste all ingredients in every layer.


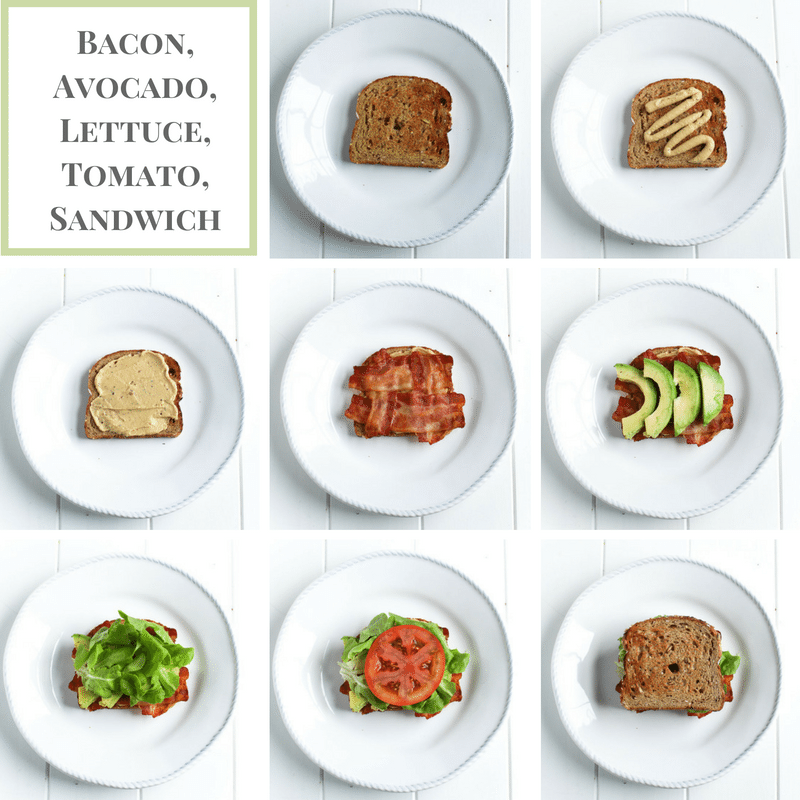
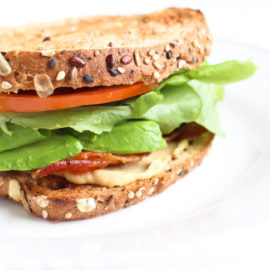
To build your perfect B.A.L.T. you have to start out with quality bread. I like a hearty whole wheat bread. Next, comes the bacon. Not all bacon is created equally. Look for pork shoulder bacon, it is a much leaner choice. Pork shoulder comes from a leaner part of the pig (the shoulder) which contains less fat than pork belly, which majority of bacon comes from. Then comes the avocado. You can mash it. I decided to keep it as slices. Whatever you like best! The lettuce I chose was a Boston bib lettuce. The leaves are tender. If you prefer more of a crunch, go for romaine. Of course, this jersey girl has to choose a juicy plump jersey tomato sliced on top.

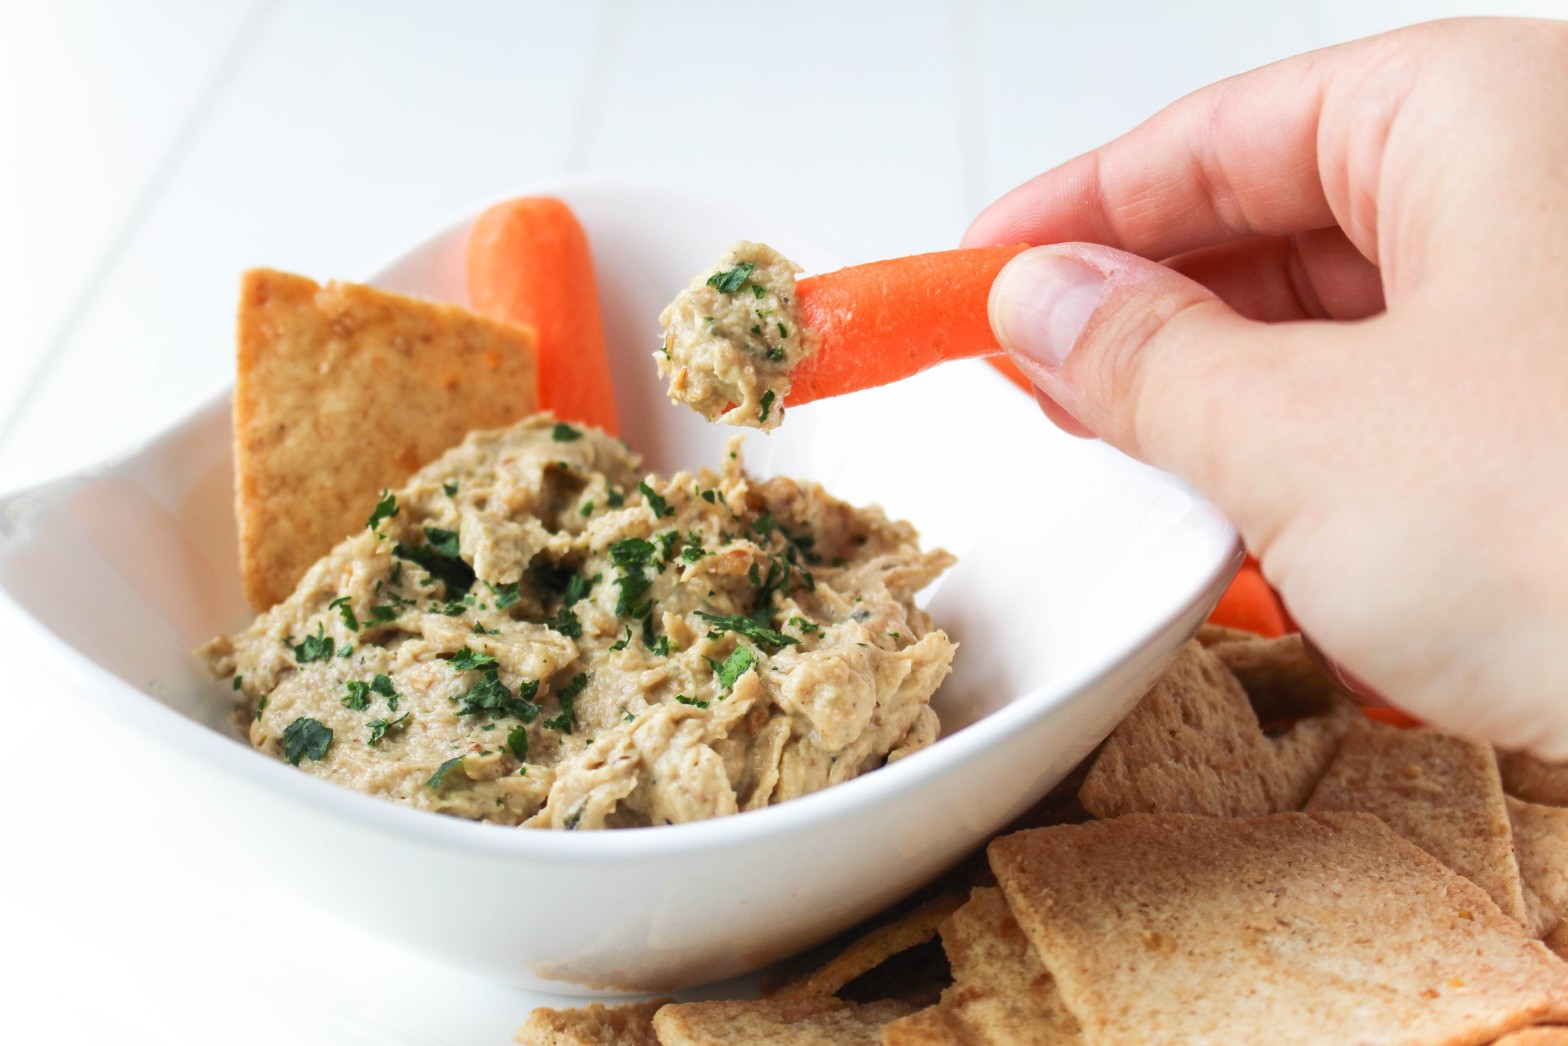
The part that ties it all together is the Sabra spread. This is a much healthier choice than adding mayo as a condiment. The new Sabra spreads contain 75% less fat than mayo and are convenient for sandwiches now that it is in a squeeze bottle. Of course you can add any of the new flavors, but I wanted to keep it in the simple side and added the sea salt and cracked black pepper.
BALT - Bacon, Avocado, Lettuce, Tomato Sandwich via RDelicious Kitchen @RD_Kitchen

Print
clock clock iconcutlery cutlery iconflag flag iconfolder folder iconinstagram instagram iconpinterest pinterest iconfacebook facebook iconprint print iconsquares squares iconheart heart iconheart solid heart solid icon
bacon, avocado, lettuce, tomato, sandwich on whole wheat bread

B.A.L.T. – Bacon, Avocado, Lettuce, Tomato Sandwich

  • Author: Julie @ RDelicious Kitchen
  • Prep Time: 10 mins
  • Total Time: 10 mins
  • Yield: 1

Ingredients

Scale
  • 2 slices whole grain bread, toasted
  • 1 tablespoon sea salt and cracked pepper Sabra spread
  • 2 slices pork shoulder bacon, cooked
  • 1/4 avocado, sliced
  • 1/4 cup lettuce
  • 12 slices tomato

Instructions

  1. Prepare all of your ingredients.
  2. Spread Sabra spread on one slice of bread. Layer bacon, avocado, lettuce, and tomato. Top with remaining slice of bread. Enjoy!

Recipe Card powered byTasty Recipes

submark

BALT - Bacon, Avocado, Lettuce, Tomato Sandwich via RDelicious Kitchen @RD_Kitchen

Sautéed Brussels Sprouts with Apples and Chicken Sausage

I feel like poor Brussels sprouts have always had bad reputation. Don’t turn up your nose to nutritious Brussel sprouts. Cook them in flavorful ways like these Sautéed Brussels Sprouts with Apples and Chicken Sausage.
Sautéed Brussels Sprouts with Apples and Chicken Sausage via RDelicious Kitchen @RD_KitchenGrowing up did your parents tell you to “eat your Brussel sprouts!”? Some still cringe when they hear that. I would guess 9/10 times those people were eating boring, unflavored, under seasoned sprouts.
I find that with many vegetables. Try cooking veggies in a variety of cooking methods and season in different ways. I showcased this idea in a cooking class once, where we cooked cauliflower in 4 different ways: steaming, boiling, roasting, and mashing with a variety of spices and herbs. It was interesting to hear everyone’s views of which method they preferred. Just because you don’t like a vegetable one way, doesn’t mean you won’t like in another way.

Don’t count out Brussels sprouts just yet, until you try this Sautéed Brussels Sprouts with Apples and Chicken Sausage recipe!
Sautéed Brussels Sprouts with Apples and Chicken Sausage via RDelicious Kitchen @RD_KitchenBrussels sprouts are part of the Brassica family of vegetables, which also includes cabbage, broccoli, kale, and collard greens. They are rich in many valuable nutrients. They are an excellent source of vitamin C and vitamin K. They are a very good source of numerous nutrients including folate, vitamin A, manganese, dietary fiber, potassium, vitamin B6 and thiamin (vitamin B1) and a good source of omega-3 fatty acids, iron, phosphorus, protein, magnesium, riboflavin (vitamin B2), vitamin E, calcium, and niacin.
Sautéed Brussels Sprouts with Apples and Chicken Sausage via RDelicious Kitchen @RD_KitchenWhat is your favorite way to enjoy Brussels sprouts?

Print
clock clock iconcutlery cutlery iconflag flag iconfolder folder iconinstagram instagram iconpinterest pinterest iconfacebook facebook iconprint print iconsquares squares iconheart heart iconheart solid heart solid icon
Sautéed Brussels Sprouts with Apples and Chicken Sausage in a white bowl

Sautéed Brussels Sprouts with Apples and Chicken Sausage

  • Author: Julie @ RDelicious Kitchen

Ingredients

Scale
  • 1 1/2 tablespoons olive oil, divided
  • 1 package garlic chicken sausage (6 links)
  • 1 onion, diced
  • 3 cloves garlic, minced
  • 1 pound Brussels sprouts, shaved with a food processor or roughly chopped
  • 2 tablespoons apple cider vinegar
  • 1 honeycrisp apple, julienne
  • salt and pepper, to taste

Instructions

  1. Slice the chicken sausage on a bias (or simply on an angle). In a large pan, heat 1/2 tablespoon olive oil and cook chicken sausage. Remove from pan and set aside.
  2. Add remaining olive oil in the pan and sauté onions and garlic until caramelized. Add shredded Brussels sprouts and cook for an additional 2-3 minutes or until desired doneness. Add apple cider vinegar and cook for an additional minute.
  3. Add apple slices and cook until just warmed through. Add the chicken sausage back in and toss until combined. Season with salt and pepper, to taste.

Recipe Card powered byTasty Recipes

submark
Sautéed Brussels Sprouts with Apples and Chicken Sausage via RDelicious Kitchen @rd_kitchen

Peanut Butter Chocolate Chip (Chickpea) Cookies

Baking in the kitchen brings back so many great memories. Growing up, my favorite recipe I would make with my mom is chocolate chip cookies. Over the years I’ve been tweaking that original recipe and have come up with a few alternatives over the years. My latest creation are these Peanut Butter Chocolate Chip (Chickpea) Cookies.
Peanut Butter Chocolate Chip (Chickpea) Chia Cookies - A healthy twist to a classic - Peanut Butter Chocolate Chip (Chickpea) Cookies Do you have a favorite family recipe? My mom’s classic chocolate chip cookie recipe is a tried and true recipe in our family. The recipe is typed up on (note: from a typewriter) paper is all torn and there are food spills and stains all over it. That’s what makes it so nostalgic.
Peanut Butter Chocolate Chip (Chickpea) Chia Cookies - A healthy twist to a classic - Peanut Butter Chocolate Chip (Chickpea) Cookies These cookies are always made when guests are over for any holiday or celebration. It has become a dessert staple in our house. But they are not the healthiest (hello butter-flavored shortening and sugar!). I’m all for sweets in treats in moderation, but it’s fun to recreate a classic with a healthier twist.

Peanut Butter Chocolate Chip (Chickpea) Chia Cookies - A healthy twist to a classic - Peanut Butter Chocolate Chip (Chickpea) Cookies Beans have been sneaking into more and more baked goods lately because 1) it can help reduce the amount of flour 2) beans can add a boost of protein and fiber. I used chickpeas since they have a very neutral taste and they match the color of chocolate chip cookies best.

Of course, I had to add peanut butter because peanut butter and chocolate is my favorite combo. And just for fun, I added some chia seeds. I really enjoy the added texture it gives to these cookies.
Peanut Butter Chocolate Chip (Chickpea) Chia Cookies - A healthy twist to a classic - Peanut Butter Chocolate Chip (Chickpea) Cookies These cookies are a little more dense than your typical chocolate chip cookies. Whip up a batch of these when you are looking for a little treat midweek.

Print
clock clock iconcutlery cutlery iconflag flag iconfolder folder iconinstagram instagram iconpinterest pinterest iconfacebook facebook iconprint print iconsquares squares iconheart heart iconheart solid heart solid icon
chocolate peanut butter chickpea cookies with a bite on a glass of milk

Peanut Butter Chocolate Chip (Chickpea) Chia Cookies

  • Author: Chef Julie Harrington, RD
  • Prep Time: 15
  • Cook Time: 12
  • Total Time: 27 minutes
  • Yield: 15 1x

Ingredients

Scale
  • 1 (15-ounce) can chickpeas, drained and rinsed
  • 1 cup whole wheat pastry flour
  • 1/4 cup chia seeds
  • 1/2 tsp baking soda
  • 1/4 tsp salt
  • 1/2 cup peanut butter
  • 1/4 cup brown sugar
  • 1/4 cup unsweetened applesauce
  • 1 tbsp vanilla extract
  • 2 eggs
  • 1/2 cup chocolate chips

Instructions

  1. Preheat the oven to 375 degrees. Spray 2 large baking sheets with cooking spray or parchment paper.
  2. In a food processor, puree the chickpeas until smooth, set aside.
  3. In a medium sized bowl, mix together the whole wheat pastry flour, chia seeds, baking soda, and salt. Set aside.
  4. In a large bowl, beat together the peanut butter, brown sugar, and applesauce until smooth. Add in the chickpeas, vanilla extract, and eggs. Beat until smooth.
  5. Slowly mix in the dry ingredients with a spatula until just combined. Mix in the chocolate chips. (Batter will be thick)
  6. Scoop the cookie dough batter (about 2 ounces each) onto the prepared baking sheets about 1 inch apart. Bake 10-12 minutes, until golden brown. Transfer the cookies to a wire rack to completely cool.

Keywords: cookie, chocolate chip cookie, chia seeds, healthy dessert, dessert, chickpeas

Recipe Card powered byTasty Recipes

Chef Julie Harrington, RD - Culinary Nutrition Consultant of chefjulierd.com
Peanut Butter Chocolate Chip (Chickpea) Chia Cookies - A healthy twist to a classic - Peanut Butter Chocolate Chip (Chickpea) Cookies

Black Forest Smoothie Bowl

Imagine the sweet indulgent taste of black forest cake, but a healthier version for breakfast. This Black Forest Smoothie Bowl will feel like an indulgent treat, but healthy for delicious and filling breakfast.
Black Forest Smoothie Bowl via RDelicious Kitchen @rdkitchenDisclosure: I was not compensated for this post, however I did receive free samples of Kura. All opinions are my own and not influenced in any way.
I will be the first to admit, sometimes these pretty looking bowls end up in a tumbler cup as I am rushing out the door. It’s so important to take the time to sit down and enjoy a breakfast. I personally am trying to be more mindful of that myself.
Black Forest Smoothie Bowl via RDelicious Kitchen @rdkitchenI know I’ve talked about this before, but enjoying a smoothie bowl vs. a smoothie drink (even with the same exact ingredients) can help practice mindful eating.

Making a smoothie bowl instead of an on-the-go drink can help practice mindful eating and encourage slower eating. It’s easy to suck down a smoothie in a few big gulps. By enjoying a smoothie bowl with a spoon it can help you slow down, be more aware of what you’re eating and pay attention to whether or not you are actually hungry.

Black Forest Smoothie Bowl via RDelicious Kitchen @rdkitchenI never used to be a fan of protein powders, because majority of them have a lot of weird sounding ingredients and additives in them and even have a weird after taste, but now there are more options out there from real food ingredients. I always promote real food first, but sometimes protein powders can be a great supplement to the meal. Key word = supplement. Protein powders alone shouldn’t replace a full meal. Take this smoothie bowl for example, it contains three food groups with a balanced mixture of carbs, fats, and proteins, coming from it’s wholesome ingredients – fruit, almond milk, yogurt, almond butter, and chia seeds. The protein powder is supplementing the meal to add that extra little boost of protein.
img_1742I was intrigued about Kura with it’s grass-fed dairy protein and probiotic blend. Again, the protein powder is meant to supplement the meal with adding an additional 14g of New Zealand grass-fed dairy protein, which is proven to have higher levels of omega-3s than grain-fed dairy protein. (source)
Have fun with the toppings and add your favorite healthy options!

Print
clock clock iconcutlery cutlery iconflag flag iconfolder folder iconinstagram instagram iconpinterest pinterest iconfacebook facebook iconprint print iconsquares squares iconheart heart iconheart solid heart solid icon

Black Forest Smoothie Bowl

  • Author: Julie @ RDelicious Kitchen
  • Prep Time: 5 mins
  • Total Time: 5 mins
  • Yield: 1

Ingredients

Scale
  • 1/2 cup frozen cherries
  • 1/2 banana
  • 1/2 cup unsweetened almond milk
  • 1/4 cup Siggi’s black cherry yogurt (or plain/vanilla yogurt)
  • 1 tablespoon chia seeds
  • 1 tablespoon cocoa powder
  • 1 scoop chocolate protein powder (I used Kura)
  • 1 tablespoon almond butter
  • 1 cup ice
  • (optional toppings) cherries, banana slices, chia seeds, cocoa nibs, almonds, etc.

Instructions

  1. Simply place all ingredients into a blender. Blend until smooth and creamy.
  2. Pour in a bowl and top with desired toppings.

Recipe Card powered byTasty Recipes

Black Forest Smoothie Bowl via RDelicious Kitchen @rdkitchen
RDelicious Kitchen - Julie Harrington Consulting LLC - @rdkitchen

Baba Ganoush (Roasted Eggplant Dip)

Looking for a new dip for your veggies? Try baba ganoush – a signature Middle Eastern roasted eggplant puree enriched with tahini and seasoned with lemon juice and lots of garlic.
Baba Ganoush (Roasted Eggplant Dip) via RDelicious Kitchen @rdkitchenBaba Ganoush (Roasted Eggplant Dip) via RDelicious Kitchen @rdkitchen

My favorite part of this dip is the smokiness that the dish brings when roasting the eggplant. I additionally roasted the garlic for this dip too. Have you ever roasted garlic before? It adds that same smokiness but also a subtle sweet flavor. Simply add cloves of garlic (you can even do the whole head of garlic at once!) in a little tin foil pouch, drizzle with some olive oil and sprinkle a little salt and pepper. Seal up the foil and roast along with the eggplant. This will also help incorporate the garlic flavor throughout the dip because it is much easier to blend since it is softer when you puree the dip.

Baba Ganoush (Roasted Eggplant Dip) via RDelicious Kitchen @rdkitchenI picked up a bunch of eggplant at my last farmer’s market visit. It’s been sitting in my refrigerator because I just couldn’t decide what to make. I had so many recipe ideas running through my head. #foodbloggerproblems
Baba Ganoush (Roasted Eggplant Dip) via RDelicious Kitchen @rdkitchenMy extended family decided this year to do a big fantasy football draft. It was pretty entertaining. One thing about our family is that we are all very loud. So all of in the room trying to have an organized fantasy draft = chaos. Everyone was just talking over each other, but once we figured everything out, everyone picked their teams. Wish me luck this season!

Baba Ganoush (Roasted Eggplant Dip) via RDelicious Kitchen @rdkitchenBaba ganoush is very similar to hummus, but instead of chickpeas being the base, roasted eggplant is. Don’t skimp on the tahini (ground sesame seeds). It really adds that extra boost of flavor, plus heart healthy unsaturated fats.
Baba Ganoush (Roasted Eggplant Dip) via RDelicious Kitchen @rdkitchen
You can use baba ganoush like in any application where you would use hummus. Spread it on a sandwich instead of mayo. Swirl it in to mashed potatoes or mashed cauliflower to kick it up with some flavor. Or just simply dunk with your favorite veggies or pita chips.

Baba Ganoush (Roasted Eggplant Dip) via RDelicious Kitchen @rdkitchen

Print
clock clock iconcutlery cutlery iconflag flag iconfolder folder iconinstagram instagram iconpinterest pinterest iconfacebook facebook iconprint print iconsquares squares iconheart heart iconheart solid heart solid icon
Baba Ganoush (Roasted Eggplant Dip) in a white bowl

Baba Ganoush (Roasted Eggplant Dip)

  • Author: Julie @ RDelicious Kitchen
  • Prep Time: 15 mins
  • Cook Time: 35 mins
  • Total Time: 50 mins

Ingredients

Scale
  • 2 tablespoons olive oil, divided
  • 1 large eggplant
  • 4 cloves garlic
  • 2 tablespoons tahini
  • 1 lemon, juiced
  • 1 tablespoon parsley
  • salt and pepper, to taste

Instructions

  1. Preheat the oven to (high) broil.
  2. Slice eggplant into 1/4 inch rounds and place on a large baking sheet. Drizzle with 1 tablespoon olive oil and sprinkle with salt and pepper.
  3. On a small piece of tin foil, add the garlic cloves, drizzle over 1/2 tablespoon of olive oil and sprinkle with salt and pepper. Loosely wrap the foil around the garlic. Place the wrapped garlic on the baking sheet with the eggplant.
  4. Broil for 5 minutes, turn eggplant and broil for an additional 5 minutes. Turn broiler off, but do not remove eggplant from the oven. Heat oven to 350 degrees and roast for an additional 25 minutes.
  5. Remove from pan, wrap the rounds in foil to lock in moisture; let sit for about 5 minutes.
  6. Peel away most of the skin of the eggplant and add flesh to a food processor. It should be soft and tender and the skin should come off easy. Add the roasted garlic tahini, lemon juice, remaining 1 tablespoon olive oil, and parsley. Process until smooth and creamy. Season with salt and pepper.
  7. Garnish with additional parsley. Serve with pita chips and veggies.

Recipe Card powered byTasty Recipes

Baba Ganoush (Roasted Eggplant Dip) via RDelicious Kitchen @rdkitchen

Double Layer Chocolate Peanut Butter Fudge

Chocolate fudge or peanut butter fudge – which one is your favorite? If you can’t decide like me, layer them together to make delicious creamy fudge.
Double Layer Chocolate Peanut Butter Fudge via RDelicious Kitchen @rdkitchenThe Recipe ReDux is challenging members this month to take a trip down memory lane with recreating a fun vacation memory recipe.

A Vacation-Inspired Recipe:
Start unpacking your favorite vacation memories. Think about a trip you took state-side or internationally and create a healthy recipe from an unforgettable meal you enjoyed. Or, create a recipe from a native ingredient you saw or tasted on your travels.

Double Layer Chocolate Peanut Butter Fudge via RDelicious Kitchen @rdkitchenWhen I was younger, my family used to go down to Wildwood, NJ every summer. I was recently reminiscing about our Wildwood vacations with my mom and the one place that we HAD to stop by was Fudge Kitchen. They make the silkiest fudge that just melts in your mouth. Plus, they had so many flavors to choose from, it was so hard to decide which one to get.
Double Layer Chocolate Peanut Butter Fudge via RDelicious Kitchen @rdkitchenWe used to get combo boxes of fudge because everyone in my family wanted different flavors. My two favorite were the classic chocolate and peanut butter fudge. So why not get the best of both flavors and layer them! Now, I know fudge is a treat, but hey when you’re on vacation it’s okay to indulge a little.
Double Layer Chocolate Peanut Butter Fudge via RDelicious Kitchen @rdkitchenTo lighten up this fudge I swapped out the sugar and sweetened it with a little maple syrup and a banana. The only problem with this fudge is you have to be patient. Since there are two layers you have a waiting time in the middle for the chocolate layer to harden before you can add the peanut butter layer.

Print
clock clock iconcutlery cutlery iconflag flag iconfolder folder iconinstagram instagram iconpinterest pinterest iconfacebook facebook iconprint print iconsquares squares iconheart heart iconheart solid heart solid icon
Double Layer Chocolate Peanut Butter Fudge stacked on top of each other

Double Layer Chocolate Peanut Butter Fudge

  • Author: Julie @ RDelicious Kitchen

Ingredients

Scale
  • 1 tablespoon cocoa powder
  • 1/4 cup dark chocolate chips
  • 3/4 cup natural peanut butter
  • 1 medium banana
  • 1 teaspoon vanilla extract
  • 2 tablespoons coconut oil
  • 2 tablespoons pure maple syrup

Instructions

  1. In a small pot over low heat, combine 1/4 peanut butter, 1/2 teaspoon vanilla extract, 1 tablespoon coconut oil, 1 tablespoon maple syrup, and 1/4 cup dark chocolate chips; until melted. Let cool slightly.
  2. In a food processor or blender combine 1/2 banana and chocolate mixture and blend until smooth.
  3. Pour into an 8×8 pan lined with wax paper; spread evenly.
  4. Place in the freezer for 1 hour to harden.
  5. In a small pot over low heat, combine remaining 1/2 cup peanut butter, 1/2 teaspoon vanilla extract, 1 tablespoon coconut oil, and 1 tablespoon maple syrup; until melted. Let cool slightly.
  6. In a food processor or blender combine 1/2 banana and peanut butter mixture and blend until smooth. Pour peanut butter mixture over the chocolate layer; spread evenly. Return back to the freezer for an hour or until fudge hardens.
  7. (Store in the freezer)

Recipe Card powered byTasty Recipes

Signature
Double Layer Chocolate Peanut Butter Fudge via RDelicious Kitchen @rdkitchen

Dark Chocolate Covered Kiwi Pops

Have you heard of SunGold kiwifruit? It’s not like your typical kiwi, with its smooth skin and bright yellow flesh. Learn some more about these vitamin C packed fruit and try a delicious Dark Chocolate Covered Kiwi Pop treats.
Chocolate Covered Kiwi Pops via RDelicious Kitchen @rdkitchenI received free samples of Zespri SunGold Kiwifruit mentioned in this post. By posting this recipe, I am entering a recipe contest sponsored by Zespri Kiwifruit and am eligible to win prizes associated with the contest. I was not compensated for my time.
SunGold kiwifruit is popping up throughout grocery stores (June-October), since being one of the new fastest growing fruits globally.

So, I never really knew that kiwifruit was one word until recently… oops. I was typing it a text and it kept autocorrecting it to one word. Don’t worry, you won’t even have to type it anymore now that a fun kiwifruit emoji is coming!
Chocolate Covered Kiwi Pops via RDelicious Kitchen @rdkitchen
Anytime I am teaching a cooking class or doing a cooking demo I always like to throw out fun facts about the food I’m cooking with. I would sweep a food category in jeopardy.
Five surprising facts about SunGold Kiwifruit:
1. Not all kiwifruit is “fuzzy” on the outside.
Zespri SunGold kiwifruit have a smooth, hairless skin. SunGold is also yellow on the inside, which is a surprise in and of itself because Americans are more familiar with the green kiwifruit variety with the fuzzy skin. Zespri SunGold kiwis have, a juicy, yellow flesh, and a tropical-sweet taste.
2. You don’t peel kiwifruit.
Kiwifruit is the perfect portable snack because it is easy to eat! Just cut in half with a knife and scoop with a spoon. That’s it – just cut, scoop, and enjoy!
3. Kiwifruit is a good meat tenderizer.
Both green and SunGold kiwifruit contain an enzyme called actinidin that helps break down protein. Actinidin occurs only in kiwifruit and improves digestive comfort by increasing the breakdown of proteins and facilitating digestion and emptying of the stomach. The actinidin can serve as a meat tenderizer: just peel and mash a kiwifruit and spread over meat or make a kiwifruit marinade. Actinidin will also break down protein in dairy so recipes with dairy should be consumed right away.
4. You can “measure” the taste of SunGold.
Zespri growers achieve the best-tasting kiwifruit through a measure called the brix. The higher the brix, the sweeter the fruit. The dry matter content (where all water is removed) indicates how high the brix will be once the fruit is ripe. A higher dry matter means the better quality the kiwifruit will be- it stores better and tastes better. Not all kiwifruit brands put so much focus on the brix and that’s why not all kiwifruit is created equal. With Zespri, you can really taste the difference!
Chocolate Covered Kiwi Pops via RDelicious Kitchen @rdkitchen
Now that you know a little bit more about the Zespri SunGold kiwifruit, how do you pick the prefect one to enjoy? To tell if a SunGold kiwifruit is ripe – hold the kiwifruit in the palm of your hand and squeeze gently.  It should yield to slight pressure when ripe. SunGold’s get softer and sweeter as they ripen.


This little fruit has quite the nutrition credentials to go along with is delicious taste, including

  • an excellent source of vitamin C, containing 2x more vitamin C than oranges
  • provides as much potassium as a banana
  • and a good source of the antioxidant vitamin E

Chocolate Covered Kiwi Pops via RDelicious Kitchen @rdkitchen
Fruit is one of my favorite desserts in the summer time. I’ve been finding myself grabbing a toothpick and poking into the frozen fruit in my freezer for a little sweet treat after dinner. I’ve never tried frozen kiwi before, so I thought it would be fun to give it a try! Plus, chocolate – how will this not be delicious?!
Verdict – love these! I found that the kiwi tasted even sweeter when it was frozen and they are easily customizable depending what extra little toppings you may want to add.

Print
clock clock iconcutlery cutlery iconflag flag iconfolder folder iconinstagram instagram iconpinterest pinterest iconfacebook facebook iconprint print iconsquares squares iconheart heart iconheart solid heart solid icon
Dark Chocolate Covered Kiwi Pop on parchment paper

Chocolate Covered Kiwi Pops

  • Author: Julie @ RDelicious Kitchen
  • Yield: 4

Ingredients

Scale
  • 2 kiwis, peeled and sliced
  • 46 oz. dark chocolate
  • (optional toppings) coconut flakes, walnuts, sprinkles, etc.

Instructions

  1. Insert popsicle sticks into the kiwi slices far enough to hold the fruit without piercing through the other end. Freeze until firm.
  2. Melt chocolate in a double broiler.
  3. Dip kiwi slices into melted chocolate, and rest over wax paper or cooling rack.
  4. Add desired toppings. After chocolate has hardened, eat and enjoy,
  5. Store leftovers in the refrigerator or freezer

Recipe Card powered byTasty Recipes

Connect more with Zespri Kiwifruit
-> Website
-> Twitter
-> Facebook
-> Instagram
-> Pinterest
Need even more SunGold kiwifruit inspiration? Scroll down to check out what other Recipe ReDuxer’s created.
Chocolate Covered Kiwi Pops via RDelicious Kitchen @rdkitchen

Gluten Free Zucchini Banana Bread

Gluten Free Zucchini Banana Bread! This low-sugar bread option is perfect for breakfast or dessert.
Gluten Free Zucchini Banana Bread via RDelicious Kitchen @rdkitchenOne of my friends has been bringing me all kinds of goodies from her garden. I am in garden envy because my green thumb is not doing that well this year. I do have some peppers that are almost ready to be harvested and mint is completely taking over, but I think my zucchini plant is dead – womp!
Gluten Free Zucchini Banana Bread via RDelicious Kitchen @rdkitchenI don’t always bake gluten free goodies, but I had an opened bag of Bob’s Red Mill gluten free 1-to-1 baking flour.  Gluten free baking can be tricky but this 1-to-1 mix makes it extremely easy.

Gluten Free Zucchini Banana Bread via RDelicious Kitchen @rdkitchenI love zucchini bread and banana bread, so why not mix them together? This is a low-fat, low-sugar quick bread that can be part of a balanced breakfast or enjoyed as dessert. Breakfast suggestion: crumble zucchini banana bread on yogurt with fresh fruit.
Gluten Free Zucchini Banana Bread via RDelicious Kitchen @rdkitchen

Print
clock clock iconcutlery cutlery iconflag flag iconfolder folder iconinstagram instagram iconpinterest pinterest iconfacebook facebook iconprint print iconsquares squares iconheart heart iconheart solid heart solid icon
Gluten Free Zucchini Banana Bread sliced on a white plate

Gluten Free Zucchini Banana Bread

  • Author: Julie @ RDelicious Kitchen
  • Yield: 12 1x

Ingredients

Scale
  • 1 3/4 cups gluten free flour (I used Bob’s Red Mill 1-to-1 baking flour)
  • 1 1/4 teaspoon baking powder
  • 1/2 teaspoon baking soda
  • 1 1/2 teaspoons ground cinnamon
  • 2 medium ripe bananas, mashed
  • 1 tablespoon canola oil
  • 1/4 cup pure maple syrup
  • 1 teaspoon vanilla extract
  • 2 egg whites
  • 1 cup shredded zucchini (about 1 medium zucchini)
  • 1/4 cup unsweetened applesauce
  • 1/3 cup nonfat plain greek yogurt

Instructions

  1. Preheat oven to 375 degrees F. Generously spray inside loaf pan with cooking spray.
  2. Squeeze shredded zucchini of excess water with a paper towel.
  3. In medium bowl combine flour, baking powder, baking soda, and cinnamon. Toss with zucchini until zucchini shreds are evenly coated with the flour mixture.
  4. In another bowl of an electric mixer, add mashed banana, oil, maple syrup, vanilla and eggs; mix until smooth. Add applesauce and yogurt and beat again until well combined. Gently mix in dry ingredients until just combined.
  5. Add to loaf pan. Bake for 45-55 minutes or until toothpick inserted into the middle comes out clean.

Recipe Card powered byTasty Recipes

Signature
Gluten Free Zucchini Banana Bread via RDelicious Kitchen @rdkitchen

Breakfast “Ice Cream” Sandwiches

On a hot summer morning, cool down with a this fun new breakfast twist. These raspberry chia Breakfast “Ice Cream” Sandwiches tastes like dessert and will nourish you through the morning!
Breakfast "Ice Cream" Sandwiches via RDelicious Kitchen @rdkitchenI was super excited when KIND featured my recipe on their newsletter including my classic green smoothie to pair with their Raspberry Chia Breakfast Bars.

If you haven’t noticed, KIND came out with these new breakfast bars. These new bars (the raspberry chia flavor in particular) contain 5 whole grains including: oats, millet, buckwheat, amaranth, and quinoa along with a filling 6 grams of fiber.
Breakfast "Ice Cream" Sandwiches via RDelicious Kitchen @rdkitchenIt is always important to eat balanced meals. My go-to tip for anyone (myself included) is to enjoy at least 3 food groups per meal (with at least one of them being a fruit or vegetable).
Breakfast "Ice Cream" Sandwiches via RDelicious Kitchen @rdkitchenThat little tip can go a long way. It will help with portion control because portion sizes will naturally start to shrink in order to include various other food groups on your plate. Plus, it will help reach the minimum recommendation of aiming to consume at least 5 fruits and vegetables a day. More matter!
Breakfast "Ice Cream" Sandwiches via RDelicious Kitchen @rdkitchenWhen I first tried these breakfast bars I usually paired them by dunking them in a yogurt with a side of fruit, so I was inspired by my combo to turn it more into a fun breakfast!
It feels like eating dessert for breakfast!
Breakfast "Ice Cream" Sandwiches via RDelicious Kitchen @rdkitchen

Print
clock clock iconcutlery cutlery iconflag flag iconfolder folder iconinstagram instagram iconpinterest pinterest iconfacebook facebook iconprint print iconsquares squares iconheart heart iconheart solid heart solid icon
Breakfast “Ice Cream” Sandwiches on a cutting board

Breakfast “Ice Cream” Sandwiches

  • Author: Julie @ RDelicious Kitchen
  • Prep Time: 5 mins
  • Total Time: 5 mins
  • Yield: 4

Ingredients

Scale
  • 4 packages KIND raspberry chia breakfast bars (contains 2 bars per package)
  • 2 (5.3 oz.) containers plain (or vanilla) yogurt (I used Siggi’s)
  • 1 tablespoon chia seeds
  • 1/4 cup raspberries

Instructions

  1. In a small bowl, gently mash raspberries. Stir in chia seeds. Add yogurt and gently fold in raspberries and chia to make a raspberry swirl.
  2. Open up KIND breakfast bars packages. Scoop about 1/3 cup onto one side of the breakfast bar and spread evenly. Top with the other breakfast bar (not too tight, so filling doesn’t spill out!)
  3. Wrap each breakfast “ice cream” sandwich with plastic wrap and add to a sealed tight container. Place in the freezer for at least 2 hours or overnight.
  4. Unwrap and enjoy a treat in the morning!

Recipe Card powered byTasty Recipes

Signature

Breakfast "Ice Cream" Sandwiches via RDelicious Kitchen @rdkitchen

Chocolate Hazelnut Smoothie Bowl

Indulge your tastebuds with this Chocolate Hazelnut Smoothie Bowl. It tastes like dessert, but also a nourishing breakfast!Chocolate Hazelnut Smoothie Bowl via RDelicious Kitchen @rdkitchen
23154032210_7cdec55b5e_b-5Swap the straw for a spoon! Smoothie bowls are becoming more and more popular these days. Pinterest is filled with beautiful smoothie bowl creations. My dietitian friends Liz & Janice over at Meal Makeover Moms even made a Smoothie Bowl Coloring Cookbook!
Making a smoothie bowl instead of an on-the-go drink can help practice mindful eating and encourage slower eating. It’s easy to suck down a smoothie in a few big gulps. By enjoying a smoothie bowl with a spoon it can help you slow down, be more aware of what you’re eating and pay attention to whether or not you are actually hungry.
Chocolate Hazelnut Smoothie Bowl via RDelicious Kitchen @rdkitchenWhat’s fun about smoothie bowls are the fun toppings you can add. Opt for nutrition powerhouse toppings like fruit, nuts, & seeds. Rather than blending toppings into a smoothie, add them on top smoothie bowl and enjoy their crunch with a spoon rather than through a straw

Chocolate Hazelnut Smoothie Bowl via RDelicious Kitchen @rdkitchen

Print
clock clock iconcutlery cutlery iconflag flag iconfolder folder iconinstagram instagram iconpinterest pinterest iconfacebook facebook iconprint print iconsquares squares iconheart heart iconheart solid heart solid icon
chocolate hazelnut smoothie bowl topped with banana and cocoa nibs

Chocolate Hazelnut Smoothie Bowl

  • Author: Julie @ RDelicious Kitchen
  • Yield: 1

Ingredients

Scale
  • 1 small banana, frozen
  • 1 scoop chocolate protein powder
  • 2 tablespoons hazelnut flour/meal (I used Bob’s Red Mill)
  • 1 tablespoon chia seeds
  • 1 cup milk of choice
  • (optional toppings): banana slices, chia seeds, cocoa nibs

Instructions

  1. Simple add all ingredients into a blender and blend until smooth.
  2. For a thinner consistency, add water. For a thicker consistency, add ice.
  3. Pour into a bowl and add toppings of your choice. Enjoy!

Recipe Card powered byTasty Recipes

Signature
Chocolate Hazelnut Smoothie Bowl via RDelicious Kitchen @rdkitchen