This post may contain affiliate links. Read my privacy policy.
Do you ever have something on your to-do list that just keeps getting rolled over every time to a new to-do list? Welp. That’s posting this Pumpkin Pie Bites recipe. Sorry for holding out on you.
I know I am often the minority when it comes to the love of my paper planner. (Passion Planner to be exact) For the month of January, the pages are completely filled with meetings, cooking classes, presentations, parties, etc. I’m one of those people who likes being busy, but sometimes things fall through the cracks, like posting this recipe which has been sitting in draft for the past two weeks. #sorryivebeenbusy
A version of this recipe was developed with one of my awesome JWU interns. I have a sweet spot for JWU interns and I am a JWU alum myself. I love spending days in the kitchen as a full “test kitchen” days. It’s been fun working with JWU interns because we speak the same “culinary language”. This recipe was tested a few times until the texture and taste came out just right.
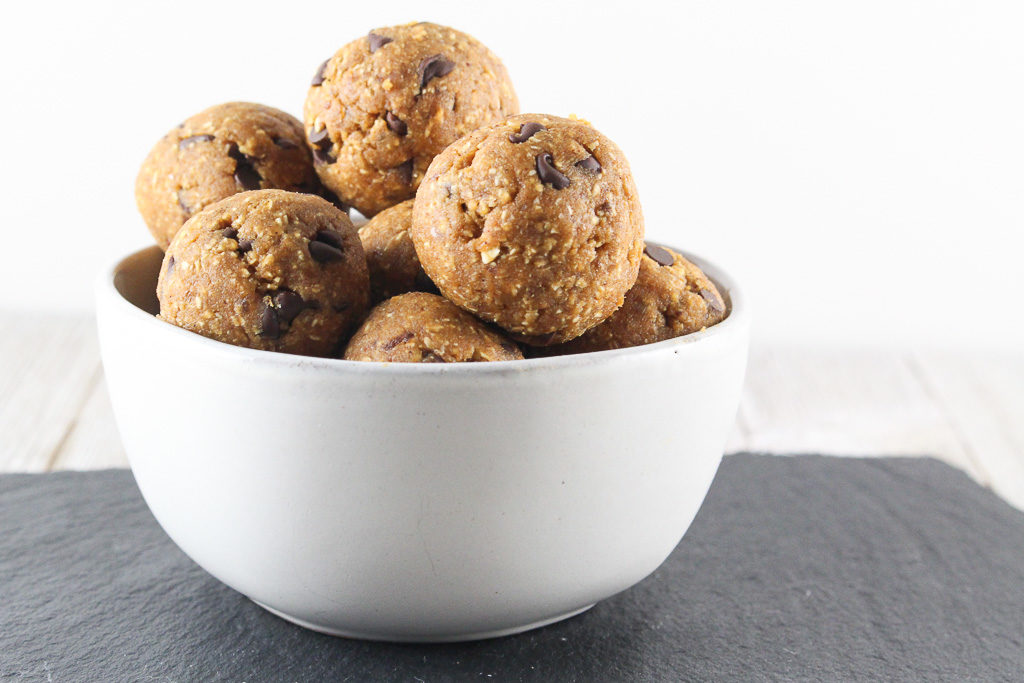
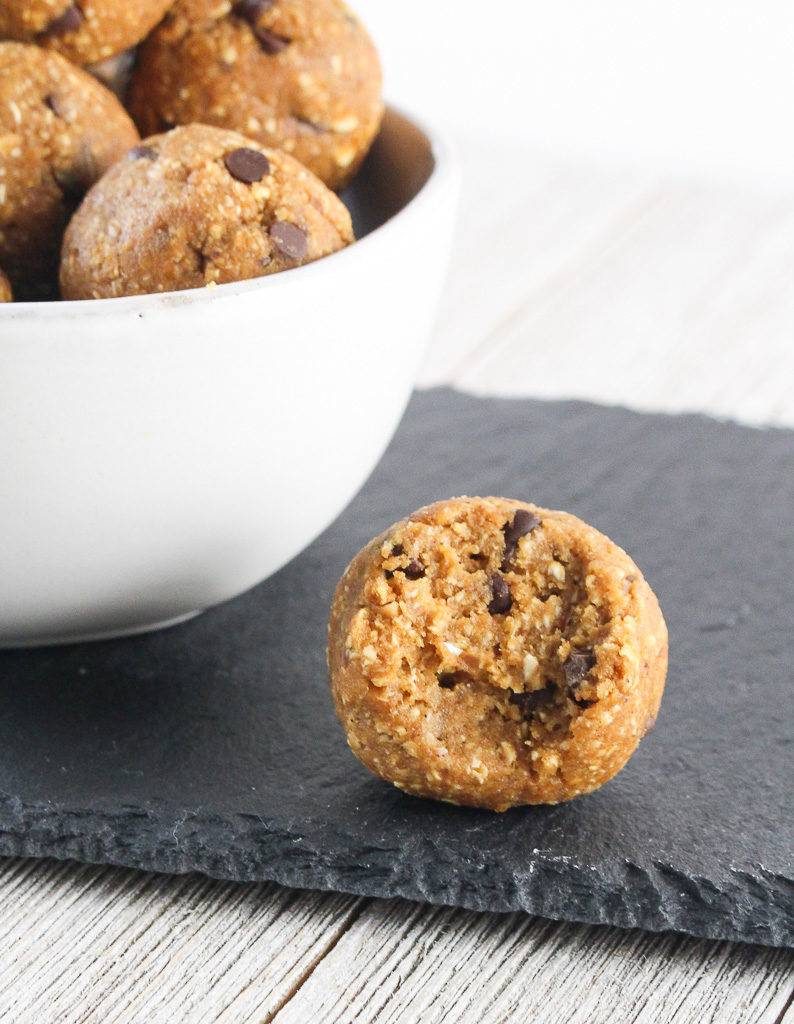
Batch cook these little energy bites for the week. They are the perfect on-the-go snack. Who says pumpkin season is over? Let’s keep the pumpkin around all year round!
Batch cook these bites for an energy-boosting snack during the day!
Ingredients
Scale
1/4 cup Medjool dates, pitted
boiling water, as needed
1/4 cup almond butter
1/4 cup pumpkin puree
2 teaspoons maple syrup
1 1/2 teaspoons pumpkin pie spice (or a mix of 1/2 tsp ginger, 1/2 tsp nutmeg, 1 tsp cinnamon)
1/4 teaspoon salt
2 tablespoon coconut flour*
1 1/2 cup oats
1/2 cup mini chocolate chips
Instructions
Soak the dates in boiling water for 10 minutes. Drain.
Combine all ingredients, except for the chocolate chips, in a food processor. Process until fairly smooth, stopping occasionally to scrape down the sides.
Transfer to a separate bowl and fold in chocolate chips. Chill in the fridge for at least 20 minutes.
Once chilled, scoop 1-tablespoon sized portions and roll into balls. The mixture makes about 16 bites. Store in the refrigerator in an airtight container.
Notes
If the dough is too sticky, pulse in additional coconut flour, 1/2 teaspoon at a time.
Keywords: pumpkin, pumpkin pie, energy bites, snack,
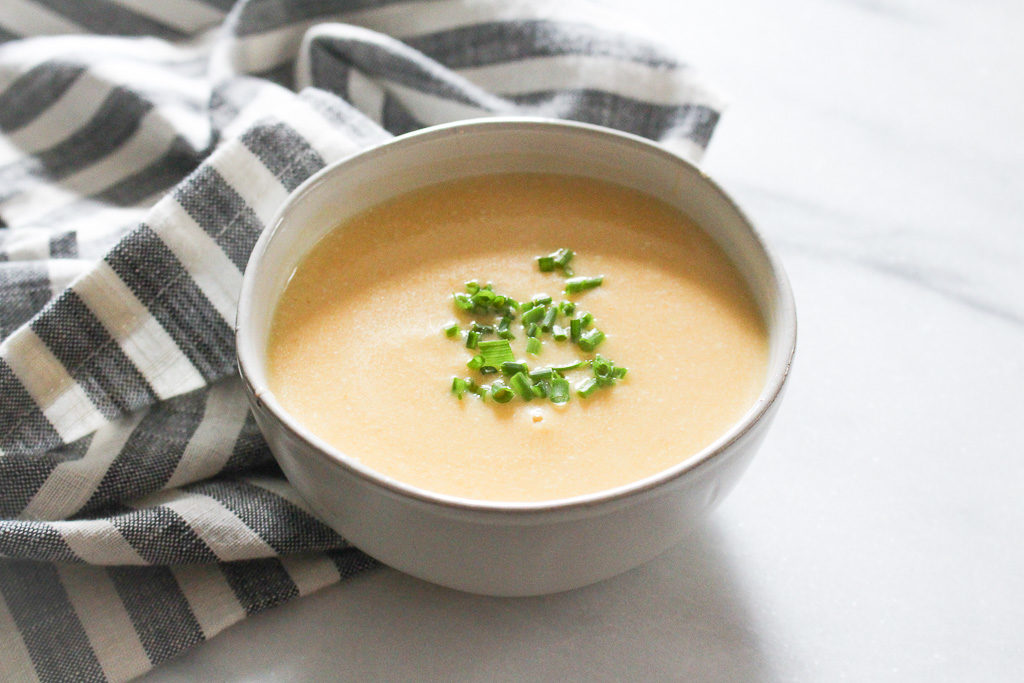
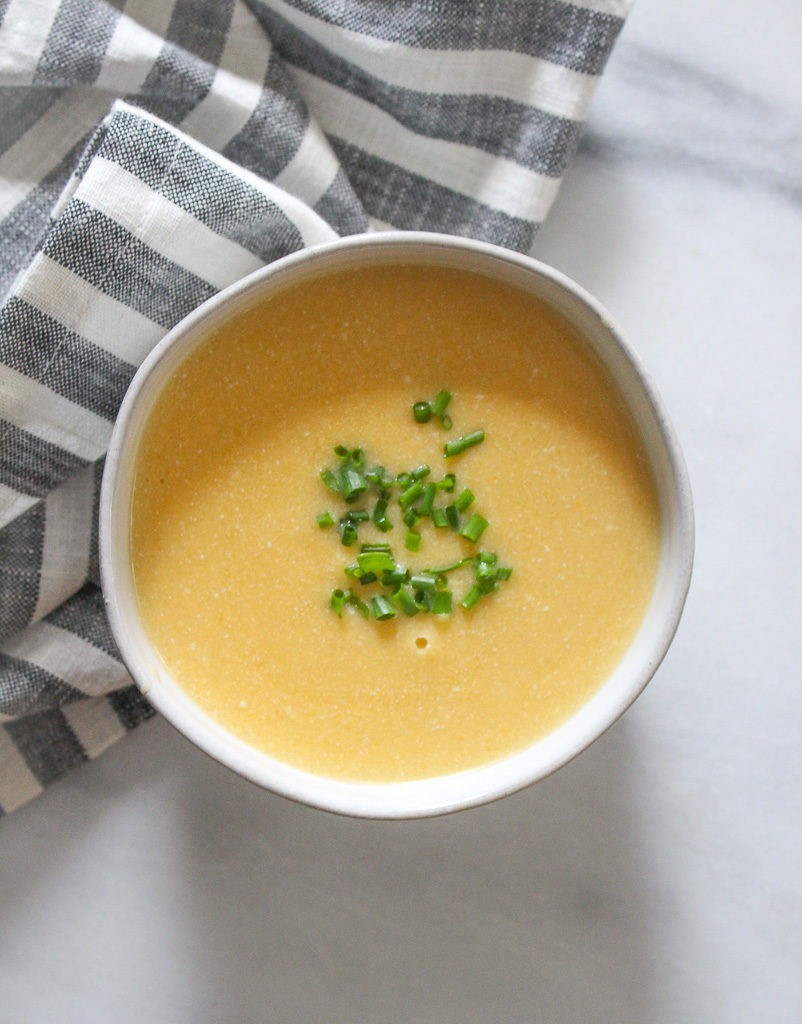
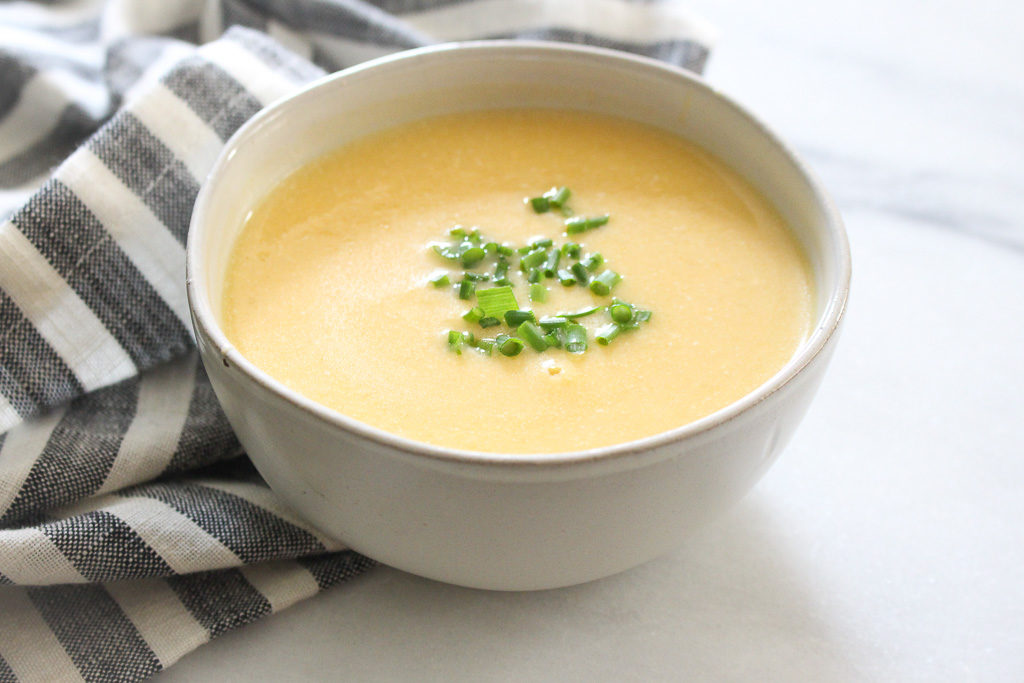
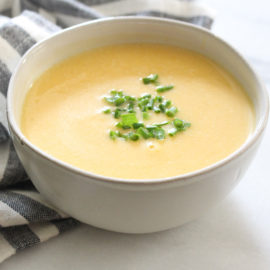
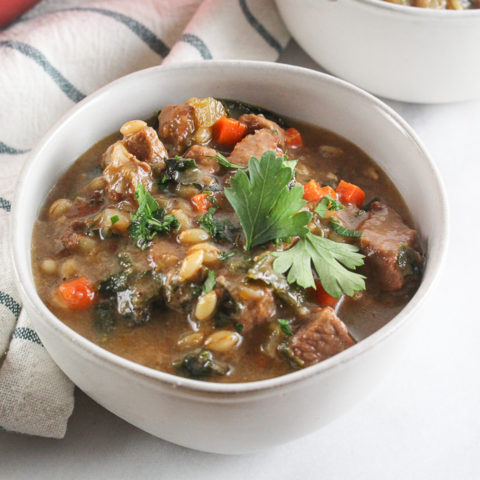
There is nothing better then cozying up to a warm bowl of soup on a chilly evening. Soups can pack in a ton of flavor utilizing various food groups creating a balanced meal.
A couple of weeks ago I had a cooking class called “Hearty Soups & Salads” and in the class, we discussed when making soup, the ingredients and steps are well thought out to build and develop depths of flavors.
You might think, pairing butternut squash and Honeycrisp apples would yield a soup too sweet, but with the addition of sharp cheddar and plain yogurt, adds a balance of salty, with a hint of tart and tangy.
When blended, this creates a silky smooth soup. Batch cook and freeze some for later.
Properly cool, freeze, and reheat soup:
Refrigerators and freezers cannot cool soups quickly enough for food safety protocols. Speed up the cooling process by placing the pot of soup in a bath of ice water in the sink. Stir soup to help release the heat.
Label and date large ziplock plastic bags. To help pour soup in the bag, place bag in the bowl and cuff the bag over the edges. Ladle soup into each bag, let out excess air and seal.
Lay bags flat in a single layer in the freezer. When completely frozen, stack bags to save space in the freezer.
Thaw overnight in the refrigerator. Reheat over medium-low heat, stirring occasionally.
1 tablespoon butter ½ sweet onion, diced 2 pounds butternut squash, peeled and cut into chunks 2 Honeycrisp apples, peeled and cut into chunks 4 cups low-sodium chicken broth 1 cup plain Greek yogurt 4 ounces sharp cheddar, grated (about 1/2 cup) [I used Cabot’s sharp cheddar] ¼ teaspoon ground red pepper (cayenne) Salt and ground pepper to taste Chopped fresh chives, for garnish
Instructions
Saute onions with butter over low medium heat in a large stockpot until translucent. Add squash, apples, and stock or broth in a large pan; bring to boil over high heat. Reduce heat to medium, cover pan and simmer squash for 20 minutes or until very tender. Uncover and let cool. Puree in blender or food processor, in batches, if necessary. Return puree to saucepan and place over medium-low heat. Stir in yogurt, cheese, and ground red pepper. Add salt and ground pepper to taste. Whisk soup just until heated through (do not allow to boil). Serve sprinkled with chives.
This post may contain affiliate links. Read my privacy policy.
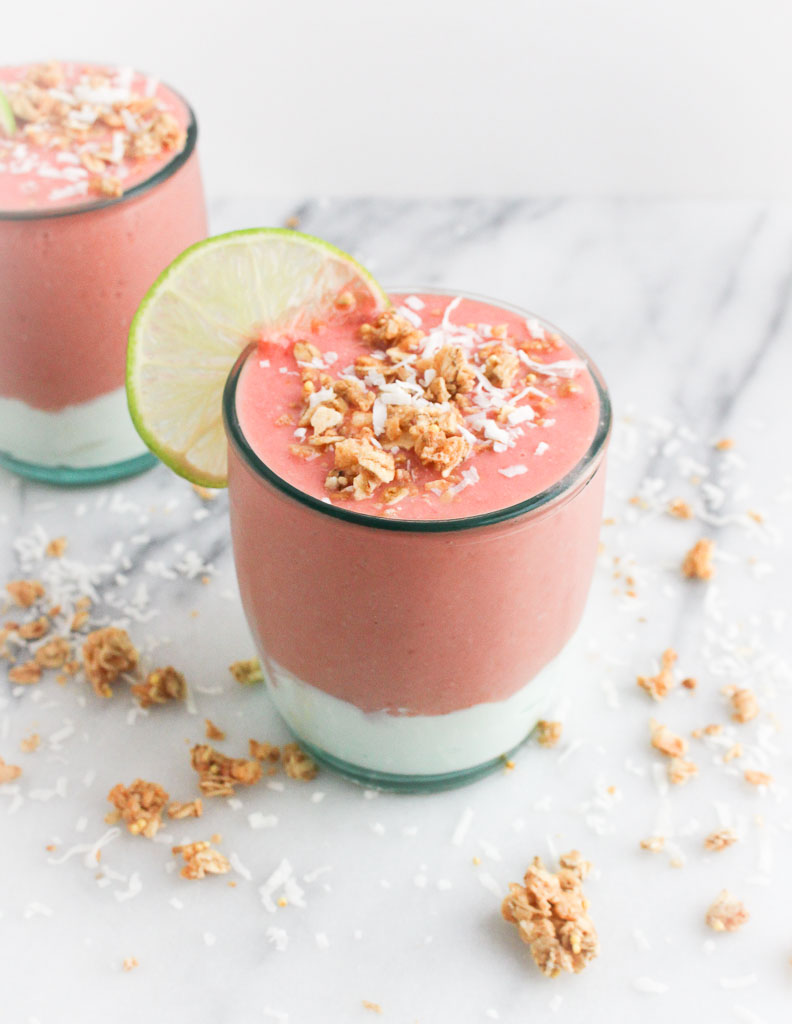
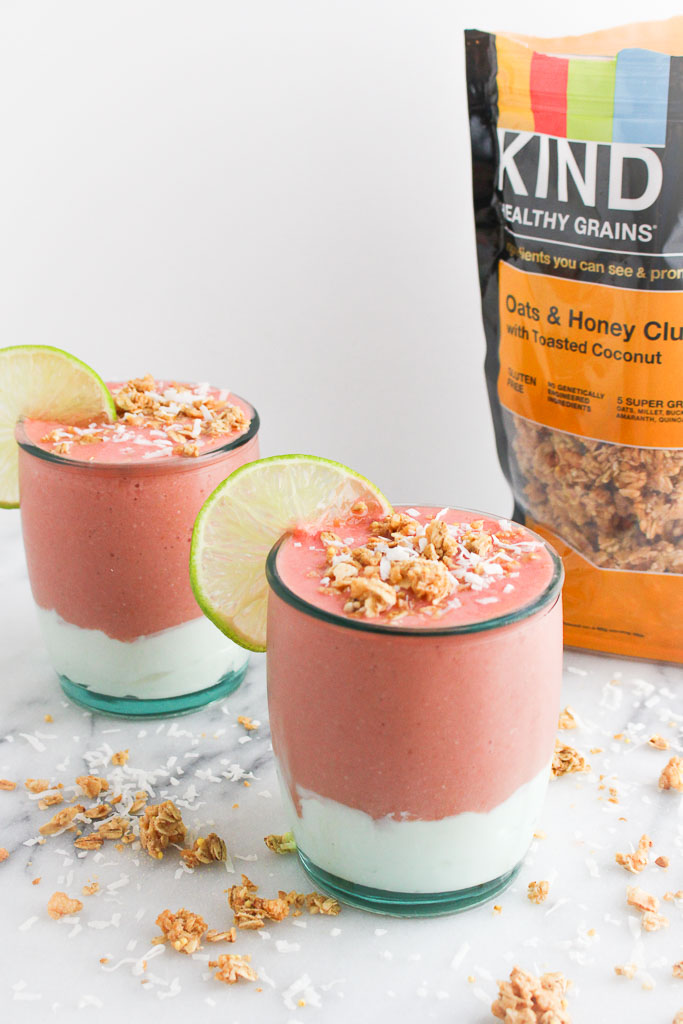
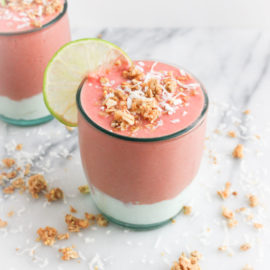
Smoothie or parfait – which do you prefer? Can’t decide? Neither can I! Get these best of both with this Mango Berry Smoothie Parfait.
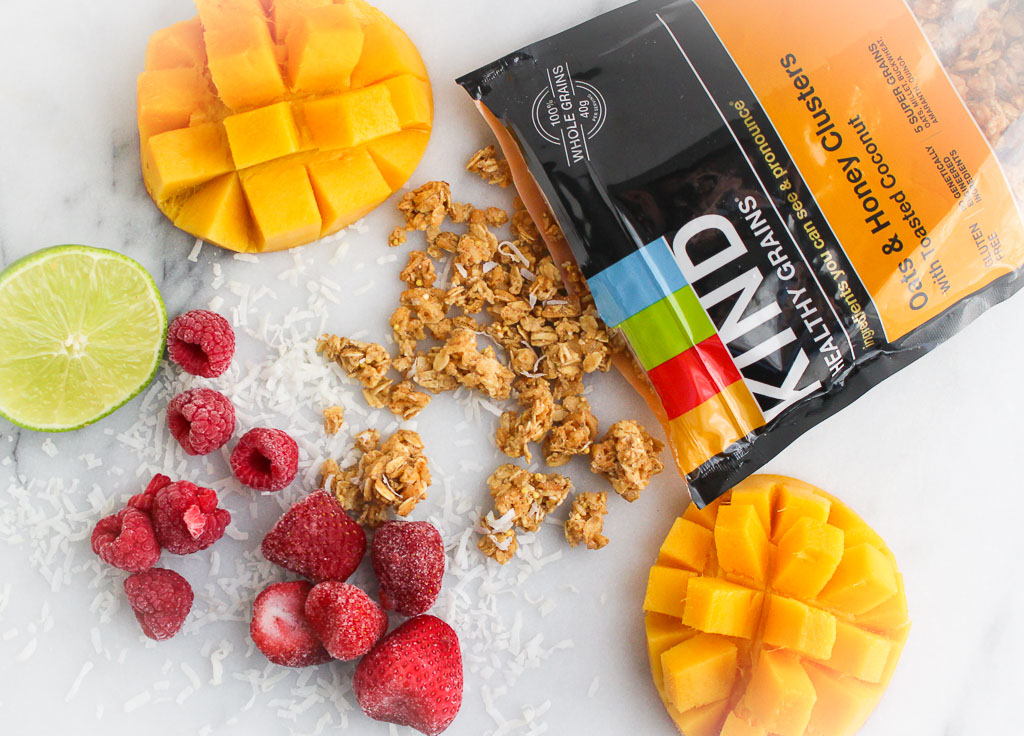
Disclosure: This post was sponsored by KIND Snacks for a recipe contest with Ahold Foods. This recipe was featured in Stop & Shop and Giants circular week of 9/20/18. Thanks for supporting the brands that make this blog possible!
Do you prefer smoothie bowls or parfaits?
Smoothie Bowls vs. Parfaits
Smoothie Bowls:
Making a smoothie bowl instead of an on-the-go drink can help practice mindful eating and encourage slower eating. It’s easy to suck down a smoothie in a few big gulps. By enjoying a smoothie bowl with a spoon it can help you slow down, be more aware of what you’re eating and pay attention to whether or not you are actually hungry. Plus you can add more toppings!
Parfaits:
A yogurt parfait is typically served in a tall glass with layers of several different ingredients. Yogurt is the star of the recipe, but many add-ins, such as fruit or granola, also make an appearance. I always prefer to make my own yogurt parfaits with ingredients and products I love. Be mindful when ordering a yogurt parfait out, as they are often loaded with added sugars. Also, sometimes if the glass is too narrow I am usually eating layer by layer until there is enough room to mix it all to get every flavor in one bite.
What about getting the best of both worlds create a smoothie parfait!
Most smoothies have bananas as the base. But what if you don’t like bananas? (Hi, Steph – this recipe is for you!) I love bananas, but I often get requests from clients for smoothies without banana based on their preferences.
Banana is often used as the base because it helps create a creamy and smooth consistency of a smoothie. Using the frozen berries with yogurt help mimic that same creamy consistency, but I felt like it was still missing something. By adding a handful of KIND oats & honey clusters gave it a thicker consistency what I was looking for.
This recipe is for anyone who can’t make up their mind what they want to eat. This happens often for me. I can never decide and tend to merge things together, which gave me the inspiration for this recipe.
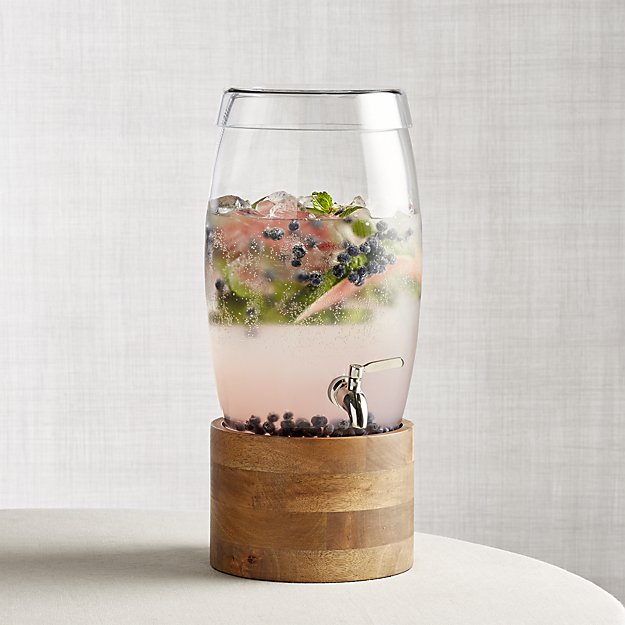
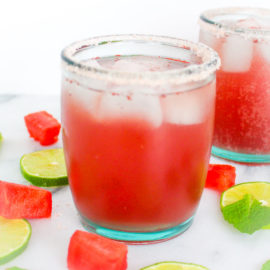
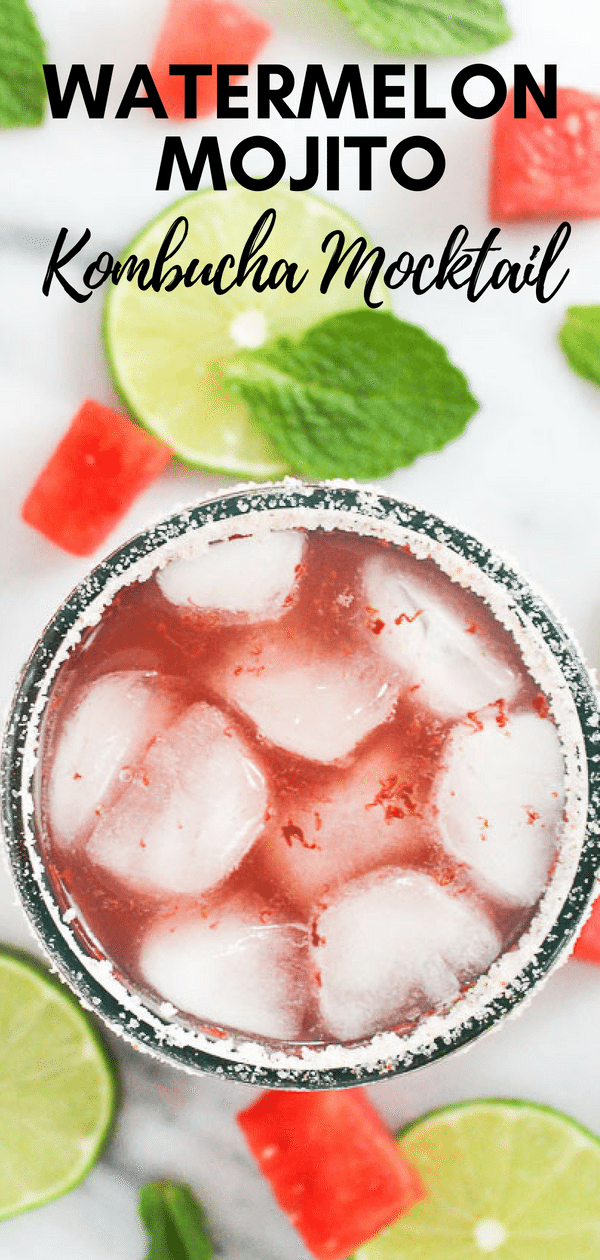
Sip on this refreshing Watermelon Mojito Kombucha Mocktails and set up a fun drink station to wow your guests this summer.
I’ve come to really enjoy kombucha.
What is kombucha?
Kombucha is a fermented tea that naturally contains probiotics. These probiotics are actually good bacteria that line your digestive tract and support your immune system, as they absorb nutrients and fight infection and illness.
With its health benefits, I wanted to make it into a fun mocktail instead of just drinking it straight. Kombucha comes in many flavors, which ranges in many colors to create a variety of colorful mocktails.
What’s a better way to enjoy your Kombucha Mocktail than with a perfectly styled drink station? A bar cart makes the perfect base for your drink station along with being a great conversation starter. They’re easy to move around your house or even outside for entertaining. The best part is that there really is a bar cart out there to match any design style or budget. You can find a glam rose gold cart with leather accents or more rustic wooden piece that’s perfect for housing all of the accouterments for fixing the perfect mocktail. Pick your favorite cart and you’ll have no problem creating a fun drink station in your home.
Large glass beverage dispensers are perfect for making a statement atop your bar cart. The bright fun color of your kombucha along with any floating fruit slices or herbs will become a tantalizing focal point for guests! This dispenserfrom Crate & Barrel has a trendy wooden stand or if you’re looking for more variety this set has two dispensers with cute chalkboard labels to tell your drinks apart. You can supplement your beverage dispensers with elegant carafes of juices or fizzy drinks for plenty of customization.
Next, add a few fun touches to really bring your station to life. There are practical additions like printed napkins or bright straws that are always sure to be a hit. A stack of books is a great way to show off your personality and can be a fun conversation starter for guests. In their post on bar cart styling tips, the professional designers at Havenly suggest hanging a piece of art above your cart to give the area a finished look. No matter how you decide to accessorize your drink station, adding thoughtful touches of your personality will elevate it from a simple beverage center to a stylish focal point in your home.
Accenting your station with a small potted plant atop your cart gives it a perfect touch of vibrancy and life! From succulents to bouquets of fresh flowers, plants are a great accessory for any style of decor. For extra fun, use a small herb planter set to showcase live garnishes for the drinks you’re serving, like some fresh mint for my Watermelon Mojito Kombucha Mocktail. Include a small pair of scissors so guests can snip their own fresh herbs for adding to their beverages.
Finally, when styling a drink station, your glassware is more than just functional. Pick out some fun glasses that match your personality and show them off on top of your bar cart like a decor piece. Cut crystal glasses are always a classic choice for some sophisticated sparkle or just grab some cute mason jars if your style is more casual. Varying the sizes and shapes of your glassware will add some fun diversity to the look of your station.
Put it all together atop your cart and you’ll have a perfectly adorable station for showing off your kombucha mocktails in style! Design style tips provided by Havenly. I was not compensated for this post. All thoughts and opinions are my own.
This post may contain affiliate links. Read my privacy policy.
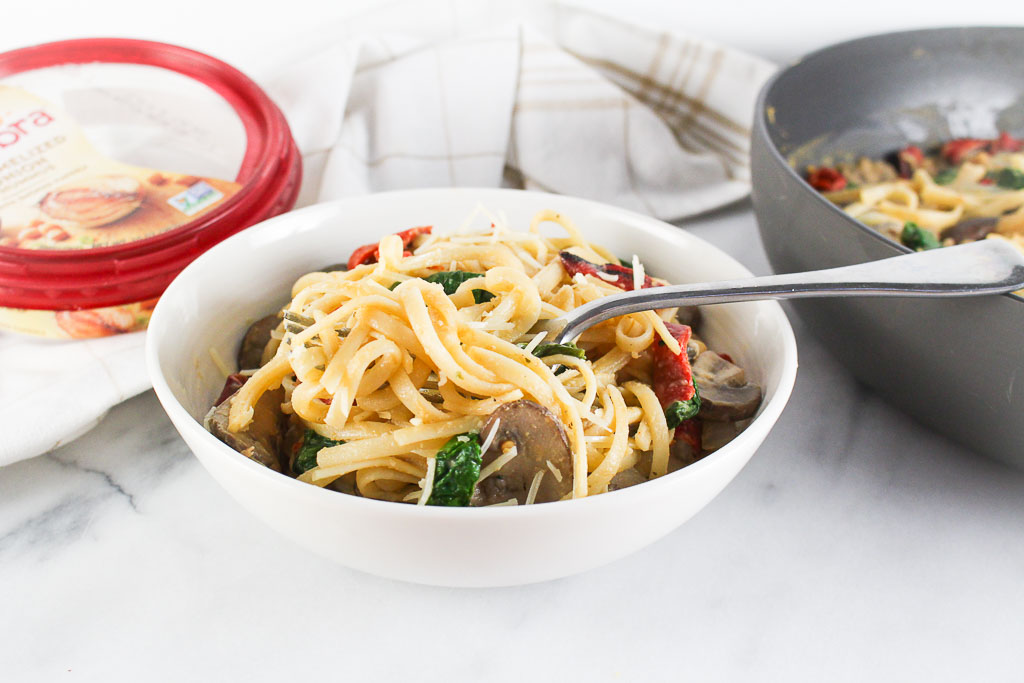
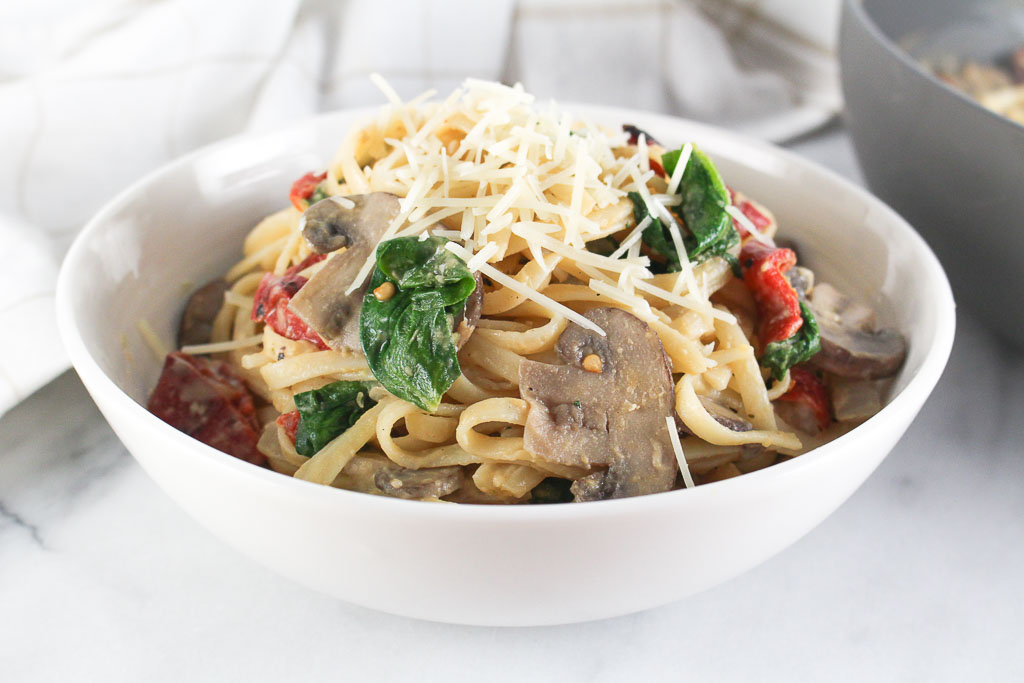
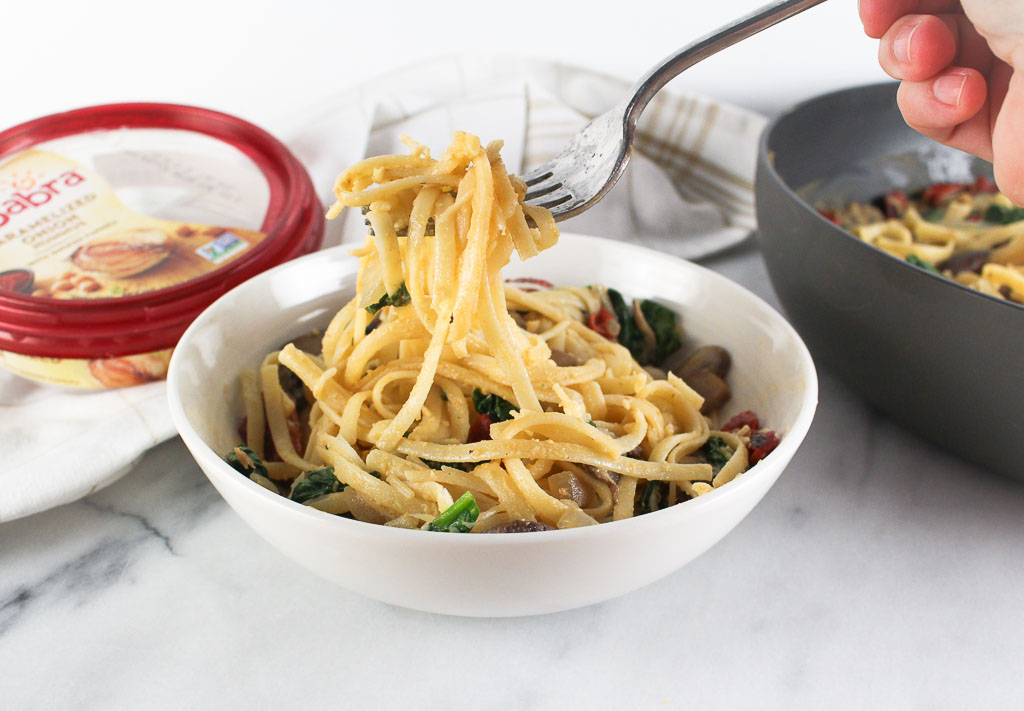
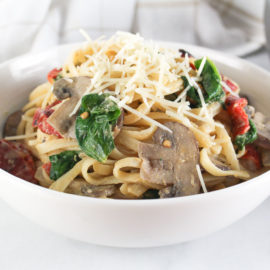
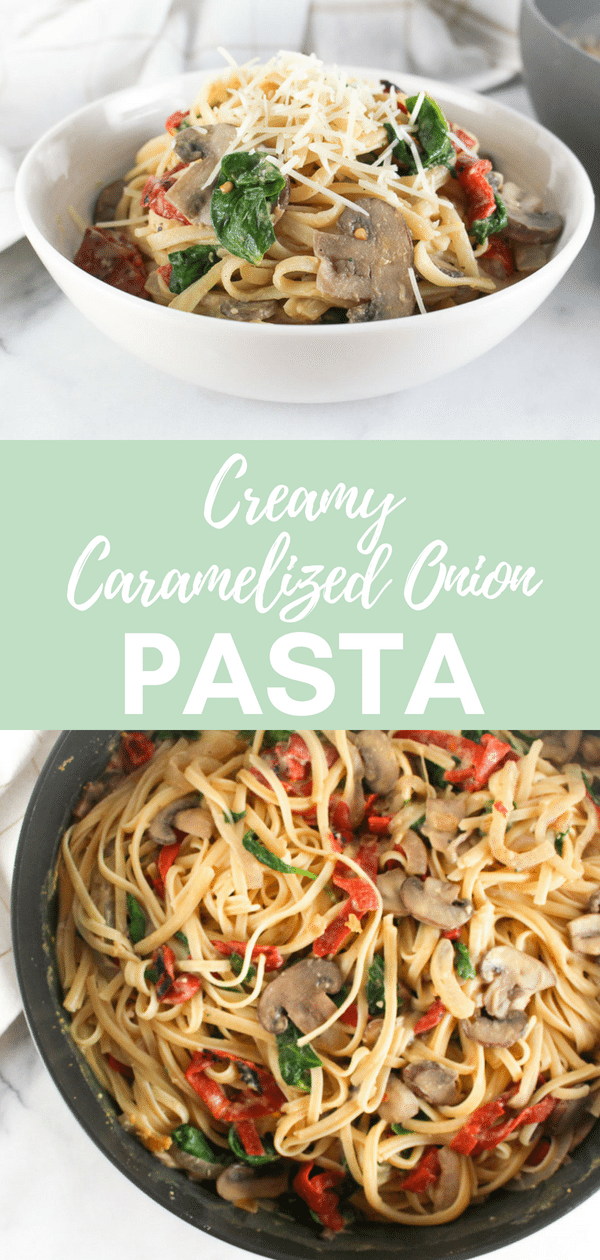
Looking to revamp pasta night? Love a creamy sauce, but looking for a dairy free version? Try this Creamy Caramelized Onion Pasta, using hummus as the base of the sauce. I received free samples of Sabra mentioned in this post. By posting this recipe I am entering a recipe contest sponsored by Sabra and am eligible to win prizes associated with the contest. I was not compensated for my time.
I have so many memories of my childhood going to Grandma’s for Sunday night dinner with my whole family. Pasta was always on the menu. It’s the Italian way! The second you walked into Grandma’s house you could smell the gravy that has been simmering all day.
Funny story about gravy .. Well, I thought everyone called marinara sauce, gravy. I remember teaching one of my first cooking classes discussing the baked eggplant parm that we were going to top with homemade gravy. With all the puzzled faces looking back at me, I instantly got nervous thinking, “oh no, maybe no one likes eggplant parm?”, but one participant spoke up and questioned the unique combo. They were all thinking gravy = the brown gravy you put on turkey during Thanksgiving. I would have given the same look if I thought I was going to be eating baked eggplant parm with brown gravy. From then on, I’ve been pretty specific when explaining the recipes we are making in cooking class.
I love creamy pasta, but it always leaves me with a stomach ache because it’s just so heavy. Did you know you can create a creamy sauce using hummus? Is your mind blown? By using hummus as the base for a creamy sauce, not only makes it dairy free but also is a plant-based protein making it a more filling and satisfying bowl of pasta. There are over a dozen delicious flavors of Sabra to choose from, but I have a sweet spot for anything caramelized onion.
To double up on the caramelized onion flavor, I added even more caramelized onions and other veggies to round out this meal. Revamp your pasta night with this new recipe!
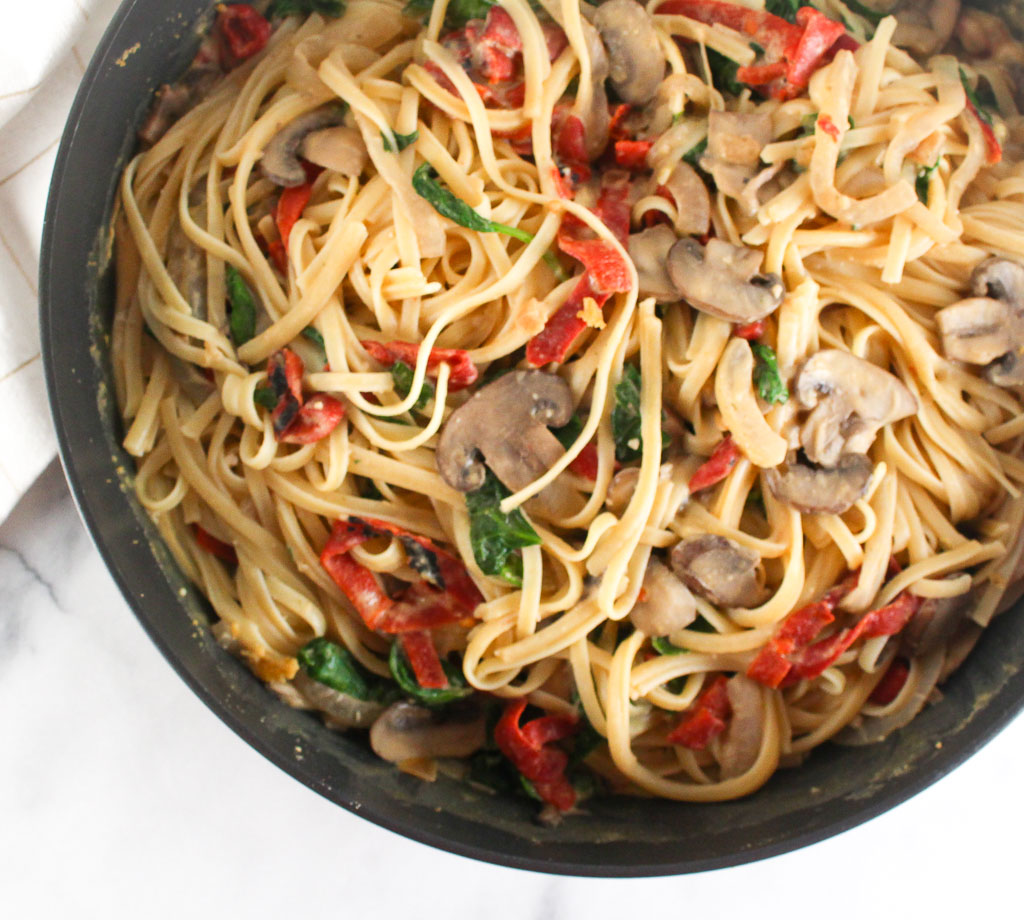
In a large saute pan, heat olive oil over medium heat. Saute onions and garlic for about 4 minutes, until the onion is translucent. Add the mushrooms and saute for 5-7 minutes, until tender and most of the water has evaporated. Tips: Do not rush this step. The mushrooms will release a lot of moisture. Saute until most of the moisture evaporates.
Add the spinach and stir to combine and wilt. Fold in the roasted red peppers. Remove from pan and set aside.
In the same pan, add the container of Sabra Caramelized Onion Hummus and broth. Whisk and bring to a gentle simmer.
Add the sauteed vegetables and linguine to the sauce. Season with salt to taste.
Notes
For a lower-carb version: Use half pasta and half zucchini noodles (or all zucchini noodles) For gluten-free: Use a gluten-free paste (my favorite it Banza!) To pack in more protein: Use a bean-based pasta.
This post may contain affiliate links. Read my privacy policy.
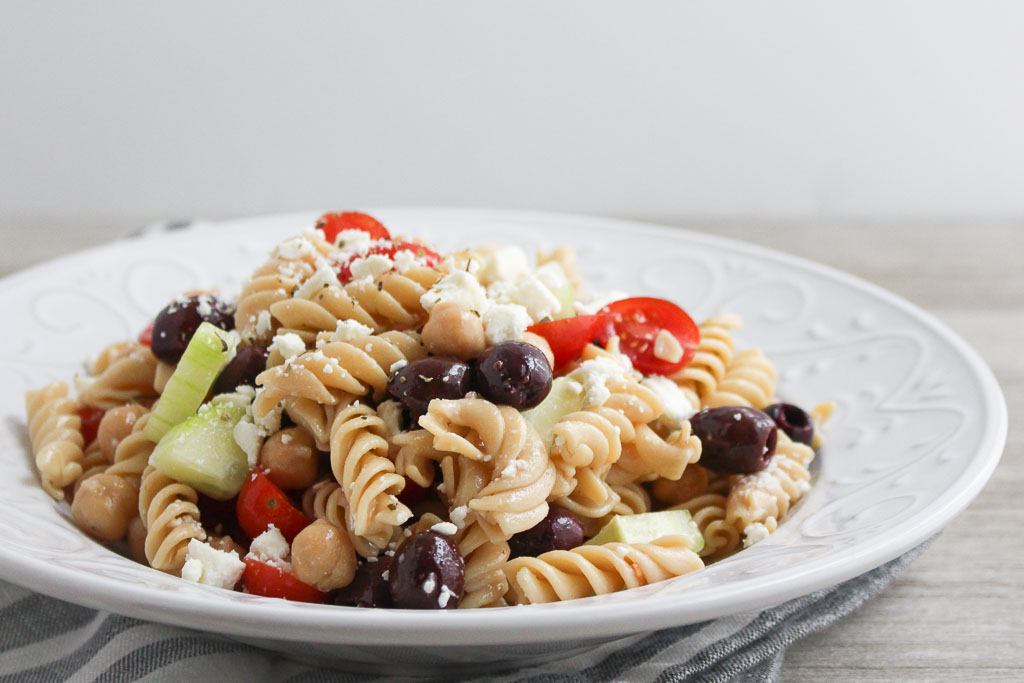
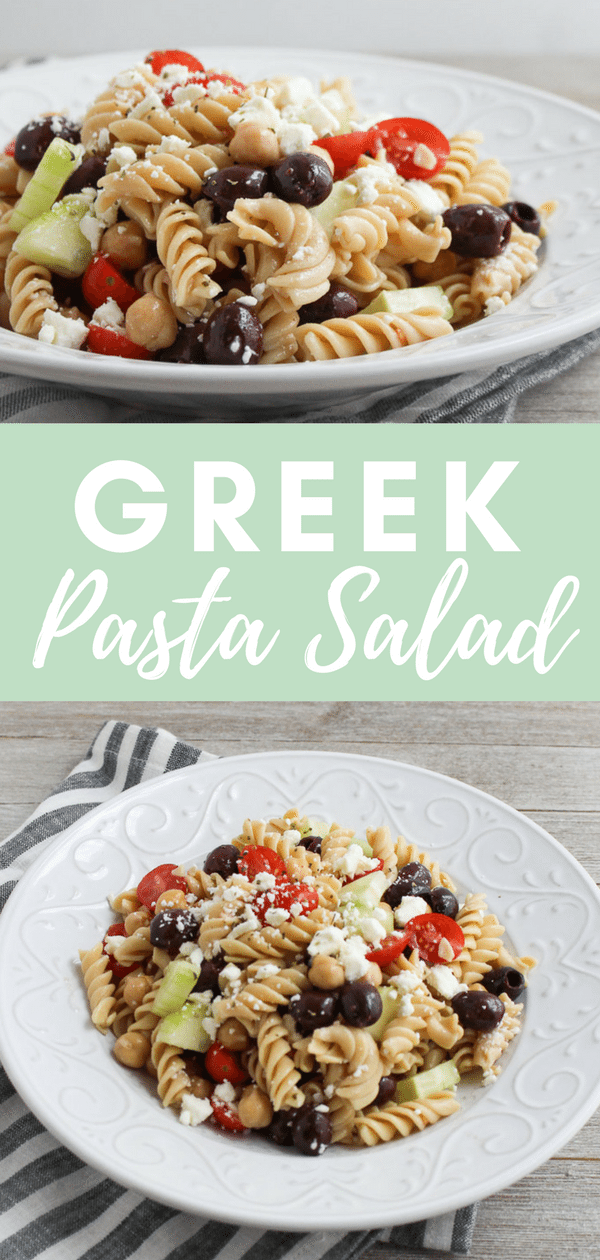
Did you know April 23rd is picnic day? What are your favorite picnic recipes? Add this Greek Pasta Salad to your next picnic spread.
I had many summer jobs during high school and in between college semesters. One of them was at an outdoor catering business. We did a lot of BBQ’s and graduation parties, which served the classic outdoor fair, including burgers, hot dogs, barbeque chicken, and ribs. Plus, the typical sides like, potato salad, pasta, salad, and coleslaw.
Making the sides was one of the tasks I simply dreaded. With catering, every recipe is made in mass quantities to serve a crowd.
Do you have a certain food or ingredient that just skeeves you out? For me it’s mayonnaise. For a large party, I would have to make potato salad in these large buckets and wear these giant gloves to toss the mayonnaise in.
I used Banza pasta for this recipe. I feel like there are never enough plant-based protein options available at barbeques. This is a great way to have a protein-packed option for those who don’t eat meat and want to enjoy this as more of a meal than a side dish.
This post may contain affiliate links. Read my privacy policy.
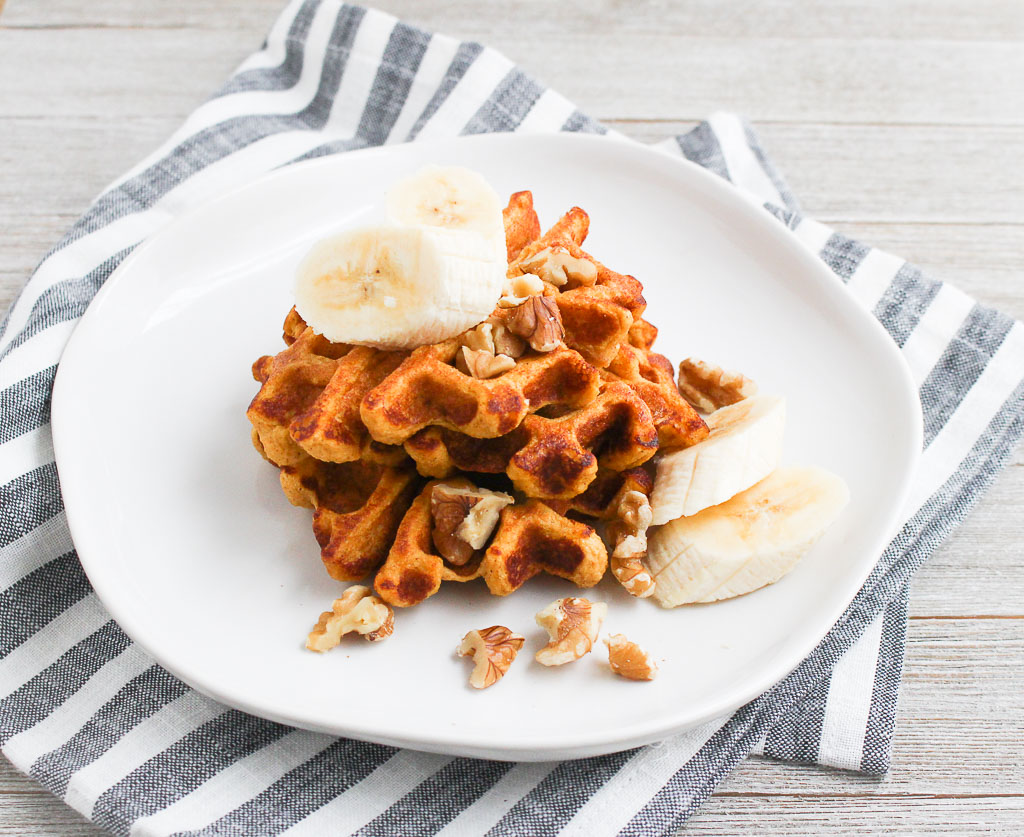
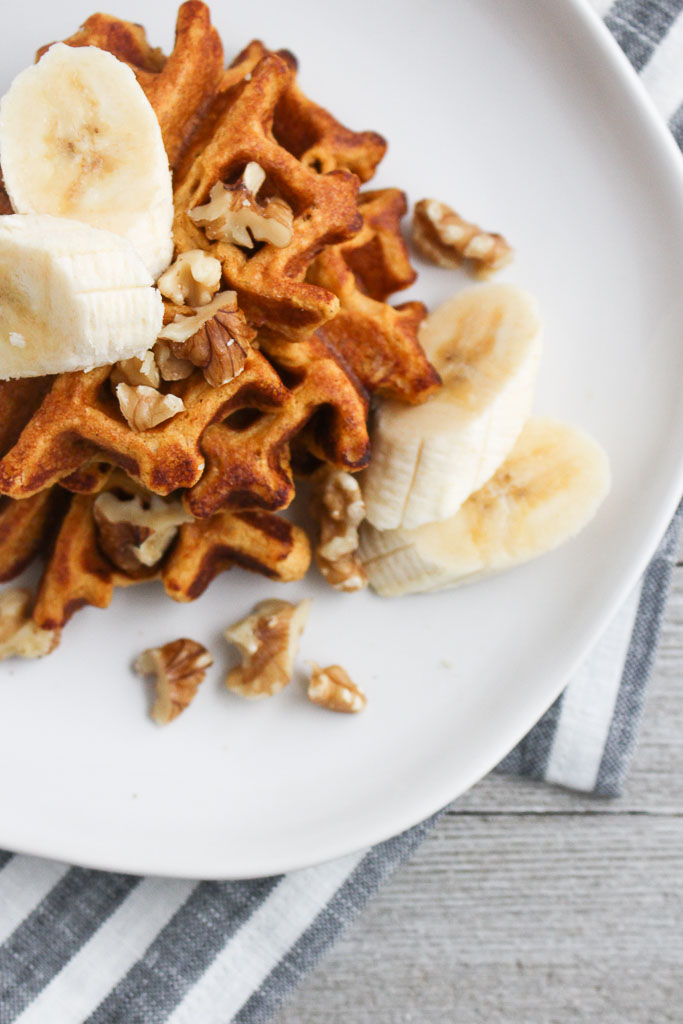
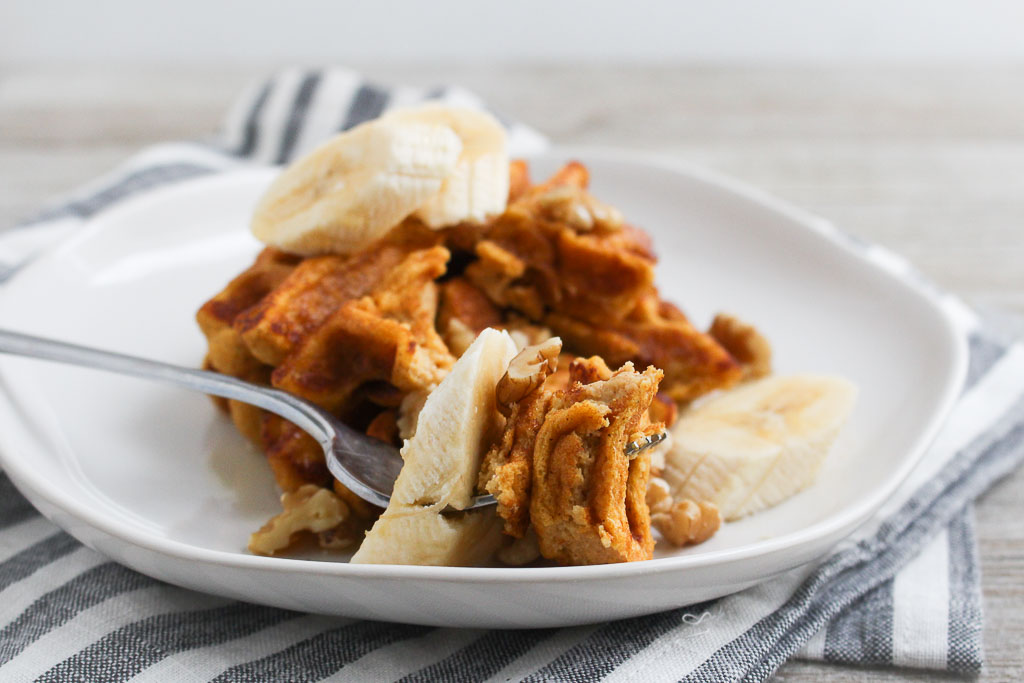
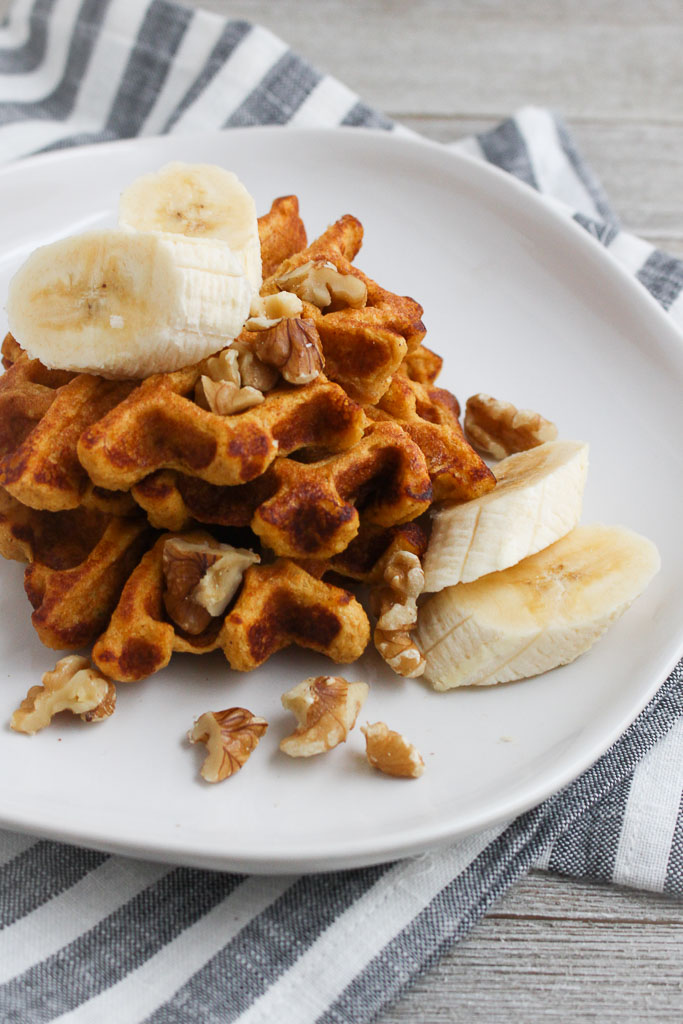
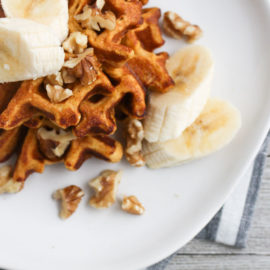
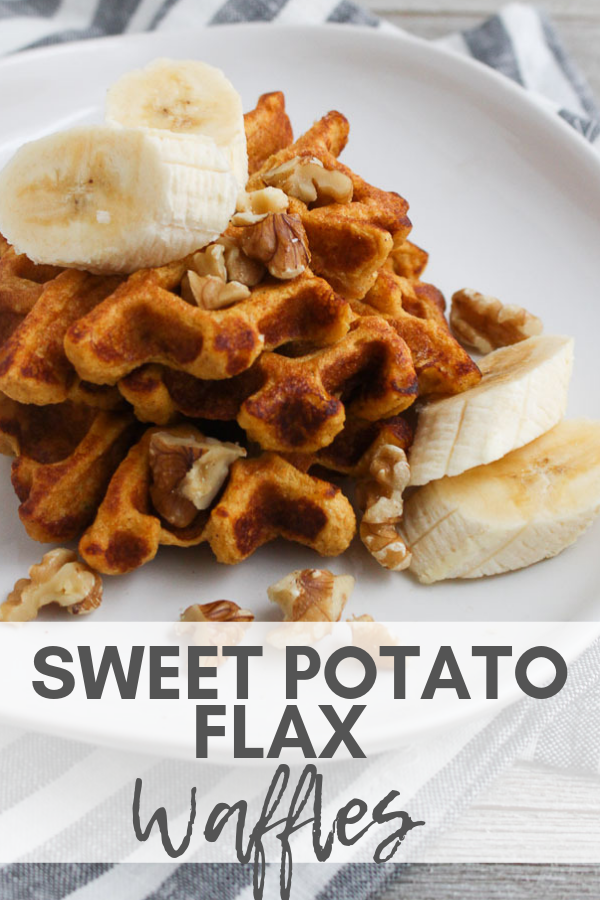
Make these Sweet Potato Flax Waffles for a delicious weekend breakfast, and freeze for later to enjoy during a busy week.
I go through phases where my waffle iron is always being used daily but then sits there collecting dust. I think it’s because sometimes I get sick of cleaning it. You have to get into all the nooks and crannies to make sure you don’t miss anything.
I used to get SO excited when we would stay at a hotel that had a continental breakfast and we could make Belgium waffles for breakfast. It was always an extra little treat!
Are Potato Waffles Healthy?
Yes! These waffles are packed with nutrition. These sweet potatoes are filled with vitamins, minerals, and antioxidants. Using the ground flax takes place of having to add flour. Flax seeds are a great source of fiber and are high in omega 3 fatty acids. Oats are another good source of fiber and have some protein as well.
This waffle recipe is balanced to help with blood sugar spikes and will keep you fuller for longer, especially when compared to other conventional breakfast foods.
Sweet Potato Waffle Ingredients
sweet potato puree
old-fashioned oats
ground flax (I used Manitoba Milling Co.)
milk
eggs
cinnamon
baking powder
salt
cooking spray
toppings: sliced banana, walnuts, maple syrup (optional)
How to Make Waffles Using Sweet Potatoes
To make the sweet potato waffle base, you need to bake the sweet potatoes first. Once they are done, scoop out the flesh and add it to a blender or food processor.
Add the remaining ingredients to the blender and pulse until it’s smooth. Allow the waffle batter to sit for about 10 minutes.
Spray your waffle iron with cooking spray and heat to medium-high.
Pour 1/3 of the batter at a time to make each sweet potato waffle. Cook 3-4 minutes or until the desired consistency is reached.
Serve with your favorite toppings for a healthy and nutritious breakfast.
Waffle Topping Ideas
Fresh fruit – bananas, apples, berries, melon
Greek yogurt
Nut Butter – peanut butter, almond butter
Seeds
Honey or maple syrup
Can You Make Sweet Potato Waffles Vegan?
I haven’t tested this version, but if you experiment you could swap the poultry eggs for flax eggs. Then cut down on the amount of additional flax. You would also want to use a plant-based milk as well.
Are These Waffles Gluten Free?
They are as long as you choose a gluten free brand of oats, like Quaker or Bob’s Red Mill.
Tips for Making
I used Manitoba Milling Co. finely milled flaxseed, which is almost like the consistency of flour. If using coarse ground flax, more liquid may be needed.
To store you can reheat them in a toaster. They also freeze really well too which is great for meal prepping.
Make sure you cook the sweet potatoes until they are tender before adding them to the blender.
Preheating the waffle iron first helps to give a crispy outside.
This batter can easily be used for pancakes as well.
Team Waffle or Team Pancake?
I’ve mentioned before that I used to be a waffle person over pancake person, only because I used to be terrible at flipping them. I think my skills have improved though. Waffle pros: They freeze and reheat better than pancakes (in my opinion). Waffle cons: You only can really make one at a time, whereas with a large enough pan, you can easily make a few pancakes at a time.
Make these Sweet Potato Flax Waffles for a delicious weekend breakfast, and freeze for later to enjoy during a busy week.
Ingredients
Scale
3/4 cup sweet potato puree (about 1 medium sweet potato – baked and flesh scooped out)
1/2 cup old-fashioned oats
1/2 cup ground flax (I used Manitoba Milling Co.)
1 cup milk
2 eggs
1 tablespoon cinnamon
1/4 teaspoon baking powder
pinch of salt
cooking spray
toppings: sliced banana, walnuts, maple syrup (optional)
Instructions
Add all ingredients to a blender and blend until smooth. Let batter sit for 10 minutes.
Preheat waffle iron to medium-high heat. Spray with cooking spray.
Pour 1/3 cup of batter into waffle iron. Cook until desired consistency (about 3-4 minutes per side).
Top waffles with sliced bananas, walnuts, and syrup, if desired.
Notes
To make sweet potato puree: Score a sweet potato with a paring knife. Wrap in tin foil and bake until soft. When cool enough to handle, scoop out the flesh and puree.
Meal Prep: Make a batch of these waffles ahead of time. They freeze well. Just pop them in the toaster to warm up.
I used Manitoba Milling Co. finely milled flax seed, which is almost like the consistency of flour. If using coarse ground flax, more liquid may be needed.
This post may contain affiliate links. Read my privacy policy.
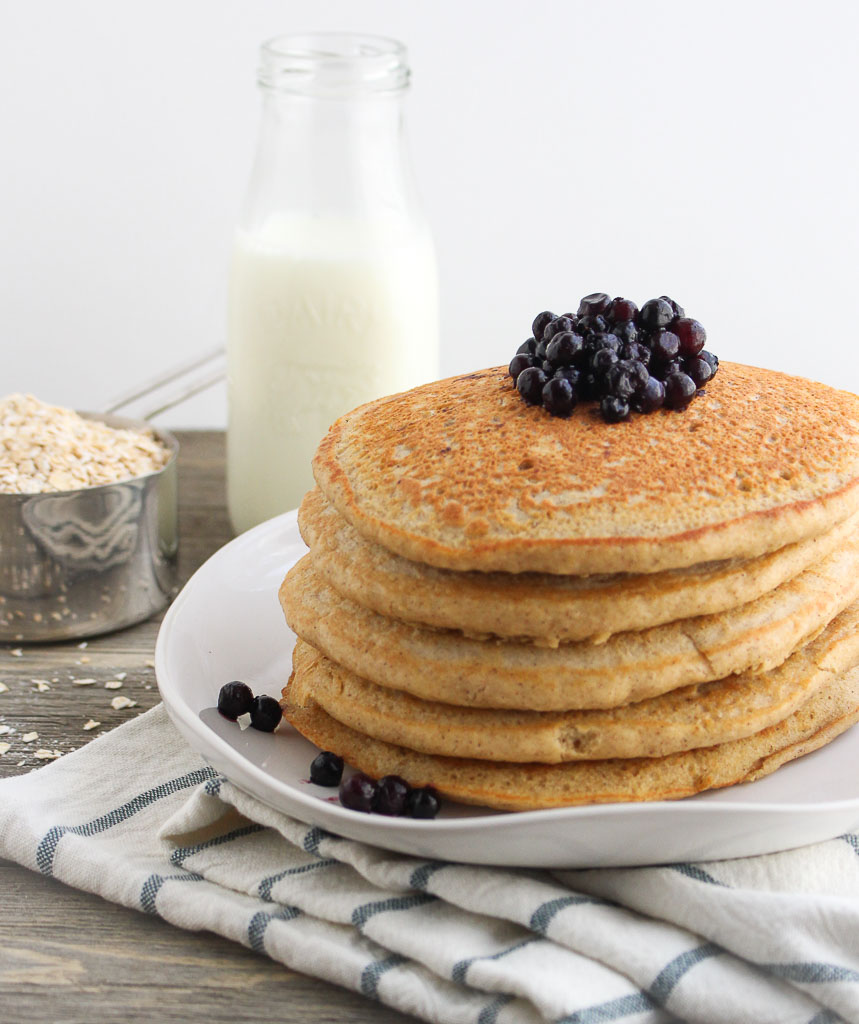
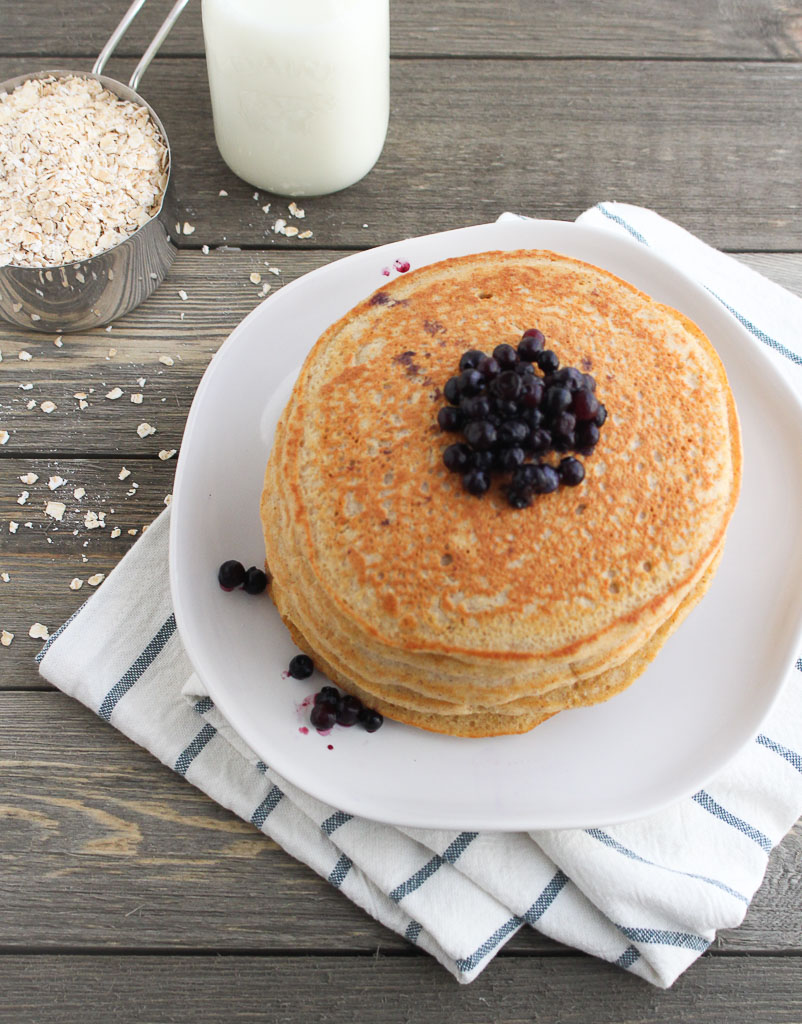
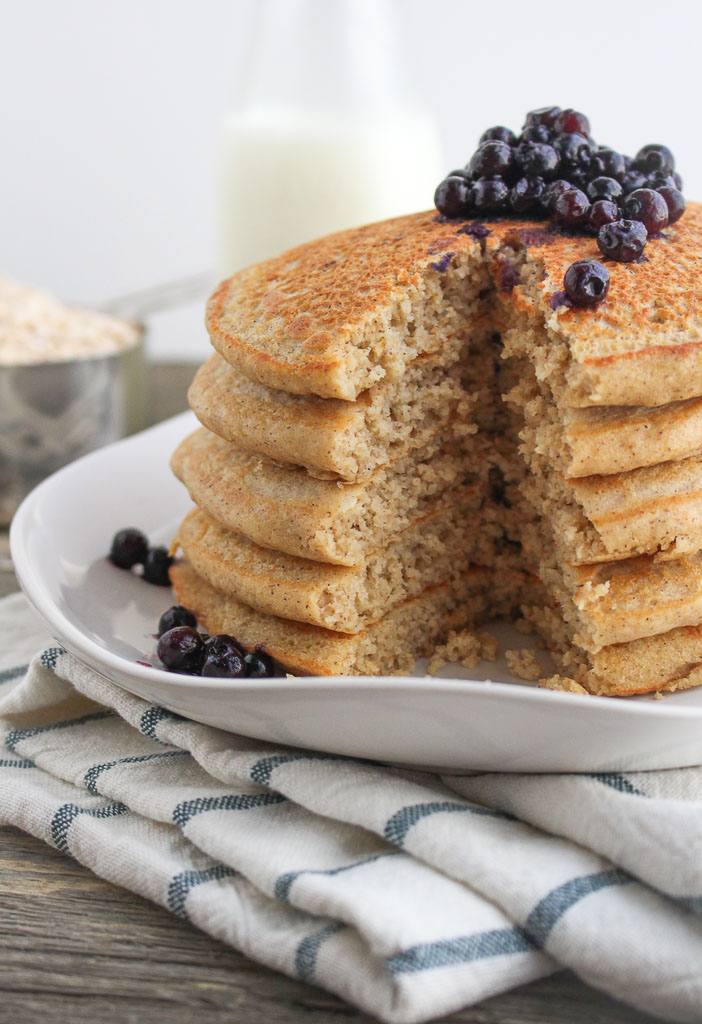
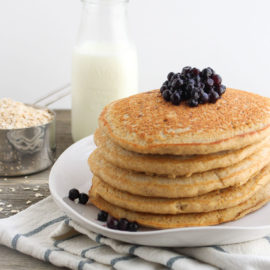
These pancakes are whole grain and gluten-free, making them a perfect fit for any pancake enthusiast!
Why I love Oat Flour Pancakes
I used to be “anti pancake” because I am the worst at flipping them. Really, it was that I was impatient and tried to flip them too early before they set.
When my sisters and I were little, my dad was the only one who was allowed to cut our pancakes. He would keep them perfectly stacked and cut them into perfect triangles. I was more of a syrup dunker than a drizzler. I would take each triangle and dunk it into the “good syrup”. My aunt lives in Vermont and she would send us delicious locally made maple syrup.
Using whole grains for pancakes
The problem with pancakes is that I never felt satisfied after eating them. Adding whole grains as the base of pancakes can help solve that solution.
I used oat flour as the base. You could just buy oat flour, but it’s pretty easy to make. Just take rolled oats or instant oats and pulse them in a food processor until they resemble a light fluffy flour. Oat flour still contains all part of the whole grain, but not as dense as whole wheat flour, yielding a fluffier pancake.
The secret to creating fluffy pancakes
Vinegar in pancakes? Yes! It’s the secret to help activate the baking powder and helps the pancakes puff and become fluffy.
I’ve tried some other methods like adding seltzer to the batter or whipping the egg whites separately from the egg yolks before combining them. Both methods do work, but I don’t always have seltzer on hand, and mixing egg whites separately makes more messy bowls. I don’t know about you, but the fewer dishes to clean, the better!
Syrup dunker or drizzler?
Are you a syrup dunker or drizzler? Most of the time I ditch the syrup and use frozen fruit like wild blueberries. When frozen berries defrost they become all gooey and syrupy. Other times, I’ll spread peanut butter or yogurt between the layers. I really just go with what I’m craving at the time. How do you top your pancakes?
This post may contain affiliate links. Read my privacy policy.
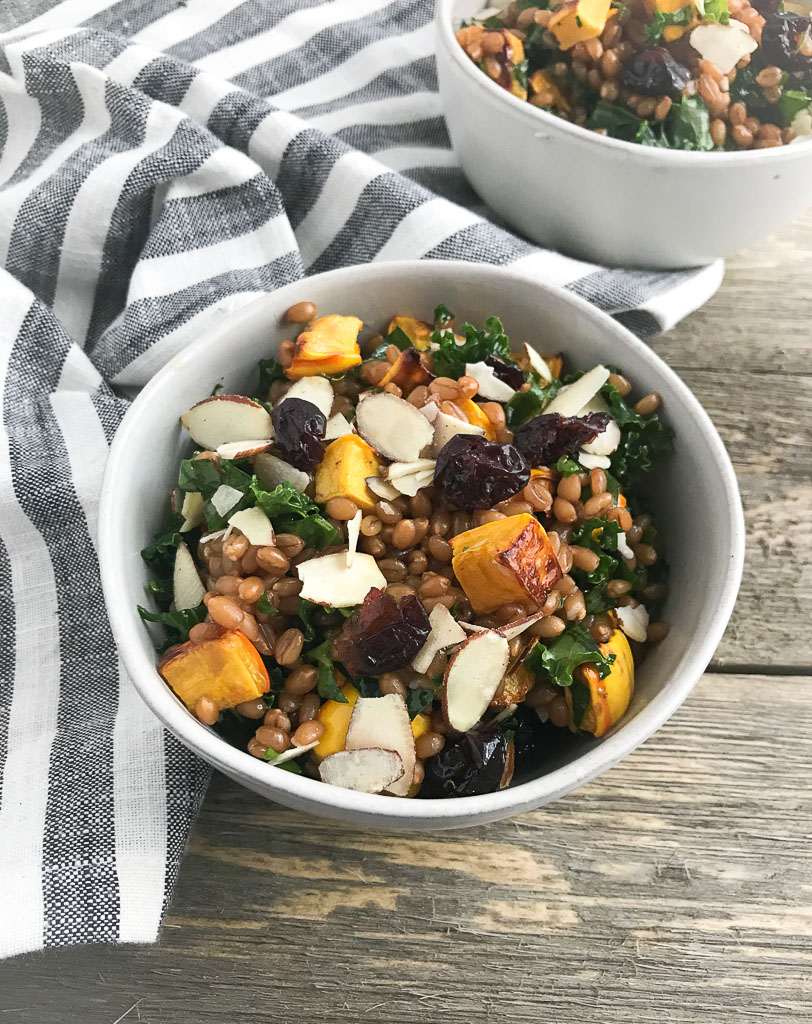
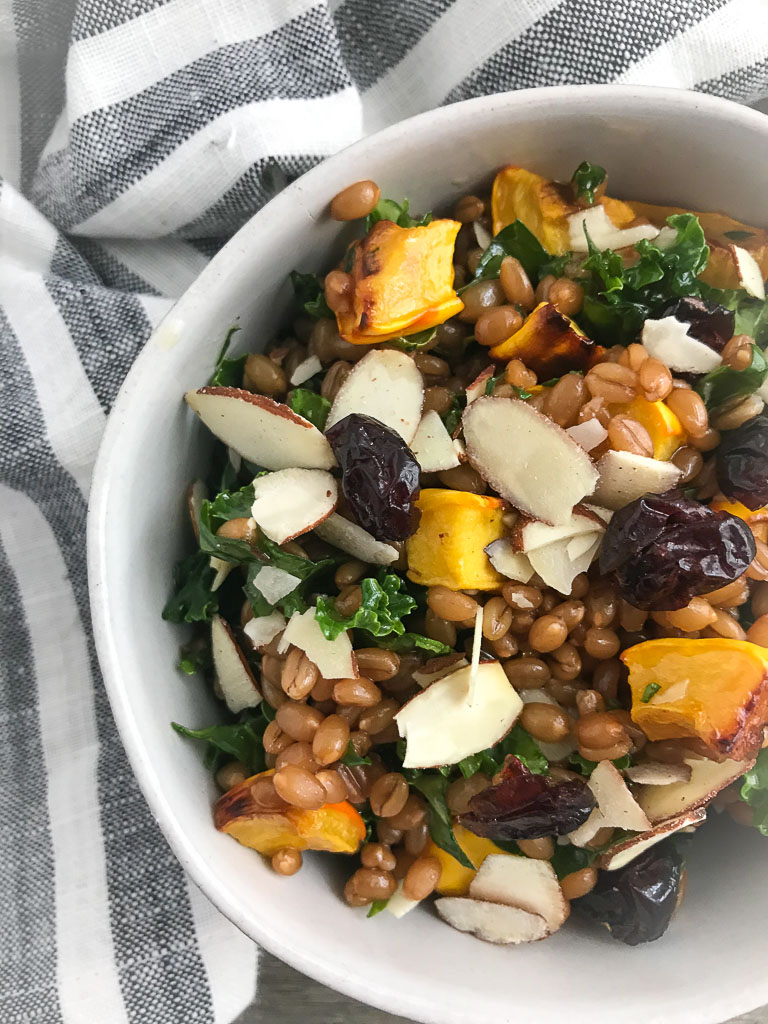
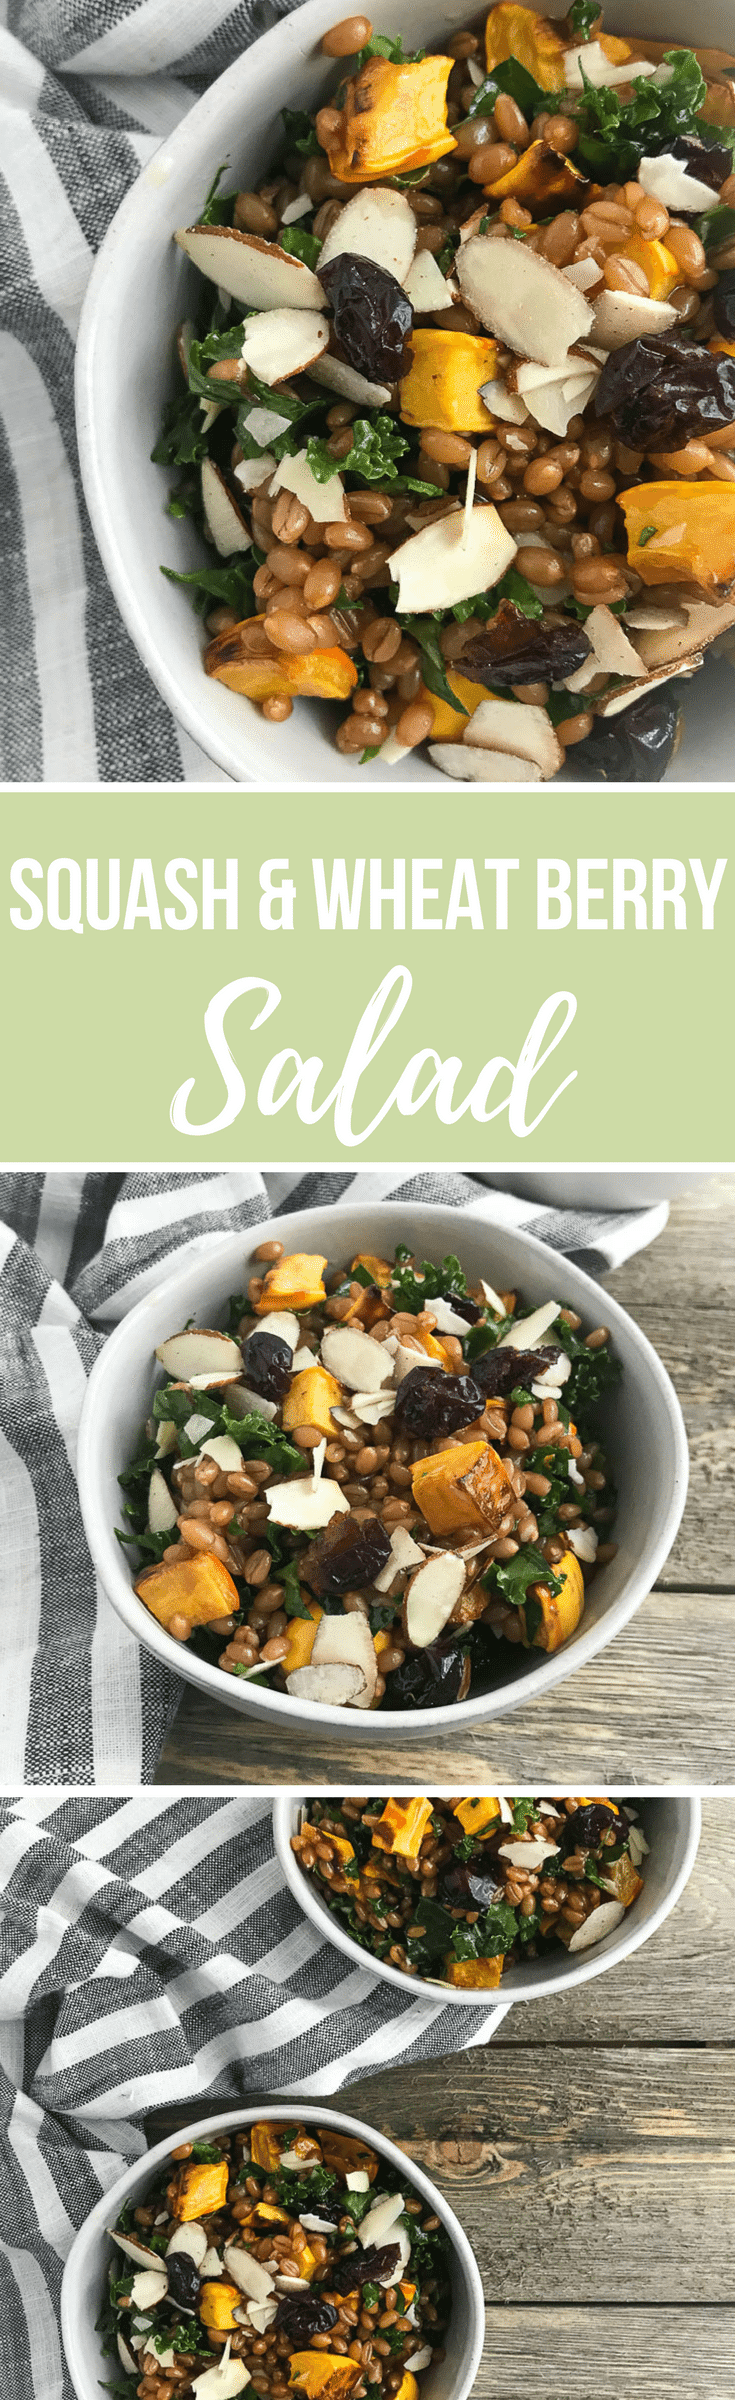
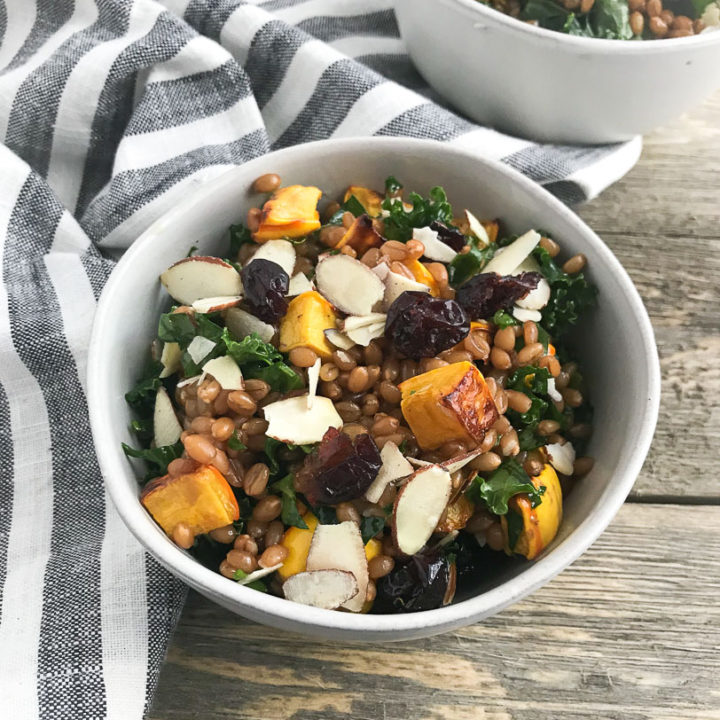
This Squash & Wheat Berry Salad captures all the different flavors of sweet, savory, tart, and nutty. Batch cook for the week for a satisfying meal or side dish.
One of my meal prep strategies is batch cooking at least one whole grain for the week. Then that whole grain is incorporated throughout the week in various ways.
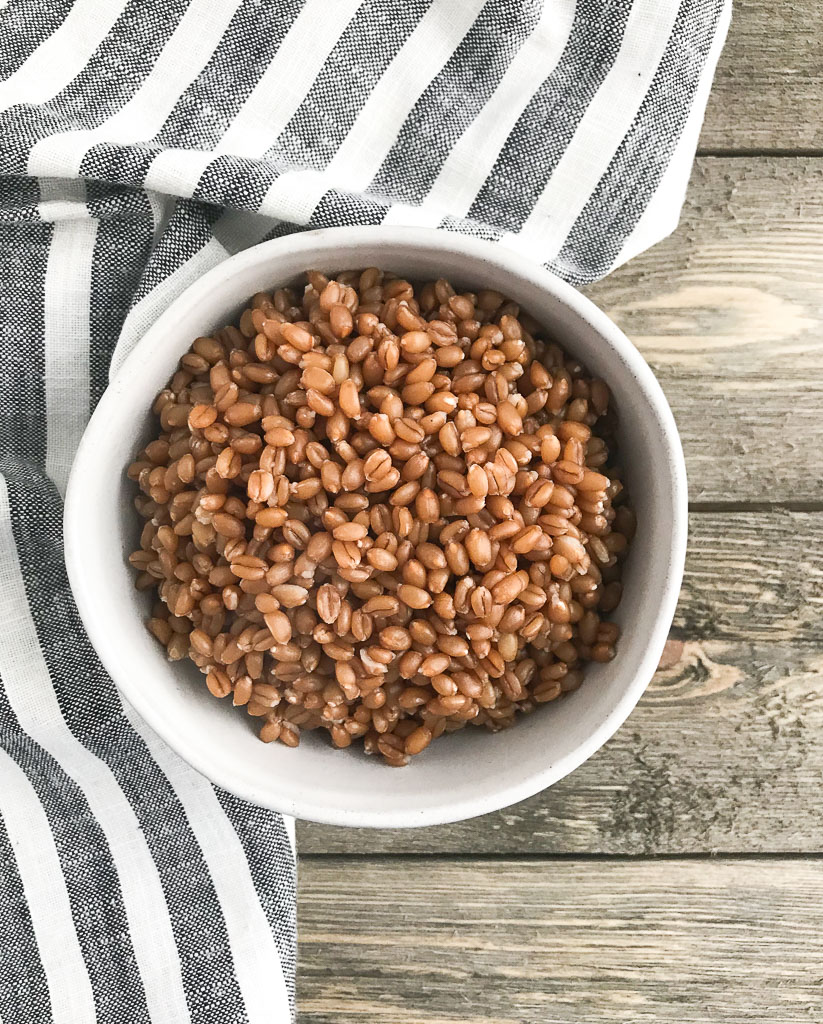
I’ve been utilizing my Instant Pot to quickly batch cook grains for my weekly meal prep. Wheat berries can take up to an hour to cook and require you to keep a constant eye on them. Throw them into the Instant Pot and voila – done in half the time!
I’ve had a little extra time on my hands this week being completely snowed in the past two days. With an already prepped batch of wheat berries in my fridge, I utilized the ingredients in my kitchen to create this dish.
I feel like many of my recipes are like I am a contestant on Chopped. The items that are in my kitchen are my “mystery basket”. I must say it is a much easier mystery basket than what the contestants end up with. Chopped viewers voted, mashed potatoes candies were voted the weirdest basket ingredient on the show. What even are those?!
Squash season is not over yet! I love using delicata squash because of its more tender flesh and skin, making this variety easier to work with. No need to even peel the skin!
You know I love making my own dressings. It’s SO easy. Want to create your own signature vinaigrette? Use my guide with your favorite flavor combination!
This Squash & Wheat Berry Salad captures all the different flavors of sweet, savory, tart, and nutty. Batch cook for the week for a satisfying meal or side dish.
Cook wheat berries according to package directions (or try my Instant Pot Wheat Berries recipe for a simple method). Let cool once cooked.
Preheat oven to 400 degrees F. Dice delicate squash. Toss with 1 tablespoon of olive oil and sprinkle with salt and pepper. Place on a baking sheet lined with parchment paper. Roast for 20-30 minutes, until squash is tender and caramelized, stirring occasionally.
In a mason jar, combine remaining 1 tablespoon of olive oil, orange zest, orange juice, and maple syrup. Secure the mason jar lid and vigorously shake. Season with salt and pepper, to taste.
In a large bowl, combine wheat berries, squash, kale, dried tart cherries, and sliced almond. Dress with salad dressing. Toss to combine.
This post may contain affiliate links. Read my privacy policy.
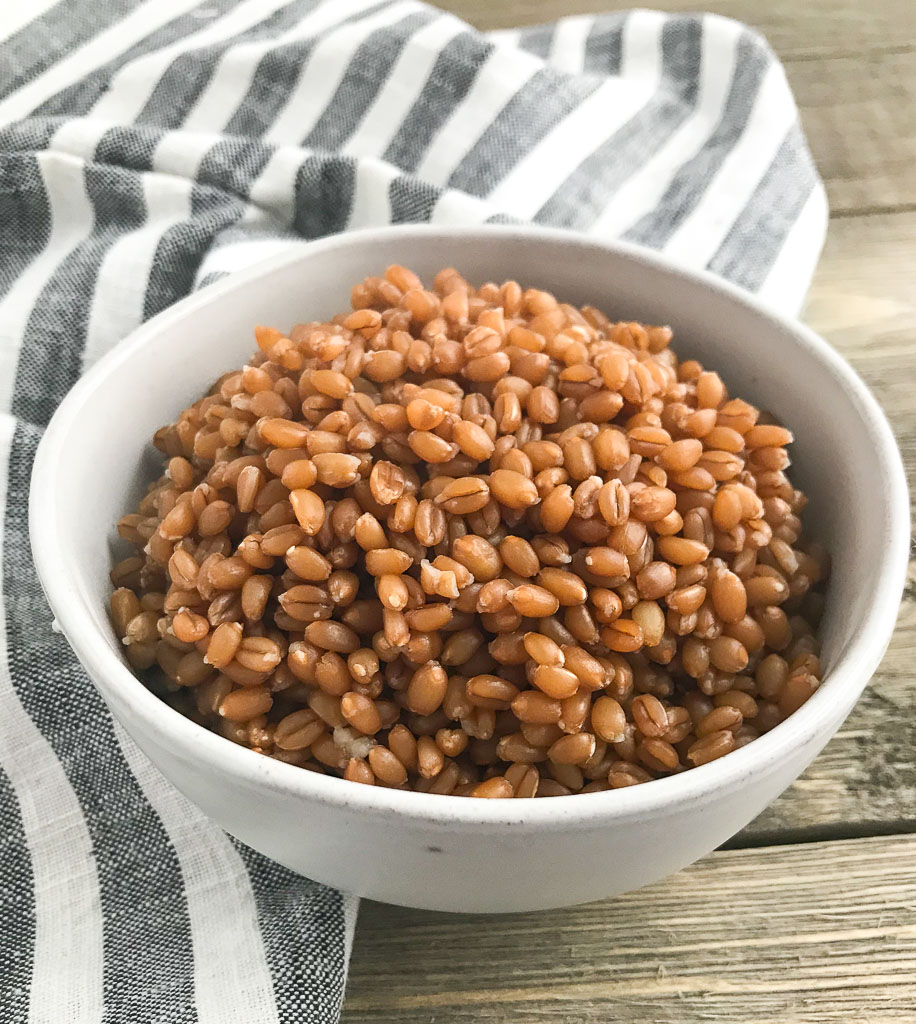
Save time and utilize the Instant Pot to make hearty whole grains, like wheat berries. Learn how meal prepping a batch of whole grains can turn into various recipes throughout the week.
The Instant Pot continues to be magical. What takes over an hour to cook, now is done in 35 minutes.
Meal prep strategies
Every week now, I’ve been prepping at least one whole grain for the week. Everyone meal preps a little differently. I tend not to make full meals, but to get the cooking process started, like chopping veggies, making a batch of whole grains, grilling a few pieces of chicken, roasting a tray of veggies, etc.
This way, I am not mandated to a certain meal and it gives me more flexibility while allowing to save time during a busy week.
Prep a batch of whole grains, like wheat berries, to add on top of a salad, in a stir-fry, mixed into a soup, as a side dish, or even served up breakfast-style. Switch up the prepped whole grain each week for variety.
Health benefits of wheat berries
Wheat berries contain 6 grams of protein, with over 20 percent of your daily value for dietary fiber, and 8 percent of your iron in each serving.
What are Wheat Berries?
Wheat Berries are the whole grain form of wheat – the whole, complete grain before it has undergone any processing. They’re a high-fiber whole grain, containing the bran, germ, and the endosperm. Wheat berries typically take longer to cook because they are not processed and it takes a while for the liquid to penetrate through the bran to soften the grain.
When cooked, wheat berries have a chewy bite and a subtle nutty, earthy flavor. They’re sturdy enough to handle bold dressings in salads and still delicate enough to taste delicious with some milk, honey, and cinnamon.
This website uses cookies to improve your experience. We'll assume you're ok with this, but you can opt-out if you wish.AcceptRejectRead More
Privacy & Cookies Policy
Privacy Overview
This website uses cookies to improve your experience while you navigate through the website. Out of these, the cookies that are categorized as necessary are stored on your browser as they are essential for the working of basic functionalities of the website. We also use third-party cookies that help us analyze and understand how you use this website. These cookies will be stored in your browser only with your consent. You also have the option to opt-out of these cookies. But opting out of some of these cookies may affect your browsing experience.
Necessary cookies are absolutely essential for the website to function properly. This category only includes cookies that ensures basic functionalities and security features of the website. These cookies do not store any personal information.
Any cookies that may not be particularly necessary for the website to function and is used specifically to collect user personal data via analytics, ads, other embedded contents are termed as non-necessary cookies. It is mandatory to procure user consent prior to running these cookies on your website.