Spruced Up Cheese and Crackers: 3 ways, with 3 ingredients each

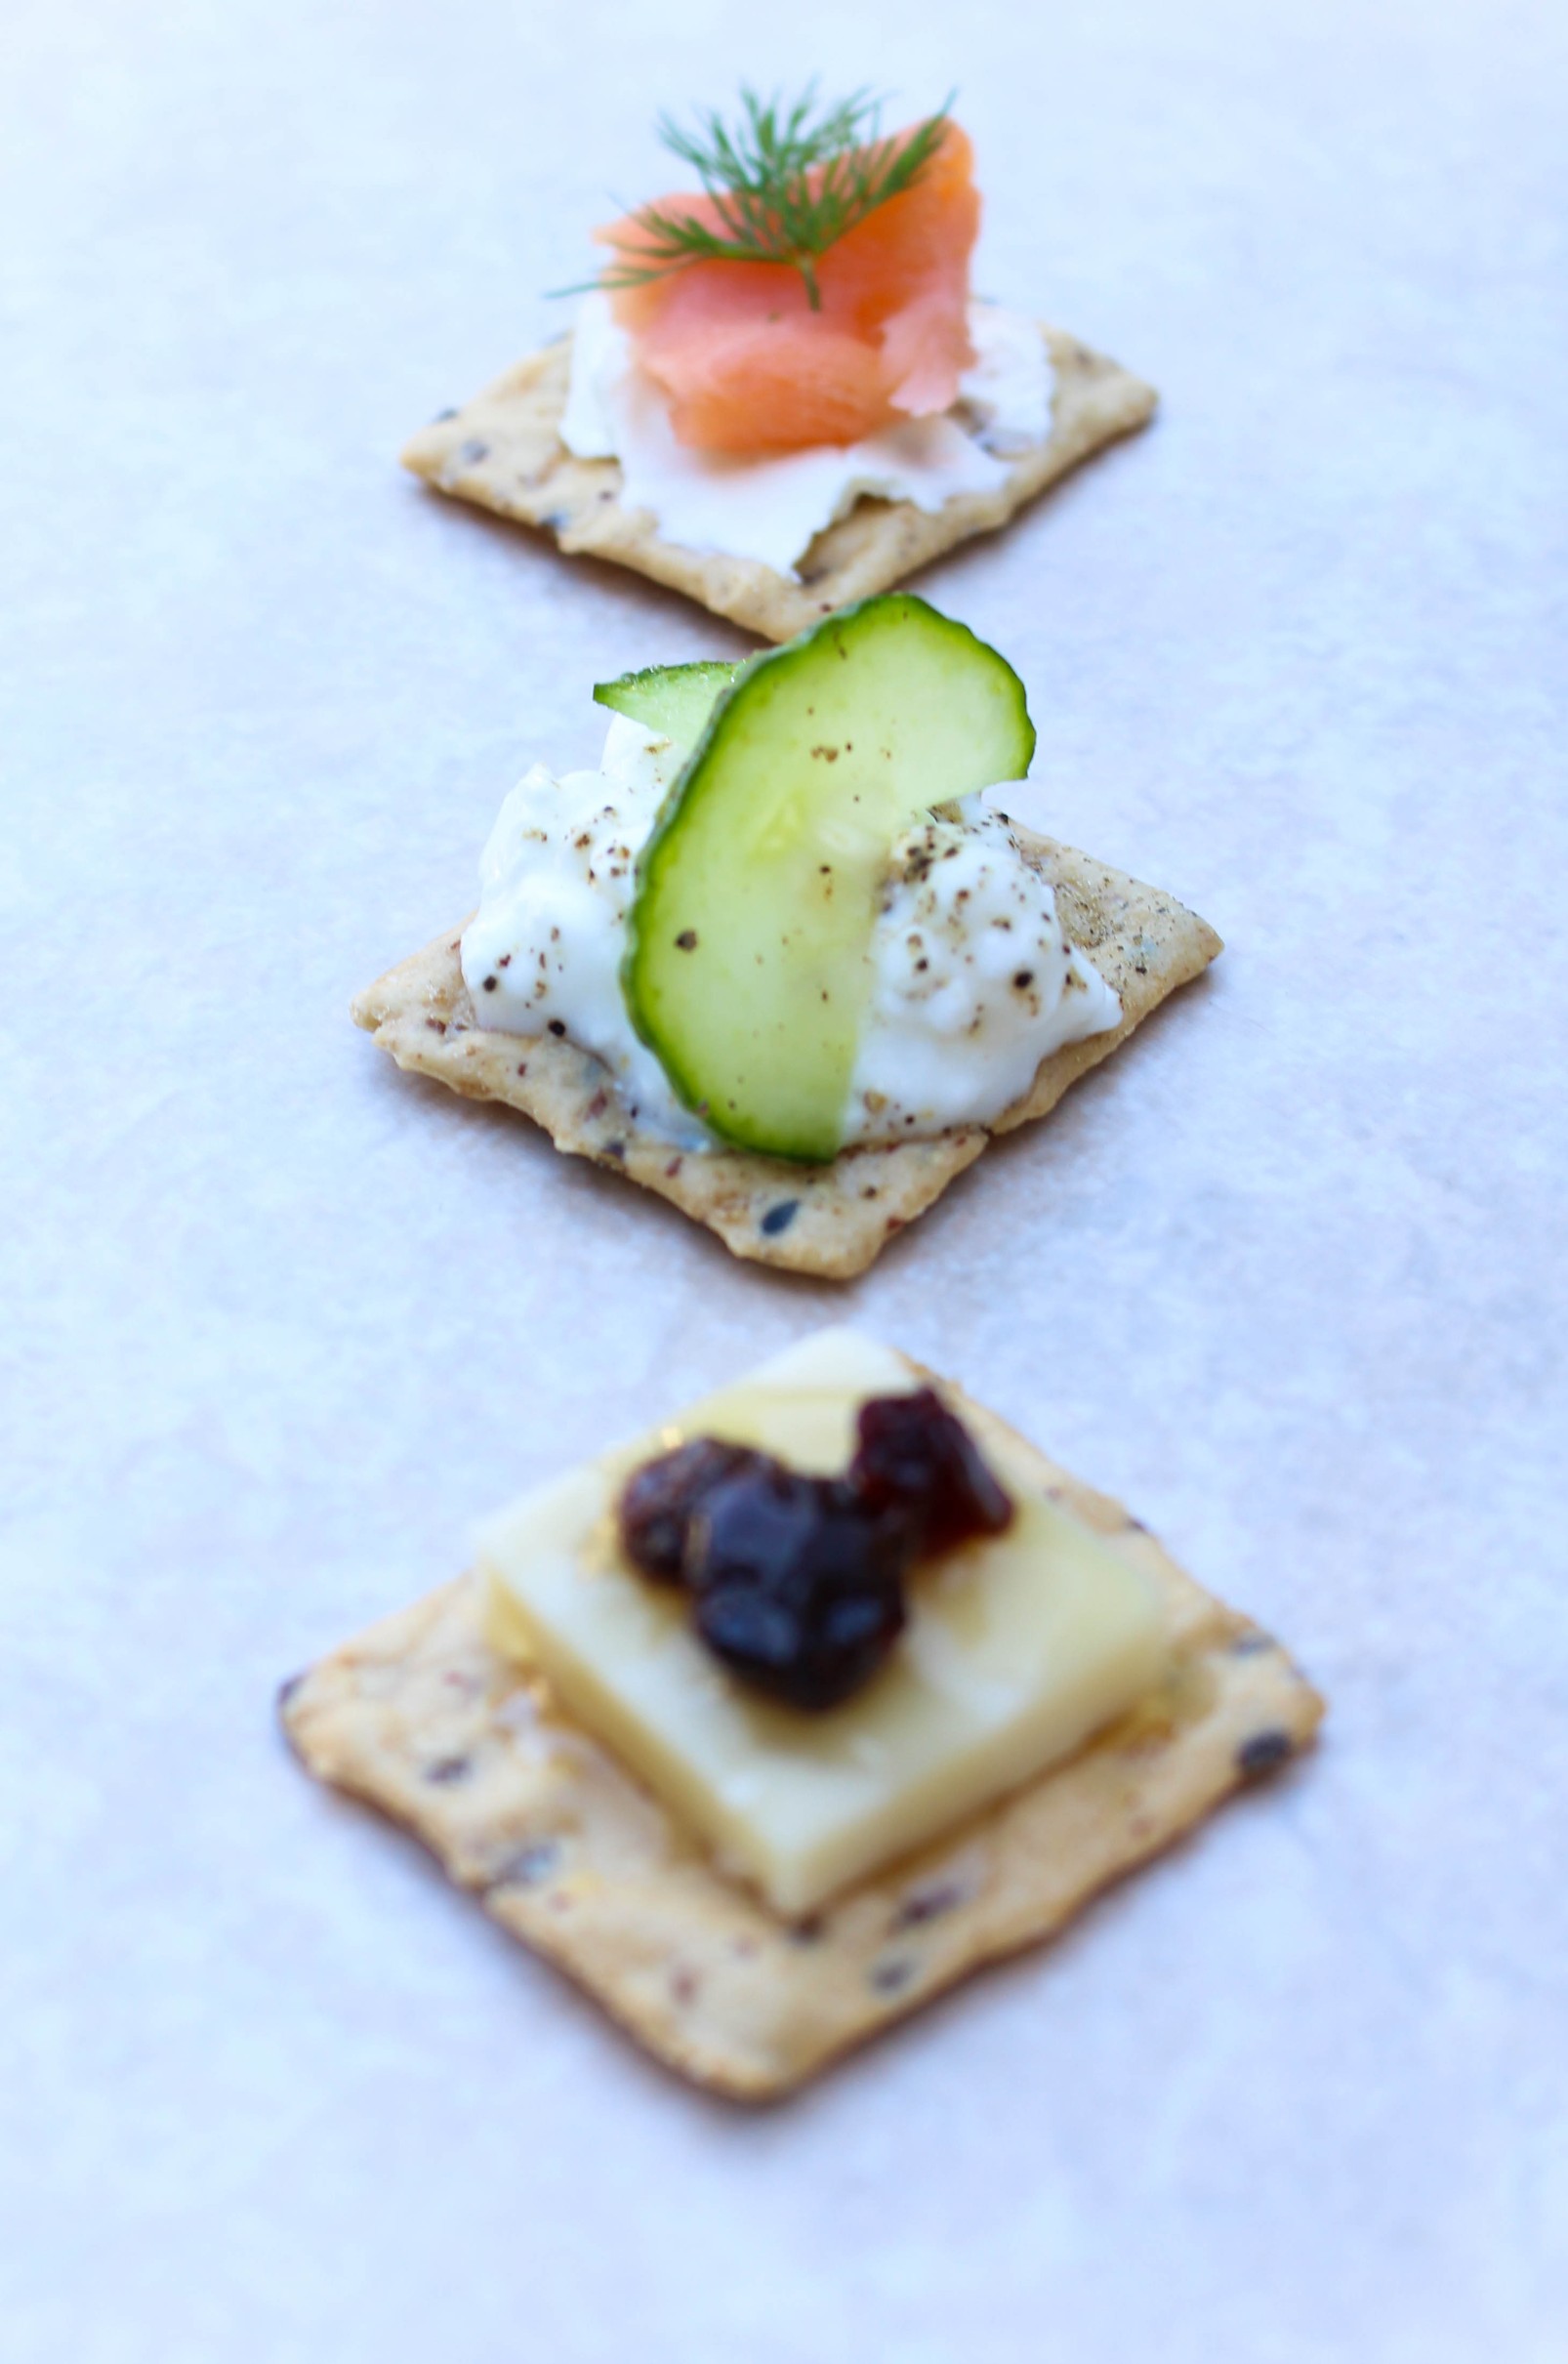
Spruce up your cheese and cracker platter the next time you are entertaining guests. Try these fun combos with only 3 topping ingredients each!
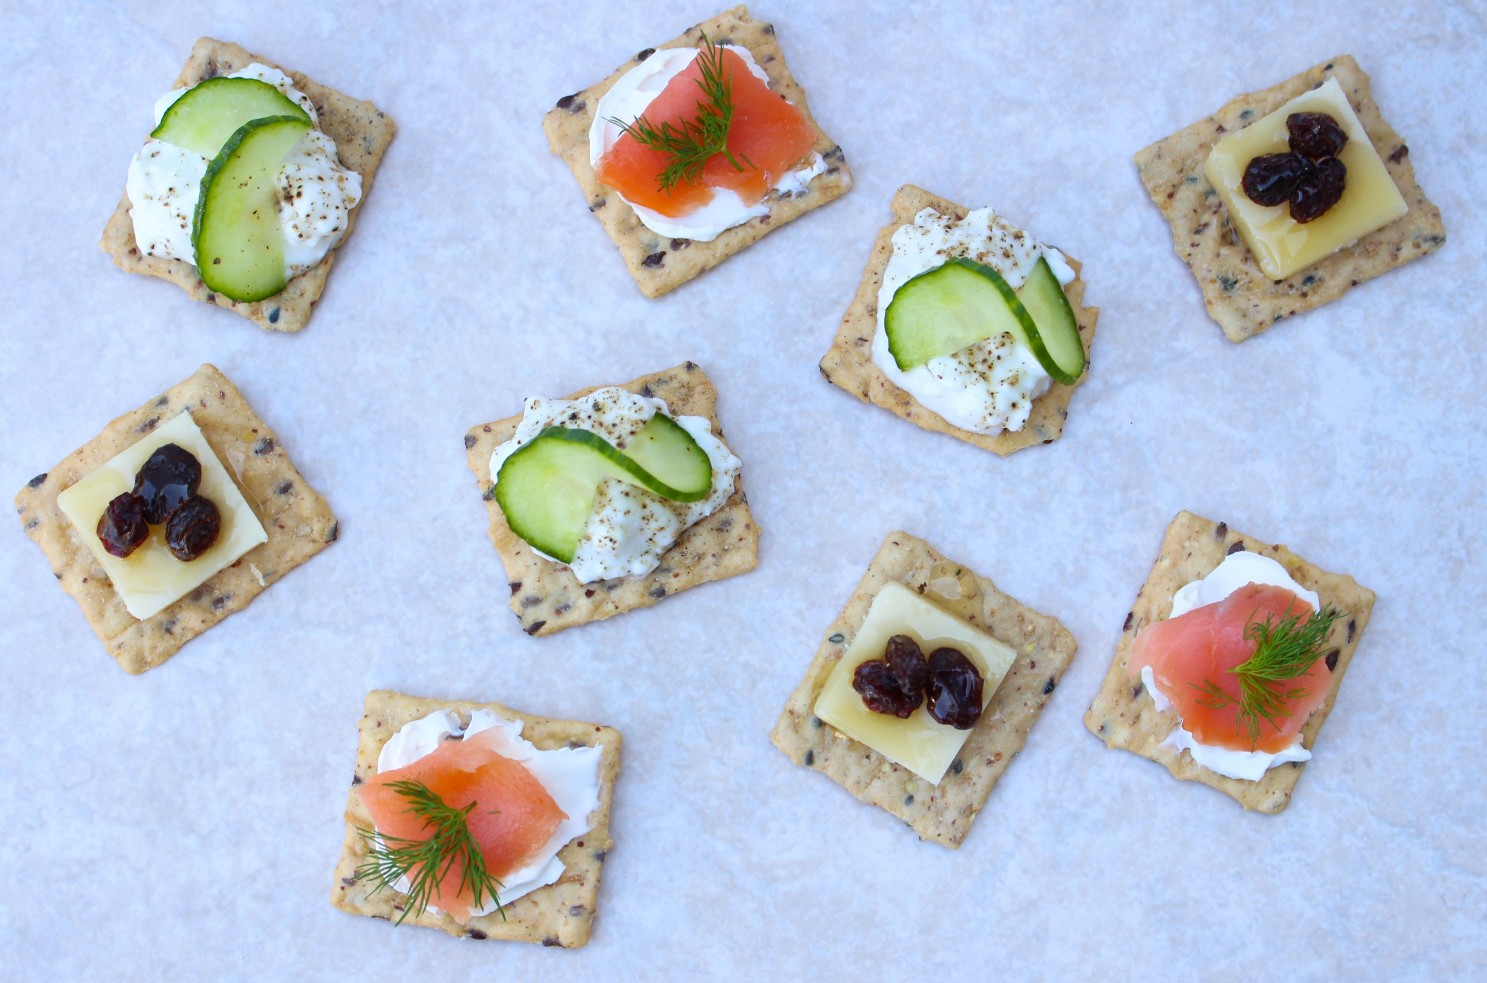
Spruced Up Cheese and Crackers: 3 ways, with 3 ingredients each via RDelicious Kitchen @rdkitchenDisclosure: This post is sponsored by Blue Diamond Nut Thins.

At any type of party there is usually a cheese and cracker platter on the appetizer table.
I love a good cheese and cracker combo, but one of my pet peeves is when the cracker crumbles apart when you take a bite and all the delicious toppings fall off.
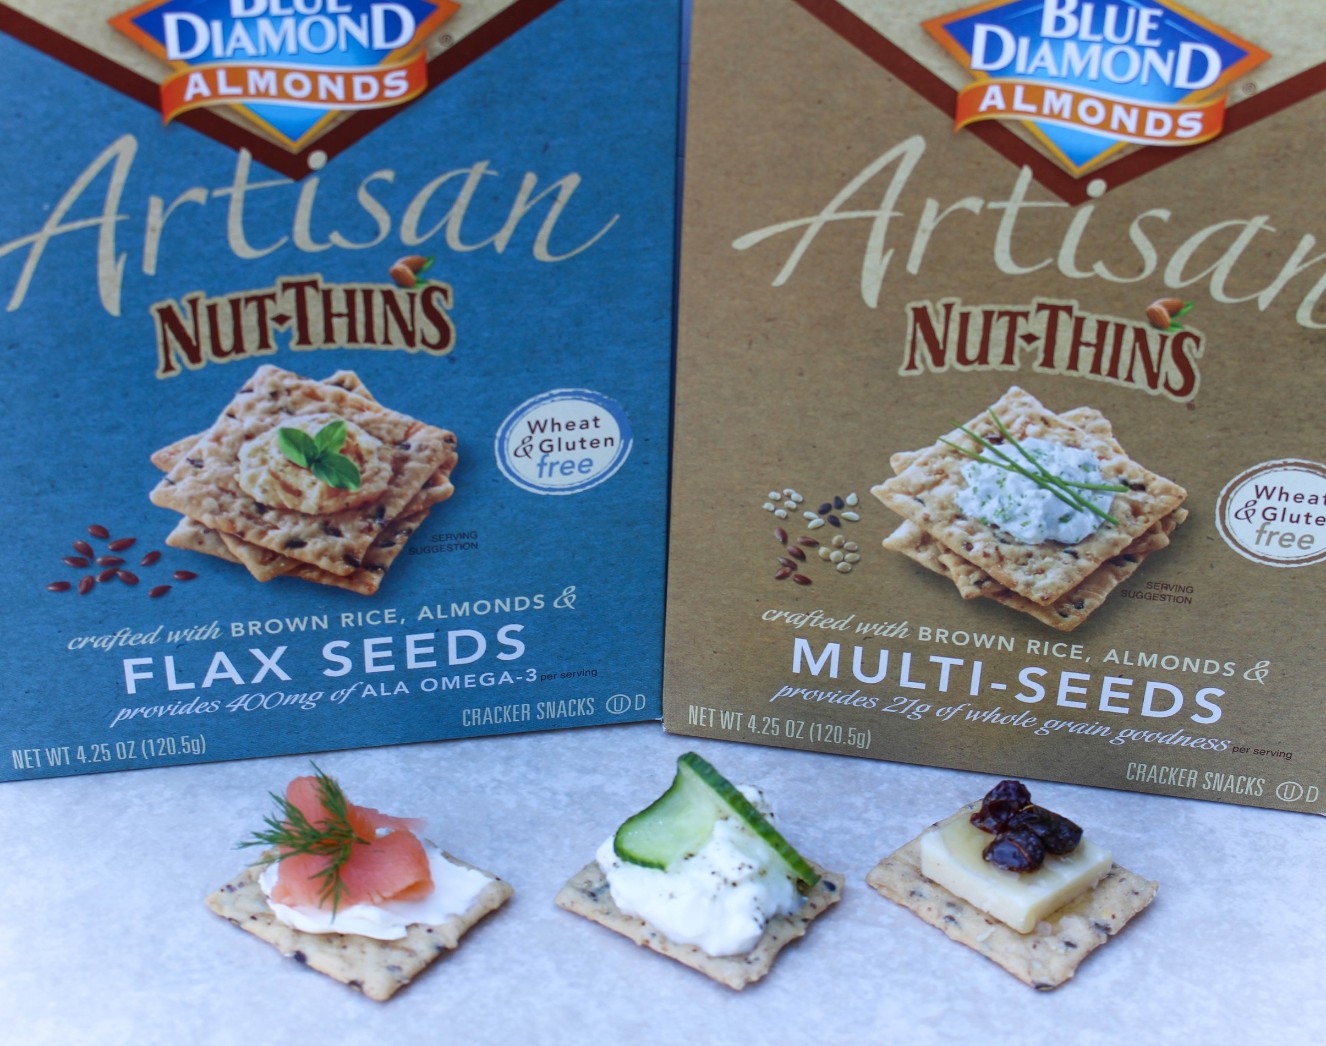
Spruced Up Cheese and Crackers: 3 ways, with 3 ingredients each via RDelicious Kitchen @rdkitchenArtisan Nut Thins are a sturdy crunchy cracker that is the perfect vessel to make your cheese and cracker platter a success.
Plus, the nutrition facts stack up so your guests can enjoy a nutritious appetizer. Per serving Artisan Nut Thins have 3 grams of protein per serving with whole grains and wheat & gluten free that can help cater to all guests dietary needs.
Spruced Up Cheese and Crackers: 3 ways, with 3 ingredients each via RDelicious Kitchen @rdkitchenWhen I serve cheese and crackers, I prefer to assemble a large platter of these little bites, so my guests don’t have to put any effort into topping their own crackers. With three simple topping ingredients, you now have to tools to create a delicious and nutritious cheese and cracker platter.
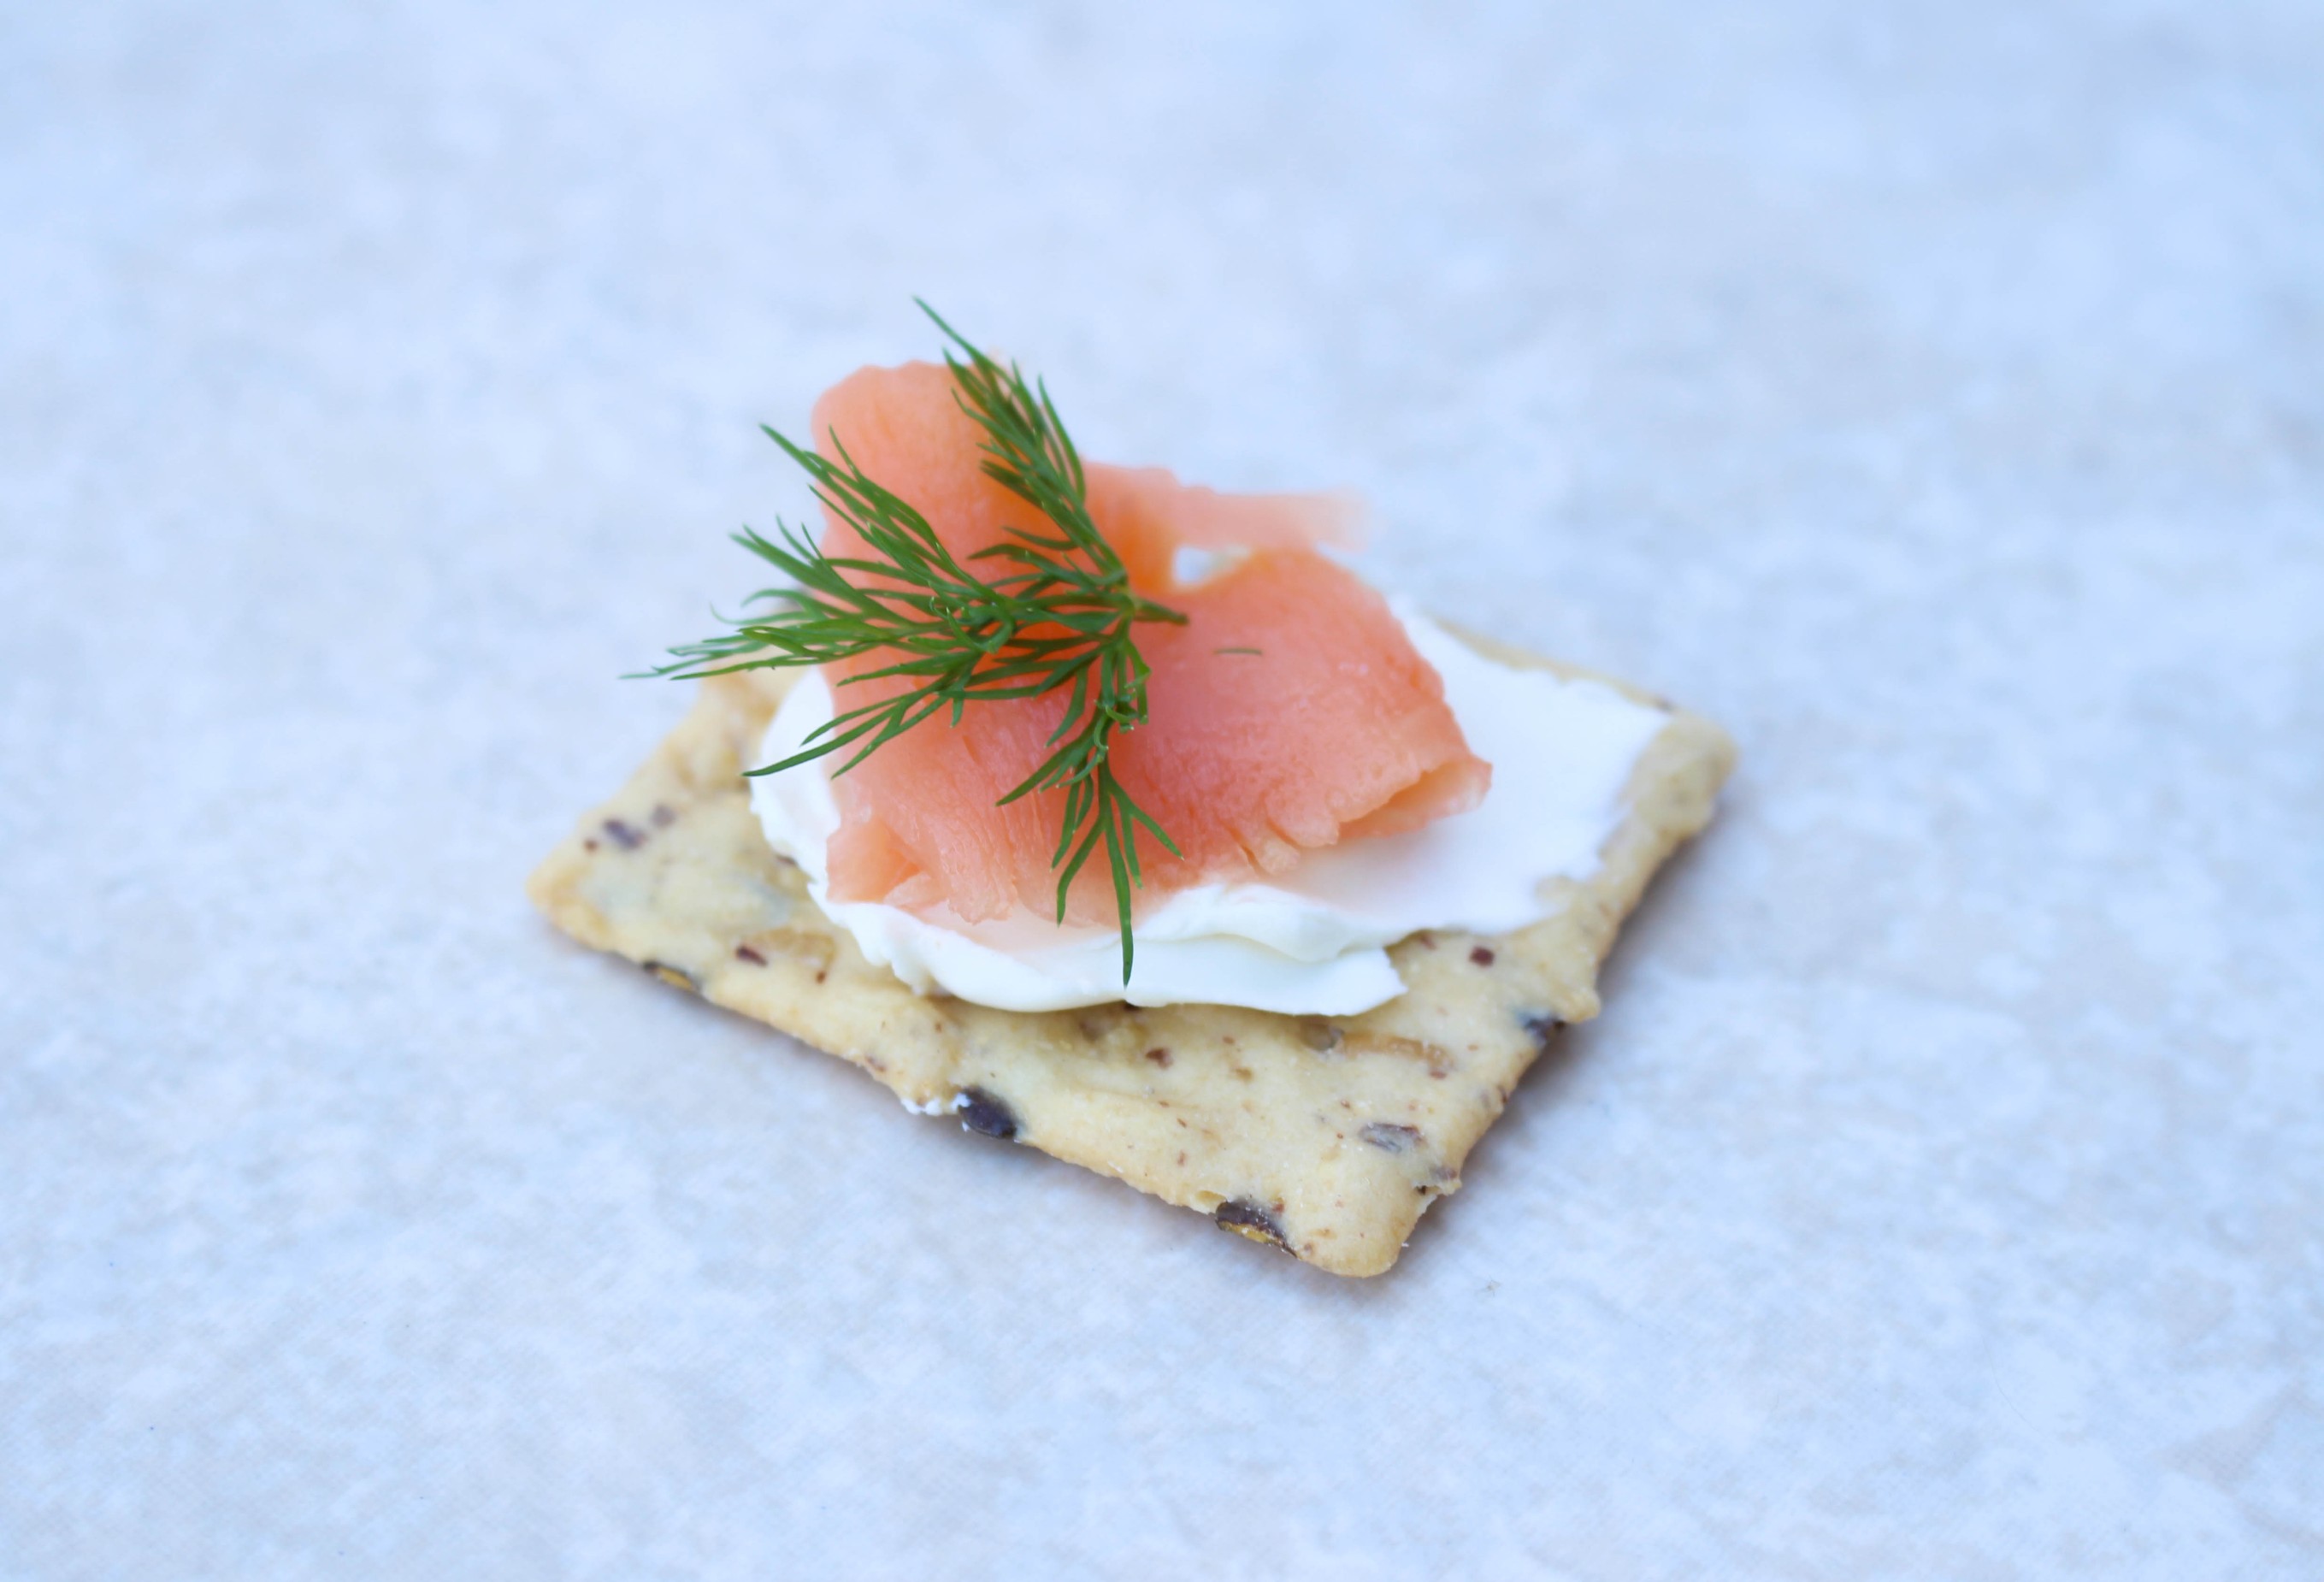
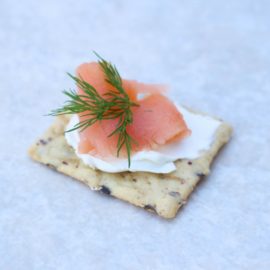
Spruced Up Cheese and Crackers: 3 ways, with 3 ingredients each via RDelicious Kitchen @rdkitchenI fell in love with the smoked salmon and cream cheese combo when I was on a cruise awhile ago. Cruises have endless buffets and is the perfect time to try new foods! During that cruise, I had it every morning for breakfast on a bagel. Bagels are not an everyday type of food for me, so a cracker topper is the perfect solution for my craving. Plus, salmon is packed with omega-3 heart healthy fats.
Print
clock clock iconcutlery cutlery iconflag flag iconfolder folder iconinstagram instagram iconpinterest pinterest iconfacebook facebook iconprint print iconsquares squares iconheart heart iconheart solid heart solid icon
cracker topped with cream cheese, smoked salmon, and dill

Smoked Salmon and Cream Cheese Crackers

  • Author: Julie @ RDelicious Kitchen

Ingredients

  • Flax Seed Artisan Nut Thins or Multi-Seed Artisan Nut Thins
  • Greek yogurt cream cheese (or low fat cream cheese)
  • smoked salmon
  • Fresh dill

Instructions

  1. Put a small smear of cream cheese on an Artisan Nut Thin cracker.
  2. Top with a small piece of smoked salmon and a sprig of fresh dill

Recipe Card powered byTasty Recipes

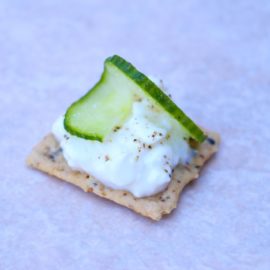
Spruced Up Cheese and Crackers: 3 ways, with 3 ingredients each via RDelicious Kitchen @rdkitchenDid you ever think to put cottage cheese on a cracker? Try it! The little hint of salt from the cottage cheese combined with the cracked pepper and refreshing cucumber is a great cracker topping combo. Plus, cottage cheese is packed with protein, making it a great appetizer choice versus the typical appetizer fare.
Print
clock clock iconcutlery cutlery iconflag flag iconfolder folder iconinstagram instagram iconpinterest pinterest iconfacebook facebook iconprint print iconsquares squares iconheart heart iconheart solid heart solid icon
cracker topped with cottage cheese and cucumber

Cottage Cheese, Cucumber, and Cracked Black Pepper Crackers

  • Author: Julie @ RDelicious Kitchen

Ingredients

  • Flax Seed Artisan Nut Thins or Multi-Seed Artisan Nut Thins
  • Low-fat cottage cheese
  • Cracked black peppercorn
  • English cucumber, thinly sliced

Instructions

  1. Place a small dollop of cottage cheese on an Artisan Nut Thin cracker.
  2. Sprinkle with a pinch of cracked black peppercorn.
  3. Make a slice half way into the center of the cucumber. Fan and place on top of cottage cheese.

Recipe Card powered byTasty Recipes

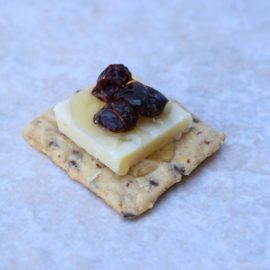
Spruced Up Cheese and Crackers: 3 ways, with 3 ingredients each via RDelicious Kitchen @rdkitchenWho doesn’t love a sweet and salty combo? I always like to think outside the box with my combinations, and this cracker combo hits all the notes. Crunch and touch of salt from the cracker, creamy and salty from the cheddar cheese, chewy and sweet from the raisins, and sweet from honey.
Print
clock clock iconcutlery cutlery iconflag flag iconfolder folder iconinstagram instagram iconpinterest pinterest iconfacebook facebook iconprint print iconsquares squares iconheart heart iconheart solid heart solid icon
cracker with cheese, honey, and dried fruit

Cheddar with Raisins and Honey Crackers

  • Author: Julie @ RDelicious Kitchen

Ingredients

  • Flax Seed Artisan Nut Thins or Multi-Seed Artisan Nut Thins
  • Cheddar cheese
  • Raisins
  • Honey

Instructions

  1. Place a slice of cheddar cheese on an Artisan Nut Thin cracker.
  2. Add a few raisins on top and drizzle with honey.

Recipe Card powered byTasty Recipes

Think outside the box with the typical cheese and cracker fare. No one wants a boring cheese platter anymore. Now you have 3 combos to start with and with only 3 toppings each, making it much less stressful to whip up right before a party.
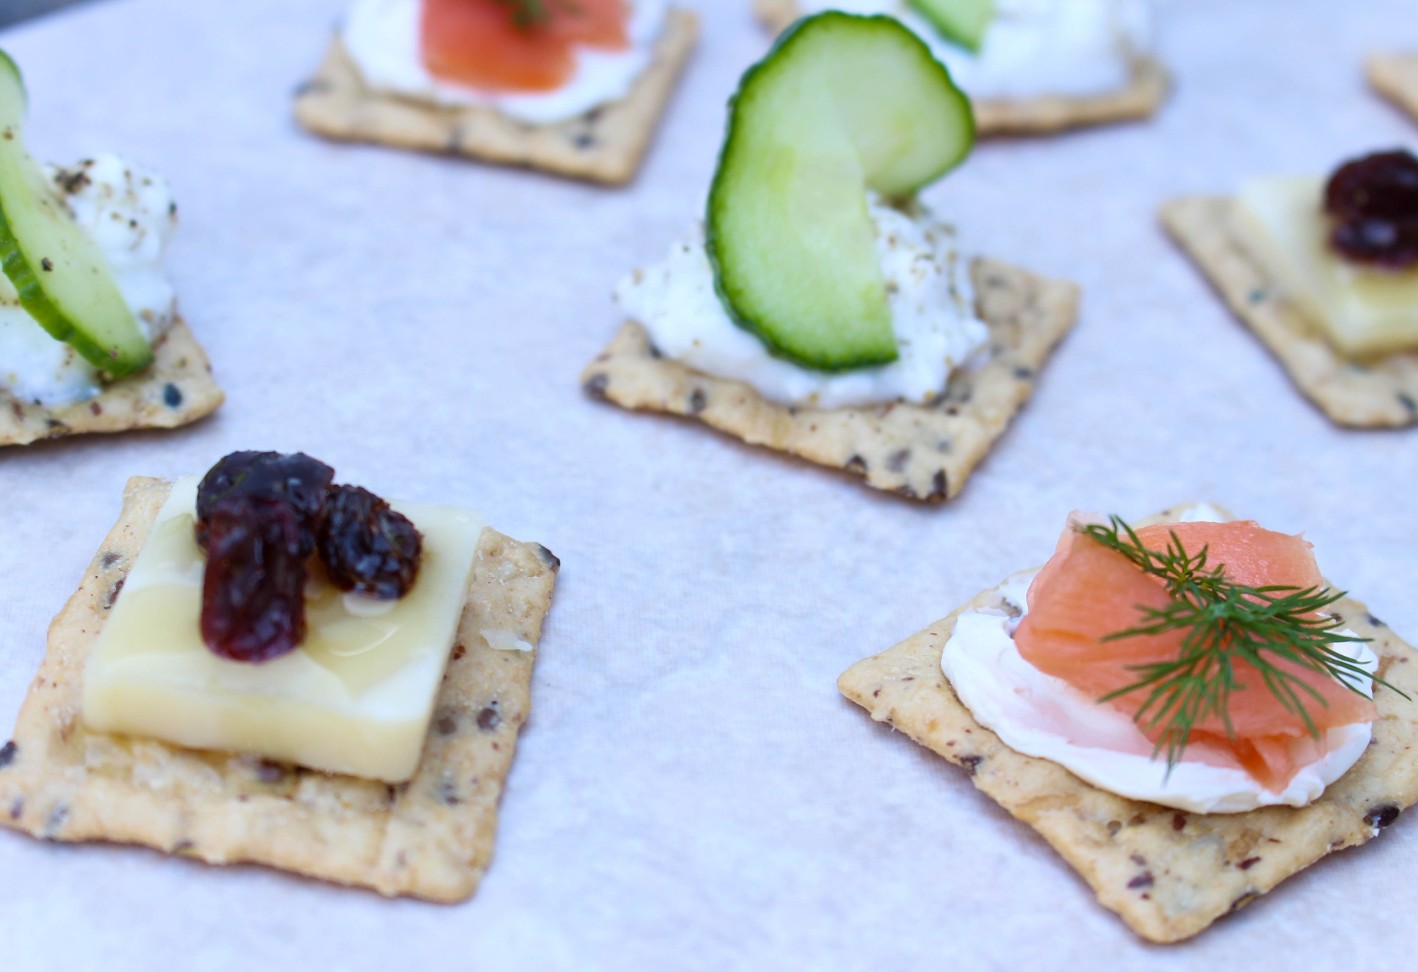
Spruced Up Cheese and Crackers: 3 ways, with 3 ingredients each via RDelicious Kitchen @rdkitchenDon’t even wait until your next party, make these for a nutritious afternoon snack.
Spruced Up Cheese and Crackers: 3 ways, with 3 ingredients each via RDelicious Kitchen @rdkitchenWhat’s your favorite cheese and cracker combo?

Signature

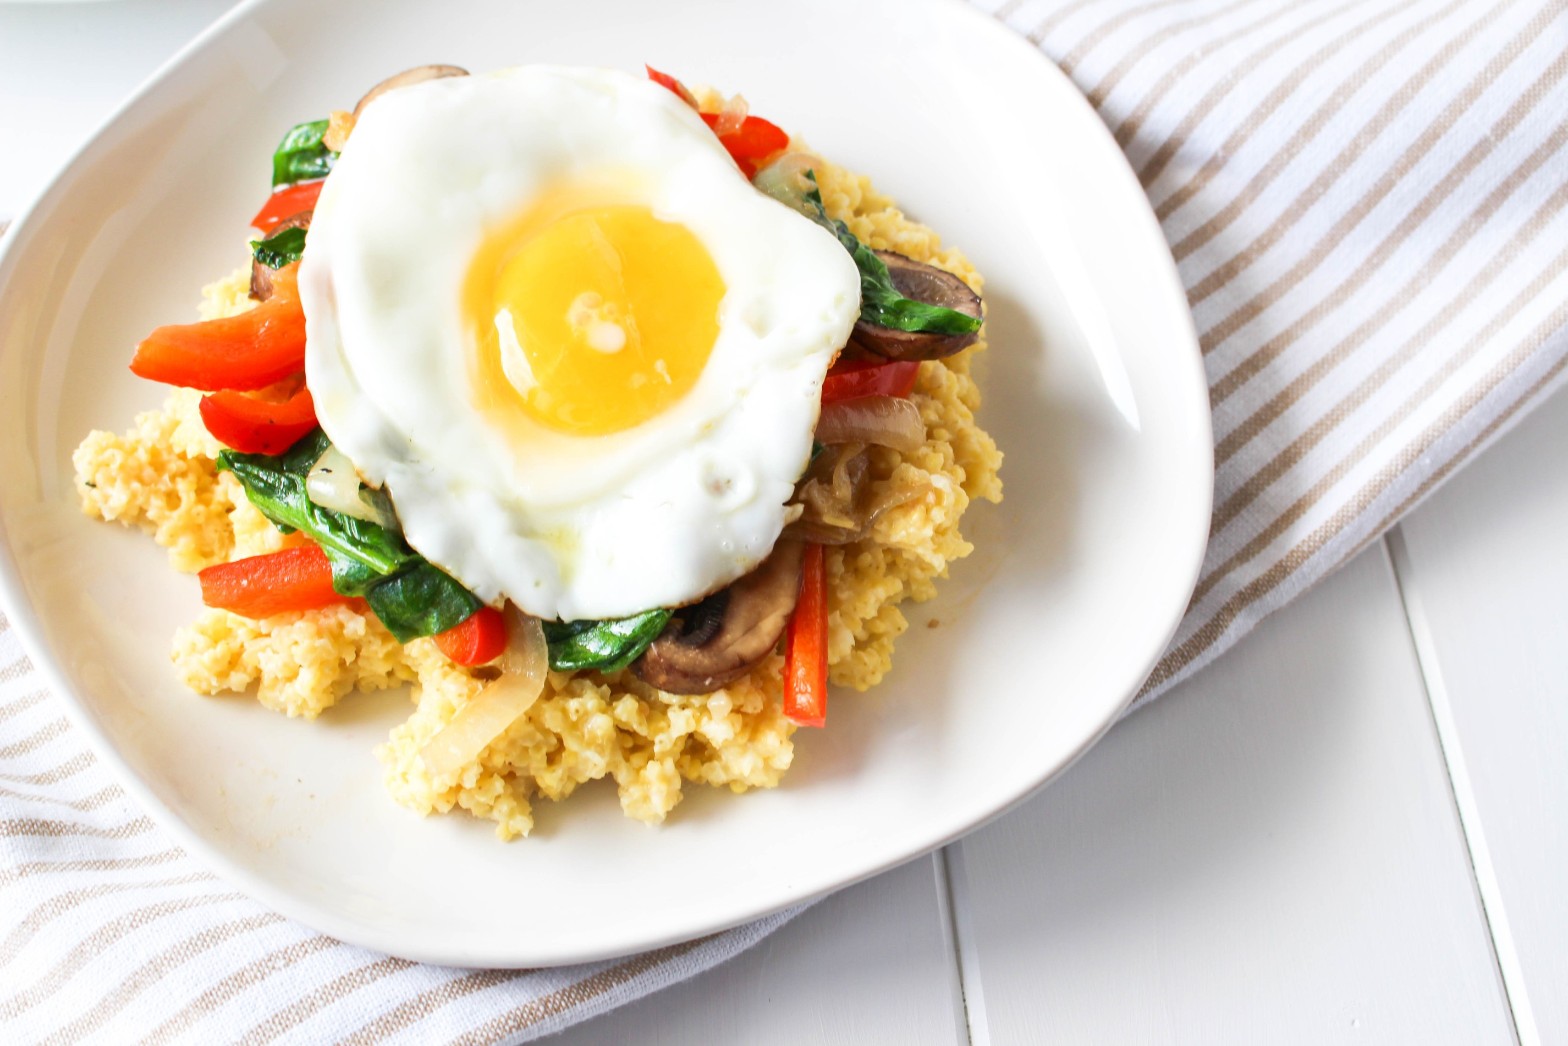
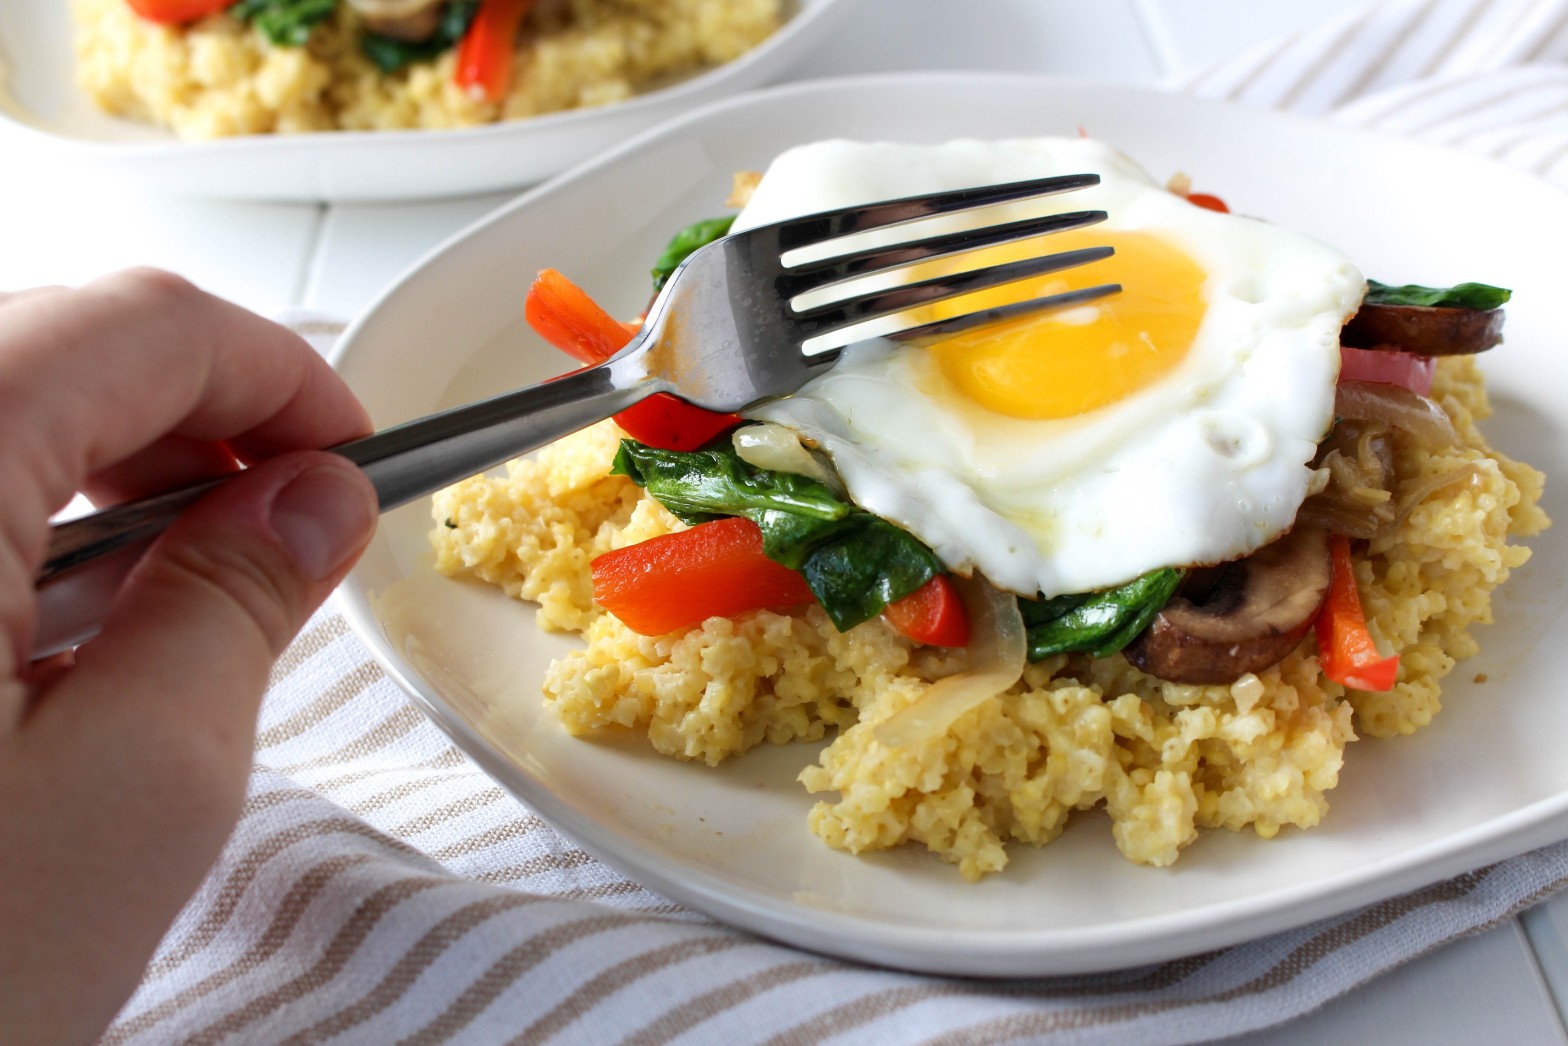
Cheesy Millet with Sautéed Vegetables and Fried Egg

Enjoy for breakfast, lunch or dinner – This Cheesy Millet Sautéed Vegetables and Fried Egg is great at any meal! With whole grains, vegetables, and protein, this dish will keep you satisfied.

Cheesy Millet with Sautéed Vegetables and Fried Egg via RDelicious Kitchen @rdkitchenOn Thursday, I am heading to Maine for the Cabot Fit for the Beach to Beacon 10k race on Saturday. I’ve never been to Maine before and I am super excited to meet up with some blogger friends and make some new ones! I am still in complete shock that I was selected to be part of the Cabot Fit team.

Am I ready for this race? I’m as ready as I can be. Training didn’t necessarily go according to plan, but race day is a whole other ball game that I thrive on. No training run compares to the race day feeling. The positive vibe all around you with everyone cheering you is the absolute best feeling. I have no race time in mind. This is actually the first 10k distance I will be racing at. I have run 5k’s and three half marathons, but no 10k’s just yet. I’m really excited to see how I will do this weekend!
Cheesy Millet with Sautéed Vegetables and Fried Egg via RDelicious Kitchen @rdkitchen
Cabot Fit Team 2015

The team includes:
Anne // fANNEtastic Food
Deanna // Teaspoon of Spice
Whitney // Little Leopard Book
Kita // Pass the Sushi
Kelly // Kelly the Culinarian
Brianne // Cupcakes and Kale Chips
Diane // Cape Fear Nutrition
& Myself!

Cheesy Millet with Sautéed Vegetables and Fried Egg via RDelicious Kitchen @rdkitchenWith Cabot sponsoring this trip, it’s perfect timing to feature this cheesy delicious recipe. I’m obsessed with this recipe creation. Since shooting these photos, I’ve made it an additional 3 times.. not even kidding! It has Cabot cheddar cheese, and a fried egg on top, do you need anything more?

Cheesy Millet with Sautéed Vegetables and Fried Egg via RDelicious Kitchen @rdkitchenHave you ever had millet? It is a whole grain with comparable nutrition facts to quinoa with a good source of protein and fiber. Plus, millet is often a cheaper whole grain variety. With whole grains, vegetables, and protein, this is a well balanced meal that can keep you full and satisfied for hours.

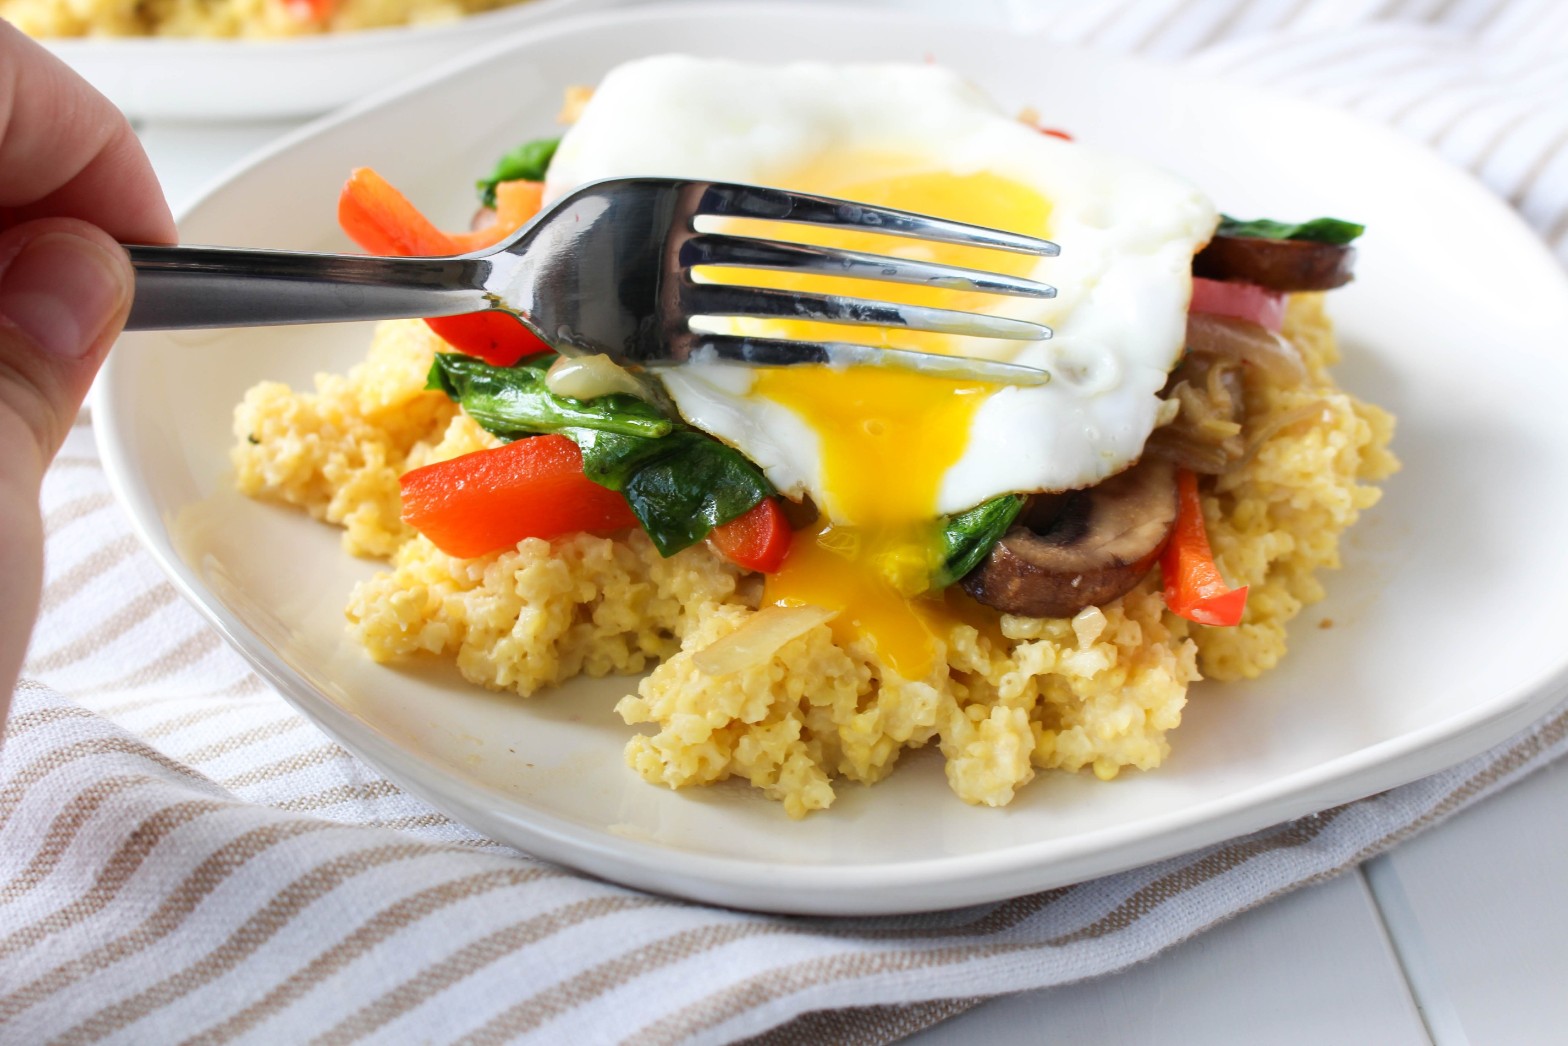
Cheesy Millet with Sautéed Vegetables and Fried Egg via RDelicious Kitchen @rdkitchenEggs are so versatile, and so is this whole meal. It can be enjoyed as a breakfast, lunch, or dinner!
Runny egg for the win! Are you pro runny yolk or go for fully cooked?

Cheesy Millet with Sautéed Vegetables and Fried Egg via RDelicious Kitchen @rdkitchen

Print
clock clock iconcutlery cutlery iconflag flag iconfolder folder iconinstagram instagram iconpinterest pinterest iconfacebook facebook iconprint print iconsquares squares iconheart heart iconheart solid heart solid icon
Cheesy Millet with Sautéed Vegetables and Fried Egg

Cheesy Millet with Sautéed Vegetables and Fried Egg

  • Author: Julie @ RDelicious Kitchen
  • Yield: 4

Description

Perfect for breakfast, lunch, or dinner! A mix of whole grains, vegetables, and protein will keep you satisfied!


Ingredients

Scale
  • 1 cup millet
  • 2 cups water
  • 3/4 cup of your favorite Cabot cheddar cheese, shredded
  • 2 tbsp olive oil
  • 1 small red onion, sliced
  • 2 cloves garlic, minced
  • 1 red bell pepper, sliced
  • 1 cup mushrooms, sliced
  • 3 cups baby spinach
  • 4 eggs
  • salt and pepper

Instructions

  1. Bring water to a boil in a medium sized pot. Add millet; cover, reduce heat to low and simmer until water is dissolved, about 20 minutes. Stir in cheddar cheese while hot.
  2. As the millet is cooking, in a large saute pan, heat olive oil over medium heat. Add onion and garlic, saute until onions are translucent. Add peppers and mushrooms, saute for another 2-3 minutes. Add spinach and cook until wilted. Remove vegetables from the pan into a bowl and set aside.
  3. Coat the bottom of the same pan with cooking spray or additional olive oil (if needed). Crack eggs into the pan and cook until edges begin to brown, or until desired doneness.
  4. Layer each plate with cheesy millet, sauteed vegetables, and top with a fried egg. Season with salt and pepper.

Recipe Card powered byTasty Recipes

Signature

Garden Fresh Ricotta Pizzas

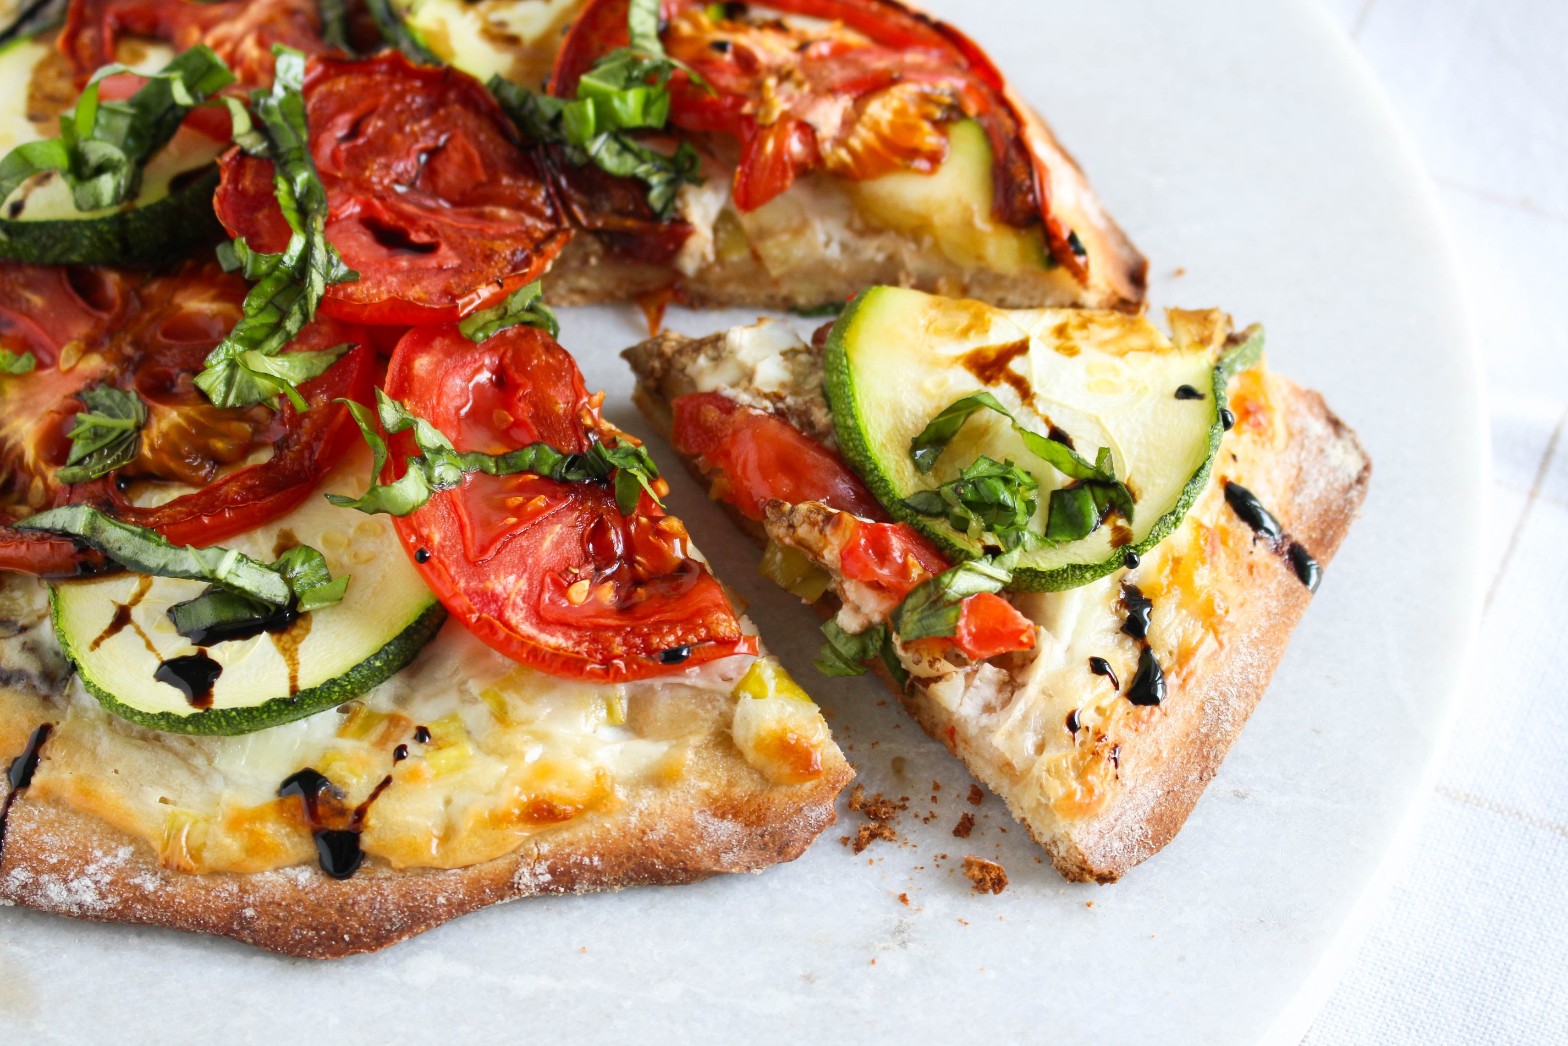
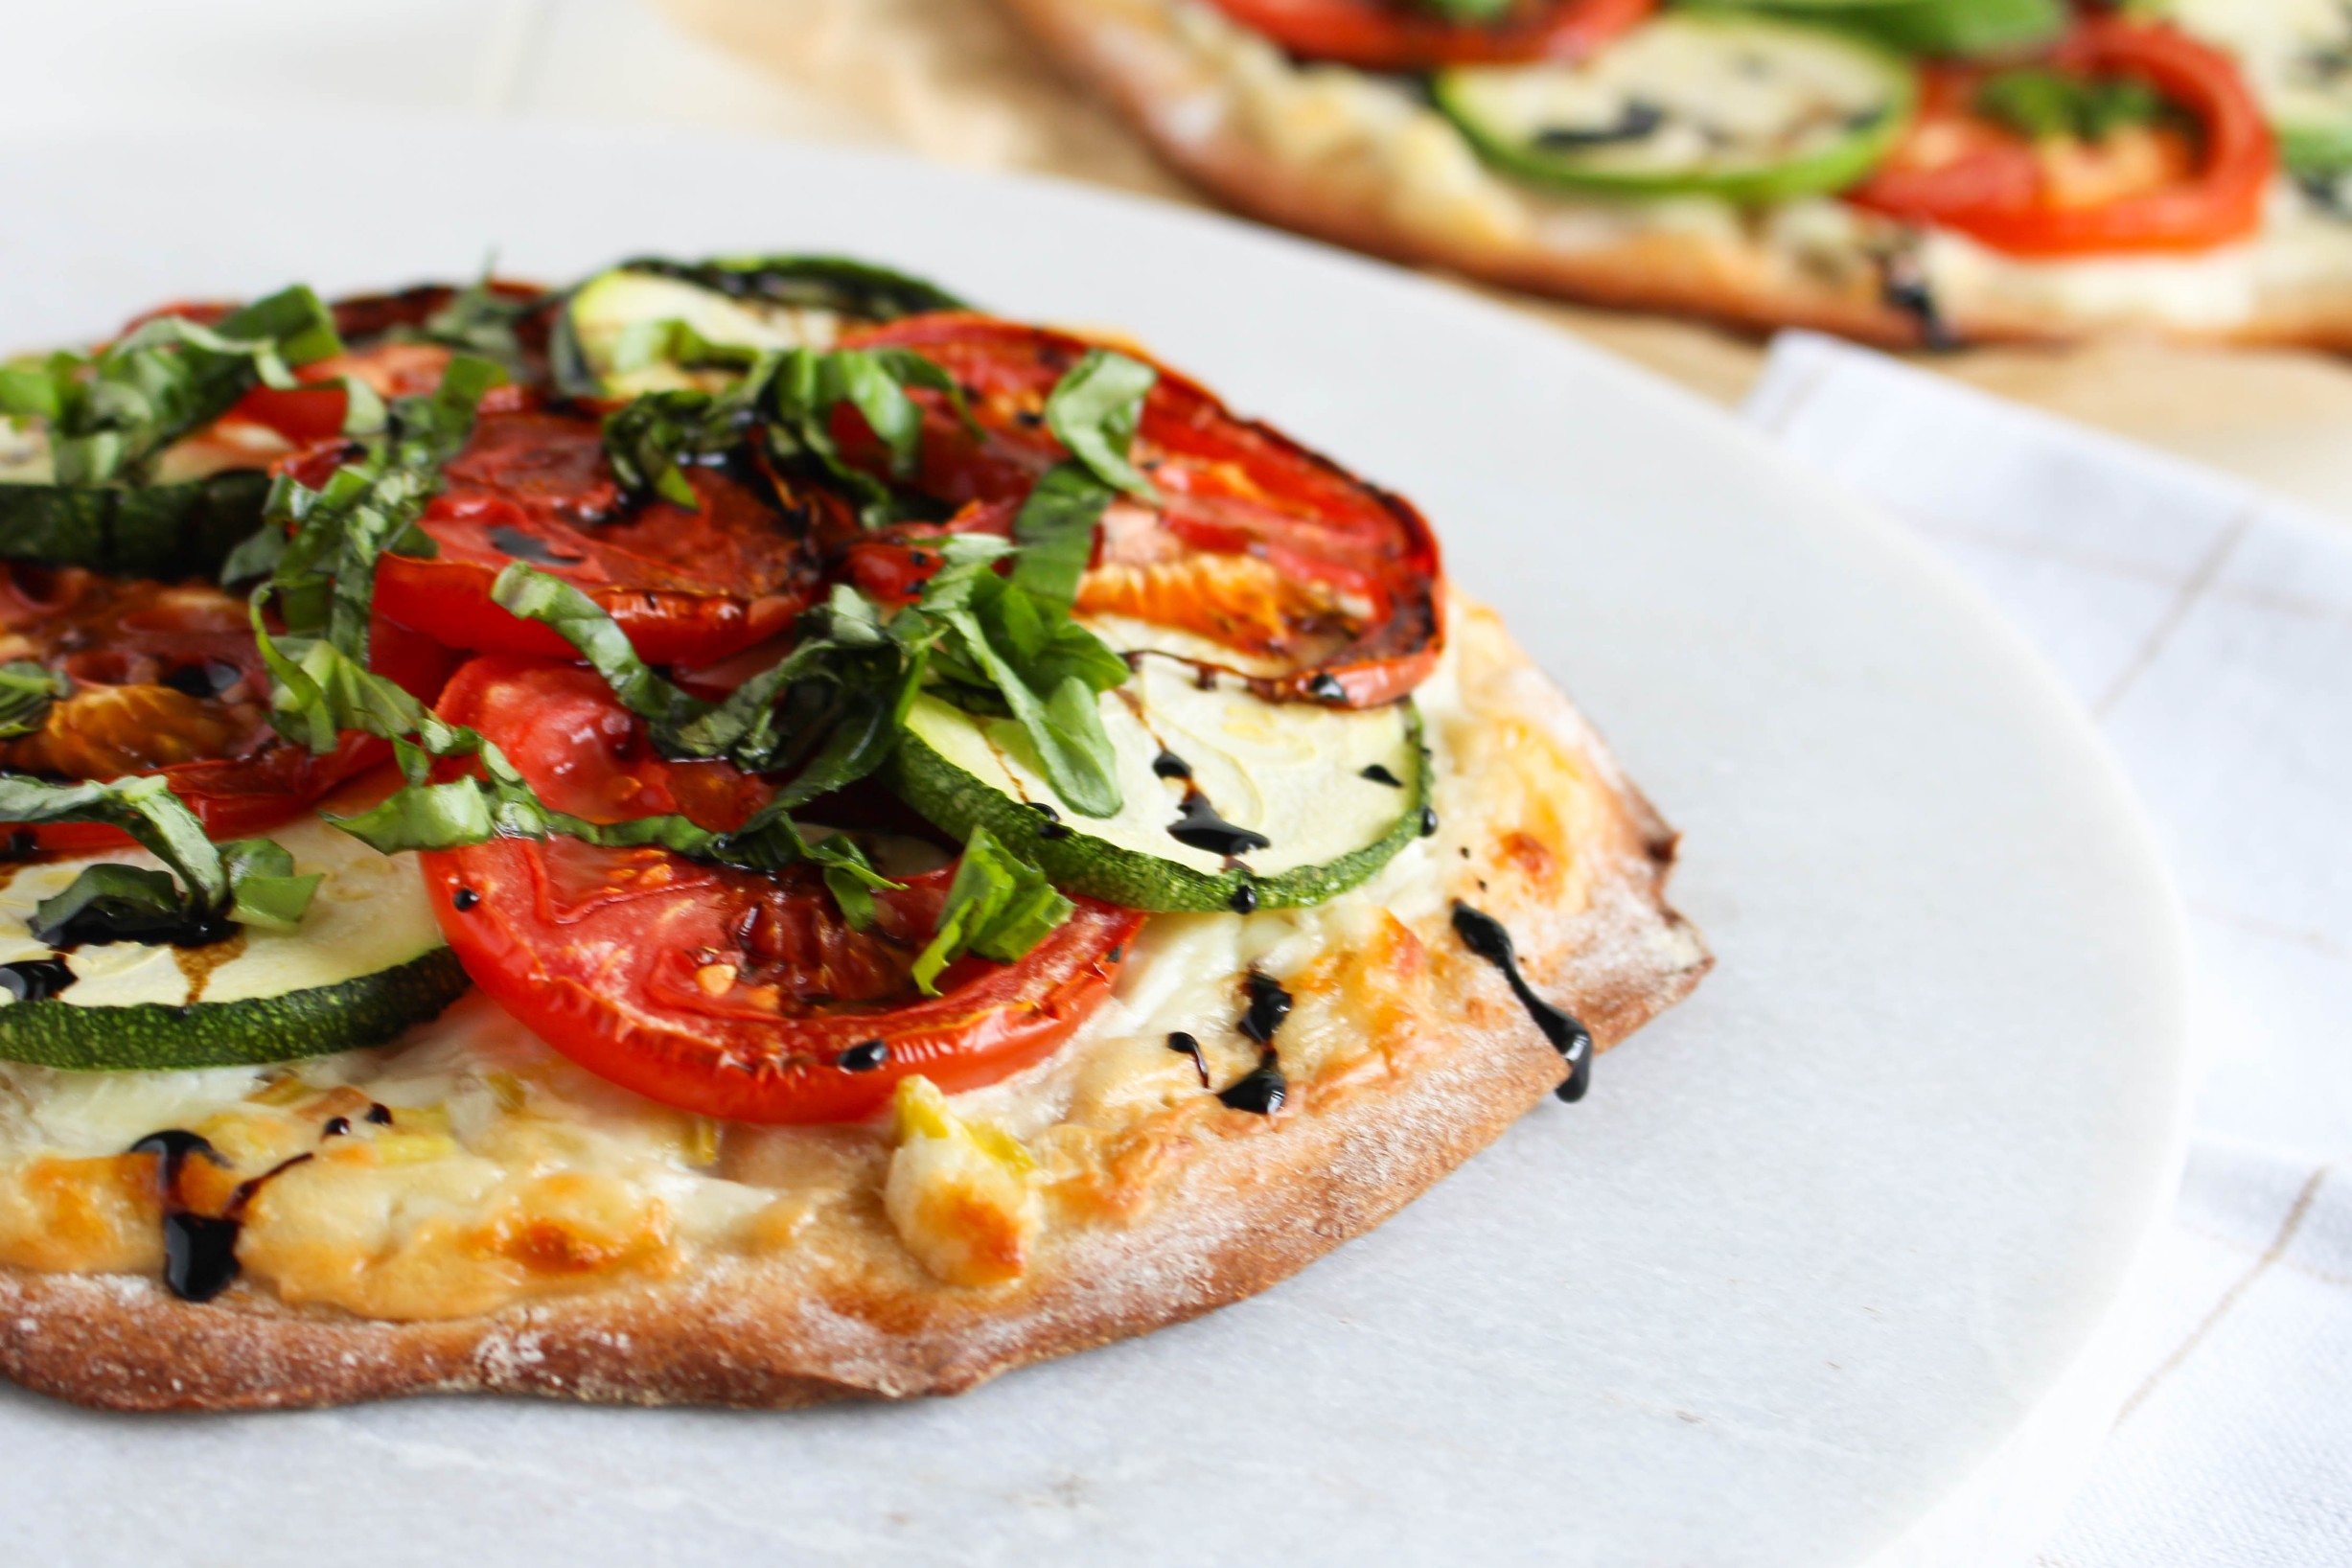
Nothing beats a Jersey fresh tomato in the summertime. Utilize local produce to whip up a seasonal recipe like this Garden Fresh Ricotta Pizza!

Whether it’s fresh from your garden, coming from a Farmers Marker or CSA share, it important to support your local farmers and choose local!

slice of Garden Fresh Ricotta Pizza

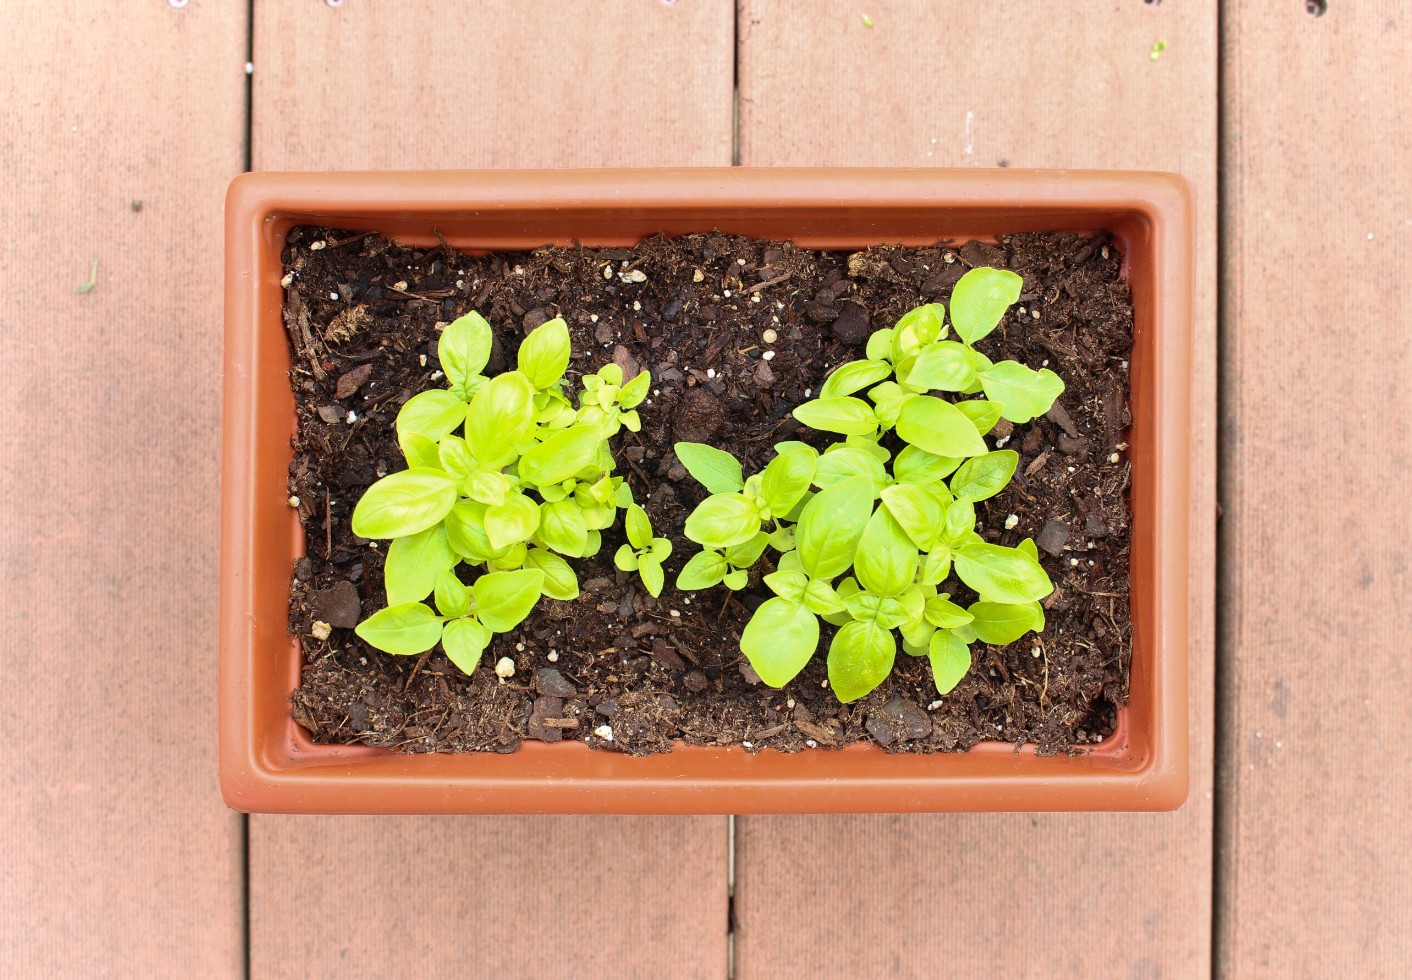
A few weeks ago, I posted on Instagram that Adrian and I created a “balcony garden” at his apartment. We are first time gardeners, and pretty much have no idea what we are doing! A few customers at work have given me some great tips and tricks along the way. We are still learning. It has been really fun so far and it is fun to see our progress!

We planted tomatoes, bell peppers, basil, dill, mint, parsley, and cilantro. Everything is doing great so far. Some growing much faster than others. The mint is growing like crazy. I think I’ll have to make some mojitos soon!

Garden Fresh Ricotta Pizzas via @ RDelicious Kitchen @rdkitchen

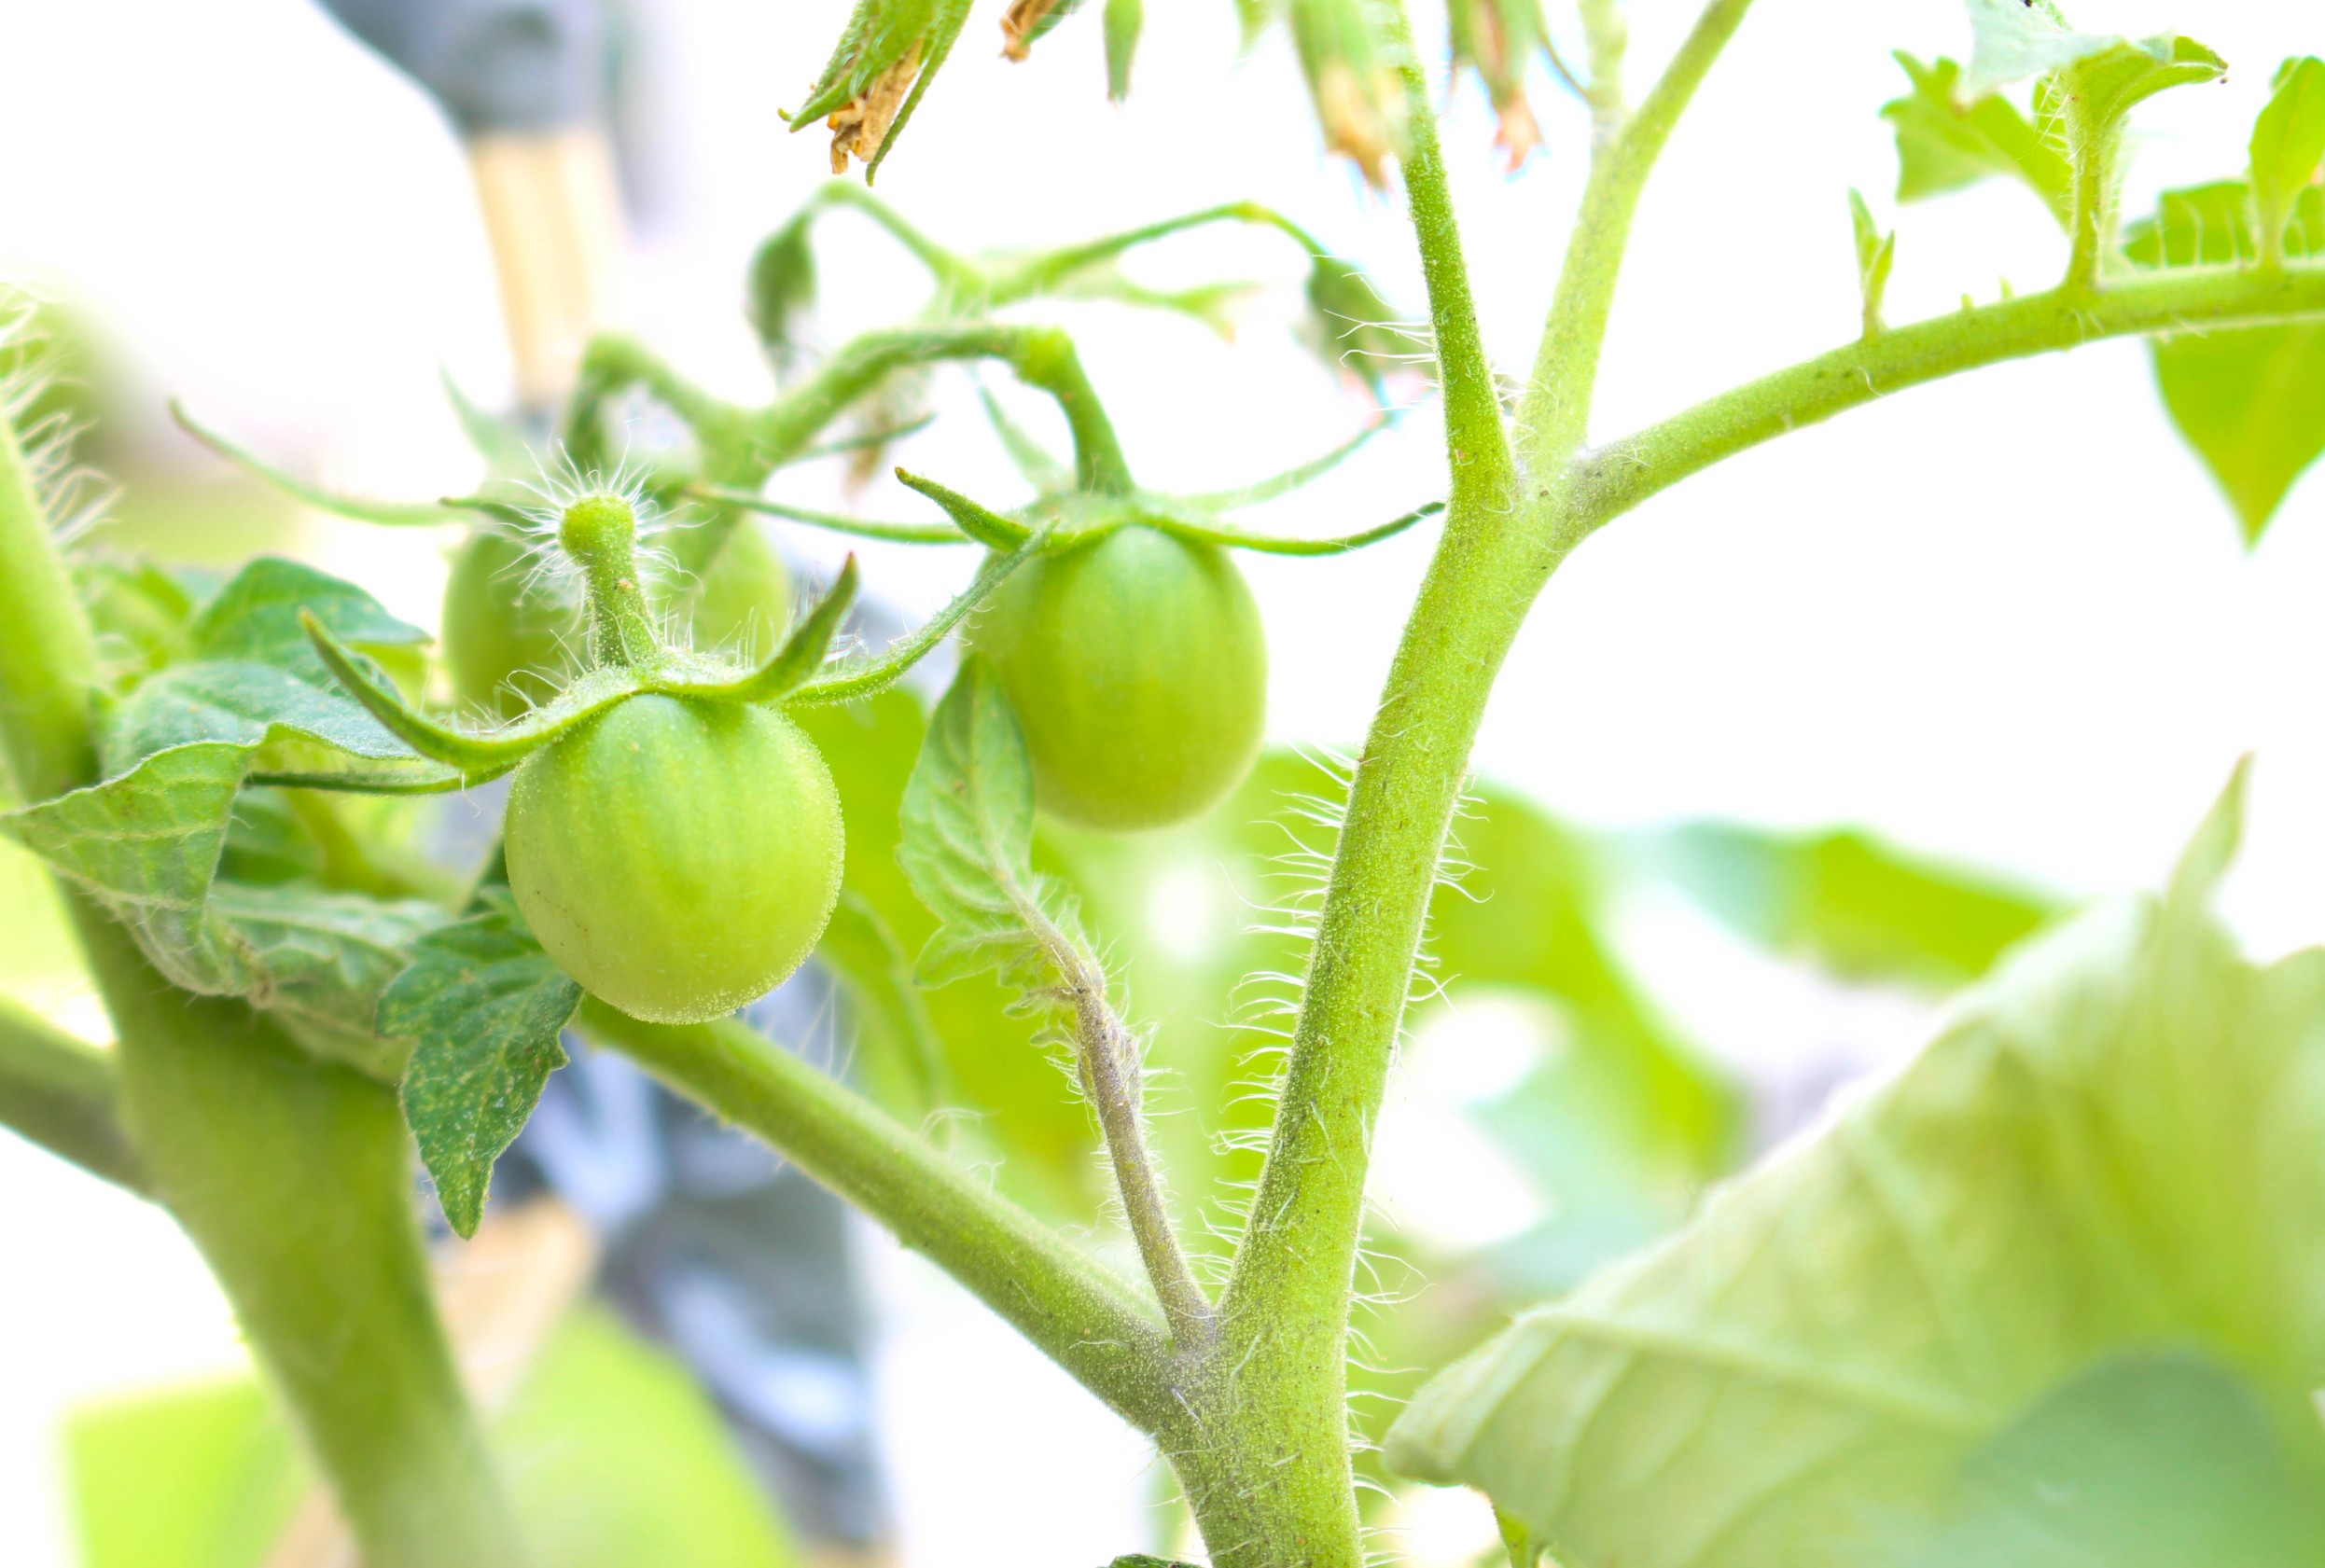
One thing we will have to do a better job next year is starting earlier. Our balcony garden is still at the very beginning of its growth stage and we are unable to utilize any of the produce yet. I am so anxious to try something we grew! We have two little tomatoes that I am overly excited about.

Garden Fresh Ricotta Pizzas via @ RDelicious Kitchen @rdkitchen

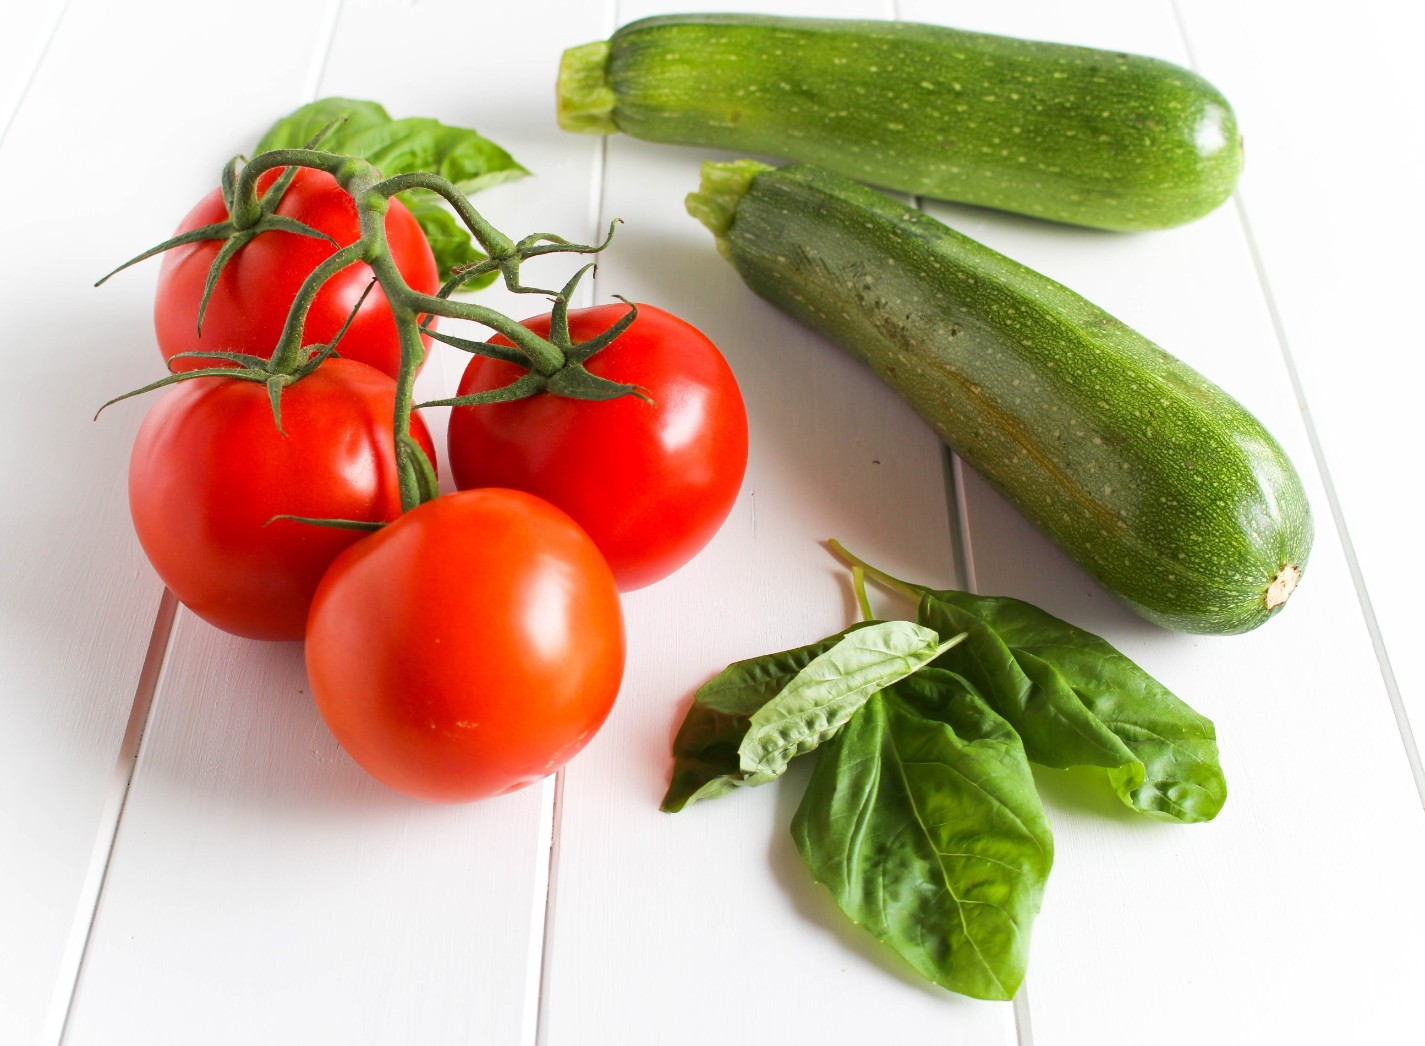
With our garden not being ready to harvest yet, I turned to a local Farmers Market for seasonal produce for this recipe. Living in New Jersey has its perks during this time of year. Jersey Fresh tomatoes are one of my favorite things in the summertime. Plus, I grabbed some zucchini and fresh basil.

Garden Fresh Ricotta Pizzas via @ RDelicious Kitchen @rdkitchen

This isn’t your traditional pizza. I wanted the produce to be the star! The ricotta cheese mixed with sautéed leeks and garlic were the perfect addition to a garden-fresh pizza for the summer. I turned them into four mini pizzas. You could easily make this as one large pizza, but for two people it is easier for portion control.

Garden Fresh Ricotta Pizza on a marble slab

Print
clock clock iconcutlery cutlery iconflag flag iconfolder folder iconinstagram instagram iconpinterest pinterest iconfacebook facebook iconprint print iconsquares squares iconheart heart iconheart solid heart solid icon
slice of Garden Fresh Ricotta Pizza

Garden Fresh Ricotta Pizzas

  • Author: Chef Julie Harrington, RD
  • Prep Time: 15 mins
  • Cook Time: 20 mins
  • Total Time: 35 mins
  • Yield: 4-6 1x

Description

Support local farmers and enjoy this Garden Fresh Ricotta Pizza with seasonal summer produce.


Ingredients

Scale
  • 1 pre-made whole wheat pizza dough
  • 1 leek, sliced
  • 1 tbsp garlic
  • 1 tsp olive oil
  • 1 cup part skim ricotta cheese
  • 1/3 cup mozzarella cheese
  • 34 tomatoes, sliced
  • 2 zucchini, sliced
  • 1/4 cup fresh basil, chopped
  • 1/2 cup balsamic vinegar (or 1/4 cup balsamic glaze)

Instructions

  1. Preheat oven to 425 degrees F. Prepare 2 baking sheets with cooking spray.
  2. In a small pan, add olive oil over medium heat. Saute leeks and garlic until just beginning to crisp. Set aside and let cool.
  3. Divide pizza dough into four equal parts. Roll each out into about an 8-inch round. Place on baking sheet.
  4. In a small bowl, combine ricotta cheese, mozzarella cheese, and leeks & garlic mixture. Evenly spread on each rolled out pizza dough in an even layer.
  5. Evenly layer tomato and zucchini slices on top.
  6. Bake in the oven for 15-20 minutes, until crust is golden brown and vegetables are tender.
  7. While the pizzas are baking, add balsamic vinegar to a shallow pan over low-medium heat. Let simmer, whisking occasionally, until reduced by half to create a balsamic glaze. Remove from heat and pour in a small dish. Let cool.
  8. When pizza is done, drizzle with the balsamic glaze and top with fresh basil.

Keywords: pizza, local, farmers market, vegetarian,

Recipe Card powered byTasty Recipes

What are your top gardening tips & tricks?

Other recipes you may enjoy

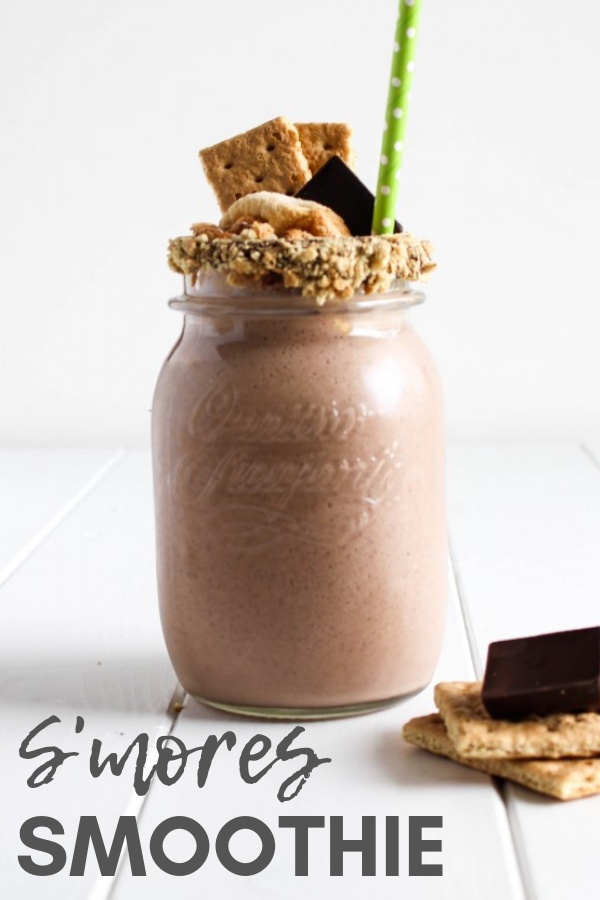
S’mores Smoothie

Power up your blender for a twist of a campfire favorite – s’mores!

S'mores Smoothie - Power up your blender for a twist of a campfire favorite - s'mores! via Chef Julie Harrington, RD @ChefJulie_RD #EasyAsBreeze #ad #smoothie #dessert #smores #summer #classic #recipe

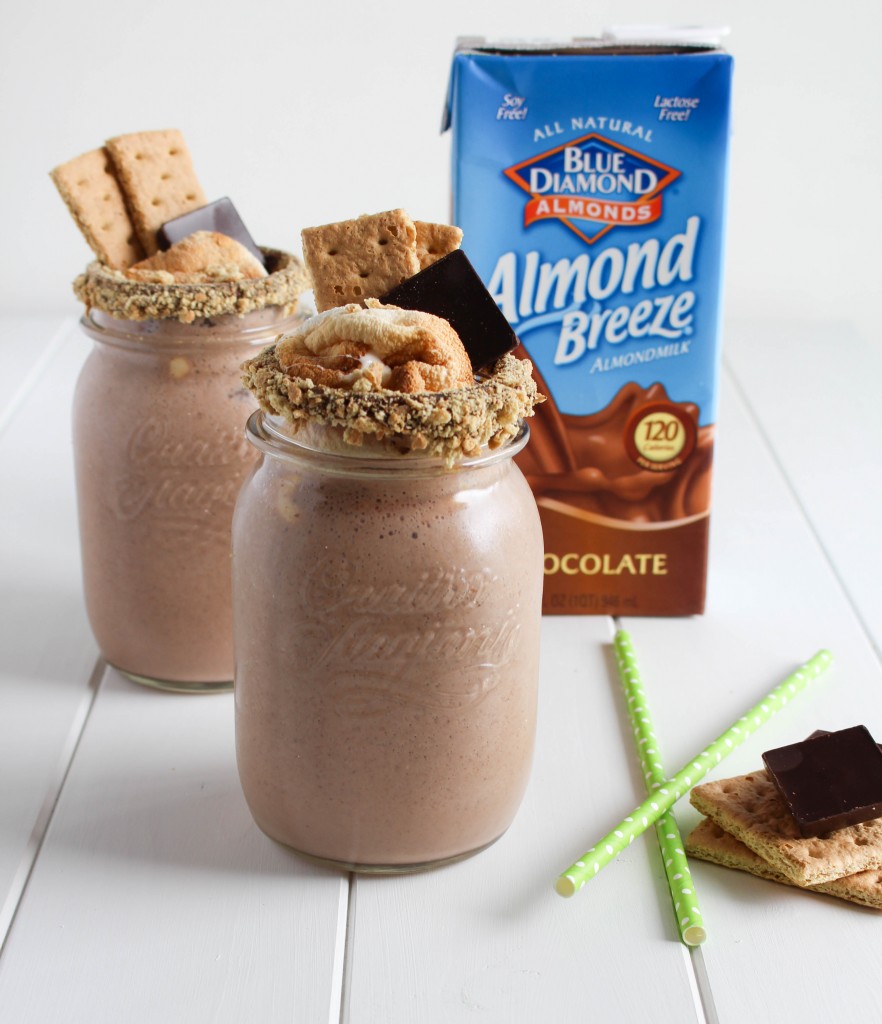
This “Easy as Breeze” post is sponsored by Almond Breeze Almondmilk. Thank you for supporting brands who help make this website possible!

S'mores Smoothie - Power up your blender for a twist of a campfire favorite - s'mores! via Chef Julie Harrington, RD @ChefJulie_RD #EasyAsBreeze #ad #smoothie #dessert #smores #summer #classic #recipe

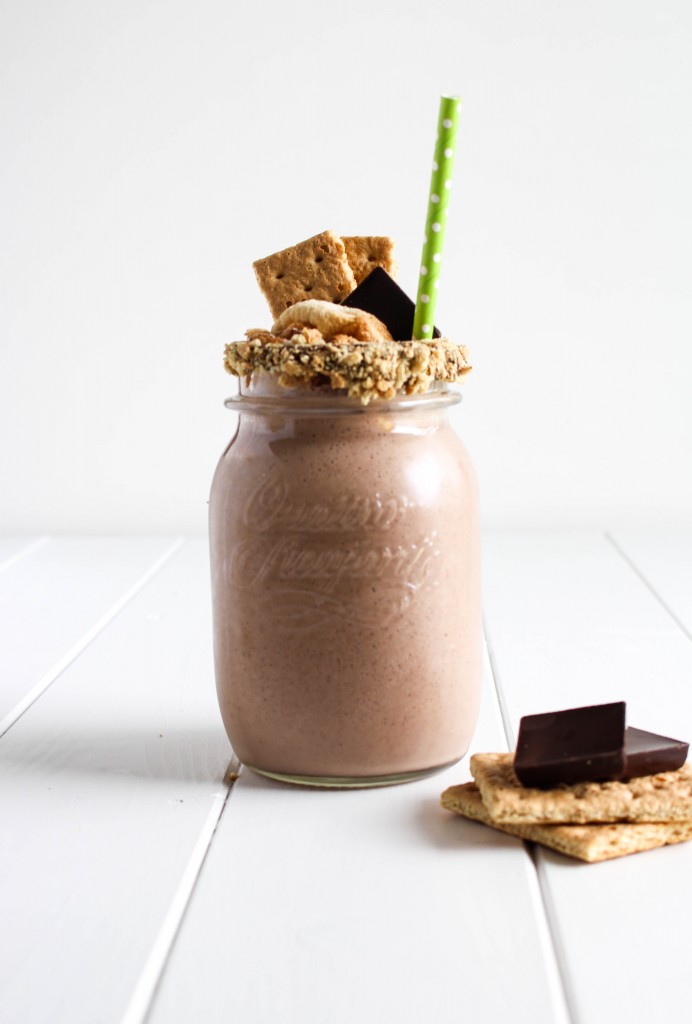
S’mores – it’s a summer time favorite. Summer is not complete without a perfect s’more over a campfire. S’mores creations have really gotten creative lately. Adding a reese pb cup instead of a chocolate square, adding in a brûlée banana slice, or even using chocolate chip cookies instead of graham crackers. I’m thinking a little more out of the box today with a drinkable form.

S'mores Smoothie - Power up your blender for a twist of a campfire favorite - s'mores! via Chef Julie Harrington, RD @ChefJulie_RD #EasyAsBreeze #ad #smoothie #dessert #smores #summer #classic #recipe

As crazy as this sounds, my uncle didn’t know what a s’more was. Uhhhh.. what! How do you not know what a s’more is?! And even after my cousins and I explained it to him, he never says it correctly. He pronounces it like s’moré.

S'mores Smoothie - Power up your blender for a twist of a campfire favorite - s'mores! via Chef Julie Harrington, RD @ChefJulie_RD #EasyAsBreeze #ad #smoothie #dessert #smores #summer #classic #recipe

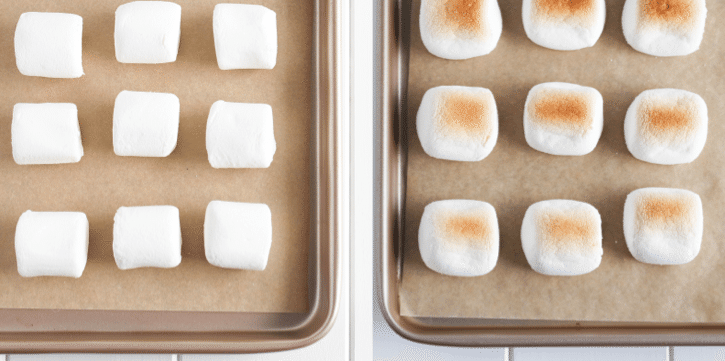
With no opportunity being around a campfire or fire pit yet this summer, I had to improvise to enjoy my s’more craving. Simply toast marshmallows by broiling them. NOTE: keep an eye on them! I burned the first batch, oops!

Learn the history of s’mores.

S'mores Smoothie #EasyAsBreeze via RDelicious Kitchen @rdkitchen

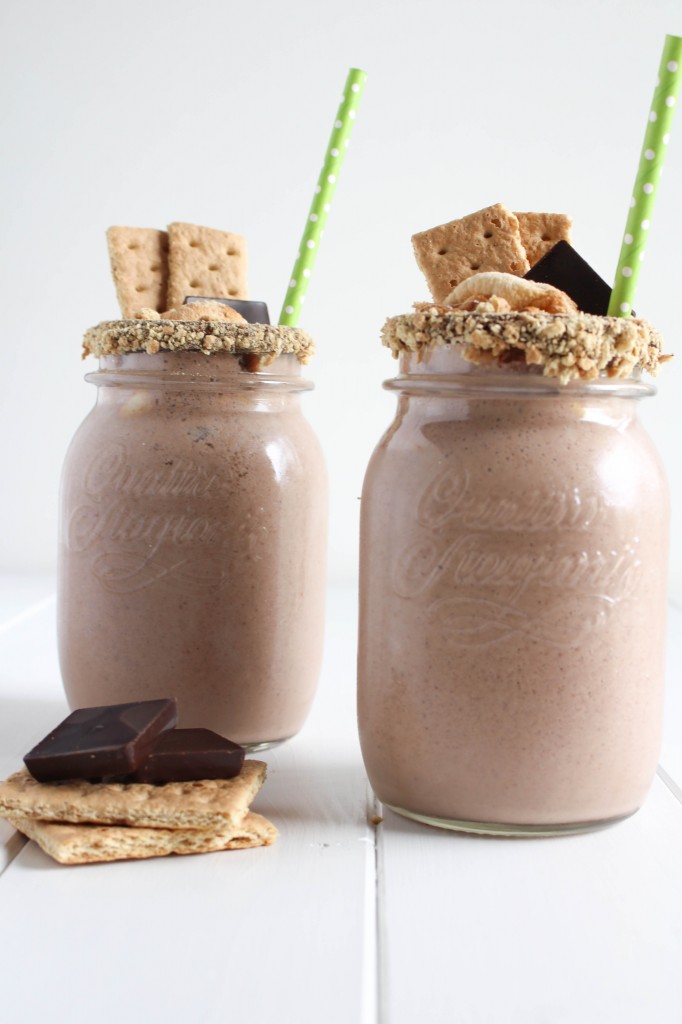
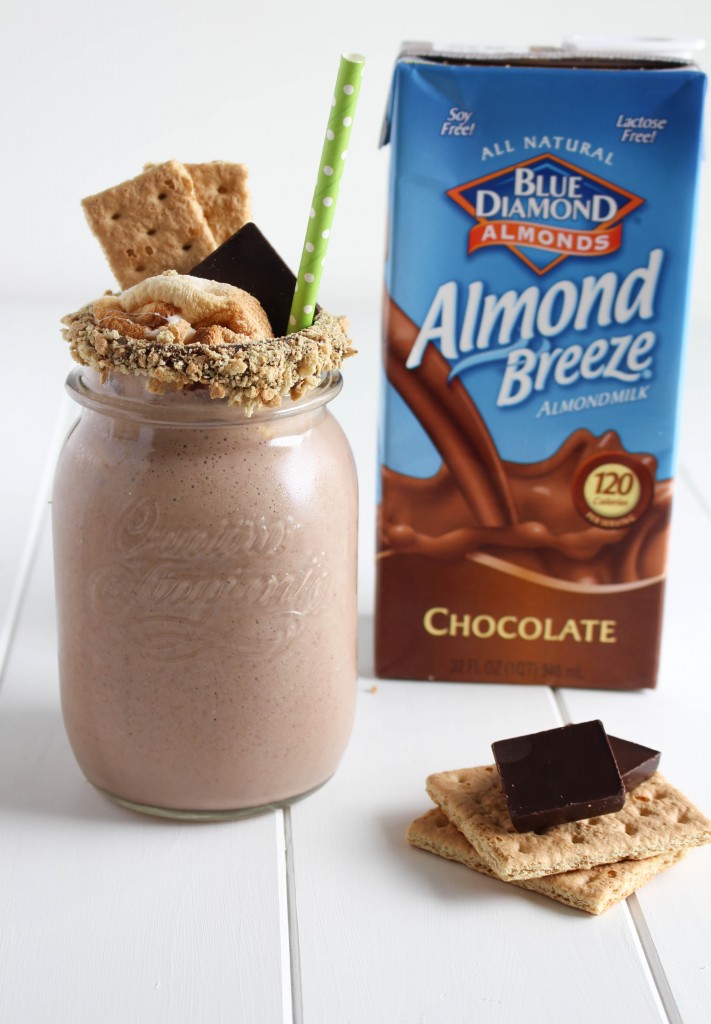
The chocolate almond milk was the perfect addition to make it taste rich and indulgent. It literally tastes like a drinkable s’more. If you have s’mores ingredients at home, it’s time to make a s’more smoothie .. now! You can thank me later.

Print
clock clock iconcutlery cutlery iconflag flag iconfolder folder iconinstagram instagram iconpinterest pinterest iconfacebook facebook iconprint print iconsquares squares iconheart heart iconheart solid heart solid icon
s'mores smoothie in a mason jar with a green straw

S’mores Smoothie

  • Author: Chef Julie Harrington, RD
  • Prep Time: 10 mins
  • Total Time: 10 mins
  • Yield: 2-4 1x
  • Category: Smoothie
  • Method: Blender
  • Cuisine: American

Ingredients

Scale
  • 1 1/2 cups chocolate almond milk
  • 2 cups vanilla Greek yogurt
  • 6 large marshmallows
  • 4 chocolate squares
  • 2 sheets honey graham crackers

Instructions

  1. Line a baking sheet with parchment paper. Place marshmallows on baking sheet and place under broiler on low for 2-3 minutes. (note: keep a close eye on the marshmallows as they can burn quickly)
  2. In a blender, combine the chocolate almond milk, vanilla Greek yogurt, toasted marshmallows, chocolate squares, and graham crackers. Blend until smooth.
  3. (optional) Melt additional chocolate and rim the glasses with chocolate and crushed graham crackers. Add additional toasted marshmallows, graham crackers, and chocolate for a garnish.

Notes

Don’t skip toasting the marshmallows or they will not blend up all the way in the smoothie.

Keywords: s’mores, smoothie, almond milk, chocolate

Recipe Card powered byTasty Recipes
Chef Julie Harrington, RD - Culinary Nutrition Consultant of chefjulierd.com
S'mores Smoothie - Power up your blender for a twist of a campfire favorite - s'mores! via Chef Julie Harrington, RD @ChefJulie_RD #EasyAsBreeze #ad #smoothie #dessert #smores #summer #classic #recipe

Fresh & Easy Tomato Cucumber Salad with Chickpeas and Feta

Looking for a refreshing, protein-packed salad that’s ready in minutes? This Tomato Cucumber Salad with Chickpeas and Feta is a must-try! Loaded with vibrant vegetables, plant-based protein, and creamy feta, this Mediterranean-inspired dish is perfect for meal prep, summer cookouts, or a quick weekday lunch.

Why You’ll Love This Salad

Quick & Easy – Ready in under 15 minutes with simple pantry ingredients.

Healthy & Fresh – Hydrating cucumbers, juicy tomatoes, and fiber-rich chickpeas make it light yet satisfying.

Make-Ahead Friendly – The flavors get even better after a few hours in the fridge.

Ingredients You’ll Need

English cucumbers – peeled and diced

Cherry tomatoes – halved

Canned Chickpeas – drained and rinsed
Did you know by simply rinsing canned beans can reduce sodium by 40%?

Feta cheese – crumbled

Fresh Parsley – or sub with dried

Olive oil – for a heart-healthy fat boost

Lemon juice – adds brightness

Salt & black pepper – to taste

How to Make Tomato Cucumber Salad

Prep the veggies: Peel and dice the cucumbers. Cut the cherry tomatoes in half. Drain and rinse the canned chickpeas.

Toss it all together: In a large bowl, combine cucumbers, tomatoes, chickpeas, feta, parsley, olive oil, lemon juice, salt, and pepper.

Taste and adjust: Mix well, taste, and adjust seasoning if needed. Serve immediately or chill to let the flavors meld.

Recipe Tips & Variations

Add Fresh Herbs: Swap dried parsley for fresh parsley, dill, or mint for a vibrant twist.

Make It a Meal: Add grilled chicken, salmon, or quinoa for extra protein and staying power.

Vegan Option: Use a plant-based feta alternative or omit cheese entirely.

Meal Prep Tip: Store in an airtight container in the fridge for up to 3 days.

Nutrition Highlights

High in fiber and plant protein from chickpeas

Hydrating and low in calories from cucumbers and tomatoes

Rich in calcium and flavor from feta cheese

Print
clock clock iconcutlery cutlery iconflag flag iconfolder folder iconinstagram instagram iconpinterest pinterest iconfacebook facebook iconprint print iconsquares squares iconheart heart iconheart solid heart solid icon
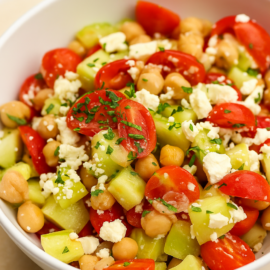
white bowl with chickpeas, tomatoes, cucumber, feta cheese, and parsley

Cucumber, Tomato, Chickpea Salad

  • Author: Chef Julie Lopez, RD
  • Prep Time: 10 mins
  • Total Time: 10 mins
  • Yield: 8

Ingredients

Scale
  • 2 English cucumbers, peeled and diced
  • 1 pint cherry tomatoes, halved
  • 1 (15 oz.) can chickpeas, drained and rinsed
  • 1/2 cup feta cheese
  • 1 tablespoon chopped fresh parsley
  • 1 tablespoon olive oil
  • 1 tablespoon lemon juice
  • salt & pepper, to taste

Instructions

  1. Toss cucumbers, tomatoes, chickpeas, feta cheese, parsley, olive oil, lemon juice, salt & pepper in a large bowl.
  2. Adjust seasonings, to taste and serve.

Recipe Card powered byTasty Recipes

📌 Save This Tomato Cucumber Salad Recipe!

Whether you’re meal-prepping for the week or need a colorful side dish for a potluck, this easy chickpea cucumber salad is a go-to that everyone will love. Plus, it’s naturally gluten-free and packed with nutrients.

Don’t forget to pin or bookmark this post for later!

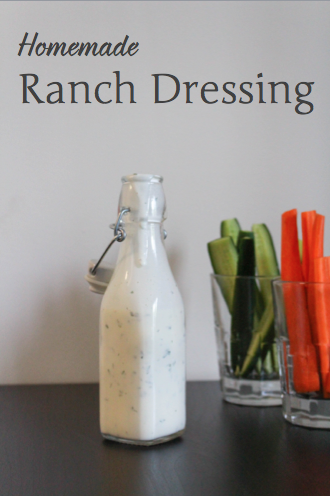
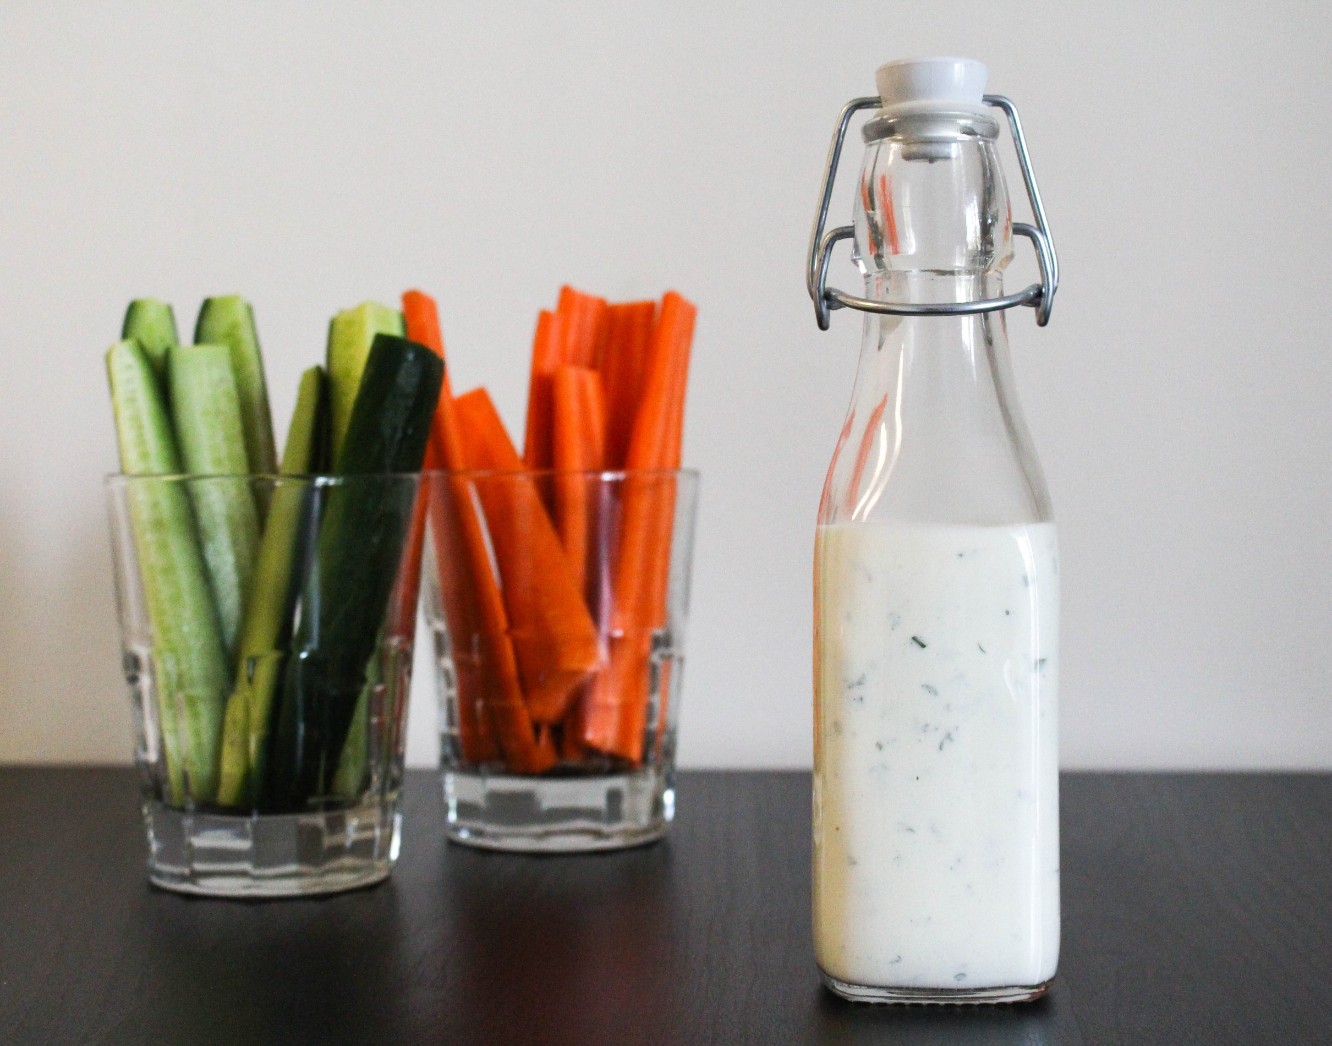
Homemade Ranch Dressing

Love eating veggies dunked in ranch? Learn to make a homemade ranch dressing and feel okay with using raw eggs when using Davidson’s Safest Choice Eggs, a great option for all your recipes using raw or gently cooked eggs.

Homemade Ranch Dressing via RDelicious Kitchen @rdkitchenDisclosure: I received coupons for free samples of Davidson’s Safest Choice Eggs mentioned in this post. By posting this recipe I am entering a recipe contest and am eligible to win prizes associated with the contest. I was not compensated for my time. 

Homemade Ranch Dressing via RDelicious Kitchen @rdkitchenI recently taught a nutrition class about label reading and brought along various food items to evaluate.  As we went through the class learning about the different aspects of the nutrition facts panel, comparing labels, and discussing each item, people were astounded when we got to the ingredient list of their favorite items and couldn’t believe that in the every day foods they are consuming, they can’t even pronounce the ingredients! One of these items I brought to review was ranch dressing, that came along with a laundry list of ingredients. One person noticed that there were eggs in it, but the dressing is not cooked. To make a nice creamy buttermilk ranch, raw eggs are used. The bottle version is safe to eat, because it has added preservatives making it shelf stable.
But what if you want to make it at home? Can you use any eggs. No. You run the risk of salmonella.
Use Davidson’s Safest Choice Eggs because of their natural pasteurization process that uses a warm water bath that eliminates the the risk of Salmonella in eggs, but does not change the taste or nutritional value. Now you can have a peace of mind making a homemade ranch dressing to dunk your vegetables in!
Homemade Ranch Dressing via RDelicious Kitchen @rdkitchenThis recipe was one of those third times a charm kind of recipes. The first time I tried making it my measurements were off and it was a watery mess. The second time, my measurements were on point but the dressing broke and didn’t keep its creamy consistency. The third time.. well that’s where we are today! .. Delicious and ready to be eaten (& posted)!
The key for this recipe is patience.
Homemade Ranch Dressing via RDelicious Kitchen @rdkitchenFirst, we are starting off with a mayonnaise base of egg yolk, lemon juice (or an acid like vinegar), and oil. I made mine with good ole elbow grease. You can use a blender or food processor, but you are less in control and your mayonnaise may break more easily.
Start by whisking your egg yolk (and dijon mustard for a pop of flavor) creating a thick creamy consistency.
This is where patience is key.  The next step is where many (myself included during my second attempt of this recipe) make the mistake of adding the oil too quickly, causing the base to split. The egg yolk and mustard are going to grab hold of the oil and not letting it become thick and fluffy preventing the emulsification process. Add a few drops of oil at a time as you continuously whisk, then gradually progress to a steady stream as you remain whisking.
Don’t be alarmed as you whisk the color becomes a bright yellow. Once you add the lemon juice (acid) the color instantly lightens up. Then whisk in the buttermilk, yogurt, and seasonings to create the rest of the ranch dressing!

Print

clock clock iconcutlery cutlery iconflag flag iconfolder folder iconinstagram instagram iconpinterest pinterest iconfacebook facebook iconprint print iconsquares squares iconheart heart iconheart solid heart solid icon
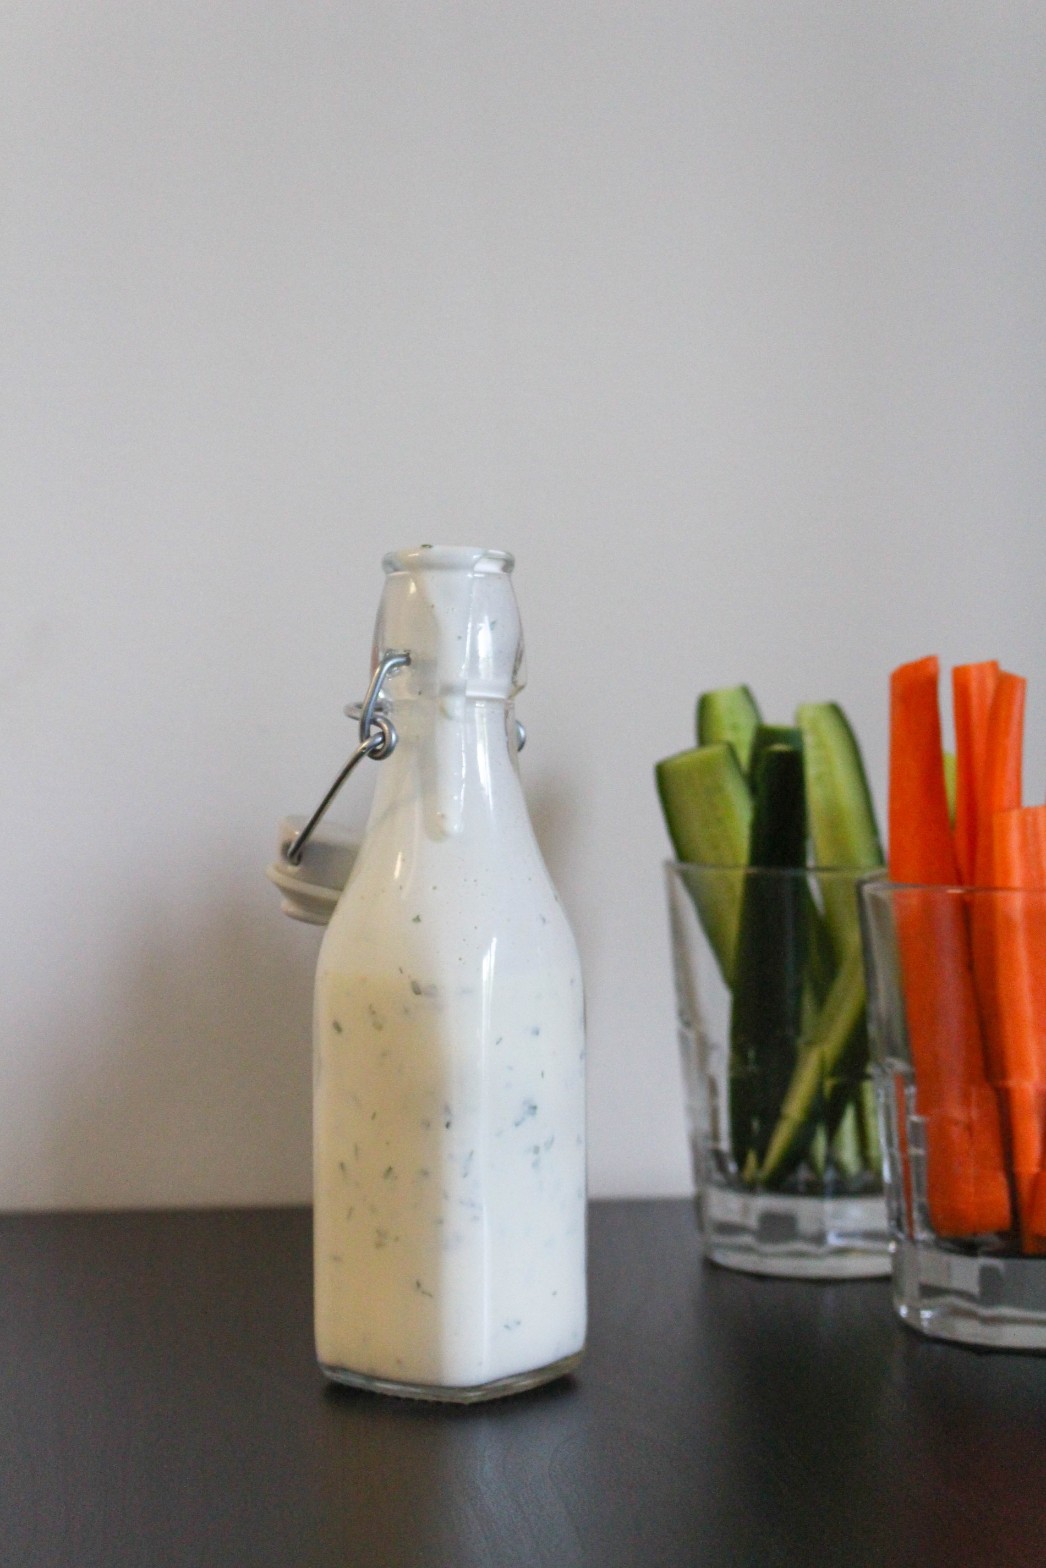
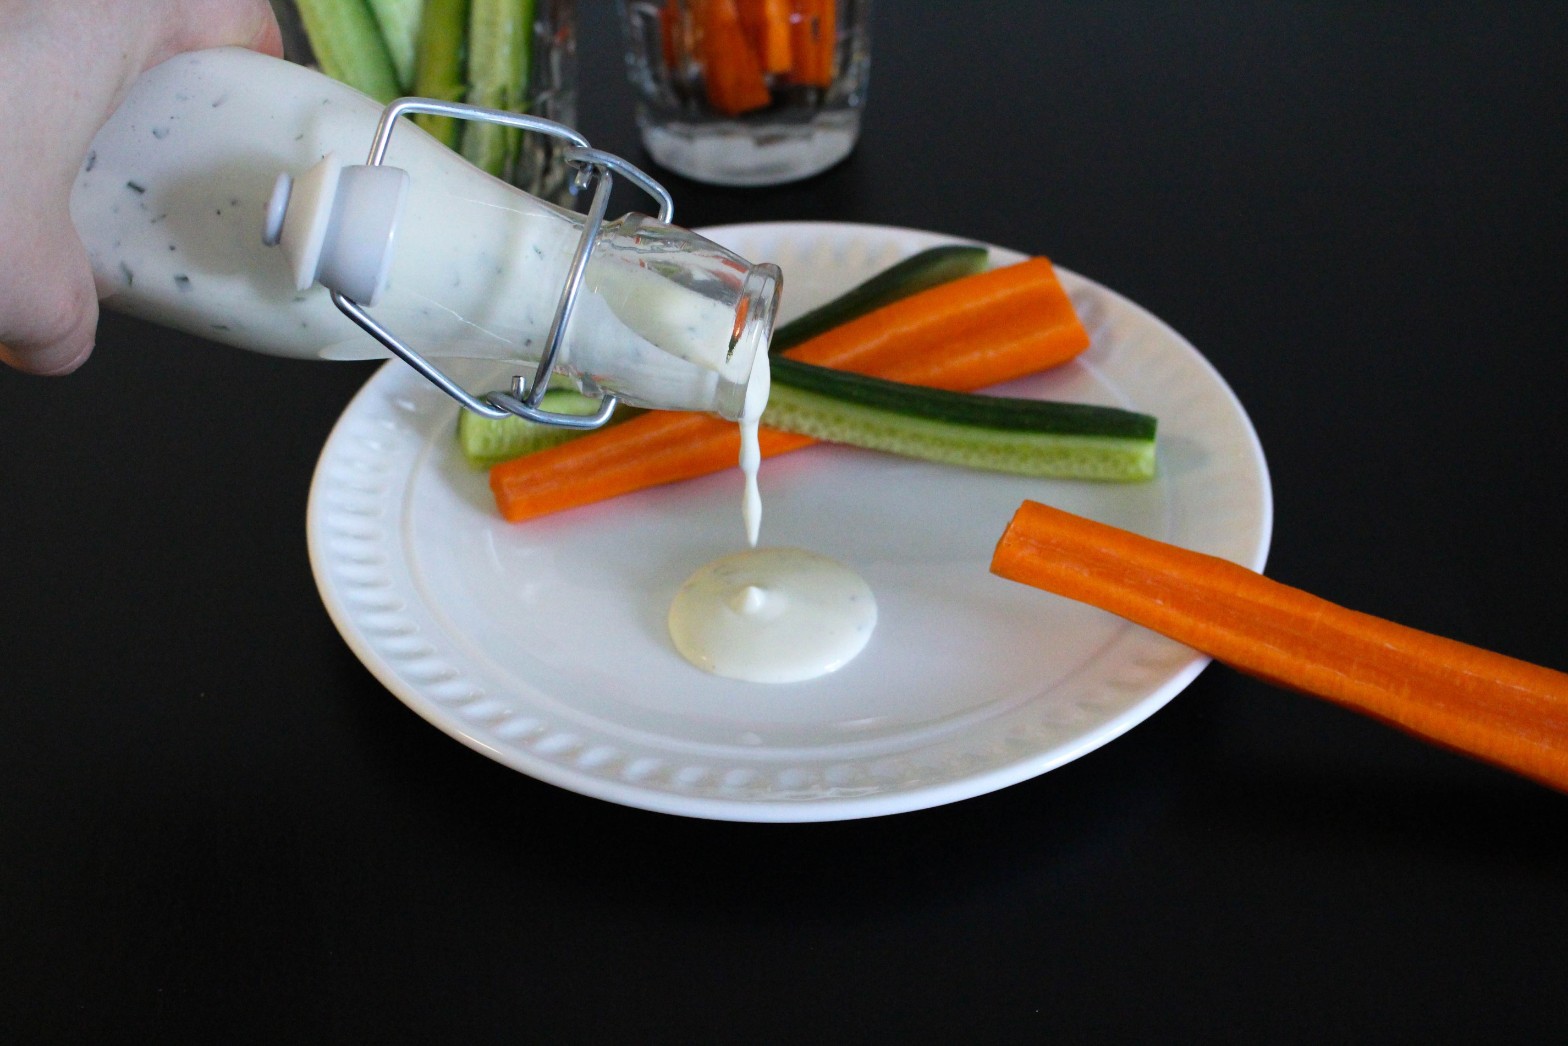
homemade ranch dressing in a glass jar with vegetables

Homemade Ranch Dressing

  • Author: Julie @ RDelicious Kitchen
  • Yield: 16 1x

Ingredients

Scale
  • 1 Davidson’s Safest Choice Pasteurized Egg yolk
  • 1 tsp dijon mustard
  • 1/2 cup canola oil
  • 1 tsp lemon juice
  • 1/4 cup reduced-fat buttermilk
  • 1/2 cup plain Greek yogurt
  • 1/2 tsp salt
  • 1/8 tsp pepper
  • 1 1/2 tsp dried parsley
  • 1 tsp dried chives
  • 1 tsp dried dill

Instructions

  1. In a large bowl, whisk together the Davidson’s Safe Egg yolk and mustard.
  2. Slowly, in a light steady stream, vigorously whisk in the canola oil until thickens. This is creating a mayonnaise base. Whisk until thick and creamy. (see blog post for detailed instructions of this step)
  3. Continue to whisk, add lemon juice, then buttermilk and yogurt.
  4. Whisk in salt, pepper, dried parsley, dried chives, and dried dill. Adjust seasonings to your flavor preference.

Recipe Card powered byTasty Recipes

Signature


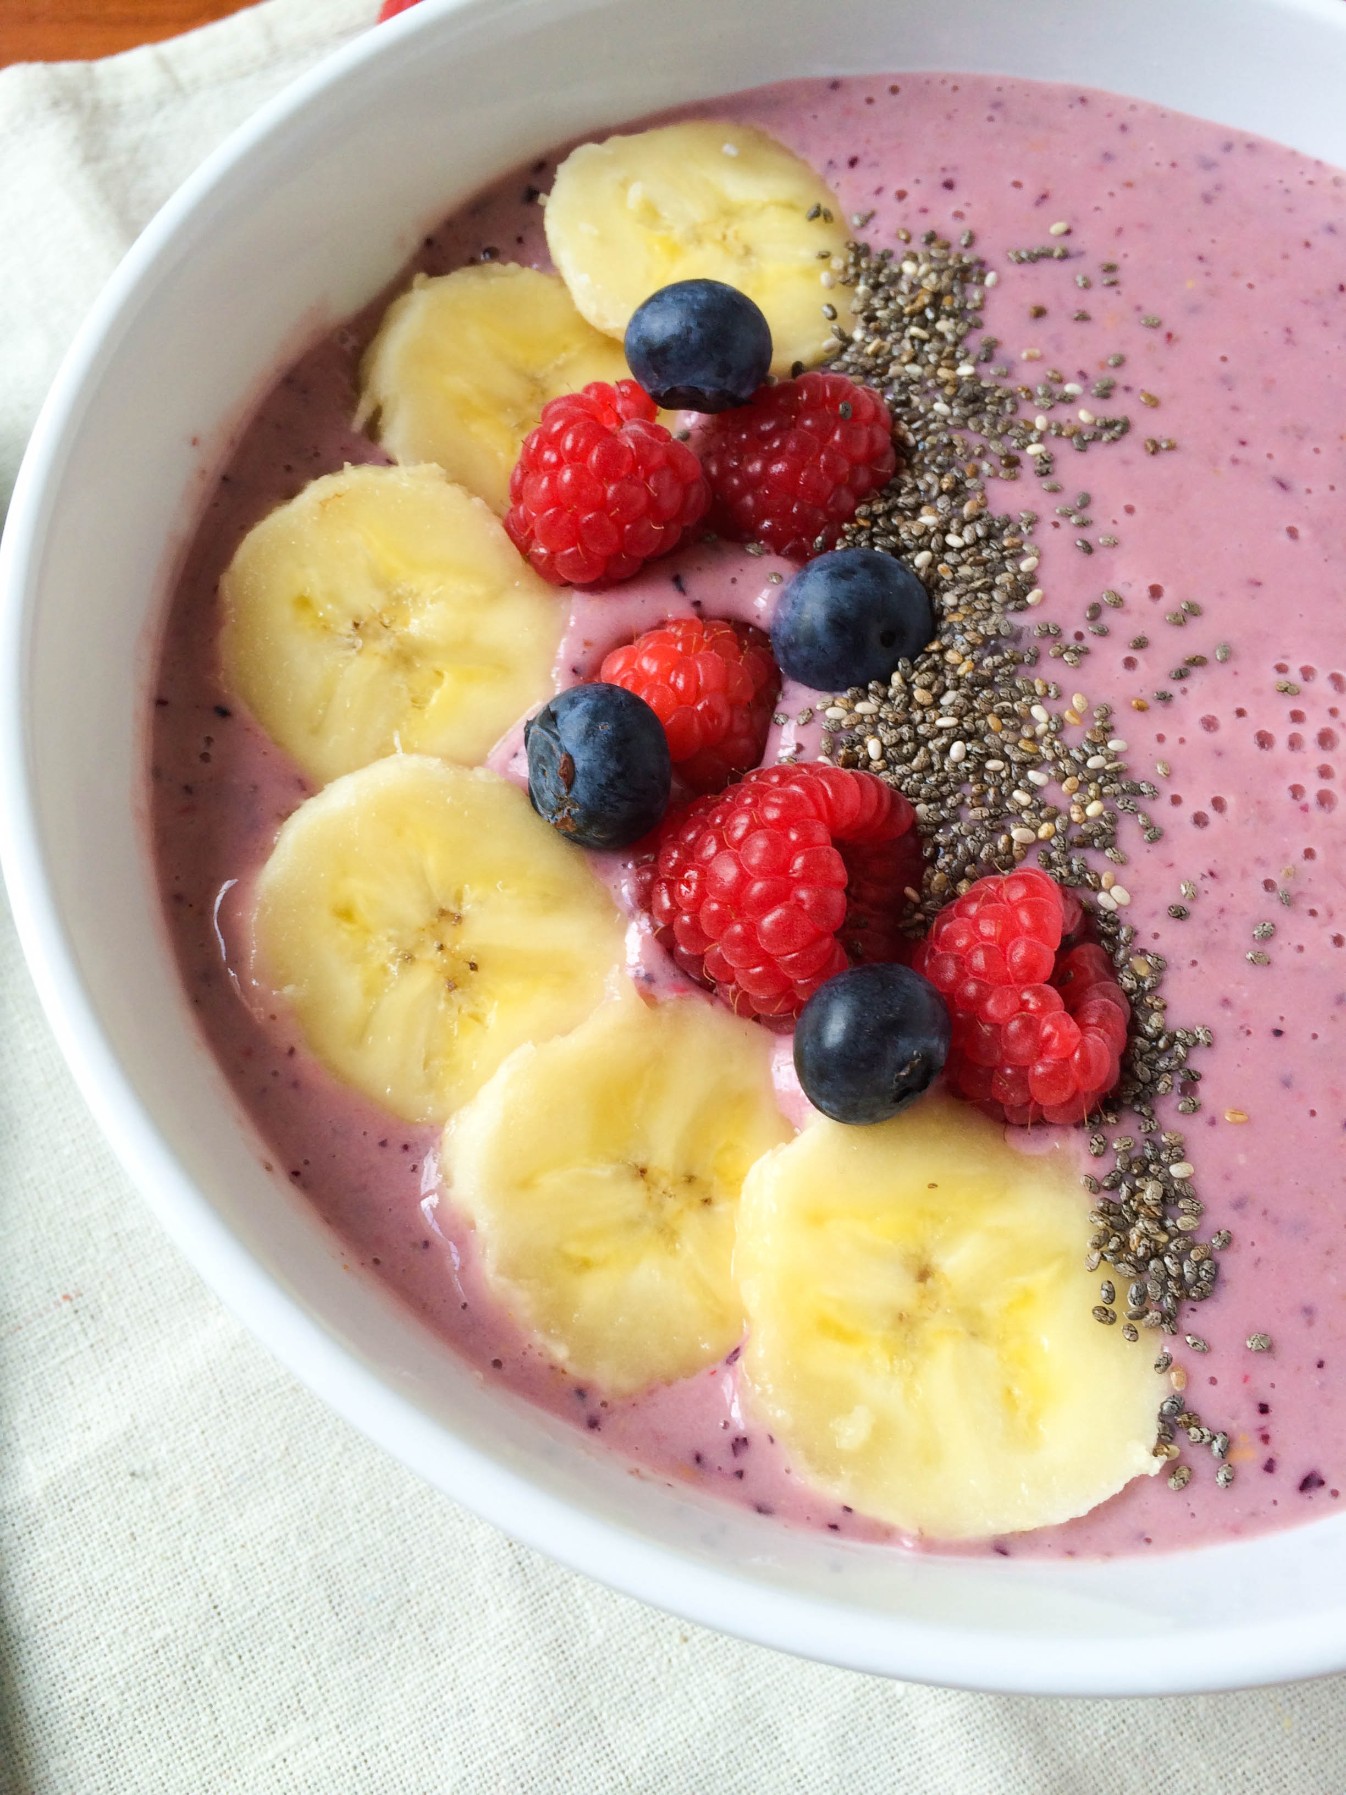
Very Berry Smoothie Bowl

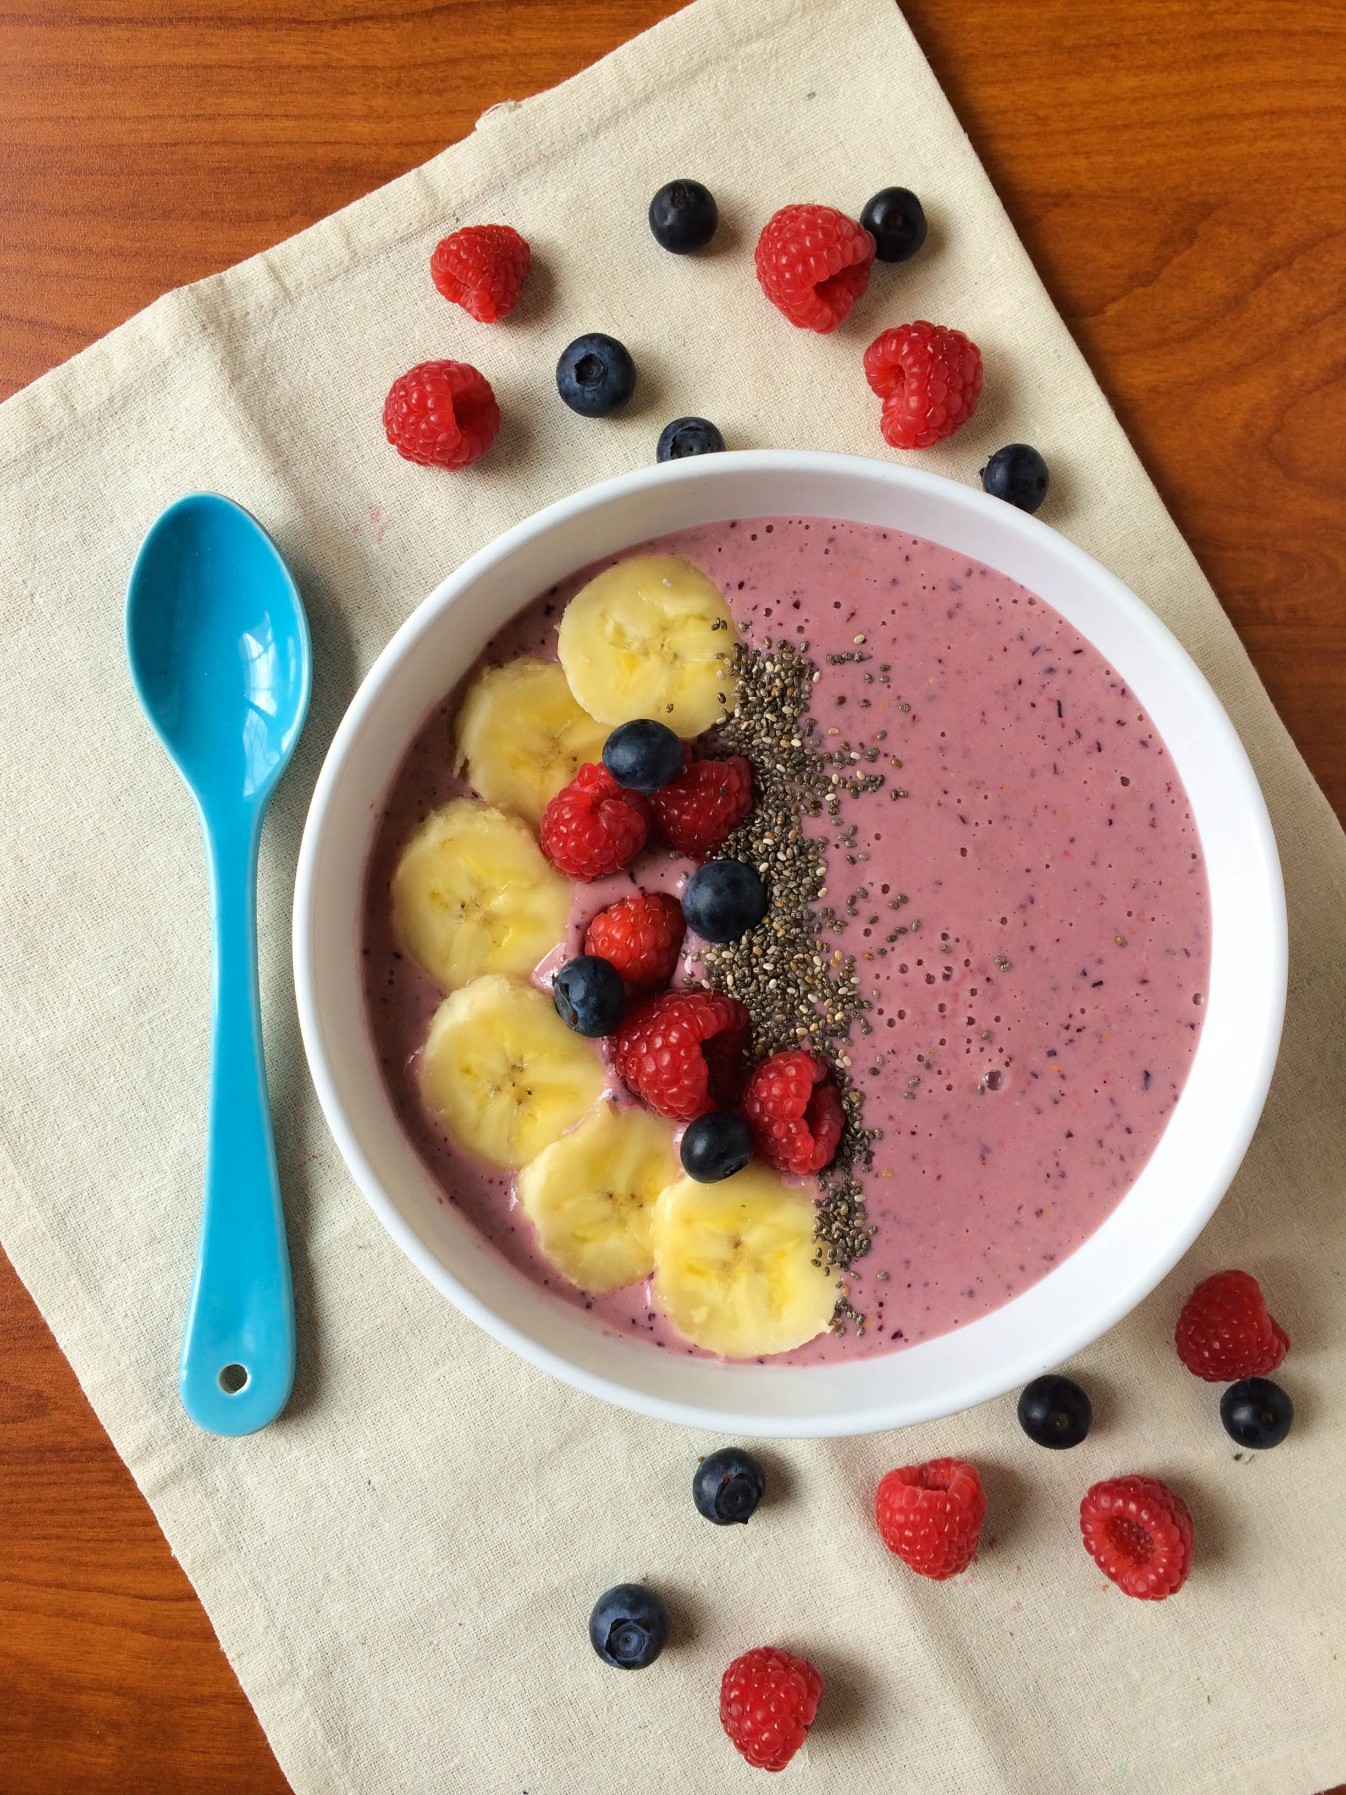
This Very Berry Smoothie Bowl is berry good! With protein and tons of juicy berries, you’ll feel energized all morning. 

Very Berry Smoothie Bowl via RDelicious Kitchen @rdkitchenDisclosure: This is my recipes for Welch’s Recipe Contest. I am eligible to win prizes. I was not compensated for my time.

It’s hot and humid here in New Jersey. I am not complaining. After this long winter, I’ll take any warm weather, humidity and all.

I just started officially training this week for a 10k coming up this summer. My last race was April of last year, so I need to get back into my training groove. I’ve been running, but not really structured from week to week. With this added humidity, I’ve had some pretty sweaty runs and craving anything refreshing after, while getting in some post run fuel.

I’ve been loving smoothies, but I end up drinking them so fast without even really getting to enjoy them. This Very Berry Smoothie Bowl, is thicker that is better to eat with a spoon rather than through a straw. It will help slow you down and enjoy all the wonderful flavors, plus, you get to put on whatever fun toppings you like!

Very Berry Smoothie Bowl via RDelicious Kitchen @rdkitchen

This Very Berry Smoothie Bowl has a little extra twist by adding 100% Welch’s grape juice. While adding a boost of fruity flavor, it also brings along many health benefits.

Welch’s and their team of Nutrition Experts can help explain why concord grapes, just like in Welch’s 100% grape juice can help with maintaining a healthy lifestyle.

Colorful fruits and vegetables offer essential vitamins, minerals and beneficial plant nutrients, like polyphenols. And, while it’s certainly important to eat a rainbow of produce, it’s worth paying attention to the purples and blues.

Print

clock clock iconcutlery cutlery iconflag flag iconfolder folder iconinstagram instagram iconpinterest pinterest iconfacebook facebook iconprint print iconsquares squares iconheart heart iconheart solid heart solid icon
Very Berry Smoothie Bowl on a tan napkin with blue spoon

Very Berry Smoothie Bowl

  • Author: Julie @ RDelicious Kitchen
  • Yield: 1
  • Category: Breakfast

Description

This Very Berry Smoothie Bowl is pure berry good! With protein and tons of juicy berries, you’ll feel energized all morning.


Ingredients

Scale
  • 1/4 cup raspberries
  • 1/4 cup blueberries
  • 1/2 banana
  • 1 cup vanilla Greek yogurt
  • 1/2 cup Welch’s 100% grape juice
  • 1 tbsp chia seeds
  • (optional) ice
  • Toppings: additional banana slices, raspberries, blueberries, chia seeds or coconut, sliced almonds, etc.

Instructions

  1. In a blender, combine the raspberries, blueberries, banana, vanilla Greek yogurt, 100% grape juice, chia seeds, and ice (if using). Purée until smooth, about 1 minute.
  2. The smoothie should be thick, so if needed, add more ice until desired consistency is reached. Pour into a bowl and top with your favorite toppings.

Recipe Card powered byTasty Recipes

Signature

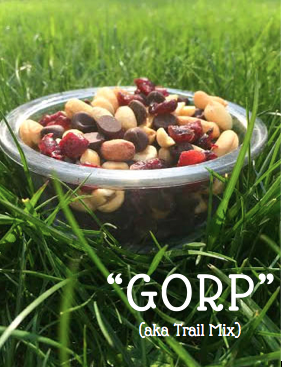
Gorp (aka Trail Mix)

Skip the packaged trail mix where there are often a laundry list of ingredients and just make it yourself! Try this simple DIY trail mix which is perfect to bring on your next hike or as a grab and go snack!

Gorp (aka Trail Mix) via RDelicious Kitchen
This month has been quite hectic. Work has been busier than ever, Adrain (the bf) is moving, and now I am a day late for the Recipe ReDux monthly recipe. Ahh.. life!
Adrain is moving to south jersey to start Physical Therapy school, so this week has been packing and moving. I am currently sitting on the new couch (that I assembled), sipping on coffee, and writing this post in his new apartment.
Unfortunately, I am not moving here right now. I’m not going to lie, it sucks. From going to seeing each other every day, to only once a week, is going to be a big adjustment. Fortunately, I’m only in north jersey so it’s only about 2+ hours of a trip, which I will finagle getting here as much as I can.

A few weeks ago, we went hiking at the Delaware Water Gap on the Mount Tammany, Dunnfield Creek trail. Adrain is a hiking guru and did a bunch of big hiking trips in college. Also, the website linked is awesome. It has a detailed description and pictures of exactly what your hike will be like and where to go. The guy who writes this blog and his hiking pal (his pup!) have gone on hiking trails nationwide, so definitely check it out for your next hiking trip.
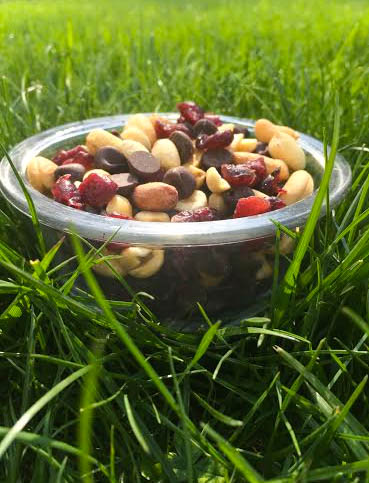
Gorp (aka Trail Mix) via RDelicious Kitchen
Trail mix is one of the most common hiking snacks to bring because it is calorically dense and nourishing for a hike without taking up much space in your pack. I learned some hiking terminology from Adrain. Apparently true hikers call trail mix, “gorp”. Fun fact! 

Gorp (aka Trail Mix) via RDelicious Kitchen
I never buy trail mix from the store. 1) because I enjoy making my own flavor combinations. 2) because in a pre-packaged trail mix there are typically overly salted nuts, sweetened fruit, and other weird ingredients.
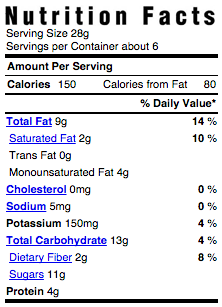
Let’s compare my trail mix with a store bought trail mix:

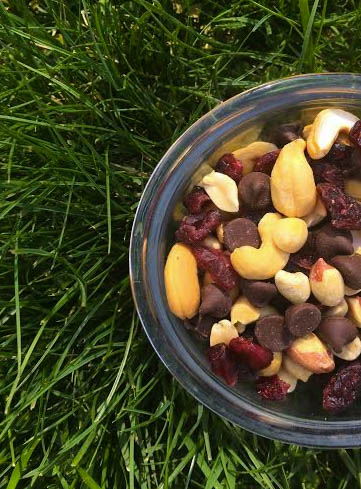
My DIY trail mix:
4 ingredients
Gorp (aka Trail Mix) via RDelicious Kitchen

Pre-packaged trail mix:
laundry list of (and artificial) ingredients, more sugar, less protein

Ingredients: PEANUTS, CHOCOLATE CANDY PIECES [MILK CHOCOLATE (SUGAR, COCOA BUTTER, MILK, CHOCOLATE, LACTOSE, SOY LECITHIN–EMULSIFIER, VANILLIN–ARTIFICIAL FLAVOR), SUGAR, ARTIFICIAL COLOR (INCLUDES YELLOW 5 LAKE, YELLOW 6, BLUE 1 LAKE, RED 40 LAKE), GUM ARABIC, CORN SYRUP, CARNAUBA WAX, BEESWAX, CONFECTIONER’S GLAZE], RAISINS, ALMONDS, COTTONSEED OIL.
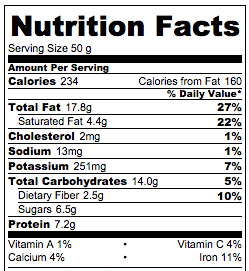
Screen Shot 2015-05-23 at 11.05.23 AM

Gorp (aka Trail Mix) via RDelicious Kitchen

Balsamic Stuffed Chicken

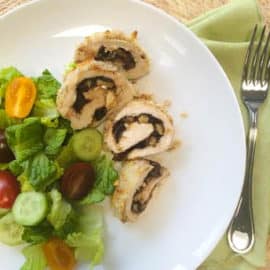
Balsamic stuffed chicken is an easy dinner idea that is ready in 45 minutes from start to finish that is bursting with flavor!

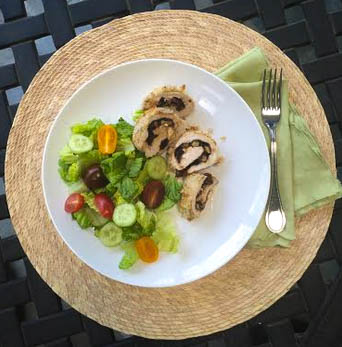
Balsamic Plum Stuffed Chicken - recipe by Julie @ RDelicious Kitchen #reciperedux

Disclosure: By posting this recipe I am entering a recipe contest sponsored by California Dried Plum Board and am eligible to win prizes associated with the contest. I was not compensated for my time.

Did you know May is National Osteoporosis Month? While you may automatically think of calcium, vitamin D, mainly found in dairy products for bone health, dried plums also have an array of health benefits.

Why We Are Using Prunes

Let’s be honest, dried plums, aka “prunes” get a bad reputation, but they are so versatile and great to add into your diet for its health benefits.

Emerging research suggests that dried plums support healthy bones, and may support heart health, digestive health, immunity and healthy aging. One serving (4-5 dried plums) is less than 100 calories. Plus, each serving provides 3 grams of fiber, 293 mg of potassium, 16 mg of magnesium, and more vitamin K than any other fresh or dried fruit.

Balsamic Plum Stuffed Chicken - recipe by Julie @ RDelicious Kitchen #reciperedux

I like dried plums as a snack, just as is, but they also can really up your game in the kitchen. Dried plums can serve as a substitute for fats or sugars to reduce calories in a baked good recipe. You can toss them on a salad or mix in to your yogurt for an extra nutritional boost.

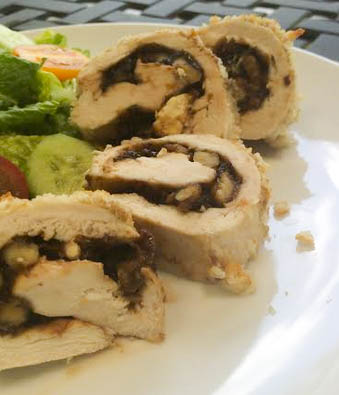
The way I am using them today, is to add moisture to this chicken dish, while mixing it’s naturally sweet flavor with other savory ingredients.

Balsamic Plum Stuffed Chicken - recipe by Julie @ RDelicious Kitchen #reciperedux

Ingredients Needed

  • boneless, skinless chicken breasts – you will need 4 that are 4 ounces each.
  • salt and pepper – to taste
  • California Dried Plums – also known as prunes
  • balsamic vinegar – gives this easy chicken recipe a ton of flavor
  • walnuts – if desired, you can swap for pecans, almonds, or pistachios.
  • feta cheese – mozzarella cheese would also taste good!
  • dijon mustard
  • panko breadcrumbs

How to Make Stuffed Balsamic Chicken

Spray a baking dish with non-stick cooking spray and preheat the oven to 350 degrees.

Add the dried plums and balsamic vinegar to a small bowl and let them soak for at least 5 minutes.

Place the chicken in between 2 pieces of plastic wrap and flatten using a rolling pin or meat mallet. Season both sides with salt and pepper.

Blend the balsamic mixer in a food process until it’s turns to a paste. If needed, add a couple of drops of water.

Spread the plum mixture over one side of each chicken breast. Sprinkle the feta and crushed walnuts on top.

Roll the chicken pieces and secure with toothpicks so the filling doesn’t fall out.

Brush the chicken roll ups with dijon mustard and coat with the panko breadcrumbs.

Bake for 25-30 minutes. Remove from the oven, take the toothpicks out and slice crosswise before serving.

Tips for Making

  • Try to pound the chicken so it’s even in thickness.
  • To make these ahead of time, follow the same instructions. Once they are rolled, cover in an airtight container. When ready, pop them in the oven and bake. We recommend only making these 24 hours in advance.
  • You can use this same method and stuff the chicken with your other favorite ingredients, such as spinach, cherry tomatoes, and mozzarella (caprese).
  • To make sure the chicken is fully cooked, use a meat thermometer. The internal temperature should be at least 165 degrees.

Can I Use Chicken Thighs Instead?

Sometimes you can swap breast for thighs, but since we are going to be rolling the chicken up, the breasts work better.

Do You Have to Roll the Chicken?

Some prefer to make “pockets” out of the chicken verus using a meat mallet. While they may be a little easier, pounding the chicken also helps to tenderize it. We also like the ratio of chicken to filling by using this method compared to the pocket.

Serving Suggestions

This meal goes great with just about any side dish, but here are a few of our favorites.

Stuffed Chicken FAQs

How do you keep chicken moist inside?

The key is marinating and using a liquid that is somewhat acidic to help tenderize the chicken.

How long does raw stuffed chicken last in the fridge?

We recommending only prepping stuffed chicken 24 hours in advanced. Depending on the filling, it can get soggy. Also, we do not want the chicken to spoil before it’s time to cook.

Print
clock clock iconcutlery cutlery iconflag flag iconfolder folder iconinstagram instagram iconpinterest pinterest iconfacebook facebook iconprint print iconsquares squares iconheart heart iconheart solid heart solid icon
Balsamic Plum Stuffed Chicken sliced on a white plate with salad

Balsamic Plum Stuffed Chicken

  • Author: Julie @ RDelicious Kitchen
  • Yield: 4

Description

Liven up your weeknight chicken dinner with dried plums to add a boost of flavor with a boost of nutritional benefits.


Ingredients

Scale
  • 4 (4 ounce) pieces skinless chicken breasts
  • salt and pepper
  • 3/4 cup California Dried Plums
  • 1/4 cup balsamic vinegar
  • 1/3 cup walnuts, finely chopped
  • 1/4 cup feta cheese
  • 2 tbsp dijon mustard
  • 1/2 cup panko breadcrumbs

Instructions

  1. Preheat oven to 350 degrees F. Coat a baking dish with cooking spray.
  2. In a small bowl add the California Dried Plums and balsamic vinegar and set aside to soak for at least 5 minutes.
  3. Place chicken breasts between 2 sheets of plastic wrap, and flatten out, using a meat mallet, or rolling pin. Season each side with salt and pepper.
  4. In a blender or food processor, blend the dried plums and balsamic vinegar, until it turns into a paste like consistency. (Add a few drops of water, if needed)
  5. Evenly spread the plum mixture over one side of each chicken breasts. Sprinkle walnuts and feta cheese on top.
  6. Roll chicken (in a jelly roll fashion) gently without letting the filling spill out. Secure chicken with wooden toothpicks.
  7. Brush each chicken roll up with dijon mustard and and coat with panko breadcrumbs.
  8. Bake in the oven for 25-30 minutes. Remove from oven and remove wooden toothpicks. Slice chicken breasts crosswise and serve.

Recipe Card powered byTasty Recipes

Blood Orange & Freekeh Salad

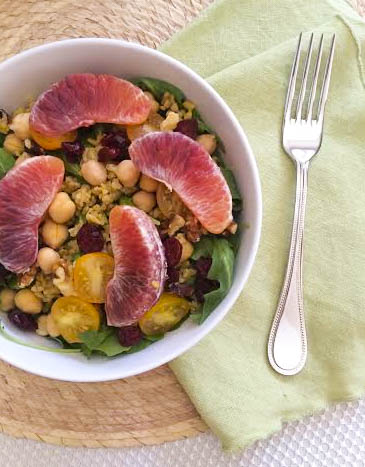
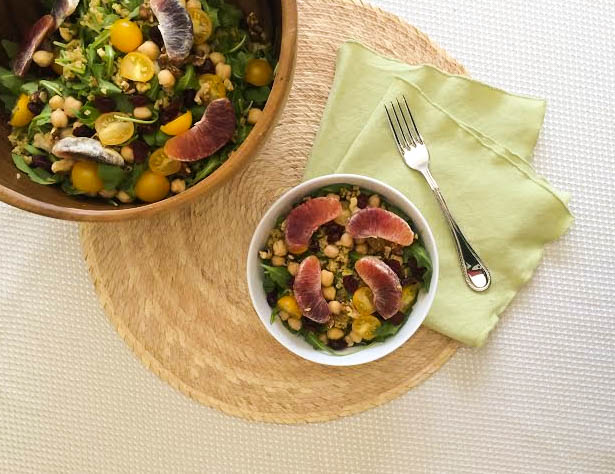
Tired of boring salads? Spruce up your salad with this Blood Orange & Freekeh Salad recipe.

Blood Orange & Freekeh Salad - Recipe by Julie @ RDelicious Kitchen @rdkitchen

Is anyone else as sick of the snow as much as I am? If you live in the northeast like me, you know what I mean..
Move over Winter, bring on Spring. My warm bowls of soup cravings have past and now my cravings have moved on to fresh colorful salads.
Blood Orange & Freekeh Salad - Recipe by Julie @ RDelicious Kitchen @rdkitchen
I typically always pack a salad for lunch. It’s a sure way I will meet my fruit/veggie quota for the day. Someone I work with noticed my salad routine and asked if I ever got bored of salad every day. Honestly, no! But it’s because I don’t pack a plain ole salad. The key is to pumping it up with various colors, textures, and flavors!

Blood Orange & Freekeh Salad - Recipe by Julie @ RDelicious Kitchen @rdkitchen
I always like to make sure I have a balance of protein, carbohydrates, fats, and plenty of fiber for the salad to keep me full through the afternoon.
Get adventurous! Find foods in your grocery store that you may not always pick up week to week. Blood oranges are fantastic and if you like navel oranges, you’ll definitely enjoy these too!

Print

clock clock iconcutlery cutlery iconflag flag iconfolder folder iconinstagram instagram iconpinterest pinterest iconfacebook facebook iconprint print iconsquares squares iconheart heart iconheart solid heart solid icon
Blood Orange & Freekeh Salad with a green napkin

Blood Orange & Freekeh Salad

  • Author: Julie @ RDelicious Kitchen
  • Yield: 4

Description

Tired of boring salads? Spruce up your salad with this Blood Orange & Freekeh Salad recipe.


Ingredients

Scale
  • 1/4 cup freekeh
  • 4 cups arugula
  • 1 (15 oz) can chickpeas, drained and rinsed
  • 1/4 cup unsalted walnuts
  • 1 pint yellow cherry tomatoes, halved
  • 1 blood orange, peeled and segmented
  • 1/4 cup dried pomegranate seeds
  • 2 tbsp olive oil
  • 1 tbsp lemon juice
  • salt and pepper

Instructions

  1. Cook freekeh according to package directions. Let cool.
  2. In a large bowl, add the arugula. Add the chickpeas, walnuts, cherry tomatoes, blood orange, and dried pomegranates.
  3. Whisk together the olive oil and lemon juice. Season with salt and pepper.
  4. Toss to combine.

Recipe Card powered byTasty Recipes

 RDelicious Kitchen