Beef Banh Mi

This Beef Banh Mi offers so many interesting flavors and textures in one bite. This recipe for a banh mi sandwich starts with a crusty roll that’s piled high with tender grilled beef, pickled vegetables, and fresh herbs.
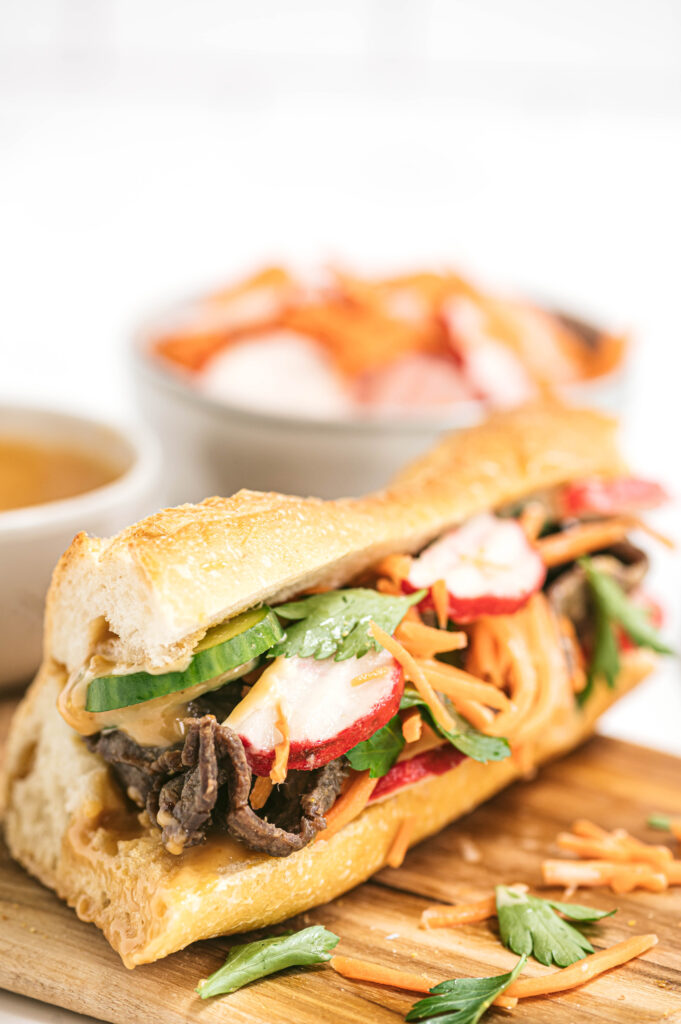
Close up image of a Beef Banh Mi sandwich

This post is sponsored by the Northeast Beef Promotion Initiative a subcontractor to the Beef Checkoff. Thank you for supporting brands that make this blog possible!

Banh Mi is a Vietnamese sandwich that has depths of flavor. Banh Mi has its origins in French colonialism in Vietnam, with bread being brought into the country by the French. The Banh Mi became popular when it was sold on street corners as an inexpensive fast food option for workers who needed to eat on-the-go. It’s popularity has resurged recently with new versions of Banh Mi, using other proteins such as beef, shrimp, or tofu instead of pork, providing even more flavor options!

In culinary school, one of my practicals for my World Cuisine class I was assigned to Vietnam and had to make a dish highlighting the flavors of that cuisine. I went with a more traditional Banh Mi, using pork, daikon radish, shrimp paste, and making the bread from scratch!

I added my own twist to the classic, swapping out pork for beef while still maintaining the traditional Vietnamese flavors.
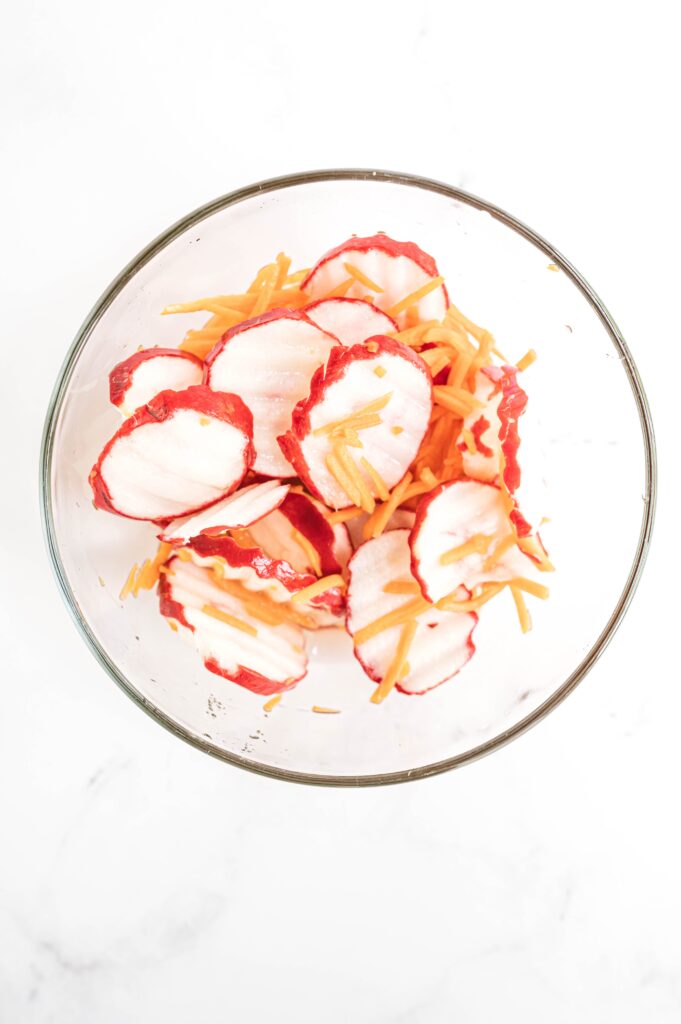
glass bowl with sliced radishes and shredded carrots

History of Vietnamese flavor profiles

Vietnamese cooking is all about balance. The five flavors of Vietnamese cuisine are sour, bitter, spicy, salty and sweet. Interestingly enough, recipes vary from region to region and city to city but share a common theme of contrasting flavors and textures.

The food of the north is heavily influenced by China. As you move south, there is more flavor-blending with Thailand and Cambodia. The tropical climate down south sustains rice paddies, coconut groves, jackfruit trees, and herb gardens. Southern Vietnamese food tends to be sweeter than northern Vietnamese food: sweeter broths for pho; use of palm sugar in savory dishes; and popular taffy-like coconut candies made with coconut cream are made from a mix with milk and sugar.
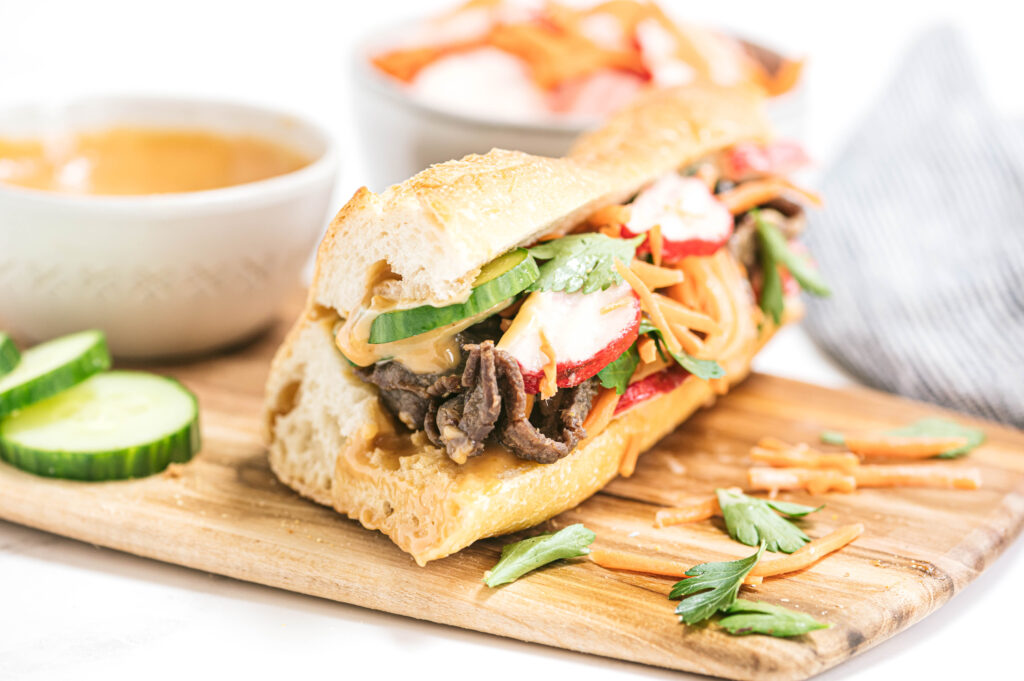
Beef Banh Mi sandwich on a wooden cutting board

Staple Ingredients of Vietnamese Cuisine

You may have some of these staple Vietnamese ingredients already in your pantry. Here are a few ingredients you will most likely find in any Vietnamese recipe.

  • Fish Sauce: Fish sauce is a condiment made by fermenting fish with salt. It has an intense, salty flavor which when combined with the sweetness of Vietnamese dishes help balance out flavors
  • Shrimp Paste: This potent paste is made from fermented shrimp or krill that has been mashed together with salt then dried to produce the salty, pungent paste.
  • Pickled Vegetables: Pickled vegetables are a staple in Vietnamese cuisine. Pickling is an ancient preservation technique that doesn’t require refrigeration and has been used for centuries across the world to preserve food.
  • Oyster Sauce: Oyster sauce is a condiment made from oysters that are cooked and mashed.
  • Sambal Oelek (chili paste): A chili paste usually consisting of chopped red chilies, garlic, shallots and vinegar. It’s used as a spicy flavoring for dishes such as satay or fried rice but it also makes an appearance in many Vietnamese recipes including Banh Mi!
  • Hoisin Sauce: Hoisin sauce is an Asian condiment made from soybeans, garlic and spices. The sauce provides sweet and salty flavors as well as some heat but not too much!
  • Cilantro: Cilantro is a herb that has a citrusy, peppery flavor. It’s often used in Vietnamese cuisine because it can be added to dishes without overpowering the other flavors.
  • Lemongrass: The herb is most commonly used to braise meats, often with fish sauce, sugar, and chilies. It adds lemony, bright, and citrusy notes.
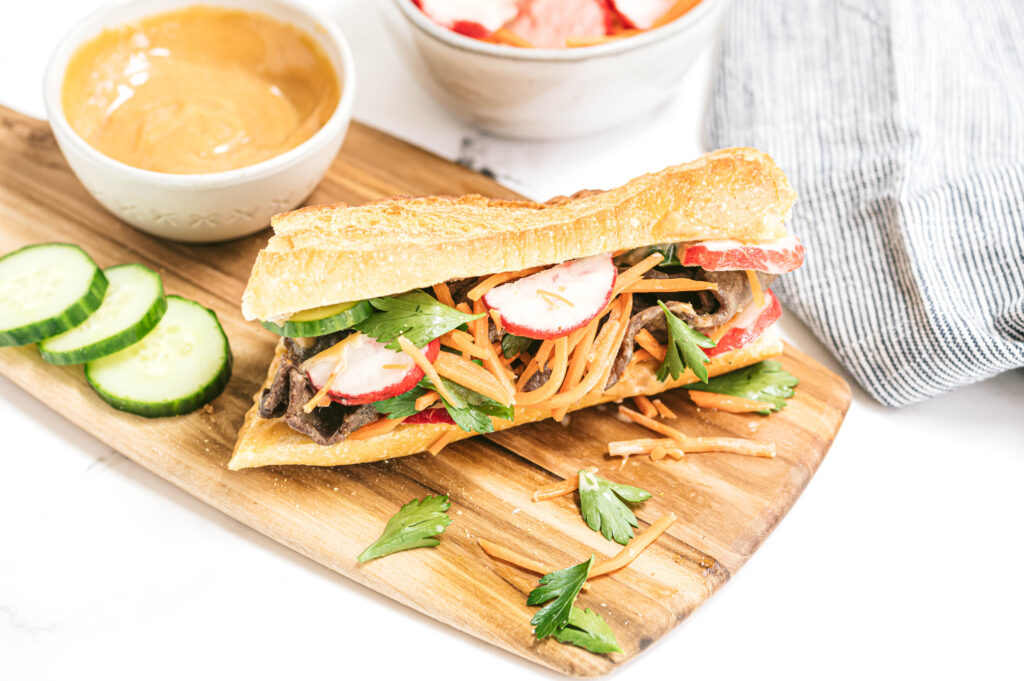
Beef Banh Mi sandwich on a wooden cutting board

Ways to tenderize beef

Beef is a very hearty and rich meat with a natural taste of umami. It’s also popularly used in Vietnamese recipes. When using leaner cuts of beef, they contain less fat, so marinating the meat to maximize flavor and help tenderize the meat is key.

A marinade works by  breaking down the muscle fibers and helping to soften connective tissues. Some ingredients that are good for marinating beef include: soy sauce, ginger, garlic, vinegar or lime juice. This recipe uses Vietnamese flavor profile utilizing:

  • soy sauce
  • fish sauce
  • brown sugar
  • lemongrass
  • garlic
  • sesame oil
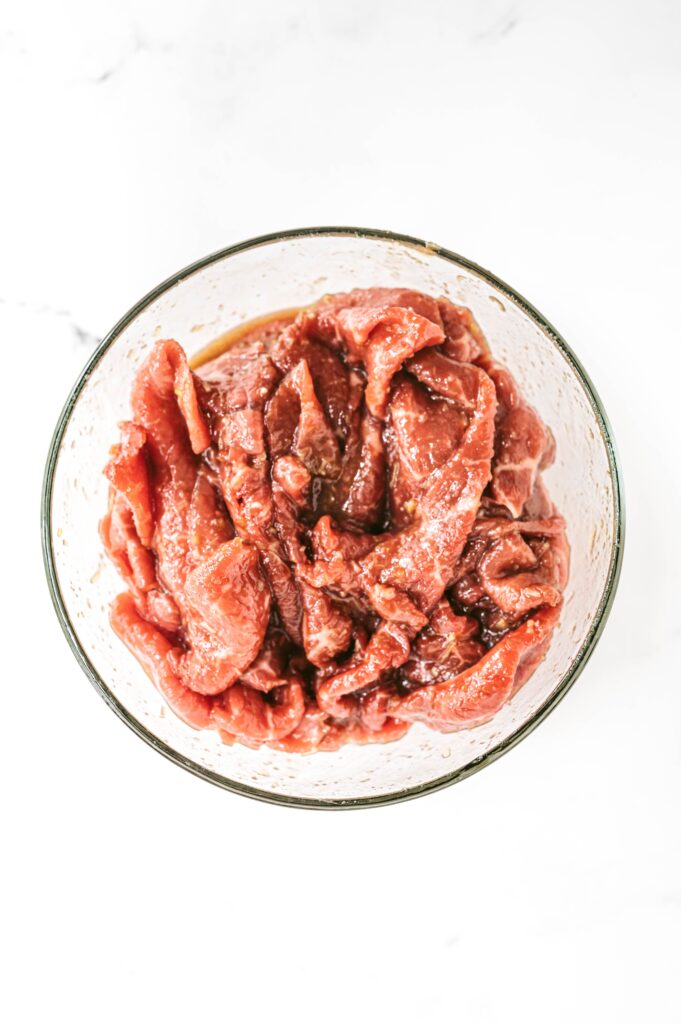
beef marinating in a glass bowl

Tips for marinades

  • You will need approximately 1/4 to 1/2 cup of marinade for every pound of beef
  • Always marinate in the refrigerator, not at room temperature
  • Before cooking, remove beef from marinade and pat dry with a paper towel to promote even browning and prevent steaming

Cooking Tips

For this Banh Mi recipe, follow these few tips listed within the recipe below.

  • To help easily slice the sirloin, place in the freezer for 10-15 minutes. Use a sharp knife and cut across the grain. Cutting across the grain means to slice perpendicular to the fibers, so the fibers in cut pieces of meat become much shorter, making it easier to chew them.
  • Use the white part of the lemon grass. Peel away the hard chewy parts, and mince the softer middle white part of the stem.
  • Utilize a peeler to create carrot ribbons or use a mandolin to create julienne slices.
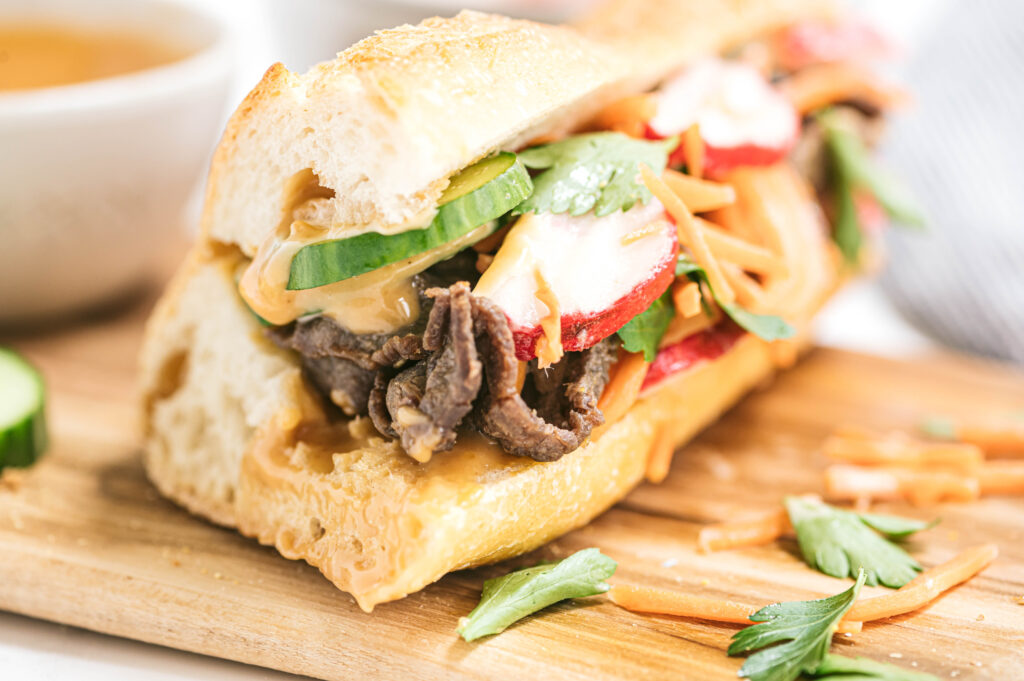
While this recipe may look like a lot of mini recipes within one recipe, it’s worth it. You can thank me later as you are chowing down 😉

Print
clock clock iconcutlery cutlery iconflag flag iconfolder folder iconinstagram instagram iconpinterest pinterest iconfacebook facebook iconprint print iconsquares squares iconheart heart iconheart solid heart solid icon

Beef Banh Mi

  • Author: Chef Julie Harrington, RD
  • Yield: 4
  • Category: sandwiches
  • Method: stovetop
  • Cuisine: Vietnamese

Description

Adding a twist to the classic Beef Banh Mi by swapping out pork for beef while still maintaining the traditional Vietnamese flavors.


Ingredients

Scale

For the pickled vegetables:
3/4 cup radish, thinly sliced
3/4 cup carrot, peeled and julienned
1/4 cup rice vinegar
1 tablespoon granulated sugar
1 tablespoon water
1/4 teaspoon salt

For the beef:
2 tablespoons low-sodium soy sauce
2 tablespoons fish sauce
2 tablespoons dark brown sugar
2 tablespoons lemongrass, white parts only, finely minced
2 cloves garlic, finely minced
2 teaspoons sesame oil
1/4 teaspoon salt
1 tablespoon canola oil
1 lb. sirloin, thinly sliced

For the sauce:
1/2 cup mayonnaise
2 tablespoons hoisin sauce
1 teaspoon garlic powder

For the sandwiches:
1 French baguette, cut into 4 pieces, then split lengthwise, toasted if desired
1/4 cup cilantro leaves
1/2 cup English cucumber, thinly sliced


Instructions

  1. Combine carrots and radishes in a bowl; set aside. In a small bowl, whisk together the rice vinegar, sugar, and salt, until sugar dissolves. Pour over vegetables. Cover and refrigerate until ready to serve.
  2. In a bowl, whisk together the soy sauce, fish sauce, brown sugar, lemongrass, garlic, sesame oil, and salt. Add the thinly sliced steak and coat with the marinade. Cover with plastic wrap and refrigerate for at least 30 minutes.
  3. In a large skillet, heat canola oil over medium heat. Add the marinated beef. Cook without stirring for 4 minutes. Give it a stir and continue to cook for 1 minute.
  4. In a small bowl, whisk together the mayonnaise, hoisin sauce, and garlic powder.
  5. Spread mayo mixture on bottom half of the bread. Layer cucumbers, cilantro beef, then pickled veggies. Place on the top half and slice crosswise before serving.
Notes

  • Use a mandolin to help easily slice the radishes, carrots, and cucumber.
  • To easily slice beef into thin slices, place the sirloin in the freezer for 10-15 minutes before slicing, then slice across the grain.

Keywords: banh mi, sandwich, beef banh mi, beef recipe

Recipe Card powered byTasty Recipes

Other recipes you may enjoy

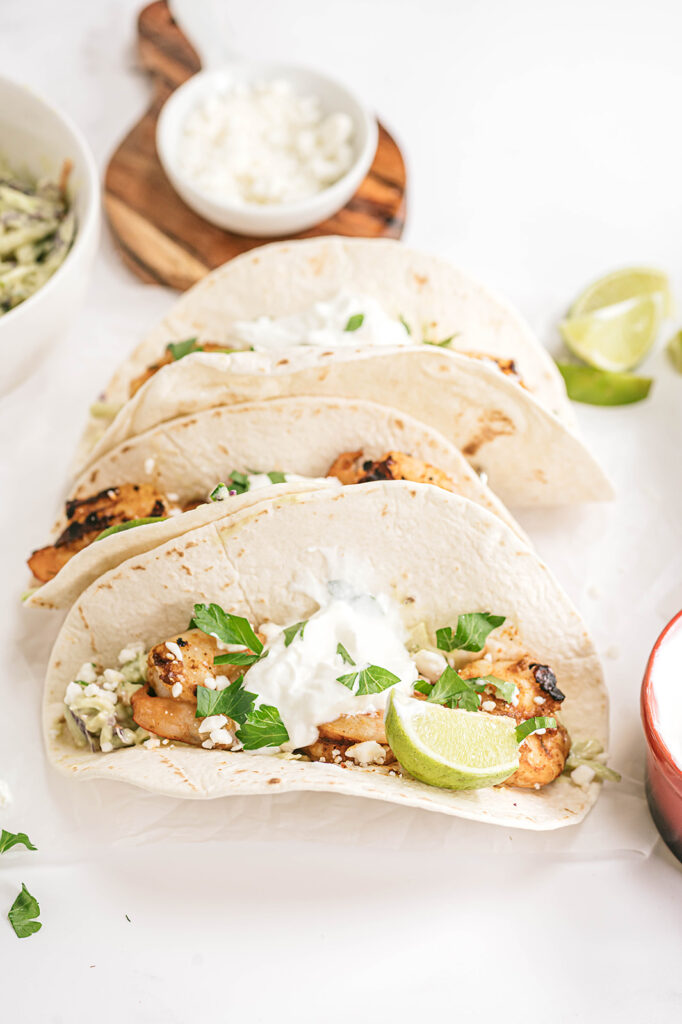
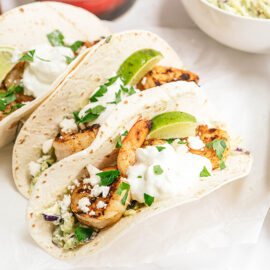
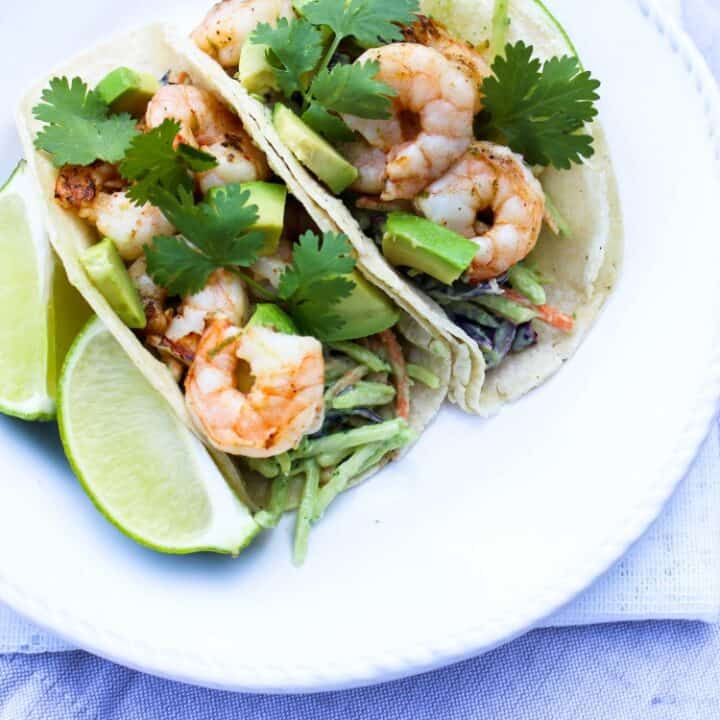
Chipotle Lime Shrimp Tacos with Creamy Avocado Broccoli Slaw

Get dinner on the table under 30 minutes! These Chipotle Lime Shrimp Tacos with a Creamy Avocado Broccoli Slaw is simple to make and you might already have all the ingredients already on hand!

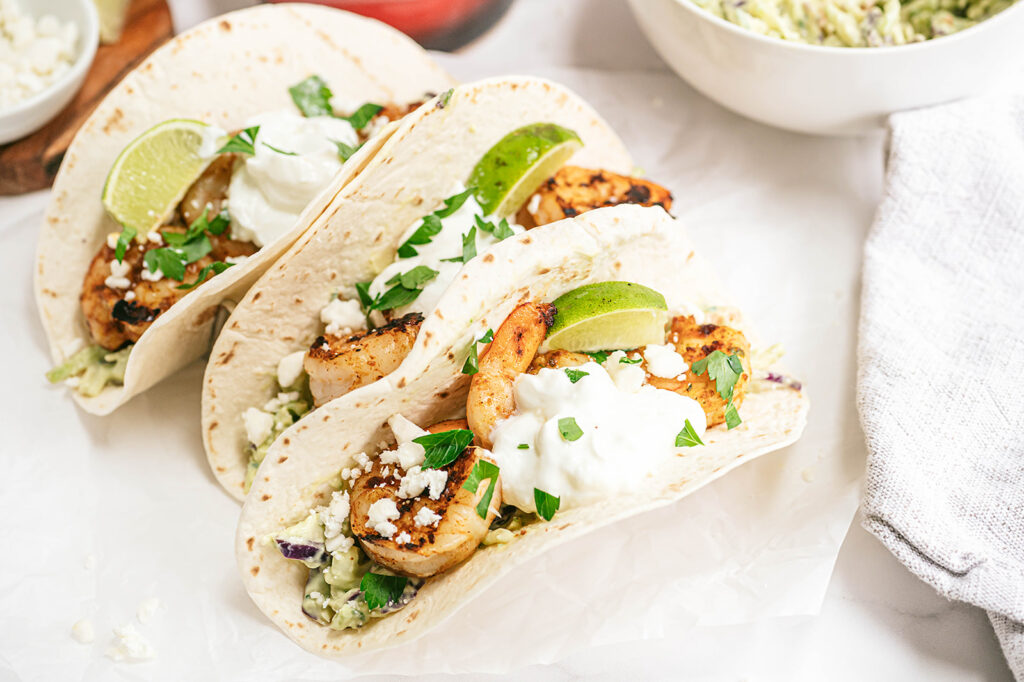
The beauty of tacos is that they are easily customizable. Kick it up a notch and add more spices to the shrimp. Swap shrimp for cod. What I love about taco recipes is that they act more as a guide. You don’t need to follow them exactly. That is what’s fun about cooking, you get to be creative in the kitchen!

Chipotle Lime Shrimp Tacos with Creamy Avocado Broccoli Slaw on a white linen napkin
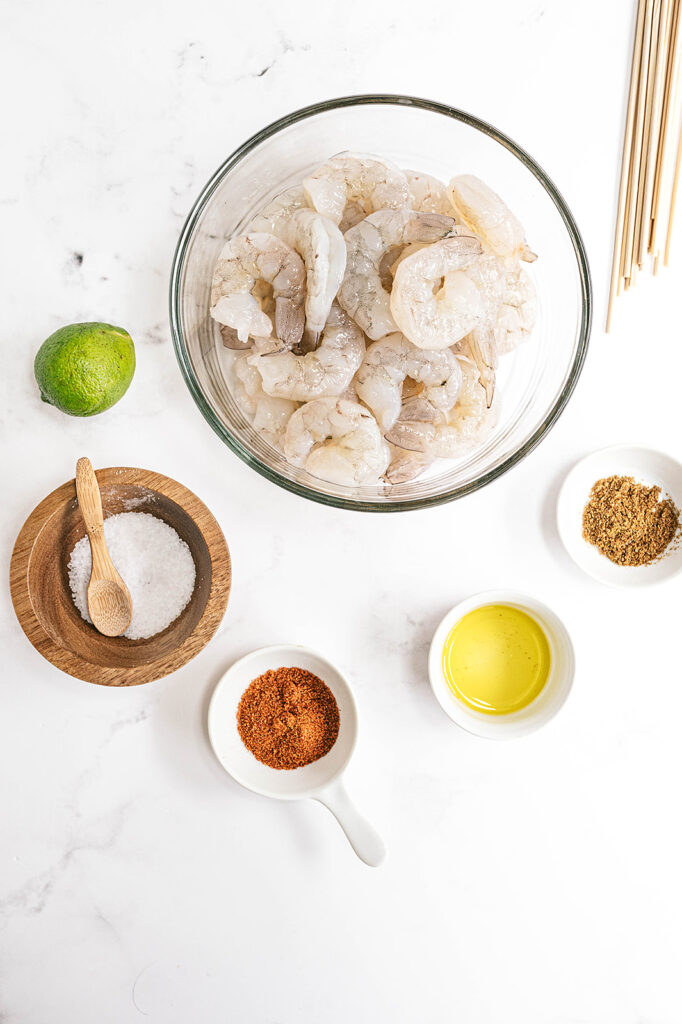
raw shrimp in a glass bowl with marinade ingredients

How to make Chipotle Lime Shrimp Tacos with Creamy Avocado Broccoli Slaw

Ingredients

  • Shrimp. I prefer using large or jumbo shrimp. Cut down on prep time by purchasing already peeled and deveined shrimp.
  • Olive oil. Olive oil or any neutral oil works.
  • Lime. The title of the recipe is lime tacos .. so ya know .. lime is needed here.
  • Chipotle seasoning blend. Take out the guess work and use a blend. The blend I used was a combo of: Sweet Chili Pepper, Chipotle Chili Pepper, Cayenne Pepper, Oregano, Cumin, Parsley, Mustard, Garlic, Onion, Carrot, Sugar, Citric Acid, Orange Peel, Lemon Peel, Oil Of Lemon & Lime.
  • Ground cumin. To add a warm, earthy flavor and aroma with a bit of both sweetness and bitterness.
  • Salt. To enhance the flavors!
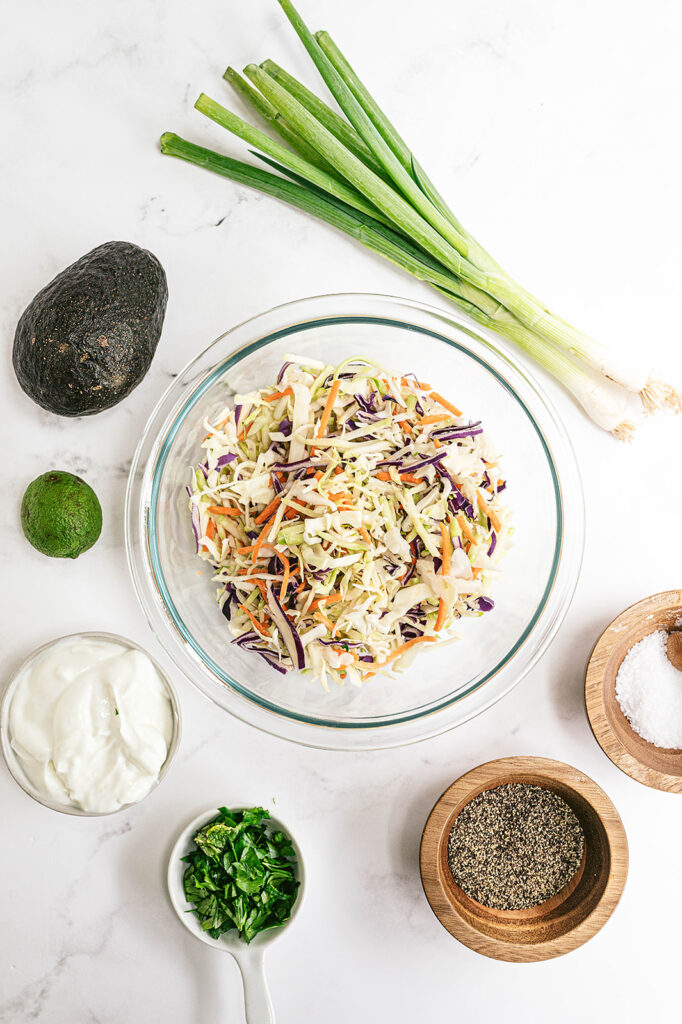
  • Broccoli slaw mix. Cut down on prep time and use a slaw mix which is typically a mixture of shredded broccoli stalks with julienned carrots and a bit of purple cabbage. It can be purchased at almost any grocery store along with the bagged salads.
  • Scallions.
  • Plain yogurt. I used this in place of sour cream. Yogurt will add the same tanginess and creaminess needed for the slaw.
  • Avocado. Your avocado still hard as a rock? Place it in a brown paper bag with a banana overnight. The banana will ripen faster giving off ethylene gas in a closed space to help ripen the avocado faster.
  • Cilantro. Don’t go crazy picking off each individual leaf. The stems pack in a ton of flavor too!
  • Tortillas. Use flour or corn tortilla – whatever you like best!
broccoli slaw in a glass bowl with scallions, avocado, lime, yogurt, cilantro, black pepper, salt surrounding the bowl on a marble platter

Equipment

  • Large mixing bowls for both marinating the shrimp and mixing the broccoli slaw.
  • A microplane is needed to zest the lime.
  • A food processor or blender helps make the avocado yogurt mixture creamy, but it’s not needed. Use a potato masher to mash to desired consistency.
  • A grill or grill pan to cook the shrimp and give it a smokier flavor.
  • Wooden skewers will help to easily flip the shrimp as it cooks.
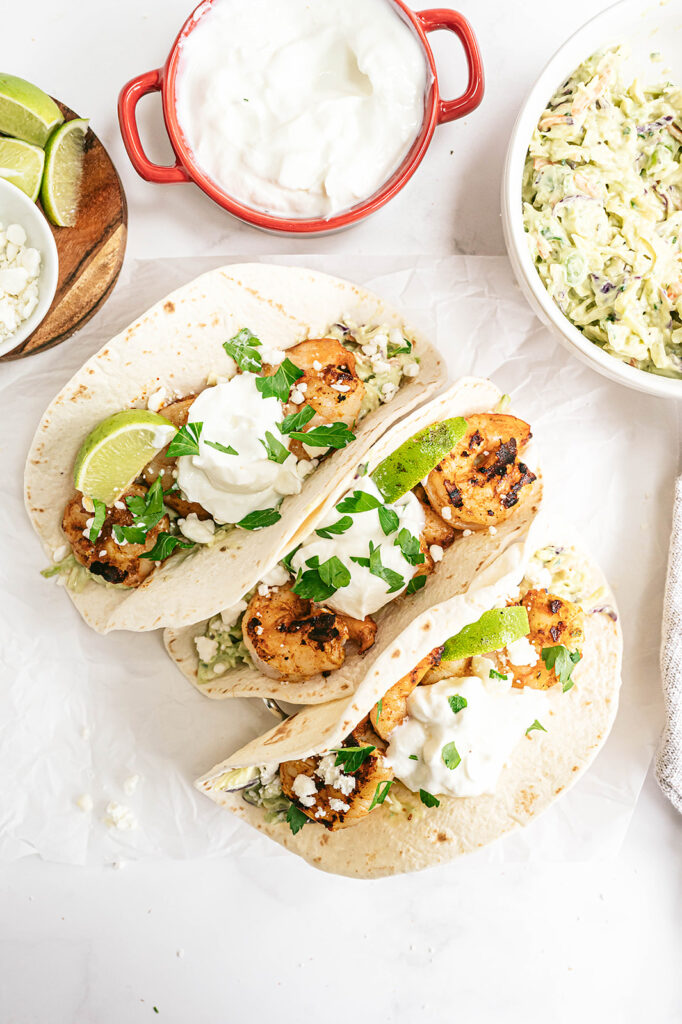
three shrimp tacos in flour tortillas garnished with yogurt and cilantro

Step-by-Step Instructions

  1. Rinse and pat the shrimp dry. Transfer to a large mixing bowl. Drizzle with olive oil and lime juice. Sprinkle with the lime zest, chipotle seasoning, cumin, and salt. Toss to coat evenly. Cover in place in the refrigerator to marinate for at least 20 minutes. Soak skewers in water as the shrimp marinades.
  2. In a bowl, combine the broccoli slaw and scallions. In a food processor, combine the yogurt, avocado, cilantro, lime juice, and zest. Pour over the slaw and toss to combine. Season with salt and pepper, to taste.
  3. Heat a grill (or grill pan) to medium-high heat. Place the shrimp on the skewers and grill until shrimp turn pink, about 1-2 minutes per side. (Alternatively, heat a large skillet over medium high heat. Add the shrimp to the hot pan and sauté, flipping occasionally, until the shrimp are cooked through.)
  4. Assemble tacos by layering the broccoli slaw, shrimp, then toppings in the tortilla.

Cooking Tips

A general rule of thumb for marinades is needing approximately 1/4 to 1/2 cup of marinade for every pound of protein. Always marinate in the refrigerator, not at room temperature Before cooking, remove the protein from marinade and pat dry with a paper towel to promote even browning and prevent steaming

opened shrimp taco
Print
clock clock iconcutlery cutlery iconflag flag iconfolder folder iconinstagram instagram iconpinterest pinterest iconfacebook facebook iconprint print iconsquares squares iconheart heart iconheart solid heart solid icon

Chipotle Lime Shrimp Tacos with Creamy Avocado Broccoli Slaw

  • Author: Chef Julie Harrington, RD
  • Prep Time: 20
  • Cook Time: 5
  • Total Time: 25 minutes
  • Yield: 4

Ingredients

Scale

For the shrimp:
1 pound large or jumbo shrimp, peeled, deveined, and tails removed (fresh or frozen and thawed)
1 teaspoon olive oil
1 lime, juiced and zested
1 teaspoon chipotle seasoning blend
½ teaspoon ground cumin
½ teaspoon salt
Wooden skewers

For the broccoli slaw:
2 cups broccoli slaw mix
2 tablespoons scallions, thinly sliced
½ cup plain yogurt
1 avocado
1/4 cup fresh cilantro, chopped
1 lime, juiced and zested
Salt and pepper, to taste

For the tacos:
8 small flour or corn tortillas
Optional toppings: Cotija cheese, sour cream, cilantro, sliced avocado, lime wedges


Instructions

  1. Rinse and pat the shrimp dry. Transfer to a large mixing bowl. Drizzle with olive oil and lime juice. Sprinkle with the lime zest, chipotle seasoning, cumin, and salt. Toss to coat evenly. Cover in place in the refrigerator to marinate for at least 20 minutes. Soak skewers in water as the shrimp marinades.
  2. In a bowl, combine the broccoli slaw and scallions. In a food processor, combine the yogurt, avocado, cilantro, lime juice, and zest. Pour over the slaw and toss to combine. Season with salt and pepper, to taste.
  3. Heat a grill (or grill pan) to medium-high heat. Place the shrimp on the skewers and grill until shrimp turn pink, about 1-2 minutes per side. (Alternatively, heat a large skillet over medium high heat. Add the shrimp to the hot pan and sauté, flipping occasionally, until the shrimp are cooked through.)
  4. Assemble tacos by layering the broccoli slaw, shrimp, then toppings in the tortilla.

Keywords: taco, shrimp tacos, heart healthy, taco Tuesday, healthy tacos

Recipe Card powered byTasty Recipes

FAQ

What if I don’t have a grill pan?
Alternatively, heat a large skillet over medium high heat. Add the shrimp to the hot pan and sauté, flipping occasionally, until the shrimp are cooked through.

What can I use in place of shrimp?
Any mild white flakey fish will do – cod, tilapia, halibut, grouper, etc.

Can I make the broccoli slaw from scratch?
Of course! Create a mixture of shredded broccoli stalks with julienned carrots and thinly sliced purple cabbage.

Other recipes you may enjoy

Should You Rinse Quinoa Before Cooking?

Quinoa is a naturally gluten free grain packed with protein, fiber, and other essential nutrients. If you’re cooking quinoa for the first time, you might be wondering if it needs to be rinsed before cooking. If so, read on for all the details on how to do that correctly!

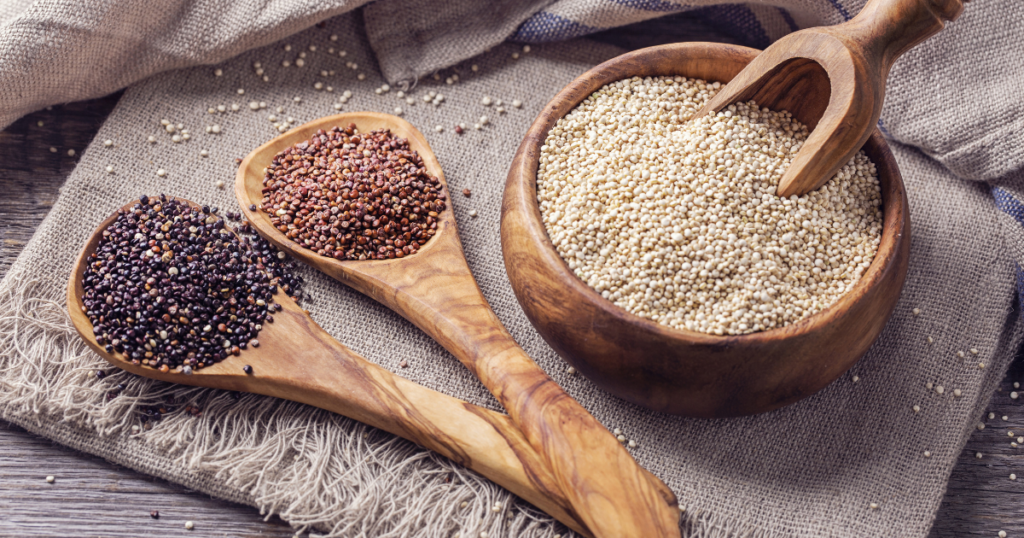
white, red, and black quinoa in a wooden bowl.

What is saponin?

Saponins, get their name because they lather up in water, like soap suds. The herb soapwort is one of the most concentrated sources of saponins and sometimes used to make a natural cleanser.

Saponin is a natural substance found on quinoa that can be removed by rinsing. Saponin has a subtle unpleasant bitter taste. By rinsing quinoa before cooking, it removes saponins, therefore removing the bitterness.

Are saponins safe?

Saponins are phytochemicals made by plants as a method of natural pest control. The bitter taste of these compounds makes the plant less palatable to birds, insects, and humans.

Rinsing quinoa just removes that bitterness, making quinoa more enjoyable.

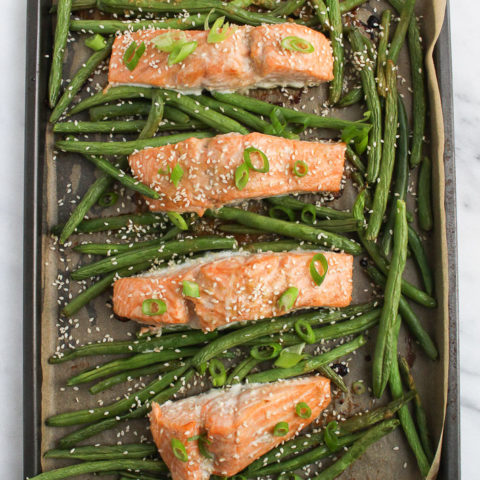
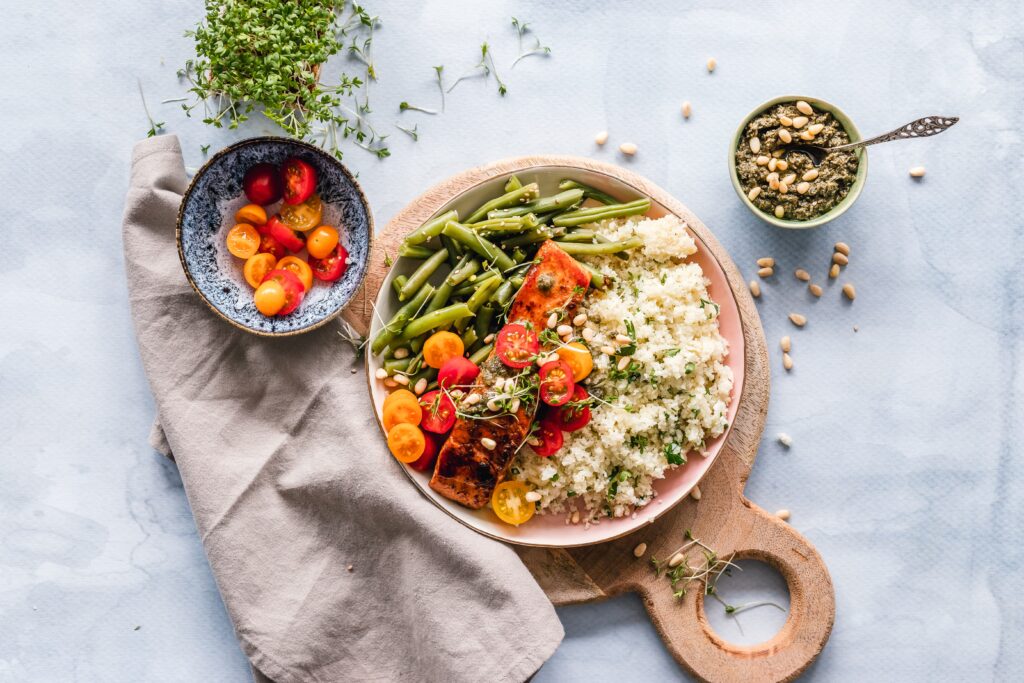
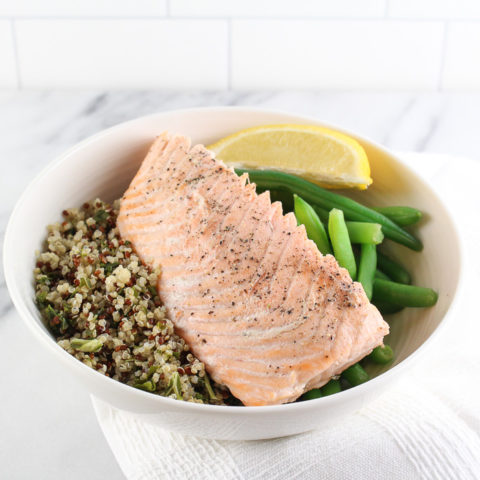
plated meal with salmon and quinoa

Health benefits of quinoa

Pronounced KEEN-wah, quinoa is gluten-free, high in protein and one of the few plant foods that contain sufficient amounts of all nine essential amino acids.

One cup (185 grams) of cooked quinoa, provides:

  • Protein: 8 grams
  • Fiber: 5 grams
  • Manganese: 58% of the recommended daily allowance (RDA)
  • Magnesium: 30% of the RDA
  • Phosphorus: 28% of the RDA
  • Folate: 19% of the RDA
  • Copper: 18% of the RDA
  • Iron: 15% of the RDA
  • Zinc: 13% of the RDA
  • Potassium 9% of the RDA

Fun fact: There are over 1,800 varieties of quinoa, but the three main types you’ll find in the grocery store are white, red, and black.

Resources:
https://pubmed.ncbi.nlm.nih.gov/15117556/
https://www.sciencedirect.com/topics/pharmacology-toxicology-and-pharmaceutical-science/saponins
https://nutritiondata.self.com/facts/cereal-grains-and-pasta/10352/2

Mission for Nutrition

It’s a very important month for dietitians – It’s National Nutrition Month! Every month dietitians work hard in various settings to help educate how to make healthy eating taste delicious! March is a little extra special.

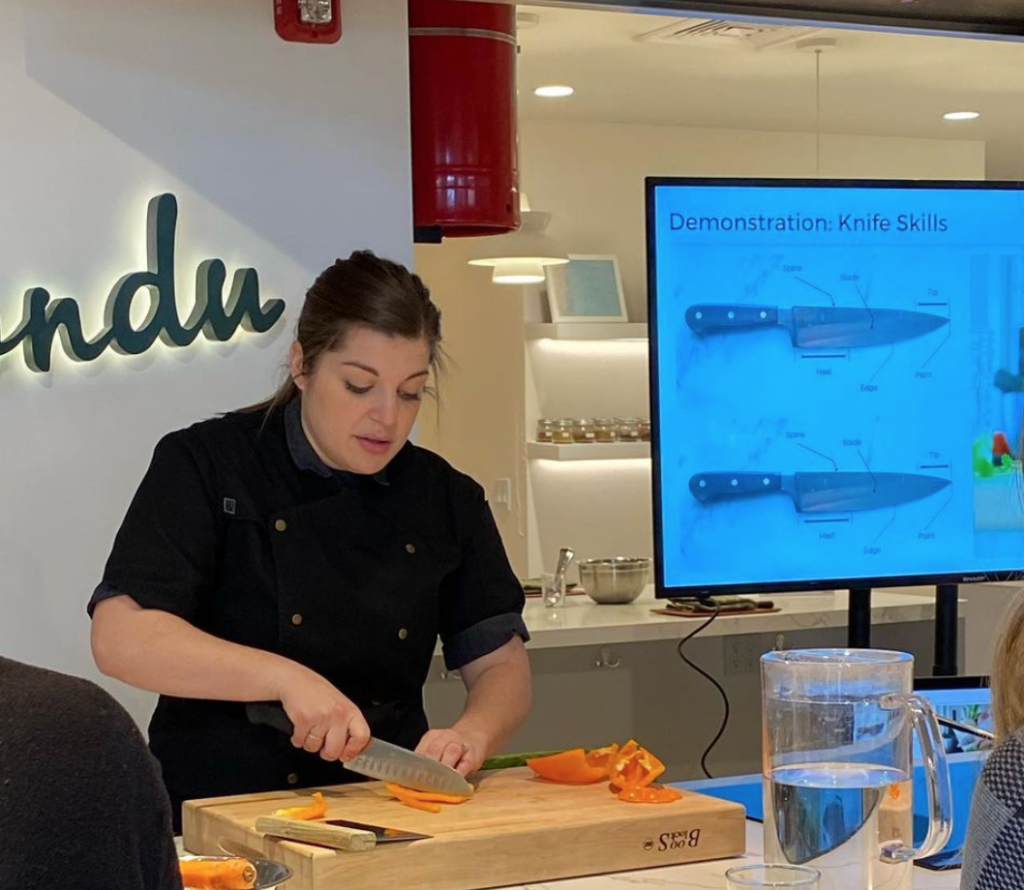
chef cutting an orange bell pepper on a cutting board

This post is sponsored by the Healthy Family Project in collaboration with Mission for Nutrition. Thank you for supporting brands that make this blog possible!

National Nutrition Month

National Nutrition Month® is an annual campaign created by the Academy of Nutrition and Dietetics. During the month of March, everyone is invited to learn about making informed food choices and developing healthful eating and physical activity habits.

This year’s theme is Personalize Your Plate. There is no one-size-fits-all approach to nutrition and health. We are all unique with different bodies, goals, backgrounds, and tastes! And a Registered Dietitian Nutritionist can tailor a healthful eating plan that is as special as you are.

Misson for Nutrition

As you may know, I am the host of Food Rx with the Healthy Family Project. Healthy Family Project is celebrating their third annual Misson for Nutrition, a month-long digital and shopper-focused program that highlights the importance and value of meal planning to make healthy choices with an element that gives back to Feeding America® food banks.

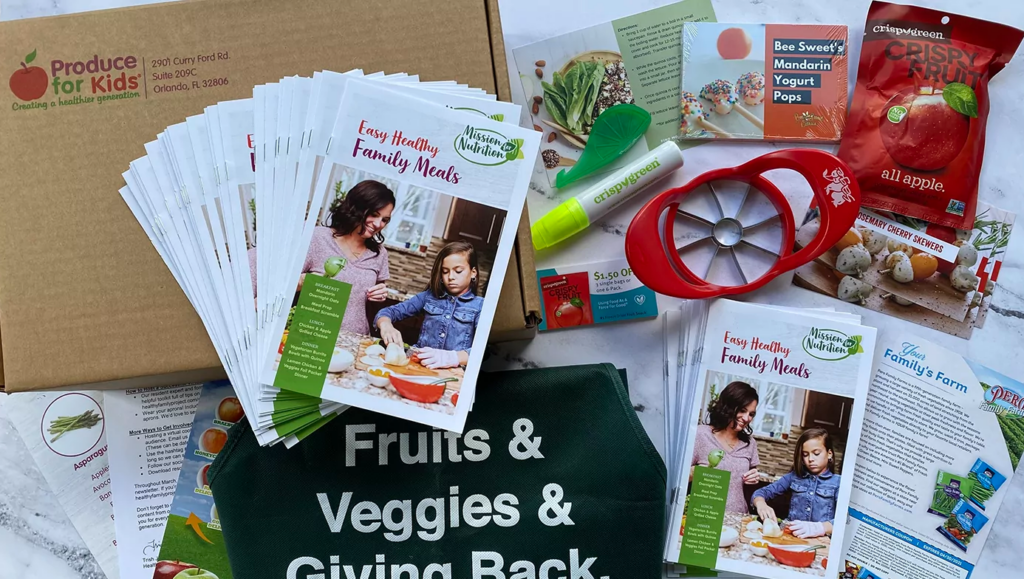
Each year, retail dietitians a kit with the tools to celebrate the month with shoppers in a big way. Want a sneak peek inside? I had fun unboxing the toolkit.

Retail dietitians using the hashtag #missionfornutrition or submitting their events to Healthy Family Project are entered to win a $1,000 continued education scholarship. Past winners have utilized the scholarship to attend retail dietitian-focused trade shows, workshops, and conferences. 

Mission for Nutrition Event Ideas:

  • Host a Facebook Live share a new recipe, nutrition tips, etc.
  • Take clients on a grocery store tour
  • Create a nutrition-focused contest
  • Start a food drive
  • Host a virtual nutrition education presentation
  • Host a virtual cooking class (see below how to get your class promoted!)

If you are a dietitian and have a virtual cooking class or demo coming up, please add your class to our lineup here! Healthy Family Project will be adding this calendar to our Mission for Nutrition homepage so that families can easily access it.

How to get involved in Mission for Nutrition

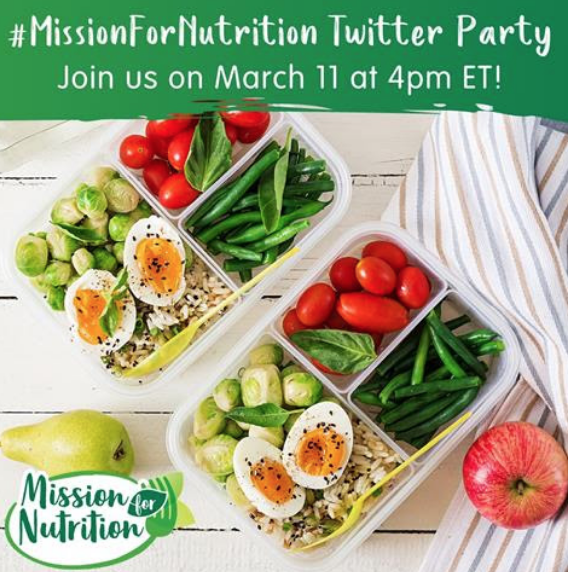
Join the March 11 #MissionforNutrition Twitter Party! At 4 pm ET on March 11, Healthy Family Project will be talking about all things meal prep, swapping recipes and hacks, and giving away prizes. Everyone is welcome to join and no RSVP is needed. Simply hop on the #MissionforNutrition hashtag and have fun! Follow Health Family Project on Twitter.

Spaghetti Squash Waffle Grilled Cheese

Are you looking for a new and creative way to utilize spaghetti squash? Let me introduce you to my new favorite recipe: Spaghetti Squash Waffle Grilled Cheese! It’s easy to make and the entire family will love it! 

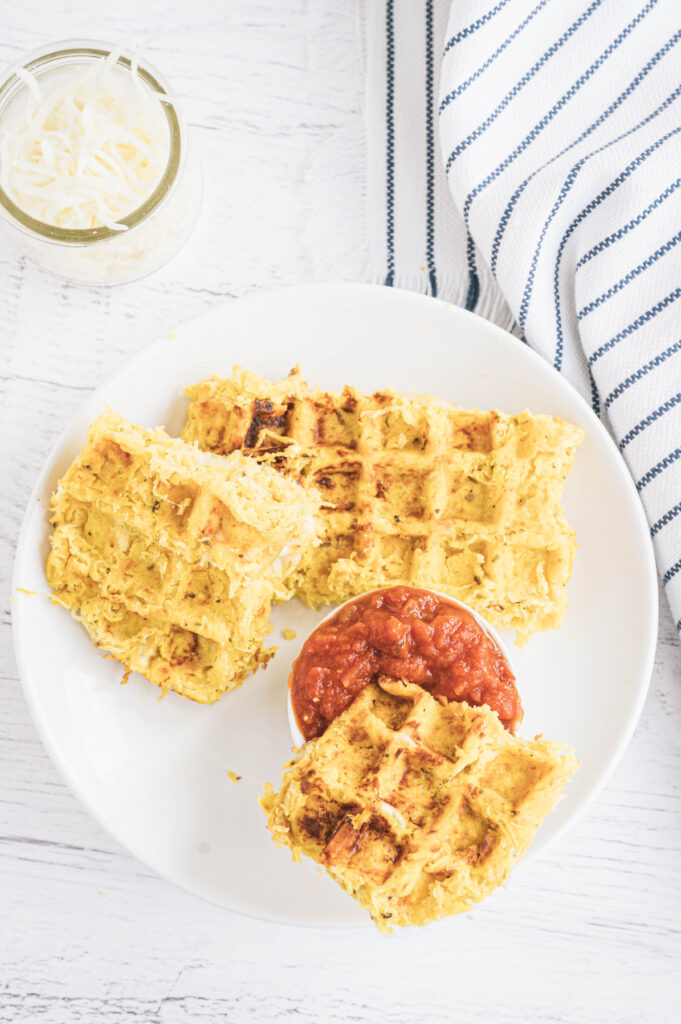
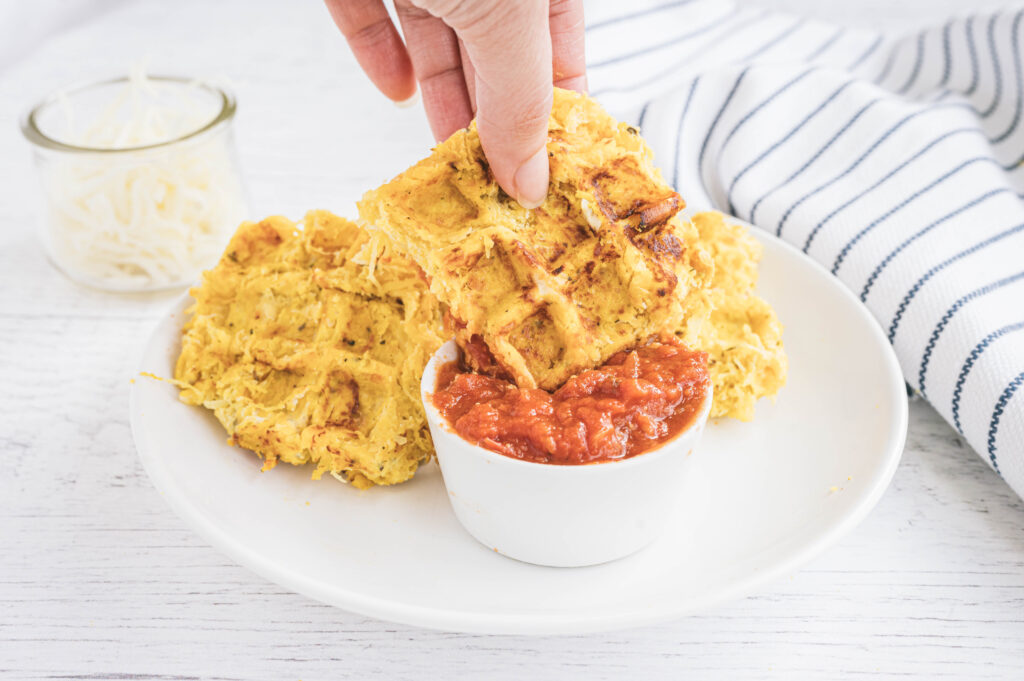
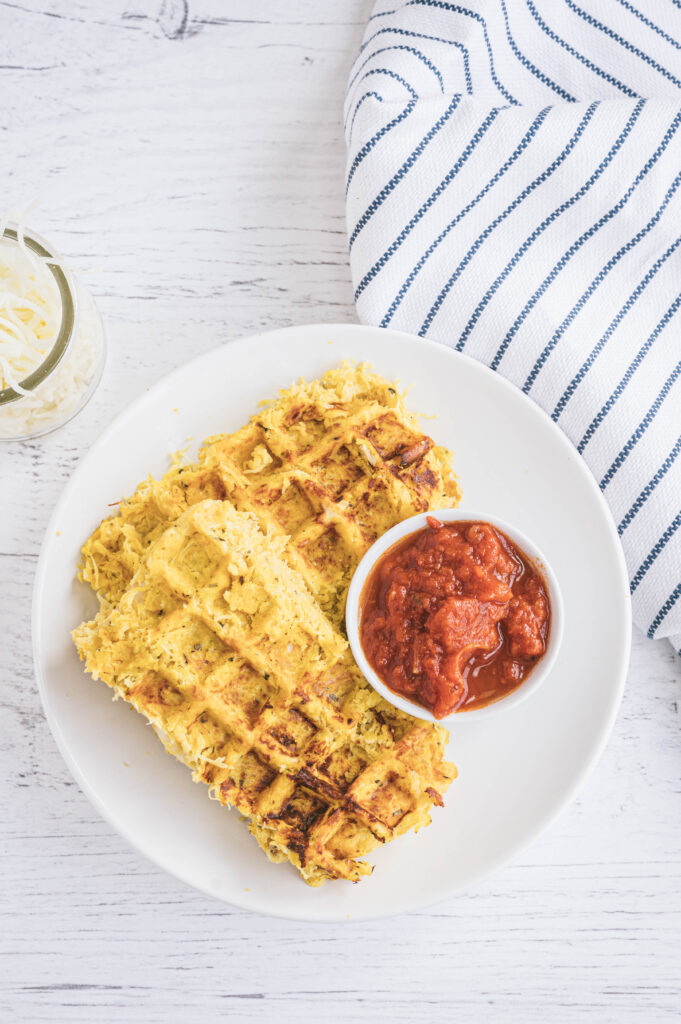
Spaghetti Squash Waffle Grilled Cheese on a white plate, one piece dipped in marinara sauce

We all know that spaghetti squash has many health benefits. It’s rich in vitamins, minerals, and antioxidants. One of the reasons I love using spaghetti squash so much when I’m cooking is because of how versatile it can be. 

What ingredients do I use for this Spaghetti Squash Waffle Grilled Cheese?

This recipe calls for ingredients you likely already have in your pantry. From eggs to parmesan cheese and various seasonings, I’m sure you have most of the ingredients on hand already. If you want to kick the recipe up a notch you could add other various seasonings as you see fit! 
How do I make this Spaghetti Squash Waffle Grilled Cheese? 

It’s very easy to make, which is another benefit if you’re busy or on the go. The most difficult part of the entire recipe is preparing the squash (which really isn’t even difficult at all!). 
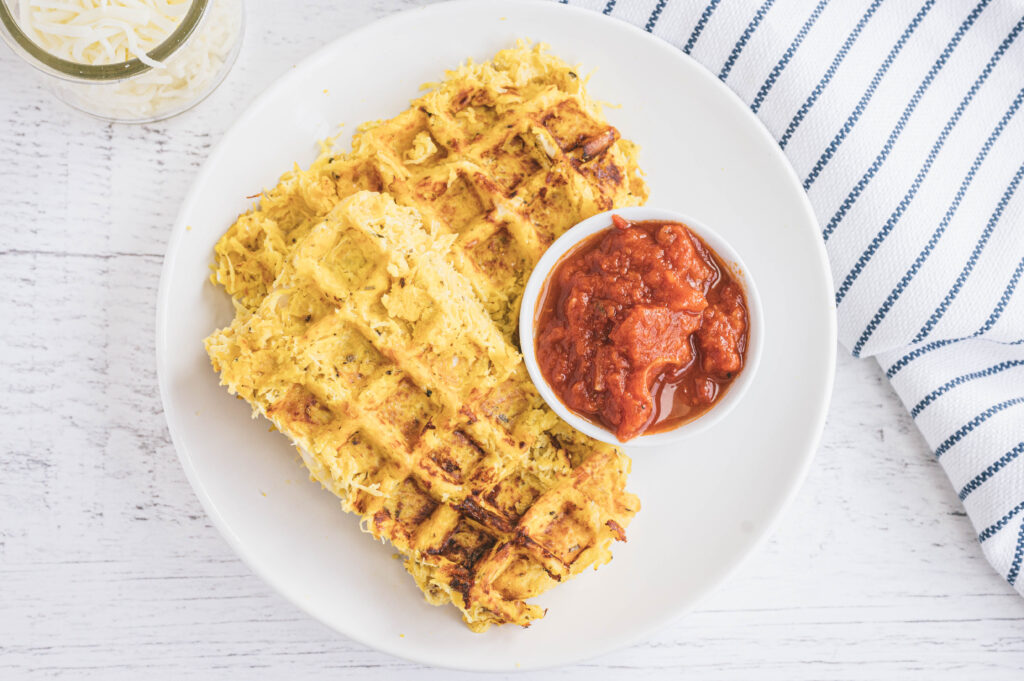
Spaghetti Squash Waffle Grilled Cheese on a white plate with a small dish of marinara sauce

How do I serve the Grilled Cheese Sandwiches?

Personally, I like to each them alone for a quick lunch or snack. If you want to make these for dinner, you can serve them with your favorite soup! You’ll find some of my favorite soup recipes here: https://chefjulierd.com/recipes/?_search=soup 

Spaghetti Squash Waffle Grilled Cheese being dipped in a small white bowl with marinara sauce

How do I cook spaghetti squash? 

The easiest method to cook the spaghetti squash for this recipe is in the microwave. However, you can also use your instant pot or oven. You’ll find the instructions in the recipe card below! 
Print
clock clock iconcutlery cutlery iconflag flag iconfolder folder iconinstagram instagram iconpinterest pinterest iconfacebook facebook iconprint print iconsquares squares iconheart heart iconheart solid heart solid icon
Spaghetti Squash Waffle Grilled Cheese on a white plate with a small dish of marinara sauce
Spaghetti Squash Waffle Grilled Cheese

  • Author: Chef Julie Harrington, RD
  • Prep Time: 15
  • Cook Time: 10
  • Total Time: 25 minutes
  • Yield: 2
  • Diet: Vegetarian

Description

Do you have spaghetti squash but you aren’t quite sure what to make with it? Let me introduce you to my new favorite recipe: Spaghetti Squash Waffle Grilled Cheese! It’s easy to make and the entire family will love it! 


Ingredients

Scale

1 medium spaghetti squash
2 eggs
⅓ cup grated parmesan cheese
½ tablespoon garlic powder
½ tablespoon Italian seasoning
¾ cup shredded mozzarella cheese


Instructions

  1. Cut spaghetti squash in half, lengthwise. Scoop out the seeds. Place the squash halves skin side up in a microwave-safe baking dish. (You can cook each squash half separately if your baking dish is too small to fit both, or cook both at once.) Fill the dish with about 1 inch of water.
  2. Microwave on high for 8 minutes. When done, a fork poked through the skin should slide easily into the squash. Continue microwaving on high for another 2 to 5 minutes as needed, until fork tender. When cool enough to handle, use a fork to scrape the strands of squash from the inside. (see notes below for alternative cooking methods)
  3. Using a cheesecloth or thin dishtowel, squeeze excess liquid from the squash (there will be a lot!). 
  4. In a medium bowl, whisk together eggs, parmesan, garlic powder, and Italian seasoning. Add the spaghetti squash and mix well breaking up any clumps of squash. 
  5. Preheat waffle iron to medium-high heat. Coat waffle iron well with cooking spray. Add half the squash mixture to the waffle iron and cook until golden brown, about 5-10 minutes, depending on your waffle iron.
  6. Open waffle iron and sprinkle one side of the waffle with half of the mozzarella cheese. Gently fold over the other half of the waffle on top of the side with the cheese. Gently press down on the waffle iron and continue cooking until the cheese has melted.
  7. Serve alongside tomato soup or dunk in marinara sauce. (or just enjoy it as is!)


Notes

Alternative methods to cook spaghetti squash:

Instant Pot – Slice the spaghetti squash in half and then scoop out the seeds in the center.
Place a trivet or steamer basket in the bottom of the Instant Pot and add a cup of water into the bottom. Arrange the cut squash halves on top of the trivet and secure the lid. Place the steam release valve in the lid is in the sealing position. Use the pressure cook or manual button to set the pressure cooker to cook at high pressure for 7 minutes. Release pressure and remove from Instant Pot.

In the oven – Preheat the oven to 400°F. Cut spaghetti squash in half lengthwise. Scoop out seeds. Drizzle the cut side with oil. Season with salt and pepper. Place cut side down on a baking sheet lined with parchment paper and bake 40 minutes or just until fork-tender. Let cool until able to handle. Flip spaghetti squash over and run a fork down the squash to separate into strands.

Keywords: spaghetti squash recipe, waffle, low carb, vegetarian

Recipe Card powered byTasty Recipes

FAQ

Do these Spaghetti Squash Grilled Cheese Waffles freeze well? How do you reheat them?
Yes! Feel free to meal prep these in advance. I would suggest heating them in the oven to warm up to retain their crispiness.

What if I don’t have a waffle iron?
Not to worry! You can still make the concept of this recipe by adding a scoop of the spaghetti squash mixture to a frying pan, crisp both sides and add cheese in the middle.

Spaghetti Squash Waffle Grilled Cheese on a white plate with a small dish of marinara sauce

other recipes you may enjoy

Rustic Apple Galette

Get creative with apples this season and switch it up by making this Rustic Apple Galette.

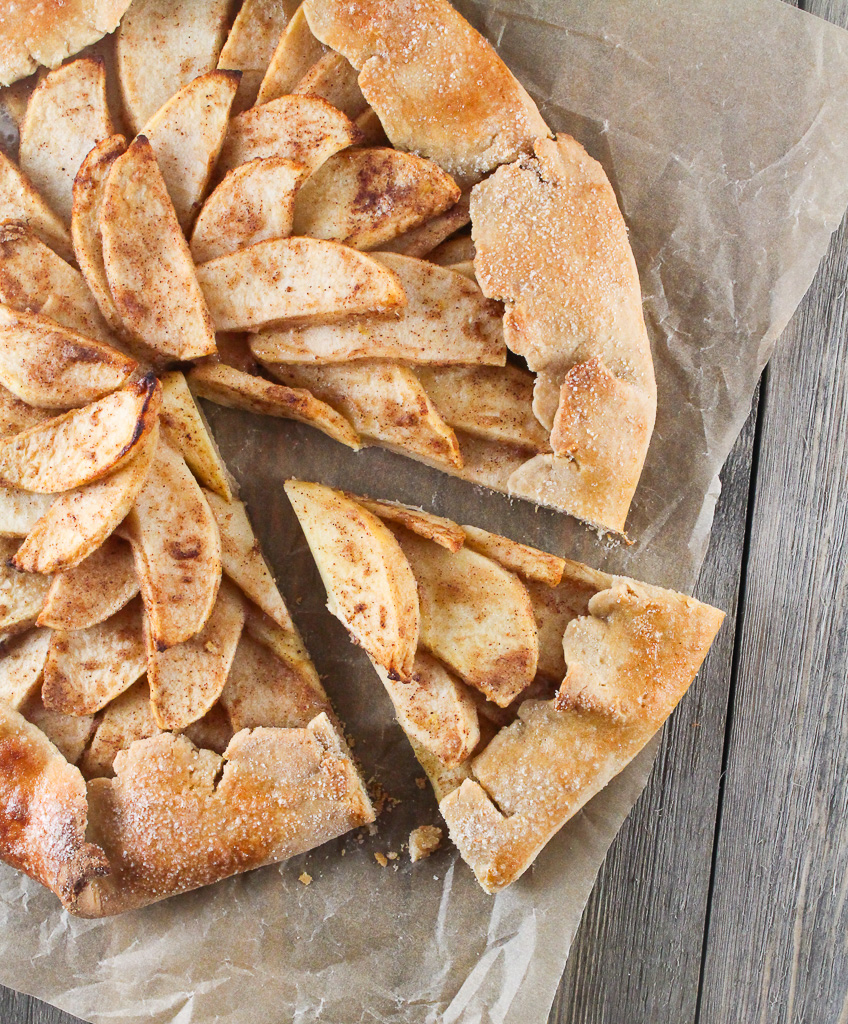
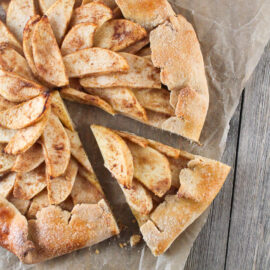
slice cut out of an apple galette

We are all creatures of habit. When I have apples on my grocery list, I walk straight to the produce department and pick the same few apple varieties each time. When I was in culinary school, it really opened my eyes to exploring new foods. I’m not just talking about unique foods, but rather some of the everyday foods that we don’t necessarily take advantage of. The majority of grocery stores carry over six varieties of apples at a time. When I was a supermarket dietitian, during the fall season, I’ve seen even up to 15 varieties taking up a spot in the produce department.

It’s not just apples to apples. Different apples contain different tastes, culinary uses, and may even ripen at different times during the season. Here are some apple varieties to look out for and ways to use them in the kitchen.

Best apples for making applesauce:

  • Pink Lady
  • Granny Smith
  • Braeburn

The best apple for making tart applesauce is a Pink Lady (for a tangy-sweet flavor) or, depending on taste, you could opt for a true tart variety like Granny Smith. Unless you have a high-powered blender, be sure to peel the skin prior to cooking. Add a hint of sweetness without added sugar, by sweetening applesauce with cinnamon.

Best apples for baking:

  • Granny Smith
  • Pink Lady
  • Golden Delicious
  • Fuji

There are a few! Apples on the sweeter end of things are a good choice, as their higher sugar content means you can go a bit lighter on added sugars in the recipes. If you want your apples to maintain a bit of crispness, look for firmer apples that will maintain texture under the heat.

Best apples for salads:

  • Honeycrisp
  • Pink Lady
  • Fuji
  • Jazz
  • Empire

For salads, you’ll want a crunchy apple that doesn’t brown too quickly when sliced or chopped.  Honeycrisp, Pink Lady, Fuji, Jazz, and Empire apples have bright white flesh that resists browning when cut.

Best apples for stuffing:

  • Pink Lady
  • Golden Delicious

Looking for a balance of sweet and savory in your stuffing recipe? Both Pink Lady and Golden Delicious varieties make a great addition to savory stuffing with their firm texture and sweet/tart flavor.

Best apples for making galettes:

  • Golden Delicious
  • Pink Lady
  • Honeycrisp
  • Golden Delicious
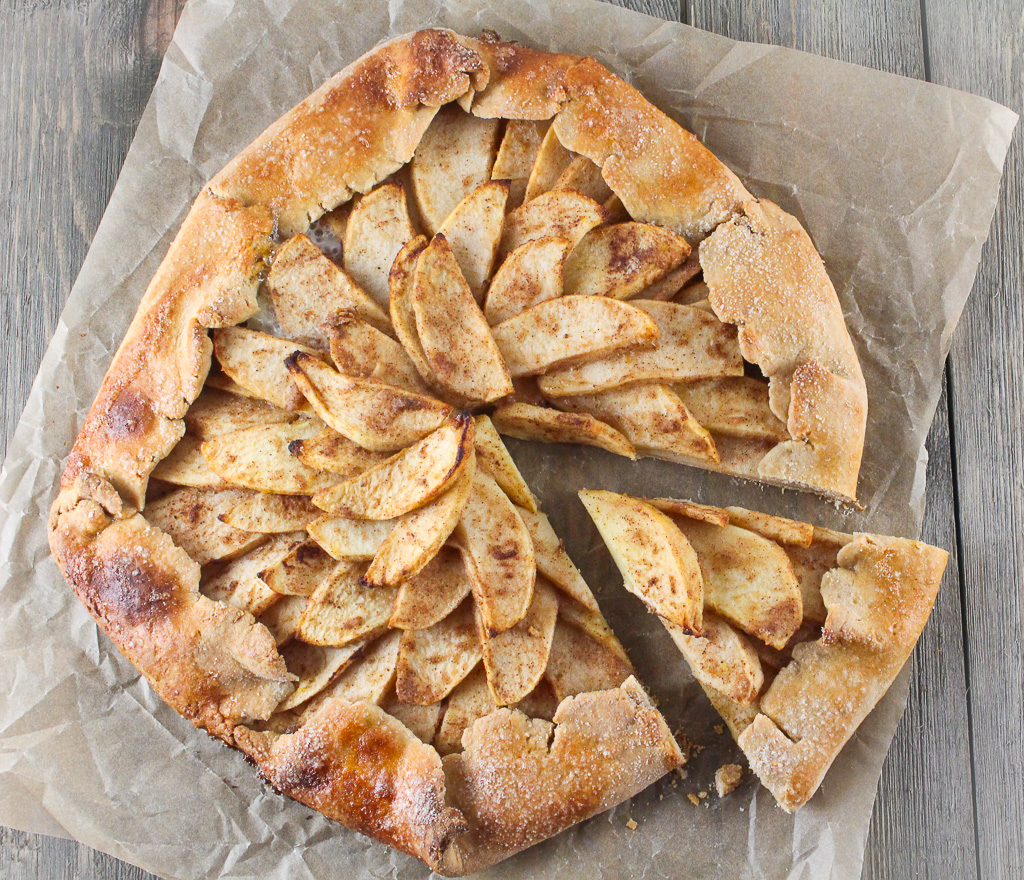
full apple galette on a piece of parchment paper with a slice cut out

What is a galette?

A galette is a French term for round or freeform crusty cakes. The fillings can be made with both sweet or savory ingredients.

The best apples to use for making an apple galette is one that is sweet and tart that holds up exceptionally well to heat, like pink lady, fuji, or honey crisp. If you are looking for a little extra tartness, using Golden Delicious apples is a great way to go too.

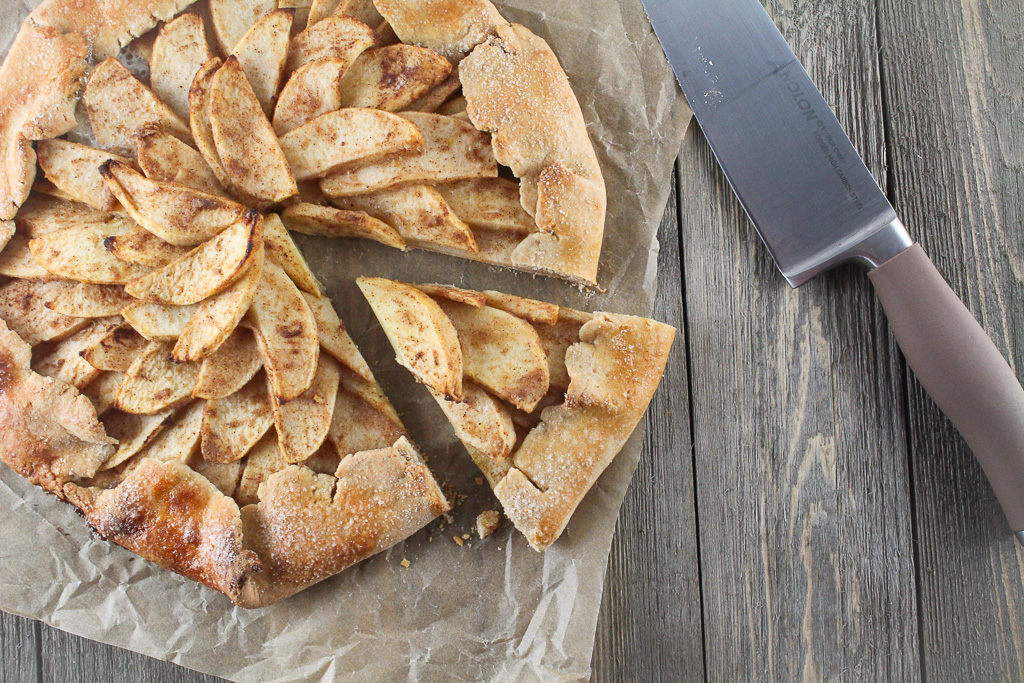
apple galette with a slice removed and a knife

Next time apples are on your grocery list, I challenge you to choose a different apple variety than your typical choice.

Print
clock clock iconcutlery cutlery iconflag flag iconfolder folder iconinstagram instagram iconpinterest pinterest iconfacebook facebook iconprint print iconsquares squares iconheart heart iconheart solid heart solid icon

Rustic Apple Galette

  • Author: Chef Julie Harrington, RD

Ingredients

Scale

For the crust:
¾ cup white whole-wheat flour
2/3 cup all-purpose flour
½ tablespoon sugar
½ teaspoon salt
1/3 cup unsalted butter (5 tablespoons), cut into ½ inch pieces
3 tablespoons low-fat milk
¼ cup plain Greek yogurt

For the filling:
3 apples, peeled and thinly sliced (choose a firm, sweet and tart variety, like Pink Lady)
2 tablespoons white whole-wheat flour
2 tablespoons maple syrup
2 tablespoons lemon juice
1 teaspoon lemon zest
½ teaspoon ground cinnamon
1/8 teaspoon ground nutmeg
1/8 teaspoon ground ginger

1 large egg white, lightly beaten
(optional) 1 teaspoon sugar


Instructions

  1. Preheat oven to 425 degrees F. Line a large baking sheet with parchment paper.
  2. Unwrap dough and place on a floured surface. Roll out dough to a 15-inch circle. Place the dough on the baking sheet. Evenly, spoon the apple mixture onto the dough, leaving a 2-inch border around the edges.
  3. Fold the edges of the dough over the apples. Brush edges with the whisked egg white. Sprinkle with sugar, if using.
  4. Bake for 25-30 minutes until the crust is golden brown. Let cool for at least 20 minutes before cutting. Cut into 8 wedges.

Recipe Card powered byTasty Recipes

This recipe was originally posted in the November 2018 issue of Today’s Dietitian.

FAQ:

Do I have to make a homemade crust?
Nope! You can definitely skip that step and use a pre-made pie crust.

What other fruits would work well in this recipe?
Any fruits that don’t have too much moisture. Pears, plums, and peaches work well in galettes.

What savory flavor combinations would you try?
I developed a savory root vegetable galette for the American Pecan Council that was delicious!

Other recipes you may enjoy

Cheesy Chili Cups

These Cheesy Chili Cups are going to become a family favorite recipe.

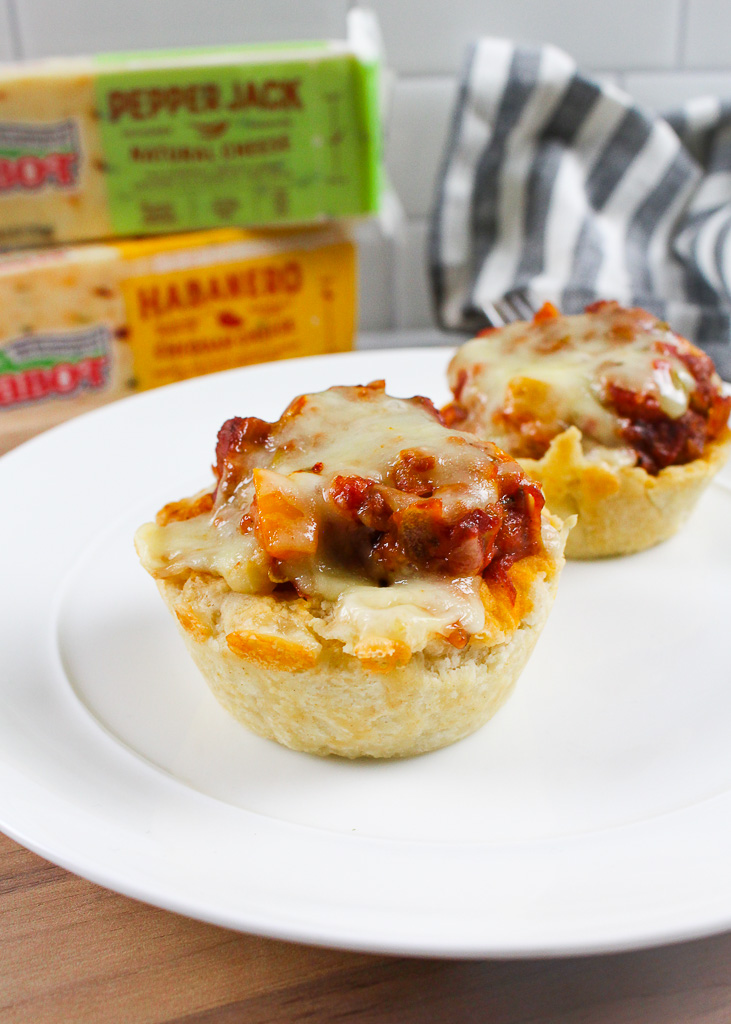
cheesy chili cup on a white plate

By posting this recipe I am entering a recipe contest sponsored by Cabot Cheese and am eligible to win prizes associated with the contest. I was not compensated for my time.

Hello everyone! My name is Corinne Levy and I’m working with Julie to complete my internship. I am a senior studying culinary nutrition at Johnson & Wales University. I absolutely love cooking especially if the dishes I make help others feel happy and healthy! By working for Julie I’m looking forward to learning more about how I can get people excited to be in the kitchen and understand that all foods fit.

As a kid, sitting down as a family for dinner was always important, but throughout time as schedules changed it did become a bit of a challenge. Luckily, we always had some easy meals that brought us together and one of them was a classic Sloppy Joe Cup. It was a simple and fun excuse for us to play around with biscuit dough!   

In honor of it being Family Meals Month, this recipe is an upgrade to Corinne’s old family Sloppy Joe Cup recipe into Cheesy Chili Cups. The base is a simple biscuit with Cabot Habanero Cheddar folded in to give some subtle heat. Instead of sloppy joe, the filling is a one-pot turkey chili with lots of fun veggies hidden in it and topped with Cabot Pepper-Jack. This is a nice hearty and cheesy recipe that the whole family can enjoy together.

Why family meals are important

September is Family Meals Month! The goal of this initiative is to show the positive effects of eating with loved ones has on our behavior. Eating as a family usually results in more at home cooking which then leads to healthier habits. It also saves you money compared to frequently buying takeout. By sitting down and sharing a meal with the ones we care about, we are allowing ourselves to build a positive relationship not just with people but also our food.

Budget-friendly shopping strategies

  • Look at what items are on sale and what coupons are available. 
  • Try to plan meals ahead of time then make your shopping list. Sticking to a list helps prevent impulse buys from getting into your cart.
  • Stock up on frozen produce! They’re often cheaper and last a long time in the freezer.

Strategies for making quick and healthy meals

  • One-pot meals are simple, involve less clean up, and are a great opportunity to use up produce.
    One-pot meal recipe inspiration
  • Sheet pan recipes can be a breeze. Chop up some veggies, season your meat or plant-based protein, toss it all in the oven, and ta-da!
    Sheet pan recipe inspiration
  • Mise en Place: by staying organized and prepared for a recipe the process of cooking will go smoother.
  • Make what you can ahead of time. Marinade things overnight, cut veggies the night before, and store them in the fridge. That way when you’re ready to cook most of the prep is done already.
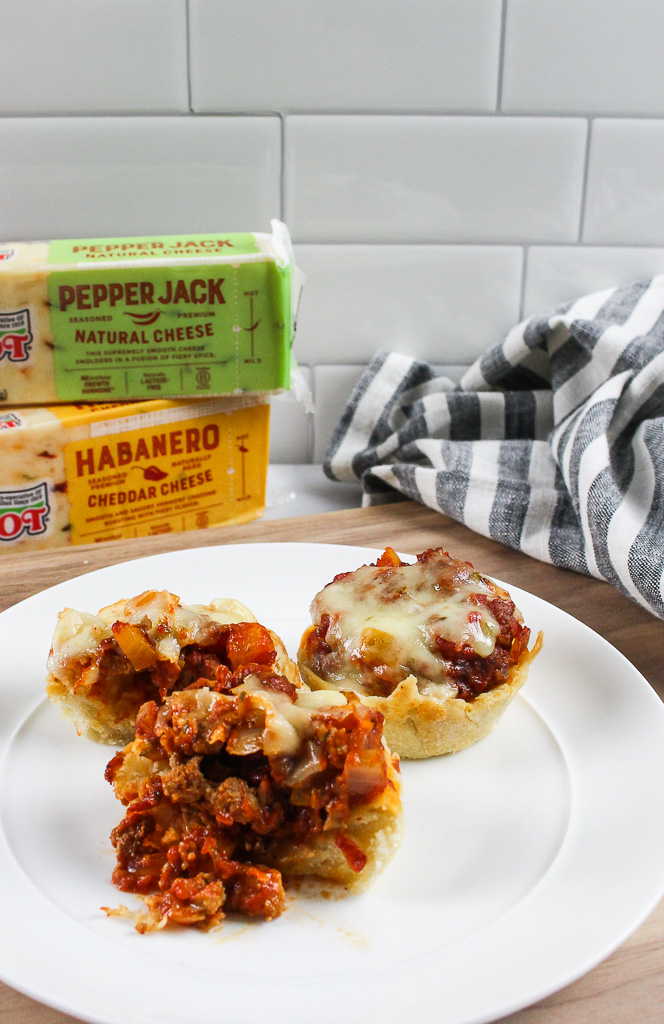
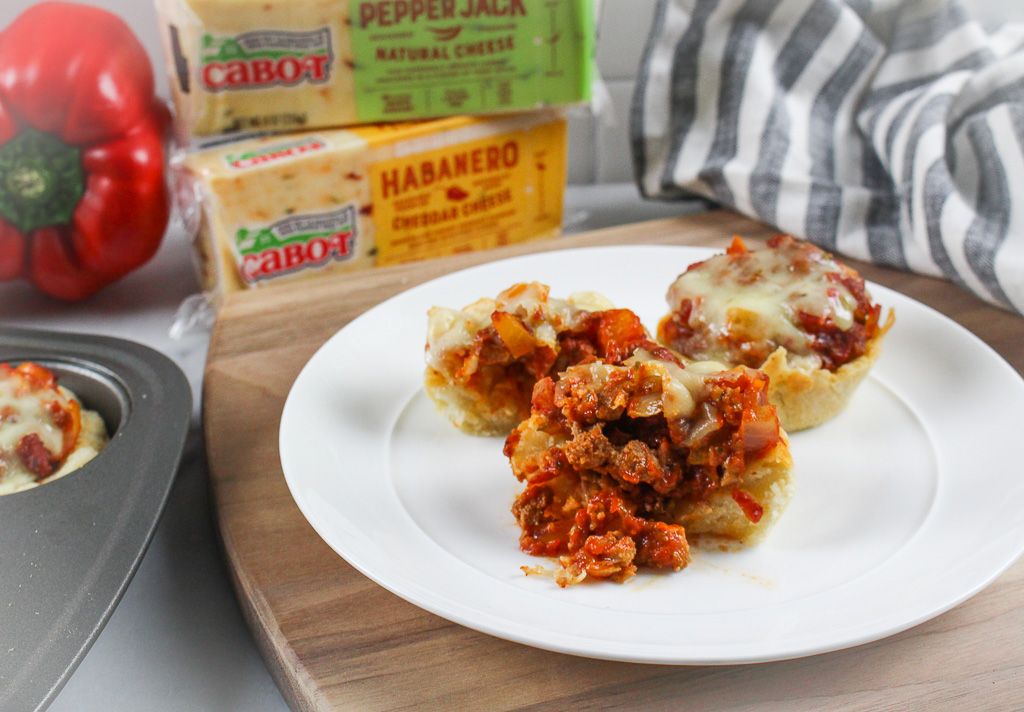
cheesy chili cup cut in half with the filling falling out on a white plate

How to make cheesy biscuits

Step One: Preheat the oven to 350℉. While that’s heating up assemble all your dry ingredients (flour, baking powder, salt) into a large bowl. Make sure the flour isn’t packed or else you’ll end up with a dense biscuit!

Step Two: Cut the butter into the dry ingredients. This is a common technique in baking where instead of totally creaming together the fat into the mix, you break the butter down into small pieces throughout the dough. This way when you bake them the butter will melt leaving nice air pockets that make the biscuit fluffy.

Step Three: Mix in the shredded cheese and milk until the dough is evenly mixed. For this recipe, we used the Cabot Habanero Cheddar to add a little heat. Cabot cheese is naturally aged cheddar that comes in a huge variety of flavors so you can customize what cheese will best suit your family dinner. Cabot’s cheese also melts nicely in the dough giving a nice rich flavor to what would normally be a simple biscuit.

Step Four: Knead and roll the dough out flat. Cut the dough out into circles (I usually end up with about 24 pieces) and place them into muffin tins or spaced out on a lined baking pan. Bake in the oven for about 10-12 minutes. 

Print
clock clock iconcutlery cutlery iconflag flag iconfolder folder iconinstagram instagram iconpinterest pinterest iconfacebook facebook iconprint print iconsquares squares iconheart heart iconheart solid heart solid icon
Cheesy Chili Cups

Cheesy Chili Cups

  • Author: Chef Julie Harrington, RD
  • Prep Time: 20
  • Cook Time: 30
  • Total Time: 50 minutes
  • Yield: 24 chili cups (6-8 servings)
  • Category: dinner
  • Method: oven
  • Cuisine: American

Ingredients

For the Filling:
½ lb ground turkey
2 tablespoons olive oil (or canola oil)
1 medium bell pepper, small dice
½ medium onion, small dice
½ medium zucchini, shredded
1 (15 oz.) canned tomato sauce
3 tablespoons tomato paste
1 teaspoon chili powder
1 teaspoon oregano
½ teaspoon garlic powder
½ teaspoon smoked paprika
1 cup Cabot pepper-jack cheddar cheese, shredded

For the Biscuit Cups:
4 cups flour
2 tablespoons baking powder
1 cup (2 sticks) unsalted butter, cold
1 ½ cups milk
1 cup Cabot habanero cheddar, shredded


Instructions

  1. Starting with the filling: In a shallow pot, heat up 2 tablespoons of oil. Then add the ½ lb of ground turkey over medium heat and cook for about 5 minutes until browned.
  2. Toss in all of the onion, zucchini, and pepper. Cook for about 5 more minutes until the onions are translucent
  3. Mix in the tomato sauce, tomato paste, and all of the spices. Let the tomato sauce reduce for another 5 minutes to get a nice thick chili. Set aside until it’s time to fill the biscuit cups.
  4. For the Biscuit Cups: Preheat the oven to 350℉. In a medium bowl mix flour, baking powder, and salt.
  5. Cut the butter into the flour until the butter is in small pea-size pieces and evenly distributed throughout.  For this, you can use a pastry cutter, a fork, or even your hands.
  6. Slowly incorporate the milk and shredded cheese until a solid yet slightly sticky dough has formed.
  7. Knead the dough on a floured surface for a minute. Then, roll it out into a ¼” sheet. Cut circles out of the dough to fit into muffin tins.
  8. Fill the muffin tin with the dough circles and make sure the dough lines the wall of each tin. The goal is to make these into little cups. Bake in the oven for 5 minutes 
  9. Take the biscuits out of the oven. Then make a well in each cup with a spoon to put in the filling. Once the filling is in the cup and topped with Cabot shredded pepper jack, put them back in the oven for 5 more minutes until the cheese is melted and biscuits are finished baking.

Notes

Recipe development support by Corinne Levy, JWU culinary nutrition intern.

Keywords: chili, biscuits, Cabot cheese, cheddar cheese

Recipe Card powered byTasty Recipes

FAQ

Can I use pre-made dough? 
Yes absolutely! If I’m in a time crunch Immaculate Baking or just a simple Pillsbury biscuit will do.

How long will these last in the refrigerator?
Like most leftovers, they’ll last in the fridge for up to 5 days.

Do these cheesy chili cups freeze well?
Yes, bag them up and freeze away! Just reheat them in the oven so the biscuit maintains a good texture.

How can this recipe be changed to be vegetarian?
You can switch the turkey out with a combination of beans and chopped mushrooms. The beans will be a good source of protein and the mushrooms will help get that umami flavor!

Does this recipe accommodate dairy allergies?
This is actually why Cabot cheese fits so well for this dish! Cabot cheese is naturally lactose-free thanks to its cheese-making process.

Cast Iron Seared Steaks with Garlic Seasoned Salt

No grill, no problem! Learn how to perfectly cook steak in your cast iron skillet.

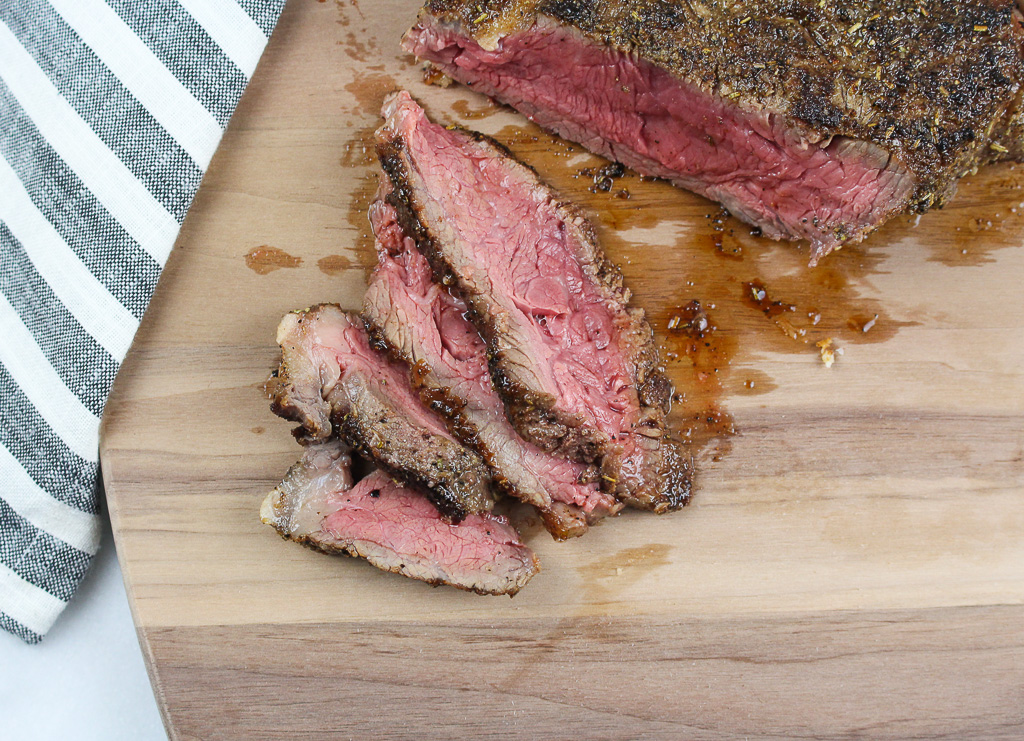
sliced medium rare steak

This post is sponsored by the New York Beef Council in collaboration for their first-ever #BeefTogether Virtual Steak Night. Thank you for supporting brands that make this blog possible!

I had the wonderful opportunity to participate in a virtual cooking class with the New York Beef Council to learn more cooking techniques to perfectly cook a steak on the cast iron skillet. I picked up a few new tips. 

Lean beef can be part of a heart-healthy lifestyle and is a nutrient-dense food. Beef is a source of important nutrients such as protein, iron, and zinc. Iron carries oxygen to our brain and body and zinc boosts our immune system.

Intimidated by cooking steak at home? Don’t be! Plus, it doesn’t have to be complicated. Create a simple dry rub and grab your cast iron skillet. Simply follow these steps to create a delicious steak at home.

How to cook steak on a cast-iron skillet:

This cooking technique first sears the steak stovetop, then finishes the cooking process in the oven.

Step One:

Preheat the oven to 425 degrees F. The cook time for medium-rare (145 degrees F) can range anywhere from 7-15 minutes of cook time in the oven. There are many variables that can cause such a range, like if the steak is cold vs. room temperature or the thickness of the steak.

Instead of basing the cooking on time, shift the focus of the cooking time depending on the internal temperature.

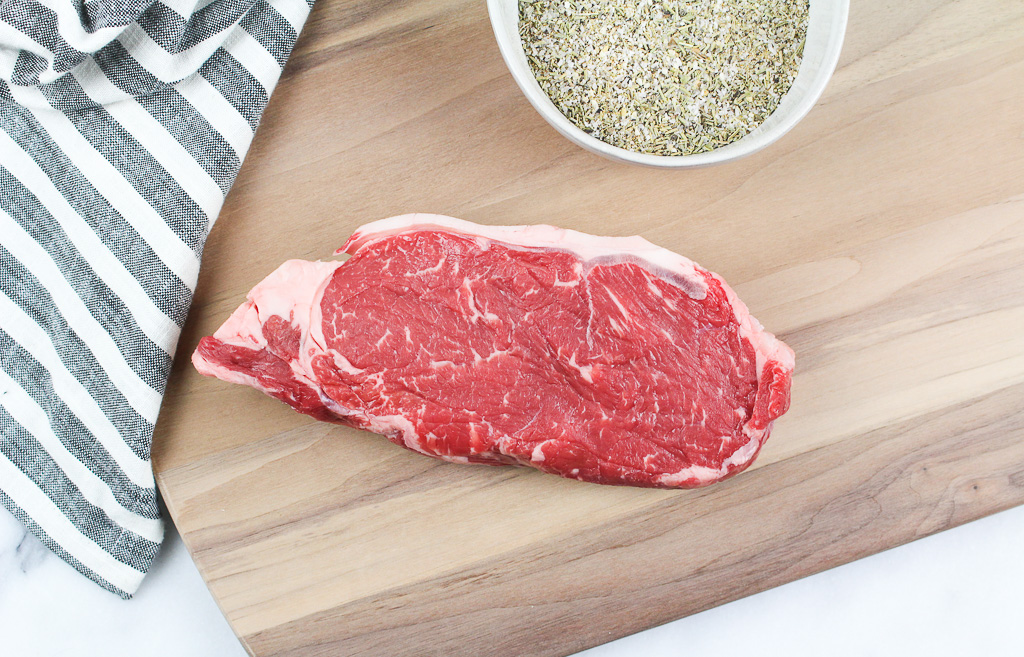
strip steak on wooden cutting board

Step Two:

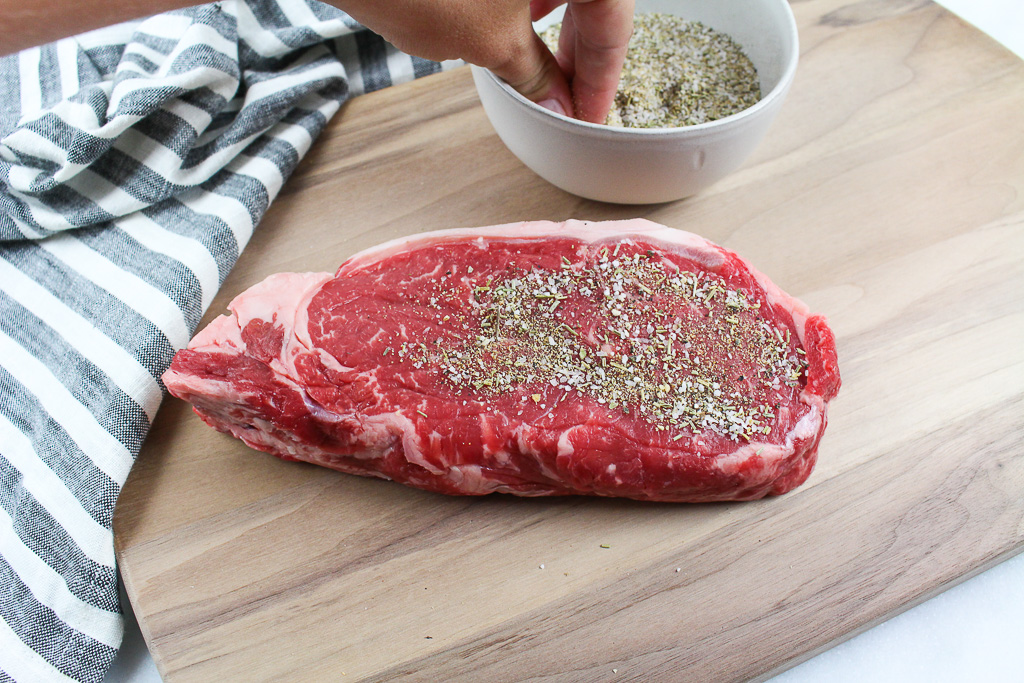
Allow the steak to come to room temperature – no longer than 30 minutes. Pat the steak dry with paper towels. This will promote more even browning and the rub to stick on better. Trim off excess fat, if desired. Rub seasoning blend on both sides evenly.

strip steak with dry rub

Step Three:

Place cast-iron skillet stovetop over high heat. Add 1-2 tablespoons of canola oil (or avocado oil) and allow to heat until shiny and glistening.
Note: Start the cooking process with oil as it has a higher smoke point than butter. If you want to add butter at the end, you can always baste it on top.

Step Four:

Using tongs, place the steak in the center of the pan. (Using tongs can help prevent any oil splattering on your hands.) Sear for about 1 minute, until a nice browned sear and the steak is easily able to move in the pan. If the steak is sticking to the pan, it’s not ready to be flipped. Don’t force it. Let it continue to cook then flip when ready and sear the other side.

Step Five:

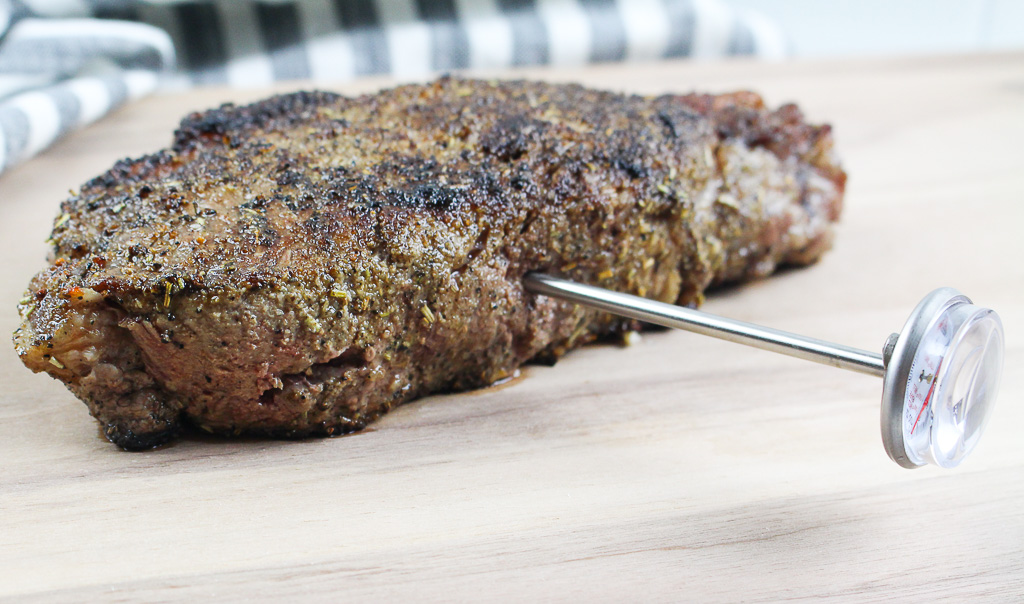
Using oven mitts, transfer the steak in the cast-iron skillet into the oven. Cook for 7 minutes and take the temperature by placing the instant-read thermometer horizontally from the side so it penetrates into the thickest part of the steak.

temping a streak

Step Six: 

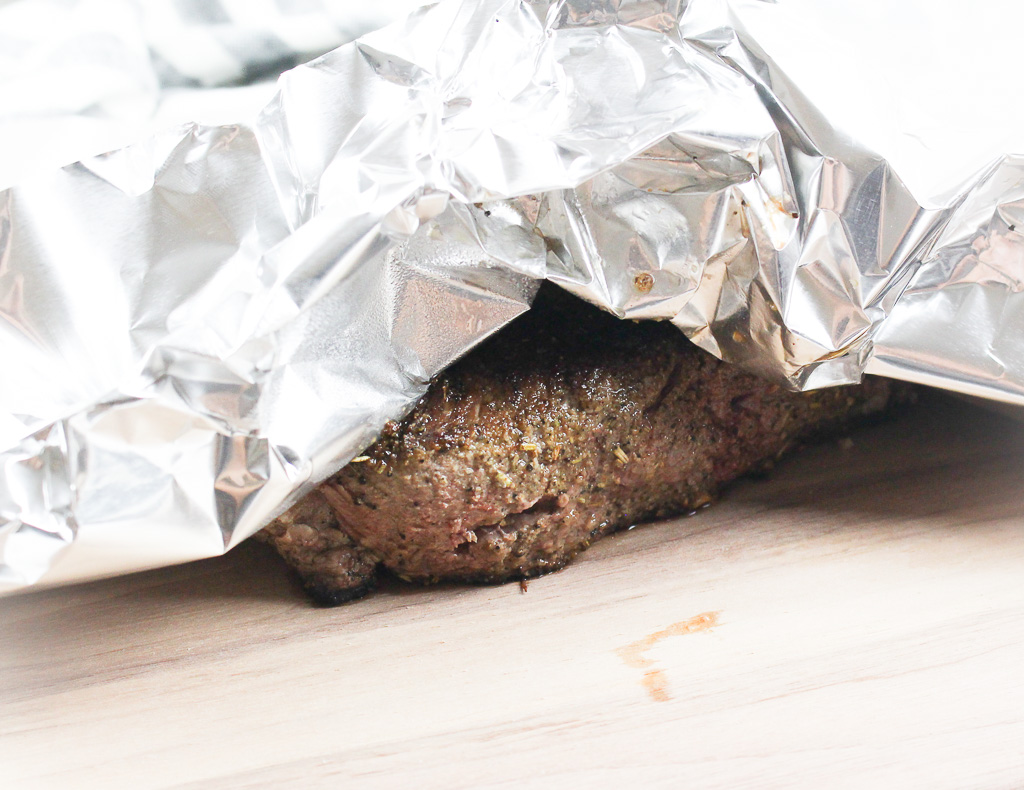
For medium-rare, pull out of the oven when the thermometer reads 140 degrees, then allow to rest to factor in carryover cooking to reach an optimal temperature of 145 degrees F. Using tongs, remove steak from the pan onto a clean cutting board. Tent with aluminum foil and allow steak to rest 5-10 minutes.

tenting a steak in foil

Step Seven:

Slice the steak across the grain and serve immediately. And most importantly, enjoy it!

sliced medium rare steak

Tips for using dry rubs:

  • Dry herbs consist of herbs, spices, and other seasonings.
  • Rubs can be applied just before cooking or up to 2 hours in advance and refrigerated until cooking time.
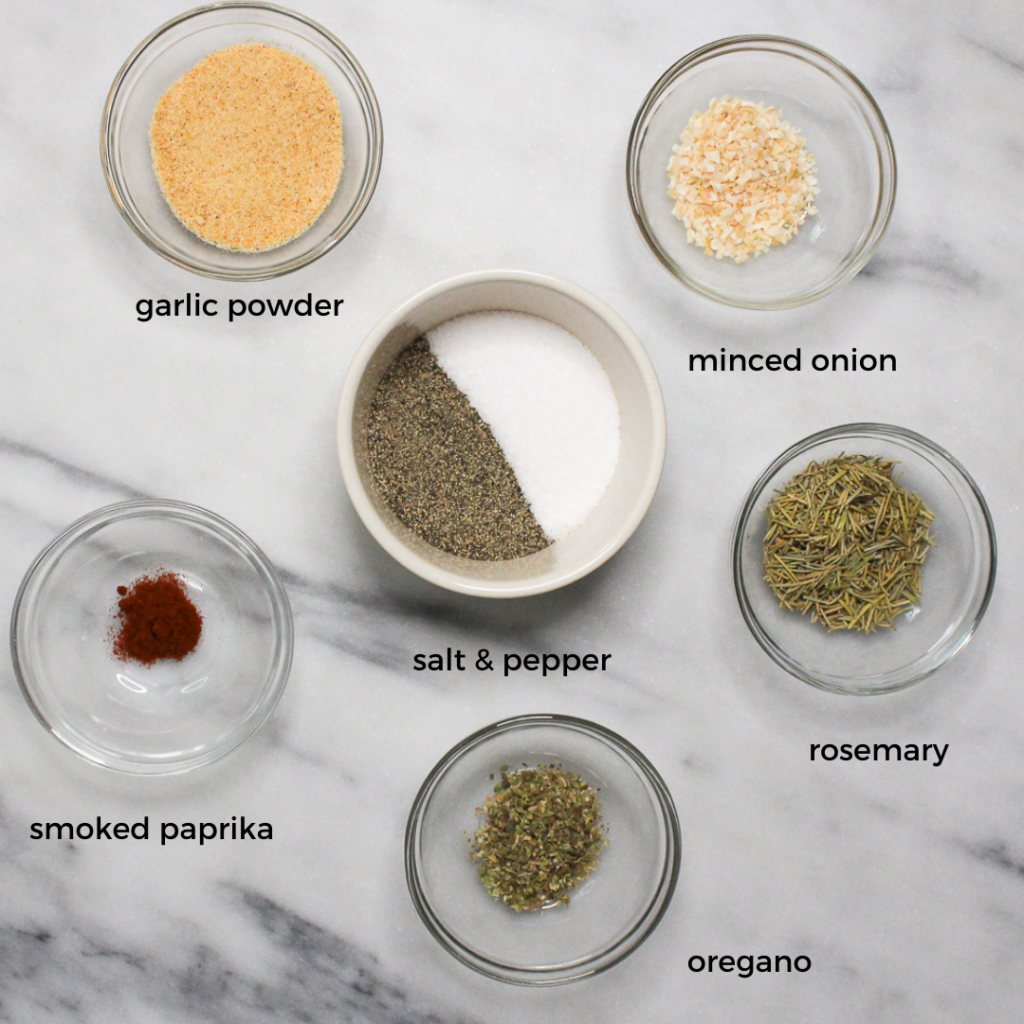
ingredients for a spice blend

When to use dry rubs:

Trouble deciding if you should use a dry rub or marinade? Dry rubs are used for tender cuts of meat. Marinades are used for less tender cuts of meat, as the acid in the marinade helps tenderize the meat.

Cooking tips:

How to properly temp a steak:

Insert an instant-read thermometer horizontally from the side so it penetrates the thickest part of the center of the steak.

Thawing a frozen steak:

For best quality, defrost beef in the refrigerator. (Never at room temperature!) Place the frozen package on a plate or tray to catch any juices.

For ½ to ¾ inch steaks, allow for approximately 12 hours to thaw in the refrigerator.

Print
clock clock iconcutlery cutlery iconflag flag iconfolder folder iconinstagram instagram iconpinterest pinterest iconfacebook facebook iconprint print iconsquares squares iconheart heart iconheart solid heart solid icon
strip steak cooked to medium rare, sliced

Cast Iron Seared Strip Steaks with Garlic Seasoned Salt

  • Author: Chef Julie Harrington, RD
  • Prep Time: 10 minutes
  • Cook Time: 7-15 minutes
  • Total Time: 16 minute
  • Yield: 4
  • Category: dinner
  • Method: stove top to oven
  • Cuisine: american

Ingredients

Scale

2 (about 810 ounces each) boneless Strip Steaks, cut 1-inch thick
1-2 tablespoons canola oil (or avocado oil)

Garlic Seasoning Salt:
4 teaspoons dried rosemary
1 teaspoons dried oregano
1 teaspoon onion granules
2 tablespoons kosher salt
1 tablespoon black pepper
4 teaspoons garlic powder
1/4 teaspoon smoked paprika


Instructions

  1. Allow steak to rest for up to 30 minutes to come to room temperature. Preheat the oven to 425 degrees F. 
  2. In a small food processor or spice grinder, pulse the rosemary, oregano, and onion granules to break them down to a similar size as the kosher salt. In a small bowl, combine the rosemary, oregano, onion granules, salt, black pepper, garlic powder, and paprika.
  3. Pat the steak dry with paper towels. Trim off excess fat, if desired. Rub seasoning blend on both sides evenly.
  4. Place cast-iron skillet stovetop over high heat. Add 1-2 tablespoons of canola oil and allow to heat until shiny and glistening. Using tongs, place the steak in the center of the pan. Sear for about 1 minute, until a nice browned sear and the steak is easily able to move in the pan. Then flip and sear the other side until browned.
  5. Using oven mitts, transfer the steak in the cast-iron skillet into the oven. Cook for 7 minutes and take the temperature by placing the instant-read thermometer horizontally from the side so it penetrates into the thickest part of the steak. Cook for temperature vs. time. The USDA recommends cooking until 145 degrees F for medium-rare. Adjust cooking time until the desired temperature is reached.
  6. Using tongs, remove steak from the pan onto a clean cutting board. Tent with aluminum foil and allow the steak to rest 5-10 minutes.
  7. Slice the steak across the grain and serve immediately.

Keywords: steak, strip steak, beef, dinner, cast iron

Recipe Card powered byTasty Recipes

FAQ:

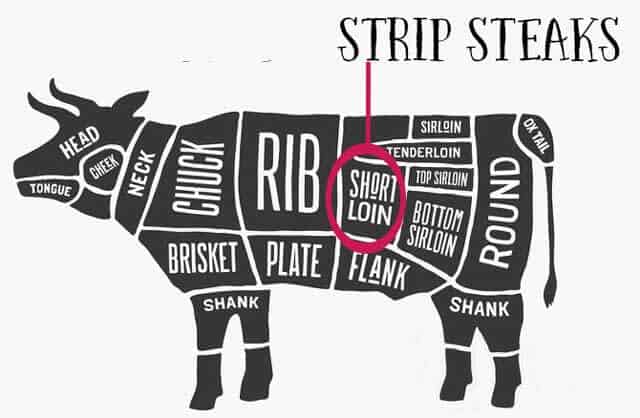
Where does the strip steak cut come from?

Strip steaks are cut from the short loin of a cow, which is located behind the rib area with the tenderloin.

anatomy of a cow
(image source: unknown)

What temperature should I cook the steak to?

Medium-rare: 145 degrees F
Medium: 160 degrees F
Well Done: 170 degrees F

What qualifies beef as “lean”?

Beef can only be claimed as “lean” if the cut of beef is less than 10 grams total fat, 4.5 grams or less saturated fat, and less than 95 milligrams of cholesterol per serving per 100 grams (about 3 ¾ ounces by weight).

What other ways can I use this Garlic Seasoned Salt?

  • Roasted vegetables
  • Popcorn
  • Homemade pita chips

Other recipes you may enjoy

The Truth About Norwegian Farm-Raised Salmon

Separate facts and fiction about farm-raised salmon and learn how the Norwegian aquaculture industry sets the standard for high-quality, safe, and sustainably farmed salmon.

This post is sponsored by the Norwegian Seafood Council. Thank you for supporting brands that make this blog possible!

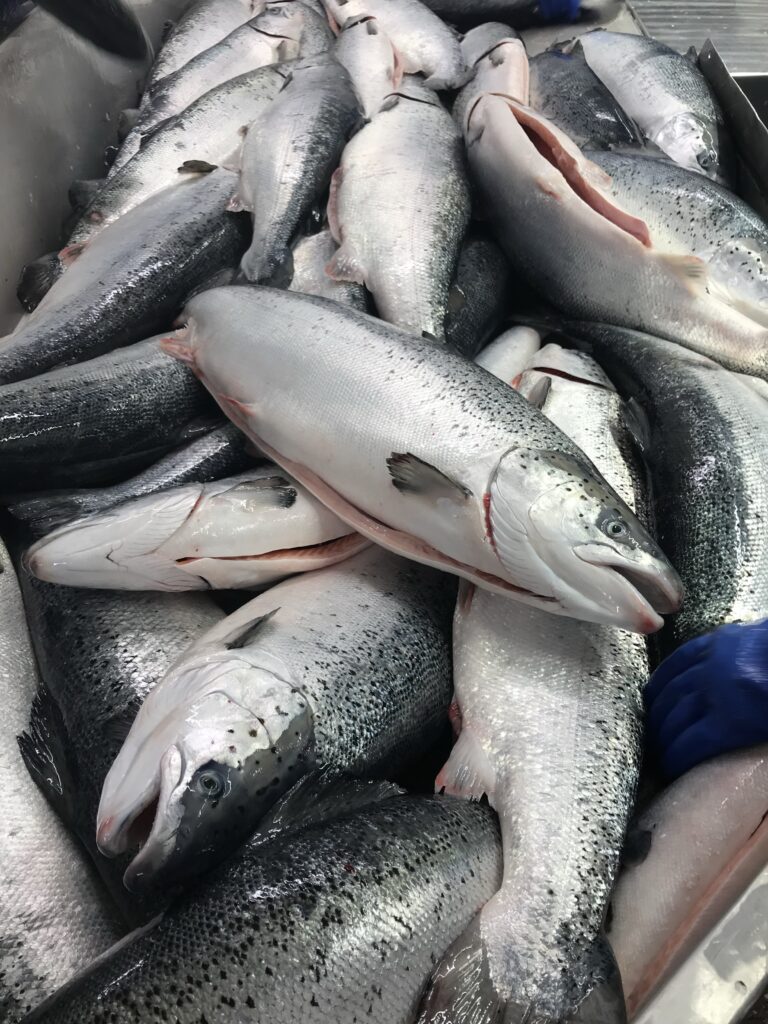
I had an incredible opportunity last year to travel to Norway to learn first hand about seafood from Norway. As a dietitian and a chef, I am invested in learning about where our food comes from and the sustainability practices behind them to create a thriving future for the next generation.

Sustainability has been one of the main objectives of the Norwegian fishing industry, committed producing seafood in a safe, controlled, and sustainable manner with strict regulations.

Get the facts about farm-raised salmon from Norway

  • Farm-raised salmon from Norway is raised in its natural habitat and not a cramped pool of fish swimming on top of each other. The ratio of the pens in the fjord is 97.5% water to 2.5% salmon.
  • Farm-raised salmon from Norway is able to have much more control to prevent disease and mortality.
  • Seafood from Norway is all about sustainability. Since fishing had been part of their heritage for more than 2,000 years, taking care of the sea for the next generation is part of their culture.
  • Seafood from Norway is shipped fresh or frozen! (really, however, the customer wants it!)

Why origin matters

There are a lot of choices out there when it comes to seafood – both wild and farmed. Salmon is really one of the most popular species in the US and there are a number of species available with different characteristics.

The origin of the seafood, as every country has completely different practices.

How to identify seafood from Norway

According to the USDA, Country of Origin Labeling (COOL) is a consumer labeling law that requires retailers (grocery stores and supermarkets) to identify the country of origin on certain foods, including wild-caught fish, farm-raised fish, and shellfish.

It will clearly be listed that the seafood is from Norway or you can look for the Seafood From Norway seal.

Our group in Norway with safety gear to check out the Fjords.

Why eat more fish

Seafood helps build healthy hearts. Omega-3 fatty acids help reduce high blood pressure and high cholesterol levels, lowering the risk of heart disease.

Storing fresh salmon

Fresh salmon can last up to two days if stored close to 32 degrees, rather than up to one day at the typical home refrigerator temperature of 40 degrees. Place the fish in a zipper-lock bag on ice in a bowl (or cover it with ice packs) and place it at the back of the fridge, where it’s coldest.

How to freeze salmon

If you want to freeze raw salmon, pat it dry, and wrap it tightly in plastic wrap, place it in an airtight container and freeze it. Make sure to label it with the date and use it within three months.

Cooking Tips

Skin side up or skin side down?

First of all—skin is tasty! So when you’re cooking salmon, keep that skin on. It provides a safety layer between your fish’s flesh and a hot pan or grill. Start with the skin-side down, and let it crisp up. It’s much easier to slide a fish spatula under the salmon’s skin than under its delicate flesh.

Best ways to cook salmon

  • Pan-fry
  • Roast
  • Broil
  • Skillet to the oven (just make sure your pan is oven-safe!)
  • Grill
  • Poached
  • In parchment (also known as en pappillote, French for “wrapped up in parchment.”)

For more information about Seafood From Norway visit: seafoodfromnorway.us

Have additional questions? Comment below!

Mediterranean Cod En Papillote

Step up your culinary game with this surprisingly easy Mediterranean Cod En Papillote made with Norweigian cod.

Mediterranean Cod En Papillote

This post is sponsored by the Norwegian Seafood Council. Thank you for supporting brands that make this blog possible!

During this time, we are staying inside and limiting the number of trips to the grocery store. Rethink the protein choices on your grocery list. Add seafood! Build recipes around lean fish with pantry ingredients you have on hand. Just starting out cooking seafood? Simple is best! Only a few ingredients and seasonings are needed to make fish delicious.

Being strategic when grocery shopping and relying on pantry staples is key. Here in New Jersey, there are limits on amounts of certain proteins like chicken and eggs. At the grocery store, there is a whole department dedicated just to seafood. Don’t skip it!

Health benefits of eating more fish

Eating seafood two to three times per week reduces the risk of death from any health-related cause by 17 percent. New to adding seafood into your menu repertoire? Start with a mid-flavored, firm fish like cod. Norwegian cod to be exact!

Tips for buying fish

There are a lot of choices out there when it comes to seafood – both wild and farmed. The origin of the seafood is something you should be looking out for, as every country has completely different practices.

Sustainability has been one of the main objectives of the Norwegian fishing industry, and they are committed to producing seafood in a safe, controlled, and sustainable manner. And I know this because I actually traveled to Norway myself with the Norwegian Seafood Council and saw how seriously Norway takes sustainability and how strict regulations that maintain fish supply are meticulously upheld.

According to the USDA, Country of Origin Labeling (COOL) is a consumer labeling law that requires retailers (grocery stores and supermarkets) to identify the country of origin on certain foods, including wild-caught fish, farm-raised fish, and shellfish.

What does “en papillote” mean?

Don’t be intimidated by this recipe, en papillote is a culinary technique that any home cook can master in their kitchen. 

The term en papillote (pronounced: ON pah-pee-YOHT) means “in paper” or “in parchment”. It is a moist-heat cooking method because it is the steam from within the package where the food is enclosed by parchment paper that cooks the food. More delicate proteins, such as fish or chicken, are more commonly cooked en papillote as they can be quickly cooked by this steaming method.

Steaming en papillote requires no special equipment other than parchment paper. The food won’t stick and parchment paper is easy to seal not allowing any liquid to escape. Just make sure to tightly seal the edges. Plus, clean up is easy – just toss the parchment when you’re done!

How to build flavors

The key to creating a flavorful en papillote dish is building flavors. When cooking en papillote, there are usually vegetables as the base with herbs and seasonings, topped off with the protein. The vegetables contain moisture and during the cooking process generate steam, which cooks the protein enclosed in the parchment pouch. Additional herbs and seasonings are used to build flavors.  Mediterranean flavors inspired this recipe creation. 

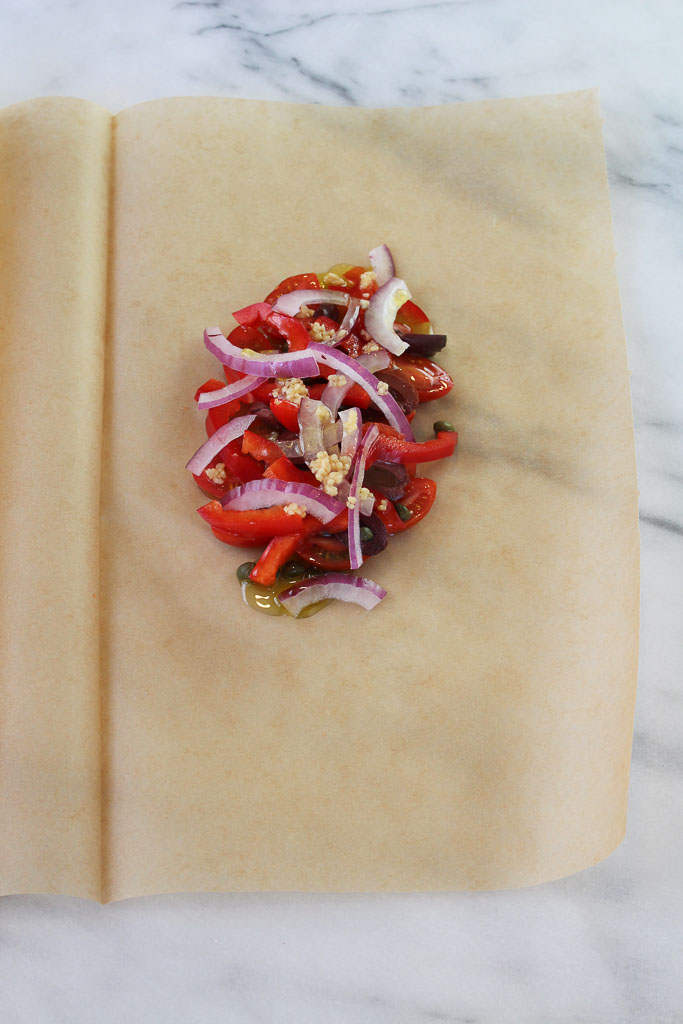
Mediterranean ingredients on parchment paper

Get cooking together

This recipe is the perfect way to get everyone involved in the kitchen.

  • Raid the pantry to play around with different spice and herb blends
  • Get the family involved – everyone makes their own signature creation
  • Little hands (kids) can help make this meal. Have them help stack the ingredients, wrap the parchment paper, etc.
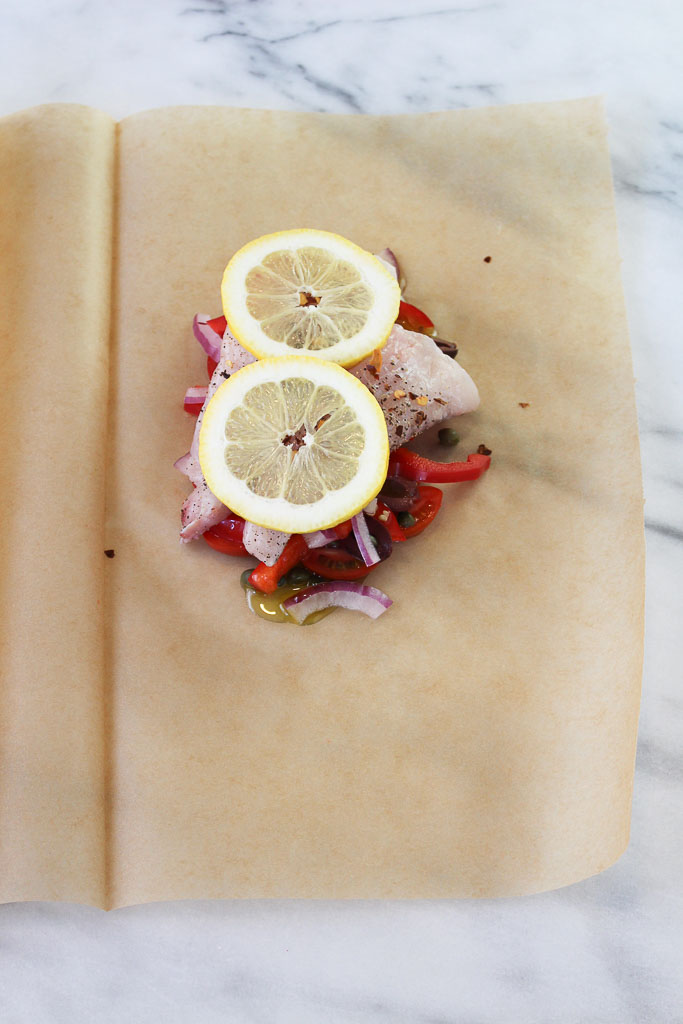
Mediterranean Cod ingredients layered on parchment

Health Benefits of Cod

Norwegian Cod is a lean fish. It contains only up to 3% fat and almost no carbohydrates. It is an excellent source of:

  • Protein
  • Vitamins (such as B12)
  • Selenium
  • Omega-3 Fatty Acids (a meal-sized portion of cod delivers the recommended daily intake)
  • Iodine
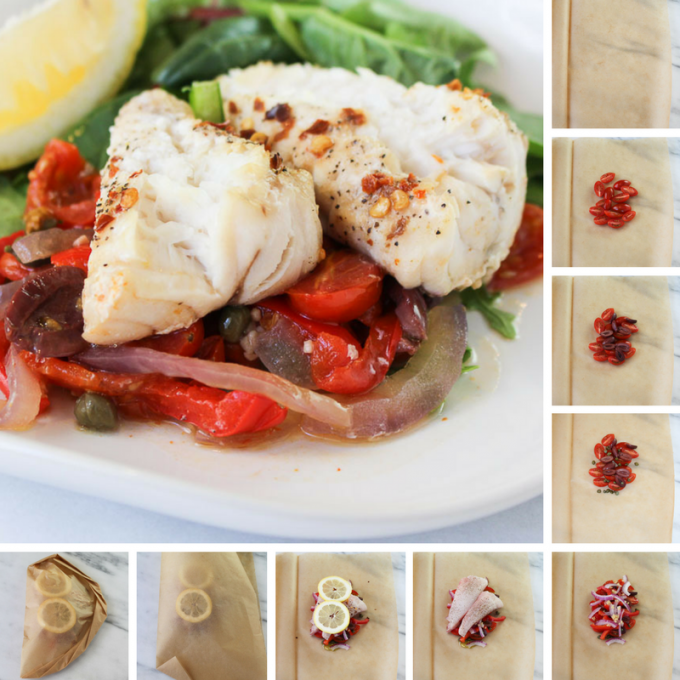
step by step guide for Mediterranean Cod En Papillote recipe
Print
clock clock iconcutlery cutlery iconflag flag iconfolder folder iconinstagram instagram iconpinterest pinterest iconfacebook facebook iconprint print iconsquares squares iconheart heart iconheart solid heart solid icon
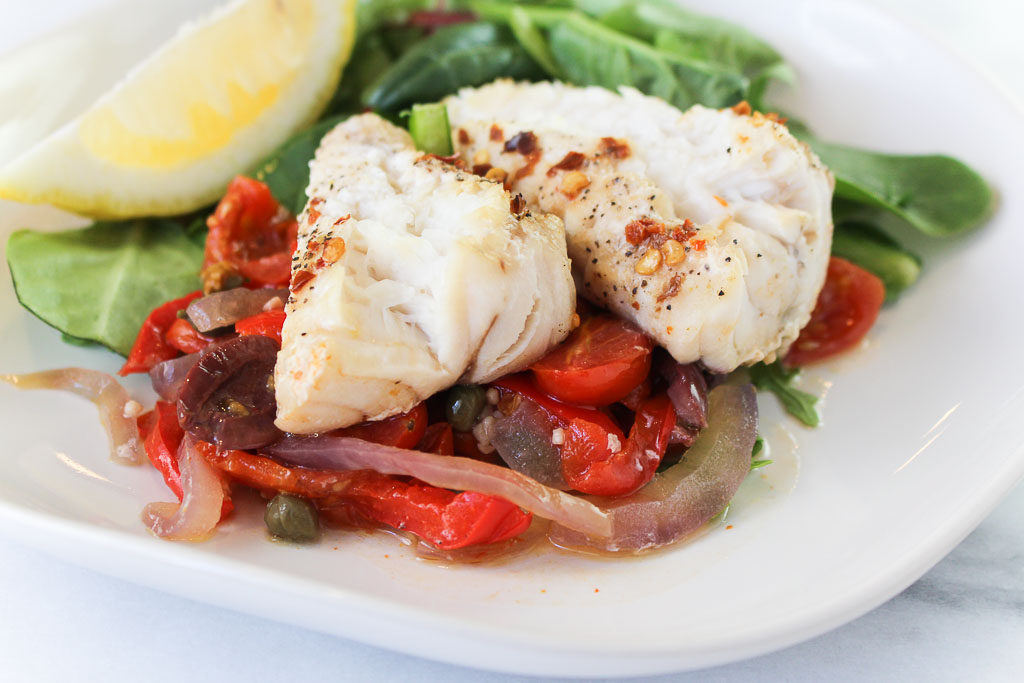
baked cod on top of mediterranean vegetables

Mediterranean Cod En Papillote

  • Author: Chef Julie Harrington, RD
  • Prep Time: 10
  • Cook Time: 20
  • Total Time: 30 minutes
  • Yield: 2
  • Category: seafood
  • Method: En Papillote
  • Cuisine: Mediterranean

Description

Step up your culinary game with this surprisingly easy Mediterranean Cod En Papillote made with Norweigian cod.


Ingredients

Scale

2 (5-ounce) pieces of Norwegian cod (or other white fish like snapper, grouper, or monkfish)
salt
pepper
1/2 cup grape tomatoes, halved
1/4 cup kalamata olives, pitted and halved
2 tablespoons capers
1/4 cup red onion, thinly sliced
1/4 red bell pepper, thinly sliced
2 cloves garlic, minced
2 tablespoons olive oil
1 lemon, sliced
2 pieces of parchment paper


Instructions

Preheat oven to 400 degrees F. Pat cod dry and sprinkle with salt and pepper. Set aside. 

Fold the parchment paper in half. On one side of the parchment paper layer the tomatoes, olives, capers, onion, pepper, and garlic. Top with fillet, drizzle with olive oil, red pepper flakes (if using) and place lemon slices on top.

Fold the other half of the parchment paper on top and seal the edges making a small fold every 1/2-inch all the way around to create a half-moon shape.  Repeat with another piece of parchment and remaining ingredients. 

Place both pouches on a baking sheet. Bake for 15-20 minutes, until the parchment paper, has puffed up and fish is cooked through.  Transfer to a plate and cut with scissors or unroll, being careful of the hot steam that will escape.

Keywords: cod, seafood from norway, En Papillote, fish, seafood recipe

Recipe Card powered byTasty Recipes

Other ways to prepare cod

  • Baked
  • Broiled
  • Fried
  • Sauteed
  • Steamed
  • Poached