Double Layer Chocolate Peanut Butter Fudge

Chocolate fudge or peanut butter fudge – which one is your favorite? If you can’t decide like me, layer them together to make delicious creamy fudge.
Double Layer Chocolate Peanut Butter Fudge via RDelicious Kitchen @rdkitchenThe Recipe ReDux is challenging members this month to take a trip down memory lane with recreating a fun vacation memory recipe.

A Vacation-Inspired Recipe:
Start unpacking your favorite vacation memories. Think about a trip you took state-side or internationally and create a healthy recipe from an unforgettable meal you enjoyed. Or, create a recipe from a native ingredient you saw or tasted on your travels.

Double Layer Chocolate Peanut Butter Fudge via RDelicious Kitchen @rdkitchenWhen I was younger, my family used to go down to Wildwood, NJ every summer. I was recently reminiscing about our Wildwood vacations with my mom and the one place that we HAD to stop by was Fudge Kitchen. They make the silkiest fudge that just melts in your mouth. Plus, they had so many flavors to choose from, it was so hard to decide which one to get.
Double Layer Chocolate Peanut Butter Fudge via RDelicious Kitchen @rdkitchenWe used to get combo boxes of fudge because everyone in my family wanted different flavors. My two favorite were the classic chocolate and peanut butter fudge. So why not get the best of both flavors and layer them! Now, I know fudge is a treat, but hey when you’re on vacation it’s okay to indulge a little.
Double Layer Chocolate Peanut Butter Fudge via RDelicious Kitchen @rdkitchenTo lighten up this fudge I swapped out the sugar and sweetened it with a little maple syrup and a banana. The only problem with this fudge is you have to be patient. Since there are two layers you have a waiting time in the middle for the chocolate layer to harden before you can add the peanut butter layer.

Print
clock clock iconcutlery cutlery iconflag flag iconfolder folder iconinstagram instagram iconpinterest pinterest iconfacebook facebook iconprint print iconsquares squares iconheart heart iconheart solid heart solid icon
Double Layer Chocolate Peanut Butter Fudge stacked on top of each other

Double Layer Chocolate Peanut Butter Fudge

  • Author: Julie @ RDelicious Kitchen

Ingredients

Scale
  • 1 tablespoon cocoa powder
  • 1/4 cup dark chocolate chips
  • 3/4 cup natural peanut butter
  • 1 medium banana
  • 1 teaspoon vanilla extract
  • 2 tablespoons coconut oil
  • 2 tablespoons pure maple syrup

Instructions

  1. In a small pot over low heat, combine 1/4 peanut butter, 1/2 teaspoon vanilla extract, 1 tablespoon coconut oil, 1 tablespoon maple syrup, and 1/4 cup dark chocolate chips; until melted. Let cool slightly.
  2. In a food processor or blender combine 1/2 banana and chocolate mixture and blend until smooth.
  3. Pour into an 8×8 pan lined with wax paper; spread evenly.
  4. Place in the freezer for 1 hour to harden.
  5. In a small pot over low heat, combine remaining 1/2 cup peanut butter, 1/2 teaspoon vanilla extract, 1 tablespoon coconut oil, and 1 tablespoon maple syrup; until melted. Let cool slightly.
  6. In a food processor or blender combine 1/2 banana and peanut butter mixture and blend until smooth. Pour peanut butter mixture over the chocolate layer; spread evenly. Return back to the freezer for an hour or until fudge hardens.
  7. (Store in the freezer)

Recipe Card powered byTasty Recipes

Signature
Double Layer Chocolate Peanut Butter Fudge via RDelicious Kitchen @rdkitchen


Guacamole Shrimp Wonton Cups

Guacamole Shrimp Wonton Cups are a crowd-pleasing appetizer to share at your next gathering. Layered with guacamole, mango salsa, and shrimp, these flavors are the perfect little bite for entertaining! 

Guacamole Shrimp Wonton Cups

We eat with our eyes first. This appetizer definitely catches your eye and the secret is – they are so easy to make!

Some recipes are more of an assemble kind of recipe vs. cooking everything from scratch and guess what.. that’s okay! It makes prep time much shorter saving you time in the kitchen. For this recipe, I used prepared guacamole and mango salsa. Feel free to create your version from scratch.

hand holding shrimp wonton cup appetizer

How to make wonton cups

Tip: Wonton wrappers are often found in the produce section of the grocery store.

  • Preheat oven to 350 F. Lightly coat a 24-cup mini muffin tin with nonstick spray.
  • Press wonton wrappers into each of the muffin tins, to create a cup shape.
  • Place into oven and bake for 10-12 minutes, or until golden brown.

Bonus: For extra flavor, brush the wontons with olive oil and sprinkle additional seasonings to the wonton wrappers before baking.

Skip this step: Don’t feel like making the wonton cups? Stack the layers of guacamole, mango salsa, and shrimp in a “scoop” chip.

Guacamole Shrimp Wonton Cups on a dark board

Nutrition Benefits of Ingredients

How do these Guacamole Shrimp Wonton Cups stack up nutritionally?

  • Homemade wonton cups: less sodium that pre-made chips
  • Guacamole: the base of guacamole is avocado – one-third of a medium avocado (50 g) has 80 calories and contributes nearly 20 vitamins and minerals, making it a great nutrient-dense food choice
  • Mango-salsa: mangos are an excellent source of vitamin C, 50% DV, which plays an important role in immune function and skin health
  • Shrimp: provides a high amount of protein and healthy fats, in addition to a variety of vitamins and minerals
Print
clock clock iconcutlery cutlery iconflag flag iconfolder folder iconinstagram instagram iconpinterest pinterest iconfacebook facebook iconprint print iconsquares squares iconheart heart iconheart solid heart solid icon
Guacamole Shrimp Wonton Cups

Guacamole Shrimp Wonton Cups

  • Author: Chef Julie Harrington, RD
  • Prep Time: 15
  • Cook Time: 10
  • Total Time: 25 minutes
  • Yield: 24 1x

Ingredients

Scale
  • 24 wonton wrappers
  • 24 medium shrimp, peeled and deveined
  • 1 tablespoon olive oil
  • 1 teaspoon garlic powder
  • 1/4 teaspoon paprika
  • 1/4 teaspoon onion powder
  • 1/4 teaspoon cayenne pepper
  • 1/4 teaspoon oregano
  • 1/4 teaspoon pepper
  • 1 cup guacamole
  • 1 cup mango salsa

Instructions

  1. Preheat oven to 350 F. Lightly coat a 24-cup mini muffin tin with nonstick spray.
  2. Press wonton wrappers into each of the muffin tins, to create a cup shape.
  3. Place into oven and bake for 10-12 minutes, or until golden brown.
  4. In a medium bowl, combine shrimp, olive oil, garlic powder, paprika, onion powder, cayenne pepper, oregano, and black pepper.
  5. Coat a large pan with cooking spray and place over medium-high heat. Add shrimp, cook, flipping once, until pink and opaque, about 2 minutes on each side. (or place on skewers and grill)
  6. Fill each wonton with 1 tablespoon guacamole, 1 tablespoon mango salsa, then 1 shrimp.
  7. Serve immediately.

Recipe Card powered byTasty Recipes

Cheesy Cauliflower Tots

Sneak in more vegetables by revamping a childhood favorite and instead making Cheesy Cauliflower Tots.
Cheesy Cauliflower Tots via RDelicious Kitchen @rdkitchen
Hello… it’s me (please tell me you sang the Adele song in your head as you were reading this) I’ve been a little MIA this past week, because the bf was home on his spring break from PT school and blogging took the back burner. When you are in a long distance relationship, you want to soak in every minute when you can be together! But it’s the perfect time to jump back in to blogging because drumroll please… it’s Recipe ReDux time! This month Recipe ReDuxer’s were challenged to create recipes with 7 ingredients or less.
Cheesy Cauliflower Tots via RDelicious Kitchen @rdkitchen
At work, for National Nutrition Month, I created a fruit and veggie challenge to strive for five fruits and vegetables a day. Each day on the calendar has five little boxes in it that participants can check off as they go along day to day to help them keep up with this challenge. This past week, one of the participants came into my office with doubt that she won’t be able to finish the challenge because she can’t stand to eat steam cauliflower for one more day. I don’t blame her. Steamed cauliflower every day for a month, I would get sick of it too! That conversation inspired me to make this recipe .. and also because Napoleon Dynamite was on TV last weekend – “You gonna eat your tots?”

Cheesy Cauliflower Tots via RDelicious Kitchen @rdkitchen
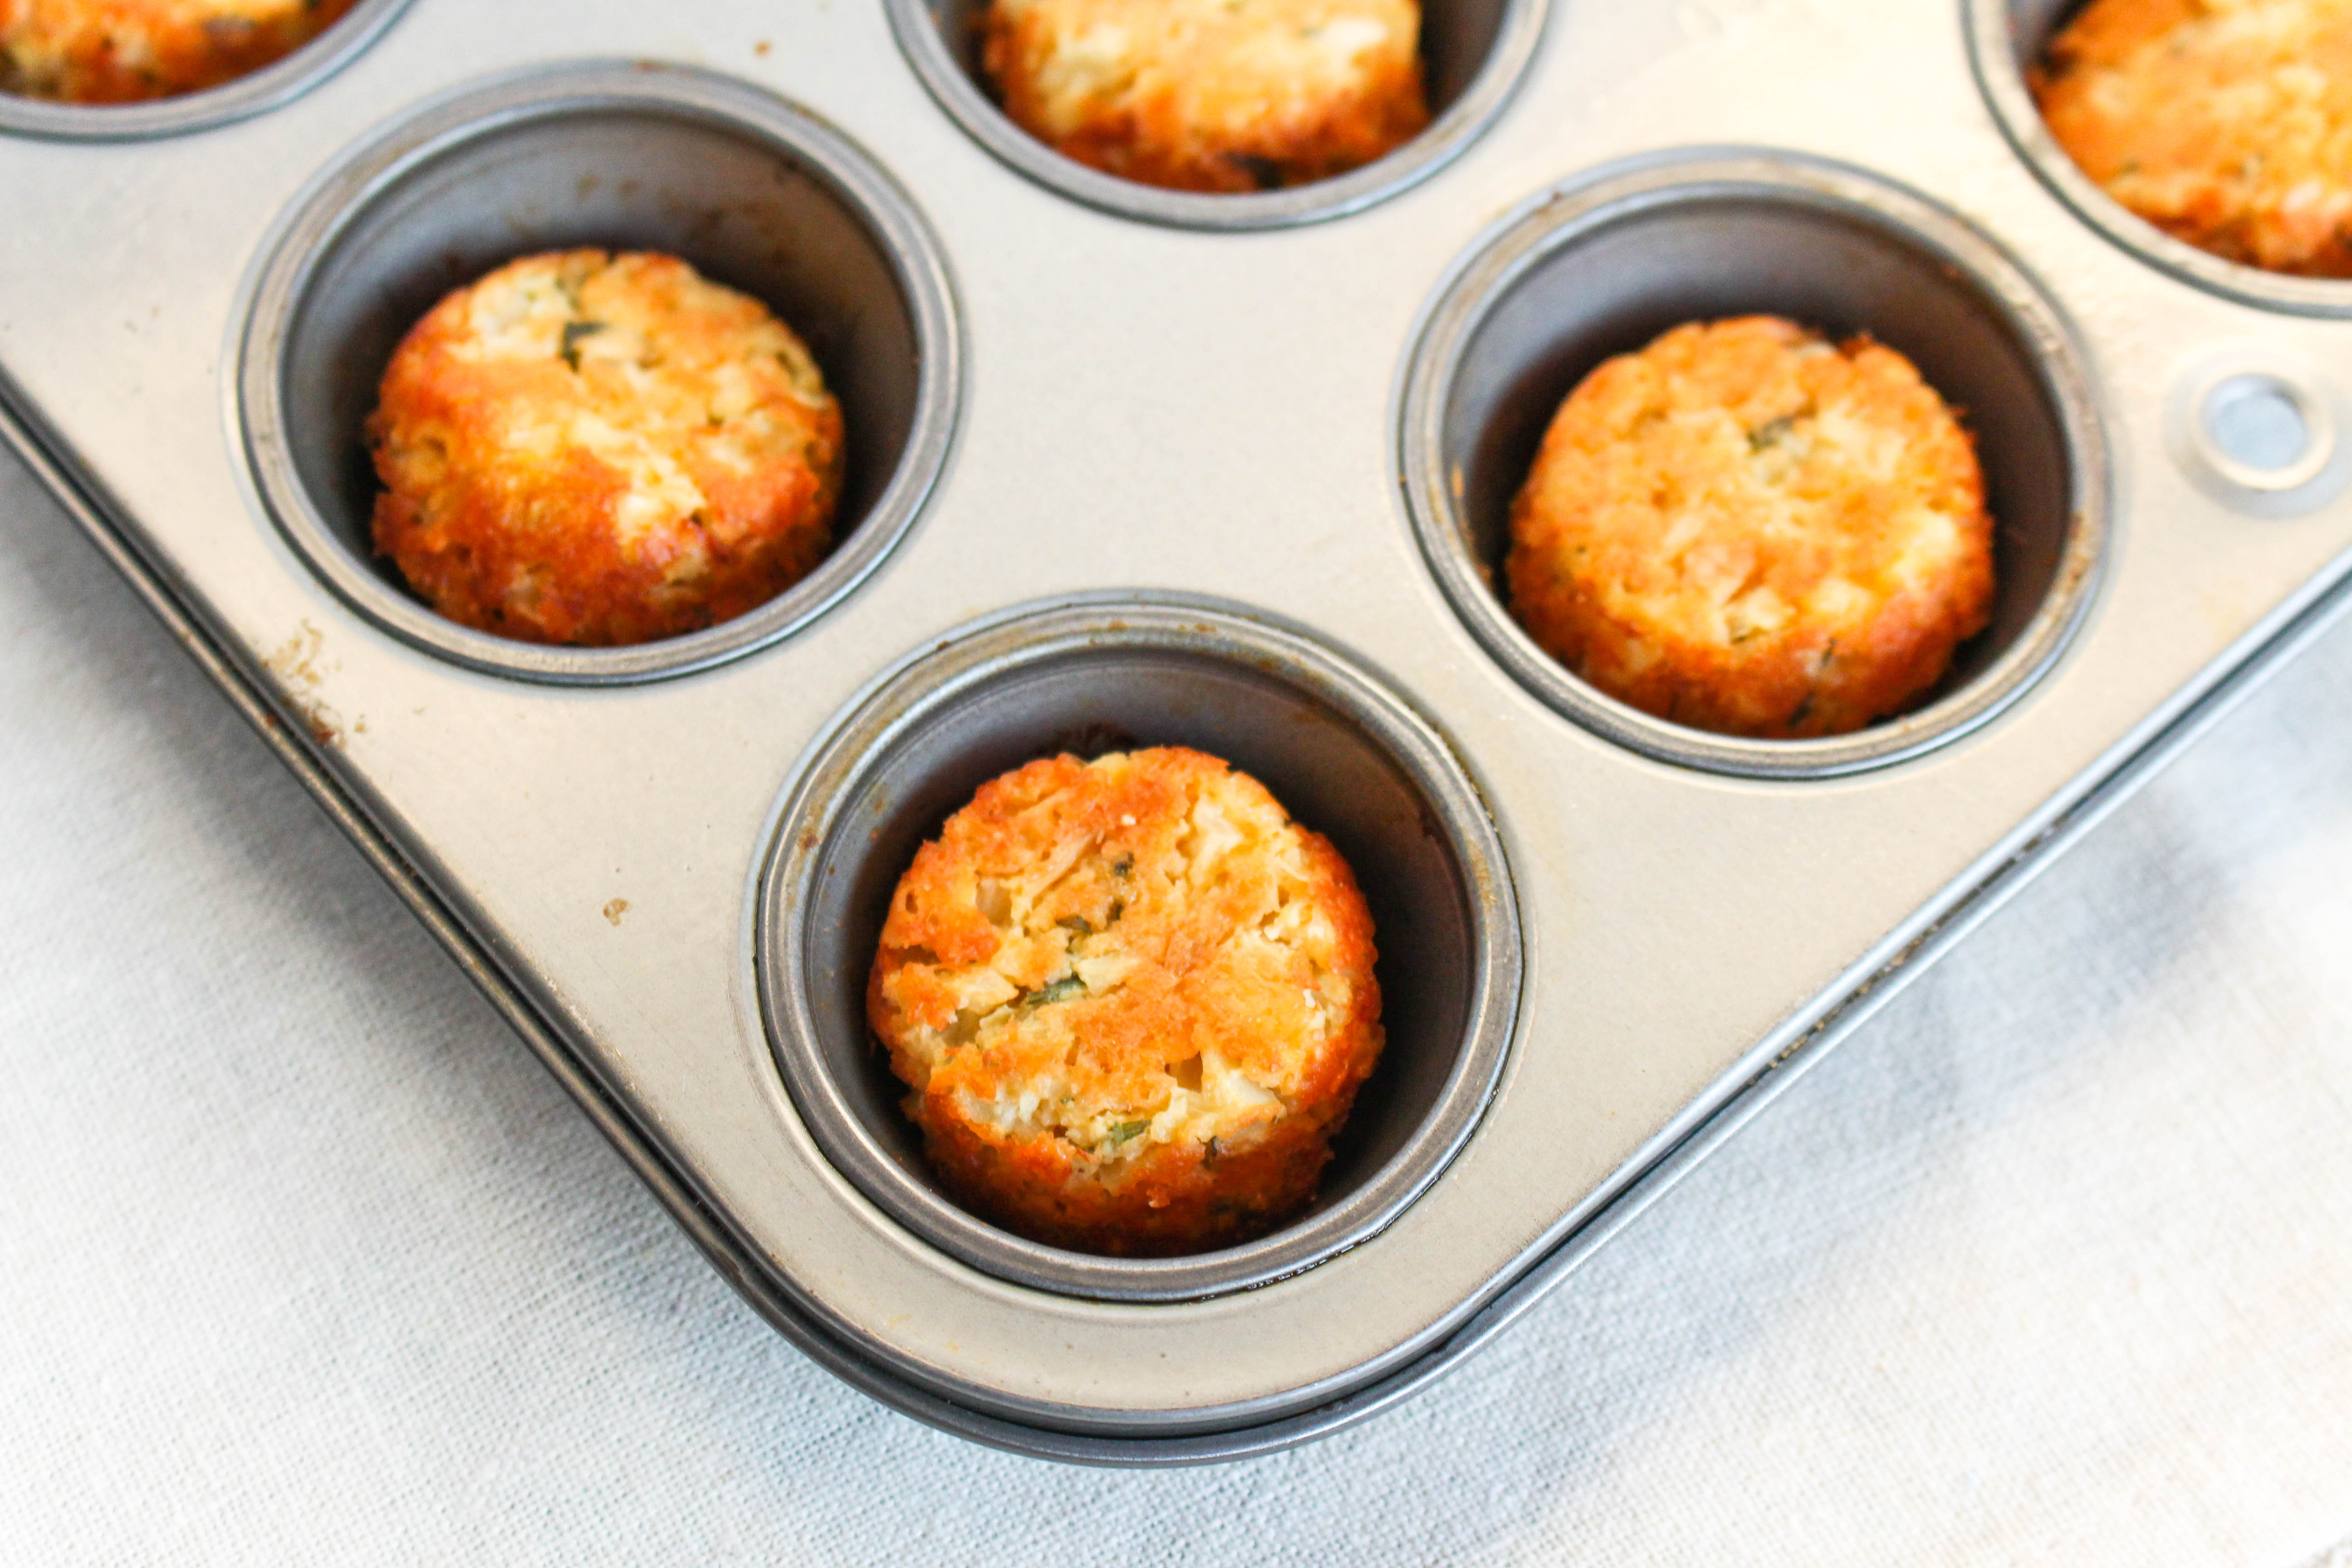
Vegetables don’t have to be boring! I think this is where most people get stuck in a rut of preparing vegetables the same way over and over again. Simply changing up the cooking method can make all the difference. Have you ever compared steamed cauliflower vs. roasted cauliflower side by side? Big change in flavor, taste, and texture. Now, transform cauliflower into cheesy tots, I think cauliflower just got even more appealing! These tots freeze very well and great for simple veggie side dish.

Print

clock clock iconcutlery cutlery iconflag flag iconfolder folder iconinstagram instagram iconpinterest pinterest iconfacebook facebook iconprint print iconsquares squares iconheart heart iconheart solid heart solid icon
Cheesy Cauliflower Tots dipped in ketchup

Cheesy Cauliflower Tots

  • Author: Julie @ RDelicious Kitchen
  • Yield: 4

Ingredients

Scale
  • 4 cups finely chopped cauliflower (or cauliflower crumbles)
  • 1 egg, whisked
  • 1/4 cup grated parmesan cheese
  • 1/4 cup Cabot cheddar cheese, shredded
  • 1/3 cup whole wheat panko
  • 1 tablespoon garlic powder
  • 1 teaspoon dried parsley

Instructions

  1. Preheat oven to 375. Spray mini muffin tins with cooking spray and set aside.
  2. Place cauliflower in a large microwave safe bowl. Dampen a paper towel and place on top of cauliflower pieces. Microwave cauliflower for 2 minutes, until cauliflower is tender. Squeeze out any excess moisture with a dish cloth or paper towels.
  3. Add the egg, parmesan cheese, cheddar cheese, panko, garlic powder, and parsley. Mix well to combine.
  4. Add 1 heading tablespoon to each muffin tin. Press to pack down the cauliflower into the tin.
  5. Bake 15-20 minutes, until cauliflower tots are golden brown. Let cool for at least 5 minutes before removing from pan.

Recipe Card powered byTasty Recipes

Signature